#edgehighlighting
Explore tagged Tumblr posts
Visit Tumblr Blog
Explore Tumblr blogs with no restrictions, modern design and the best experience.
Last Seen Tumblr Blogs


Fun Fact
If you dial 1-866-584-6757, you can leave an audio post for your followers.
Photo
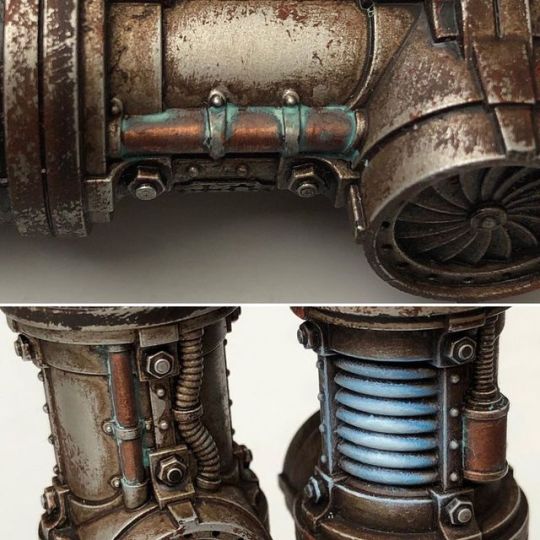
Weathering Sector Mechanicus: Copper & Plasma Conduits I added Nihilakh Oxide to almost all copper parts and drybrushed the plasma relays (Citadel Wrack White as a base followed by VMC blue fluorescent and Citadel Ceramite White in the center). The drybrushing might be a little less clean compared to airbrush. But it’s quicker and it’s easier to get good sharp edge highlights on the surrounding pipes for a high contrast OSL effect. #PaintingWarhammer #gamesworkshop #sectormechanicus #oilwash #tabletop #miniaturepainting #warhammer40k #plasma #drybrush #verdegris #weathering #edgehighlighting https://www.instagram.com/p/ByvS_zLhxaF/?igshid=102g0shjsb83f
#paintingwarhammer#gamesworkshop#sectormechanicus#oilwash#tabletop#miniaturepainting#warhammer40k#plasma#drybrush#verdegris#weathering#edgehighlighting
9 notes
·
View notes
Photo

Finally finished this guy (except for basing!) soooooo pleased with this one #necrons #indomitus #warhammer40k #warhammer #canoptekreanimator #necrons40k #nihilakhdynasty #nihilakh #tesseractglow #painting #miniatures #miniaturepainting #girlswhogame #nofilter #edgehighlighting #gamesworkshop #9thedition https://www.instagram.com/p/CEueRYPHPTm/?igshid=yehfd2wzbltj
#necrons#indomitus#warhammer40k#warhammer#canoptekreanimator#necrons40k#nihilakhdynasty#nihilakh#tesseractglow#painting#miniatures#miniaturepainting#girlswhogame#nofilter#edgehighlighting#gamesworkshop#9thedition
0 notes
Text
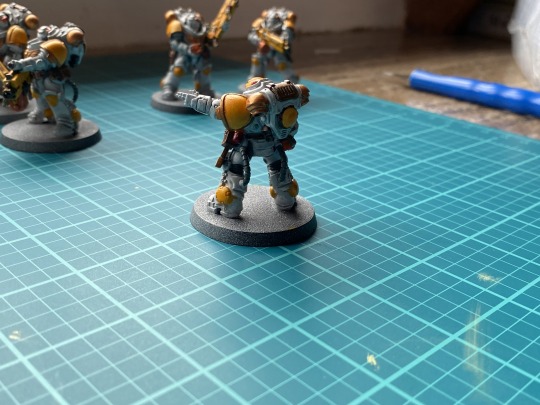
Paintbrush, PlasGlue, and Holy Clippers: Sparse Marns Part VI: Layering and Highlighting
SO CLOSE! The End is Nigh >:>
Ok so, Once Again, in my haste to Get On With It, I forgot to take pics of how they looked with the rebrightening before I moved on to highlighting -__-
Basically I just went over the models with the same colors I'd already painted them in, and filled in the interiors of each panel, making sure to stay away from the recesses so that I could maintain the darkness I'd built there. On the under-parts of the model I only built that color back up on those sections which would be brightest(judging by... holding them up to the light from my window and seeing where it fell). This took a few hours but it was pretty straight forward: again, as with the touchup step, it was VERY important to be careful and controlled with my brush here to save myself having to do even MORE touchup(spcl since, if I painted any of the recesses, that'd be AT LEAST 45 minutes of no painting before I could fix it).
Once that was done I moved on to highlighting, which is basically just the above step, with brighter versions of each color, and in an even smaller area. My Accomplices:

In a stroke of luck, last week my gamestore started stocking VALLEJO minipaints :D That... probably doesn't mean anything to any of y'all but, while I wouldn't call them "the gold standard", they are Just A Paint Company that does a REALLY Good, Consistent job with their paints, and it was super-convenient for me since it meant I now had a brighter, pure white to highlight my paint-scheme with! So: I used the vallejo white for the white, the vallejo flat yellow for the yellow and dorn yellow for edge highlighting, the mournfang brown for the brown with Jokaero orange for edgehighlighting, the stormvermin grey for the grey, the gehenna gold for the bronze, and the auric armor for the gold! Oh! And I then I remembered I'd need a highlight for the oranges so
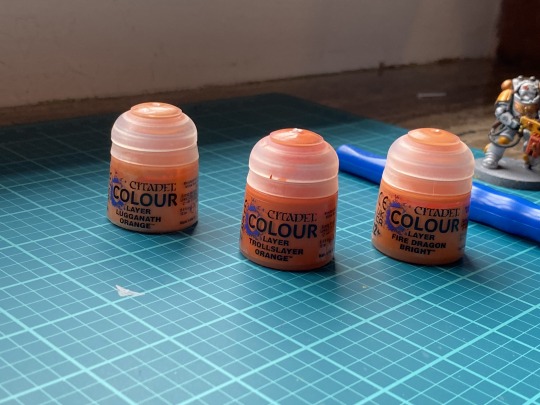
Trollslayer in the middle in the orange I've been using, and I went out and bout Firedragon for the main highlight, and Lugganath for the Edge ^v^ ^v^
The point of highlighting is the help trick the eye by increasing contrasts and emphasizing the parts of the model where light catches the most to make it catch even more! I used three different highlighting techniques to do this. First, I painted the most light-facing areas with the highlight colors, blending it via less and less paint into the base layer as I moved into the dark areas(and a few times, mostly if I ever put TOO much of the highlight anywhere, some on-model mixing with the base layer). Second, I edge-highlighted; meaning I would trace the point or side of the brush JUST across relevant edges of the model, or mark said edges with tiny scritches of paint where tracing wasn't viable. Third, I drybrush, which is where you take either a brush you dont care about or a poofy brush(makeup brushes are perfect for this), dip the tip of it DRY in the paint, dab MOST of the paint off on a paper towel, and then just dust what's left over the mini to JUST brighten up the highest parts(and create a nice speckled light looking effect).
You don't need to do all of this! In fact, Highlight-blending and edgehighlighting are pretty tricky techniques each in their own way, and edging in particular needs a very steady brush, but the point of this whole thing was building skills so I decided to Try Everything >:3 >:3 >:3 A nice drybrush will be perfectly fine in most situations, and far kinder to your nerves, or you can just... Not highlight at all! Not highlighting is fine u_u Here are the brushes I used:
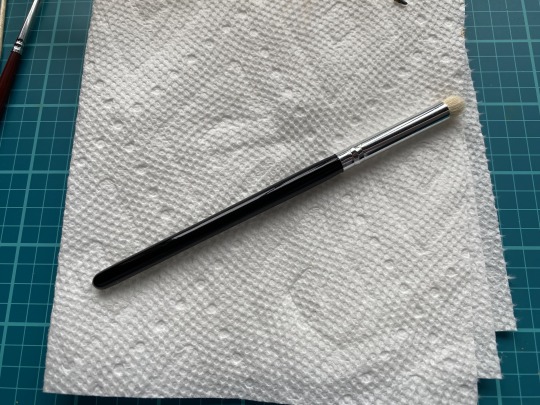
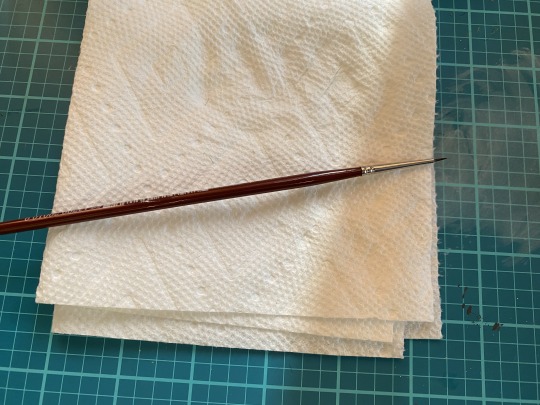
the drybrush is on the left, and on the right is a Precise Detail which I went out and bought when my Super Detail's condition started causing Prablems
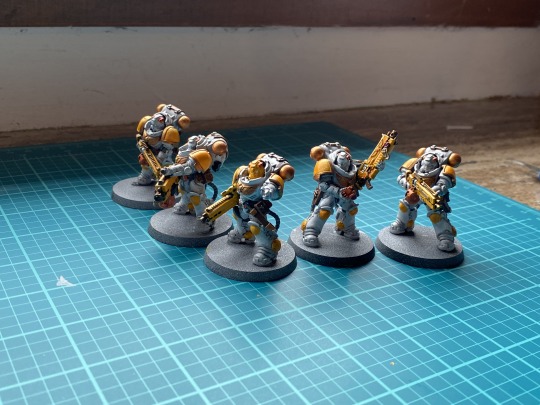
Anyway: once that was all done the Lads looked thus
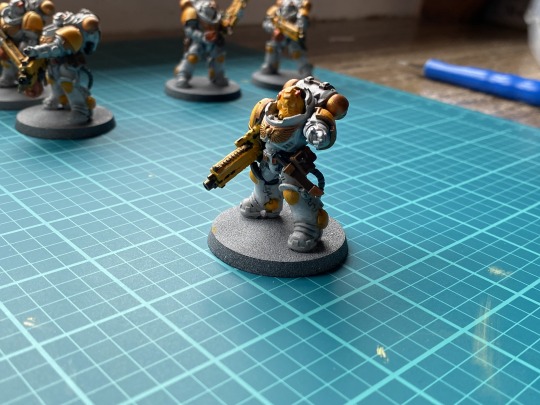
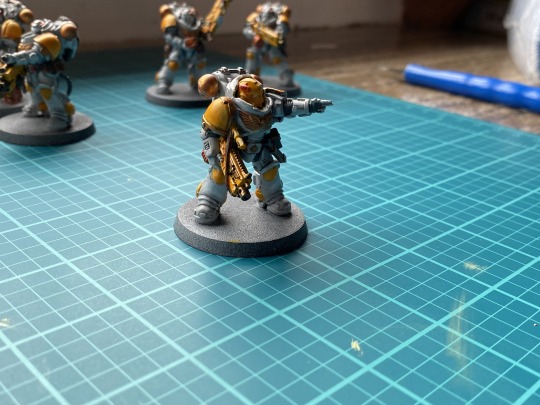


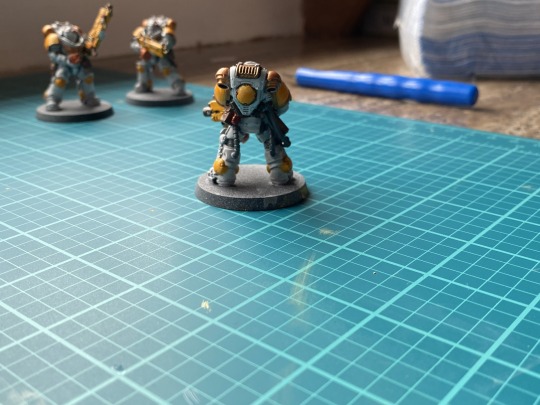


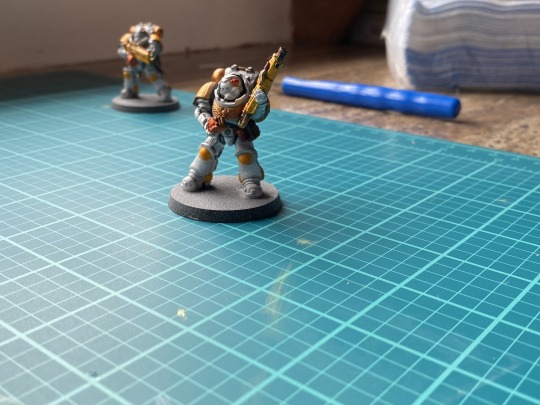
You might also notice a their eyes painted in the highlight white: that's prep for applying citadel's waystone green gemstone technical paint to them later. Later being now. Here's how that looks when dry.


Bscl: the gemstone technicals are VERY Thick glazes that love to pool in recesses but thin out evenly from the top of where you lay them, so when you paint them over a bright color,you get a nice and even gradient of translucency with the very tippy-top shining through most brightly, creating a glassy effect! It's so Neat :> :> (and SO MUCH LESS Work that creating the same effect with, like, 4 seperate, increasingly thinner complimentary layers -_-)
Unfortunately I have MANY basing pictures and but 7 image slots left on this post, so I will have to end this one here. Check in tomorrow to for the Lads getting Based :| :|
#zA Paints#zA Hobbies#GamesWorkshop#Space Marines#Heavy Intercessors#Nova Paladins#Layering#Highlighting#Hobbyposts
3 notes
·
View notes
Text
A few weeks ago, I went on a painting course run by Seige Studios. I learned a great many things, some of which I have been putting to good use already. Little tweaks to make my work more efficient and other little housekeeping tips that have had significant impact. However one of the core teaching points of the course was battle damage and decals, neither of which I have done since the course. I wanted to change this and happened to spot the Primaris Repulsor in the cabinet looking all grey and sad. Normally, I don’t do battle damage on the Ultramarines however I need something to practice on and it seemed perfect.
First job was to airbrush the base coat onto it:
There were a couple of splatters with the airbrush, but I wasn’t upset about that. It would give me an idea of where to put the battle damage while I was working meaning they’d not show while I was finished. My next step was to edgehighlight the whole thing. This took a while and again, I made several mess ups while I was doing it. These will also be turned into rust spots and other battle damage.
When done, I started on the front of the tank. I don’t have any large Ultramarine decals, but I have some smaller ones. I placed one on the front and then followed the steps I had written down while on the course.

In the picture, you can see some of the places towards the top of the tank where the edge highlighting is a bit too thick – this will become damage when I get around to adding some more to the vehicle.
It might be some time before I do so however, I am finding that personal projects are taking a bit more of a back seat while I work on commissions and miniatures for selling. Those are what pays the bills after all. I think my evenings will be for personal things and learning, while the day is for work miniatures. Either way, I find I am very much enjoying the amount of painting I am doing and even those miniatures I have painted more than once are fun.
The Repulsor A few weeks ago, I went on a painting course run by Seige Studios. I learned a great many things, some of which I have been putting to good use already.
#art#battle damage#fun#games workshop#GW#learning#new stuff#tank#techniques#Ultramarines#Warhammer 40000#Warhammer 40k#Wh40K#work
7 notes
·
View notes
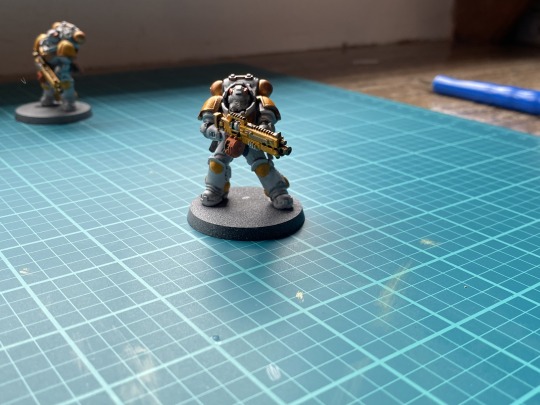
Photo


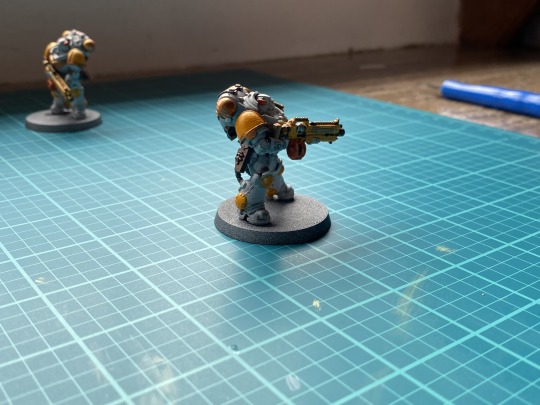
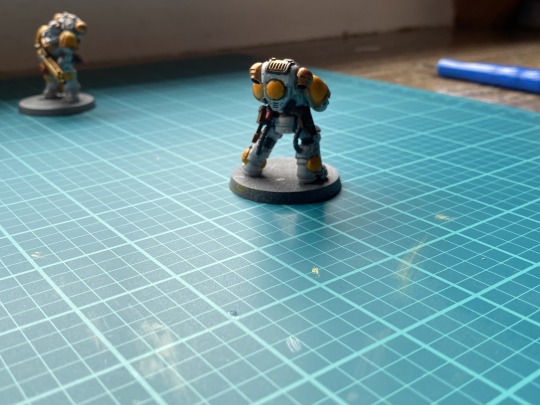
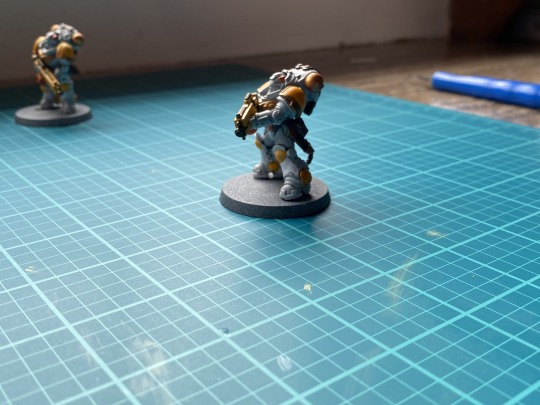
This was supposed to be a lamenter, but turned into an imperial fist. A gift for my good friend Emma. Paint list; Power armour: Averland sunset, Yriel yellow, Agrax earthshade(recess shade) Screaming skull(edge highlight), Pallid wych flesh(further edge), White scar(finest edge)
Bolter: Abaddon black, Eshin grey(edge highligh), Dawnstone(finest edge), Leadbelcher, Nullin oil, Stormhoast silver(edgehighlight)
Aquila: Mepheston red, Carroburgh crimson, Evil sunz scarlet(edge highlight), Wild rider red(finest edge)
Shoulder pad: Abaddon black, Nullin oil, Eshin grey(edge highlight), Dawnstone(finest edge)
Base: Martian ironearth
3 notes
·
View notes
Text
Tutorial - Battle Damage
Tutorial – Battle Damage

I started to practice battle damage on one of my tanks during some personal hobby time the other evening and someone asked if I would be able to tell them how I did it. Here is my step by step guide to creating battle damage on vehicles:
Step 1: Basecoat and edgehighlight the tank. Don’t worry about being super duper neat with the edge highlights, those parts that are a bit thicker or smudgy you…
View On WordPress
#art#battle damage#fun#learning#new stuff#primaris#repulsor#tank#techniques#Tutorial#Ultramarines#work
3 notes
·
View notes