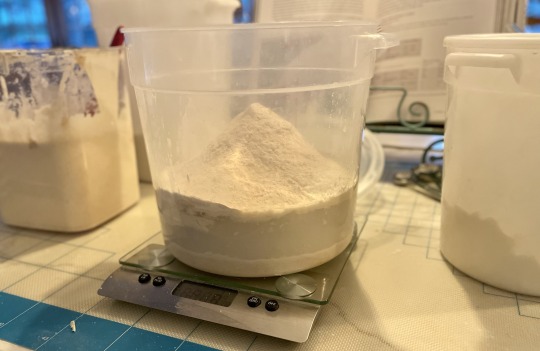
#fed starter on the bottom then warm water and sea salt then a mix of bread flour and APF and then whole wheat flour
Text
l a y e r s
#baking#fed starter on the bottom then warm water and sea salt then a mix of bread flour and APF and then whole wheat flour
127 notes
·
View notes
Text
7 Easy Ways to Improve Digestion
New Post has been published on https://healingawerness.com/news/7-easy-ways-to-improve-digestion/
7 Easy Ways to Improve Digestion

Table of Contents[Hide][Show]
Do you struggle with digestive issues? Many of us deal with gut problems like irritable bowel syndrome (IBS), constipation, leaky gut, or other digestive disorders.
While there are plenty of over-the-counter options to help boost stomach acid or otherwise soothe the discomfort of digestive problems, there are plenty of natural solutions you can try, too. Cultivating a healthy gut with lifestyle and diet changes is way better than popping a handful of Tums every day!
How to Improve Digestion
I’ve noticed a big change in my digestion since transitioning to a healthier lifestyle. The change has been most profound for our son, who struggled with allergies (and who had a complete turnaround thanks to the GAPS diet).
Here are a few of the things that I’ve found most helpful for fighting digestive issues like bloating, heartburn, indigestion, flatulence. Plus, they all aid in overall gut health naturally!
1. Start Drinking Bone Broth
There’s a reason that you crave a warm bowl of chicken soup when you’re feeling sick. One of the best things you can do for your gut health — and overall health — is to start consuming real, nutrient-dense bone broth on a daily basis, even when you’re feeling well.
Broth made from whole simmered animal bones is incredibly nourishing. It’s packed with minerals, gut-soothing gelatin, lipids, and calcium. Bone broth’s natural gelatin content is the key player here, as it helps soothe the digestive tract and improve nutrient absorption. Our children get bone broth from a very early age, as it is also a great natural source of minerals.
It’s really easy to make your own bone broth right at home — the hardest part is planning in advance, since it takes at least eight hours to make.
Here’s a handy recipe that you can easily modify depending on what kinds of herbs and veggies you have on hand (but don’t skip the apple cider vinegar! It helps to extract all those lovely minerals from the bones that we’re after). If you don’t have the time to brew up your own batch, you can buy high-quality bone broth online.
Then, use your homemade or store-bought bone broth to make soups, or simply warm it up and drink it like tea. Remember that quality is important here, and true bone broth is different from most of the salty, watery broths that you’d find on your grocery store shelves.
If you aren’t able to make or buy bone broth, another option (though not quite as good) is to supplement with natural gelatin powder, which will confer some of the same health benefits.
2. Change Your Bathroom Posture
Turns out the simple act of sitting on the toilet could be causing more problems than we realize. New research (alongside age-old evidence) confirms that squatting to use the bathroom is more efficient and more natural, and can help limit the time we spend on the can. A squatting position enables our bodies to empty our bowels fully, which helps us avoid digestive disturbances and even hemorrhoids.
I’m not suggesting that you actually need to go squat out in a field in order to aid in good digestion. We simply need to adopt a more natural position on the toilet that mimics a squat, instead of the sitting position that has become standard.
You could instead try perching up on the toilet seat in a squat, though I personally don’t recommend trying this if you are pregnant, have balance issues, or simply aren’t already a very strong squatter.
At our house, we have a Squatty Potty in each bathroom as a simple way to improve bathroom posture. It’s simply a stool that elevates your legs while you sit, so you’re closer to a natural pooping position. Plus, our Squatty Potty is a great random conversation starter with visitors!
If you’d rather DIY the whole Squatty Potty thing, you could also use a couple of small upside-down buckets or a regular stool to get similar results.
3. Get Enough Magnesium
I’ve been a magnesium evangelist ever since it helped me manage my morning sickness while pregnant. It turns out that magnesium is also great for better digestion. I’ve gotten many emails from readers who were low on magnesium and who noticed digestive benefits when they focused on getting more magnesium in their diets.
Magnesium is essential for your overall health. It is the second most abundant mineral in the human body after potassium, and it is necessary for over 600 enzymatic reactions that benefit the brain, heart, skeletal system, and muscles.
As far as digestion is concerned, all you have to do is think about how magnesium works for your sleep to understand how it works. You know how a nighttime supplement of magnesium after dinner helps you get to rest quicker? Magnesium works similarly within your digestive tract, relaxing the intestinal wall to keep everything moving along smoothly.
So, how can you start getting more magnesium in your system? There are a couple of easy fixes:
Season your food with healthy salt. Sea salt and pink Himalayan salt have ample amounts of magnesium, so be sure to use those instead of the iodized stuff.
Take a bath. A warm bath with a handful of Epsom salt will let your skin absorb the magnesium directly. Bonus: You’ll sleep better that night, too!
Supplement. If you still need a little extra, try using a magnesium skin oil or a time-release oral magnesium supplement to boost your levels. Many people notice an immediate digestive difference, but take it easy at first — loose stools may occur. Just start with a low dose and work your way up slowly.
4. Up the Probiotics
The human gut is teeming with bacteria, and this is vitally essential because we rely on a mix of bad and good bacteria in our microbiome to keep us healthy. Plus, much of our immune system and nervous system is located here in the gut — including both the large and small intestine. So, we need to be mindful of the balance of beneficial versus harmful bacteria in our system, because if it gets tipped in the wrong direction, a lot of digestive disturbances can follow.
The best way to give your beneficial gut bacteria a boost is to consume fermented foods or drinks regularly, like sauerkraut, kombucha, water kefir, or kimchi. These real food options are good sources of probiotics and enzymes and can help aid in nutrient absorption. Most of these foods you can make easily at home, and then you know exactly how long the ingredients have fermented — no preservatives necessary.
We don’t take many supplements regularly, but a high-quality probiotic is something that everyone in our family takes daily. This easy lifestyle shift has made a big difference in digestive health for all of us.
Overall, I think that a combination of a good probiotic along with eating plenty of fermented foods and drinks can make a big difference in easing digestion and easing problems like belly bloat. Plus, it may even aid in weight loss.
5. Get Regular Exercise
It’s important to get moving every single day, as daily exercise can benefit your cardiovascular health, as well as your digestion.
The mixture of movement and gravity helps food travel through the digestive system, and directs blood flow to the digestive organs. You don’t have to run or do Zumba every day to get this benefit, either — frequent low-level activity like walking is an excellent aid to digestion.
The sedentary modern lifestyle of sitting all day puts a kink in the digestive process and makes normal digestion more difficult. For a quick and easy fix, walk a few miles at a comfortable pace each day. Bonus points if you do it as a family or with your significant other and get some quality time, too!
6. Eat More (Healthy) Fat!
When we’re feeling stopped up, the most common advice we hear is to avoid protein and dairy products in favor of more fiber. While this might work for some, research shows that an excess of fiber might actually impair our mineral absorption. With this in mind, it’s important not to overdo it on the fiber.
Instead, consider getting more healthy fats into your diet. Since fat is slippery and helps move things along, those who struggle with constipation can benefit from regularly consuming healthy fats such as coconut oil, grass-fed butter, free-range animal fats (including lard and tallow) and unheated olive oil.
The fats we don’t consume ever? Vegetable oils and margarine (here’s why).
It shouldn’t be too hard to come up with ways to eat all these healthy fats, but in case you’re stuck, try one of my favorite ways to boost healthy fat consumption — a mug of bulletproof coffee!
7. Stand (and Sit) Up Tall
Just as bathroom position affects digestive health, our posture matters as well.
What does posture have to do with digestion? When you’re slouching, your circulation suffers — and we need a healthy amount of blood flow to our digestive organs to help them do their job.
Although sitting up tall is great for keeping your circulatory system working properly, there are other things you can do as well:
Get up from your desk. While walking more and sitting less is ideal, it’s not always possible. If you have a desk job, try to make it a point to get up and stretch every 30 minutes or so. Set up your office to support movement with a variety of sitting, standing, and even walking options.
Don’t lie down right after eating. Your body digests more slowly when you’re lying down, so be sure to stay upright after meals for optimal digestion and better absorption of carbs.
Try belly breathing. Taking deep breaths from your diaphragm can train your body to relax its internal organs, preventing gas from becoming trapped.
It’s easy to forget our posture, but if you can remember to sit (or stand) up straight every time you catch yourself slouching, your organs will have an easier time digesting.
Bottom Line
If you struggle with poor digestion, try any of these tips to help detox your system, aid in elimination, and keep things running smoothly. These seven things have worked great for my family and me, but I’m not a doctor and can’t tell you what your individual body needs the most. Consider meeting with a nutritionist or health care professional to uncover hidden food sensitivities, make a customized diet plan, and get your digestion running in peak condition!
This article was medically reviewed by Dr. Scott Soerries, MD, Family Physician and Medical Director of SteadyMD. As always, this is not personal medical advice and we recommend that you talk with your doctor.
Have you ever had digestive troubles? What helped you? Share below!
Sources:
De Baaij, J. H., Hoenderop, J. G., & Bindels, R. J. (2015). Magnesium in man: implications for health and disease. Physiological reviews, 95(1), 1-46.
Chou, C. C. (1983, April). Splanchnic and overall cardiovascular hemodynamics during eating and digestion. In Federation proceedings (Vol. 42, No. 6, pp. 1658-1661).
Cummings, J. H. (1978). Nutritional implications of dietary fiber. The American journal of clinical nutrition, 31(10), S21-S29.
Hirota, N., Sone, Y., & Tokura, H. (2002). Effect of postprandial posture on digestion and absorption of dietary carbohydrate. Journal of physiological anthropology and applied human science, 21(1), 45-50
Polukhov, R. (2012). The ileocoecal valve changes in chronic constipation in children. Klinichna khirurhiia, (2), 42-44.
Saint-Germain, C. (1997). The production of bone broth: a study in nutritional exploitation. Anthropozoologica, 25(26), 153-156.
Scaldaferri, F., Lopetuso, L. R., Petito, V., Cufino, V., Bilotta, M., Arena, V., … & Poscia, A. (2014). Gelatin tannate ameliorates acute colitis in mice by reinforcing mucus layer and modulating gut microbiota composition: Emerging role for ‘gut barrier protectors’ in IBD?. United European gastroenterology journal, 2(2), 113-122.
Siebecker, A. (2005). Traditional bone broth in modern health and disease. Townsend Letter for Doctors and Patients, (259-260), 74-82.
Sikirov, D. (2003). Comparison of straining during defecation in three positions: results and implications for human health. Digestive diseases and sciences, 48(7), 1201-1205.
Svanberg, U., & Lorri, W. (1997). Fermentation and nutrient availability. Food Control, 8(5-6), 319-327.
Source: https://wellnessmama.com/8008/improve-digestion/
0 notes
Text
Heartlight Sour Dough Bread
This is the best recipe that I have found for making Sour Dough Bread. It is a method that I have developed over many years of much trial and error with ingredients, preparations etc. It is easy to bake a loaf a bread, a child with a Easybake oven can do that. To make Sourdough bread you rely on the artist in you to and why it is called artisan bread; it takes some time and effort, but you will be heartily rewarded. Sourdough does not mold, has a fantastic taste and delightful texture/crust, digested slowly and is tolerated well by gluten sensitives.
This bread is composed of three main ingredients flour, water and salt. You add a few 175-year-old bugs and you have a sourdough starter. There is no commercial yeast used in making this sourdough, it replicates a natural yeast called Candida milleri, and little baby microbes of bacterium called Lactobacillus sanfranciscensis that have survived since 1847. Wagon trains heading west carried and created sour dough starter across the country for making bread on the road. In that process they picked up bacterium strains from all parts of the country. Yeasts that were born in the wild west from wild winds and wild grains from across this land that took refuge on the flour bags in the Conestoga wagons creating this unique starter kept alive since 1847.
The most important ingredient that I not listed in the recipe is love. This bread recipe is infused with love; Love is patient; love is kind; all by design. To make good sourdough it must have this ingredient. One must be a nurturer, someone who needs you and knead them. One needs to be patient with the process and committed to caring for and feeding your starter on a regular basis to keep it healthy and vital. You need to use some or discard some once a week and then feed it and refrigerate. It still is active but slowed down. If it is in storage too long alcohol may form a thin layer on top, that means the bugs you need to be fed. The bugs eat simple sugars, they burp CO2 and shit alcohol; when swimming in their own shit, they stop burping… it is time shake it up, remove some and then feed. I either bake bread, make sour dough muffins, dry it out to send to friends for starter. I do not like to discard.
A baker’s dozen tips:
Use unbleached “bread flour”, bread four has higher protein/gluten content
Use some natural whole wheat flour for beneficial fiber, (it helps move the mail)
Use a little Rye flour which helps to stimulate the starter
Use natural unrefined sea salt with beneficial minerals and add salt at later step, it slows down the bugs replication initially.
Use only un-chlorinated or bottled water or boil your water for 20 minutes, chlorine is bad mojo for bugs
Use your oven with the light on and place resting dough and or levain in oven to double, keeps it about 80 degrees and no draft or bugs.
Add some Potato flakes to the starter as friendly catalyst to encourage activity
Mist the bread with water just prior to baking
Preheated 500-degree oven
Bake in Cast Iron Dutch Oven
High Hydration water content (sticky dough); Dust with rice flour to prevent sticking to banneton
Sharp razor for scoring
Patience, it is a two-day process
METHOD:
Activate sourdough starter.
Autolyze: measure/weigh all ingredients (except salt) into a bowl. Mix well. Cover and rest dough for 2 hours.
Bulk ferment: Add salt. Stretch and fold dough (with damp hands) every 45-60 minutes for 2-4 hours at room temperature. Keep dough covered.
Pre-shape. Cover and rest the dough for 15 minutes on the bench.
Final shape. Put dough into a floured banneton (or floured, cloth-lined bowl/tin). Cover dough with cloth. Cover with plastic and retard (refrigerate) for 8-12 hours (optional).
If dough was refrigerated, bring to room temperature. Rise in banneton for 1-3 hours or until ready.
Pre-heat oven, baking tray and roasting lid (or ceramic casserole dish including lid) for 1 hour before baking (500°F).
Sprinkle the dough surface (base) with dusting flour. Turn out dough onto a sheet of baking paper. Spray lightly with water (if adding topping). Score bread. Spray lightly with water. Put bread in Dutch Oven with lid on. Bake at 500°F for 15 minutes (lid on).
Uncover and Bake at 450°F for 15-30 minutes (lid off) until golden and cooked.
Remove bread from the oven. Cool completely on a wire rack.
Slice bread and serve.
Store bread at room temperature (covered) or wrap and freeze (whole or sliced).
Detailed instructions
Step 1. Making the Levain (starter sponge)
The night before you make the levain, make sure to feed your sourdough starter. I usually add 1/3 cup bread flour, dash of rye and 1/3 cup water and mix it well.
¼ cup (40 grams) bread flour
¼ cup or (40 grams) wholegrain wheat flour
¼ cup (40 grams) sourdough
1/3 cup (80 grams) unchlorinated water
Mix all ingredients and put it into a tall see-through glass. Put an elastic band around the glass or mark the jar so you can monitor the growth of the levain
Cover the glass and put the levain somewhere warm. Preferably 77°F (in oven with light on is perfect)
When the levain has almost tripled go to the next step.
Autolyze ( hydrating flour)
3 ¾ cups (675 grams) bread flour
½ cup (150 grams) whole wheat flour
2 cups (575 grams) water (reserve 50 grams of water for adding salt later)
Instructions:
To do the autolyze all we need to do is mix water and flour
Measure out all the flour in a bowl and all the water except 50 grams that we reserve for mixing in the levain and salt later. Mix it but don’t knead, just get all flour hydrated
Cover the flour water mix and leave it until your levain has at least doubled in size.
Mix the dough
Put the levain on top of the dough. Spread the salt over the top and add the reserved 50 grams of water
Mix it all very thoroughly. I usually use my fingers and push the levain through the dough and do some light stretch and folds. I keep repeating until I feel like it’s been mixed very well
Cover the dough and leave it to rest 30 minutes somewhere warm
Bulk fermentation
It’s time for the bulk fermentation. During the fermentation we develop the doughs gluten and get air into the dough. With this dough 3 stretch and folds are usually enough
Wet your hands so that the dough doesn’t stick to your fingers
Grab the size of the dough furthest away from you with both hands. Grab a hold and stretch the dough upwards if it can go without breaking. Then fold the dough down towards yourself
Turn the bowl 180 degrees (a half turn)
Do another stretch and fold
Turn the bowl 90 degrees (a quarter turn)
Do another stretch and fold
Lastly you should turn the bowl 180 degrees (a half turn)
Repeat the last stretch and fold
You have now stretched and folded the dough from all four sides. Leave the dough to rest somewhere warm, covered, for another 30 minutes
Repeat this process two times more
After the third stretch and fold, I will do a windowpane test. Lift and edge of the dough and stretch it with your fingers. You should be able to make a thin membrane without the dough breaking. Look at the video in the article
If the dough still is not strong enough to pass the test, I do a 4th stretch and fold and repeat the test. Do this up to the 5th and 6th stretch and fold.
After the last stretch and fold you should leave the dough until it’s grown by 20-50% (usually 1½ hours)
Preshaping
First we are shaping the dough to build a gluten membrane on the top of the dough. This will help the oven spring during baking
Pour the dough unto an unfloured table and divide it in half. Put a sprinkle of flour on top of both
Grab a lump of dough and flip it using your bench scraper so that the floured side is now on the table top
Grab the part of the dough that us the furthest away from you. Stretch it and fold down in front of you
Repeat with the part that is right in front of you. Grab the dough with both hands and stretch it and fold it away from you. Repeat with the right and left sides of the dough
In a swift motion invite the dough so that the part you previously floured is now turned up
Put your bench scraper behind the dough and pull it towards yourself. I hold the scraper in my right hand and I guide the dough with my left. The front of the dough should be pulled underneath, and the top of the dough should tighten
Now put the scraper in front of the dough and push it forward while twisting, so that the scraper ends up behind the dough. You can now repeat the process in the previous step
Repeat until you have a nice round and taut boule (ball). Pop any big bubbles you see on the surface
Repeat with the other lump of dough. Let them rest 15 minutes under a cloth
Prepare the bannetons
Make a mixture of half bread flour and half rice flour
Put a dish towel in the bannetons. If you don’t have one, you can absolutely use a bowl with parchment paper.
Put some of the flour mixture in a strainer and flour the bannetons. It’s better to use too much than too little
Final shaping
We do the final shaping to make sure the dough is super strong
Take a boule and sprinkle it very lightly with flour on the top
Flip it using your bench scraper so that the floured side is against the table
Repeat the process from the preshaping
When you have finished the shaping, grab the boule with your scraper and invert it into the banneton. The bottom should be up
Repeat with the other boule and place it in the banneton
Sprinkle the dough liberally with rice flour and put the bannetons into separate bags. Make sure you get some air in there so that the plastic does not get into contact with the dough
Place in the fridge overnight
Heat the oven – next morning
Place Dutch oven in oven as well to get piping hot.. Turn the oven to 500°F. If it doesn’t go that high, put it to maximum. Heat the oven for at least an hour. We want the Dutch oven to be completely warmed through
Baking the bread
Take a banneton out of the fridge and let rest covered for a few hours on the counter
Put a piece of baking paper on top of your peel and put it on top of the banneton
Turn it over and carefully lift the banneton off the dough
Slash the dough using a super sharp knife or razor
Open the oven and move the dough to the Dutch oven
Spray the top of your dough lightly with your spray bottle
Put on the lid and close the oven
Bake for 15 minutes
Remove the lid so the bread can get some color. Turn the oven down to 450°F. I usually bake for another 20-25 minutes for this bread or until internal temp is 190°F. I love it when the crust gets dark and crunchy.
Remove the bread from the oven and let it cool on a wire rack until it is COMPLETELY cooled off.
Turn the oven back up to /500°F. When it is hot, repeat the procedure for the other bread.
Watch master breadmaker Sune at the Danish Bread Geek website:,
https://www.youtube.com/watch?v=Znv99QbfWGs&t=222s
Origin of starter and instructions to activate:
http://www.carlsfriends.net
Heartlight Studio’s Carl Griffith Sourdough Bread Tutorial Heartlight Sour Dough Bread This is the best recipe that I have found for making Sour Dough Bread.
0 notes
Last Seen Blogs

nuppe-souiumono
ぬんぬんぬんるん(´∩皿∩`)

weallliveinamellowsubmarine
oh okay x

naotorali
藤娘 ❋ Naotora Ii

zivvio
Zivvio

ethicskye
skye