#for context layout is for making sure your characters and backgrounds and props are on model
Explore tagged Tumblr posts
Visit Tumblr Blog
Explore Tumblr blogs with no restrictions, modern design and the best experience.
Last Seen Tumblr Blogs


Fun Fact
Tumblr has a low social media market share in South America.
Text
Showed my animation layout professor my animatic and he said it was really good. I am vibrating that's really high praise from him
#for context layout is for making sure your characters and backgrounds and props are on model#and also figuring out cinematography and camera movement and blocking
434 notes
·
View notes
Text
Watchmans
It is 2018. I have been reading comics for over 20 years, and making them for about ten. I have never read Watchmen.
I even own the damn thing. I’m not sure when it got into my collection; it’s almost as if it was assigned to me when I started making comics where people fuck and say bad words. @beesmygod suggested that I ought to actually, you know, read the book. Assess how it’s aged. To make a long story short: it’s okay.
To make a short story long, I’ll break my assessment down into sections. People love that.
Art
It’s great. It’s not exciting, but it’s incredibly solid. It doesn’t feel “off”, while at the same time it never comes off as excessively referenced. The color palette can be jarring, and played a part in me not reading the book for a long time. I stopped noticing it after a while, and sometimes if you squint real hard and ignore the lineart, the colors look cool together in and of themselves. A notable exception: Nite Owl looks absolutely ridiculous without clothes on. It’s like Dave Gibbons got the script, read “chubby man” and thought, aw no, people hate looking at those. Nite Owl is the Ken Doll genitalia of Fat. It’s off-putting.
The comic makes great use of layouts, and pages always end on good narrative beats. Easy to follow (visually).
Story
Watchmen is what happens when a friend of yours tells you about some drama that’s clearly really exciting to them, but not to you. You don’t know the people involved. Your friend tells you everything that happened, and maybe even in the right order, but doesn’t tell you why you should care. That was the biggest issue for me, really: the story couldn’t convince me to invest in the characters. Is it because there are too many of them, so the focus is too broad? Is it that none of them are interesting people? The women in particular are boring in this comic, though at least the original Silk Spectre has a good line or two about Tijuana Bibles. I’d say that the women are less characters than props, but that would imply that the males had depth. Rorschach is the only character who, while not deep, has any weight to him at all.
There are a lot of references to the Cold War and Mutually Assured Destruction in this comic. There’s even a somewhat obscure reference to Nixon’s “Mad Bomber” strategy, which impressed me. Even so, I don’t feel like the comic makes the best use of the material. The threat of nuclear annihilation feels like background noise, even as the world encounters a potential crisis over the Soviet invasion of Afghanistan. This is more than a cosmetic issue, as the threat of annihilation is what drives the climax of the book. Going into Ozymandias’ big reveal, my initial response was, “Was this really necessary?” Things didn’t seem bad enough to warrant something so dramatic. Imagine what kind of shit he could’ve pulled if he was fully prepared for the Cuban missile crisis. What a drama queen. I assume this was an oversight; of all the criticism hurled at Ozymandias by the other characters, nobody tells him that he’s overreacting - just that they can’t believe he’s doing this “mad scientist shit”. When it’s done, they say, “All we did was fail to stop him from saving the world”. No, you failed to stop him from throwing a tanty. He didn’t save the world. It wasn’t in imminent danger in the first place.
All of that said, it’s not a terrible comic. It’s ambitious as all hell, which I respect. Is it a great comic? Well, we’ve collectively decided it is, so that means it is. Is it a great comic on its own merits, read in 2018? Not really. It has too much trouble with all of its moving parts, and knowing how to prioritize them properly to keep people focused. They even layer another comic in, a narrative-within-a-narrative. It’s an interesting affectation, but it doesn’t help with the impression of noise. It’s a real noisy comic.
On Rorschach
People have accused Watchmen of romanticizing the self-aggrandizing, tone-deaf attitude and behavior of Rorschach. A friend of mine believed he was an author insert. I think you’d have to assume the author really, really dislikes himself to believe that. Rorschach is not meant to be liked; he’s meant to set the book’s tone/thematic conflict, and he’s meant to be understood. In understanding him, you may find things about him that you do not hate. He isn’t even always wrong, which I think confuses some readers.
Rorschach is incredibly obnoxious. I think the author was pretty open about that. If you have to be beat over the head with constant declarations of how shitty a person is to be satisfied that the author isn’t glorifying being shitty, I just don’t know what to tell you.
On The Comedian
He’s like Dadaism if Dadaism was fascist, instead of the opposite of that. The shittiest nihilist. I don’t get him. Is he just there to suck? Why did anybody put up with this guy? Sure, he moves the plot along, but otherwise, man. Why are you here.
Moral relativism
The book’s thematic conflict seems to be “moral relativism versus absolutism”, but I can’t tell where the book ultimately lands in regard to that question. Perhaps that is the point, as we utterly fail to do that in real life, as well. Or, perhaps the book forgets about the thematic conflict partway through. It’s hard to tell. What the book does concretely do, is drive home how even moral absolutists can’t agree on what the correct absolute morals are. Just... like in real life. I wish the comic touched on this theme again near the end. It would have helped pull things together.
On women
Alan Moore’s depiction of women in this comic is just a dang bummer. It really is. Every living woman in the comic is defined in some way by her relationship to sex: a prostitute, a woman who falls for her would-be rapist, a woman largely kept as a consort to the human stand-in for nuclear weapons. A woman who loathes her husband’s work because it keeps her from getting the sex she wants. Two women get in a fight about being gay and having sex. Neither of the living female heroes gave much of an actual shit about fighting crime, and even seem annoyed to be dragged along. Rorschach has problems with everyone, but women in particular, he doesn’t see as people. None of these things in and of themselves are necessarily indicative of an author’s narrow view of women - this might be controversial, but I think even “a woman who falls for her would-be rapist” could theoretically be done well. When nearly all of your references to women are like this, it’s a pattern. It would be one thing if this pattern only showed up when viewed through Rorschach’s narrative lens, but that isn’t the case. This is normative. Sucks.
2/5 arbitrary stars. Historically important, interesting in that context. Not that interesting, otherwise.
edit: @gunwildversuseverything , thanks for the heads up
187 notes
·
View notes
Text
Hamburger Menu with a Side of React Hooks and Styled Components
We all know what a hamburger menu is, right? When the pattern started making its way into web designs, it was both mocked and applauded for its minimalism that allows main menus to be tucked off screen, particularly on mobile where every pixel of space counts.

CSS-Tricks is all about double the meat.
Love ‘em or hate ‘em, hamburger menus are here and likely will be for some time to come. The problem is how to implement them. Sure, they look simple and straightforward, but they can be anything but. For example, should they be paired with a label? Are they more effective on the left or right side of the screen? How do we tackle closing those menus, whether by click or touch? Should the icon be an SVG, font, Unicode character, or pure CSS? What about a meatless option?
I wanted to build one of those but failed to find a simple solution. Most solutions are based on libraries, like reactjs-popup or react-burger-menu. They are great, but for more complex solutions. What about the core use case of a three-line menu that simply slides a panel out from the side of the screen when it’s clicked, then slides the panel back in when it’s clicked again?
I decided to build my own simple hamburger with sidebar. No pickles, onions or ketchup. Just meat, bun, and a side of menu items.
Are you ready to create it with me?
View on CodePen View on GitHub
Here’s what we’re making
See the Pen Burger menu with React hooks and styled-components by Maks Akymenko (@maximakymenko) on CodePen.
We’re building use React for this tutorial because it seems like a good use case for it: we get a reusable component and a set of hooks we can extend to handle the click functionality.
Spin up a new React project
Let’s spin up a new project using create-react-app, change to that folder directory and add styled-components to style the UI:
npx create-react-app your-project-name cd your-project-name yarn add styled-components
Add basic styles
Open the newly created project in your favorite code editor and start adding basic styles using styled-components. In your src directory, create a file called global.js. It will contain styles for the whole app. You can write your own or just copy what I ended up doing:
// global.js import { createGlobalStyle } from 'styled-components'; export const GlobalStyles = createGlobalStyle` html, body { margin: 0; padding: 0; } *, *::after, *::before { box-sizing: border-box; } body { align-items: center; background: #0D0C1D; color: #EFFFFA; display: flex; font-family: -apple-system, BlinkMacSystemFont, "Segoe UI", Roboto, Helvetica, Arial, sans-serif, "Apple Color Emoji", "Segoe UI Emoji", "Segoe UI Symbol"; height: 100vh; justify-content: center; text-rendering: optimizeLegibility; } `
This is only a part of global styles, the rest of it you can find here.
The CreateGlobalStyle function is generally used for creating global styles that are exposed to the whole app. We’ll import it so we have access to these styles as we go.
The next step is to add a theme file that holds all our variables. Create a theme.js file in the src directory and add following:
// theme.js export const theme = { primaryDark: '#0D0C1D', primaryLight: '#EFFFFA', primaryHover: '#343078', mobile: '576px', }
Add layout, menu and hamburger components 🍔
Go to your App.js file. We’re going to wipe everything out of there and create the main template for our app. Here’s what I did. You can certainly create your own.
// App.js import React from 'react'; import { ThemeProvider } from 'styled-components'; import { GlobalStyles } from './global'; import { theme } from './theme'; function App() { return ( <ThemeProvider theme={theme}> <> <GlobalStyles /> <div> <h1>Hello. This is burger menu tutorial</h1> <img src="https://image.flaticon.com/icons/svg/2016/2016012.svg" alt="burger icon" /> <small>Icon made by Freepik from www.flaticon.com</small> </div> </> </ThemeProvider> ); } export default App;
Don’t forget to add the line with the small tag. That’s how we credit flaticon.comhttp://flaticon.com) authors for the provided icon.
Here’s what we’ve got up to this point:
Let me explain a little bit. We imported ThemeProvider, which is a wrapper component that uses the Context API behind the scenes to make our theme variables available to the whole component tree.
We also imported our GlobalStyles and passed them as a component to our app, which means that our application now has access to all global styles. As you can see, our GlobalStyles component is inside ThemeProvider which means we can already make some minor changes in it.
Go to global.js and change the background and color properties to use our defined variables. This helps us implement a theme rather than using fixed values that are difficult to change.
// global.js background: ${({ theme }) => theme.primaryDark}; color: ${({ theme }) => theme.primaryLight};
We destructure our theme from props. So, instead of writing props.theme each time, we’re using a bunch of brackets instead. I’ll repeat myself: the theme is available because we’ve wrapped our global styles with ThemeProvider.
Create Burger and Menu components
Create a components folder inside the src directory and add two folders in there: Menu and Burger, plus an index.js file.

index.js will be used for one purpose: allow us to import components from one file, which is very handy, especially when you have a lot of them.
Now let’s create our components. Each folder will contain three files.
What’s up with all the files? You’ll see the benefit of a scalable structure soon enough. It worked well for me in a couple of projects, but here is good advice how to create scalable structure.
Go to the Burger folder and create Burger.js for our layout. Then add Burger.styled.js, which will contain styles, and index.js. which will exporting the file.
// index.js export { default } from './Burger';
Feel free to style burger toggle in a way you want, or just paste these styles:
// Burger.styled.js import styled from 'styled-components'; export const StyledBurger = styled.button` position: absolute; top: 5%; left: 2rem; display: flex; flex-direction: column; justify-content: space-around; width: 2rem; height: 2rem; background: transparent; border: none; cursor: pointer; padding: 0; z-index: 10; &:focus { outline: none; } div { width: 2rem; height: 0.25rem; background: ${({ theme }) => theme.primaryLight}; border-radius: 10px; transition: all 0.3s linear; position: relative; transform-origin: 1px; } `;
The transform-origin property will be needed later to animate the menu it toggles between open and closed states.
After adding the styles, go to Burger.js and add the layout:
// Burger.js import React from 'react'; import { StyledBurger } from './Burger.styled'; const Burger = () => { return ( <StyledBurger> <div /> <div /> <div /> </StyledBurger> ) } export default Burger;
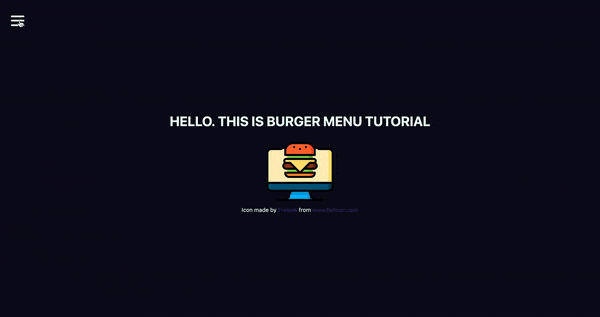
After that look at the left top corner. Do you see it?
Time to do the same with the Menu folder:
// Menu -> index.js export { default } from './Menu'; // Menu.styled.js import styled from 'styled-components'; export const StyledMenu = styled.nav` display: flex; flex-direction: column; justify-content: center; background: ${({ theme }) => theme.primaryLight}; height: 100vh; text-align: left; padding: 2rem; position: absolute; top: 0; left: 0; transition: transform 0.3s ease-in-out; @media (max-width: ${({ theme }) => theme.mobile}) { width: 100%; } a { font-size: 2rem; text-transform: uppercase; padding: 2rem 0; font-weight: bold; letter-spacing: 0.5rem; color: ${({ theme }) => theme.primaryDark}; text-decoration: none; transition: color 0.3s linear; @media (max-width: ${({ theme }) => theme.mobile}) { font-size: 1.5rem; text-align: center; } &:hover { color: ${({ theme }) => theme.primaryHover}; } } `;
Next, let’s add the layout for the menu items that are revealed when clicking on our burger:
// Menu.js import React from 'react'; import { StyledMenu } from './Menu.styled'; const Menu = () => { return ( <StyledMenu> <a href="/"> <span role="img" aria-label="about us">💁🏻♂️</span> About us </a> <a href="/"> <span role="img" aria-label="price">💸</span> Pricing </a> <a href="/"> <span role="img" aria-label="contact">📩</span> Contact </a> </StyledMenu> ) } export default Menu;
We’ve got nice emojis here, and best practice is to make them accessible by wrapping each one in a span and adding a couple of properties: role="img" and aria-label="your label". You can read more about it here.
Time to import our new components into our App.js file:
// App.js import React from 'react'; import { ThemeProvider } from 'styled-components'; import { GlobalStyles } from './global'; import { theme } from './theme'; import { Burger, Menu } from './components'; // ...
Let’s see, what we’ve got:

Take a look at this nice navigation bar! But we’ve got one issue here: it’s opened, and we want it initially to be closed. We only need to add one line to Menu.styled.js fix it:
// Menu.styled.js transform: 'translateX(-100%)';
We are well on our way to calling this burger cooked! But first…
Adding open and close functionality
We want to open the sidebar when clicking the hamburger icon, so let’s get to it. Open App.js and add some state to it. We will use the useState hook for it.
// App.js import React, { useState } from 'react';
After you import it, let’s use it inside the App component.
// App.js const [open, setOpen] = useState(false);
We set the initial state to false, because our menu should be hidden when the application is rendered.
We need both our toggle and sidebar menu to know about the state, so pass it down as a prop to each component. Now your App.js should look something like this:
// App.js import React, { useState } from 'react'; import { ThemeProvider } from 'styled-components'; import { GlobalStyles } from './global'; import { theme } from './theme'; import { Burger, Menu } from './components'; function App() { const [open, setOpen] = useState(false); return ( <ThemeProvider theme={theme}> <> <GlobalStyles /> <div> <h1>Hello. This is burger menu tutorial</h1> <img src="https://media.giphy.com/media/xTiTnwj1LUAw0RAfiU/giphy.gif" alt="animated burger" /> </div> <div> <Burger open={open} setOpen={setOpen} /> <Menu open={open} setOpen={setOpen} /> </div> </> </ThemeProvider> ); } export default App;
Notice that we’re wrapping our components in a div. This will be helpful later when we add functionality that closes the menu when clicking anywhere on the screen.
Handle props in the components
Our Burger and Menu know about the state, so all we need to do is to handle it inside and add styles accordingly. Go to Burger.js and handle the props that were passed down:
// Burger.js import React from 'react'; import { bool, func } from 'prop-types'; import { StyledBurger } from './Burger.styled'; const Burger = ({ open, setOpen }) => { return ( <StyledBurger open={open} onClick={() => setOpen(!open)}> <div /> <div /> <div /> </StyledBurger> ) } Burger.propTypes = { open: bool.isRequired, setOpen: func.isRequired, }; export default Burger;
We destructure the open and setOpen props and pass them to our StyledBurger to add styles for each prop, respectively. Also, we add the onClick handler to call our setOpen function and toggle open prop. At the end of the file, we add type checking, which is considered a best practice for aligning arguments with expected data.
You can check whether it works or not by going to your react-dev-tools. Go to Components tab in your Chrome DevTools and click on Burger tab.

Now, when you click on your Burger component, (don’t mix it up with the tab), you should see, that your open checkbox is changing its state.
Go to Menu.js and do almost the same, although, here we pass only the open prop:
// Menu.js import React from 'react'; import { bool } from 'prop-types'; import { StyledMenu } from './Menu.styled'; const Menu = ({ open }) => { return ( <StyledMenu open={open}> <a href="/"> <span role="img" aria-label="about us">💁🏻♂️</span> About us </a> <a href="/"> <span role="img" aria-label="price">💸</span> Pricing </a> <a href="/"> <span role="img" aria-label="contact">📩</span> Contact </a> </StyledMenu> ) } Menu.propTypes = { open: bool.isRequired, } export default Menu;
Next step is to pass open prop down to our styled component so we could apply the transition. Open Menu.styled.js and add the following to our transform property:
transform: ${({ open }) => open ? 'translateX(0)' : 'translateX(-100%)'};
This is checking if our styled component open prop is true, and if so, it adds translateX(0) to move our navigation back on the screen. You can already test it out locally!

Wait, wait, wait!
Did you notice something wrong when checking things out? Our Burger has the same color as the background color of our Menu, which make them blend together. Let’s change that and also animate the icon a bit to make it more interesting. We’ve got the open prop passed to it, so we can use that to apply the changes.
Open Burger.styled.js and write the following:
// Burger.styled.js import styled from 'styled-components'; export const StyledBurger = styled.button` position: absolute; top: 5%; left: 2rem; display: flex; flex-direction: column; justify-content: space-around; width: 2rem; height: 2rem; background: transparent; border: none; cursor: pointer; padding: 0; z-index: 10; &:focus { outline: none; } div { width: 2rem; height: 0.25rem; background: ${({ theme, open }) => open ? theme.primaryDark : theme.primaryLight}; border-radius: 10px; transition: all 0.3s linear; position: relative; transform-origin: 1px; :first-child { transform: ${({ open }) => open ? 'rotate(45deg)' : 'rotate(0)'}; } :nth-child(2) { opacity: ${({ open }) => open ? '0' : '1'}; transform: ${({ open }) => open ? 'translateX(20px)' : 'translateX(0)'}; } :nth-child(3) { transform: ${({ open }) => open ? 'rotate(-45deg)' : 'rotate(0)'}; } } `;
This is a big chunk of CSS, but it makes the animation magic happen. We check if the open prop is true and change styles accordingly. We rotate, translate, then hide the menu icon’s lines while changing color. Beautiful, isn’t it?

Okay, folks! By now, you should know how to create a simple hamburger icon and menu, that incorporates responsiveness and smooth animation. Congratulations!
But there’s one last thing we ought to account for...
Close the menu by clicking outside of it
This part seems like a small bonus, but it’s a big UX win because it allows the user to close the menu by clicking anywhere else on the page. This helps the user avoid having to re-locate the menu icon and clicking exactly on it.
We’re going to put more React hooks to use to make this happen! Create a file in the src directory, called hooks.js and open it. For this one, we’re gonna turn to the useEffect hook, which was introduced in React 18.
// hooks.js import { useEffect } from 'react';
Before we write the code, let’s think about the logic behind this hook. When we click somewhere on the page, we need to check whether the clicked element is our current element (in our case, that is the Menu component) or if the clicked element contains the current element (for instance, our div that wraps our menu and hamburger icon). If so, we don’t do anything, otherwise, we call a function, that we’ll name handler.
We are going to use ref to check the clicked element, and we will do so every time someone clicks on the page.
// hooks.js import { useEffect } from 'react'; export const useOnClickOutside = (ref, handler) => { useEffect(() => { const listener = event => { if (!ref.current || ref.current.contains(event.target)) { return; } handler(event); }; document.addEventListener('mousedown', listener); return () => { document.removeEventListener('mousedown', listener); }; }, [ref, handler], ); };
Don’t forget to return the function from useEffect. That’s so-called "clean up" and, basically, it stands for removing an event listener when the component unmounts. It is the replacement of componentWillUnmount lifecycle.
Now let’s hook up the hook
We’ve got our hook ready, so it’s time to add it to the app. Go to the App.js file, and import two hooks: the newly created useOnClickOutside and also useRef. We’ll need the latter to get a reference to the element.
// App.js import React, { useState, useRef } from 'react'; import { useOnClickOutside } from './hooks';
To get access these in the current element, we need to get access to the DOM node. That’s where we use useRef, also, the name node perfectly reflects the point of this variable.
From there, we pass the node as a first argument. We’ll pass the function that closes our menu as a second argument.
// App.js const node = useRef(); useOnClickOutside(node, () => setOpen(false));
Lastly, we need to pass our ref to the DOM element. In our case, it will be div, that holds the Burger and Menu components:
// App.js <div ref={node}> <Burger open={open} setOpen={setOpen} /> <Menu open={open} setOpen={setOpen} /> </div>
Your App.js should look similar to this:
// App.js import React, { useState, useRef } from 'react'; import { ThemeProvider } from 'styled-components'; import { useOnClickOutside } from './hooks'; import { GlobalStyles } from './global'; import { theme } from './theme'; import { Burger, Menu } from './components'; function App() { const [open, setOpen] = useState(false); const node = useRef(); useOnClickOutside(node, () => setOpen(false)); return ( <ThemeProvider theme={theme}> <> <GlobalStyles /> <div> <h1>Hello. This is burger menu tutorial</h1> <img src="https://media.giphy.com/media/xTiTnwj1LUAw0RAfiU/giphy.gif" alt="animated burger" /> </div> <div ref={node}> <Burger open={open} setOpen={setOpen} /> <Menu open={open} setOpen={setOpen} /> </div> </> </ThemeProvider> ); } export default App;
Check this out! It works as expected, and it’s fully functional and responsive.
Congratulations, everyone! You did a great job! Happy coding!
View on GitHub
The post Hamburger Menu with a Side of React Hooks and Styled Components appeared first on CSS-Tricks.
Hamburger Menu with a Side of React Hooks and Styled Components published first on https://deskbysnafu.tumblr.com/
0 notes
Link
The following blog post, unless otherwise noted, was written by a member of Gamasutra’s community. The thoughts and opinions expressed are those of the writer and not Gamasutra or its parent company.
Midnight Hub is a Swedish indie studio run by former Mojang and Paradox developers. Right now we're hard at work with our story-driven mystery game Lake Ridden. Feel free to reach out on Twitter if you got any questions!
This post was originally posted on our developer blog, by our talented art director Erik Nilsson. By posting it here we hope to spread his advice on how to make a kickass art portfolio when applying for a games industry job! So, without further ado, here are Eriks' advice in his own words:
A few weeks back I found all of my usual artist work for Lake Ridden replaced by one thing: sorting through applications we had received for the available 3D artist intern position. We only had one spot but dozens of applications, so for me that meant portfolio reviews, meetings, emails and interviews all day long.
I really don’t mind it, I love looking at other people’s artwork, but as I began to dig into the pile of emails from students, one thing became clear to me: no one had taught them about presentation or what a good portfolio should look like. Almost all of the applications needed the same kind of pointers.
An example of concept art for a "hero prop". This was actually the art test we sent some of the artist applying for the internship at Midnight Hub. Each enlarged item tells a story and shows that there is a thought out idea behind the prop.
Knowing how to create and present your portfolio when you apply to a game company, is just as important as having awesome 2D or 3D skills. If you have a badly presented portfolio you will struggle to find work.
This all left me very frustrated, portfolio creation should be a mandatory part of any game art education by now. You can't just teach people a software and then expect them to get jobs, they are competing with every other artist in the industry, or at least the country. And some of those other people certainly know how to present a portfolio.
So! In this blog post I have assembled a few tips on what I think every artist should take to heart, student or not, hopefully it will help some artists that are just now searching for their first game art job or internships. Get ready for some tough love!
Portfolios Are Really Important!
Your portfolio is king. As an artist it is the single most important information about yourself you can send to a company. Of course a short (like half a page max) personal letter is also important too: personality and teamwork is a vital part of game development after all. But as an Art Director, the first thing I will look at is your portfolio.
I don’t really care about your resume, it's always a nice bonus if you have some experience from another company, if you have shipped a title before, or are able show that you can work with other people. All that is great, but none of it matters if your portfolio is no good. As an AD I might have 50 other portfolios to review after yours, and unfortunately I don’t have the time to read a really long personal letter. If your portfolio is not interesting, an AD usually won’t bother with the other stuff.
Our producer Sara wrote a short blog post about on how to apply to a game company in general, check it out here.
Keep It Clean and Simple!
So, since ADs' and recruiters' time usually is very limited, you need to make their work as quick and easy as possible. I want to open an email, press a portfolio link and immediately see your three best pieces of artwork. One click, bam! Your best art right in front of my eyes! Don’t make me search through your email for the portfolio link, don’t make me wait for a long loading time, don’t make me download a plug-in that I might not have on my pad and never send me your portfolio as a zip.
A robot concept from my own portfolio. As you can tell all the info you need is collected at one place, without any distractions. The contact info is included.
When I say a “good” portfolio I don’t necessarily mean a pretty looking one, don’t spend time decorating your website or blog with flashy fade effects or “cool” layouts. I am there to look at your impressive 3D models, not your pretty website, after all, I am not looking for a web-designer, right? A simple, neutral background color with a bunch of images and some contact info is all I need.
Always put your contact info somewhere at the top of every page in your portfolio, just make sure it’s not distracting me from your pretty pictures. Don’t send me just a demo-reel (unless you apply as animator), or a Sketchfab page. They are cool, but they take time to open and are usually a bit clunky. I want a portfolio page (with your reel on, if your an animator, Youtube embedding works fine). I really don’t want to open a Sketchfab window unless the model looks really cool. And they might not always give me the best first impressions of your artwork. Give me a portfolio with simple images so that I can quickly look at all of your art, even on a phone. Then give me the option to look closer through Sketchfab.
Website or Blog?
It will always look really cool if you have your own website, but today you usually don’t need one. A simple blog with your art on is often enough, or why not use Art Station? A lot of people do, it’s easy to use, clean and most ADs already know how it works. With that said, it does look a bit more professional with your own site.
What Should I Put In My Portfolio?
When making art for your portfolio there are a few rules you should consider:
1. Quality before quantity - You only want to show me the best images you got. If you are uncertain on a piece: drop it! Bad images might actually cast doubt on your best ones. I would much rather see five strong images than one good and fifteen mediocre or bad ones. Remember, my time is limited, if I only see three images make sure it’s your best work.
2. Generalist or specialist - Figure out what kind of company you want to work for. Or figure out what kind of work you want to do - large companies usually want people that can specialize.
If you love making every detail on a high poly rifle look kickass, but not much else, chances are you are more suited for a job at a big company. They have tons of people hired to work there and they are competing against the most advanced tech in the industry. Because of this, they would rather pay you for doing one thing amazingly awesome, than doing a lot of different things really well.
Small companies on the other hand (like we at Midnight Hub), usually don’t have the money or space to hire a lot of people, so for them it’s usually more important that you have a broad skillset. They can’t really hire you to only sit and do rifle parts all the time.
3. Adapting to what a company is looking for - If a company is looking to hire an environment artist it’s probably a really good idea for you to have some environment art in your portfolio.
You can’t always adapt your portfolio to everyone’s needs, but if you are really interested in applying for a specific position, and you don’t have anything close to that in your portfolio already, it might be a good idea to make a new piece just for that! For example, if you want to work as a character artist on The Division, try making a next gen post-apocalyptic survivor character for your portfolio before applying.
4. Presentation - Presentation of your art is key for your portfolio. A good model can easily look horrible with the wrong composition and/or lighting. If that’s the case it will also show the AD that you don’t understand these basic artistic concepts. But having good composition and lighting will not only show that you understand this, they can also help your art stand out from the crowd.
A nice 3D environment piece by my friend David Österlind. It tells a story and works great as a beauty shot. It also contains a fairly large amount of props and textures that can be shown in separate images along with their wireframes and maps.
The same can be said for texture work and design, you want to find some way for your art to stick out from among the huge pile of other artist portfolios. Another really important thing to show in your presentation is workflow. For a 2D artist this can mean including thumbnails, sketches and variations under the final rendered design. For 3D artist you usually want to show one or two beauty shots, with a wireframe, maps, triangle count and maybe a few close-ups or in-game shots.
5. Storytelling in your presentation - Telling a story with your art is another great way to stand out. If you have a concept image of a character, try doing a few more concepts from the same world, maybe a monster, maybe a location, maybe the hero and the villain etc.
With 3D you can do the same thing, or maybe do an animation. If you made a cool tree, try putting it into a game engine, build a scene, light it, maybe add a few plants etc and try to tell a story about the location. Use that as a beauty shot and include another more technical image containing all of the props, maps, wireframes etc. Present your art in a context, rather than just as a bunch of separate images. This will show that you understand storytelling, workflow and pipelines, after all, this is probably how you would work at a real company!
A few quick environment sketches i did a while back, they are all based on the small black thumbs and they are all set in the same world. This gives a context and a meaning when they are put together. This shows I have an understanding for the 2D workflow.
Time To Summarize!
1. Portfolio is king. This is your single most important piece about yourself as an artist. Make it awesome!
2. Clean and simple. Art Station works fine. One click, bam! Your best art right in front of the art director's eyes.
3. Quality before quantity. When in doubt, don’t include the piece.
4. Adapt - what kind of games do you like making?
5. Presentation is 50% of the work. Include your items in a scene or put them together in exciting ways!
Thanks for the read and hope this helps! Feel free to ask me in the comments if you think I forgot something you consider important! Also, we managed to find a great 3D artist who will soon join the team, but more about that later. Now, go make some awesome art!
- Erik
0 notes