#formatting for covers artists etc manually...
Explore tagged Tumblr posts
Visit Tumblr Blog
Explore Tumblr blogs with no restrictions, modern design and the best experience.
Last Seen Tumblr Blogs


Fun Fact
The Tumblr app for Google Glass was released on May 16, 2013.
Text
he is listening 2 my music with me :3
#debloated it (as in used adb to get rid of most google stuff) and streamlined the whole thing a bit#found a decent sized micro sdxc so im no longer running out of space from..167 songs#which means i can add more yippee!#i wanna add the music i have downloaded on my phone but its mostly misc songs from youtube... which means ill have to do most of the#formatting for covers artists etc manually...#the site ive been using for this already has everything but track numbers so its gonna be rlyyy annoying
1 note
·
View note
Text
Submit Your Music on YouTube Easily: A Comprehensive Guide for Independent Artists
In today’s digital age, independent musicians have an unprecedented opportunity to share their music with a global audience. One of the most powerful platforms for doing so is YouTube, where millions of users tune in daily to discover new content. However, submitting your music on YouTube can seem overwhelming for newcomers, especially if you want to ensure that your submission process is as smooth and hassle-free as possible. This guide will help you submit your music on YouTube easily, step by step, while also introducing you to some essential tips to maximize your reach.
Setting Up Your YouTube Channel for Music Submissions
Before you can start submitting your music on YouTube, you need to create and set up your channel. Having a professional and polished channel will not only help you appear more legitimate but also give you the tools to manage your uploads efficiently.
To begin, visit YouTube and sign up for an account if you don’t already have one. Once your account is created, customize your YouTube channel to reflect your brand as an artist. This includes uploading a profile picture (which could be your album artwork) and a cover photo. Your channel name should be consistent with your artist name for better recognition.
Another important aspect of setting up your channel is to enable YouTube monetization if you’re eligible. This is essential if you want to make money from your music through ads on your videos. Monetization requires you to meet certain eligibility requirements, such as having a certain number of subscribers and hours of video watch time.
Preparing Your Music for YouTube Submission
Now that your channel is ready, the next step is preparing your music. Submit your music on YouTube easily by making sure that the format is compatible with the platform. Typically, YouTube supports a wide range of file formats, including MP3, WAV, and video files (MP4, AVI, etc.).
If you’re submitting an audio-only track, you might consider creating a simple lyric video or static image video to accompany your music. Music videos with visual elements tend to receive more attention than simple audio uploads, as they offer a more engaging experience to your audience.
You should also ensure that the quality of your music and video is top-notch. Uploading a high-quality MP3 or video file (at least 1080p resolution for video content) will help make a great first impression on your listeners.
How to Submit Your Music on YouTube Easily: Upload Process
Once your music is ready, it’s time to upload it to YouTube. Go to YouTube Studio, the platform’s central hub for managing your content. From here, you can upload your video or audio content by clicking the ‘Create’ button and selecting ‘Upload Video.’
After selecting your file, YouTube will prompt you to enter important information about the video. This includes your video’s title, description, and tags. For the best visibility, make sure to use relevant keywords related to your genre and music style. Don’t forget to include your name as an artist or band in the description, and use hashtags to help your video show up in related searches.
When uploading your music, you’ll also be prompted to choose the video’s privacy setting. Choose “Public” if you want your music to be available for everyone to see immediately. If you’re still working on promoting it, you might opt for “Unlisted” or “Private” until you're ready to launch it publicly.
Using Distributors Like Deliver My Tune to Submit Your Music
While it’s possible to submit your music on YouTube easily by uploading directly, many independent artists use distributors to simplify the process. Distributors like Deliver My Tune offer a service that helps musicians get their music on YouTube and other platforms without the hassle of manual uploads.
Once you upload your music to a distributor, they’ll take care of the technicalities, ensuring that your song is distributed across a variety of platforms, including YouTube, Spotify, and Apple Music. Using a distributor like Deliver My Tune can save you time and ensure your music reaches a wider audience. Additionally, many distributors provide services like YouTube Content ID, which helps protect your music from unauthorized use by claiming monetization on any videos that feature your tracks.
Maximizing Your Reach and Engagement
After uploading your music, it’s time to focus on getting the most out of your YouTube presence. Submit your music on YouTube easily, but remember that it doesn’t end with the upload. Promoting your music effectively is key to success on the platform.
To increase the visibility of your music, share your YouTube link across social media channels and encourage your fans to share it with others. Engaging with your audience in the comments section of your videos can also help build a community around your music.
Another way to maximize reach is by collaborating with other artists or influencers on YouTube. Collaborative videos or features in their channels can introduce your music to a larger, more diverse audience.
Conclusion
Submitting your music on YouTube doesn’t have to be difficult. By following these simple steps, you can ensure your music is shared with millions of potential listeners worldwide. Start by setting up your channel, preparing your music, and using tools like Deliver My Tune to streamline the process. Once your music is uploaded, take steps to engage with your audience and promote your videos across various platforms. With consistent effort and attention to detail, your music can thrive on YouTube, helping you build a strong fanbase and make your mark in the music world.
Related Articles:
For further reading, explore these related articles:
Submit your music on YouTube for free
Submit your music on YouTube in India
Submit your music on YouTube globally
Submit your music on YouTube step-by-step
For additional resources on music marketing and distribution, visit DMT RECORDS PRIVATE LIMITED.
0 notes
Text
The MAL x HF 2023 contest ends in 7 days! [Checklist]
This year's MyAnimeList x Honeyfeed Writing Contest novel submission period closes this next Thursday, August 31st. If you are participating in this contest, here's a checklist of important things to remind yourself of what your novel needs to be eligible for the judging process.
Your novel's protagonist is a male character and the story is told from the male POV.
Your novel revolves mostly around romance, where the MC's main focus is to have a wholesome romantic relationship. Love is in the air most of the time, and it's the main drive of your story.
On your Author's Note, it should clearly say what subplot and theme you are entering. If your novel does not display the subplot "Isekai" or "Present-Day" accompanied by the appropriate themes it will get automatically disqualified. For Isekai, the themes are RPG or High Fantasy. For Present-Day, the themes are Chance Encounter or Teenage Love.
Example of how a subplot and theme should look like on your contest entry Author's Note:


Note about Author's Note:
If you deleted the auto-text input from your author's note from your novel when entering the contest, you can manually input it again by following the exact format shown in the example above. Please keep in mind that if your novel does not have this information in the author's note by August 31, 2023, your entry is automatically disqualified.
Note about the Isekai subplot:
All Isekai subplot entries must follow the Isekai trope of arriving into another world by reincarnation, summoning, ritual, portal, curse, etc., and the protagonist can not easily go back to the "real world" or "jump between worlds" willingly. The MC can not just be an original local from that fantasy land. The only exception to this is that your protagonist is locked inside a video game world while his body is inactive in the real world or controlled by another consciousness other than the MC's. The "being isekai'd" is a must for this type of contest entry.
Note about RPG theme:
All RPG entries must have LitRPG elements or a videogame characteristic clearly presented in the story. These RPG concepts are leveling systems, skill points, skill trees, scores, ranks, health bars, experience-gaining, video-game-like menus, etc.
Note about the Present-Day subplot:
All Present-Day subplot novels must be set in a contemporary real world, meaning that your character is living on planet Earth in the year 2023. Mentions of supernatural elements are okay when sparse and are not the main focus of the story. Things like ghosts, aliens, spirits, illusions, wishes, miracles, etc. are okay in moderation, but things like fantasy creatures and magic being real are less okay. The use of fantasy elements in Present-Day entries will be discussed case by case by the judges.
4. Your Novel is not published anywhere else other than Honeyfeed until October 30th, 2023 (for non-finalists).
Note about Finalists:
Those novels that make it to the finalist 10 can not be posted outside of Honeyfeed until the winners are revealed in December 2023. If your finalist novel is discovered to be posted on another website before the winners are announced, it will be automatically disqualified from the finalists vote.
5. Your novel has an appealing synopsis.
6. Your novel has a cover image with the appropriate artist credit.
Note about copyrighted images:
You can not just get an "image off the internet" and use it as your novel cover without the author's explicit consent. If you are found using a copyrighted image that does not belong to you, your novel will be automatically disqualified. In some cases, we may ask for proof of purchase of the art or the artist's direct contact information. Please use AI-generated art at your own risk.
Note about Canva:
Canva is free and it is available directly on the Honeyfeed site. Please use it if you don't want to pay for art.
7. Your chapters were not all posted on the same day.
8. Your novel's main plot point was resolved within 25,000 words minimum or 75,000 words maximum.
Note about min/max wording limits:
Honeyfeed is flexible if your novel is a few hundred words short or over. Your story doesn't have to make it exactly at 25k/75k words when its finished. A few words under or over is okay, just don't abuse the flexibility and be safe by complying with the limits as best as you can.
9. Your novel reaches a satisfactory ending or volume closure by August 31, 2023.
10. You do not update your novel after August 31, 2023.
Note about updating Author's Note or Cover Image:
When you update your novel's cover or author's note, Honeyfeed does not know where the update happened so it marks it as a new entire novel update. When updating either of those, the novel will appear as updated after August 31st. If you update your author's note, please do not delete the subplot or theme. If you update your novel cover, please do not leave your novel coverless. If you do end up updating any of those after Aug.31, please leave a small note on your Author's Note with what has been updated on what date, so that the judges know what got updated. Judges do not have backend access to Honeyfeed.
We invite you to re-read all of the MAL x Honeyfeed Writing Contest details and rules.
0 notes
Text
All About RP Icons For Beginners by Birdy


Hi OP, I’m not sure how experienced you are with all the nonsense surrounding the making and using of RP icons, so I’m gonna come at it as though you don’t have any experience with it at all and I’m sorry if that’s too simplified for you, but also if I’m gonna write many paragraphs about one topic I may as well make it accessible for as many people as possible ¯\_(ツ)_/¯
This post goes into what tools are out there for the popular methods of finding/making RP icons in the first half and my personal methodology for choosing and using them in my RP for the second half. This is a very surface level answer to the question and is not meant to be an in depth tutorial for the more labor intensive aspects of the process, but if you guys want more information and can’t find it elsewhere, please ask and I'll know what I should be talking about next.
Also I’m also contractually obligated to mention to the masses that I do take commissions both for the drawing of RP icons and the service of capping, cutting, recoloring, and framing canon icons. Sometimes I even post batches of canon character icons for free on this blog so like,,,,, hit me up if you want. But!! You don’t need me, you can absolutely do all of it yourself!! I go into the broad strokes below.
Question 1: “How do you get icons?”
This is kind of a broad question and the answer depends on what your needs are. The right answer for you is gonna live in one of two camps
Find some that already exist that are free to use
Make them yourself / commission somebody else to make them for you.
What you'll choose is gonna depend a lot on your character first and foremost. The big determining factor in most cases is whether or not the face you want has been in anything you can take pictures of.
If you have a canon character who exists in visible media--
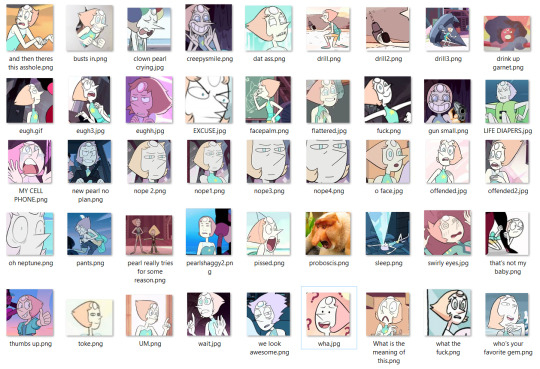
--you're in luck! The chances of you finding some resources that exist already is higher when you have a canon character who is in at least a few pieces of media. OP asked about Pearl from Steven Universe, and she's a great example of a character with a lot of resources. Searching for rp icons of a popular character will often yield packs of icons on Tumblr, Dreamwidth, Livejournal, etc. Most of these will be completely free to use or have very reasonable conditions for use (like credit the person who made them for example.) It's often a good first step to see what preexisting resources are available to you even if you still plan on making your own icons.
If you have an OC or a character that's not all that popular--
--you're gonna fall into the second camp. If you want icons, you have to have them made. So what are your options?
Help! My character appears in no media! What are my options?
If your character appears in no media you're in a tough spot. Different people approach this problem in different ways.
Face Claims
One option you have is to choose a face claim to represent your character. In roleplay a face claim or ‘FC’ is a person or character whose appearance you use for the physical description of your character. I personally am not big on doing this, I prefer drawn icons and I tend to RP as animated characters, but some people really like using celebrities and stuff to represent their characters. When I was playing Angus McDonald he hadn't appeared in any visual media yet, so I sometimes used Bryce Clyde Jenkins as the face claim for certain types of threads.
If you're somebody who likes to use face claims there are loads of resources out there for finding the perfect one, including here on tumblr. Try searching up RP Faceclaim Directory and playing around with some of the ones that pop up.
DIY RP Icons
The other option you have is to create those icons from scratch. Draw them yourself based on icons you like or commission an artist to draw some for you. If you can't draw yourself, I've seen some people get really creative with this. Some people create their character in the sims, dollmakers, or their favorite RPG and then take screenshots of that to use for icons. There's also no law that says every icon you use has to be your character's face. When I was writing a trashy mermaid AU I got a lot of mileage out of icons that depicted harbor and oceanic scenes with no actual faces. Get creative, go nuts, have fun.
Icons Aren’t That Important
The other thing to remember that icons are not a must in many RP circles. It's perfectly possible to have a great time and write cool stuff without any pictures at all. Depending on your platform of choice there are probably also other interesting ways you can make your posts unique to you by formatting the text or using symbols or emojis or otherwise denoting your personal style in text.
Help! My character appears in lots of media! How do I make icons?
Again, there are a million and one answers to this question and it really depends on what tools are available to you and what your preferences are. This section is not a tutorial but it will outline some of the options you can look into.
The icon making process is typically in 2 stages-- stage 1: get all your images of your character, and stage 2: edit all of those images into icons.
If you have access to the source material, any version of Photoshop, and software that automates the collection screencaps from video (KM Player, VLC, etc) you're pretty much gucci. You're gonna have no problem getting loads of nice icons in a reasonably short amount of time and there are a million different tutorials on how to use those things whichever way you prefer.
If you don't have access to those things you still have options.
You can still screencap things manually, and you can screencap in batches by holding down the windows key and pressing PrtSc any time you want to save an image. They should be saving to >pictures>screenshots unless you’ve set things up differently. It’s a good way to take a lot of screenshots without stopping in between.
( EDIT / UPDATE: to say that if you use automation for taking screencaps remember to turn that shit off when you’re not using because it oh mylanta it WILL continue to take images without you realizing. Figured out where all my disk space has been going with this rookie mistake, thanks OP)

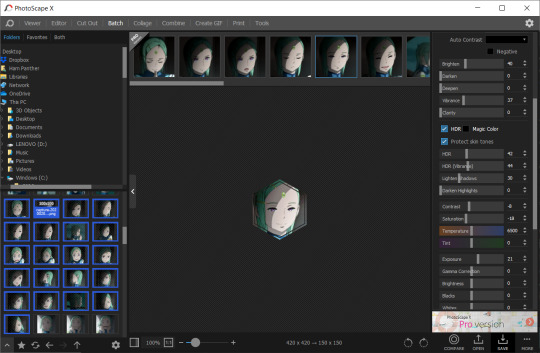
Additionally, PhotoScape X is a really great little tool for windows and mac that I've never seen anybody talk about, but I use it sometimes and it's totally free with the exception of a few paid features I’ve never once needed or wanted. This program is not as efficient as using Photoshop but it has presets for cropping images easily as well as batch editing options for some basic borders and color retouching. While it’s not as powerful as Photoshop, you can get a lot done with it reasonably quickly compared to other choices. You can also take and edit snips of anything on your screen with it, which is really really useful if you don’t have access to the video or image files you would need on your hard drive for other version of this process. The program looks like this:
Also, not to be like a minimalist about it, but you can also just fucken use Microsoft Paint or whatever you have. Like, whatever, there’s no law. You graphics dont have to be comlpex or deep fried. Half of my icons have been made or edited in paint at some point. It wont be as fast as some of these other methods but a lot of us aren't out here making icons in batches of 100 at a time.
Anything that you can use to make smallish images of your characters face will work to make icons.
If you want more information about any of these methods of icon creation let me know and I’ll talk about them.
Question 2: “How do you make your icons ‘work’ in posts?”
I'm a little confused on what you mean by "make them work" so I'm gonna cover my bases here. I'm assuming what you're getting at is a sort of sense of cohesion in the icons I use, or having the "right" expression for the scene I'm writing. Either that or them not stretching and looking weird thanks to tumblr. I’ll get to both of those.
And before I go into my own rationale for icon choices I feel I should point out that a lot of people who aren't me do successfully manufacture cohesion out of their images by doing fun stylistic things like recoloring their images all the same way or putting cute borders and stuff around them or making them fun shapes, and that's totally something you can learn how to do if it interests you. I do this for icons commissioned by other people and I’m not against talking about how to do those things, but I don’t really bother with them for my own icons all that much. That stuff is all fun and it’s a neat thing you could get into that can make your icons all look really nice together.
BUT ANYWAY --
Since the character you asked about is Pearl, I’m going to focus on her. Nearly all of my Pearl icons are completely unedited and a lot of the credit I would have to give regarding icon quality goes to Pearl herself and the consistently good lighting that the show uses. I don’t have a huge need for editing or color retouching beyond making memes or whatever other goofy things I might be getting up to. Pearl is extremely expressive compared to other characters I have written and since she's in nearly every episode, I've managed to collect…

...oh god, that’s too many icons.
Pearl is a main character and I've been RPing as her for over 6 years now so I have a fuckload of images to choose from and I'm not gonna pretend that doesn't help when I wanna “make things work”. She gives me a lot of options.
That said, you absolutely don't need 3000 images to make a good post. The way I've collected and organized these images may be of use to you even if you dont have as many icons. I've done a lot with my setup to make finding the right icon very easy.
For starters, a minor subset of my Pearl icons are grouped by a particular defining feature. I have one large Pearly folder full of icons and then a few smaller folders inside for icons I thought worth grouping separately. For example, all icons of SUF Pearl in her new jacket are in the same folder. All icons of Pearl in short term alternate outfits are in the same folder. Anything I sourced from Attack the Light is in its own folder. I do this with anything that has a very specific use, such as writing AU content or flashbacks to specific time periods. If I can picture an icon in my head, I usually know where in my ridiculous hell collection to go to find it.
This folder was originally just for her pre-canon outfit but now all of her outfits that only appeared temporarily are in there.
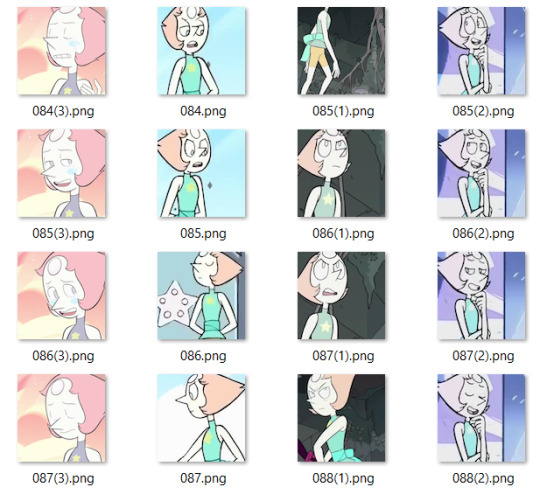
Perhaps more important for the sake of cohesion is that nearly all of my icons that aren’t squirreled away in some smaller folder are loosely arranged by episode. What that means is that most of the time I have icons from the same scene right next to one another. It makes it incredibly easy to make my RP replies appear as though it's all one cohesive scene even if I use more than one icon. When you do it this way it becomes very easy to choose icons that have the same lighting or that appear to lead from one expression seamlessly into another. Exhibit A:
While the vast majority of my icons are numbered, I do take the time to name ones I find myself using a lot or that have particularly unique expressions. Usually I'll choose names that I'll find descriptive or easy to remember based on the context of the icon. You can have a lot of fun with that and never lose your favorites.
Also don't be afraid to lean on icons you got from weird places if you like them. The icons of Pearl from the official comics run don’t look like most of what I have. I think them being different would turn a lot of RPers off, but I use them a lot because I like the style and I almost never see other Pearl RPers using them. It either makes me stand out or it makes me tacky, one of the two, haven’t figured out which, but also I’m not stopping.

And just to reiterate, you can use icons that aren’t your character if they’re thematically relevant or vague enough to look like them. When I’m capping I’ve started saving a folder of miscellaneous environments of interests, hands, and other everyday types of scenery that appear in the thing I’m taking screencaps of.

You can use any size you want for RP icons but the most common is 100x100 or 150x150 pixels. Any smaller than that and the image gets to be difficult to read and work with in my opinion. That doesn’t stop people, of course, but I’m elderly and need glasses now, so no tiny icons for me. On that note, I rarely see RP icons larger than 300x300. Any larger than that it tends to get bulky and be in the way of other people’s comfortable internet browsing experience, especially on mobile. Of course, these are just my suggestions. What you choose will ultimately be up to you, but somewhere in that 100 to 300 px range is pretty safe.
A very tumblr specific thing to know is that any image that is wider than 300 pixels will be stretched to hell, so you probably want to keep it smaller than that.

Thanks, Tumblr, I hate it!
Also, don’t be afraid to make trash images for fun if you’re so inclined. People love that, or at least I do. Not having the right icon can be fun and lead to a very silly solution. Lean into being a shitposter if that’s what you’re called to do.


So yeah, that’s basically what my suggestions are. Collect your images in a way that helps cohesion and ease of use. Keep them a good size. Don’t be afraid to get unconventional with your choices or make memes or whatever. It’s all for a fun time.
Anyway, that’s all I can think of right now, but more info on any of this can be obtained at the price of one ask, I know it was a lot of different moving parts.
20 notes
·
View notes
Note
do you have any recs for learning about screenwriting / how to screenwrite? i'm one of those writers who kind of sees things like a movie and i'm wondering if things would work out better for me with a new medium. thanks in advance!
I hope you’ve got some time to read all of this because it got really frickin’ long.
I was introduced to screenwriting in a Writing Lab in college and followed suit into a Screenwriting IA (Integrative Activity, where students demonstrate what they’ve learned over the course of their studies in the Cinema and Communications program).
So admittedly, most of what I learned was from two teachers who already knew their stuff and worked in the industry. However, I was so interested in pursuing screenwriting once I’d fallen in love with it, that I bought all the “optional” resource books my Screenwriting teacher had recommended.
The Screenwriter’s Manual: A Complete Reference of Format and Style by Stephen E. Bowles, Ronald Mangravite, and Peter A. Zorn Jr. really has the basics for what you need to learn how to get into screenwriting. It is available on Amazon for a range of prices.
I also read significantly through The Screenwriter’s Problem Solver: How to recognize, identify, and define screenwriting problems by Syd Field and to be honest it can actually be useful for any kind of story writer, as I perused it and applied some of its content to a few films I found were really poorly executed.
I own, but have not significantly perused:
Story: Substance, Structure, Style and The Principles of Screenwriting by Robert McKee
My uncle who is a screenwriter recommended highly, I personally haven’t dived in yet because the McKee has a stupid disclaimer about why he chose to use He pronouns to refer to the writer throughout the book which was a bit irritating so I just covered it with a sticky note and let it sit for a while.
Writing Short Films: Structure and Content for Screenwriters by Linda J. Cowgill
*Writing Tools: 55 Essential Strategies for Every Writer by Roy Peter Clark.
*Showing & Telling by Laurie Alberts
*Writing Down the Bones: Freeing the Writer Within by Natalie Goldberg (currently reading)
*Take Off Your Pants! : Outline Your Books for Faster, Better Writing by Libbie Hawker.
* = not screenwriting specific, general writing.
Two other books that come highly recommended by both of my uncles who work in the industry are: Save the Cat by Blake Snyder, and Screenplay: The Foundations of Screenwriting by Syd Field.
Since I didn’t learn this completely on my own, I don’t have many online resources, but a quick google search of “Basic Screenwriting Format” should yield you some decent results. HERE is one I found, which has a few book recommendations in it as well. Airtable has resources for screenwriting as well but I am not as familiar with it, search “screenwriting” in the template section.
Here’s what I can recommend right off the bat, sign up for Celtx. It has free and paid subscription services, and you can keep 3 projects on your account at a time, but you can also just download them as PDF’s to free up space and reupload them later and the format will be in tact. Scrivener also has a screenwriting word processor, but it’s a (one time) paid program.
There are many other word processors for screenwriting, but the best for beginners is Celtx. Most processors these days do the formatting for you, unlike 10-20+ years ago when you had to figure that shit out yourself. All you have to do is get familiar with where everything goes.
Which brings me to the next part of my answer…
A Screenwriting Crash Course
For a whole fucking load more of information, look under the cut.
First and foremost, I think it’s important to understand that the narrative description / action / description (all terms used interchangeably) is written in present tense 3rd person, and that you should focus on describing exclusively on what can be SEEN and HEARD. You should also try to be as concise and brief as possible. I found this was quite freeing because while I do love the metaphorical descriptions in prose, screenwriting is a very snappy and visual medium to write in.
Another thing to understand is that beyond learning the basic formatting rules of screenwriting, you can pretty much bullshit formatting you’re not sure about. I’ve read many screenplays where certain elements were not consistent, such as whether or not the writer chooses to put their characters’ names in CAPS every single time (you should at least do so when the character is first introduced).
It’s actually really easy to find scripts of your favourite films online with a quick google search, it might take practice but I’ve managed to build a decent collection of screenplays that I like to read and get an eye for certain formatting tricks that won’t be in a “how to” book. Screenplays also read very quickly. There’s a general rule of 1:1 for page:minute, meaning 1 page is usually equal to one minute of screen time, and if not, it usually averages out.
I’m going to pull some quotes from The Screenwriter’s Manual to give you a bit of an idea of where you can start: pg 25 - 44, 49 - 63
You can find photos of the table of contents HERE if you’d like to message me directly with specific questions, I’d be happy to send you photos of the section you want.
The Staging
The first component in the scene line [or slug line] provides the most basic information about the set-up for the scene.
The staging is ALWAYS abbreviated and followed by a period. There are only two choices for a scene:
INT. for an interior set, informing the reader that the scene takes place in an inside environment
EXT. for an exterior set, specifying an outside environment.
1. The Location
The second component in the scene line is the location in which the scene takes place.
The location follows the INT. or EXT. designation and is separated from it by two character spaces [most screenwriting processors will do this automatically].
Do not abbreviate any words in the location component of the scene line. For example,
INT. APARTMENT is correct, and INT. APT. is incorrect.
VERY IMPORTANT
It is absolutely essential that every specific location be distinguished from every other location.
If Joe lives in an apartment, then you can call that location INT. APARTMENT But if, in the same screenplay, Bob also has an apartment you can no longer use INT. APARTMENT as a location for Bob’s apartment.
To eliminate confusion, one solution is to call each apartment location by the resident’s name: INT. JOE’S APARTMENT and INT. BOB’S APARTMENT
Once a specific location has been identified in the scene line, all subsequent scenes taking place in that location MUST be identified in exactly the same way.
FIRST NOTE:
The location identifies where the activity and dialogue take place…
… if John lives in a multi-room apartment and John is currently in his bedroom (so that other rooms are concealed from view), then the scene line must read, INT. JOHN’S BEDROOM or INT. JOHN’S APARTMENT, BEDROOM
[If the action moves from one location to another there are different ways to indicate it; one would be to created a new scene line to indicate the new location, or to indicate the new location in the description like “John walks out of his bedroom and into the LIVING ROOM”. ]
…
FOURTH NOTE
A scene line can take either of two common variations:
Most often, the scene line will define a specific location, such as INT. JOHN’S LIVING ROOM which limits the field of view to the area where the “camera” is placed.
If the scene takes place in a more generalized location, you can write it as an open scene, such as EXT. COLLEGE CAMPUS … By identifying the scene in a generalized way, you are indicating that it is not important to your narrative to identify precisely where on the campus this scene takes place.
THE TIME
The third component of the scene line indicates the general time at which the scene begins.
The time follows the location and is separated from it by a character space, then a dash, and then another character space.
[ example: INT. JOHN’S HOUSE, ATTIC - DAY ]
The time component of the scene line is most typically specified as a simple DAY or NIGHT. However, the time component can define a more precise period of the day or night. For example, DAWN, MORNING, AFTERNOON, RUSH HOUR, etc.
… You CANNOT specify an exact time, such as 3:30 PM, in the scene line. If such a specific time is required, you need to [include it in your description]…
When there is no lapse of time from one scene to the next, the time element in the scene line could simply be, CONTINUOUS. … if the time lapse is very brief, then you could use something like, MOMENTS LATER, A FEW MINUTES LAYER
AN EXEMPTION:
If a scene takes place in a location in which there is no way to gauge the visible time (DAY or NIGHT), then that element is omitted from the scene line.
ADDING SPECIFICS TO THE SCENE LINE
IDENTIFYING HISTORICAL PERIOD
[example EXT. PARIS, FRANCE - DAY (1946)
EXT. CHICAGO, ILLINOIS - DAY (1920′s)]
INDICATING A MOBILE SITUATION
If a scene opens with a moving vehicle within the location, then that can be indicated in the scene line. For example… INT. JOHN’S CAR - DAY (MOVING)
2. ACTION or [DESCRIPTION]
Description imparts the necessary detail to the essentials of the scene, describing such features as the characters, sets, props, and any necessary action and sound cues.
It is generally best to keep the level of detail focused on the actions and dialogue that comprise the narrative. That is where your attention and the reader’s interest should be directed.
By describing the particular props and decor in a scene and how each character dresses or grooms, you can suggest such character information as personality type, emotional condition, religious affiliation, economic level, artistic taste, and for forth.
First, establish the scene, describing only what is visually apparent in the location and giving only as much detail as necessary.
You cannot describe anything that cannot be seen… until they have been revealed.
You do not need to itemize things that are generic and would ordinarily be present, such as furnishings, colours, arrangements, [etc]…
However you MUST specify anything that is unusual or essential to the scene.
[ My uncle imparted me with a great tip; screenwriting doesn’t maintain traditional prose rules about paragraphs. You should try to keep your descriptions a maximum of four lines, and feel free to break them up into one-line or even one-word for emphasis.]
…
VERY IMPORTANT:
You can only convey what is happening at the moment… [No what has happened or what will happen].
You CANNOT provide any biographical, psychological, or situational information [about your characters] unless you can find visual means to do so (such as a newspaper article, a television program, [etc.])…
INTRODUCING CHARACTERS
Each character must be introduced in the description the first time [they] physically appear in the screenplay. This includes not only major characters, but also supporting characters and even minor characters and groups that function as characters.
NAMING CHARACTERS
When a character is introduced, [their] name is ALWAYS typed in ALL CAPS regardless of whether the character is identified by a proper name, a profession, or an appearance… EVANS, AGENT ONE, DERELICT…
Once a character has been introduced, all subsequent references to that character’s name in the description should be written in a normal manner with initial caps… Evans, Agent One, Derelict…
DESCRIBING CHARACTERS
As the screenwriter, you know who is a major character and who is a supporting or minor character because you have the entire story in your mind. The reader, however, is in a different situation.
… The amount of detail you provide about a character’s appearance and demeanor will give the reader a key to that character’s important in the script.
As a guide, when characters are introduced, you need to make clear how important each is going to be by tailoring the description and context accordingly.
[ You should describe their appearance and what they are doing when you introduce your characters. There are many different formats to describe a character when you are introducing them, and none of them are the hard and fast rule, you will probably end up settling for your own preferred method].
WARREN EVANS, late twenties, intense, handsome with closely cropped hair and a neatly trimmed moustache, is working with cool precision at one of the hundreds of banks of wiring terminals. he is dressed in coveralls and wearing thin latex gloves.
A VARIATION:
A character’s age can also be assigned a numerical designation, such as…
WARREN EVANS (late 20s), ruggedly handsome, dressed in…
Seated at the table is CINDY LEWIS, late 20s and very attractive…
[ Generally you should only mention eye colour, skin colour, height, weight, hair style/colour if it is relevant to the narrative. ]
WORDS THAT GET CAPPED
In addition to using CAPS to introduce characters in the description, there are established conventions for other elements that need to be typed in CAPS but only if they affect the narrative…
Those elements include:
all essential costumes, props and decorany important action, effects, or emphasisany required music or sounds
Although some of the following instances require CAPPING, many will be judgement decisions.
FIRST NOTE:
You CANNOT identify every costume, prop, or decor on the set. Ordinary objects that have no special significance to the narrative should be left [ in normal text].
SECOND NOTE:
… if a certain prop is important to the story, you should CAP it when it first appears, regardless of whether it is important to that particular scene.
WHEN TO CAP AND WHEN NOT TO CAP
CAPPED words can be effective only if they are used sparingly and appropriately, if CAPPED words are used too frequently, their significance will be lost.
3. THE DIALOGUE-BLOCK
The dialogue element, [also] called the dialogue-block, of the screenplay format consists of three components:
the character-name specifies which character is speaking…the dialogue reveals what is being said by that charactera parenthetical, when necessary, instructs [or indicated an element of] how or to whom the character [is speaking]. EVANS (to the group) Sorry I’m late. This round’s on me.
GENERAL RULES
ALWAYS contains the character-name and dialogue, and it MAY, if helpful, also contain parentheticals.is ALWAYS single spaced with no blank lines that internally separate the individual componentsis ALWAYS preceded and followed by a single blank line
[ Parentheticals should not be used too often, you should be attempting to provide context for how the character is delivering their line in the description by providing adequate mood/intensity/emotion.]
CHARACTER NAMES
A character-name is the designation used for the speaker…
… Once a character-name has been established, you MUST consistently use that name from that character.
For example, if you’ve introduced the character as COLIN PRYCE in the description, then you will probably want to use the designation COLIN or PRYCE in the dialogue-block.
DIALOGUE
Everything that the actor speaks that is heard by the audience is dialogue.
[Dialogue] is ALWAYS written in basic prose with initial caps and proper punctuation.
EMPHASIS IN DIALOGUE
To emphasize a particular word or phrase you should underline it.
OFF-SCREEN or VOICE-OVER CUES
[ Off-screen: when a character is not physically present in the scene peaks from a nearby location, close enough that they could enter the scene. Such a character might be speaking from a room out of view or from behind a concealed area.
Voice-over: (1) a voice heard from a mechanical device such as a telephone, radio, intercom, tape recorder, answering machine, walkie-talkie, etc. (2) The voice of a narrator, which is required when the dialogue is spoken by an unseen narrator. (3) The thoughts of a character, applied when a character is visually present and what is heard are their thoughts.
Usually, a character who is speaking dialogue is visually present within the scene. However, there are two important exceptions: off-screen and voice-over.
The off-screen (O.S.) and voice-over (V.O.) cues
- ALWAYS follow the character-name on the same line- are ALWAYS enclosed in parentheses- are ALWAYS abbreviated in upper case.
PARENTHETICALS
Parentheticals are a convenient device to convey specific information about how the dialogue is being said…
[Parentheticals] are ALWAYS enclosed by parentheses… are restricted to words, phrases, and fragments… ALWAYS apply to the dialogue that immediately follows it.
Parentheticals need to be concise and direct, indicating such brief information such as:
- to whom the character is speaking (to John), (into phone), (to himself)- a particular gesture or mannerism(raising his glass), (looking at her watch)- how the dialogue is being spoken(angrily), (coughing), (softly), (thick ____ accent)
WRITING PARENTHETICALS
Because parentheticals are limited to words and phrases, they [should always be written in lowercase and with no punctuation, for example:
(loudly)
No more than two directions should be included in any parenthetical. If two directions appear they should be separated by a semi-colon:
(to the class; loudly)
THREE SPECIAL CASES
- a (beat)- a (pause)- an (interrupting)
[A (beat) indicates a change of thought, suggests a moment of indecision, or conveys a dramatic effect.
A (pause) signifies that a break in the dialogue occurs. This is most often used in phone conversations.
An (interruption) indicates that the dialogue begun be the previous speaker is being interrupted by the current character (there are a few different ways you can format this). ]
I won’t go any further than this because this is already extremely long, but ultimately I invite you to take a look at some of the scripts (here and here) I’ve written and doctored as an amateur screenwriter as well as digging up your own favourite movie scripts which will give you a good idea of how to implements what formatting.
#anon asks.#answered asks.#writeblr#am writing#screenwriting#resources.#writing advice.#on screenwriting.#long post.#my resources.
339 notes
·
View notes
Link
"Love - the absolute circle of trustfulness - that's the secret of it all. I love the birds, the snakes, the society person, the academic, and the baby - all creatures of the universe are alike, and they will never harm you unless you fear them." -Charles Kellogg, 1915 Charles Dennison Kellogg was unlike any performer in the history of the American stage. He developed a few key obsessions - the forest, love, vibration, fire - into an irresistibly charismatic package and then sold that package in the form of himself through an uncanny use of the press, a vigorous appetite for travel, and a need to be the center of attention through a serpentine five-decade career as a pontificator and showman. In the early decades of the twentieth century, he amused and astounded heiresses and industrialists, yogis and artists, scientists and, most of all, the plain folk of most states in the union with demonstrations of his vision of a wholesome and interconnected world of all living things. His memory has largely faded, but he left behind a memoir, riddled with gaps and touched with hokum, many photographs, hundreds of press notices and reviews in newspapers, over an hour of sound recordings, at least one fragment of film, and a legacy of naturalism and invention that has entered into the lore of his native California. Kellogg was born October 2, 1868, the fourth of five children to Henry Kellogg (b. 1822 in New London, Connecticut) and Mary E. Carlisle (b. 1845 in Jefferson, New York) in the Sierra Nevada mountains of northern California’s Plumas County in a settlement called Spanish Ranch “nearly a hundred miles from the nearest railroad,” according to Kellogg. His father’s involvement in a nearby goldmine in the 1850s paid off, and he used his share of the profits to establish a provisions store for the area prospectors. Kellogg wrote that his mother was the only white woman in the area, and that he “lost her in infancy.” In fact, she left the family when he was about 3 years old, and his autobiography gives us an indication of the wound her abandonment left through the pains with which he purposefully wrote her out of his life’s story. (She died in Long Beach, California in 1917.) In his auto-mythology, Kellogg was as a child close to a Chinese servant named Moon and an unnamed Indian woman, who, he wrote, “taught me to fear no creature [and] taught me, too, the habit of minding my own business, letting the other fellow alone - bird, bear, snake, Indian and other humans. […] My earliest recollection is sitting with the Indians about their campfires or watching the Chinamen boil their rice between stones.” The impressions of the sounds and feelings of the wilderness in early childhood embedded themselves deeply in young Charles. He recalled it as a period of immense freedom, a world with “no doctors, missionaries, telephone, telegraph, schools, saloons, poorhouse, jail or gamblers; no police for there was no disorder. There were birds, grizzly bears, deer, wolves, foxes, skunks, badgers, mountain lions, wild cats, snakes, and all the smaller wood folk.” It was also here that before the age of six, he witnessed a wedding for the first time and learned about death and funeral rites among the Chinese. In this powerful paradise of vivid experiences, he was “lonely, but not unhappy,” spending his days “always preoccupied with birds and insects, listening to them and talking to them in their own languages.” It was between the ages of four and six that he began to experiment with his ability to imitate birds, forcing air through this nose with his mouth closed. He claimed throughout his adult life that this remarkable ability came down to an anatomical formation in his larynx similar to that of a songbird. This claim, repeated thousands of times, often backed up with the validation of unnamed doctors, was, of course, utter nonsense, but it is not clear whether he believed it, on some level, himself. It was many years after Kellogg had been sent off to live with his mother’s relatives in Syracuse, New York at the age of six or seven that Charles realized that he was in possession of a remarkable skill. In Syracuse, he learned to work with tools, to build furniture and fireplaces - skills he valued and worked into his persona as a woodsman. He attended Syracuse University and sang in the choir, aware that a relative of his father’s (by marriage) Clara Louise Kellogg, had become a famous soprano. But apart from mentions of his education in the manly, manual crafts, the period from the ages of seven to twenty-two when Kellogg became a civilized, college-educated Yankee were never mentioned in Kellogg’s stories. They didn’t serve what he was selling about himself. Almost immediately after graduation, we have the first press notice of Charles Kellogg as a performer, August 1891 at Chautauqua, New York, a hotbed of aspirational “edutainment,” where he debuted his unique bird-imitation talent. Realizing that he was on to something, he gave at least a half-dozen concerts of music with bird imitation at YMCAs, churches, and meetings around Pennsylvania and New York at the beginning and end of the year and another half-dozen in California a few months later. There were more shows in California in 1893-94, then back to Pennsylvania and Massachusetts in 1896-97. All of February and March of 1898 was spent touring Pennsylvania and Ohio. January through April of 1900 was spent on the road through Pennsylvania, Ohio, Maryland, D.C., and Virginia, by which time he was claiming to have anywhere from a 9 1/2 to 12 1/2 octave vocal range. After getting married for the first time, he spent November 1900 to April 1901 touring the same states again plus Connecticut and published an article in Success magazine called “The Wickedness and Folly of Killing Birds.” In early 1902, through Horace Traubel, friend and executor of Walt Whitman, Kellogg met the naturalist John Burroughs, thirty years’ Kellogg’s senior, with whom he traveled to Jamaica during January and February. Kellogg held Burroughs (as wells as naturalist John Muir, with whom he also spent several days with at one point) in esteem and treasured the memory of their trip. Burroughs was certainly an influence on and model for Kellogg. Whether Kellogg was aware of Burrough’s fierce denunciation in a 1903 article for the Atlantic denouncing contemporary nature-writers tendencies to anthropomorphize the natural world is unclear, but it was major news among naturalists for years, ultimately drawing comment from President Theodore Roosevelt. In 1904, Kellogg and his brother bought a 45 acre plot in North Newry, Maine, where they built the Kellogg Nature Camp, a Summer vacation resort for city folk wanting to spend time in with the woods. They built cabins connected by boardwalks, a common-house with a large fireplace (a specialty of Charles’s) and powered it with a waterwheel. It is now part of a nature reserve with many of the structures they built still standing. And each year during each late Fall, Winter, and early Spring, in an ever expanding radius, Kellogg began to cover the country with shows of his knowledge of and ability to replicate bird song - Tennessee and Kentucky by 1903, Nebraska and Kansas by 1907. By that time, shows regularly lasted two hours and received glowing reviews everywhere he went. His break came at the age of 43 in 1910, by which time he had left his first wife Emily and relocated to San Francisco and had ingratiated himself within a world wealthy socialites, where he was a favorite at parties. On December 4 The Call newspaper ran a, glowing illustrated full-page article on him titled The Man Who Sings With Birds in Their Own Language, which crystalized in print the stage-show that Kellogg had been assiduously developing, year after year, for nearly two decades. "He has the uttermost faith in the power of love and kindness,” the article asserted. “’It is all love," he says. 'Anybody who goes into the woods with the spirit of love in his heart without the faintest desire for destruction or possession can make friends with the birds if he is merely tactful and patient. Birds can read the heart better than men. They know their friends and are ready to love them.' In Kellogg's mind, there is no place for fear or hatred [...] Fear creates fear. Hatred breeds hatred. Love engenders love. These are the cardinal tenants of Kellogg's creed." His count of 3,000 performances in 24 years was, like almost everything else he said, likely an exaggeration but not so far from the truth that you could discount the claim out of hand. Twenty years of stories, stage patter, and tricks caught the public imagination. Less than a month after the article appeared in San Francisco, Kellogg went to Camden, New Jersey to cut his first trial disc for Victor Records on January 24, 1911 and then another four performances on the 28th. Victor didn’t release any of them. When Kellogg went back on the road on the east coast from October to December 1911, he had a new repertoire of claims for his abilities. This is when his press notices begin to claim that his throat is abnormally formed like that of a bird’s. And that: -He’d been to Paris and Berlin and received high praise. (His sister-in-law did invite him to perform at a private salon in Paris, where he met August Rodin, but not until 1912.) -His throat had been examined at Harvard. (He had been claiming that he’d “baffled scientists” there for years, and that they’d measured his vocal range from 64 cycles a second to 49,560 cycles.) -He speaks 15 animal languages and can communicate with bears, rattlesnakes, worms (who, he said, can sing), lizards, squirrels, etc. -That a man could (theoretically) be pinned motionless to a tree with the use of sound. -And, most crucially for his career from this point forward, that he could extinguish fire with sound. In February 1912 an article making many of these claims along with his belief that “vibration will ultimately take the place of electricity as a motive force” ran in syndication across the country in advance of his having signed with the Orpheum chain of vaudeville theaters for whom he performed three shows a day (a matinee and two at night) for months across the west coast - Winnipeg, Spokane, Los Angeles, etc - from April 1912 until April of the following year and then, without his standard Summer break, for the rest of 1913 across the east coast plus Indiana, Illinois, North Carolina, and Kansas. In New York City, he gave a demonstration of divination for water for another syndicated news article. He spent 1914 touring the west coast and midwest before returning to the Philadelphia area where he remarried to Sarah “Sad’i” Fuller Burchard on January 14, 1915 in Wilmington, Delaware. One month later, he went again to Camden, New Jersey in February 1915, where over two days he recorded the first four performances that were issued on discs. He was almost 47 years old and had spent the past 25 years on the road developing his act in halls, theaters, auditoriums, clubhouses, churches, tents, homes, and high schools. Kellogg’s assessment of vaudeville does not have the ring of disreputable behavior that has often been handed down through the years: “Back stage is not such a fry cry from the forest, for on these vaudeville stages I find conditions that are congenial to my own habits of the woods - conditions I do not find elsewhere in the world. In hotels, railroads, and even private homes, tobacco and other noxious odors, and not infrequently even uncleanliness such as cuspidors, are not unusual. System, punctuality and order are seldom the rule. In the forest, in all nature, punctuality, order, and system are the very breath of life. The stars, the tides, the migration of birds, the appearance of herbs, the trees, the flowers are all on time, giving that sense of harmony felt, and rejoiced in by all. Back stage, I find pure air in perfect ventilation, no tobacco, no bad odors, scrupulous cleanliness, system, order, punctuality - in a word, the perfection of organization, bringing quiet and a reposeful atmosphere in which to work.” Kellogg’s first vaudeville tour was a 1912-13 run at the west coast Orpheum chain, run by Percy Williams who was known as the first vaudeville impresario to pay high fees to the acts he wanted. The west coast Orpheum houses were run locally and, according to Joe Lurie Jr’s Vaudeville: From the Honky-Tonks to the Palace (1953), unlike many of the rowdier and down-market vaudeville theaters, “they were all fine, clean, well-appointed theaters, running clean shows, and were a credit to their towns.” Kellogg performed at shows with as many as eight other acts on the bill. The shows in Washington opened just after Bert Williams’ run and included a spoof of the domestic morality play Everywoman titled Everywife, the blackface comedy duo McIntyre and Heath, the Fearless Ce Dora (“one continuous thrill through the seven minutes which she spends revolving at railroad speed inside [a] golden globe”), and Thomas Edison’s early, abortive attempts at talking pictures. Through 1915 and 1916 Kellogg was headlining in the eastern U.S. for both Orpheum and B.F. Keith’s circuits of vaudeville houses in the eastern U.S. and Quebec as well as Majestic Theaters in the midwest and Texas, where others on the bills included dog acts, monkey acts, the Dennis Brothers’ rotating ladder act, and various acrobats, singers, and comedians. At the end of each show was Kellogg, standing in front of a painted woodland backdrop. Second on the bill for at least one of those shows was the Three Keatons, including 20 year old Buster, who was on the verge of leaving for Hollywood. Kellogg himself appeared second on the bill in late 1916 only under Nora Bayes, arguably the most popular singer in the U.S. His proclamations to the press at the time ranged from the flatly false (that he did not believe “that wild animals die unless molested by man or that they struggle with each other, because I have never seen them do either,” that he did not know his own age, that hat he spent 9 months of the year in the wilderness and came “into civilized society only when the call of a friend proves too strong to resist”) to the simply peculiar and the nearly-true (that he had “never read a book through - print disturbs me - although I believe in the teaching of the Bible as I have heard of them from others, because I have seen the proved true in my own life,” and “I have never tasted fish, flesh, or fowl, although I am not a vegetarian,” that dogs will die from long durations of discordant sounds) to the charming, bordering on visionary (“Fear - that’s what causes all sin. Fear of money, fear of getting caught, fear of wounded vanity, fear of public opinion, all all the rest,” and “I can take the recorded songs of a thousand birds and they will be harmonious. That’s because they are in tune with nature, while man and his instruments need to be attuned.”) Kellogg was an avid photographer, claiming never to take a gun (or a compass, claiming an inborn sense of direction) into the woods, but producing photographs prolifically from 1902 onward. We know that he had performed in Rochester, New York, home of the Eastman-Kodak company, by December, 1900, around the time of the introduction of the “brownie” camera - the first cheap, popular device for making photos. It is unclear whether he might at that point met Gertrude Achilles Strong (b. May 4, 1860; d. May, 1955), a recent divorcee and the daughter of Henry A. Strong, co-founder and first president of the Kodak company, or whether they met much later in the late 1910s in Hawai’i. Regardless, their meeting and relationship was pivotal for Kellogg. His first disc for Victor certainly sold very well, likely in the tens of thousands, and he claimed that he could earn $4,000 a week (a staggering $100,000 in today’s money - and more than half of the $7,000 a week that the Orpheum paid Sarah Bernhardt, their highest-paid entertainer) performing in the 1910s, and his family was relatively wealthy. But they weren’t Gertrude Achilles Strong wealthy. Almost no one was. When she died in 1955, she left behind a fortune of over nine million dollars, making her the single richest person in the history of the state of California at the time, well into the top half of the richest 1% nationally. In 1913, Kellogg bought over 88 acres in Morgan Hill, south of San Francisco, an area he dubbed “Ever Ever Land,” where he built an inventive and “environmentally responsive” open plan cabin that he called “The Mushroom.” Around 1920, Gertrude Achilles Strong bought his land and more than 500 additional surrounding acres. She built a mansion for herself there at a cost of $276,000 (four million today) as well as a house for Kellogg and his wife and put him on her permanent payroll as property manager. He built water systems for her property and built and patented a riding fruit and nut picker for the property, while he lived comfortably with his wife Sad’i and two young live-in maids for the rest of his life. Each winter from 1915 through 1919, Kellogg toured from coast to coast, stopping in Camden, New Jersey to record a few performances for Victor Records, where he cut a total of 26 performances, six of which the company the company destroyed without having issued them. On February 15 and 16, 1916, he recorded four light classical pieces, imitating birds and following along the well-known melodies, as if a bird were singing the tunes in its down language. On the 15th, Alma Gluck, a star of the Metropolitan Opera and one of the most popular sopranos in the U.S. also recorded three of her best-selling performances. Although she did not record on the 16th, and Kellogg possibly traveled more than 100 miles north to Dalton, Pennsylvania near Scranton to visit friends on the 17th when Gluck recorded “The Bird of the Wilderness,” with words by Rabindranath Tagore, he joined her again in Victor’s studio on the 18th for two bird-themed performances on which Kellogg provided bird imitations. When the single-sided 12” disc of “Listen to the Mockingbird” was released in the Spring along with a significant marketing push by Victor, its sales exceeded expectations. When “Nightingale Song” from a mid-19th century operetta called Der Vogelhandler (The Bird Seller) by the Austrian composer Carl Zeller, was released a month or two later as a less-expensive 10,” it became one of the best-selling records of the decade. Apart from the two sides recorded with Gluck, Kellogg’s recordings are evenly divided between the bird-imitation novelties with musical accompaniment (an unenduring genre that grew in popularity both on stage and on records in the early decades of the 20th century) and segments of his stage act in which he would lecture on his relationship with the wilderness with demonstrations of bird-calls interspersed. Seven of those sides remain a fascinating glimpse of Kellogg’s performing persona. The last of them, titled “Bird Chorus,” recorded without commentary on January 14, 1919 is an extraordinary and unheralded moment in the history of sound recording. Starting in January 1915 and through all of 1916, Kellogg added a section of his stage act in which he turned on “an orchestra” of six Victrolas borrowed from local dealers in each town, and played discs of his bird-imitation and then proceeded to perform with them, simulating, as one reviewer put it, “a voice from the deep forest.” For the “Bird Chorus” disc Kellogg simplified the process to a single disc of his own performing along with a live performance, ingeniously weaving two continuous sequences of songs together to give the impression of multitudes of birds singing together. It is the first instance of overdubbing. Notably lacking from Kellogg’s discography are examples of his most spectacular and longest-lasting piece from his stage act - the “Blade of Flame.” By the beginning of 1912, Kellogg introduced a gas burner on stage which produced a four-foot blue flame inside a glass tube. Kellogg told his audience that because all of nature is connected through vibration and because of the gift he possessed of a vocal range many times that of highly trained singers and larger than that of a grand piano, he could cause the “blade of flame” to dance and ultimately to extinguish it using only his voice. It was, next to his bird-imitating, his best-known and best-loved routine. He augmented it with a demonstration of the technique of building fire by wood friction (a skill he imparted to the then-nascent Boy Scouts). Naturally, his fire performances in enclosed theaters were of some concern to local fire departments, and he made it a regular public relations stop to visit fire houses in each town during the afternoons to demonstrate the act, reassuring them of his control of fire and wowing them along with the local press. The only footage apparently extant of Kellogg is one silent minute of a newsreel outtake Kellogg giving this demonstration for a group of Boston firemen on November 5, 1926. (The film, including ten precious seconds at the end of Kellogg demonstrating his bird-imitation technique facing the camera is available online at the University of South Carolina’s Moving Image Research Collections site.) He continued to elaborate the routine, using bowed tuning forks. In the mid-20s he arranged a series of radio broadcasts intended to demonstrate his hypothesis that vibrations broadcast at sufficient amplitude could extinguish house fires. His proposal was that in the future each house could be scientifically tuned such that fire departments would need only to broadcast the appropriate frequencies to put out the fires. The seed for the idea seems to have originated with Kellogg’s exposure to Herman Helmholtz’s book On the Sensation of Tone which had already been published in two editions in America before Kellogg began making theatrical use of its central concept, that the air around us is a medium through which vibration is transmitted in waves. Kellogg was so enamored with the idea that in May and June of 1913, Kellogg added a bit to his stage act in which he explained to the audience that mental vibrations are crucial in love and marriage and that “tuning” of a silent “mental wireless” to a compatible frequency with one’s mate was central to harmonious love. Newsprint reviews of his attempts to demonstrate this with his wife were decidedly snarky. The audience didn’t get it, and it was quickly dropped from the act. Kellogg’s greatest and most enduring “hit” as a showman was neither a stage-act nor a recording. It was a vehicle made from two large pieces. The first was a Nash Quad, a four-wheel drive truck capable of hauling four tons. The second was a 22-foot section of a fallen redwood log eleven feet in diameter. He obtained the former in early Summer 1917 from the Nash Motor Company in Kenosha, Wisconsin while they were being produced for use in the First World War. Kellogg convinced the company’s namesake president of a vision of the beauty of California’s enormous redwood forests (and, very likely, the publicity benefits of Kellogg’s scheme) and took the Quad to Bull Creek Flat in Humbolt County, where with the help of several axemen from the Pacific Lumber Company they spent months sawing off a section of a fallen tree, stripping its bark, and carving out its interior into a living quarters with beds, cabinets, kitchenette, and bathroom. Mounting it on the chassis of the Quad, he polished and varnished the whole thing a copper color and installed electric lights. By November of that year, he drove the wooden cabin-on-wheels that he dubbed the Travel-Log cross-country, stopping in Kenosha for work on the radiator and “finishing touches” (including their brand name, it seems). Using his celebrity and press-savvy, he toured the machine, giving talks on the beauty of the great redwoods and the dire need for their preservation, taking a piece of the forest to the people. In the process, he introduced America to the idea of a mobile home. It now resides in the Humbolt State Park’s visitor center, reportedly only yards from where the tree from which it was hewn grew for centuries. Kellogg recorded 11 more performances for Victor during the period 1924-26. Seven of them were discarded by the company without having been released. The remaining four were re-recordings of his first two records using the new invention of microphones. While he continued to perform, his schedule gradually slowed as he shifted his first to attention to Gertrude Achilles Strong’s property and then to a fascination with Fiji, where he first traveled in the Spring of 1925 from Hawai’i. Fixated on the idea of wooden lali slit-drums and their use in communication over distances, Kellogg arrived alone and presented himself as a naturalist to the Chief of the Native Department on the island of Suva, who showed him a the instrument and for him to visit to the island of Baqa to witness fire-walking (after Kellogg had given a demonstration of the “blade of flame” routine, having thoughtfully packed the gear needed for it, and gave a performance of “Narcissus” as a bird-imitator) in the company of a British medical doctor. Kellogg was suitably impressed and incorporated discussion of both lali drumming and fire-walking as further evidence of his central theme of the need for vibratory attunement in his subsequent performances through the 1920s and 30s. In 1929, Kellogg survived a near-fatal car crash immediately before he self-published The Nature Singer: His Book, a profusely photo-illustrated collection of impressions drawn from his life and career and a document of his own self-invention, which went through at least two printings (all of them signed; the first 1000 are numbered), wrapped in the attractive but exceedingly brittle birch parchment that he used as stationary and for press notices. That year, he also patented an automobile ignition that started with whistling. He continued to criss-cross the country, giving talks based on his experiences in nature combined with pleas for conservation. There was talk of a movie that never manifested. In 1940, he and Sad’i adopted a 9 year old girl named Shannon who had been born in Honolulu. (She subsequently married a Charles Newton, nine years her senior, in 1961, divorcing him in 1967, and died in 2007.) When in 1946 Paramahansa Yogananda published his Autobiography of a Yogi, describing his encounters with spiritual teachers and his travel in India and U.S., he briefly recounted in a footnote having seen Charles Kellogg do the “blade of flame” bit in Boston in the ‘20s. And that’s who Kellogg has been for the past century - a remarkable and unlikely figure at the intersection of science and art and showmanship and the spiritual. Charles Kellogg’s health declined through the 1940s before died of a heart attack on September 3, 1949 at the age of 80.
5 notes
·
View notes
Text
RULES
APPLY NOW
Rules Summary
All contributors are expected to follow these rules in all project spaces (Discord, Tumblr, Twitter, etc).
Contributor Rules:
Due to the mature nature of the project, no one under the age of 18 may apply.
No drama allowed. Disrespectful behavior will not be tolerated, period.
Make sure you can follow the Schedule! [ View Schedule ]
Most of the project’s communication will be through Discord. You will be expected to join the project server if accepted so make sure you have a Discord account.
If you have a problem with anything about the project, mods, or another contributor, you need to privately report it to a mod immediately.
Submission Requirements:
All new content! Do NOT post your submission without permission!
Even though this project is suggestive in nature, for legal reasons it cannot be explicit. No actual nudity is allowed. Implied is ok.
ABSOLUTELY NO SHIPS! Ships may not even be implied. Draw only the character you are assigned.
Some kind of uniform is required.
Follow the measurement and format guides provided in the Production Manual (will be linked later).
There will be a review process - be prepared to accept critique.
Some Clarification
Rules
Mature Content. Though we will not be allowing truly explicit images, the nature of this project is still mature so we will not allow minors to participate. Because the products will be shipping out of the US, that means everyone must be 18 or older.
Respectful personal conduct will be expected and strictly enforced. All comments and critiques must be offered in a polite and civil manner, and accepted the same way. That means NO SHIP BASHING, NO ANTI BEHAVIOR and NO DRAMA. The project is general in nature with no relationships shown, but we all understand that everybody has relationships they personally enjoy. Nobody will be allowed to criticize or harass another participant based on their personal preferences. Respectful and polite discussion is allowed, but rude and unconscionable behavior will not be tolerated.
Professionalism & Reliability. Everyone must commit to having their parts done in a timely manner. The moderators will be as flexible as possible, and may move deadlines back if too many people are unable to meet them in order to accommodate the most participants possible. However, Contributors repeatedly missing deadlines will be replaced.
Communication will be accomplished primarily through Discord. All Contributors will be expected to join the Discord channel and be alert for notifications from moderators regarding the project. Additionally, there will be a review process that requires communication between Contributors and Staff, so Contributors must be willing to discuss their work via Discord with Staff members. Problems regarding pieces will need to be communicated, whether it’s missing a deadline, difficulty meeting a requirement, or inability to find a good reference image. Interpersonal conflicts should be privately reported to a moderator.
Submissions
All submissions must be new content. That means they cannot be posted anywhere before the calendar is published. DO NOT POST YOUR PIECE! Any works posted before the calendar is published will not be included.
Explicit images will not be allowed. Nudity may be implied but all private parts must be covered. If the work is showing more than a swimsuit could allow, then clothing and/or strategically placed objects will need to be added.
Assigned character ONLY. We won’t allow even a hint of shipping so don’t put more than one character per image. Don’t try to sneak a ship in with subtle hints either. Contributors will be assigned a character based on the character preferences submited with your application. The Staff will attempt to assign each Contributor a character within their top three choices. However, the goal is to showcase a different character each month, so you may not get your favorite if several people choose the same one. If you have a problem with the character assigned, you need to let the Staff know so a reassignment can be attempted.
Setting and Theme. The theme is uniforms, so all works must include a uniform of some form. Be creative with this and try to find interesting uniforms. We’re going to be flexible on what counts and if you aren’t sure you can always just ask. The only limit on the setting is your imagination so have fun with that.
Format and Bleeds. A formal Production Manual will be added latter but here’s the basic specs:
Trimmed work will be 10 inches wide by 15 inches tall at 300 dpi.
Submitted work will be 10.25 inches wide by 15.25 tall. This number includes 1/8 inch (0.3175cm) bleeds on all sides.
Room for date block must be included in the piece (template will be provided).
Signature, if desired, must not be in the area where the date block will be applied (per template) and must be at least 1.5 inch from any side of piece to ensure it will be visible.
Finished piece MUST be in CMYK format if possible.
Finished piece MUST be submitted in .jpg, .jpeg, .psd, or .pdf format. PNG format will NOT be accepted if it can be avoided.
All art will be reviewed multiple times. Comments and suggestions will be offered to help you better complete your work and keep it within the necessary guidelines for the project. Critiques regarding requirements or layout specifications must be be heeded, but style critiques are at the creator’s discretion. This is primarily an assistive tool; the Staff understands that many artists do not like to show their work before it is complete, however, progress reviews are an essential part of producing quality work.
13 notes
·
View notes
Text
A Peek into the Indie Writer World – Part IV: A Walk Through the Process
If you’re thinking of going indie, or have already decided to, you may find yourself wondering what steps you need to take. This is a look at the process, focusing on hard copy books and e-books.
The short version, in bullet format for those with very little time:
Write your story
Identify your output product(s)
Copy edit your story
Purchase and/or assign ISBNs
Request PCN (hard copy print only)
Format the story
Create front matter for printed work
Cover art and design
Publish
Market
The longer version with more details below the cut.
Write Your Story
There are many different ways to write. Use whatever process works for you (drawn out, under tight deadline, or anything in between). Revise and edit your draft to ensure you have the best possible version you can. Many people like to use critique groups or beta readers, other people don’t. The key is that your content (poetry, short stories, novella, or novel) is the highest quality you can make it.
Identify Your Products and Process
You can start looking at the various products and printers out there while you’re still in the writing stage. As your story gets closer to being ready to print, you’ll want to have some decisions on your starting point, at least. Will it be an e-book with print to follow? Or do you just want to start with the e-book and see how it goes? Your plans will influence some of your next steps.
Copy Edit Your Story
Most people think of this as proofreading, finding and fixing typos, spelling mistakes, and grammatical errors. In this case, it also includes ensuring your soon to be published book has a consistent style.
Style is a set of rules that provide a uniform look to a document. This includes things like use of font, font attributes (bold, italic, underline), implementation of flexible or optional grammar (such as the Oxford/serial comma), and the presentation of specialized terms. Most fiction publishers have a house style built off Chicago or AP style, both of which have handy manuals. It ultimately doesn’t matter what style you go with, as long as you are consistent.
In the editing world, style often includes formatting elements, but for the indie writer, some of that formatting will vary depending on the product or products you’re producing.
Things to Watch For
Consistent spelling for names of people and places
Consistent terminology for magic or world-specific details (eg: does the world use shape-shifter, shape shifter, or shapeshifter?)
Use of numbers (phone, age, height, distance) are generally spelled out in fiction
Consistent units of measure (unless there’s a good reason for it, you don’t want to randomly switch between metric and imperial)
If attention to detail and copy editing aren’t your strong suits, copy editing is something you should plan to hire out. You can also just hire someone for the pieces you need done. If you have a handle on your house style, but want someone else to proofread, that’s totally a thing that people do.
Purchase or Assign ISBN
If you’re printing with a company that offers a free International Standard Book Number (ISBN), and you’ve chosen to go that route, you can skip the purchasing step. I personally prefer to have full control of all my ISBNs, allowing me to take them with me if I switch printers or distributors.
Buy your ISBN in advance via Bowker. You will need one ISBN for each product you are producing. A trade paperback needs a different ISBN than a hardcover or audio book. There’s often a discount to purchase multiple ISBNs at one time.
Once you have any needed ISBNs for this project, you’ll need to link the number to a book title, and provide some information on the book and edition (publisher, summary, cover etc). This is a good time to perfect your back-cover blurb or teaser. You can come back and update much of the ISBN information later if you don’t have all the elements at the time you’re doing this.
Request a Preassigned Control Number (print copies only)
If you’re based in the US, you’ll want your book registered with the Library of Congress as this increases the likelihood that it will get into libraries. It also provides some added copyright protection.
You will use the Preassigned Control Number (PCN) process, which takes 10-15 business days. Start this far enough before you plan to complete the publication process, to ensure you have your Library of Congress Control Number (LCCN) before you go to print. If you have trouble navigating the Library of Congress’ website for questions (and you probably will, it’s not as clear as it could be), you may want to explore the PCN Manual.
To complete the process of registering, you will need to send a hard copy of the printed book to the Library of Congress.
Format the Story
Formatting your work can fit in with style, especially after you’ve gone through the indie process and have a handle on what you want and need. Many writers will create their draft in the most complicated format they are planning on producing, just so this piece is well underway (and less frustrating later). Once the book is ready for publication, they’ll make copies to reformat for other products.
At this point you need to know how you plan to publish and what company you’ll be using, as different publishers have different formatting requirements. Be sure you read the requirements before you put in a bunch of work changing your novel into a font you won’t be able to use.
Features you need to make formatting decisions on include:
Page size (determined by the product you are creating)
Margins (leave room for the gutter – the inside margin where the binding is)
Chapter heading font, size, and position
Indent (fiction usually indents first line of a paragraph)
Line spacing (look at similarly sized books to choose number of lines per page)
Section breaks (asterism or section sign are both good choices)
A Note on Paragraph Styles
If you’re not already using paragraph styles in your word processor, you need to start now. Styles designate font, size, and text attributes, as well as features like line spacing and indents. When used properly, styles ensure consistency and a professional looking end product. They also make it much easier to reformat the entire document if you need different features for a different product, or if you suddenly need a different font for your text body.
If you are creating an e-book, you must designate title and heading 1 styles at the very least, as these are used for navigation. Failure to designate these will often result in your book not meeting requirements for distribution.
Accessibility
Do not use extra returns and the space-bar to place text where you want it on the page. This makes your digital end product inaccessible to people with adaptive reading equipment. Screen readers will read every one of those spare characters, and no one wants to hear “asterisk, asterisk, asterisk, asterisk…” as they wait for the next section. Instead, use your styles to put chapter headings where you want them, and use hard returns (ctrl+enter) to separate chapters.
Front Matter
This is the content that comes between the front cover and the first page of the story regardless of whether it is a print or e-book. The professional standard includes:
Copyright page (including the year of publication, ISBN, and LCCN)
Table of contents (this will be automatically generated for e-books)
Title page (should be on the right page for print editions)
Optional content includes:
Acknowledgements
Dedication
Book Cover
This is your primary advertiser for your book, whether it’s print, e-book, audio book, or a serial. You will use this image everywhere to pitch your work. We’ve all been told to not judge a book by its cover, and we all do it anyway, so expect that this is something that must be done right.
Consider your cover a visual extension of the story. It needs to be appealing while giving your reader clues on what to expect. If your zombie apocalypse story has a cover that feels like a Christian devotional, it won’t appeal to some of your readers and you’ll have gone against the expectations of others. You absolutely do not want your book to look like you spewed clip art at the page, a common new indie writer mistake. A generic cover does you no good either.
It’s okay if you don’t have the skills to create a stunning cover for your book; hiring someone to do this for you may be your best bet. It’s worth paying to get a cover that helps readers decide to pick your story. There are a lot of great artists out there, so look around and find someone whose style is a good fit and who you can afford. That said, don’t whine about prices. Artists deserve to be paid what they’re worth.
Publish
The steps at this stage will vary depending on the company or program you decide to go through.
For most print on demand printers, expect to have to buy a proof before the book becomes available to the public.
Market
This stage will vary depending on your comfort level and opportunities. In general, you should be marketing yourself as a writer at any opportunity. This means participating at conventions, doing readings, and posting announcements on your social media and website. Be careful to avoid giving your friends a constant hard sell on Facebook, though. No one enjoys that. Your social media needs to be somewhat active and should include content not specifically related to a recent book release. Posting teaser chapters can be a great try-before-you-buy option.
While this looks like a lot of steps to take, they are spread out over the course of your process of bringing your story to publication, and many are not that onerous. Most print on demand companies have paid services to help with some of these steps, if they seem too great for you to overcome on your own.
⁂
For the first article in this series, check out Part I. Or if you just missed the previous article, check out Part III. To see the next one, check out Part V.
For more articles on writing, check out my Reflections From the Sol section.
3 notes
·
View notes
Text
Converting Flac To Mp3
FLAC (Free Lossless Audio Codec) is a dimension-compressed however lossless digital audio format with smaller file dimension than uncompressed lossless codecs like WAV FLAC is at present well-supported by many software program applications and hardware assist is rising. That's how the perfect FLAC to MP3 Converter for Mac works. It also helps a ton of other audio and video codecs as input. Tagging will develop into a difficulty. For those who intend to make use of individual information turns into extra of a chore. You would do this if you happen to use playlists or randomize information your transportable device. Use one thing like tagMP3 in the event you need this. Tagging allows your software to access music titles, artist, track quantity, album titles and album cover art as metadata. It's a must to add this to every file. Step four. Hit Browse under Vacation spot to specify the trail to save the extractedmp3 audio file and click Begin in the backside to initiate VLC convert FLAC to MP3 instantly. Give your favourite discs a break with FreeRIP MP3 Converter. Listen to your favorite tracks on your devices. In order for you some other higher video converter, I recommend Video Converter Ultimate to you, it has free model, and if you simply need to convert video format, the free version is sufficient to use. FLAC to MP3 Converter comes with a constructed-in CD ripper, permitting to again up audio CDs or creating a perfect copy for enjoying the music on the go. You'll be able to rip Audio CDs into lossless FLAC information, AAC, MP3, or every other audio format instantly. FLAC to MP3 Converter automatically saves files within the format of your choice on the fly with no enormous temporary recordsdata saved on your arduous drive. choose a folder of FLAC music files, and drag them into the File Conversion window in Max. Output Audio - Assist MP3, WMA, WAV, FLAC, AAC, M4A and OGG output codecs. Since disk space is so cheap, I don't know why anybody would go along with a lossy codecs anymore, aside from to stay with one thing you already transformed to MP3 previously. If you're going to the difficulty of ripping CDs at the moment, go with FLAC. You possibly can at all times downgrade FLAC to a MP3 lossy format, however there is no worth going the opposite method. There are a vast array of applications on the internet you'll be able to choose from when converting fromflac tomp3 in Mac or COMPUTER's. To achieve the duty smoothly, a simple-to-use instrument called Video Converter is hereby launched to you. Despite the title, this utility isn't only for video information but in addition for audio recordsdata. It's very simple and does batch conversion job in a short time. You simply drag and drop your FLAC recordsdata into its home windows, set the output to MP3 file type after which hit the Convert button, FLAC to MP3 converter after which it gives you backmp3 audio recordsdata. For free users, CloudConvert permits 25 minutes of conversion time per day. This makes it great for fast conversions, however it's best to look elsewhere if it is advisable convert your whole music assortment. In the event you, an experienced consumer, wish to be certain that you get the output audio information in top quality, you can click on the Settings icon subsequent to Profile menu to name up the Profile Settings dialog, after which you'll be able to end the configurations in it by selecting a proper codec, adjusting channel, pattern price and bit fee (i.e. 320 kbps) in corresponding box. One of the popularaudio converters within the Mac Store is the apt-titled To MP3 Converter Free, a straightforward-to-use utility for converting from considered one of 200 audio and video codecs to MP3. Of course, the software supports FLAC information, and the method for making the conversion could not be simpler. The software program also means that you can change the output from a relentless bitrate to a variable bitrate, transfer tags from the supply file, and modify the quantity to the maximum level. You should utilize the Lame codec with Foobar to transform FLAC to MP3. There is no need to do one thing else first.
Within the Search field type "Free FLAC to MP3 Converter" and you will notice all logs of "Free FLAC to MP3 Converter" within the database suitable along with your Windows Model. Some of the advanced settings in Swap embody deleting the supply audio file after a conversion, automatically normalizing audio, editing tags, and downloading CD album details from the web. This FLAC to MP3 converter has batch processing capacity, so you'll be able to convert a wide range of different audio recordsdata simultaneously to 1 format as an alternative of manually converting each one individually. Also, you can mix and be a part of a number of audio items collectively - just choose audios you wish to be part of and tick the "Merge into one file" field (see bottom right). It is a known downside that FLAC information are normally too large to suit an MP3 player. So, are you on the lookout for software program to convert massive FLAC information to smaller MP3? Free Simple FLAC to MP3 Converter is easy, but quick, flexible and powerful FLAC to MP3 converter. Free Easy FLAC to MP3 Converter permits you to scale back file size of big FLAC, so you can simply ship it to your phone, or by E-mail. This converter is completely freed from cost for any use. With its construct-in latest & superior FLAC codec and Lame MP3 encoder, the output MP3 music will keep premium quality that you may inform no distinction from the unique. FLAC stands for Free Lossless Audio Codec, another audio information compression algorithm. Unlike WMA and MP3, FLAC is lossless. This comes on the expense of bigger file size, in fact. And whereas FLAC is a wonderful compression algorithm for lossless archival storage, players probably require MP3. Enter Codecs: AAC, AC3, AIF, AIFF, ALAW, DTS, FLAC, M4A, M4B, M4R, MP2, MP3, , WAV, WMA, etc. On the right bottom discipline, you'll be able to select MP3 from the checklist. Subsequent, do some customization and choose an output path to your transformed MP3 recordsdata.2. Just select the output information like MP3. You possibly can add as many FLAC files as you want from the native laborious drive, and all of them will probably be batch transformed once you hit the convert button. File names might be retained, only the file extension modifications to the selected format. MP3 stands for Movement Image Experts Group Layer 3, which is a digital compression algorithm for audio file. The mp3 file might be over 10 instances smaller when compared to a uncooked source file. Today, the MP3 file format is the most well-liked musical file codecs on the planet.
1 note
·
View note
Text
To FLAC Converter 1.0.12 Free Obtain For Mac
Although there a ton of various audio codecs out there, many media units reminiscent of iPods, smartphones and tablets, and desktop music gamers like Home windows Media Participant and iTunes are often appropriate with only a few particular ones. Added changing FLAC to Ogg information. 5KPlayer is repeatedly pressured to be a multifunctional, quick, secure and steady offline FLAC file converter capable of video audio conversion integrated with video music playback , on-line video music obtain and video audio AirPlay to offer you nice comfort to take pleasure in numerous media files. For those who're working with information already compressed right into a lossless format likeflac orape, you may simply decompress them towav without dropping any info for enhancing before compressing once more to whatever format you need. FLAC is without doubt one of the better-known audio codecs for lossless compression. Regardless of its reputation, the format continues to be not supported by ubiquitous media players like iTunes and QuickTime, and many cellular apps don't decode it. That's why it's a good idea to decompress your FLAC recordsdata and save them in a extra accessible format like WAV. It is a breeze to do this with the Movavi converter - top-of-the-line software program choices in terms of changing and modifying multimedia files. Time-consuming during retrieval of the converted file, as one has to wait for it to be despatched by way of electronic mail. Audio high quality is certainly crucial part for audio conversion software program, but the pace of conversion is also an important issue. This is for positive that a quick program will save quite a lot of beneficial time when you've got numerous giant recordsdata to convert within a short period of time. Due to All2MP3 for Mac for utilizing particular technology and you must wait anymore because the conversion course of is tremendous fast. This script uses ffmpeg to convert a folder tree of FLAC recordsdata into another folder tree of MP3 files. Cover art is included, when present. You possibly can set a CORES variable to create background jobs to convert a number of recordsdata at a time. It additionally helps conversion of wide selection of unprotected audio codecs, resembling M4A, AAC, AC3, WAV, MP3, AU, AIFF, FLAC, M4R, MKA, CDA, Apple Lossless, and so forth. Straightforward M4P Converter is a stable resolution to your iTunes music conversion needs. best flac to mp3 converter mac to Mp3 - free on-line application converts audio information withflac extension to compressed Mp3 file format. Flac is the brief form for Free Lossless Audio Codec and is a high quality audio format. In contrast to Mp3, flac is a lossless audio format that means that there is no such thing as a loss in data like Mp3. One of the main benefits of Flac is that it is patent free and has a opensource implementation as properly. Chances are you'll want to convert flac to mp3 for numerous causes. One the reasons could be to decrease file measurement or must play on any frequent audio player. Our flac to mp3 converter involves your rescue and might convert any flac file to Mp3 audio file. Our decoders and encoders are special in maintaining the highest quality vs file measurement balance. Wave Splitter - This tiny, highly environment friendly and moveable program provides an alternative approach to cut wav recordsdata. Because it would not devour any RAM, WaveSplitter ought to be particularly useful on less highly effective computer systems. The final model of this little freeware gem dates again to 2000, however it appears to work simply high quality even on recent platforms. Be aware: This AnyMP4 FLAC to MP3 Converter offers the service of changing and enhancing a number of audio files at one time, which implies that you would be able to upload piles of audio files at one time. This is likely one of the most attractive features of AnyMP4 FLAC to MP3 Converter. Convert information from wv to MP3,MP2, WAV, WMA, OGG, AAC, APE, FLAC, WV, TTA ,SPX,MPC,AC3 and MP4 to WAV and backwards. You can even edit and reduce audio information simply Convert video downloads to music information utilizing video to mp3 converter. First, choose which audio file you want to have reduce and upload them. You may add them from Dropbox, Google Drive, via a web hyperlink, or immediately out of your pc. Outline Title, Artist, Album, Style, Observe or 12 months for output MP3 information. Step 3. When every thing is set, hit the Convert to MP3 to begin free converting FLAC to MP3 instantly. Supported Audio File Formats: MP3, WAV, WMA, M4A, FLAC, M4R, AIFF, OGG, AAC, AMR, etc. Add the file from your computer or enter a URL to an online file that it's essential be transformed. FLAC is a measurement-compressed however lossless open supply audio format. The recordsdata it produces are about half as massive because the uncompressed WAV or AIFF codecs, however bigger than compressed, lossy formats. MP3 stands for Movement Picture Experts Group Layer 3, which is a digital compression algorithm for audio file. The mp3 file will be over 10 instances smaller when in comparison with a raw source file. Right now, the MP3 file format is the most well-liked musical file codecs on this planet. This FLAC to MP3 converter has batch processing capability, so you possibly can convert quite a lot of totally different audio recordsdata concurrently to 1 format instead of manually changing each one individually. Also, you may mix and be a part of a number of audio items collectively - simply select audios you want to join and tick the "Merge into one file" box (see backside right). A file with the instructions to transform the flac recordsdata (this script is executed automatically). VLC android Apk and VLC app for iOS is offered for Google Play Store and Apple App Store respectively. VLC Media participant also supports batch conversion possibility so you'll be able to convert a number of recordsdata very simply even 320kbps and 128kbps a number of information without dropping high quality. The -i choice within the above command is simple: it is the path to the enter file. The second possibility -f mp3 tells ffmpeg that the ouput is in mp3 format. The third possibility i.e -ab 192000 tells ffmpeg that we would like the output to be encoded at 192Kbps and -vn tells ffmpeg that we dont need video. The last param is the identify of the output file. Without the normalizing your MP4's, your music expertise could possibly be dull, boring, and even annoying at times; audio leveling software program edit volumen mp4 wavgain edit wav vista mp4 normalizer freeware change quantity stage in mp4. Improving Recording Quality. Converter mp4 to mp4 low sizer.
1 note
·
View note
Text
DESCRIPTION MusicBrainz Picard Portable is an easy-to-use audio tag editor that supports a wide variety of formats, including MP3, Ogg Vorbis, FLAC, MP4 (AAC), Musepack, WavPack, Speex, and more. The app analyzes a music track and searches for it in MusicBrainz's online database, if a match is found, the program downloads all the information about the track, right down to the album cover. Also, you can manually add all major tags: artist, album, track, year, genre, etc. There is an opportunity to extract metadata from audio discs, it allows you to organize a music library and save time when renaming files by tags, etc. Key features of MusicBrainz Picard Portable: Supports all popular music formats including MP3, Ogg Vorbis, FLAC, MP4 (AAC), Musepack, WavPack, Speex, The True Audio, and Windows Media Audio. Automatic and manual modes for editing audio file tags. Extraction of metadata from audio discs. The ability to organize your own music library. Release year: 2021 Version: 2.7.2 System: Windows® XP/Vista/7/8/8.1/10 interface language: Multilanguage- English included File size: 48.4MB Format: rare Execute as an administrator: There's no need
0 notes
Text
Aimersoft music recorder free download 無料ダウンロード.Aimersoft iMusic
Aimersoft music recorder free download 無料ダウンロード.Aimersoft Video Converter Ultimate

Save Audio in M4A/MP3 with 100% Rriginal Quality - Ads Free!.[OFFICIAL] Aimersoft Video and DVD Solution Provider - Convert Video, Rip/Burn DVD
This online music recorder will save your recorded audio in MP3/M4A encoder and at sample rates up to 48,Hz and bit rate up to kbps. • Auto-split: Record music one after one. With the help of the most accurate track splitting algorithms, Aimersoft Music Recorder will precisely split songs when silence exceeds the user-defined time Record Undownloadable Music Easily: In certain cases, the songs cannot be downloaded normally, to solve it, iMusic provides record feature. Whenever you play a song and you feel like to keep it, just click the record button to get it Aimersoft is a professional software provider to offer full video and DVD solutions, like Video Converter, DVD Ripper, DVD Creator, DVD Copy, DRM Media Converter for
Aimersoft music recorder free download 無料ダウンロード.Aimersoft Music Recorder : Free Download, Borrow, and Streaming : Internet Archive
Aimersoft Music Recorder is a best music recorder to save what you hear from online radio, video sites and media players with a simple Nov 19th to Aimersoft is a professional software provider to offer full video and DVD solutions, like Video Converter, DVD Ripper, DVD Creator, DVD Copy, DRM Media Converter for Record Undownloadable Music Easily: In certain cases, the songs cannot be downloaded normally, to solve it, iMusic provides record feature. Whenever you play a song and you feel like to keep it, just click the record button to get it
Sync music from iTunes library to Samsung, LG, Motorola, Sony, ZTE, HUAWEI, Lenovo, etc. Transfer any music for your needs: copying entire music library or moving certain music tracks to other devices is available. Fix Entire iTunes Library: Ability to clean up the dead or broken downloaded music tracks in your iTunes library; fix mislabeled songs; add missing covers automatically and remove duplicate tracks. The artist name, song title, year and genre, can be added to the song automatically in toolbox.
You can also add, remove or edit the information about the tracks or songs manually. Record Undownloadable Music Easily: In certain cases, the songs cannot be downloaded normally, to solve it, iMusic provides record feature. Whenever you play a song and you feel like to keep it, just click the record button to get it. Automatically Add ID3 Tags Info: The ID3 tags, like artist name, song title, year and genre, will be added to the song automatically when recording.
Support to download songs from over music sites like YouTube, Spotify, Pandora, last. fm, Vimeo, Dailymotion, Facebook, VEVO, etc. Stream any music and play the music you downloaded from the Internet on iMusic. Remove music in DRM protection and convert downloaded M4P music files to MP3 format. Music is life for me and I really searched for something that can manage everything related with music. I found iMusic an apt tool to satisfy my needs. The iMusic Program Works Great for Easy Mac to Android Music Transfers.
If you really want to give justice to your favorite music track then this one is the ultimate music management product. I have been using it with all pleasure since long time. Desktop Products Resources Support Popular Downloads. Back Featured Video Products Aimersoft Video Suite Your all-in-one video solution for Windows and Mac.
Learn More. Aimersoft Video Converter Ultimate Your fastest video converter and full DVD solution. Aimersoft Video Converter Your professional and competitive video converter. Aimersoft DVD Creator Burn videos to DVD with over 50 free DVD templates. What are you looking for? Download Video. Convert Video. Rip DVD. More Products. Back Resouces Video and Audio Tips. DVD Burning Tips.
DVD Ripping Tips. DRM Removing Tips. Back Downloads Video Converter Ultimate for Windows. Video Suite for Windows. DVD Ripper for Windows. DVD Creator for Windows. Video Converter Ultimate for Mac. Video Suite for Mac. DVD Ripper for Mac. DVD Creator for Mac. More Downloads. iMusic Overview Guide Tech Spec Reviews Download Buy Now Download Buy Now. Aimersoft iMusic Your One-stop Music Transfer and Management Expert.
Free Download Buy Now. Wactch iMusic Video. Download Now Download Now. Between Android Device and iTunes Sync music from iTunes library to Samsung, LG, Motorola, Sony, ZTE, HUAWEI, Lenovo, etc. Transferring music between Android device and Mac is easy to be done. Record Songs and Playlists with Original Quality. Record Any Media Files You Like Record Undownloadable Music Easily: In certain cases, the songs cannot be downloaded normally, to solve it, iMusic provides record feature.
Aimersoft iMusic Powerful Toolbox. Why People Choose Aimersoft iMusic. Korin atshe. GAZETTE REVIEW. Munro Santer. Add Your Review. Screenshots of iMusic. Aimersoft iMusic Your One-Stop Music Transfer and Management Expert Download Now Buy Now. Download Now Buy Now.
0 notes
Text
Streaming Video For Mac Free

OBS (Open Broadcaster Software) is free and open source software for video recording and live streaming. Stream to Twitch, YouTube and many other providers or record your own videos with high quality H264 / AAC encoding. Fortunately, Free Video Downloader for Mac software is an effective way to download and convert videos for Mac. Being compared with the online application, the professional software excels at its accelerated downloading speed, expanded video formats, great stability and more complete functions. Red5 Open source media server. Red5 is an open source media server available in both Open. Streaming 1.4.3 for Mac can be downloaded from our website for free. The software relates to Lifestyle Tools. The actual developer of this free software for Mac is It's About Time Products, LLC. Our antivirus check shows that this Mac download is malware free.
Connect your audio devices to your Mac and, if necessary, install any software included with the devices. In the Audio MIDI Setup app on your Mac, in the sidebar of the Audio Devices window, select a device. Note: For iOS and iPadOS devices, first click Enable, then select the device. You may be asked to unlock your device with a passcode or to. Acclaimed audio interfaces, studio monitors, and keyboard controllers. Mac OS Sierra 10.12 and iOS 10 Support For M-Audio Products Whenever a new operating system is released, it is crucial to check the compatibility of your hardware and software before choosing to make the jump. This article will be updated periodically to reflect the current status of M-Audio. Audio interface for mac os catalina.
Live Streaming For Mac
Video Player For Mac
Best Video Streaming Software For Mac
Streaming Video For Mac Free Youtube Downloader
Streaming Video For Mac Free Download
Overview
Download
Feature
How to use
Free Mac video downloader is a web-based application specially designed for Mac users to download TV episodes, movies, music videos, news, sports and other online video clips from tons of video hosting sites. It covers video downloads for sites like YouTube, Dailymotion, Vimeo, Blip TV, Liveleak, Lynda, Break , Vube, Ustream, Ted and many others. Aside from its ability to download video on Mac, there are some other awesome features that are worth mentioning.
Download videos in high quality, including 1080p video
Directly convert video from websites to MP3 on Mac OS X
Convert videos to any video/audio formats
Provide video search engine to find desired videos
Extreme function for capturing all screen activities
Fully compatible with Mac OS X (Mavericks 10.9 included)
Great integration with Safari, Firefox, Opera and Chrome
100% FREE and Safe
No toolbars, adware or malware
Download Robust Video Downloader for Mac software
Free Mac video downloader combines the simplicity of usage, full functions and fast speed. But a good portion of people prefer the software program to the web-based tool. This is mainly because the software runs better, more stable and reliable. Fortunately, Free Video Downloader for Mac software is an effective way to download and convert videos for Mac. Being compared with the online application, the professional software excels at its accelerated downloading speed, expanded video formats, great stability and more complete functions.

Features of Video Downloader for Mac software
Download video instantly on Mac
The user-friendly interface makes downloading super easy, you simply get videos in one single mouse click. This video downloader for Mac provides the option to download videos in original quality, including HD and 4K videos. Users who do not want to download video one by one could perform multiple video downloads during one session.
Convert video effortlessly

More than a Mac downloader, it can convert any local or downloaded files to all kinds of formats such as MP4, MKV, MOV, MPEG, WMV, AVI, FLV, MP3, RM, VOB, OGG, AAC, AIFF, WAV, etc. After that, you may transfer the video to popular gadgets like iPod, iPad, iPhone, Zune, PSP, Android and more for endless enjoyment.
Detect and download video automatically
The tool features a smart detector, which facilitates to auto-detect and download the videos streamed in the built-in browser of the program. A list of top websites is displayed on the screen at run time. As long as you click on a certain site for playing the video you want to download, the advanced sniffer will grab it in a matter of seconds. Surely, you may navigate to other sites that are not listed; the videos being played can be captured as well.
Live Streaming For Mac
Download YouTube playlist
With this professional video downloader for Mac, users can download YouTube single videos as well the whole collections from YouTube users' channel, personal playlist, movies category, YouTube charts, artists' channel and music category. Within just one click, you can grab all videos in specified channle/list with 3X faster speed brought by advanced technologies.
Schedule video downloads
The program enables users to start and stop video downloading at any time you preset. Moreover, you can schedule your Mac computer to shut down, enter into sleeping mode or exit the program when download completes.
Manage video efficiently
It comes with handy video manager, letting you control over download progress and sort the downloaded files in order. In case you may need to quit the program for dealing with other cases, you can resume your downloads automatically. Also, the program makes it possible to preview the downloaded content with integrated media player.
How to use
1. Use free online tool to download videos on Mac
This free Mac video downloader does not require any installations or registrations; you simply copy the video link and paste it into the URL field. After clicking 'Grab it', it will display video formats available for saving your videos in FLV, WebM, 3GP, MP4 and other formats depending on the website you are downloading from. Nevertheless, before using the app, the very first step is to enable Java applet in Safari or other browsers. Please make sure that you check 'Enable Java check box' under 'Preferences' tab in your browser.
Video Player For Mac
2. Use free Mac software to download videos
One click to download single video as well as the whole collections
The program is very easy to use. To perform every single video download, you simply specify the video URL that you want to download and click 'Paste URL' button.
The steps to download the entire YouTube playlist are exactly the same. All you need to do is to find the URL of YouTube playlist and hit on 'Paste URL'. Resume to interface, in the popup window, all the videos will be automatically fetched. Select all or part of them per your needs, and then click 'Add to download' to carry on multiple downloads simultaneously.
Auto-detect and grab video that is being played
Given that you do not want to process Mac video download simply by copying and pasting the URL manually, then you are suggested to take advantage of its 'Detector' function. As long as you load videos in the built-in browser, this Mac video downloader will take care of the rest.
3. Video Tips for Mac
Most video addicts like to enjoy abundant videos from video sharing sites including YouTube, Dailymotion, Vube, BBC, ESPN, Facebook, Vimeo, Hulu and other similar sites. You are looking for specific guides on downloading from a platform to your Mac computer, please refer the detailed instructions below
YouTube has had such an incredible string of successes. People want to download their favorite videos to watch offline and keep forever.
Best Video Streaming Software For Mac

Download Dailymotion on Mac
Is there a way out here to watch Dailymotion videos without any data connection? Sure, you are in the right place to get the easiest tricks.
Streaming Video For Mac Free Youtube Downloader
Mac os for android tablet. Still trying to find a way to download HD videos from Vimeo? Don¡¯t sweat it, spare a few minutes to check the detailed tutorial.
Streaming Video For Mac Free Download
You may find the easy solutions to perform Facebook video download in this article. A wonderful Mac downloader is presented.
Download Hulu on Mac
Want to play TV episodes from Hulu to your Mac without being bothered by poor internet connection? Just download them for later playback.
0 notes
Text
Wav For Mac

Youtube To Wav For Mac
Aiff To Wav For Mac
Wav player for mac free download - WV Player (formerly Wav Player), Free Mac Bluray Player, Free WAV Player, and many more programs. Take your Mac to the stage with a full-screen interface optimized for live performance, flexible hardware control, and a massive collection of plug-ins and sounds that are fully compatible with Logic Pro X. Learn more about MainStage 3. Final Cut Pro X.

What is M4A? M4A files are encoded with lossy Advanced Audio Coding (AAC) or Apple Lossless Audio Codec (ALAC), which helps a lot to reduce the file size. But the problem is that M4A is compatible with just a small number of devices and platforms, mainly Apple-owned ones, like iTunes, iPhone, iPad, iPod, etc.
To make it playing on more devices and platforms, converting M4A to WAV would be a good option. And in this guide, we will show you 5 methods using M4A to WAV converters. Check them now.

Method 1. How to Convert M4A to WAV in Batch with VideoProc
VideoProc is a fast M4A to WAV media converter and a robust video converter that specializes in all types of media file format conversion. With support of full GPU acceleration, audio and video files can be batch converted in seconds or minutes without any quality loss, for sure. Both commonly used audio file formats and obscure ones are covered by it, like M4A, WMV, MP3, M4R, AAC, FLAC, OGG, etc. Besides, it is built in with powerful audio/video editor and recorder.
Free download VideoProc and convert M4A to WAV now!
Step 1: Add music files to the list.
Click Video > + Music to add M4A file(s) to the list, or you can simply drag and drop the music file into the centerboard.
Step 2: Start converting M4A to WAV.
After loading up all M4A files, select Music in the section of Target Format. And then choose WAV.
Step 3: Run the conversion process.
Click Browse to set an output destination for the generated WAV file(s). And then hit RUN to start to convert M4A to WAV in batch or not.
Audio Editings You Can Do with VideoProc
1. Click Codec Option to open the parameter adjusting panel. You are going to have full control over the exported WAV file.
Move the quality slider left or right to get a lower or higher quality.
Go to Audio Codec Options. You can enter the desired Audio Codec, Sample Rate, and Bit Rate information.
Click Name & Tag to enter a new panel where you can adjust the Output Name, Song Name, Artist, Album, Genre, Images and other information.
2. You are also allowed to convert M4A files to other formats, namely, MP3, M4R, AAC, OGG, FLAC, and more.
3. Click Merge if you need to joint multiple M4A files into one.
Method 2. How to Convert M4A to WAV in iTunes
Apple iTunes can also work as an M4A to WAV converter. It is a default app on Mac, but it is also available for Windows users. Follow the steps below to find out how to use it make the job done.
Step 1. Launch iTunes, Click on Preference from the Edit menu. Go to General > Import Settings.
Step 2. Choose WAV Encoder in the drop-down menu next to the Import Using. Save the change by clicking on OK. Now you can change the M4A file to WAV format. Keep reading.
Select the third-option of Outlook for Mac archive file (OLM).Click Continue and browse the OLM file to import it. Pst for outlook mac download. After importing the data, you can access them into your account.Till now, we have learnt the significance of OLM file in Outlook for Mac, default locations of OLM files for different versions on Mac system, process to backup emails in OLM file and importing backup OLM file to a new or updated Outlook for Mac version. Here are the steps;. In the Tools category, click the Import option.
Step 3. If the M4A file has already existed in iTunes library, you can just choose File > Convert > Create WAV Version, then another WAV version of this file would be displayed in iTunes Library; However, if the M4A files are not in iTunes library, the operation would be a little different. Hold down the Shift key on your keyboard, and click File > Convert > Convert to WAV. Then it would ask you to locate and import the M4A files. Just choose the files and click Open button. iTunes will change them in WAV format and show them in library.
Step 4. Now you just need to jump to the library folder and find the converted files. Have no idea where it is? Click on Edit > Preference > Advanced in iTunes, and you will see the folder path.
Method 3. How to Convert M4A to WAV in Audacity
Audacity is an open-source audio editor that also allows you to convert M4A to WAV on Windows, Mac, and Linux without paying a penny. But before everything gets started, you have to download FFmpeg Library, Because The FFmpeg library allows Audacity to import and export a much larger range of audio formats, M4A included.
Step 1. Locate FFmpeg Library.
Install FFmpeg on your computer. You can just go to here to get the installation file. Normally when you have FFmpeg installed on your computer, Audacity would automatically detect the library and you have no need to do another thing. If it fails detecting the library, just launch Audacity, go to the menu bar to click Edit > Preferences, select Libraries on the pop-up dialog window, and click the Locate button to do it manually.
Tip: some of you may also need to have an LAME MP3 library installed on your computer. The process is the same as installing the FFmpeg library.
2. Add M4A File(s) to Audacity.
Launch Audacity again. Go to File > Open and select M4A file(s) you want to convert.
3. Start the Conversion of M4A to WAV
Click on File on the menu bar and select Export > Export as WAV. Set an easy-to-found position as the output file folder. Click on OK to save changes. The conversion process will soon start.
Method 4. How to Convert M4A to WAV in VLC

Even though VLC works as a media player, we can also use it for M4A to WAV conversion. And here are the detailed steps.
Step 1. Launch VLC on your computer, click on Media tab > Convert / Save.
Step 2. In the new window, click +Add button to locate the M4A file and import it. Then choose Convert / Save button again.
Step 3. In another new window, click on the wrench icon menu, which would lead you to the page with more video and audio formats options.
Step 4. On the page, find and choose WAV. Then click Save button back to the previous window.
Step 5. Then choose the destination path and click Start button. VLC would start the processing job.
Method 5. How to Convert M4A to WAV Online
Online tools are becoming popular among users, since they require no downloading and installing some files. It is quite convenient. Here we recommend you Zamzar as an great choice.
Step 1. Open this tool in your browser on your Windows 10 or Mac computer.
Step 2. Load your M4A files by clicking on the Add File button. You can import multiple files. However, you need to know that Zamzar only allows users to convert 2 files a day for free. Mac for ios. For converting more files, you have to upgrade your account, with three options, basic plan with $9/month, pro plan with $16/month, and business plan with $25/month.
Step 3. After files imported, click the Convert button to start processing.
Step 4. Wait for Zamzar finishing the converting, and then just download the converted files to your computer.
Youtube To Wav For Mac
Over to You
Aiff To Wav For Mac
Now we finish all 5 methods on converting M4A to WAV and just choose the one you prefer. Still have no clue? If you want do it in batch, then VideoProc would be the best option; if you prefer free software, iTunes, Audacity and VLC would be great; if you do not want to downloading any installation file, then go to the online way.
0 notes
Text
Afterparty + Soundtrack Download For Mac

Jul 19,2019 • Filed to: Download Music • Proven solutions
In Afterparty, you play Milo and Lola, recently deceased best buds who suddenly find themselves staring down an eternity in Hell. But there’s a loophole: outdrink Satan and he’ll grant you re-entry to Earth.Milo and Lola are now dead, thirsty, and roaming the streets of Nowhere, the outermost. In AFTERPARTY, you are Milo and Lola, recently deceased best buds who suddenly find themselves staring down an eternity in Hell. But there’s a loophole: outdrink Satan and he’ll grant you re-entry to Earth. What adventures will you stumble through in the underworld? Every step is up to you. IMusic could be the best music downloader working on Windows PC and Mac. This free music downloader is designed for users to download music from the most widely used 3000 music sites (supported music sites are kept increasing).
I'm looking for best free iTunes music download sites, who can help?
If you are looking for best free iTunes music download sites, then keep reading this article since you will know of top sites that you can use. Across the Internet, you will notice that various websites have thousands of music that you can download, but you do not have an idea on which site to exactly use. We are going to review ten sites, which will make it easier to pick and use to download music.
Part 1. Best Free Music Downloader Websites to Download Music to iTunes
SoundCloud is the home of online music streaming sites as well as podcasts. SoundCloud allows you to follow people and explore the content they upload. On this website, you will find latest free music that you can download to your iTunes.
Pros:
It has tones of music libraries.
You can share music with your friends.
Cons:
Its search is not that good.
You can also find free music downloading for itunes on Free Music Archive. The music content is categorized to different genres like Blues, country, jazz, rock, pop and much more. You can also get top charts of all time or weekly and monthly charts.
Pros:
It curates music from other sites like 12Rec, and radio station thus providing huge library of music.
Cons:
It has few music library compared to other music sites.
NoiseTrade is another music site that you can visit and download music to your iTunes. The music files are well listed with song covers and titles.
Pros:
Songs are categorized to different genres.
It displays songs that are trending songs.
Cons:
You may fail to get songs of popular artistes.
Last.fm is another free music downloader for itunes that allows you to get free music downloads. When you click on “Free Music Download” button at the page, you will get a list of free music.
Pros:
You can stream live music.
It has a multilingual interface.
It displays newly released songs.
Cons:
Free music for downloads are limited.
If you want a site that you can explore different music genres as well as radio stations, then visit Jamendo. Its user interface is also very simple. You will also find a number of playlists. Download free palylist to iTunes is also available.
Pros:
Downloads are fast.
It has huge music libraries.
It supports sharing of music files.
Cons:
Not all music are free.
On BeeMP3 website you will be able to downloads tons of free music in MP3 format. Its search button is very responsive and it allows you to enter up to 5 keywords.
Pros:
It has popular music by popular artists.
You can stream music.
It is free to use.
Cons:
You can only download music in MP3 format.
MusOpen is also a free website that you can find free music without copyrights. This site also has free recordings and textbooks. The content is organized alphabetically for easy acess.You could get free iTunes music recorded from this websites.
Pros:
It has royalty free music.
You can browse music according to composer, year, performer and instrument.
Cons:
It just focuses on classical music.
This streaming music site allows you to download music in MP3 format. You can search for songs using keywords or paste URL link from other streaming sites like YouTube, very easy to download free music to iTunes.
Pros:
It displays bitrate of the song you want to download.
It allows one to play music.
It displays the source of the song such YouTube or Vimeo.
Cons:
It has annoying ads.
SoundClick allows you to browse and download music according to genres and top charts. This website has nearly all music genres such as pop, jazz, acoustic, metal, rock urban and much more. This website is not fancy, but trust me you will get nearly all the music that you want.
Pros:
It has a music store.
You can manage your stations.
You can stream music online.
Cons:
It user interface is not appealing.
You can also check on Audio Archive to get free audios and music recording of radios shows, podcasts and programs. On this free music download site, you can also get movies, images, data and concerts.
Pros:
It has thousands of free music.
You can also download podcasts.
It is easy to use.
Cons:
It focuses on old music thus you may fail to get latest music.
Part 2. Best Free Music Downloader for iTunes - iMusic
Having learnt about best websites that you can download music freely, it is essential to learn about a software that allows you to download free music from all these best download websites. An ideal software that not only supports ten websites but more than 3000 sharing sites is iMusic software. From these sites, you will be able to download music directly to your iTunes library. Once you have downloaded them, you will have the liberty to transfer the music files to your iOS device or your Android phone. Furthermore, iMusic allows you to download music as well as playlist from its inbuilt music library.
iMusic - Best Music Downloader to Download Music to iTunes
iMusic supports download of music from more than 3000 music sites including YouTube, Vimeo, Vevo, Hulu, etc.
It records music with ID3 tags being labelled automatically from online sites.
iMusic allows you to manage your iTunes library by deleting duplicates, erasing broken files, adding covers to your music.
It is built with a music toolkit, which enables you to rip CD music, convert music and form car playlist.
iMusic can also import music from your mobile device to iTunes Library.
Backup and recover the iTunes Library automatically.
Fix ID3 tags, like artist name, song title, year and genre automatically.
How to Download Music from Any Site to iTunes using iMusic:
Step 1. Launch iMusic software
On your computer, double-click on iMusic to open it and click on “GET MUSIC” icon.
Step 2. Select Music site
After clicking on “GET MUSIC”, you can then click on “DOWNLOAD” button. You will then see a list of sites below the copy and paste URL button. Scroll through and select any site that you want such Vevo. Next, search for the music file that you want and move to the next step.
Step 3. Select output format and Download Music
After that select the output format of your music and click on “Download” button. Once the file has been downloaded, you can locate them under “Library” icon.
There you go use iMusic software to get any music genre from the ten listed sites above. It is easy to use, and it has fast download speed. From these sites, you can also record music.
Bonus: How to Transfer Music from iPhone/iPod/iPad to iTunes Easily
Video Tutorial: iMusic- Transfer Music from iPhone/iPod/iPad to iTunes
Apple Music allows you to download tracks or entire albums for offline listening on the iPhone, Mac, and PC. But if you're crunched for storage on your device, it's best to stream Apple Music and only download select songs you listen to the most. That said, the Music app or iTunes can put a spanner into the works and automatically download songs and albums whenever you add them to your library. Annoying, right?
Below, we shall look at what you must do to stop Apple Music from downloading music automatically on the iPhone, Mac, and PC. The auto-download setting does not sync between devices over iCloud. So, you'll have to disable the feature on every device you want to stop downloads from happening automatically.
Disable Apple Music Automatic Downloads - iPhone
Apple Music has come a long way since its introduction on the iPhone in 2015. It's vastly improved in terms of navigation, pushes out better recommendations, comes with dark mode support, features a nifty auto-play feature, and more. You can stop automatic downloads in Apple Music on your iPhone by diving into the Settings app.
Step 1: Open the Settings app on your iPhone.
Step 2: Scroll down and tap Music.
Step 3: Turn off the switch next to Automatic Downloads.
Tip: You can also use the Optimize Storage option to impose a limit (4GB, 8GB, 16GB, etc.) on the amount of storage that Apple Music can use. You can use it with or without the Automatic Downloads option enabled.
Additionally, you can tap the Downloaded Music option to bring up a list of all downloaded music arranged by artist and album—you can then delete any listed item by swiping to the right and selecting Delete.
Now that you've disabled automatic downloads in Apple Music, you can tap the Download icon next to the album or track to initiate a download manually. Or, you can long-press an item and select Download on the context menu.
Also on Guiding Tech
What Does Apple Music's Web Player Do Differently And When Should You Use It
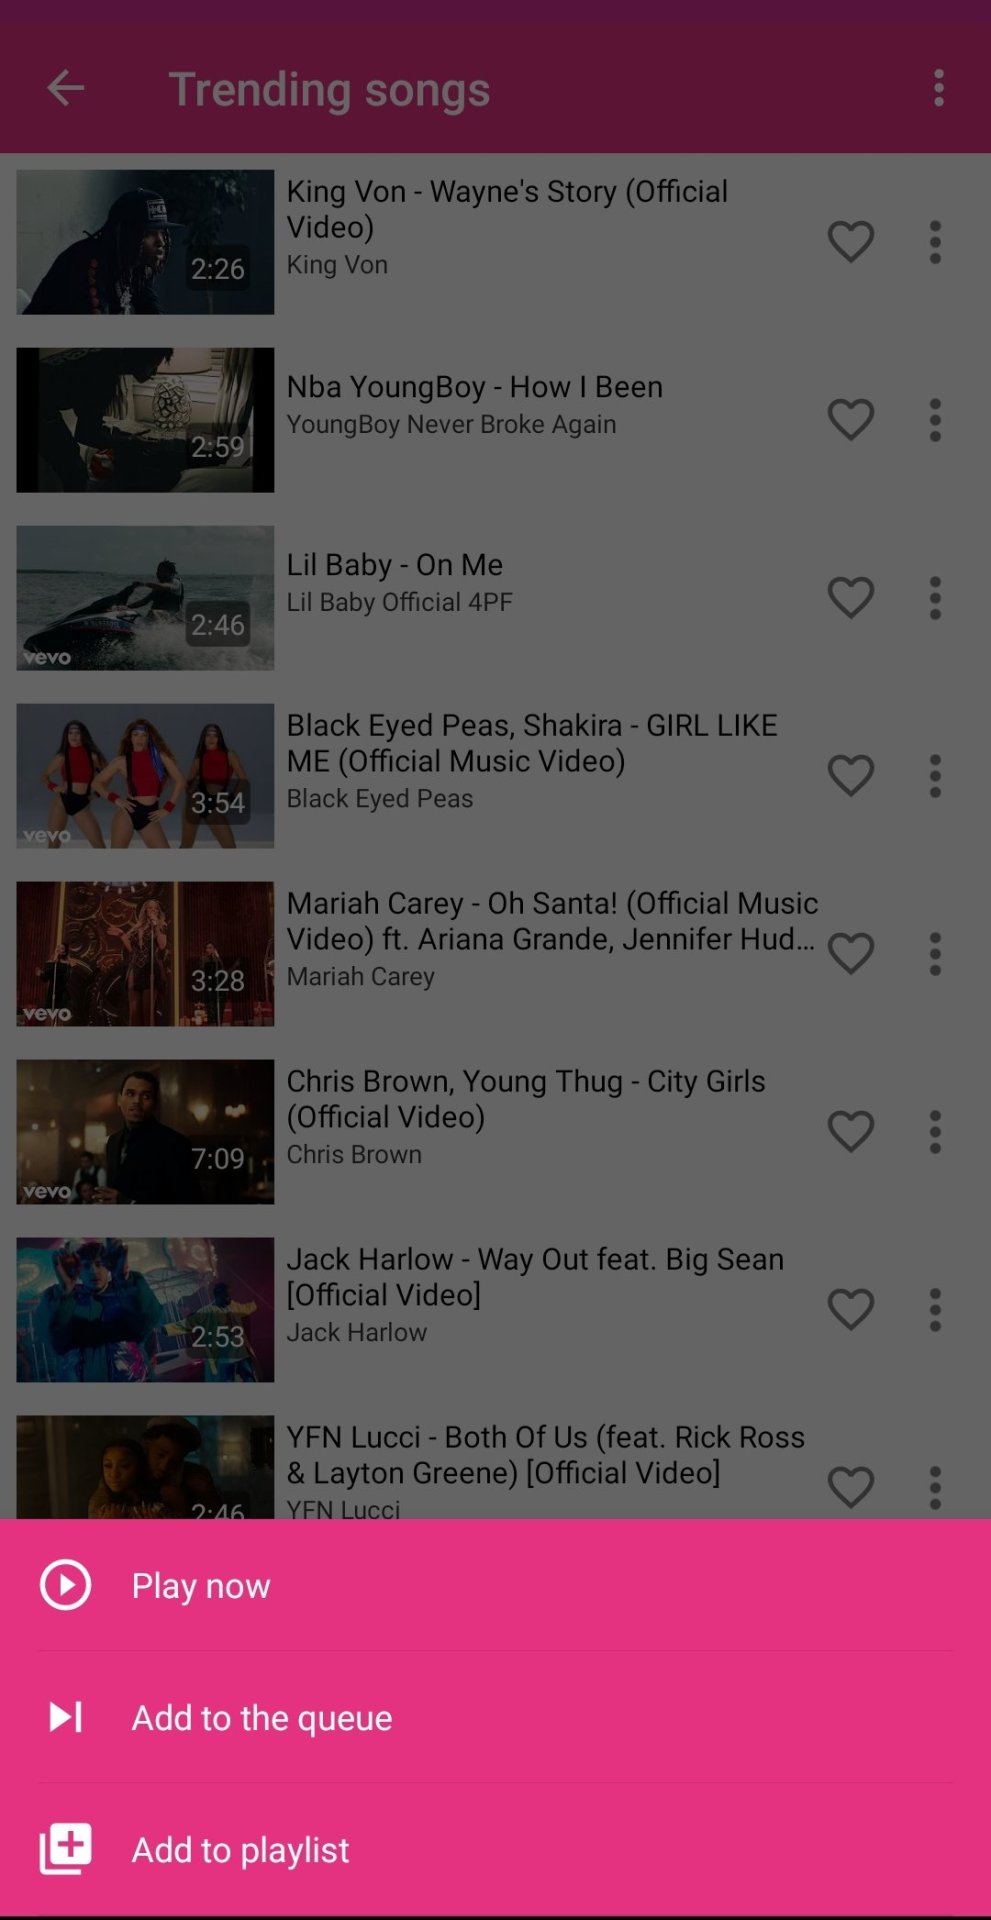
Read More
Disable Apple Music Automatic Downloads - Mac
macOS Catalina users need to use the dedicated Music app to stream Apple Music. Yes—Apple pulled the plug on iTunes after macOS Mojave. The new Music app is polished and much smoother to use. You can stop automatic downloads in Apple Music on your Mac by diving into the app's Preferences pane.
Note: If you use macOS Mojave or older on your Mac, skip to the next section to figure out how to disable auto-downloads in Apple Music on iTunes.
Step 1: Open the Music app. Then, tap Music on the menu bar and select Preferences.
After Party + Soundtrack Download For Mac Free
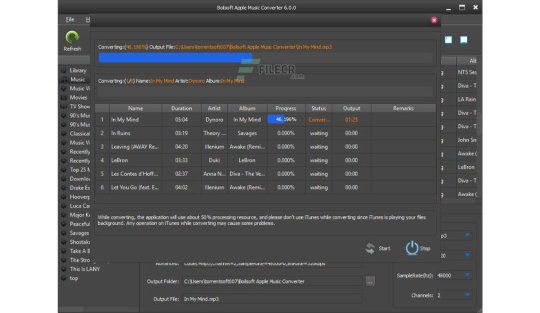
Step 2: Switch to the Downloads tab.
Step 3: Turn off the switch next to Downloads. Click OK to save your changes.
Tip: To remove a previously downloaded track or album, right-click the item and select Remove Download.
You can always download tracks and albums manually by clicking the Download icon next to each item or by right-clicking and selecting Download.
Also on Guiding Tech
#Apple Music='bp-purple>
Click here to see our Apple Music articles page
Disable Apple Music Automatic Downloads in iTunes - PC and Mac
Unlike on the Mac, you are still confined to listening to Apple Music on the PC via iTunes. If you want to disable automatic music downloads, you must head into the iTunes Preferences pane. The following steps apply to both the traditional desktop and the Microsoft Store version of iTunes. You can also use them to turn off auto-downloads in iTunes on macOS Mojave and earlier.
Step 1: Open iTunes.
Step 2: Open the Edit menu and select Preferences. If you use iTunes on the Mac, select iTunes on the menu bar and select Preferences instead.
Step 3: Switch to the Downloads tab. Then, uncheck the box next to Music. Click OK to save your changes.
Tip: If you want to remove a previously downloaded track or album, right-click the item and select Remove Download.
Despite turning off auto-downloads, you can still download tracks manually. To do that, click the 3-dots next to a track or album and click Download. Or, right-click an item and select Download.
Disable Apple Music Automatic Downloads - Android
If you use Apple Music (or plan to install it) on an Android smartphone, you do not have to worry about turning off automatic downloads. The app does not feature the ability to download tracks automatically—you can only do that manually.
Also on Guiding Tech
YouTube Music vs Apple Music vs Spotify: Which Is the Best Music Streaming Service
Read More
Go Manual
Even if storage isn't a concern, turning off auto-downloads in Apple Music gives you the freedom to decide what songs you want to keep on your iPhone, Mac, or PC. Auto-downloads also do not make much sense if you have access to a faster and/or cheaper internet connection.
Next up:Do you have issues while downloading tracks manually on your iPhone? Click on the next link to know how to fix that.
The above article may contain affiliate links which help support Guiding Tech. However, it does not affect our editorial integrity. The content remains unbiased and authentic.Read Next
After Party + Soundtrack Download For Mac Os
13 Best Ways to Fix the Apple Music Not Downloading Songs Issue on iPhone and AndroidAlso See#iphone #macos
Did You Know
MEMS gyroscopes became popular after the launch of the iPhone 4 in 2010.
More in Internet and Social
Top 8 Fixes for Prime Video Picture-in-Picture Not Working on Android and iPhone
0 notes
Text
A Guide To Understand Photography Workshop and Event
You regularly caught wind of photography workshops and occasions on the off chance that you are keen on photography. Furthermore, in some cases, you think they are not so valuable. Photography isn't that, that somebody can educate in one day.
All things considered, You might be correct or perhaps not. Relies on you.
At the point when we began our journey to someplace, we need a guide at some point. Also, at that time local people can manage you since they know the way quite well.
Photography Workshops and Events like those local people. Specialists who will direct you, they know the photographic way quite well.
Now, it's totally up to you. In what capacity will you use them?
What is Photography Workshop?
To learn photography is more than fun, it can be a powerful tool of self-expression. But first, you need mastery of your camera and the critical fundamentals. So you can merely look at a scene and know what to do.
Although profoundly private and natural, pictures are predicated at the inventive utilization of guidelines in the general parcel as, state, favorable luck, or a characteristic feel of workmanship, and there's no higher chance to practice novel musings than photography workshops.
Regardless of whether you need to find approaches to control a photography business or you're meaning to exchange from metropolitan pictures to untamed life pictures, there's sure to be a workshop out there that is ideal for you.
At last, going to a workshop is a likelihood to create as a craftsman with the guide of utilizing learning the best approach to comprehend matters from each other outlook. Yet, presently not, at this point most straightforward that, it's moreover a magnificent way to make new companions and master contacts, the entirety of the while learning new aptitudes and remembering for your rundown of qualities.
Why do we need Photography Workshop?
1. Participating in a photography workshop will renew your passion for images.
Picking your camera and investigating new photographic prospects will urge you to create as a photographer.
2. The possibility to picture graph the maximum scenic places regionally and abroad
A guided photograph outing or workshop will take you all together and on the double to remarkable spots. Master ability in shooting the web site on the web and finding new ones will forestall prized leg-canvases and time, allowing you to focus on your own personal pictures with the entirety of the training achieved for you. Pick a workshop with gifted teachers that practice within side the area you need to visit.
3. Share an experience with compatible people who share your passion
Shooting new and super places along with other people who extent your side interest is without question a prized becoming more acquainted with the experience. Imparting information and procedures to others is an absolutely moving encompassing that can allow you to accomplish a fresh out of the box new phase of photographic disclosure for your experience to transform into a higher photographer.
4. Learn from a professional even as growing your very own style
An exact workshop boss will ensure that every player gets the degree of help they need and maybe accessible to help varying. A gifted mentor will help you to get a handle on specialized abilities even as introducing adequate time for people to find their own personal vision. With proficient directing, your imaginative discernment will become more prominent intense allowing you to extend your own personal private style.
5. The exceptional places on the exceptional times
A skilled picture taker has achieved his investigations to choose the outstanding season, the uncommon season of day, and the legitimate mellow for a chose area. He can prepare you in a manner to contemplate the display while in transit to get the uncommon picture chart conceivable. Going with an expert who knows about the region will generously finish your photographic experience.
6. Technical expertise – getting to know accurate publicity, a way to use filters, etc.
The present virtual cameras can confound even predominant picture takers. Understanding what trademark does what sets aside some effort to investigate. A pictures workshop is the suitable chance to practice and extend your capacities as a photographic artist. Under the management of an educated master and with the help of companions you may grow the ability needed to make putting pictures. Taking an interest in a workshop is a likelihood to get some answers concerning precise exposure and the use of channels. In a pleasantly run workshop, you'll be prescribed to make the arrangement 'in camera'. This is the pith of pictures.
7. The possibility to exercise what you analyze
In a workshop, classes might be given on the spot. This grants you to examine specialized capacities and hypothesis 'within side the field' and put your schooling to apply right away. The more prominent you practice your new abilities, the more they'll live with you. The point is to have the technique for making an image chart end up second nature with a reason to lose you to seek after the innovative vision.
8. Develop a photographic vision
Photography is all around observing. Figuring out how to get mindful of the qualities of a capacity picture diagram requires some serious energy and exercise. Subtleties comprising of equilibrium, sedation, and format all make commitments to the tasteful attributes of an image diagram. Having a talented photographic artist as a coach will help you to cause to feel of the connections among the variables on your image chart resulting in a strong piece that works.
9. Constructive critique
Input from an educated photographer and companions can offer productive bits of knowledge into how others comprehend your artworks and the manner in which you may upgrade your pictures. Workshop conditions need to now not, at this point be a one-way road. Communication among people, the organization, and the mentor are completely loved becoming more acquainted with encounters.
What point should be cover in a photography workshop?
If you an amateur then you make sure the workshop should cover
1. A brief photography introduction
2. Camera Settings
3. Types of lenses
4. Understanding digital cameras and associated photography gear
5. Familiarization with all the controls in your camera
6. Camera modes and making the best out of your camera –
Ø Program Mode,
Ø Aperture Priority,
Ø Shutter Priority, and
Ø Manual modes
7. Technical Concepts of photography
Ø Technical aspects of making a photograph
Ø Focus and Focal Length Understanding exposure,
Ø Histograms and metering Aperture,
Ø Depth of Field,
Ø Shutter-speed,
Ø ISO and White Balance Knowing what makes a technically good photograph;
Ø Identifying problems in images
8. Composition Stories through your photographs
Ø Guidelines for good composition
Ø Understanding quality and play of light
9. Types of photography and their nuances
Ø Portrait,
Ø Landscape,
Ø Wildlife,
Ø Architecture and
Ø Macro photography at a glance
10. Post-processing images on the computer
Benefits of Photography Workshop
1: Reinvigorate Your Passion
The photography workshop gives direction and a route to your hobby. It has often been seen that even in the wake of putting away a huge load of money on the camera, the energy or interest before long disappears. This especially happens with a novice picture taker. Regardless, getting classes along with help with maintaining your favorable position impeccable.
2.Gives a path
Photography isn't just about taking irregular pictures to a great extent. Photography is a workmanship and it has a dream. The photo is an impression of the vision that the photographic artist has behind tapping the image. It shows what he sees, how he sees, and how he chooses to depict it to the world. This vision comes from inside however a decent instate and coach can motivate and draw out your innovativeness.
3.Feedback of the assignment
It is fundamental to have a serious climate to draw out the best in you. The opposition puts a little weight which rouses you to attempt genuinely and draw out the best in you. In any case, never under any condition move redirects from the opposition because continuously end every one of you are understudies so better help each other in creating. Moreover, when you get analysis on your errand, it helps in zeroing in on improving your frail focuses.
4.Assessment of what you learn
The tasks are a necessary piece of the photography educational plan. The theories will be instructed in class anyway what you have acknowledged so far will just come out on the report. The theories should be practice. You may be given an task of your decision or mentioned to investigate a few given subjects. The undertaking will be given with a cutoff time which will similarly tell you the best way to chip away at a time.
5.Identify your style
Not everything photographers can be the equivalent. An expert instructional training course will offer an occasion to perceive your extraordinary style. Probably your mentor or tutor can help you in perceiving your claim to fame.
And If you still think that is it worth to spend money on a photography workshop?
I will recommend to you "YES, it is", Photography is an art just like science. That is the reason Workshops dive into both. It begins with the basic, addresses the high level, and polishes the nuances. In its entirety, it will transform the camera and photography ideas into expansions of your body and brain. So matters of presentation, centering, and metering doesn't hinder you when you wish to catch a special second. Or on the other hand, interpret your sublime vision into a life-changing picture.
A photography workshop likewise will assist you with interfacing with more individuals, here specialists will criticize your work so you can improve your aptitude right away.
Now you should peruse cautiously before you go to one. If you are a novice, any sort of photography workshop will be incredible for you. In any case, on the off chance that you know well the fundamental photography, at that point read each workshop's guideline and highlighted points, what they going to educate you. At that point go for that specific workshop.
If you are now ready for a photography workshop or photography event. Do visit https://events.chiiz.com . Check out our mentors and their portfolio also you can check our workshop and participate in our magazine photography contest to enhance your skill.
0 notes