#freecrochetpattern
Text


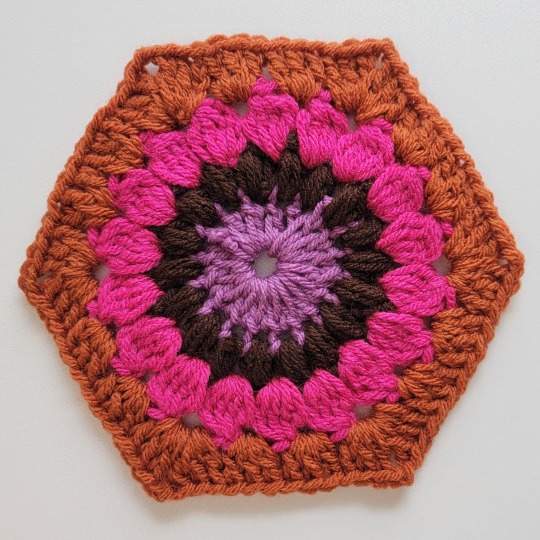
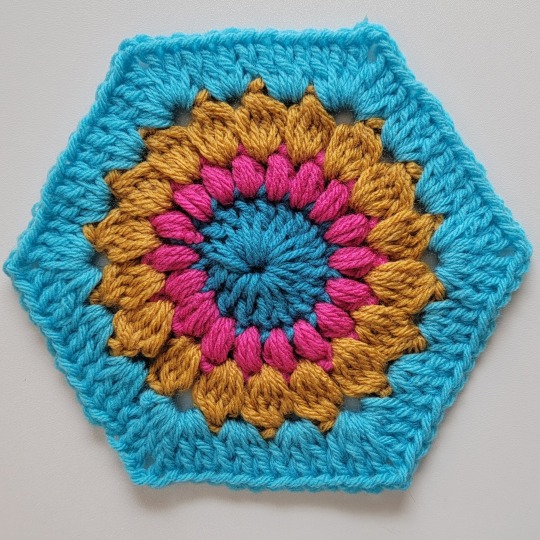
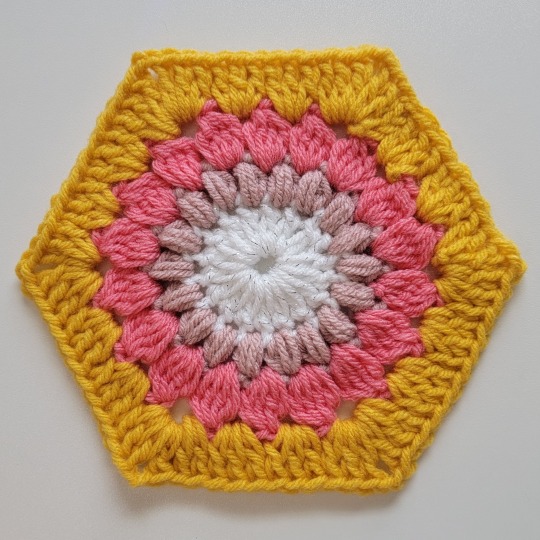
New free pattern from me! You can see the full pattern for my Sunburst Hexagon on my blog! Or grab the PDF from my Ravelry shop! 😊😃✨️
Playlist featuring more free Hexagon tutorials here!
Check out the tiktok here!
#yarn#fiberartist#crocheters#crocheting#crocheted#crochetpattern#crochetpatterns#freepattern#freepatterns#freecrochetpattern#free#freecrochetpatterns#ravelry#smile#ravelrypatterns#crochetcreations#diy#howtocrochet#love#craft#crafting#crafty#handmade#handmadegifts#crochetblog#happy#patternrelease#crochetafghan#crochetblanket#new
72 notes
·
View notes
Text
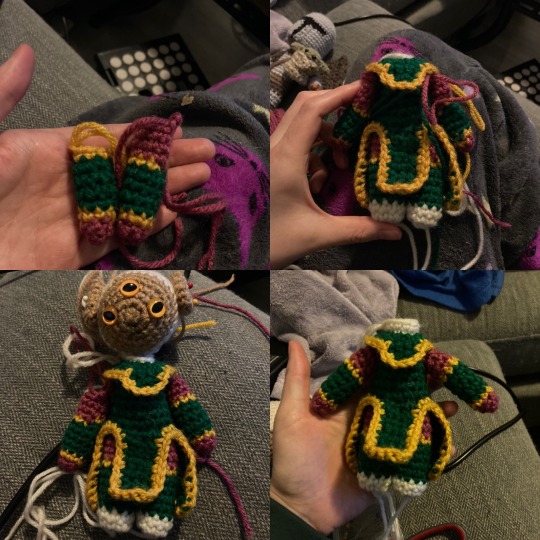
Nomai (Outer Wilds) Pattern

Solanum, my beloved! (just kidding!) I am so happy to share this pattern for the Nomai from Outer Wilds - it is a bit of an involved pattern, and probably not for beginners, but I will do my best to explain what I did! Please feel free to message me if you have questions. As always, if you use this pattern, please link back to my page, and tag me here on tumblr or @ erin.gurumi on instagram! I love to see what people make!
Technical stuff:
I used a 3mm crochet hook and these yarns:
Loops and Threads Impeccable in Walnut Tweed (horns)
Red Heart Super Saver in Warm Brown (face)
Red Heart Super Saver in Cream (hair)
Red Heart Super Saver in Paddy Green (space suit)
Red Heart Super Saver in Gold (trim)
Raspberry scrap yarn (glove/shoulder/thigh)
White scrap yarn (boots)

^Head:
Rather than the usual amigurumi method of starting from the top/bottom of the head, I started from the front of the face and worked toward the back - this let me make the back of the head in the cream color to better match those ancient Nomai murals!
6 sc in a magic circle in Warm Brown
inc 6x to make 12 stitches
(1 sc, inc) 6x to make 18 stitches
(2 sc, inc) 6x to make 24 stitches
(3 sc, inc) 6x to make 30 stitches
1 row of 30 stitches
Add eyes (I used 12 mm cat eye safety eyes), and nose/mouth (you can do embroidery, paint, etc... I used marker!)
Switch to Cream, 8 rows of 30 stitches
(3sc, dec) 6x to make 24 stitches
(2sc, dec) 6x to make 18 stitches
(sc, dec) 6x to make 12 stitches
dec, until closed, stuff and finish off
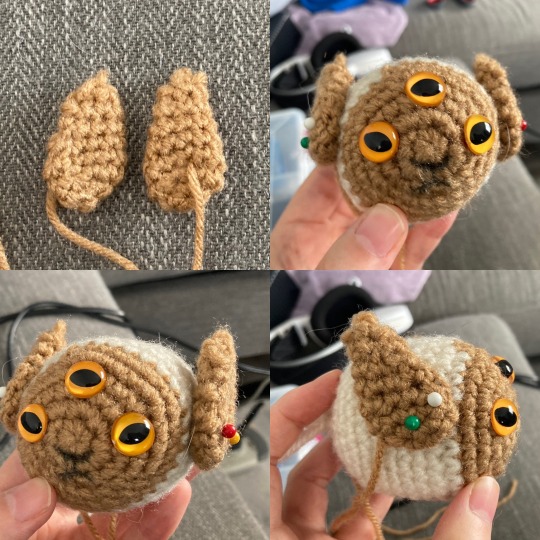
^Ears:
Make two of these of course! To make a teardrop shape like this I start with a round amigurumi shape then kind of flatten it down -
6 sc in a magic circle in Warm Brown
inc 6x to make 12 stitches
dec 1x to make 11 stitches
dec 1x to make 10 stitches
dec 1x to make 9 stitches
from here, decrease until the shape is closed, then add one sc to the top to make it extra pointy - flatten the drop and attach to the sides of the head!
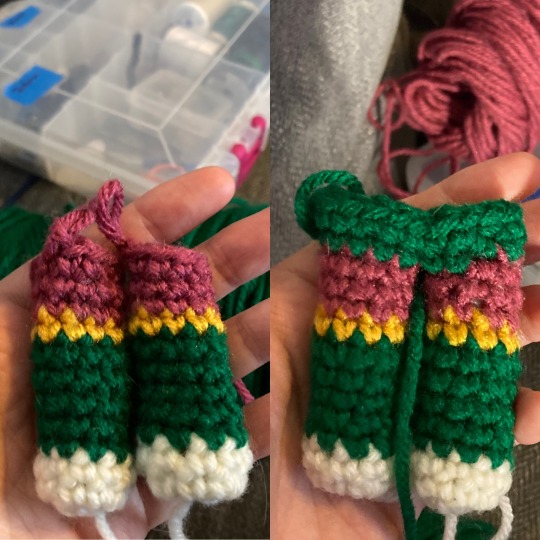
^Legs/torso
This is the usual method I use to make "standing" humanoid amigurumi, where you make two legs and then connect them by crocheting around them - this time it was a bit more involved because of the many color changes and doing a couple rows of crocheting in the back loops so that I was able to attach her tabards and collar
6 sc in a magic circle in White
inc 2x then (inc, sc)4x to make 10 stitches
1 row of 10 stitches in White
change to Green, 5 rows of 10 stitches
change to Gold, 1 row of 10 stitches
change to Raspberry, 3 rows of 10 stitches
Stuff and finish off one leg, stuff and keep the other leg
Torso:
As I'm making the torso, rather than counting how many stitches until I get to a dec, I just eyeball where the decrease will go (for example, in the center of the back, or behind a leg)
On right leg, color change from Raspberry to Green, chain 1, slip stitch into left leg, sc around both legs (~20 stitches - if it ends up more, just decrease in back to that)
1 row of 20 stitches
1 row of 20 stitches in back loops (important for adding the tabards!)
1 row of 18 (one dec behind each leg)
1 row of 17 (dec in back)
1 row of 16 (dec in back)
1 row of 15 (dec in back)
1 row of 13 (one dec in front, one in back)
1 row of 12 (dec in front)
change to Cream, 1 row of 12 in back loops (important for adding the collar!)
1 row of 12
Finish leaving a long tail for connecting the head
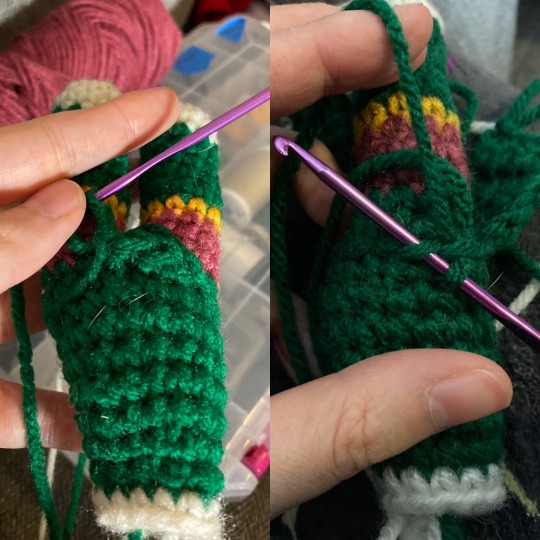
^Front Tabard
This is where it gets a little wonky, as I was really just eyeballing the widths of the front and back tabards and using what I had available in terms of the backloops. I also found that crocheting one way resulted in the "flaps" tending to point upward rather than downward, but... I'm not sure if it has to do with how you hold your hook?
Holding ami upside down, attach yarn by right leg with a slip stitch, sc 4
turn, sc 4 (repeat 11x, or however long you want the tabard to be)
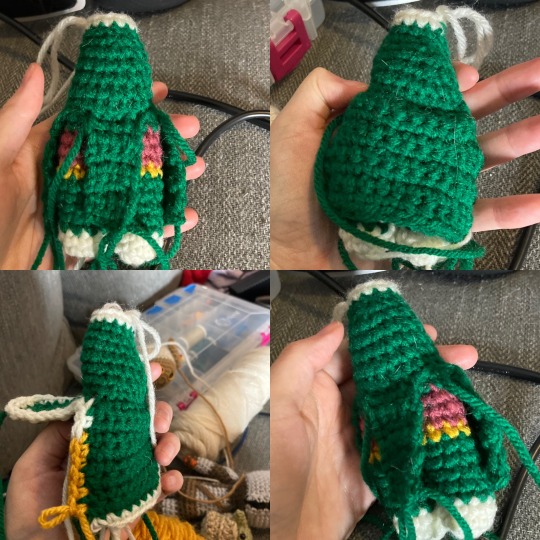
^ Back tabard:
You know, I realized part way through that in the back of the Nomai space suits, they actually have two separate bits of fabric (it's super hard to tell from the front!) So I think if you wanted you could make it more accurate you can split the rest of the back loops in half and do this twice, it is basically the same as the front!
Holding ami upside down, attach yarn by left leg with a slip stitch, sc ~13
turn, sc 13 (repeat 13x, or however long you want the tabard to be)
After finishing both the front and back tabards, I crocheted around it with the Gold yarn. Just slip stitch the yarn into one of the stitches (it looks like I started in the back left corner) and crochet around, possibly going into the back loops at the waist if you need to! In the bottom left pic you can see I tried with a White trim first and didn't like it, so I switched to the Gold!
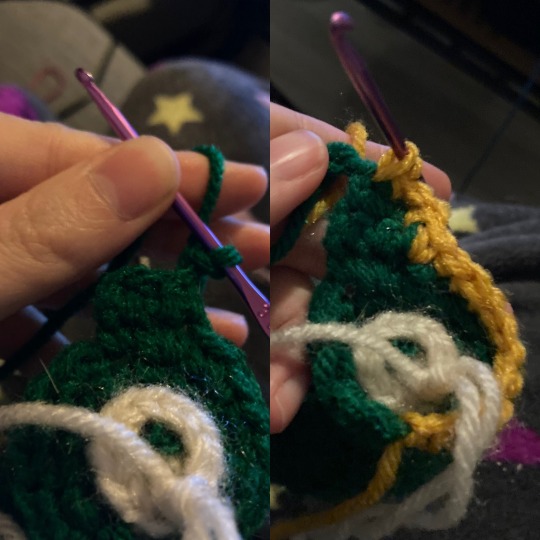
^Collar:
Quite similar to the tabards, except that I went around the neck a couple times to make the shoulder and back collar before starting to crochet back and forth to make the longer front piece.
Start with ami upside down, attach yarn at ami's right shoulder, sc around the back loops (12 stitches)
On second round, increase in every sc, (24ish) -
Stop when you are where you want the collar's front piece to start (I would say ~ 2 stitches past the center of chest) chain 1 and turn, sc 3ish across (or however many you want , chain 1 turn, sc across again (only two rows tall).
Attach Gold in the back and add trim similar to the tabards
^Arms:
Straightforward, but a bit of a pain due to all the color changes in such a small space! Believe in yourself!
6 sc in a magic circle in Raspberry
1 row of 6 stitches in Raspberry
change to Gold, (inc, 2 sc)2x to make 8 stitches
change to Green, 4 rows of 8 stitches
change to Gold, 1 row of 8 stitches
change to Raspberry, 3 rows of 8 stitches
At this point I attached the arms to the body, saving the head for later (I probably could have attached the head now, I just didn't want to while experimenting with her antlers and hair)
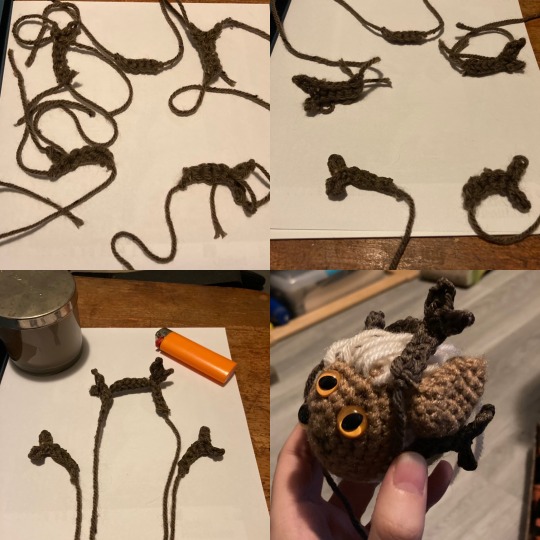
^Antlers:
I was surprised at how not-bad these turned out, as I really was winging it... I used the foundation single crochet (fsc) stitch (look up tutorials for this!) and some futzing with the orientation of the pieces to make the "branches" - I honestly don't know how necessary it is, but here's what I did:
Lower antlers (make 2):
5 fsc, turn piece upside down, 2 fsc
finish off and re-attach yarn with slip stitch at turning point, 1 fsc
Upper antlers (make 2):
8 fsc
finish off and re-attach yarn with slip stitch 2 stitches from end, 1 fsc
Upper connector (make 1):
5 fsc, leave tails for connecting
I used a candle to VERY CAREFULLY burn the fuzz off the antlers, so they would be a bit smoother and shinier. If you want to do this, please be cautious, mindful of the type of fiber your yarn is made of, and if you are little, have an adult help!
I then attached the connector to the two upper antlers (just using the tails and knotting them together, but I am sure a dab of hot glue or fabric glue would work fine!) and attached all antlers to the brown yarn of the face, then finally attached the head to the body! As for weaving in ends, ugh I just tried to tie them off and hide them as best as possible!
Adding hair: I reached the image limit, but adding hair is pretty straight forward - What I do is cut lengths of yarn ~2x as long as I want the hair to be (in this case about 7 inches), and then use the crochet hook to thread them through a stitch. If you want them to be more secure, you can tie a knot, but I never bother since my plushies aren't handled very heavily. Since the back of the head was already done in Cream, I didn't feel like I needed to add hair until all the surface was hidden, so I just added until I liked how it sat! Make sure you add hair under her chin for a cute lil goat beard!
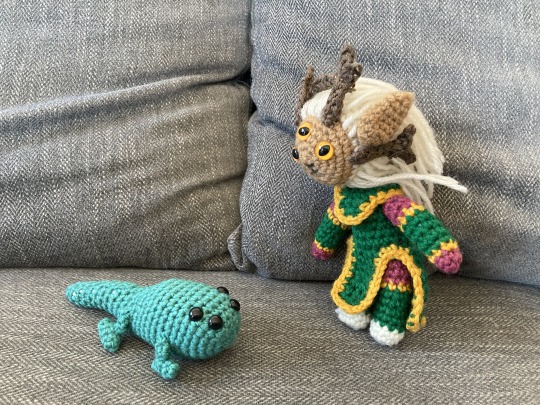
PHEW! That is a lot! Let me know if you try this pattern, especially if something seems unclear or wrong/missing, as I am not sure I did a great job explaining all of it! And please, tag me here or @ erin.gurumi on instagram if you end up making her, I would love to see! Outer Wilds is such a special game and I am very happy with how she turned out! Good luck!
#amigurumi#crochet#diy#crochetpattern#freecrochetpattern#yarn#plushie#cute#kawaii#free crochet pattern#stuffie#outerwilds#outer wilds#solanum#nomai#long post#longpost
487 notes
·
View notes
Text

Free Amigurumi patterns, all easy to Crochet beginner patterns😻 These two cats have a full video on how to make them included.
55 notes
·
View notes
Text
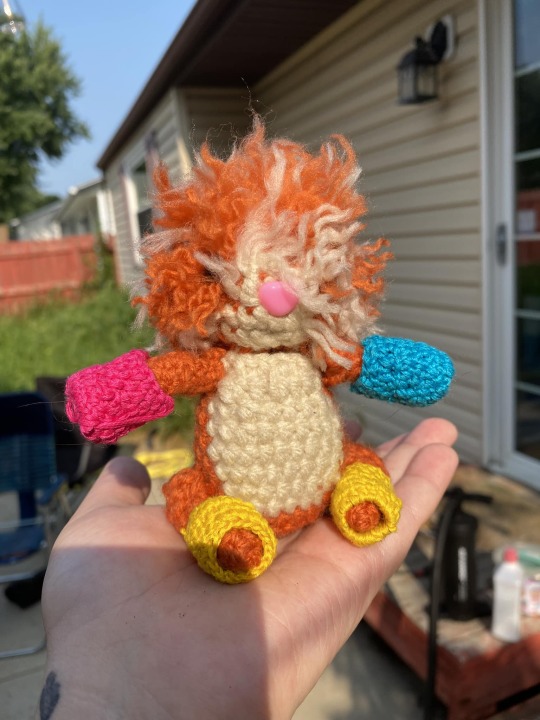
Crotator-Tot Pattern
Pattern under the read more.
This Pattern does NOT have to be done in Half Double Crochet, that's just my personal preference because i don't like Single Crochet lawl. (I'm just poor artist so its also a cost saving management.
This is the first pattern i've ever written, so there will be mistakes because of that and because i've only been crocheting for 2 years ;))K
This Pattern Takes...about 4-5 Hours to complete.
This pattern may NOT be used for profit, there MUST be a donation to your local animal shelter.
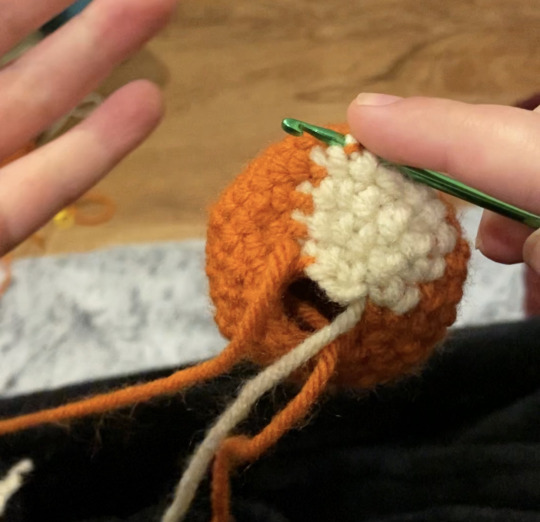
For this Particular Tator Tot I used a 3.125mm hook and Impeccable yarn by loops and threads in color "Pumpkin" and Caron 1 Pound in "Off White"
Guide:
Hdc: Half Double Crochet
Hdc-dec: Half Double Crochet Decrease
Hdc-inc: Half Double Crochet Increase
sl st: Slipstitch
CC: Change Color ((the pattern isn't exact with this, take with grain of salt, change color when you feel like it makes sense <3))
Ear 2x:
Chain 7
Sc 5hdc sc
Leave tail to attach to head
Head:
R1: Hdc 6 magic circle
R2: *Hdc-inc*
R3: *1 Hdc hdc-inc*
R4: *2 Hdc hdc-inc*
R5: *3 Hdc hdc-Inc*
R6: Hdc ((2 Hdc change color, 2 Hdc change color)
R7: Hdc CC 6 Hdc CC hdc
R8: *3 Hdc Hdc-dec*
R9: *2 Hdc Hdc-dec*
((Place eyes and nose on and start attaching ears and the bed head floof then stuff the head))
R10-end: Hdc-dec
Leave long tail to attach
Body:
R1: 6 Hdc magic circle
R2: Hdc-inc
R3: 1 Hdc Hdc-inc
R4: 2 Hdc Hdc-inc
R5: 3 hdc hdc-Inc
R6: CC Hdc 6 CC *4hdc hdcdec*
R7: CC Hdc 8 CC *hdc*
R8: CC Hdc 10 CC *5 Hdc Hdc-dec*
R9: CC Hdc Hdcdec 3 Hdc Hdcdec CC 3 Hdc
R10: *Hdc*
R11: CC 10 Hdc CC 3 Hdc 2 Hdcdc Hdc 2 Hdcdec finish row
((Stuff body now))
R12: Hdcdec CC 4Hdc Hdcdec 3Hdc CC Hdc Hdcdec
R13-end: Hdcdec until closed
Arms x2:
R1: 6 Hdc in MC sl st into first Hdc
R2: *Hdc*
R3: 4 Hdc-Dec 4 Hdc
R4-7: Hdc
R8: sl st shut
Should be ~2 inches long
Leave long tail to sew on
Leg x2
R1: 10 HDC in MC
R2: *Sc *
R3: 2 SC-dec SC
Sc around until desired length ~5-6 rounds
Tail
6 hdc in mc
Hdc
Dec 1 each row until close
Bonkers: (using embroidery thread OR halving worsted weight (4 strand into 2 strands) ((Requires some finesse ))
R1: 20 Hdc MC
R2-4: hdc (repetitive testing on arms/legs to make sure they fit, increasing and decreasing as needed)
Constructing the Crotator-Tot
Attach each part of the body to its respective spot (I find it easier to put the tail on straight after the legs are on)
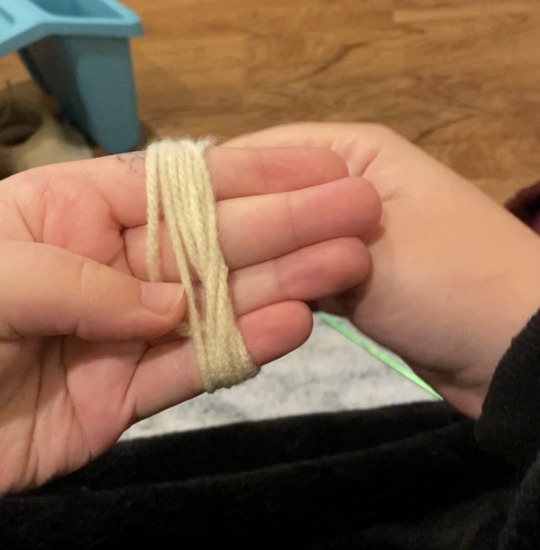
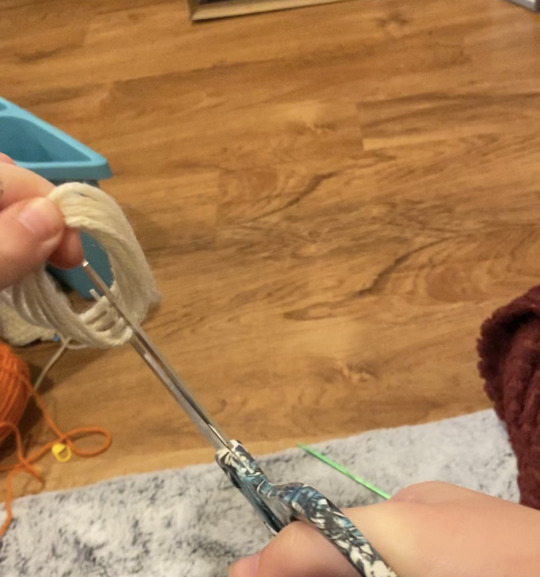
to add the fluff, wrap yarn around your fingers and cut, then tie around stitches. to make fluffy ((Carefully!)) Comb out the yarn


22 notes
·
View notes
Text
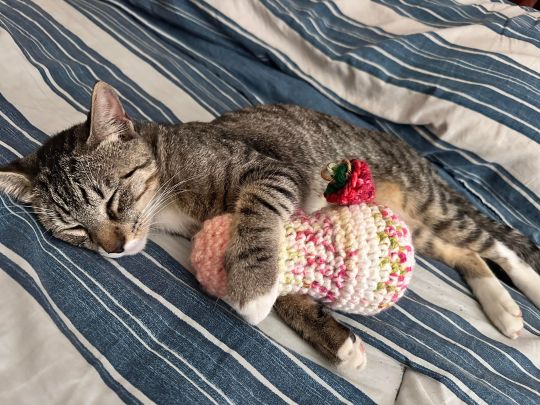

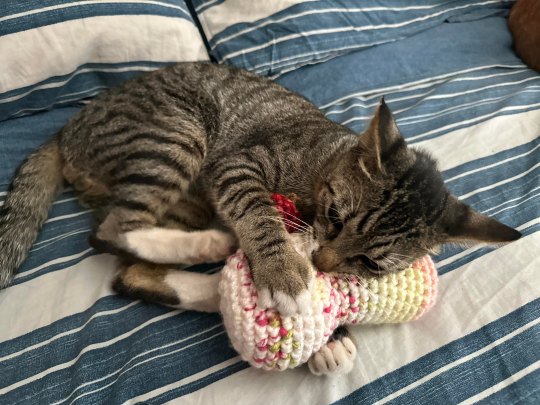
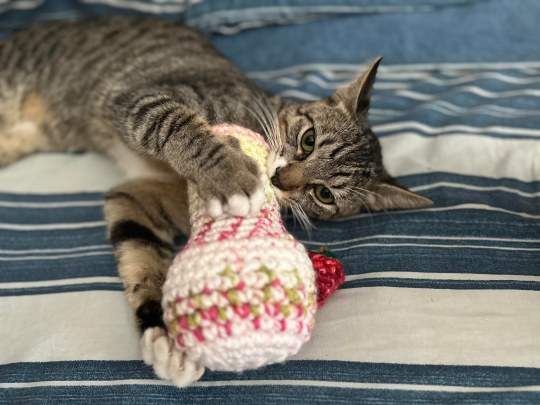
Made a cat pipe with leftover scrap yarn 🧶 stuffed it with a bit of catnip and Max here doesn’t want to let it go! He even took a nap after playing with his new toy💕
🍄 Pattern Credits: Dream9design on YouTube
#crochet#amigurumi#madewithlove#handmade#crochetaddict#crochetlove#handmadecrafts#plushies#cuteamigurumi#crochetpattern#freecrochetpattern#crochetplushies#crochettoys#cuties#catstagram#catlover#cats#catlife#catmemes#catphoto#catscatscats#catsoftheday#crochetforlife#crocheters of tumblr#arts and crafts#kawaii#crochet patterns#pretty cats#cute cats#animal friends
44 notes
·
View notes
Text
#mycrochetpattern#crochetpattern#freepattern#crocheted#crochet pattern#free crochet pattern#crochet dress#dress crochet#freecrochetpattern
14 notes
·
View notes
Text
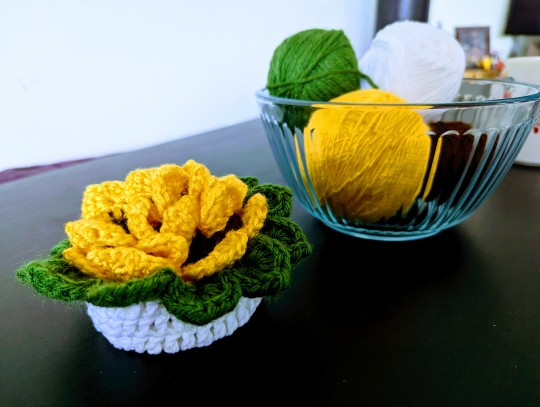
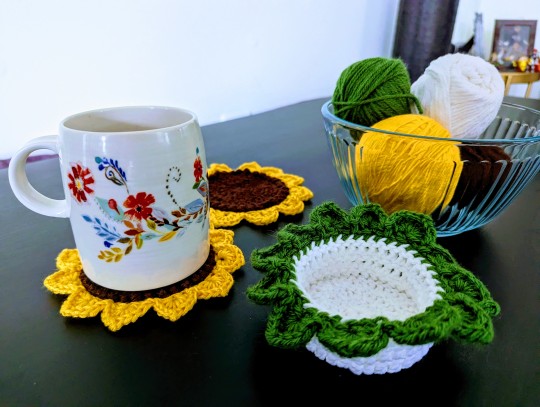
Mother's Day Gift
Mom is difficult to shop for, so I always try to do handmade gifts. Thank you IG and youtube for the ideas and free tutorials:

youtube
Using medium weight yarn from YARNS I ALREADY HAVE AND DON'T HAVE LABELS FOR ANYMORE.
Crochet Hook Size: 3.5mm
Learned picots during this project. At least I think I did. Otherwise, it was all mainly double crochets :)
#yarn#yarnaddict#erikalovescrafting#erikalovescrocheting#crochet#crocheting#crochetgifts#crochetcoaster#sunflowercrochet#crochets#freecrochetpattern#youtubecrochetpattern#youtubefreepattern
23 notes
·
View notes
Text
In case anyone needs a fast and fun gift for the holidays. I started making these and they're pretty fast and fun :D
44 notes
·
View notes
Text
Amigurumi Venti wisp aka Barbatos crochet pattern

Free pattern here
#amigurumi#crochethea#crochet#freecrochetpattern#crochetdoll#freeamigurumipattern#amigurumipattern#crochetpattern#venti#genshin impact#venti fluff
63 notes
·
View notes
Photo
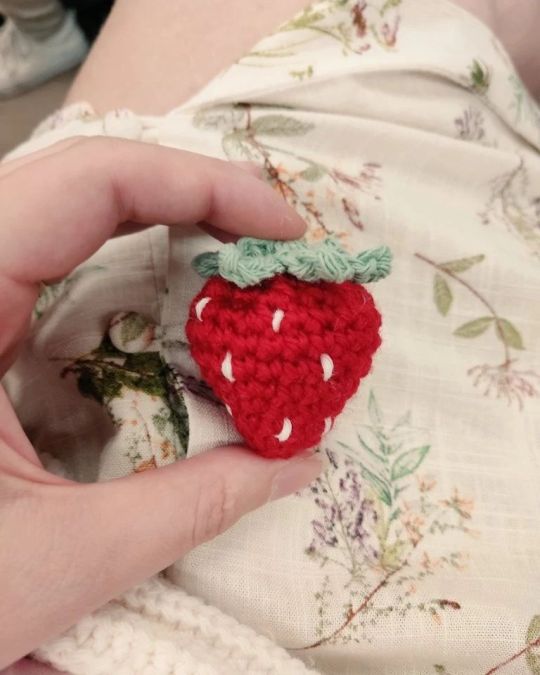
Strawberry amigurumi plus a pattern ❤️ make sure to swipe for the full pattern and finish off after row 11 💕 sow the stem on however suits you and use white yarn to make the seeds 🍓 I also recommend looking up crochet terms and abbreviations if it's your first time ❤️ US terms ⚠️ Tags: #strawberry #strawberries #pattern #amigurumi #cute #toy #squishy #crochet #crochettoy #crochetpattern #freecrochetpattern #tutorial #summer #fruity #DIY https://www.instagram.com/p/ClgU6iJthA8/?igshid=NGJjMDIxMWI=
#strawberry#strawberries#pattern#amigurumi#cute#toy#squishy#crochet#crochettoy#crochetpattern#freecrochetpattern#tutorial#summer#fruity#diy
15 notes
·
View notes
Text

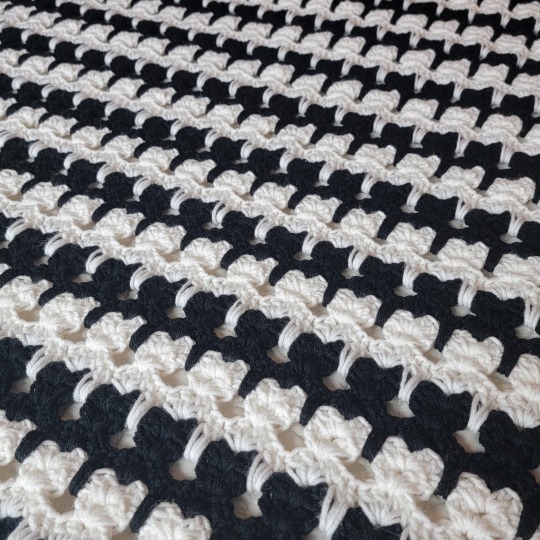


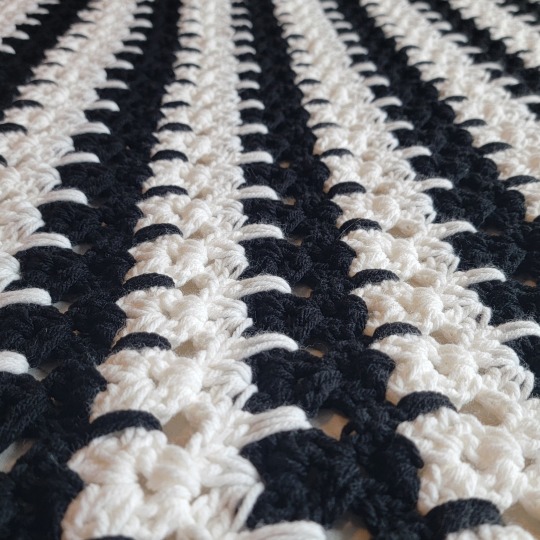
New free pattern from me: Kitty Cat Afghan! Full pattern on my blog or grab the PDF from my Ravelry shop! Both links are in my bio! 😻🖤🤍
Check out the IG reel here!
Check out the tiktok here!
#yarn#fiberartist#crochetersofinstagram#crocheting#crochetcrew#crochetpattern#crochetpatterns#freepattern#freepatterns#freecrochetpattern#free#freecrochetpatterns#ravelry#smile#ravelrypatterns#crochetcreations#diy#howtocrochet#love#craft#crafting#crafty#handmade#handmadegifts#crochetblog#happy#patternrelease#create#blanket#new
27 notes
·
View notes
Text
Free Crochet Patterns Link!
Did you know I have crochet patterns for free! I store all the links to them here:
https://eringurumi.tumblr.com/original_patterns
#crochet#amigurumi#cute#kawaii#stuffie#stuffed animals#plushie#plushies#stuffies#yarn#diy#amigurumi pattern#freecrochetpattern#free crochet pattern#freepattern#freeamigurumipattern#doll#dolls
310 notes
·
View notes
Text
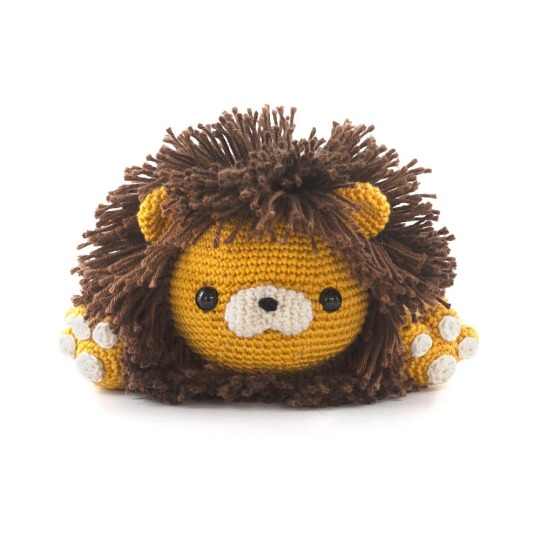
Free lion Crochet pattern. Make this Amigurumi with the DIY Fluffies pattern.
#amigurumi#crochet#amigurumipatterns#lovecrochet#yarn#haken#freecrochetpattern#free crochet pattern#free amigurumi pattern
229 notes
·
View notes
Photo
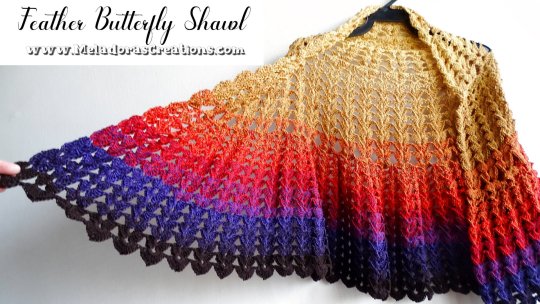
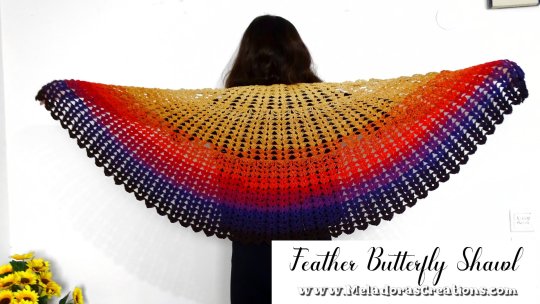
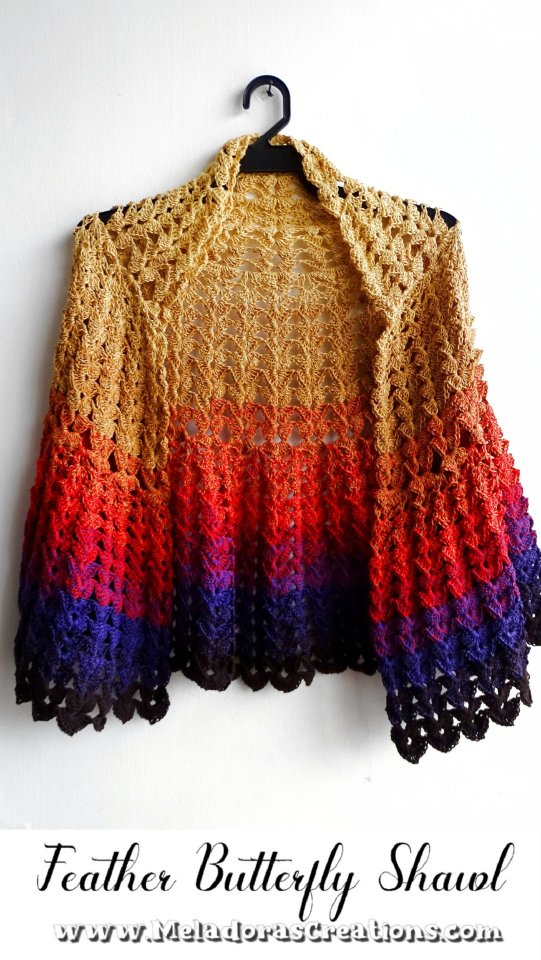

The Feather Buttery Shawl is the 10th Butterfly shawl in the series. This one has the butterfly theme as it's stitch. A shawl made of butterflies! Bunches of little butterflies! The end result looks like feathers, so this is why I called this one the Feather Butterfly Shawl.
My family really loves the look of this one, I didn't even have to ask what they thought of it. They just saw it and went Wow! Which is amazing for me to hear considering this is the 10th one in the series so I wanted it to be a special one. I'm working on making a book with all 10, I'll keep you updated!
I really hope you like this one too. It's an easy repeat just like all the Butterfly shawls. You'll have to make slight adjustments to make it keep growing correctly but the adjustments are easy to do. No markers needed on this Butterfly Shawl either. It really is that easy!
✫Tutorials
Right Handed https://www.youtube.com/watch?v=-S4qsW2UfVY
Left Handed https://www.youtube.com/watch?v=y37-K6e-_Rk
Feather Buttery Shawl Pattern
https://www.meladorascreations.com/feather-butterfly-shawl-free-crochet-pattern/
Sign up for my newsletter so you can always be update date with the free patterns I release as they come out! https://www.meladorascreations.com/sign-up-for-newsletter/
#crochet#crochetshawlpattern#freecrochetpattern#butterflyshawl#meladorascreations#crochetbutterfly#crochettutorial#crochetshawltutorial
27 notes
·
View notes
Text
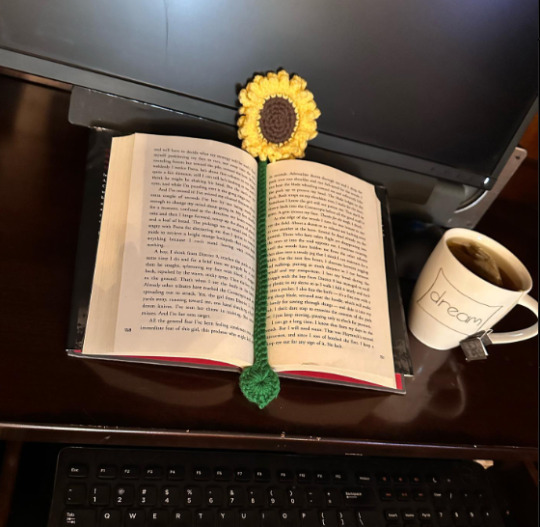
It’s good day to be drinking tea, reading and having a beautiful bookmark to keep track of my reading💕 ☕️ 📖
🍄 Pattern Credits: madugurumi on Instagram
#crochet#amigurumi#madewithlove#handmade#crochetaddict#crochetlove#handmadecrafts#crochetpattern#freecrochetpattern#crochetforbeginners#sunflower#sunflowerbookmark#crochetforlife#crochet patterns#plushies#kawaii#arts and crafts#crocheters of tumblr#roses#flowers#tea talks
7 notes
·
View notes
Last Seen Blogs

shelbyi-phillips
Untitled

kindagomez
KINDAGOMEZ

half-life-citizen
Dr freeman!
poesiachiquita
Poesía retorcida como tú mente.
deren-gnlz
myself