#gmail hostgator
Explore tagged Tumblr posts
Visit Tumblr Blog
Explore Tumblr blogs with no restrictions, modern design and the best experience.
Last Seen Tumblr Blogs


Fun Fact
130K people were victims of a chain letter scam that affected Tumblr in May 2011.
Text
📧 ATUALIZADO Como Configurar EMAIL PROFISSIONAL no GMAIL em 2024 (Domínio Próprio)

Como Configurar um E-mail Profissional no Gmail em 2024: Guia Passo a Passo
Introdução: Ter um e-mail profissional é essencial para qualquer negócio que deseja transmitir credibilidade e seriedade aos seus clientes. Porém, gerenciar diversos e-mails em plataformas diferentes pode ser complicado e demorado. A boa notícia é que você pode integrar o seu e-mail profissional ao Gmail, centralizando todas as suas mensagens em uma única plataforma. Neste artigo, vou te ensinar como configurar o seu e-mail profissional no Gmail de maneira rápida e eficiente.
O que é um E-mail Profissional e Por Que Você Deve Usar Um?
Um e-mail profissional é aquele que utiliza o domínio do seu site, por exemplo, "[email protected]". Diferente dos e-mails gratuitos, como Gmail ou Yahoo, um e-mail com o seu próprio domínio passa mais confiança aos seus clientes, além de reforçar a marca do seu negócio.
Vantagens de Integrar o E-mail Profissional ao Gmail:
Centralização das Mensagens: Gerencie todos os seus e-mails em uma única interface, evitando a necessidade de acessar múltiplas contas.
Usabilidade: Aproveite a interface simples e amigável do Gmail, que já é uma ferramenta familiar para muitos usuários.
Acessibilidade: Acesse seus e-mails profissionais de qualquer lugar, seja no desktop ou no aplicativo do Gmail no seu celular.
Segurança: O Gmail oferece recursos avançados de segurança, como autenticação em duas etapas e proteção contra spam.
Requisitos para Configurar o E-mail Profissional no Gmail:
Antes de começar, certifique-se de que você possui:
Um domínio próprio registrado.
Um serviço de hospedagem que oferece suporte para e-mails.
Uma conta ativa no Gmail.
Se você ainda não tem um domínio e uma hospedagem, recomendo a Hostinger, que é a plataforma que utilizo em meus tutoriais. A Hostinger oferece e-mails ilimitados e um domínio gratuito ao contratar um plano de hospedagem.
❤️ Hostinger com desconto: https://fiqueisemcracha.com.br/melhorhospedagemytb (Cupom: LuanaFranco)
Confira aqui o passo a passo para configurar seu domínio e e-mail profissional.
Passo a Passo: Como Integrar o E-mail Profissional ao Gmail
1. Acesse sua Conta no Gmail
Entre na sua conta do Gmail onde deseja receber os e-mails do seu domínio.
2. Acesse as Configurações do Gmail
Clique na engrenagem de Configurações no canto superior direito.
Selecione Ver todas as configurações.
3. Adicionar a Conta de E-mail Profissional
Vá até a aba Contas e Importação.
Em Verificar o e-mail de outras contas, clique em Adicionar uma conta de e-mail.
Insira o endereço de e-mail profissional que você deseja integrar.
4. Configure o Servidor POP3
Insira as informações do servidor POP3 da sua hospedagem.
Verifique se a porta está correta e marque as opções para manter uma cópia no servidor e usar conexão segura.
5. Configurar o Envio de E-mails
Para enviar e-mails usando o seu e-mail profissional, configure o servidor SMTP da sua hospedagem.
6. Teste e Verifique a Integração
Envie um e-mail de teste para verificar se tudo está funcionando corretamente.
Certifique-se de que os e-mails enviados e recebidos estão aparecendo na sua caixa de entrada do Gmail.
Assista ao Tutorial Completo: Para facilitar ainda mais, eu gravei um vídeo tutorial mostrando todos esses passos em detalhes. Assista ao vídeo abaixo para seguir o passo a passo diretamente na tela do seu computador:
youtube
Conclusão: Configurar o seu e-mail profissional no Gmail é uma excelente maneira de simplificar a gestão das suas comunicações empresariais, mantendo a eficiência e a segurança. Com este guia, você estará preparado para integrar seu e-mail ao Gmail sem dificuldades. Aproveite os benefícios de ter um e-mail profissional e leve a credibilidade do seu negócio para o próximo nível!
Se você achou este artigo útil, compartilhe com outros empreendedores que possam se beneficiar desse conhecimento. E não se esqueça de assistir ao tutorial completo no vídeo acima!
#hostinger#0f59MwOVdo2X#Luana Fanco#gmail para receber e enviar email da hospedagem#como configurar email profissional no gmail#email profissional gmail#gmail hostinger#gmail hostgator#configurar gmail hostinger#gmail dominio personalizado#gmail con dominio propio#gmail profissional gratuito#usar email profissional da empresa dentro do Gmail#usar e-mail profissional da hostinger no gmail#e-mail#email#como#usar#integrar#adicionar#configurar#email da empresa#dominio proprio#Youtube
0 notes
Text
O site mello equipa é confiável? melloequipa.com Este site é falso
ERRO NO NOME: não tem “br”
ENDEREÇO: falso
TELEFONE FIXO: não tem / usa WhatsApp (11) 95412-0001 E-MAIL: 99% SEMPRE “CONTATO / SAC” ou GMAIL [email protected] CNPJ: não tem PLATAFORMA RESPONSÁVEL: HOSTGATOR AVALIAÇÕES: não tem SELO(S) DE SEGURANÇA: falso REDES SOCIAIS: não tem
Rua Ginaldo Willis Galdino, 145
Jd.Antártica/SP - Cep: 02652-190
0 notes
Text
Plans For Brazil's Best & Cheapest Dedicated Server
When looking for the best and cheapest dedicated server hosting plans in Brazil, you'll want to consider providers that offer reliable infrastructure, fast connectivity, and competitive pricing. Here are some options to explore:

HostGator Brazil: HostGator offers dedicated server hosting in Brazil with competitive pricing and a range of plans to choose from. Their services include reliable infrastructure, high-speed connectivity, and 24/7 technical support.
Locaweb: Locaweb is a leading hosting provider in Brazil, offering dedicated server hosting solutions with affordable plans and reliable performance. They provide customizable configurations, fast connectivity, and responsive support services.
KingHost: KingHost provides dedicated server hosting services in Brazil with competitive pricing and scalable plans. They offer reliable infrastructure, high-speed connectivity, and 24/7 technical support to ensure the smooth operation of your servers.
HostDime Brazil: HostDime offers dedicated server hosting solutions with data centers located in Brazil. They provide affordable plans, customizable configurations, and reliable performance to meet the needs of businesses of all sizes.
UOL Host: UOL Host is a popular hosting provider in Brazil, offering dedicated server hosting with competitive pricing and reliable performance. They provide customizable configurations, fast connectivity, and responsive support services.
Before making a decision, carefully compare the features, performance, support, and pricing of each provider to find the best fit for your specific requirements and budget. Additionally, consider reading reviews from other customers to gauge their experiences with the provider's services.
View More: Brazil Dedicated Server - it4int.com Gmail - [email protected] Skype - it4int
#Brazil dedicated server price#Brazil dedicated server free#brazil dedicated server#dedicated server brazil#best dedicated server in brazil#brazil based dedicated server#cheap dedicated server brazil
0 notes
Text
How To Buy Web Hosting From Hostgator
In the series of post Website Planning and Creation. So far we’ve discussed Buying a Domain Name. The next step to start a website is to buy web hosting. In this post, I go over What is a Web Hosting? Types. How To Buy Web Hosting From Hostgator? Why choose Hostgator as Web Host?
So let’s start with hosting and it’s types
Web Hosting
Web hosting or hosting refers to any service which provides space for websites over the internet. Or which live the website over the internet. Web Host act as a storage place for your website.
Types of Web Hosting
The hosting plan you choose for your website will impact many things — like how fast your site loads and what kind of maintenance you have to do.
There are mainly four types of web hosting:
Shared Hosting
In shared hosting, your website will be store on the same server as multiple other websites. With a shared hosting plan, all domains share the same server resources, such as RAM and CPU. Because all resources are shared, the cost of shared hosting plans is relatively low.
I recommend shared hosting. It is affordable, fast, and meets the needs of any basic website which makes it a perfect plan for beginners.
Virtual Private Server (VPS)
A VPS hosting plan is the ultimate middle ground between a shared server and a dedicated server. It’s ideal for website owners that need more control, but don’t necessarily need a dedicated server.
Dedicated Server Hosting
Dedicated hosting gives website owners the most control over the server that their website is stored on. Because the server is exclusively rented by you and your website is the only one stored on it. Dedicated servers are one of the most expensive web hosting options.
Cloud Hosting
It means many computers working together, running applications using combined computing resources. It’s a hosting solution that works via a network. Cloud hosting is scalable, meaning your site can grow over time, using as many resources as it requires. While the website owner only pays for what they need.
Reasons To Buy Web Hosting From Hostgator
Before we get into the Step by Step guide on How to Buy Web Hosting From Hostgator. I first want to quickly go over reasons Why buying web hosting from Hostgator is an excellent choice.
I personally use Hostgator for this blog and any other sites that I create. I’ve had excellent service and always had a good experience with their technical support team. I highly recommend you choose Hostgator as your hosting provider.
It is the most well-known hosting provider. Hostgator has competitive pricing. You can get Hostgator hosting for as low as Rs 99 per month. Hostgator offers a 45-day money-back guarantee and has a 99.9% uptime guarantee.
How To Buy Web Hosting From Hostgator: Step by Step Guide
The first step to Buy Web Hosting From Hostgator is to visit hostgator.in . The image that is given below will open on your screen.
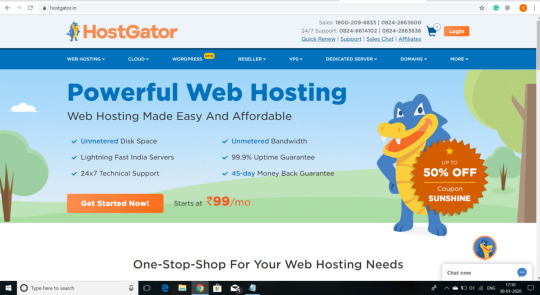
Note that I’m using the Indian version of the site to search for and buy hosting.
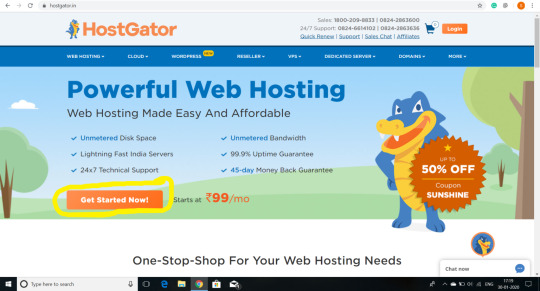
You will see where it says powerful web hosting. Click the orange Get Started Now button to move on to the next step in this How to Buy Web Hosting From Hostgator: Step by Step.
You will now on a page that shows three different plans consisting of the start, hatchling, baby, and business plan.
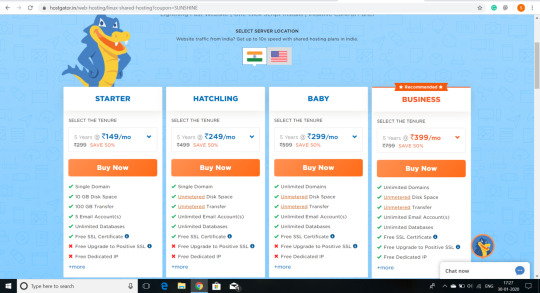
The starter plan is a good plan obviously if you are just starting out.

The hatchling plan is a good plan if you only have one website. You can always upgrade to a different plan later if you need to.
The baby plan is the most popular plan as it allows you to have unlimited websites.
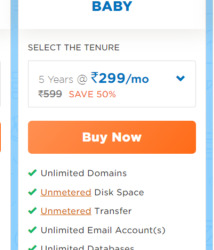
The business plan comes with a free positive SSL certificate, free dedicated IP, free SEO tools, and VOIP phone service.

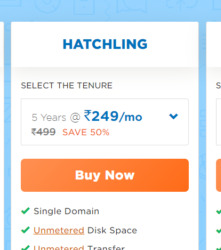
When you decide on the plan, you would like to go with click the orange buy now button to continue with our how to buy hosting from Hostgator guide.
After clicking it will ask you if you already have a domain name for your hosting plan as shown below.
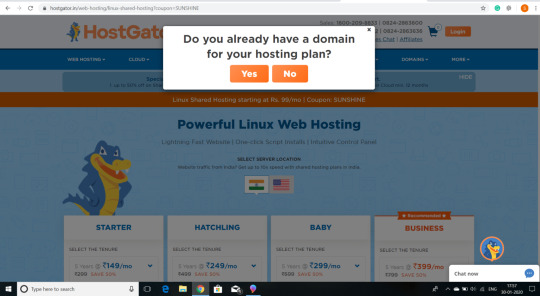
If you own a domain click yes no if not. I would recommend buying domain from different provider due to several reasons. To know these click here Buying A Domain Name.
Write your domain name and click on continue.

After that your order summary will appear then click continue as below.

After this, it will ask you to log in.
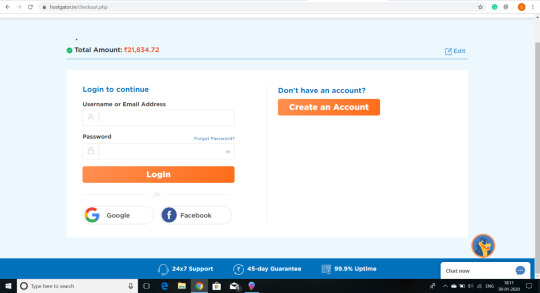
Login with your gmail or facebook whatever suits you.
Billing
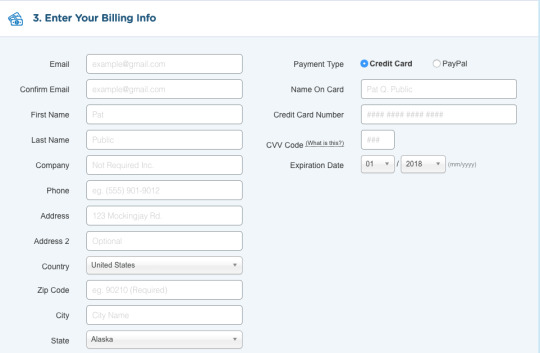
After a few smaller steps it will ask for billing.
When you are happy proceed with billing.
You’ll now be directed to a payment confirmation page, and Hostgator is now setting up your account. This will only take a few seconds to minutes.

At this time Hostgator is also going to email you your Hostgator receipt and your Hostgator CPanel login details. Once you get the login details, click the link in the email to log in to the Hostgator CPanel.
The last thing I want to go over in this How to Buy Web Hosting From Hostgator: Step by Step Guide is an introduction to the Hostgator CPanel. Once you are logged in the Hostgator CPanel will look like this.
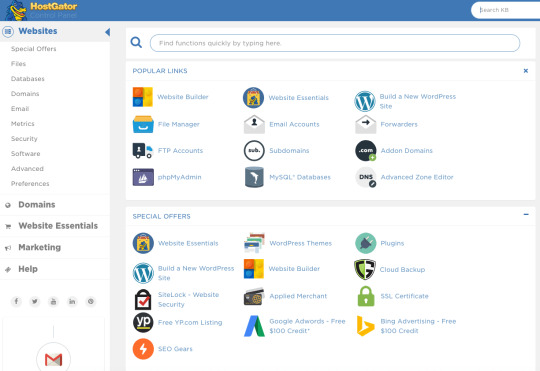
Over on the left side menu click on website essentials and then you’ll click the on Site Builder and CMS. You will see website builder, WordPress, and One-Click Installs.

If you want to use Hostgator’s website builder click on website builder to continue in creating your site. But we’re going to use WordPress, click the WordPress option.

You should now successfully have purchased hosting from Hostgator.
I hope you enjoyed and found this Step by Step Guide on How to Buy Hosting from Hostgator helpful.
2 notes
·
View notes
Text
Inactive Account Policy: Don’t Let New Google Rules Lock You Out of Your Site
Google has announced a new Inactive Account Policy that every business owner needs to understand. From their update:
Starting later this year, if a Google Account has not been used or signed into for at least 2 years, we may delete the account and its contents – including content within Google Workspace (Gmail, Docs, Drive, Meet, Calendar) and Google Photos.
The policy only applies to personal Google Accounts, and will not affect accounts for organizations like schools or businesses.
The new inactive account policy is a good idea, but it may come with some significant hidden risks for your website, domain, security certificates and online presence.
How could the Inactive Account Policy harm my business?
As nearly anyone who has worked at an IT firm, digital agency or cyber security business can tell you, some businesses lose their security certificates, hosting or websites because they do not respond to renewal emails. The problem typically begins with a business owner setting up a website using a personal account as the email address, buying services for several years, then forgetting that those services need to be renewed. This happens more frequently than most business owners realize, and it can be devastating if a site host wipes out a business website, or if a business loses access to its domain.
Think about every piece of collateral with your website on it: business cards, letterhead, advertising, online links. Now imagine that all of it is lost because you failed to renew your web address on time. While many online service providers have built recovery options into their renewal processes, those processes may not work if you do not have access to the email used to register the service. At a minimum, you can expect to spend a lot of time on the phone with the provider attempting to resolve the problem. If you lose your web domain, your business email will stop working. These are not problems to take lightly.
How can I stop a lost email address from shutting down my business?
The first step in protecting your online assets is to know what you pay to access to keep your site online. This will always include the following:
Domain Name: This is the URL of your business, such as https://protectnowllc.com. Domains are not owned; businesses purchase access to them for a set period of time from a domain name registrar, such as GoDaddy or Google Domains. Most businesses opt for 2- or 3-year domain registrations, though you can register a domain for longer or for as little as a year.
Site Hosting: Unless you run your own server, someone provides a service to keep your website online. This could be an all-in-one site builder and hosting provider provider, such as Squarespace; a company that specializes in a particular site platform, such as WP Engine, or companies like SiteGround and HostGator that provide server space and allow you to build your site any way you like.
Security Certificates: Your site should have some sort of SSL certificate. Sites that lack them will not be indexed by search engines and may be blocked by web browsers and smart phones.
Third-Party Services: Many things fall into this category, such as image hosts, data feed providers and some website widgets or modules.
Losing access to your domain is the worst case scenario for any business. Sites and email will no longer function.
Most hosting providers have a grace period for renewal. Your site will go offline and your email may stop working, depending on whether your host provides your email as well as your website. Contacting their customer service and updating your agreement with the provider will typically get your site back online quickly. In the worst case scenario, all of your data and site content could be deleted.
These certificates must be renewed annually. You may find it very difficult to access your website if the security certificate expires, but your email will work.
Only specific functions or parts of your website will stop working if one of these services is interrupted.
Make a list of the services you use and the companies that provide them. At a minimum, the list should include your domain name provider, your email provider, your web host and your security certificate provider. If you have trouble identifying any of these providers, look through old emails or review old bank statements and look for one-time charges for companies that may provide these services. You should keep the list of services and providers in a spreadsheet. Do not include passwords in this spreadsheet, as this creates a security risk.
Once you have services and providers listed, log in to each provider and note the date when your service must be renewed. As you attempt to do this, you may discover that a service was registered with a personal email you can no longer access. This is the time to contact the company directly and update your account information. Do not wait until services go down and you are potentially losing business.
Make sure that the email used for each service is active; it can be a personal email, as long as you use that personal email account at least a few times a month. Preferably, it should be a business email associated with a business owner or a company’s IT department. Remember that the new Google Inactive Account Policy will only apply to personal accounts, not Google Workspace or business accounts.
Add the email used to register each service to your spreadsheet. Check the spreadsheet on a regular basis; if you see a renewal date coming up, be sure to check the email associated with that service, including spam folders. Service providers will typically send renewal notices 60 days, 30 days and 14 days before a service is suspended for nonrenewal.
Following these steps will ensure that you do not suffer any service interruptions. In larger organizations, it is a good idea to task someone with service monitoring and renewal so that notices do not slip through the cracks or get overlooked in spam folders. If you contract IT services or have an in-house IT department, make sure that your service providers are whitelisted so that emails can get through.
Why is Google changing its Inactive Account Policy?
Unused email accounts can be used by cyber criminals to carry out attacks, including fake ad attacks that direct users to malware sites. Cyber criminals may also mine unused accounts for personal contacts that can be used in phishing attacks, which is why it is a good idea to be wary of unexpected contacts from people you have not heard from in a long time. An abandoned account may have been compromised, and you could be talking to a criminal.
By suspending these unused accounts, which may have passwords for sale on the Dark Web, Google eliminates an avenue for cyber crime. This is a welcome step for everyone who is concerned with cyber security. Take inventory of your services and the accounts used to access them, and it will have no impact on your business.
Protect Now offers CSI Protection Certification, cyber security employee training that creates meaningful changes in employee attitudes toward individual and business security. We also help businesses manage their overall cyber security with Virtual CISO services. Contact us online or call us at 1-800-658-8311 for a free consultation.
0 notes
Text
Portable ZOOK Email Backup Wizard It allows you to backup emails from your online email account directly without any hassle. The tool has a user-friendly graphical interface that allows the user to archive emails to a local storage folder. The tool backs up emails from webmail, web server, cloud mail, web host email accounts without any extra effort. Portable ZOOK Email Backup Wizard software allows you to backup 40+ online email services like Gmail, Yahoo, GSuite, Rediffmail, Outlook.com, AOL, Amazon WorkMail, etc. Provides complete web email backup like GoDaddy, HostGator, HostMonster, BlueHost, DreamHost, etc. Users can save backups in technical formats like PST, MBOX, EML, EMLX, MSG, PDF, DOC. XP/Vista/7/8/8.1/10English28.57MB
0 notes
Text
O site jb pecas é confiável? jbpecas.com
Este site é falso Não tem CNPJ
ERRO NO NOME: não tem "br"
ENDEREÇO: pertence à empresa original que teve os dados clonados
TELEFONE FIXO: não tem / usa celular (62) 99937-3062 E-MAIL: 99% SEMPRE “CONTATO / SAC” ou GMAIL [email protected] CNPJ: não tem Plataforma: HOSTGATOR SELO(S) DE SEGURANÇA: não tem REDES SOCIAIS: não tem
(62) 99937-3062
Av. Berlim 597, Parque Industrial Joao Braz - Goiânia/GO, 74483-110
0 notes
Text
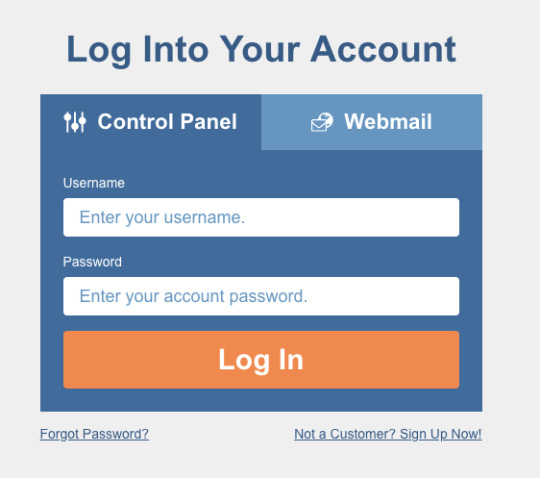
How to create a business email address
and use it through gmail for free so instead
of using yourname gmail.com
you'll be able to use your name at yourwebsite.com
you how to hook it up to your gmail account so that you can both send and receive emails
through this new professional email address but have the comfort and familiarity of the gmail platform
why would you want a professional email
Number #1
Free emails look cheap a professional
email address shows that you're serious about yourself and your business
Number #2
Free email accounts are more at risk for
hacking
Number #3
professional emails help build your overall brand
Step #1
Step number one do you have a website in order to get a professional email like your name at yourwebsite.com you need to own your own domain name like yourwebsite.com
so if you don't go and create website with
hostgator so once you have a domain name and hosting we can move on to next step
Step #2
Step number two which is to add your
custom email account let's go ahead and go over to hostgator.com and sign in
from here what we're going to do is select the hosting package that we want to create this professional email
you can use 10minutewebsite.com to make a professional email here you can create email account
Step #3
Step number three which is to set up your mail client
setting up a mail client means that we will link
up this new professional email address to
your gmail account so that way you can send and receive emails through your gmail account but under your new custom professional name so to do this we have to go over to gmail and sign in
put in information right so now we're going to go ahead and hook up the new email that we created to our gmail
whenever you've done that just click on add account and then it's going to ask us if we want to be able to send mail as this new
professional email which we do and it automatically says yes so you can just leave that checked and click on to create an alias
and an alias means that you can add
your actual name to this new professional email address so that whenever it shows up in somebody's inbox it will not only show your professional email address but also show a personal touch of your first and last name
next to it and it doesn't have to just be your first and last name
Step #4
Step number four which is to verify your new email so in order to verify our new email what
we're going to do is just go back over to gmail
and then just scroll down to check mail
from other accounts which we went to
earlier and then just click on check mail now
and as you can see it says one mail fetched and the reason for this is because whenever you set up a new email with gmail gmail knows that this account is not getting a lot of emails right away because it's brand new
so it's not going to fetch mail as often
but as you start to get more emails through this account gmail will fetch them almost instantly but for now you can go in and manually check it by hitting the check mail
Number #5
Step number five is is to send yourself a test email so we want to make sure this new email is working
0 notes
Text
Comment améliorer la délivrabilité d'un email, paramétrer SPF, DKIM et DMARC ?

Afin d’éviter que des personnes malveillantes usurpent votre identité en utilisant le même nom de domaine, il existe des solutions. C’est là que les protocoles d’authentification SPF, DKIM et DMARC entrent en jeu. De la définition de ces termes jusqu’aux étapes à suivre pour définir votre email comme expéditeur légitime. Plan - Définition de SPF, DKIM et DMARC - Pourquoi utiliser les protocoles SPF, DKIM et DMARC ? - Limites des protocoles SPF et DKIM - Authentifiez vos domaines avec SPF, DKIM et DMARC - Configuration d’un enregistrement DNS pour l’authentification SPF - Configuration d’un enregistrement DNS pour l’authentification DKIM - Configuration d’un enregistrement DNS pour l’authentification DMARC Voir la fiche service : PARAMETRER EMAIL AUTHENTIFICATION SPF, DKIM, DMARC Les définitions de SPF, DKIM et DMARC La Sender Policy Framework, ou SPF, est une norme d’authentification permettant de faire le lien entre un nom de domaine et une adresse email. Elle consiste à définir le ou les expéditeur(s) autorisé(s) à envoyer des emails avec un domaine donné. Elle permet ainsi aux clients de messagerie (Gmail, Outlook…) de vérifier que l’email entrant d’un domaine vient d’un hôte autorisé par l’administrateur de ce domaine. Le DomainKeys Identified Mail, ou DKIM, est un protocole d’authentification permettant de faire le lien entre un nom de domaine et un message. Le protocole permet de signer votre email avec votre nom de domaine. L’objectif du protocole DKIM n’est pas uniquement de prouver que le nom de domaine n’a pas été usurpé, mais aussi que le message n’a pas été altéré durant sa transmission. Le Domain-based Message Authentication, Reporting and Conformance, ou DMARC, est une norme d’authentification complémentaire à SPF et DKIM destinée à lutter plus efficacement contre le phishing et autres pratiques de spamming. Elle permet aux détenteurs de domaines d’indiquer aux FAI (Fournisseurs d’Accès à Internet) et clients de messagerie quelle conduite tenir lorsqu’un message signé de leur domaine n’est pas formellement identifié par une norme SPF ou DKIM. Pourquoi utiliser les protocoles SPF, DKIM et DMARC ? Il s’agit des principaux protocoles permettant de vérifier l’identité des expéditeurs. C’est un des moyens les plus efficaces pour empêcher les phishers et autres fraudeurs de se faire passer pour un expéditeur légitime dont ils usurperaient l’identité en utilisant le même nom de domaine. Il existe un autre avantage, et non des moindres. En effet, la mise en place de ces protocoles permet d’améliorer la délivrabilité des emails envoyés, puisque vous serez mieux identifié(e) par les FAI (Fournisseurs d’Accès à Internet) et clients de messagerie de vos destinataires. Vous optimisez alors vos chances que vos emails arrivent bien dans la boîte de réception de vos destinataires et non dans le dossier “spams” ou “courriers indésirables”. Ces protocoles sont devenus des normes de l’envoi d’email. Un message expédié sans signature SPF et/ou DKIM est vu avec suspicion par les différents outils d’analyse de l’email. Limites des protocoles SPF et DKIM SPF a ses limites. Par exemple, si l’email est transféré, la vérification peut ne pas avoir lieu, puisque l’adresse émettant le message transféré ne sera pas forcément comprise dans la liste des adresses validées par SPF. Il faut donc être le plus exhaustif possible lors de l’ajout de nouvelles adresses à votre enregistrement SPF. En tant qu’expéditeur, la signature DKIM ne vous empêchera pas d’être considéré comme spammeur si vous n’appliquez pas les bonnes pratiques emailing. Il faudra donc veiller à respecter ces bonnes pratiques lors de la conception du contenu de vos emails : faire attention au ratio texte/image, éviter d’utiliser les mots repérés par les filtres anti-spam comme étant à risque, etc. Autre point, SPF et DKIM ne spécifient pas l’action à appliquer en cas d’échec de la vérification. C’est là qu’intervient le protocole DMARC en indiquant au serveur du destinataire comment il doit agir si les processus d’authentification de l’expéditeur échouent. Authentifiez vos domaines avec SPF, DKIM et DMARC Pour configurer les paramètres d’authentification SPF, DKIM et DMARC de votre domaine, il vous faut accéder aux enregistrements DNS de votre compte d’hébergement (AWS, Google, OVH, Ionos, HostGator, etc.). Si vous ne les trouvez pas ou n’y avez pas accès, votre fournisseur d’hébergement peut vous aider. Configuration d’un enregistrement DNS pour l’authentification SPF Deux choses sont à retenir à propos des enregistrements SPF : Un enregistrement SPF est un enregistrement de type TXT – à ne pas confondre avec le type SPF (utilisable, mais déconseillé). Il ne doit y avoir qu’un seul enregistrement SPF par domaine. Si vous avez plusieurs enregistrements DNS SPF, les opérateurs de messagerie ne sauront pas lequel utiliser, ce qui pourrait causer des problèmes d’authentification. Consultez vos enregistrements DNS depuis votre compte d’hébergement : vous ne voyez aucun enregistrement SPF ? Alors créez-en un. Sinon, vous modifierez l’enregistrement SPF existant. Configuration d’un enregistrement DNS pour l’authentification DKIM Pour bénéficier de l’authentification DKIM, vous allez devoir créer un nouvel enregistrement DKIM. Contrairement à l’authentification SPF, votre domaine peut comprendre plusieurs enregistrements DNS DKIM sans que cela ne pose problème. Depuis votre compte d’hébergement, créez un nouvel enregistrement DNS de type TXT. Configuration d’un enregistrement DNS pour l’authentification DMARC Avant de vous lancer dans l’implémentation de DMARC, soyez bien sûr(e) que SPF et DKIM soient correctement implémentés. Comme indiqué précédemment, DMARC définit la politique à appliquer en cas d’échec de SPF et DKIM, et ce via un enregistrement DNS dédié. Cela requiert une correspondance entre les noms de domaine SPF et DKIM et l’en-tête « From ». DMARC permet ensuite de choisir parmi 3 politiques à appliquer en cas de non-correspondance : None : aucune action, appliquer la politique locale. Quarantine : marquage comme spam. Reject : rejet du message. A noter pour SPF, DKIM et DMARC : Selon votre hébergeur, vous devrez peut-être insérer des guillemets autour des valeurs TXT. Si vous ne savez pas s’il faut ajouter des guillemets, vous pouvez contacter votre fournisseur d’hébergement. Pour en savoir plus, consultez nous. Voir la fiche service : PARAMETRER EMAIL AUTHENTIFICATION SPF, DKIM, DMARC Read the full article
0 notes
Text
Which is the reliable and cheap web hosting company in India?
Hey guys,
I am going to tell some reliable and cheap web hosting company in India
Hostinger
About Hostinger: Hostinger is one of the best picks among the top 10 hosting companies in India. Around 15,000 new users are estimated to be signing up for Hostinger every day and more than 29 million active customers give a brief idea of Hostinger’s hosting service quality. It consists of premium features to increase the reliability and speed of your website.
Pricing: Considering the Shared hosting service, for instance, Hostinger is one of the best web hosting in India based users can expect to depend on. Moreover, the lowest shared hosting package comes for ₹59/month, accommodating a single website, an email account, a free SSL certificate, 100 GB bandwidth, and more.
Uptime: Keeping your website online throughout the day, Hostinger ensures most of the Uptime. A good looking 99.50% is recorded for an average run. Above all, despite occasional downtime for updates and maintenance, hostinger india makes sure that you don’t lose business.
Features: It’s great to see that even the lowest package of Hostinger is packed with just enough features to start a website smoothly. It comes with 1 free domain registration, email account, 100 GB of limited bandwidth, 1x allocated resources, and a free SSL certificate to secure your website from unwanted threats like hacking and online fishing.
<a href="https://codebuggy.com/">All India Hindi News Portal Regional</a> <a href="https://codingbells.com/">codingbells</a> <a href="http://photoeduc.in/">All India News Portal Regional</a> <a href="https://techyedupro.com/">Videography Photography Information </a> <a href="https://medium.com/@harshalyallewar007/in-your-salary-can-you-buy-an-apple-iphone-the-latest-model-5c6a5f6f8abc">Videography Photography Information </a>
Pros
30-day money back guarantee
Unlimited bandwidth and storage
Free domain name
Backups for free
Reliable uptime and fast server
Free Bitninja security & SSL certificate
Single-click WordPress installer
Bluehost
Bluehost is My No. 1 choice for the cheapest web hosting service. The most popular brand is with over 2 million websites installed worldwide. This is recommended web hosting by WordPress with one-click WordPress install, and 24/7 customer support.
If you are just starting, then your cheap web hosting search ends here. You can start with Blue host as it is the best for website beginners. Their paid plans start with 199 INR (Discounted Price) and also provide a 30 days money-back guarantee.
Bluehost Features:
Free SSL certificate
Free domain for 1 year
Beginner Friendly and Easy to use Interface
99.99% uptime, which is the best in the industry.
Average load time of half-second
Best for bloggers as well as large websites
Affordable price plan
High-Speed Servers
HostGator
About Hostgator: Hostgator is one of the oldest web host India based clients may rely on. They are widely appreciated for their Cloud-based hosting environment while keeping the costing affordable for everyone. Adding to that, reliability, speed, and excellent support also make the hosting giant stand out of the crowd.
Pricing: Starting at just ₹99/month for a shared hosting plan, newly developed sites may go for a bigger package according to their website’s needs. The introductory price may look cheap and covers all the necessary features to start a complete website, but for extra stuff like Gmail access, data backups, Sitelock monitoring, SEO tools, and others the prices may don’t look good enough. You are advised to look out for these aspects while checking out.
Uptime: First, Hostgator has been consistently maintaining 99.98% uptime for months. The best part is the fact that Hostgator’s uptime guarantee comes with free one-month credit to your hosting account if they fail to maintain a minimum of 99.90% uptime.
With that being said, all the pre-planned maintenance and unpredictable hacking attacks are not included in the terms. Most importantly, any sort of other issues can be counted into the said guarantee and customers may claim for their credit within 30 days through a support ticket.
Features: Guaranteed 99.9% uptime, 24×7 technical support, and 45-day money-back guarantee would be our first priority if we are going for Hostgator web host review. For instance, with the basic shared hosting plan, Hostgator gives you a single free domain, limited 10 GB of disk space, 100 GB of data transfer, free 5 email accounts, free SSL certificate, and unlimited database.
Pros
100% Uptime
Reliable Technical Support
Free Migration, SSL, Backup
45 Days Money-Back Guarantee
Free Domain Name
Free Cpanel & Website Migration
User-Friendly Functionalities
Unmetered Space And Bandwidth
thanks to the readers for more relevant detail visit my answer
166 views
Add CommentPromoted by Hostinger.inWhich are the best and cheapest hosting for WordPress with good resources in India?
Darius Grigorjevas
, Head of Customer Success at Hostinger.com
Updated April 1, 2020
There are quite a few options for cheap and good web hosting providers for WordPress in India. The question is: how to choose the best one? To do that, we have to put a few factors into consideration. Now, without further ado, let’s start. When choosing a host, look for the one that has an(Continue reading in feed)
Aseem Chandna
, Blogger and Online Entrepreneur
Answered February 11
When it comes to Web Hosting, you should look out for many parameters before deciding. There are far too many parameters that need to be kept in mind at the time of selecting the web host.
Different hosting companies offer different options, features, and functionalities. So, what could be the best option for you might not work for others.
Your web host needs to be highly reliable, supportive, and cost-effective.
Since the purpose of this post is to help you make an informed decision, I'm not gonna confuse you by mentioning 10s of web hosting service providers. As mentioned above, I have done all the hard work, researched 10s of web hosting companies, read customer reviews, and applied due diligence while arriving at my final 5 best web hosting companies in the world.
I have compiled a list of Best Web Hosts for 2021, that includes a detailed review of popular Web hosting companies for all kind of users, including newbies, startups, enterprises, and eCommerce companies.
I am assuming that you are starting off with a new blog and would need limited resources. So, I will suggest DreamHost.
Dreamhost is one of the most trusted web hosting companies in the world which has been in business since 1996. Dreamhost has been PCMag's "Editors' Choice" Winner 5 Years In a Row. Over 1.5 million websites trust Dreamhost the world over.
Dreamhost is officially recommended by WordPress for exceptional web hosting services.
Here’re the main features that inspired me to keep Dreamhost on my list of 5 best web hosting services in 2021:
Free SSL Certificate
100% Uptime Guarantee
Unlimited Traffic
Unmetered Bandwidth
Fast SSD Storage
WordPress Pre-installed
Possibility to add Email as low as $1.67/mo
24/7 Support
NEW: WP Website Builder
NEW: Free Automated WordPress Migration
Dreamhost is offering a limited period discount of 67%.
Discounted prices start at just $2.49/mo.
I highly recommend Dreamhost simply because people greatly love Dreamhost - it has an unprecedented high rating of 4.7 (out of 5) on Trustpilot!
Check out the full details about the Best Web Hosting Services In 2021 (including Dreamhost, Bluehost, Hostgator, and Fastcomet), prices, and discount offers by clicking on the link in the footnotes below. [1]
I have also included a review of MilesWeb (an Indian Company) that is creating new benchmarks in Web Hosting.
Hope this helps. Please feel free to get in touch if you need further help.
Best wishes! 👍
Footnotes
[1]
Best Web Hosting Services In 2021
99 views
Add Comment
Prahlad
, Blogger
Answered February 1
As we Know in India most of the Companies is providing the cheap web hosting, but it is most important for one to choose the perfect best Web hosting for their Website.
As we all Knows that in India every person is Searching for Cheap Best Web hosting, but they even do not know that cheap Web hosting is not providing the best and Reliable Web Hosting.
Before Choosing any web Hosting Know, Does your Web Hosting is Providing Below Features
Web Server: does your Hosting provider is using the Best web server, Let Me tell you what is Web Server- Where your Content is Stored and Shared on WWW.
Server la
… (more)12
Add CommentSponsored by MilesWebHost everything from a blog to dynamic websites.Get 24/7 support, 30-day money back guarantee and a high-speed server. Pick your plan & get started!Sign UpRelated QuestionsMore Answers Below
What is the most cheapest web hosting service in india for unlimited websites?
Which is the best web hosting in India?
Which is the best and reasonable web hosting service provider in India?
Anonymous
Answered August 5, 2019
Originally Answered:
which company provide Cheap web hosting in India?
cheap web hosting in India are those who really give better service, best way to ask this question is cheap and best web hosting in India, i had use lots of hosting big brand to small company but i feel one big difference is big brands costumer support is not that much effective infect they are not understanding Clint problem.
i have fix some scale to understand which company is best for hosting
Recurring price is same as normal price. This very important thing their are lot of company are giving you lot and lots offer but they indirectly try to cheat you. In the name of recurring price they cha
… (more)1
Add Comment
Web Tech Preneur
, Web Hosting Adviser & Reviewer
Updated February 18, 2020
I’m a Blogger and in my Blogging carrier, I’ve experienced so many web hosting companies.
So after using many hosting here is my best suggestion for you.
Here below are my 3 suggestions:
#1. NameCheap Hosting
It is a cheap and best hosting in speed or support.
here you can get web hosting at just Rs 91/month where you can host up to 3 sites or blogs.
here you also get a Free SSL and Unlimited Bandwidth.
Get Namecheap Discount Coupon
#2. GoDaddy Hosting
GoDaddy is Best and Cheap Hosting for Indians.
Here you get just Rs 99/months + Free Domain name for 12 months. So for Indians, it is really a good optio
… (more)1
Add Comment
Stella Joseph
, Blogger
Answered April 7, 2020
Originally Answered:
What are the best affordable Indian web hosting companies?
Web hosting has become prevalent as businesses want to connect with customers who have access to smartphones and other devices. A website conveys information about the products and services of the enterprises while customers also search on the internet to find the relevant products or services. Besides this, a website can also become the interactive platform with live chat-bot and online customer service. It provides contact information of the businesses. To create a web presence, the enterprises need to hire web
0 notes
Video
youtube
Como Redirecionar Seus E-mails da Hostgator para o Gmail do Google
0 notes
Photo

Where Hostgator Mx Records In Gmail https://ift.tt/2oK6WaR
0 notes
Text
How to make easy money - How to make easy money online actually within minutes with this crazy method!
Watch me show you live on video just how I make $10 plus in under 5 minutes!!! - Check out the video below!

How to make easy money without having to learn a number of special skills will be great but the something of its that very few individuals get to achieve, which then leads some people to believe that its not feasible making cash or perhaps a regular income on the web, But thats not the case and your going to find out by the tail end of the article How to make easy money online anytime you want...So lets get it!
How to make easy money and the 2 ideas that will help save alot of time
1: organization - always stay organized this will save you alot of time and headach in the long run, keeping things like spreadsheets of your ingoing&outgoings and finances will help you not only manage your money and investments wisely and will help you save both time and money once managed right.
Two: research - Always research anything your interested in or thinking to get interested in as a method to make money online, as proper investigation will assure that you know where and how to print on the best methods and information to get you generating cash effectivly and wisely.
Things needed to find out How to make easy money online
ok you planning to require a few things when starting the journey of yours to generating an income online, these items will help you remain organized and to properly act on the info or perhaps methods you discovered to make money online.
: an original email account - you can creat one free of charge on gmail or perhaps outlook any one will get the job done, this is to make sure your online stuff doesnt get mixed up with random messages from your personal email address, have to seperate emails keeps everything organized.
: a website(optional) - in case your truly trying to go the distance and make money online or perhaps start a web based business then you'll most likely need a website and also hosting, which you can get from namecheap or perhaps hostgator.
: a little free time - making cash on the web or even learing How to make easy money online is a procedure and can atleast require a couple of hours a week to invest your time in analysis and research so its crucial you've some leisure time to set aside during the week.
: patience - you are going to need to be affected person when trying to earn money online as it will take some time and in many instances cash before you begin making any real money on the internet and be in a position to quit the line of business of yours, But there is two old saying that apply here and that is..."Rome wast constructed in a day"...and..."it takes cash making money"...and both of these're real.
: Self belief - yep, you are going to need to belive in yourself when learing How to make easy money online as like earlier stated, it can take time before you learn what you have before going ahead and putting things into play and quite often this wait can be demoralizing and sometimes those around you might not belive in what your completing this task you need to be your very own cheerleader and think positive as that's a vital point to pulling in money online.
Once you've all the above sorted out your practically good to go with starting your money making journey!
Things to remember when trying to see How to make easy money
: do not give up.
: keep focused.
: stay organized.
: think positive
Watch me show you live on video just how I make $10 plus in under 5 minutes!!! - Check out the video below!
Extra Tags
get money fast quick ways to make money how to make easy money ways to get money fast quick ways to get money quick ways to earn money invest money online and earn daily how to invest and make money daily
0 notes
Text
How to Change Blogger To Custom Domain

In this article I’m Telling how you can change blogger to custom domain. Visitors mostly write short address (url) it saves his time & less typing. If you have blogger then your blogger address (url) is very long like and you will change your blogger address into custom domain name likeThrough custom domain name your url will be short and easy to learn. Few years ago, blogger was very famous. So, mostly people user .blogspot but now only 5% use .blogspot. Everyone change blogger to custom domain like 123movies. Custom domain looks nice and understandable also. Through custom domain we can remove .blogspot from url. Now read step by step to change blogger to custom domain.
1. Buy Domain Name

First of all you have to buy a domain from any of website like godaddy,namecheap,hostgator etc.
2. Type New URL in Blog

Sign in to your blog through Gmail. After opening your blog, Click on “Settings > Basic”. Under publishing your blog address is mentioned. Now click on “+Setup a third-party URL for your blog”.
In Blog Address write your new url without .blogspot. Like,Replay Poker. After that click on “Save”.
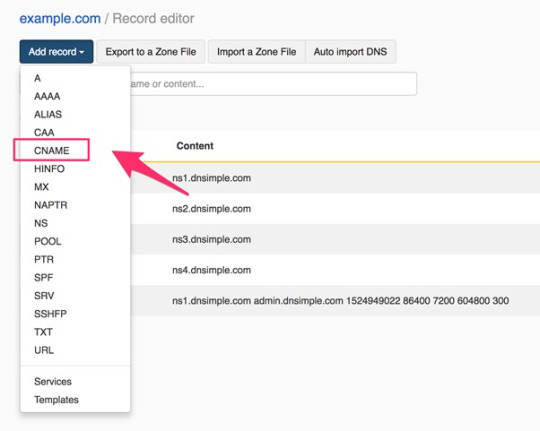
The system will generate Error and provide CNAME details. CNAME full form is Canonical Name. It means domain name uses another domain name IP address. Every domain has unique IP address. Here, CNAME is required because we are transferring our old domain name to new domain name.
The system generated 2 CNAME’S. On the first column, Name mentioned and on second column, Destination mentioned. CNAME is unique for every user. Through this CNAME your .blogspot domain will transfer to your new domain name.
3. Sign in to Domain Registration Website

In the previous step you generated unique CNAME. Now you have to copy this CNAME to your new domain name settings. Firstly, sign in to Domain Registration Website (like GoDaddy, EasyDNS etc) where you purchased domain (if you have not purchased domain then buy now).
After Sign in to Domain Registration Website your Product page will open automatically. Now, click on “Manage” which is opposite to “Domains”.
“My Domains” page will open. In this page, “DNS” drop down button place in menu bar. Click on “DNS” then click on second option “Manage Zones”.
After click on “Manage Zones”. “DNS Management” page will open. In this page, write your “Domain Name” like digitalmarketingtutorials.com and Click on Search. Don’t include “www” in domain name. If you include then error will display. I will sort out this issue in coming steps
In “DNS Management” page, Records, Name servers & additional features mention. In “Records”, you can see four CNAME’S.
Now, you can easily edit and add CNAME’S. In records, you edit third CNAME and add one new CNAME.
Click on pencil sign of third CNAME. Through this pencil sign you can edit CNAME. We have to edit third CNAME because www is mentioned in this. If you remember, in blog 2 CNAME generated. One CNAME is www.
4. Add 1st CNAME
Now go to blog where CNAME generated. First CNAME contains name (www) and destination. Copy destination and paste to domain registration website where you click on edit third CNAME. Don’t forget to remove @ where you paste CNAME destination. After that, Click on Save.
5. Add 2nd CNAME
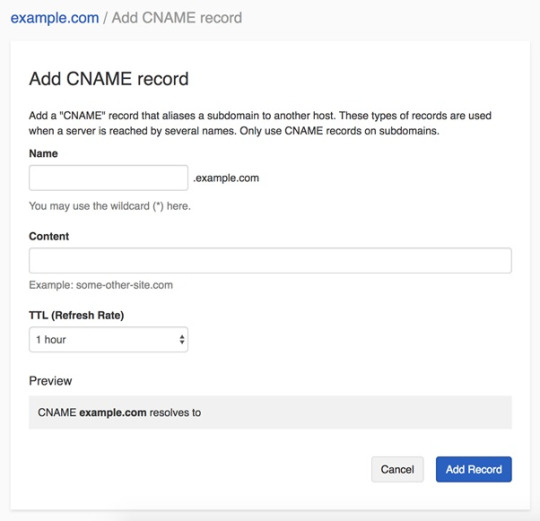
We generated two CNAME in blogger. One CNAME is saved. Now we have to add another CNAME. Go to Domain Registration Website, Click on Add (right side corner).
Move to Domain manager
After click on add, select Type – CNAME.
Now go to blogger copy 2nd CNAME details like Name and Point To and paste into domain registration website. Click Save. See below screen shots.
Editing in Domain Manager
Now go to blog and click on Save. Through all these steps Error removed.
Now you can check your both url available in blog like If user searches for .blogspot then automatically your .com website open. This is known as redirect of url.
Reach to blogger nameservers
After 2-3 minutes your domain redirects .blogspot to .com. Now you open your .com url.
Change blogger nameservers
NOTE: If any visitor opens your website without “www” like then your website shows an error page. See below screen shot.
To sort out www issue. Again go to Blogger -> Settings -> Basic -> Publishing. Click on Edit.
Change Blogger To Custom Domain
Now, click right mark on “Redirect to www.xyz.com”. Click on Save.
Go to Domain Registration Website (Godaddy). Click on Add. Now add 4 ANAME’S.
216.239.32.21
216.239.34.21
216.239.36.21
216.239.38.21
the reversing process work for Change Custom Domain To Blogger
Example,
Change Blogger To Custom Domain
After adding 4 ANAME’S. Your website will open without www.
0 notes
Text
O site corujiinha pecas é confiável? corujiinhapecas.com.br
Este site é falso Não tem CNPJ
PROPRIETÁRIO: Ladrão filho de uma p.u.t.h.a. de Ribeirão Preto
ERRO NO NOME: dois "i"
ENDEREÇO: pertence à empresa original que teve os dados clonados
TELEFONE FIXO: não tem / usa celular DDD 37: 37 99929-9034 E-MAIL: 99% SEMPRE “CONTATO / SAC” ou GMAIL [email protected] CNPJ: não tem Plataforma: HOSTGATOR SELO(S) DE SEGURANÇA: não tem REDES SOCIAIS: não tem / ícones falsos
0 notes
Video
youtube
How to Create a FREE Professional Email in Hostgator & Connect with Gmail
Learn how to easily setup an professional and free domain email in Hostgator & connect it to Gmail. You'll be able to fully manage all your emails in ONE place! Send and receive.
0 notes