#how to disable cache completely in for specific website
Explore tagged Tumblr posts
Visit Tumblr Blog
Explore Tumblr blogs with no restrictions, modern design and the best experience.
Last Seen Tumblr Blogs


Fun Fact
Mobile Tumblr US users spend an average of 4.04 minutes per session on the app.
Text
Page Optimization Best Practices: A Blueprint for Online Growth
Page optimization is an essential system in virtual advertising and net development that ensures websites are person-friendly, functional, and aligned with seek engine tips. It encompasses quite a few techniques and practices aimed at improving a website's performance, visibility, and general user revel in (UX). By optimizing a page, companies and content creators can achieve better search engine ratings, force organic visitors, and ultimately enhance conversion costs. This complete manual explores the facets of page optimization, from its technical factors to consumer-centered techniques.

On-Page Optimization
The Importance of Page Optimization
In the state-of-the-art competitive digital landscape, merely having an internet site is inadequate. Users anticipate rapid-loading, cellular-friendly, and easily navigable pages. Moreover, serps like Google prioritize web sites that supply value through optimized overall performance. Here’s why page optimization is essential:
Enhanced User Experience: Optimized pages load quickly, are visually appealing and provide intuitive navigation. This maintains users engaged and decreases bounce costs.
Higher Search Engine Rankings: Search engines reward optimized pages with better ratings, growing visibility, and natural reach.
Increased Conversions: A properly optimized web page encourages customers to take desired movements, including creating a purchase, signing up for a publication, or downloading content.
Better Accessibility: Optimization guarantees your content is on the market to all customers, such as people with disabilities, through features like alt textual content and proper structure.
Cost Efficiency: Pages optimized for speed and overall performance lessen server load and bandwidth utilization, reducing hosting expenses.
Key Elements of Page Optimization
Page optimization is multi-faceted, involving each technical and content-associated components. Below, we delve into its middle elements:
Page Speed Optimization
Page speed refers to how quickly a webpage masses its content. It's a crucial rating issue for search engines like Google and Yahoo and significantly affects consumer retention. A postponement of even a 2nd can bring about massive drops in personal engagement and conversions.
Minimize HTTP Requests: Reduce the number of factors like photographs, scripts, and CSS documents.
Compress Images: Use equipment like TinyPNG or ImageOptim to lessen image sizes without compromising quality.
Enable Browser Caching: Cache static files so returning site visitors don’t need to reload all factors.
Use a Content Delivery Network (CDN): Distribute content across more than one server to reduce latency.
Optimize Code: Minify CSS, JavaScript, and HTML to put off unnecessary characters.
Mobile-Friendliness
With over half of internet traffic coming from cellular gadgets, ensuring a web page is cell-pleasant is non-negotiable.
Responsive Design: Use CSS frameworks like Bootstrap to ensure the page adapts to specific screen sizes.
Viewport Settings: Define the viewport for your HTML to govern how your website is displayed on cell devices.
Clickable Elements: Ensure buttons and hyperlinks are properly sized and spaced for touchscreens.
Content Optimization
Content is at the heart of any website. Optimizing content for relevance, readability, and engagement is crucial.
Keyword Research: Identify and use goal key phrases naturally in your content.
Structured Data: Use schema markup to help serps recognize your content material.
Readability: Use brief paragraphs, subheadings, and bullet points to make content material scannable.
Engaging Visuals: Incorporate great images, movies, and infographics to complement textual content.
On-page search engine marketing
On-page search engine marketing entails optimizing character internet pages to rank better in seek engine results.
Title Tags: Create compelling and keyword-rich titles within 50-60 characters.
Meta Descriptions: Write concise descriptions that summarize the page content material and consist of target keywords.
Header Tags (H1, H2, and so forth.): Use headers to shape content material logically and improve readability.
Internal Linking: Link to different applicable pages in your website to enhance navigation and search engine optimization.
Technical Optimization
Technical optimization makes a specialty of backend upgrades to beautify overall performance and seek engine crawlability.
Robots.Txt File: Guide engines like Google on which pages to crawl or ignore.
Canonical Tags: Avoid duplicate content material problems by specifying the favored version of a website.
SSL Certificate: Secure your website online with HTTPS to reinforce consideration and ratings.
404 Error Pages: Create consumer-friendly error pages to guide users to lower back to practical parts of your website online.
Tools for Page Optimization
Several tools can simplify and streamline the optimization manner:
Google PageSpeed Insights: Analyzes web page speed and affords actionable guidelines.
GTmetrix: Offers insights into website performance and areas for development.
Ahrefs/Semrush: Helps with keyword studies, content optimization, and search engine marketing monitoring.
Hotjar: Tracks user behavior via heatmaps and session recordings.
Strategies for Effective Page Optimization
To reap meaningful effects, you want a well-rounded strategy. Here’s a step-by-step approach:
Conduct an Audit
Before enforcing modifications, conduct a comprehensive audit to identify existing troubles. Tools like Screaming Frog or Google Analytics can reveal overall performance bottlenecks, broken hyperlinks, and content gaps.
Prioritize User Intent
Understand your target market's wishes and design pages that cope with them. Whether users are seeking data, products, or services, make certain your content aligns with their intent.
Focus on Core Web Vitals
Google’s Core Web Vitals — Largest Contentful Paint (LCP), First Input Delay (FID), and Cumulative Layout Shift (CLS) — are crucial for web page optimization. Aim to meet their benchmarks for stepped forward user revel in and scores.
Test and Iterate
Optimization is an ongoing system. Use A/B checking out to experiment with web page layouts, calls-to-movement (CTAs), and different elements. Monitor overall performance and refine based on results.
Keep Up with Trends
The digital landscape evolves swiftly. Stay knowledgeable about updates to look engine algorithms, layout developments, and emerging technologies.
Common Challenges and Solutions
While web page optimization gives huge advantages, it also affords challenges:
Balancing Speed and Functionality: Advanced capabilities like animations can sluggish down your website online. Use light-weight libraries and green coding to strike stability.
Content Overload: Too a whole lot of content material can crush users. Focus on turning in concise, cost-driven information.
Managing Multiple Platforms: Ensuring steady overall performance across desktop, cell, and drugs requires thorough testing and responsive design.
The Future of Page Optimization
As technology advances, web page optimization will keep evolving. Emerging tendencies like voice seek, AI-pushed personalization, and augmented truth (AR) integration will redefine consumer expectations. Websites will want to leverage these improvements at the same time as adhering to foundational optimization ideas.
Additionally, the rise of privacy policies emphasizes the want for transparent facts practices. Optimized pages will not only perform nicely but additionally build acceptance as true through secure and ethical dealing with of personal records.
2 notes
·
View notes
Text
How to Troubleshoot Issues with TellCulvers Survey Website?
The TellCulvers survey website offers a convenient way for customers to share feedback about their dining experience at Culver’s. By participating, customers not only help the brand improve but can also receive rewards like free menu items or discounts. However, as with any online platform, users may occasionally face technical issues when trying to complete the survey. In this guide, we’ll walk you through common problems encountered on the TellCulvers survey website and offer detailed troubleshooting tips.
Common Issues with TellCulvers Survey Website
Before diving into solutions, it’s helpful to identify the typical problems users experience when visiting tellculvers.com/survey. These include:
Website Not Loading Some users report that the site doesn’t load or displays an error message.
Survey Code Issues Problems with entering the survey code printed on your receipt are common.
Browser Compatibility Problems Certain browsers may not support the survey site’s functionality.
Slow Website Performance The site may load slowly due to high traffic or connectivity problems.
Errors During Submission Users might encounter issues when submitting their responses, often leading to frustration.
Mobile Device Incompatibility Some users find it challenging to access the survey via their smartphones or tablets.
Expired Survey Link or Code Trying to use an outdated receipt or survey link can lead to errors.
How to Troubleshoot TellCulvers Survey Website Issues
1. Check Your Internet Connection
A stable internet connection is essential for accessing tellculvers.com/survey. If the website doesn’t load:
Ensure your device is connected to Wi-Fi or a cellular network.
Test your connection by visiting other websites.
Restart your router or modem if the issue persists.
2. Verify the Website URL
It’s crucial to type the correct web address. Enter tellculvers.com/survey directly into your browser’s address bar. Avoid clicking on links from unverified sources, as these may lead to phishing sites.
3. Use a Compatible Browser
The TellCulvers website works best with updated browsers. Try the following:
Use popular browsers like Google Chrome, Mozilla Firefox, Safari, or Microsoft Edge.
Clear your browser’s cache and cookies to remove temporary files that may interfere with site performance.
Update your browser to the latest version for optimal compatibility.
4. Resolve Survey Code Issues
The survey code is a critical component for accessing the feedback form. If you encounter problems:
Double-check the code entered. Ensure there are no typos or spaces.
Ensure the receipt is still valid. The survey code typically expires after a specific number of days.
If the code is illegible, contact Culver’s customer service for assistance.
5. Troubleshoot Submission Errors
Encountering issues while submitting your responses can be frustrating. Here’s how to resolve this:
Ensure all required fields in the survey are completed. Missing answers often cause submission errors.
Disable browser extensions or ad blockers that might interfere with the site’s functionality.
Refresh the page and try resubmitting your responses.
6. Optimize Mobile Access
If you’re using a smartphone or tablet to access tellculvers.com/survey:
Switch to a different device if the site doesn’t load properly.
Use the browser’s desktop mode, which can sometimes resolve layout or navigation issues.
Avoid using public Wi-Fi networks that may restrict access to specific websites.
7. Resolve Expired Link or Code Issues
Survey links and codes have an expiration date. If your receipt is outdated:
Ensure you complete the survey promptly after your visit to Culver’s.
If your code has expired, you’ll need a new receipt to participate.
8. Check for Scheduled Maintenance
Occasionally, the TellCulvers survey website may be temporarily unavailable due to maintenance. To verify:
Visit Culver’s official website or social media pages for announcements about downtime.
Wait for a few hours and try accessing the site again.
9. Disable Pop-up Blockers
Some browsers block pop-ups by default, which can interfere with the survey form:
Go to your browser settings and temporarily disable pop-up blockers.
Add tellculvers.com/survey to your browser’s whitelist to ensure smooth navigation.
10. Contact Culver’s Customer Support
If none of the above solutions work, you can reach out to Culver’s customer support:
Visit Culver’s official website to find their contact information.
Call the customer service helpline for guidance on completing the survey.
Mention the issues you’re facing and provide details about your browser and device.
Preventing Issues on TellCulvers Survey Website
Taking a few preventive measures can minimize the likelihood of encountering problems on the TellCulvers survey website:
Keep Devices Updated Ensure your operating system, browser, and antivirus software are updated regularly.
Save Your Receipt Promptly Store your Culver’s receipt in a safe place, and complete the survey as soon as possible to avoid code expiration.
Use Trusted Devices For a smoother experience, access the survey on a reliable device, such as a laptop or desktop, rather than an older smartphone.
Avoid High-Traffic Times Try completing the survey during off-peak hours to prevent slow loading due to high traffic.
Bookmark the Website Save tellculvers.com/survey in your bookmarks to avoid mistyping the URL.
Why Participate in the TellCulvers Survey?
While troubleshooting technical issues is important, don’t forget the benefits of participating in the TellCulvers survey:
Customer Rewards: By sharing your feedback, you can earn discounts, free custard, or other menu items as a thank-you.
Enhanced Dining Experience: Your feedback helps Culver’s improve its service, menu, and overall experience.
Convenience: The survey takes only a few minutes to complete, making it a quick and easy way to contribute.
Conclusion
Experiencing issues with the TellCulvers survey website can be frustrating, but most problems can be resolved with a few simple steps. By ensuring a stable internet connection, using a compatible browser, and verifying the survey code, you can successfully complete your feedback submission. Remember, if you continue to face challenges, Culver’s customer support is always there to help.
Taking the time to troubleshoot ensures you don’t miss out on rewards and allows you to share valuable feedback that helps Culver’s maintain its commitment to excellent service. So, the next time you visit Culver’s and receive a survey invitation, feel confident in your ability to navigate and complete the process smoothly!
0 notes
Text
A Complete Guide to BT Login Email: How to Access and Troubleshoot Your Account

BT login email, a reliable email service provided by British Telecommunications, offers its users seamless access to manage their communications. Whether you use BT login email as your primary email provider or simply rely on it for specific services, understanding how to log in securely and manage your account is crucial. This comprehensive guide will take you through the process of logging in to BT login email, troubleshooting common login issues, and ensuring your account remains safe and secure.
Why BT Login Email is Essential
BT login email offers a wide array of features for both personal and business use, including organizing your emails, cloud storage, contacts, and calendar management. It’s integral to staying connected, whether you’re handling important business communications or managing your personal messages. Understanding how to log in to your BT Email account is key to ensuring that you can access these features at all times. Moreover, BT Email is equipped with security features to help protect your sensitive data.
How to Log In to BT Email
Step-by-Step Process to Access Your BT Login Email
Visit the BT Email Login Page: To begin, open your preferred web browser and type in https://mail.btinternet.com or simply visit BT’s official website at www.bt.com and click the Sign In button.
Enter Your BT Email Address: On the login page, input your full BT Email address, including the domain (e.g., [email protected]), and click Continue.
Input Your Password: Next, type in your password associated with your BT Email account. If you’ve forgotten your password, simply click Forgot Password? and follow the prompts to reset it.
Click on ‘Sign In’: After entering your password, click Sign In to access your inbox and other features associated with your BT Email account.
Troubleshooting Common BT Login Email Issues
Incorrect Password or Username
Solution: Double-check your username and password for typos. If you can’t remember your password, use the Forgot Password? link to reset it.
Account Locked After Multiple Failed Login Attempts
Solution: After several failed login attempts, BT may lock your account for security reasons. Wait for 15-30 minutes and try again. If you still can’t log in, contact BT support for assistance.
Two-Factor Authentication (2FA) Problems
Solution: If you’re using 2FA and can’t receive your verification code, ensure your phone number is up-to-date. Alternatively, use backup codes if available or contact BT support for help.
Browser Cache Issues
Solution: Clear your browser’s cache and cookies or try logging in using a different browser or device to avoid issues with loading the login page.
Account Suspended or Disabled
Solution: If your account is suspended, you’ll need to check for any notifications from BT about the suspension. If the issue persists, contact BT customer support to resolve it.
Improving Security for Your BT Login Email
To protect your BT Email account and sensitive data, it’s important to enhance the security of your login process:
Use a Strong Password: Avoid using easily guessable passwords. Combine uppercase, lowercase, numbers, and special characters for a secure password.
Enable Two-Factor Authentication (2FA): Turn on two-factor authentication for an added layer of security. This requires an additional verification step, such as a code sent to your phone or authentication app.
Stay Vigilant Against Phishing: Be cautious of phishing scams that attempt to steal your login credentials. Never click on suspicious links or share your password with anyone.
Setting Up BT Email on Other Devices
You can also set up your BT Email on third-party email clients such as Outlook, Apple Mail, or mobile email apps. Here’s how:
Open your email client and go to the account settings.
Enter your BT Email credentials (your BT Email address and password).
Enter the IMAP and SMTP server settings: IMAP server: imap.mail.btinternet.com SMTP server: smtp.mail.btinternet.com IMAP Port: 993 (SSL encryption) SMTP Port: 465 (SSL encryption)
Save the settings and verify that your email client successfully syncs with your BT Email account.
FAQs
Q1: What should I do if I forgot my BT Email password? Click on the Forgot Password? link on the login page and follow the prompts to reset it via your registered recovery email or phone number.
Q2: Can I access BT Email on my mobile device? Yes, you can access BT Email on your smartphone by using the BT Mail app or setting it up in your mobile email client with the correct IMAP/SMTP settings.
Q3: How do I recover my BT Email account? If you’re having trouble logging in, use the Forgot Password? link or contact BT customer support for assistance with account recovery.
Q4: How do I improve the security of my BT Email account? Enable two-factor authentication (2FA), use a strong password, and remain cautious of phishing attempts to enhance the security of your BT Email account.
Conclusion
Logging in to your BT Email account is a straightforward process, but being aware of potential issues and how to resolve them is important for smooth access. By following the step-by-step instructions above and implementing best security practices, you can ensure that your BT Email account is both accessible and secure. Additionally, setting up your BT Email on third-party email clients can help streamline your communication across various platforms. If you face any login difficulties, don't hesitate to contact BT support for further assistance.
0 notes
Text
Why Google Analytics & Search Console Data Never Match
When it comes to analyzing website performance, Google Analytics and Search Console are two essential tools that every website owner should use. Google Analytics is a web analytics service that monitors user behavior on your website, whereas Search Console is a webmaster tool that allows you to see how your site ranks in Google search results. Although both tools are intended to give you significant insights about your website, there may be some differences in the metrics reported by each due to several reasons:
1. Various tracking methods.
One of the primary causes for the discrepancy between Google Analytics and Search Console numbers is that they employ different monitoring systems. Google Analytics uses a tracking code that you place on your website to monitor user activity such as page views, bounce rates, and session lengths. In contrast, Search Console analyzes search data from Google's index to measure how your website performs in Google search results, such as the number of clicks, impressions, and average position.
2. Data sampling.
Google Analytics employs data sampling to estimate data from enormous datasets. Data sampling is evaluating a portion of data and then extrapolating the results to approximate the complete dataset. This might result in somewhat different statistics than the real data, particularly if your website receives a high volume of visitors or data. Search Console does not utilize data sampling, therefore, the data given is based on actual data obtained by Google's search engine. As a result, you may notice some differences between the metrics presented by Google Analytics and Search Console, particularly for bigger datasets.
3. Time Frames
Another cause for the discrepancy between Google Analytics and Search Console numbers is the usage of various periods. Google Analytics may report data based on when the user accessed the website, whereas Search Console reports data based on Google’s crawl time. This implies that data may not match perfectly, particularly if your website is often updated or changed.
4. JavaScript
Google Analytics uses JavaScript to collect information about user activity on your website. However, if a user disables JavaScript in their browser or if the JavaScript tracking code has problems, Google Analytics data collection may be insufficient or erroneous. In contrast, Search Console does not require JavaScript and instead reports on website performance using Google's search engine data.
5. Caching.
If your website caches pages to improve page load speeds, Google Analytics data may be affected. Caching saves a version of your website's pages and provides it to users rather than creating a new version each time. This can lead to duplicate page visits or other errors in the data supplied by Google Analytics. Search Console, on the other hand, does not rely on page visits to report on how your website performs in Google search results, therefore caching should have little effect on the data presented.
From an SEO standpoint, it's critical to utilize both tools in tandem to gain a complete picture of website performance. An SEO Agency in Mumbai, Chimp&z Inc, provides the best SEO services using a blend of Google Analytics and Search Console specifically designed based on the client's requirements. They also have a branch of an SEO company in Gurgaon.
0 notes
Text
why does my norton vpn keep turning itself off
🔒🌍✨ Get 3 Months FREE VPN - Secure & Private Internet Access Worldwide! Click Here ✨🌍🔒
why does my norton vpn keep turning itself off
Norton VPN troubleshooting
Norton VPN Troubleshooting: Resolving Common Issues
Norton VPN is a popular choice for safeguarding online privacy and security, but like any software, it may encounter occasional glitches. If you're experiencing trouble with Norton VPN, here are some troubleshooting steps to help resolve common issues:
Check Your Internet Connection: Before diving into VPN-specific troubleshooting, ensure that your internet connection is stable. Weak or intermittent connections can cause VPN problems.
Restart the VPN Application: Sometimes, a simple restart can fix minor issues. Close the Norton VPN application completely and reopen it to see if the problem persists.
Update Norton VPN: Ensure that you're using the latest version of Norton VPN. Developers frequently release updates to address bugs and enhance performance.
Switch Servers: If you're having trouble connecting to a particular server or experiencing slow speeds, try switching to a different server location within the Norton VPN application.
Check Firewall and Antivirus Settings: Norton VPN may conflict with your firewall or antivirus settings, leading to connectivity issues. Temporarily disable these security features and see if the problem resolves.
Clear Cache and Cookies: Clearing your browser's cache and cookies can sometimes resolve VPN-related browsing issues, especially if you're experiencing difficulty accessing certain websites.
Contact Customer Support: If you've tried the above steps and are still experiencing problems, reach out to Norton's customer support for assistance. They can provide personalized troubleshooting steps and address any underlying issues.
By following these troubleshooting tips, you can resolve many common Norton VPN issues and enjoy a secure and seamless browsing experience. Remember to stay updated with the latest software versions and reach out for support when needed.
Automatic shutdown Norton VPN
Title: Understanding Automatic Shutdown in Norton VPN
Norton VPN offers robust security and privacy features to safeguard your online activities. One feature that users often encounter is the automatic shutdown function. This feature is designed to enhance user experience and ensure optimal performance of the VPN service.
Automatic shutdown in Norton VPN is a built-in mechanism that activates under specific conditions. When enabled, it allows the VPN application to automatically disconnect from the VPN server after a certain period of inactivity. This can be particularly useful for conserving battery life on mobile devices and reducing unnecessary network usage.
The primary purpose of automatic shutdown is to prevent unnecessary VPN connections when not actively browsing the internet. By disconnecting from the VPN server after a period of inactivity, Norton VPN helps optimize network resources and improves overall performance.
Users can customize the automatic shutdown settings according to their preferences. They can specify the idle time after which the VPN connection should be automatically terminated. This flexibility allows users to balance between privacy and convenience based on their usage patterns.
However, it's essential to understand the implications of automatic shutdown. While it can conserve resources and enhance user experience, it may also temporarily expose your device to potential security risks when disconnected from the VPN server. Therefore, it's crucial to weigh the benefits and drawbacks before enabling this feature.
In conclusion, automatic shutdown in Norton VPN is a valuable feature that enhances user experience and optimizes network performance. By allowing users to customize the idle time before disconnection, it strikes a balance between privacy and convenience. Understanding how to leverage this feature effectively can contribute to a safer and more efficient online experience.
Persistent Norton VPN disconnection
Persistent Norton VPN Disconnection: Causes and Solutions
Experiencing persistent disconnections with Norton VPN can be frustrating and concerning, especially when privacy and security are at stake. While Norton VPN is designed to provide a secure and stable connection, several factors can contribute to frequent disruptions. Understanding the possible causes and implementing appropriate solutions can help mitigate this issue.
Network Congestion: High network traffic or congestion can lead to intermittent VPN disconnections. This often occurs during peak hours when many users are accessing the internet simultaneously. To alleviate this, try switching to a different server location or connecting during off-peak hours when network traffic is lower.
Software Conflicts: Conflicts with other applications or security software installed on your device may interfere with Norton VPN's functionality. Ensure that Norton VPN is whitelisted or exempted from any firewall or security software settings to prevent conflicts.
Outdated Software: Using outdated versions of Norton VPN or your device's operating system can result in compatibility issues and frequent disconnections. Keep both Norton VPN and your device's software up to date to ensure optimal performance and compatibility.
Weak Signal Strength: Poor Wi-Fi or cellular signal strength can lead to unstable VPN connections. If you're using a Wi-Fi connection, try moving closer to the router or connecting via Ethernet cable for a more stable connection. For mobile devices, consider switching to a different network or location with better signal reception.
Server Overload: Overloaded VPN servers can struggle to handle incoming connections, leading to disconnections for some users. To address this, try connecting to a different server location or contacting Norton support for assistance in identifying less congested servers.
By addressing these potential causes and implementing the suggested solutions, users can minimize the likelihood of persistent Norton VPN disconnections and enjoy a more reliable and secure browsing experience.
Norton VPN auto-off issue
Title: Troubleshooting the Norton VPN Auto-Off Issue
Are you experiencing frustrating interruptions with your Norton VPN unexpectedly turning off? This issue can be a significant inconvenience, compromising your online security and privacy. However, there are several steps you can take to troubleshoot and resolve this problem.
Update Norton VPN: Ensure that your Norton VPN software is up to date. Sometimes, outdated versions can encounter compatibility issues with operating system updates or other software on your device.
Check for Software Conflicts: Other security software or applications running on your device could conflict with Norton VPN, causing it to shut down unexpectedly. Temporarily disable any conflicting software and observe if the auto-off issue persists.
Restart Your Device: A simple restart can sometimes resolve technical glitches or conflicts that may be causing Norton VPN to malfunction.
Reinstall Norton VPN: If the issue persists, try uninstalling and reinstalling Norton VPN. This process can refresh the software and its settings, potentially resolving any underlying issues.
Contact Norton Support: If none of the above steps resolve the auto-off problem, it may be necessary to contact Norton customer support for further assistance. They can provide personalized troubleshooting steps or escalate the issue to their technical team for investigation.
Check for System Updates: Ensure that your operating system and device firmware are up to date. Sometimes, system updates can introduce compatibility issues with VPN software, and installing the latest updates can resolve these issues.
By following these steps, you can troubleshoot and resolve the Norton VPN auto-off issue, ensuring uninterrupted protection of your online activities. Remember to regularly update your VPN software and keep an eye out for any potential conflicts with other applications to maintain a secure and private browsing experience.
Norton VPN self-deactivation reasons
Norton VPN is a widely used tool for ensuring online privacy and security. However, users may encounter instances where the VPN unexpectedly deactivates itself, leaving their internet activity exposed. Understanding the reasons behind this self-deactivation can help users troubleshoot and mitigate the issue.
One common reason for Norton VPN self-deactivation is software conflicts. Sometimes, other security software or applications installed on the device may interfere with the VPN's operation, causing it to deactivate unexpectedly. Users should ensure that their device is not running conflicting software and try disabling or uninstalling any such programs to see if it resolves the issue.
Another potential cause is network instability. If the internet connection is weak or unstable, the VPN may disconnect automatically to maintain a stable connection. Users can try switching to a different network or troubleshooting their current connection to resolve this issue.
Additionally, outdated software or incomplete installations can also lead to Norton VPN self-deactivation. Users should regularly check for updates to the VPN software and ensure that it is installed correctly to prevent any disruptions in service.
Furthermore, configuration errors or settings mismanagement can trigger the VPN to deactivate unexpectedly. Users should review their VPN settings and configurations to ensure everything is set up correctly according to their preferences and requirements.
In some cases, server issues or maintenance activities on Norton's end may also result in temporary deactivation of the VPN service. Users can check Norton's official website or support channels for any announcements regarding such issues and wait for them to be resolved.
By identifying and addressing these potential reasons for Norton VPN self-deactivation, users can enjoy a more reliable and secure online browsing experience.
0 notes
Text
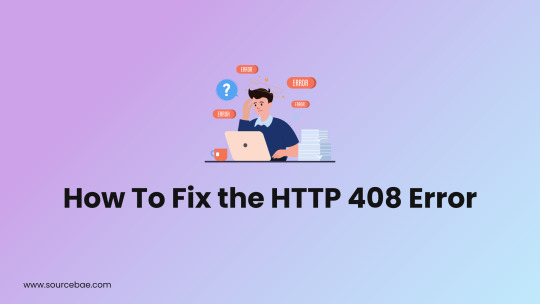
How To Fix the HTTP 408 Error
In the realm of the digital age, encountering errors while browsing the web is not uncommon. One such error, the HTTP 408 Error, can be frustrating for users and website administrators alike. But fret not! In this guide, we will dive deep into the intricacies of the HTTP 408 Error and provide you with a range of solutions to ensure uninterrupted browsing. So, if you've ever wondered "How To Fix the HTTP 408 Error," you're in the right place. Fix the HTTP 408 Error The HTTP 408 Error, also known as the "Request Timeout" error, occurs when a server doesn't receive a complete request from a client within a specified time period. This can happen due to slow internet connections, heavy server loads, or misconfigurations. Here's a step-by-step breakdown on how to resolve this error and get back to smooth browsing: 1. Check Your Internet Connection A stable and reliable internet connection is vital for proper communication between your device and the server. Ensure you're connected to a strong network before proceeding. 2. Refresh the Page Sometimes, the error might be transient. Try refreshing the page by pressing the F5 key or clicking the refresh button on your browser's toolbar. 3. Clear Browser Cache and Cookies Cached data and cookies can lead to communication issues with the server. Clear your browser's cache and cookies and then try accessing the website again. 4. Try a Different Browser It's possible that the issue is browser-specific. If you're encountering the error in one browser, try accessing the website using a different browser. 5. Disable Browser Extensions Certain browser extensions might interfere with the communication process. Temporarily disable your extensions and see if the error persists. 6. Check Server Status The server hosting the website might be experiencing downtime or maintenance. Visit the website's official social media pages or forums to check for any announcements regarding server status. 7. Increase Server Timeout Limit If you manage the website, consider increasing the server's timeout limit to provide more time for client requests to be processed. 8. Optimize Website Performance Slow-loading websites can trigger the HTTP 408 Error. Optimize your website's performance by compressing images, minifying code, and using content delivery networks (CDNs). 9. Use a Content Delivery Network (CDN) CDNs distribute website content across multiple servers, reducing the chances of server overload and request timeouts. 10. Update Software and Plugins Outdated software or plugins can lead to compatibility issues and errors. Keep your website's software and plugins up to date. FAQs Why am I seeing the HTTP 408 Error? The HTTP 408 Error occurs when a server doesn't receive a complete request from your browser within a specified time. This can be due to slow internet, server load, or misconfigurations. Can a slow internet connection cause the HTTP 408 Error? Yes, a slow or unstable internet connection can lead to the HTTP 408 Error, as the server might not receive your request in a timely manner. Is the HTTP 408 Error permanent? No, the HTTP 408 Error is often temporary and can be resolved by refreshing the page, checking your internet connection, or optimizing your website's performance. How can I prevent the HTTP 408 Error on my website? To prevent the HTTP 408 Error on your website, ensure your server's timeout limit is reasonable, optimize your website's performance, and keep software and plugins up to date. Can browser extensions cause the HTTP 408 Error? Yes, certain browser extensions can interfere with the communication process between your browser and the server, leading to the HTTP 408 Error. What should I do if the website's server is down? If the website's server is down, you can wait for it to come back up or check the website's official social media pages for updates on server status. Conclusion Navigating the complexities of the digital landscape can be a challenge, but armed with the knowledge from this guide, you're now equipped to tackle the HTTP 408 Error head-on. By following the steps outlined here, you can troubleshoot the error and enjoy seamless browsing experiences. Remember, whether it's a slow internet connection, server load, or misconfigurations, there's a solution for every roadblock. So, bid adieu to the HTTP 408 Error and embrace hassle-free browsing! Read the full article
0 notes
Photo
Here you can find the detailed guide on How to Completely Disable Cache in GoogleChrome as well as for a Specific Website on Windows PC. So that you can protect your privacy from others.
#how to disable cache completely in google chrome#how to disable cache completely in for specific website#how to disable cache completely in google chrome and specific website
0 notes
Text
Version 422
youtube
windows
zip
exe
macOS
app
linux
tar.gz
🎉🎉 It was hydrus's birthday this week! 🎉🎉
I had a great week. I mostly fixed bugs and improved quality of life.
tags
It looks like when I optimised tag autocomplete around v419, I accidentally broke the advanced 'character:*'-style lookups (which you can enable under tags->manage tag display and search. I regret this is not the first time these clever queries have been broken by accident. I have fixed them this week and added several sets of unit tests to ensure I do not repeat this mistake.
These expansive searches should also work faster, cancel faster, and there are a few new neat cache optimisations to check when an expensive search's results for 'char' or 'character:' can quickly provide results for a later 'character:samus'. Overall, these queries should be a bit better all around. Let me know if you have any more trouble.
The single-tag right-click menu now always shows sibling and parent data, and for all services. Each service stacks siblings/parents into tall submenus, but the tall menu feels better to me than nested, so we'll see how that works out IRL. You can click any sibling or parent to copy to clipboard, so I have retired the 'copy' menu's older and simpler 'siblings' submenu.
misc
Some websites have a 'redirect' optimisation where if a gallery page has only one file, it moves you straight to the post page for that file. This has been a problem for hydrus for some time, and particularly affected users who were doing md5: queries on certain sites, but I believe the downloader engine can now handle it correctly, forwarding the redirect URL to the file queue. This is working on some slightly shakey tech that I want to improve more in future, but let me know how you get on with it.
The UPnPc executables (miniupnp, here https://miniupnp.tuxfamily.org/) are no longer bundled in the 'bin' directory. These files were a common cause of anti-virus false positives every few months, and are only used by a few advanced users to set up servers and hit network->data->manage upnp, so I have decided that new users will have to install it themselves going forward. Trying to perform a UPnP operation when the exe cannot be found now gives a popup message talking about the situation and pointing to the new readme in the bin directory.
After working with a user, it seems that some clients may not have certain indices that speed up sibling and parent lookups. I am not totally sure if this was due to hard drive damage or broken update logic, but the database now looks for and heals this problem on every boot.
parsing (advanced)
String converters can now encode or decode by 'unicode escape characters' ('\u0394'-to-'Δ') and 'html entities' ('&'-to-'&'). Also, when you tell a json formula to fetch 'json' rather than 'string', it no longer escapes unicode.
The hydrus downloader system no longer needs the borked 'bytes' decode for a 'file hash' content parser! These content parsers now have a 'hex'/'base64' dropdown in their UI, and you just deliver that string. This ugly situation was a legacy artifact of python2, now finally cleared up. Existing string converters now treat 'hex' or 'base64' decode steps as a no-op, and existing 'file hash' content parsers should update correctly to 'hex' or 'base64' based on what their string converters were doing previously. The help is updated to reflect this. hex/base64 encodes are still in as they are used for file lookup script hash initialisation, but they will likely get similar treatment in future.
birthday
🎉🎉🎉🎉🎉
On December 14th, 2011, the first non-experimental beta of hydrus was released. This week marks nine years. It has been a lot of work and a lot of fun.
Looking back on 2020, we converted a regularly buggy and crashy new Qt build to something much faster and nicer than we ever had with wx. Along with that came mpv and smooth video and finally audio playing out of the client. The PTR grew to a billion mappings(!), and with that came many rounds of database optimisation, speeding up many complicated tag and file searches. You can now save and load those searches, and most recently, search predicates are now editable in-place. Siblings and parents were updated to completely undoable virtual systems, resulting in much faster boot time and thumbnail load and greatly improved tag relationship logic. Subscriptions were broken into smaller objects, meaning they load and edit much faster, and several CPU-heavy routines no longer interrupt or judder browsing. And the Client API expanded to allow browsing applications and easier login solutions for difficult sites.
There are still a couple thousand things I would like to do, so I hope to keep going into 2021. I deeply appreciate the feedback, help, and support over the years. Thank you!
If you would like to further support my work and are in a position to do so, my simple no-reward Patreon is here: https://www.patreon.com/hydrus_dev
full list
advanced tags:
fixed the search code for various 'total' autocomplete searches like '*' and 'namespace:*', which were broken around v419's optimised regular tag lookups. these search types also have a round of their own search optimisations and improved cancel latency. I am sorry for the trouble here
expanded the database autocomplete fetch unit tests to handle these total lookups so I do not accidentally kill them due to typo/ignorance again
updated the autocomplete result cache object to consult a search's advanced search options (as under _tags->manage tag display and search_) to test whether a search cache for 'char' or 'character:' is able to serve results for a later 'character:samus' input
optimised file and tag search code for cases where someone might somehow sneak an unoptimised raw '*:subtag' or 'namespace:*' search text in
updated and expanded the autocomplete result cache unit tests to handle the new tested options and the various 'total' tests, so they aren't disabled by accident again
cancelling a autocomplete query with a gigantic number of results should now cancel much quicker when you have a lot of siblings
the single-tag right-click menu now shows siblings and parents info for every service, and will work on taglists in the 'all known tags' domain. clicking on any item will copy it to clipboard. this might result in megatall submenus, but we'll see. tall seems easier to use than nested per-service for now
the more primitive 'siblings' submenu on the taglist 'copy' right-click menu is now removed
right-click should no longer raise an error on esoteric taglists (such as tag filters and namespace colours). you might get some funky copy strings, which is sort of fun too
the copy string for the special namespace predicate ('namespace:*anything*') is now 'namespace:*', making it easier to copy/paste this across pages
.
misc:
the thumbnail right-click 'copy/open known urls by url class' commands now exclude those urls that match a more specific url class (e.g. /post/123456 vs /post/123456/image.jpg)
miniupnpc is no longer bundled in the official builds. this executable is only used by a few advanced users and was a regular cause of anti-virus false positives, so I have decided new users will have to install it manually going forward.
the client now looks for miniupnpc in more places, including the system path. when missing, its error popups have better explanation, pointing users to a new readme in the bin directory
UPnP errors now have more explanation for 'No IGD UPnP Device' errortext
the database's boot-repair function now ensures indices are created for: non-sha256 hashes, sibling and parent lookups, storage tag cache, and display tag cache. some users may be missing indices here for unknown update logic or hard drive damage reasons, and this should speed them right back up. the boot-repair function now broadcasts 'checking database for faults' to the splash, which you will see if it needs some time to work
the duplicates page once again correctly updates the potential pairs count in the 'filter' tab when potential search finishes or filtering finishes
added the --boot_debug launch switch, which for now prints additional splash screen texts to the log
the global pixmaps object is no longer initialised in client model boot, but now on first request
fixed type of --db_synchronous_override launch parameter, which was throwing type errors
updated the client file readwrite lock logic and brushed up its unit tests
improved the error when the client database is asked for the id of an invalid tag that collapses to zero characters
the qss stylesheet directory is now mapped to the static dir in a way that will follow static directory redirects
.
downloaders and parsing (advanced):
started on better network redirection tech. if a post or gallery URL is 3XX redirected, hydrus now recognises this, and if the redirected url is the same type and parseable, the new url and parser are swapped in. if a gallery url is redirected to a non-gallery url, it will create a new file import object for that URL and say so in its gallery log note. this tentatively solves the 'booru redirects one-file gallery pages to post url' problem, but the whole thing is held together by prayer. I now have a plan to rejigger my pipelines to deal with this situation better, ultimately I will likely expose and log all redirects so we can always see better what is going on behind the scenes
added 'unicode escape characters' and 'html entities' string converter encode/decode types. the former does '\u0394'-to-'Δ', and the latter does '&'-to-'&'
improved my string converter unit tests and added the above to them
in the parsing system, decoding from 'hex' or 'base64' is no longer needed for a 'file hash' content type. these string conversions are now no-ops and can be deleted. they converted to a non-string type, an artifact of the old way python 2 used to handle unicode, and were a sore thumb for a long time in the python 3 parsing system. 'file hash' content types now have a 'hex'/'base64' dropdown, and do decoding to raw bytes at a layer above string parsing. on update, existing file hash content parsers will default to hex and attempt to figure out if they were a base64 (however if the hex fails, base64 will be attempted as well anyway, so it is not critically important here if this update detection is imperfect). the 'hex' and 'base64' _encode_ types remain as they are still used in file lookup script hash initialisation, but they will likely be replaced similarly in future. hex or base64 conversion will return in a purely string-based form as technically needed in future
updated the make-a-downloader help and some screenshots regarding the new hash decoding
when the json parsing formula is told to get the 'json' of a parsed node, this no longer encodes unicode with escape characters (\u0394 etc...)
duplicating or importing nested gallery url generators now refreshes all internal reference ids, which should reduce the liklihood of accidentally linking with related but differently named existing GUGs
importing GUGs or NGUGs through Lain easy import does the same, ensuring the new objects 'seem' fresh to a client and should not incorrectly link up with renamed versions of related NGUGs or GUGs
added unit tests for hex and base64 string converter encoding
next week
Last week of the year. I could not find time to do the network updates I wanted to this week, so that would be nice. Otherwise I will try and clean and fix little things before my week off over Christmas. The 'big thing to work on next' poll will go up next week with the 423 release posts.
1 note
·
View note
Photo
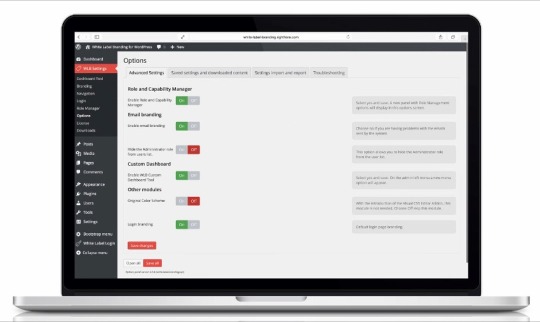
10 Best White Label Branding Plugins for WordPress
What is White Label Branding?
Your local supermarket chain has its own supermarket brand products it offers to its customers. These supermarket brand products are cheaper compared to the same product sold under a fancy brand name. Does this mean that the supermarket manufactures its own products?
Not at all. The products are manufactured by third parties contracted by the supermarket chain to produce products under the supermarket brand name. The supermarket chain gives an impression that it has manufactured the products.
This is called white label branding. It is a worldwide phenomena. And it is not limited to supermarket chains. All industries and sectors practice it.
Think of big electronic manufacturers and retailers of your favorite desktops, laptops, mobile phones and so on. They too put their brands, logos, and serial numbers on white label products.
White label branding is not restricted to physical products. It is widely practiced in digital products too.
In this article II will explain how white label branding works in WordPress then I will explore some white label branding plugins for WordPress that are available on Code Canyon.
WordPress sites can have a cookie cutter appearance recognizable by many. The content management side especially. You can customize the appearance of the back-end to reflect your clients’ brands by using white label branding plugins.
How Does White Label Branding Work for WordPress?
Here is how white label branding works for digital products: you buy white label digital products and services, put your brand name on them, and resell them as your own.
But white label branding for WordPress works differently.
How White Label Branding Works for WordPress Developers
As a developer you have many clients. This means you have to create their websites—to reflect their unique brands. Coding a new WordPress website from scratch every time you have a new project is costly both in time and money.
Turnkey WordPress websites offer a simple solution. You can use the same website template—both front-end and back-end—for different clients. You only need to customize the website to reflect specific identity of each client.
This involves adding the brand name, logo, and specific graphics and content that identify and differentiate each clients. It means removing standard logo, graphics and information that comes with the WordPress and personalizing the website with clients’ content.
Most of the time what customers see when they visit a website is the front-end. This is the public image that represents the company.
But there is more to a website than the front-end. There is the back-end with the dashboard that customers don’t get to see.
People who run the website use the back-end every day. They want to manage their own content, inventory, images and so on. They do this using the dashboard. Every time they log in to the back-end they want to see their brand reflected and not the cookie cutter WordPress logo and messages.
Using White Label Branding Can Help Your Reputation as a Developer
Imagine every time clients log into the back-end they are greeted by the same standard WordPress dashboard message and WordPress logo. They wonder why am I not greeted by my own brand name? My own logo? My own messaging?
This is where using turnkey websites can reflect badly on you to your customers and ruin your reputation. If don’t do it right your clients will end up feeling you took them for their money and gave them a standard template you use with every client.
Full customization of both the front-end and the back-end of the WordPress website is important because it is a total reflection of the client’s business not only for their customers who only see the front-end but also for the business owners and employees who have to work with back-end tools. This kind of user experience and satisfaction reflects well on you as a developer.
How White Label Branding is Done
White label branding can be done manually or by using plugins.
The manual process involves making changes to your WordPress theme's PHP code by inserting snippets of code to perform the following tasks:
replacing WordPress logos with the client’s logo
replacing standard login images with client’s image
replacing the header
customizing the admin menu
replacing footer text like Powered by WordPress with your own wording
If you have no coding knowledge or little coding experience then manually white labeling is overwhelming. Same applies to the experienced developer pressed for time.
Of course, you don’t have to do all that manually. There are plugins you can use to do white labeling.
What Do White Label Branding Plugins Do?
They give you the ability to control and transform the appearance the back-end.
They help you customize the back-end of your WordPress without coding.
They come with extensive documentation that helps you do the customization by yourself.
You can completely transform the look of the dashboard, customize the appearance of the admin menu, logo, header, the width of the logo, the footer logo, and the login form, as well as replace standard WordPress messages with customized messages that reflect clients’ brands.
White Label Branding Plugins on CodeCanyon
On CodeCanyon you will find white label branding plugins that will help you customize your clients’ WordPress backend to reflect their brands.
1. White Label Branding for Multisite
White Label Branding for Multisite lets you control the branding of the main site and all sub-sites in a network of websites powered by WordPress Multisite.
It also allows you to:
give each sub-site the ability to do their own branding and customize their menus for the editor role
customize the menus and logos on each sub-site in your WordPress Multisite Network
replace the WordPress logo from the log-in screen and dashboard with your own identity or even your client’s
add custom dashboard meta box viewable only to editors or all users with your own welcome message or help
User bruceakinson says:
Amazing features, worked perfectly for what I needed it to do.
2. White Label Branding for WordPress (Single Site)
With the White Label Branding plugin you have the ultimate tool for customizing the WordPress admin and login screen.
It allows you to take full control over branding in the WordPress admin by:
customizing your login screen, menus and logos
changing the color scheme of the entire admin setion
creating your own advanced login templates
creating new user roles and assign capabilities
Not only that but, you can decide who has access to what features by hiding elements for other administrators.
You can even create a fake administrator account! This is useful if you want to give your clients “admin” access, but still limit what they have access to. The real administrator will also be hidden from the users list. This way a client with the “fake” administrator account will never know that they don’t have full access to all features.
Usery kops says
The ultimate white label tool - fantastic.
3. White Label Login for WordPress
White Label Login makes it easy to customize the default WordPress login.
It provides the following UI styles for login:
slide login
push login
modal login
In addition you can:
customize e-mails for registration and reset password
customize login and logout redirects by user role
insert dynamic login and logout links in the WordPress menu
insert dynamic buttons in your content with shortcodes
rewrite rules for wp-admin.php and wp-login.php
create social login support for logins using Facebook, Twitter, Google+, Linkedin and Microsoft Live
Also included in its list of dynamic features is a visual CSS editor for customizing colors and fonts for each screen. The plugin supports 600+ Google Fonts.
User by naftas says:
Very flexible plugin. Gives very good possibilities for the website developer for fine tuning of all login features.
4. WPAlter
WPAlter completely changes the style of the WordPress admin panel to your desired color theme.
Using this plugin in you can:
remove WordPress texts and logo
create custom login themes and add a custom logo for login and admin pages
hide, rename and re-arrange admin menu items.
hide admin menu items based on user roles
You can also white label emails.
WPAlter is tested for compatibility with popular plugins: Visual Composer, WP Super cache, WP Total cache, Contact form 7, WooCommerce.
User WPBlueLabel has this to say:
Great plugin. Allows tons of customisation that really enhances the WordPress Dashboard experience. Thanks a lot.
5. Material Admin
This multisite-compatible white label branding WordPress theme comes with:
100 elegant themes and gives you an option to create your own custom theme
20+ custom dashboard widgets for site and visitor statistics
LTR and RTL modes so can be used for any language
In terms of white label branding of the WordPress back-end you can easily:
rearrange menu and submenu items
change menu icons
enable or disable menu and submenu items
It also comes with a fully customizable login screen.
User thesourcep says.
Works awesome straight out of the box. Great default layouts and options and support is second to none. Awesome job—thank you!
6. Legacy Admin
Legacy Admin is an advanced, feature-rich white label WordPress admin theme.
It comes with the following:
20 elegant themes fully customizable
fully customizable beautiful login screen theme
admin menu management
Here is what Legacy Admin allows you to do in terms of white label branding:
customize admin top bar (all links and CSS Styles)
customize footer
customize login section
customize admin look and feel to represent your branding needs
customize the admin menu
add a custom logo and favicon for the admin panel
It is translation-compatible with RTL and LTR modes that can be used to support any language.
Finally, Legacy Admin is also multisite-compatible so it’s easy to install and ready to use on a multisite network.
Check out the demo and see why user Spac3Rat says:
Absolutely amazing. It transforms the WordPress admin drastically, making it pop. Love it.
7. Slate Pro
Say goodbye to the run-of-the-mill WordPress. With Slate Pro:
you can reimagine WordPress with a clean and simplified design
change or remove all WordPress branding
custom brand clients’ admins with custom colors and a custom login screen
Your clients don’t even have to know that you’re using WordPress! Also Slate Pro is multisite-compatible so you can control the look of all sub-sites.
User ATingle says:
An A1 plugin, oozes class—very, very impressed. Major props to the designers.
8. WPShapere
WPShapere is a very popular back-end customization plugin on CodeCanyon. It’s a very light plugin, easy to install, and easy to customize.
Here is what you can do with this powerful plugin:
remove the WordPress logo from the admin bar
upload your own logo to login page and on admin bar
customize login page design
customize the admin theme with 16 in-built themes to kick start your project
remove the WordPress default dashboard widgets
add your own content widgets and RSS widgets
customize admin bar links
add your custom logo, text content or links on the footer
create user access restrictions
User ChazzLayne says:
The perfect back-end customization suite, it's the missing piece that WordPress should have given developers from the start!
9. Ultra Admin
Ultra Admin is a combination theme and white label branding plugin that helps you design a WordPress site for your clients with your own company branding.
It comes with 30 built in theme templates. You can customize the admin menu, top bar, buttons, content boxes, typography, forms, text and background colors, logo and so on.
White Label Branding features will help you transform the back-end by:
rearranging menu and submenu items
changing menu icons
controlling top bar links
customizing footer
setting plugin access permissions
customing the login page
User Eight7Teen says
This is by far the most full-featured WP admin white label plugin available. It is incredibly well built and the developer seems eager to solve any issues you may run into. Definitely recommend!
Bonus
Here's one more plugin that isn't specifically a white label branding plugin, but could be useful for any white label branding project.
Menu By User Role
Menu by User Role gives you complete control over the menus in your WordPress powered website. You have the ability to:
create public menu
create a menu for logged-in users
create a separate menu for each user role defined in your website
In addition you can create a custom navigation menu, which can be used instead of thw default menu. In order to use this feature it must be registered in the theme’s functions.php file.
You can easily add pages, posts, categories and custom links to the menu. And you can even create multi-level menus with just a few clicks and organize them by drag and drop.
This plugin can be used together with White Label Branding for WordPress.
User deezeeweb says
Works really well - with every theme and user plugin I've used.
Conclusion
These are some white label branding plugins that caught my eye. You can find more plugins on CodeCanyon.
WordPress
Top WordPress Security Tips for Admins
Reginald Dawson
WordPress
Persisted WordPress Admin Notices: Part 1
David Gwyer
WordPress
10 Best WordPress Slider & Carousel Plugins of 2019
Nona Blackman
WordPress
Best Affiliate WooCommerce Plugins Compared
Lorca Lokassa Sa
WooCommerce
20 Best Shipping & Pricing WooCommerce Plugins
Nona Blackman
by Lorca Lokassa Sa via Envato Tuts+ Code https://ift.tt/2BWoyU8
1 note
·
View note
Text
How to disable pop up blocker in firefox windows 10

How to disable pop up blocker in firefox windows 10 how to#
How to disable pop up blocker in firefox windows 10 software#
How to disable pop up blocker in firefox windows 10 windows#
Pop-ups from trusted websites are safe to view and click on. But pop-ups can come from a variety of sources, and while many are harmless, others can serve as vehicles for malware. Pop-ups are generally safe, depending on the source. Enabling pop-ups for only some sites will keep unwanted pop-ups blocked while allowing other sites to work normally. You can allow all pop-ups in Firefox or enable them only on certain sites as needed. And when you click a link to play a video or audio clip, the media may load in a pop-up window. Some websites use pop-ups to open login forms or other form fields or signup forms to make sure the main window remains visible in the browser.Īlso, a site’s terms of service or important privacy-related information may appear as a pop-up window. There are legitimate reasons to enable pop-ups from time to time. In these cases, you’ll need to identify the program that’s serving the pop-up and adjust its settings to disable those pop-ups. Some apps or programs issue pop-up notifications by default. Blocking pop-ups in Firefox only blocks Firefox pop-ups from appearing while your browsing. It’s also possible that the pop-up didn’t come from Firefox but from another program you’ve got running. Or the pop-up might have been triggered by a key or mouse-click, which may activate a pop-up that was otherwise blocked. The pop-ups could be coming from a browser extension or add-on you’re running, so if you don’t need it anymore, remove the extension from Firefox. If you’ve turned on your Firefox pop-up blocker but are still seeing pop-ups, there are a few possible explanations. Now you can easily allow and block pop-ups in Firefox however you like! Why are my pop-ups still not blocked? In the dialog box that displays, you can choose to allow pop-ups on a specific website, remove the selected website from the list, or remove all websites from the exceptions list. To allow pop-ups for only some sites, click on Exceptions and add the URL to the dialog box.
How to disable pop up blocker in firefox windows 10 windows#
Uncheck the Block pop-up windows box, which will allow all pop-ups to appear. Navigate to the Permissions section in the Privacy & Security panel via Steps 1-3 above.
How to disable pop up blocker in firefox windows 10 how to#
Here’s how to disable the Firefox pop-up blocker and allow all pop-ups in Firefox: When it comes to allowing pop-ups in Firefox, you can choose to allow only some pop-ups or allow them all. Sometimes, you need to allow or enable pop-ups on your browser, because some websites use pop-ups to deliver essential site functionality, like login forms and other signup fields.
How to disable pop up blocker in firefox windows 10 software#
But for optimal safety online, get a free virus scanner and cleaner tool to make sure all software and apps on your device remain secure and virus-free. That not only speeds up your browsing, but also keeps your data more secure by removing footprints from your browsing path.Ī tidy browser ensures a smoother, more private browsing experience, and cleaning your browser also makes it safer. Select Privacy & Security in the left navigation panel.Ĭheck the box next to Block pop-up windows to completely disable all pop-ups.įor even faster, more seamless browsing, you can also clear your search and browser history, delete your cookies, and clear your browser cache. Here’s how to block pop-ups on Firefox:Ĭlick the hamburger menu button (an icon with three horizontal lines) in the upper right of your browser window and select Settings. If you want to ensure your browsing remains uninterrupted by intrusive pop-up ads or other distractions, you may want to block pop-ups in your browser. Otherwise, blocking pop-ups is often an easy way to streamline your browsing. Pop-up windows are used to display notifications with additional information, to play videos or other media, and to serve form or login fields, without you needing to open a new window or tab.īecause pop-ups sometimes deliver essential site functionality, like login forms, you may need to allow pop-ups for some sites to work properly. It’s well-known that pop-ups are often simply intrusive ads, but pop-ups can serve other purposes as well.
0 notes
Text
Differentiating Managed VPS vs Cloud Server
Let’s discover the two most powerful as well as cost-effective hosting options, cPanel Managed VPS vs Cloud Server Hosting.
VPS vs Cloud Server: Scalability
cheap VPS hosting as well as Cloud server both are scalable. There are multiple tiers for managed and self-managed server plans, each with diverse bandwidth and disk space limits. It can configure with load matching solutions such as HAProxy or Apache Load Balancer. Hence you don’t have to modify further settings when a web hosting company promotes your web hosting plan.
VPS vs Cloud Server: Performance
The performance of the server is where several variables and specific needs are monitored. Here are a few factors that affect your site and server performance:
Web apps and sites you use
The performance depends upon whether you are using one WordPress website with some plugins or a Drupal website combined with Matomo analytics for a startup. According to your small business requirement, you can even use a Dolibarr website along with project management, customer relationship manager (CRM), and enterprise resource planning (ERP) software.
Average internet speed of the target geographic market
Traffic and activity expectation on the site
You need to analyze how many visitors are reading your blog and what are your potential customers for online shopping. Moreover, the audience can be students playing games or an interactive learning management system (LMS) platform.
Your industry and whether your data is susceptible to cyber attackers
E-Commerce websites are goldmines, especially for personal identifiable information (PII). Websites that offer software downloads are major targets for man-in-the-middle (MITM) attacks by redirecting download requests into malicious activities.
Physical server location
Your hosting provider’s IT infrastructure
The finest way is to decide which server package that is preeminent for you to upload on your entire server environment. Then you can compare the performance metrics.
Managed VPS Hosting:
Managed cheap VPS Hosting is already optimized to run server management application with everything previously installed since you logged in for the first time. In order to keep up with existing network speed criteria, caching software such as PHP-FPM and NGINX is either set up or available for rapid installation with ideal settings for the web provider’s infrastructure.
This saves a lot of time. PHP processes and Databases occupy a lot of server resources. If you are not using them, you can try to disable those services. But at times, you can’t since they are part of core processes.
Cloud Server Hosting
Cloud Server has none of these features. You have to install the software manually or from a package manager. It is great for a person that knows all the requirements and how to take advantage. If not, then you are going to spend all your time learning that you may have utilized in some other thing.
VPS vs Cloud Server: Security
Just like performance, constricting your cyberattack surface involves things that are not under your control and specific use. It is very not secure by default, but you can use the managed server with readily available security functions.
Managed VPS hosting:
Managed cheap VPS hosting in sydney is easy to secure for beginners because you can do so using a cPanel from the web browser. A managed VPS usually comprises free technical support.
Cloud Server Hosting:
Cloud Server requires you to configure all your solutions by yourself, which includes:
Antivirus (AV) scanning
Firewalling
Denial-of-service (DOS) protection
Security information and event management (SIEM)
Navicosoft provides cloud hosting as well as cheap VPS hosting giving you complete reliability, scalability, and flexibility. We have state-of-the-art data centres around the globe, including Germany, Korea, Bulgaria, China, USA, UAE, Mexico and several other locations. Navicosoft’s managed VPS team monitors the server and is available 24/7 for configuration. Our cheap VPS hosting, as well as cloud server, guarantees you daily backups. We realize the reputation of your business.
0 notes
Text
Remove Secure Browser Software Mac

Web Browsers For Mac Os
Mac Secure Browser Nbme
Free Secure Browsers
Best Secure Browser
Remove Secure Browser Software Mac Torrent
The current web page applies to PSI Secure Browser 1.0.19 version 1.0.19 alone. How to erase PSI Secure Browser 1.0.19 from your computer using Advanced Uninstaller PRO PSI Secure Browser 1.0.19 is a program marketed by the software company PSI Services LLC. Frequently, people choose to remove.
Jul 10, 2020 The Mac maintenance and security app called Combo Cleaner is a one-stop tool to detect and remove MacReviver virus. This technique has substantial benefits over manual cleanup, because the utility gets hourly virus definition updates and can accurately spot even the newest Mac infections. Dec 12, 2018 The “This Mac Is Not Secure” pop-up alert is a misleading advertising. It is designed in order to trick and force you into calling a fake Apple Support service. If the Mozilla Firefox, Chrome and Safari opens automatically to the “This Mac Is Not Secure” scam then may be possible that you’re a victim of undesired software from the ‘ad-supported’ software (also known as adware. AVG Secure Browser has been designed by security experts with your privacy and security as the main goal, all with a familiar easy-to-use interface. Unlike other regular browsers it assures that your data remains private and secure — from the very moment you first launch it. To remove Adaware secure search from Firefox, reset the browser to its primary state. For that, follow the guide below: Remove dangerous extensions Open Mozilla Firefox, click on the menu icon (top right corner) and select Add-ons → Extensions. Here, select Adaware secure search. Mar 24, 2020 Safari also checks if a website that asks you to enter password or credit card information is not secure because it's unencrypted. With iOS 13.4 and macOS 10.15.4, Safari also warns you if the certificate is valid but the version of TLS (1.1 and earlier) is not secure.
The “This Mac Is Not Secure” pop-up alert is a misleading advertising. It is designed in order to trick and force you into calling a fake Apple Support service. If the Mozilla Firefox, Chrome and Safari opens automatically to the “This Mac Is Not Secure” scam then may be possible that you’re a victim of undesired software from the ‘ad-supported’ software (also known as adware) category.
What does Adware do? Some of the more common acts on MAC OSs include: adware can show undesired commercials;adware can reroute your web browser to unwanted sites like the “This Mac Is Not Secure” scam; ad supported software can slow down your MAC; ad-supported software can alter web-browser settings.
The ad supported software can end up on your MAC in various ways. Most often is when you download and install freeware and forget to uncheck the box for the optional programs installation. Do not panic because we have got the solution. Here’s a instructions on how to get rid of “This Mac Is Not Secure” pop up scam from the Chrome, Firefox and Safari and other web browsers.
Remove “This Mac Is Not Secure” pop-up scam (Removal guide)
The answer is right here on this web page. We have put together simplicity and efficiency. It will allow you easily to free your MAC of adware that shows misleading “This Mac Is Not Secure” fake alerts on your Apple Mac. Moreover, you can choose manual or automatic removal solution. If you are familiar with the computer then use manual removal, otherwise use the free anti-malware utility developed specifically to remove ad supported software. Of course, you may combine both methods. Read it once, after doing so, please print this page as you may need to close your internet browser or reboot your Apple Mac.
To remove “This Mac Is Not Secure” pop-up scam, perform the steps below:
How to manually remove “This Mac Is Not Secure” pop-up scam
The ad-supported software can change your internet browser settings and reroute you to the webpages which may contain lots of advertisements or various security threats, like browser hijacker infection, malicious software or PUPs. Not every antivirus application can identify and get rid of adware easily from your MAC OS. Follow the few simple steps below and you can delete the “This Mac Is Not Secure” pop up scam by yourself.
Removing the “This Mac Is Not Secure” scam, check the list of installed software first
In order to get rid of PUPs like this ad-supported software, open the Finder and click on “Applications”. Check the list of installed apps. For the ones you do not know, run an Internet search to see if they are adware, browser hijacker or potentially unwanted applications. If yes, delete them off. Even if they are just a programs which you do not use, then removing them off will increase your Apple Mac start up time and speed dramatically.
Open Finder and click “Applications”.
It will show a list of all programs installed on your MAC OS. Scroll through the all list, and remove any questionable and unknown software. Right click to questionable program and choose “Move to Trash”. Another method is drag the program from the Applications folder to the Trash.
Most important, scroll through the all list, and move to trash any unknown applications. Don’t forget, select Finder -> Empty Trash.
Remove “This Mac Is Not Secure” pop-up scam from Google Chrome
Reset Chrome settings will remove “This Mac Is Not Secure” fake alerts from web-browser and disable malicious addons. It will also clear cached and temporary data (cookies, site data and content). Essential information like bookmarks, browsing history, passwords, cookies, auto-fill data and personal dictionaries will not be removed.
Open the Chrome menu by clicking on the button in the form of three horizontal dotes (). It will open the drop-down menu. Choose More Tools, then click Extensions.
Carefully browse through the list of installed extensions. If the list has the plugin labeled with “Installed by enterprise policy” or “Installed by your administrator”, then complete the following instructions: Remove Chrome extensions installed by enterprise policy otherwise, just go to the step below.
Open the Chrome main menu again, click to “Settings” option.
Scroll down to the bottom of the page and click on the “Advanced” link. Now scroll down until the Reset settings section is visible, like below and click the “Reset settings to their original defaults” button.
Confirm your action, click the “Reset” button.
Delete “This Mac Is Not Secure” pop up from Safari
The Safari reset is great if your internet browser is hijacked or you have unwanted addo-ons or toolbars on your browser, which installed by an malicious software.
Click Safari menu and choose “Preferences”.
It will open the Safari Preferences window. Next, click the “Extensions” tab. Look for unknown and suspicious extensions on left panel, select it, then press the “Uninstall” button. Most important to remove all unknown extensions from Safari.
Once complete, click “General” tab. Change the “Default Search Engine” to Google.
Find the “Homepage” and type into textfield “https://www.google.com”.
On the introduction page of the Spotify app, hit to the Download button to download and install the Spotify app on your Android devices.Step 4. Now, you can block ads on Spotify with some helpful and reliable Spotify Ad Blockers on your PC computer, Mac and all your devices. When you have successfully downloaded and installed the Spotify on your Android devices, it is easy to enjoy Spotify playing without ads on your Android devices.See? Spotiy app mac now playing. Start from here to enjoy Spotify with no ads playing.
Remove “This Mac Is Not Secure” from Firefox by resetting internet browser settings
Resetting your Firefox is first troubleshooting step for any issues with your web browser application, including the redirect to “This Mac Is Not Secure” page. Essential information such as bookmarks, browsing history, passwords, cookies, auto-fill data and personal dictionaries will not be removed.
Start the Mozilla Firefox and click the menu button (it looks like three stacked lines) at the top right of the web-browser screen. Sandisk ultra plus xc 1 64gb mac software download for free. Next, click the question-mark icon at the bottom of the drop-down menu. It will display the slide-out menu.
Select the “Troubleshooting information”. If you are unable to access the Help menu, then type “about:support” in your address bar and press Enter. It bring up the “Troubleshooting Information” page as shown on the image below.
Click the “Refresh Firefox” button at the top right of the Troubleshooting Information page. Select “Refresh Firefox” in the confirmation prompt. The Mozilla Firefox will start a process to fix your problems that caused by the “This Mac Is Not Secure” adware. When, it’s complete, click the “Finish” button.

Run free malware removal utilities to completely remove “This Mac Is Not Secure” pop up warnings
If you are not expert at computer technology, then we recommend to use free removal utilities listed below to remove “This Mac Is Not Secure” pop-up for good. The automatic solution is highly recommended. It has less steps and easier to implement than the manual solution. Moreover, it lower risk of system damage. So, the automatic “This Mac Is Not Secure” removal is a better option.
How to automatically remove “This Mac Is Not Secure” scam with MalwareBytes Free
Remove “This Mac Is Not Secure” pop up manually is difficult and often the ad supported software is not fully removed. Therefore, we recommend you to use the MalwareBytes that are fully clean your Apple Mac. Moreover, this free application will allow you to remove malicious software, potentially unwanted programs, toolbars and hijacker that your machine may be infected too.
Installing the MalwareBytes Anti-Malware is simple. First you will need to download MalwareBytes Anti-Malware from the link below. Save it to your Desktop.
Malwarebytes Anti-malware (Mac) 14157 downloads Author: Malwarebytes Category: Security tools Update: July 10, 2018
When downloading is complete, close all windows on your Apple Mac. Further, open the saved file. Follow the prompts.
The MalwareBytes will automatically run and you may see its main window like below.
Next, press the “Scan Now” button . MalwareBytes AntiMalware utility will start scanning the whole machine to find out ad-supported software that causes multiple misleading “This Mac Is Not Secure” alerts and pop ups. Depending on your MAC OS, the scan may take anywhere from a few minutes to close to an hour. While the MalwareBytes Free program is checking, you can see how many objects it has identified as threat.
Once the system scan is finished, you can check all items detected on your MAC system. Review the scan results and then click “Remove Selected Items” button.
The MalwareBytes AntiMalware (MBAM) will delete adware that displays misleading “This Mac Is Not Secure” pop-up on your MAC system and move items to the program’s quarantine.
Stop “This Mac Is Not Secure” popup warnings and other unwanted web-sites
It’s also critical to protect your web-browsers from harmful web pages and ads by using an ad-blocker program like AdGuard. Security experts says that it’ll greatly reduce the risk of malicious software, and potentially save lots of money. Additionally, the AdGuard can also protect your privacy by blocking almost all trackers.
Visit the following page to download AdGuard.
AdGuard for Mac download 2560 downloads Author: © Adguard Category: Security tools Update: January 17, 2018
Once the downloading process is finished, launch the downloaded file. You will see the “Setup Wizard” screen. Follow the prompts.
This computer-aided design software is perfect for any professional, from engineers to architects. It is allowing to make drafts, edit 2D projects and 3D models for 3D printing. AutoCAD is a perfect program to create realistic 3D models, using solid, surface and mesh modeling tools! Free 3d cad software for beginners.
Web Browsers For Mac Os
Each time, when you launch your MAC OS, AdGuard will start automatically and stop unwanted ads, “This Mac Is Not Secure” scam, as well as other malicious or misleading sites.
Don’t know how your web-browser has been hijacked by adware
The ad-supported software spreads bundled with various free software, as a supplement, which is installed automatically. This is certainly not an honest way to get installed onto your MAC OS. To avoid infecting of your machine and side effects in the form of undesired “This Mac Is Not Secure” ads, you should always carefully read the Terms of Use and the Software license. Additionally, always select Manual, Custom or Advanced setup type. This allows you to disable the setup of unnecessary and often harmful programs.
Mac Secure Browser Nbme
Finish words
Now your MAC should be free of the adware that causes misleading “This Mac Is Not Secure” popup scam on your internet browser. We suggest that you keep AdGuard (to help you block unwanted pop up ads and unwanted harmful sites) and MalwareBytes Free (to periodically scan your machine for new adwares and other malicious software).
Free Secure Browsers
If you are still having problems while trying to remove “This Mac Is Not Secure” pop up scam from the Chrome, Safari and Firefox, then ask for help here here.
Best Secure Browser
(1 votes, average: 5.00 out of 5)
Remove Secure Browser Software Mac Torrent
Loading..
0 notes
Text
How To Fix the HTTP 408 Error

In the realm of the digital age, encountering errors while browsing the web is not uncommon. One such error, the HTTP 408 Error, can be frustrating for users and website administrators alike. But fret not! In this guide, we will dive deep into the intricacies of the HTTP 408 Error and provide you with a range of solutions to ensure uninterrupted browsing. So, if you've ever wondered "How To Fix the HTTP 408 Error," you're in the right place. Fix the HTTP 408 Error The HTTP 408 Error, also known as the "Request Timeout" error, occurs when a server doesn't receive a complete request from a client within a specified time period. This can happen due to slow internet connections, heavy server loads, or misconfigurations. Here's a step-by-step breakdown on how to resolve this error and get back to smooth browsing: 1. Check Your Internet Connection A stable and reliable internet connection is vital for proper communication between your device and the server. Ensure you're connected to a strong network before proceeding. 2. Refresh the Page Sometimes, the error might be transient. Try refreshing the page by pressing the F5 key or clicking the refresh button on your browser's toolbar. 3. Clear Browser Cache and Cookies Cached data and cookies can lead to communication issues with the server. Clear your browser's cache and cookies and then try accessing the website again. 4. Try a Different Browser It's possible that the issue is browser-specific. If you're encountering the error in one browser, try accessing the website using a different browser. 5. Disable Browser Extensions Certain browser extensions might interfere with the communication process. Temporarily disable your extensions and see if the error persists. 6. Check Server Status The server hosting the website might be experiencing downtime or maintenance. Visit the website's official social media pages or forums to check for any announcements regarding server status. 7. Increase Server Timeout Limit If you manage the website, consider increasing the server's timeout limit to provide more time for client requests to be processed. 8. Optimize Website Performance Slow-loading websites can trigger the HTTP 408 Error. Optimize your website's performance by compressing images, minifying code, and using content delivery networks (CDNs). 9. Use a Content Delivery Network (CDN) CDNs distribute website content across multiple servers, reducing the chances of server overload and request timeouts. 10. Update Software and Plugins Outdated software or plugins can lead to compatibility issues and errors. Keep your website's software and plugins up to date. FAQs Why am I seeing the HTTP 408 Error? The HTTP 408 Error occurs when a server doesn't receive a complete request from your browser within a specified time. This can be due to slow internet, server load, or misconfigurations. Can a slow internet connection cause the HTTP 408 Error? Yes, a slow or unstable internet connection can lead to the HTTP 408 Error, as the server might not receive your request in a timely manner. Is the HTTP 408 Error permanent? No, the HTTP 408 Error is often temporary and can be resolved by refreshing the page, checking your internet connection, or optimizing your website's performance. How can I prevent the HTTP 408 Error on my website? To prevent the HTTP 408 Error on your website, ensure your server's timeout limit is reasonable, optimize your website's performance, and keep software and plugins up to date. Can browser extensions cause the HTTP 408 Error? Yes, certain browser extensions can interfere with the communication process between your browser and the server, leading to the HTTP 408 Error. What should I do if the website's server is down? If the website's server is down, you can wait for it to come back up or check the website's official social media pages for updates on server status. Conclusion Navigating the complexities of the digital landscape can be a challenge, but armed with the knowledge from this guide, you're now equipped to tackle the HTTP 408 Error head-on. By following the steps outlined here, you can troubleshoot the error and enjoy seamless browsing experiences. Remember, whether it's a slow internet connection, server load, or misconfigurations, there's a solution for every roadblock. So, bid adieu to the HTTP 408 Error and embrace hassle-free browsing! Read the full article
0 notes
Text
5 Common Web Browser Issues & How to Fix Them
These days, internet or web browsers are one of the essential components in our digital world. They play a vital role in helping users scroll through millions and billions of web pages and sites effortlessly. Keeping in mind that we mere human beings have created these web browsers, they might sometimes act up. No matter which browser or version you use, errors and technical glitches are something from which you can’t escape. In this article, we are going to promptly show you how to troubleshoot five common browser issues.
Slow Speed and Page Loads Even with Fast Internet
If you are experiencing slow performance in your internet browser, even though your internet is fast enough, other devices are streaming 4K videos without a break, then following these fixes:
Check for updates in your browser by navigating to Help and then “About + (Your browser name).”
If that doesn’t fix your problem, disable all extensions and Add-ons to see the difference in performance.
Another way to improve browser performance is by clearing all cache and cookies data. You can do this by wiping all browsing data from your browser, but be sure to uncheck auto-fill data such as saved IDs and passwords.
If that doesn’t work either, then uninstall your browser and install it again with the latest installer. This time, you might wish to use another browser.
In case you are still facing slow browser performance issues, then it could be a bad software or virus on your system, Make sure to run a thorough virus scan to get rid of that.
Lastly, it could be your computer itself, which might have an older or slower processor and less amount of RAM. You can try a lightweight web browser if your computer is slow.
Autofill is Acting Up
Autofill is one of the most important features in a web browser to quickly feed the required information fields. Such as it helps you quickly provide your email and password whenever you log in to a site. However, in some cases, it starts acting up and improperly fills the demanded details in a form page.
To fix this, first ensure if autofill enabled or not on your browser. You can check it by navigating to Settings> Auto-fill for Chrome; Preferences > Privacy & Security > Login and Passwords for Firefox and more.
If the feature is enabled, then corrupted browser log data can cause the Auto-Fill feature to act up. Another fix is by deactivating all extensions one by one and seeing if it fixes the issue.
Unwanted URL Suggestions
Do you frequently see several useless website suggestions while you access the URL address bar? If yes, you might wish to remove them if possible, but there is no specific option for that. Hey, it is not even hard at all, to clear all history and browsing data. If you don’t wish to clear the whole data, click and hold a URL suggestion and then hit Shift + Delete keys at the same time.
Webpages Don’t Load or Appear as Expected
Do you often see garbled or messy web pages while accessing the internet on your browser? If yes, here are the fixes you should try:
Check your internet connection performance.
Try to reload the webpage as it could be a server issue that you can’t affect.
Are you still seeing a muddy page? Open the same page on another device and with a different connection.
Are other websites loading fine? If yes, then it is possible the site is restricted in your country, or the site’s server is temporarily down. It is also possible that the website isn’t coded or designed well, and it is under development.
The Browser is Crashing Randomly
If the browser stops, closes, or crashes without any sign of warning, it is possible something has corrupted it. You can try by updating it to the least version, resetting all settings and preferences to default, clearing all brewing data including cache and cookies, etc. If that doesn’t work, uninstall the browser completely and reinstall it.
Conclusion
Now that you are aware of the most usual internet browser errors and how to fix them, you will be able to troubleshoot them whenever they occur. The primary fixes are clearing cache and cookies, updating it to the latest version, and reinstalling if nothing works.
Visit:office.com/setup
Source:https://daniel11ryan.wordpress.com/2020/09/08/5-common-web-browser-issues-how-to-fix-them/
0 notes
Photo

https://www.wpplatformhelp.com/wordpress-help/how-to-use-multiple-themes-for-pages-in-wordpress/
How to Use Multiple Themes for Pages in WordPress
youtube
For styling tweaks you can easily add templates for your pages and even for single posts in your theme. But there are rare times you want to use a completely different theme for a section or a page of your site. In this video, we will show you how to use multiple themes for pages in WordPress.
If you liked this video, then please Like and consider subscribing to our channel for more WordPress videos.
Text version of this tutorial: http://www.wpbeginner.com/wp-themes/how-to-use-multiple-themes-for-pages-in-wordpress/
Check us out on Facebook: https://www.facebook.com/wpbeginner
Follow us on Twitter: http://twitter.com/wpbeginner
Join our circle on Google+: https://plus.google.com/+wpbeginner/
Checkout our website for more WordPress Tutorials http://www.wpbeginner.com/
Summary of this Tutorial:
Start by making a complete backup of your site and disabling any caching plugins on your site.
Then install the themes you are wanting to use for your site in your themes area.
Install and activate the Jonradio Multiple themes plugin and go to Appearance, Multiple themes to configure.
Here you can select which theme is for the homepage and choose a url prefix and a keyword that will make the page a different theme.
Customize the theme how you would want it to look and you will be using that theme in specific areas of your site.
Related Links:
Jonradio Multiple themes
https://wordpress.org/plugins/jonradio-multiple-themes/ source
0 notes