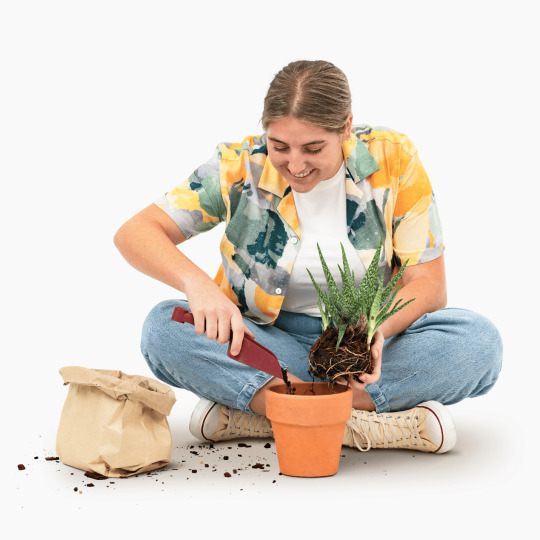
#how to remove a rootball
Explore tagged Tumblr posts
Visit Tumblr Blog
Explore Tumblr blogs with no restrictions, modern design and the best experience.
Last Seen Tumblr Blogs


Fun Fact
Tumblr has a 66 index score for customer satisfaction in the US.
Video
youtube
“How to Remove Four Uprooted Stumps Fast DIY Guide”
#youtube#“How to Remove Four Uprooted Stumps Fast DIY Guide”#how to remove a stump#stump#stumps#stump removal#stump removal business#stump grinding#stump grindin#stump grinder#stump grinder machine#stump grinidng#stump grind#stump rid#rid of stump#how to get rid of stump#rayco rg50#rayco rg50 stump grinder#vermeer stump#vermeer stump grinder#bandit stump grinder#green teeth#how to remove a huge stump#how to remove a root ball'#how to remove a rootball#tree stump#tree stump removal#tree guys#treelife#tree care
0 notes
Text
youtube
We met Elisabeth when we visited her horticulture class at Footscray High School. Her love of plants continues at home, where she has an impressive collection of indoor plants.
At just 16 she already has about 150 plants in her room at home in Melbourne’s inner west. Elisabeth particularly loves anthuriums or flamingo plants.
For optimum plant growth she has installed full-spectrum grow lights. She also keeps her room at 80% humidity, ”which can get a little bit much,” she admits.
Elisabeth buys plants from collectors interstate and does a lot of propagation.
One is Philodendron ‘Dean McDowell’, which she points out has extra-floral nectaries that produce necta; in the wild this farmed by ants which, in turn, guard the plant, forming a mutually beneficial relationship.
A favourite plant is Anthurium warocqueenum, which has long, velvety leaves. She ordered this plant from Far North Queensland and it inspired her to create a vertical garden, because it need humidity and something to climb on.
The garden was built out of an old laundry sink and a piece of PVC foam board covered in two layers of horticultural felt; the plant roots sit between the two layers with no actual substrate. The roots attach to the felt, which absorbs liquid fertiliser from the sink and so provides all the nutrients the plants need to grow. The sink can be wheeled out to hose down and eliminate any mineral buildup.
Elisabeth was encouraged by her parents to join local planting days as a small child and grew to love colourful flowers and succulents as she got older.
A birthday gift of a Monstera deliciosa one year kick-started her collecting bug.
She now has a spreadsheet of all the plants she has, which has helped her learn the scientific names and work out what she wants to collect.
Elisabeth shows how she repots an anthurium she has propagated, first soaking it for a few hours in liquid fertiliser to reduce transplant shock, then removing any old substrate from the roots. She then put the rootball in a pot and gently backfills with growing mixture.
Her preferred substrate is a mix of LECA (lightweight expanded clay aggregate) and mineral blend designed for succulents - this reduces the risk of mould and ensures there’s no fungus gnats, which can live in potting mix. She sterilises the mix before using it; this can be done with boiling water, steam or in the microwave.
Filmed on Boon Wurrung & Bunurong Country in Newport, Vic
#gardening australia#solarpunk#australia#indoor garden#indoor plants#plants#horticulture#garden#gardening#Youtube
6 notes
·
View notes
Text
Chapter 7 - Installation and Establishment
balled and burlapped - the roots are wrapped up in a burlap ball
bare root - the roots are exposed / not in dirt / could temporarily be in woodshavings for moisture retention reasons
container grown - grown in container, potentially rootbound and shitty
containerized - put into a container? wtf is this
drum lace - wow i dont know what this is
girdling root - all of watershed nursery's trees :)
guying - putting a cable btwn two branches that are anticipated to split apart
hardened off - getting a seedling grown inside or in protected conditions to get used to the Real World environmental conditions
perched water table - water being stuck at a higher level / not draining, probably due to morons putting gravel at the bottom of the pot because they don't understand how saturation works
planting specifications - recommendations for how to plant something? or is this the landscape architect's command
root ball - the mass of roots and dirt of a plant
root pruning - when you trim roots in order to correct girdling roots, or to keep a rootball small, or some other reason
staking - putting a stick in the ground and tying the plant to that stick so it doesnt whip around in the wind because the plant was not adapted to existing wind conditions and hasn't had a chance to root due to being grown elsewhere
substrate - medium that the plant is grown in
transplant shock - when you did not do a good job and the plant is suffering because of you
tree spade - a shovel
tree wrap - some stupid thing that the industry tries to make you think you need, probably
wire basket - some stupid thing that will probably girdle roots in the long run but in the interim it will discourage gophers and/or other pests from eating the entire root crown. but they will still eat whatever roots extend past the basket :)
---
yep containerized means it didnt start in a container but when you buy it it's in a container :) ok
oh the wire basket is to support the burlapping. but everything i said is still true :)
i wonder how i will do on this section of the test. in practice i know how to install and establish a tree, but that doesn't matter because i still have to answer test questions
oh drum lacing is tying the root ball/burlap in the format that a drum is created (zigzag-esque)
tree spade is a large machine for digging up trees.
roots will desiccate if not kept moist
oh also guying isn't when you cable a tree (that's cabling LOL) guying is just staking a tree down in place with wires.
---
Trees are generally available from the nursery in one of four forms: bare root, container, burlapped, or *containerized* i truly dont care about this distinction
Bare-root trees are normally planted when __dormant__, before buds begin to grow.
__Girdling__ roots can become a problem because they can constrict the vascular system in the trunk or in other roots.
Planting holes should be dug __2__ to __3__ times the width of the root ball at the surface, with the sides sloping down to the diameter at the base of the root ball.
Trees that are dug in the nursery are often wrapped with __twine__ to keep the root ball intact and reduce exposure of the roots to air.
The planting hole should never be __deeper__ than the root ball.
In areas where the soil is heavy clay, plant trees with the root ball __2__ to __3__ inches higher than the original grade.
True/False- Research has shown that soil amendments generally do not assist the tree in establishment and growth. True? i mean if you put mulch or compost on top, that could help. but "soil amendment" really means nothing to me
True/False- digging a tree for transplanting can remove as much as 90 percent of the absorbing roots. True and also it could remove more. what's to stop an idiot from destroying all roots. "can remove" what is this line of questioning
In temperate climates, the two best times to transplant most trees are __late fall__ and __early spring__ ok i don't really agree with that because why would i wait until early spring. just do it in the fall.
When transplanting a tree, the root ball should be __ to __ inches diameter for every inch of tree caliper. In general, a root ball depth of __ to __ inches should be sufficient. i don't care for this question either because it depends. this is the sort of question i would get wrong just because i don't like memorizing arbitrary numbers. also what's the age/size of the tree being transplanted?? is it the same for a dogwood as it is for a redwood? this question is dumb. the book really wanted me to say 10-12 inches for every inch of tree caliper. bro are you kidding me. first of all by that math i would never transplant a tree over 2". do you think im tryna dig a rootball wider than 2' ??? how would i even pick that up. do you know how heavy 2 cubic feet of clay soil is. and if it's sand then say goodbye to all the absorbing roots (see previous question). and then the book wanted me to say 30-36" deep for the root ball. are you fuckin serious??? you think i'm digging 3 feet into the ground?!?!?!?! i could see this if i were working at a nursery and using a backhoe and a lift. but there is no fucking way i would ever dig a 3' deep root ball by hand. just from soil disturbance alone. the width of my hole would be triple the size of the actual rootball just so i could get the soil out.
True/False- if trees have wire baskets to help maintain the integrity of the root ball, these baskets should never be removed nor should the top portion be cut off at planting. FALSE always remove anything restricting the roots
True/False- most of the new roots generated after planting will grow horizontally and near the soil surface. False? what the fuck is this question. they'll grow everywhere as far as i know
Pre-digging to create a more densely rooted ball is called __idiocy__. it's called root pruning. i don't care for this technique
True/False- staking of newly planted trees is not always necessary. True. nothing is necessary
ok i am getting too irritated by whoever wrote this chapter. this is a 100% ego thing because i feel like i know what i needa know about planting trees already
also this is kevin wiecks' book and i think he got some answers wrong. he (or somebody) circled the multiple choice (something i would never do because i don't write in books) and i have now corrected them.
0 notes
Text
I hate peat moss. I hate it so much.
Why is it the default substrate?
Whoever thought this was a good idea should be punched in the face and shot in the kneecap.
I got four plants over the last month or two that were planted in peat and had thin, fragile roots. Of course they were all also rootbound... and I couldn't remove the substrate... so rather than traumatizing the fuck out of the plants to get the shitty soil (read: 100% peat, no drainage) off, I just planted the rootball in my soil.
I'm currently regretting the fuck out of that decision because all four plants are having issues and it's nearly impossible to figure out if they're truly over or under-watered because of the peat that either swells when it absorbs moisture and suffocates the roots or dries and refuses to absorb water.
This stuff is a NIGHTMARE. No matter how you water, you're fucked. If you water correctly and let the substrate dry properly you are just as fucked as if you had watered too soon. HOW DO PEOPLE EVEN LEARN HOW TO WATER IN THIS?
*SCREAMS*
#i suddenly remember why I stopped using store bought potting soil#ARGH#if I keep having a problem with them I'm gonna take them out back and spray the rootball with the hose#they might hate me for it#i hate peat
1 note
·
View note
Text
How to Make a Miniature Garden ?
Who said you need a lot of space to enjoy the beauty and enjoyment of your garden. With a miniature garden, you can have a beautiful garden that fits in a small room. Here are some instructions on how to create a miniature garden:
1. Choosing the Container
Choose from pots or metal trays, terracotta or glass pots, and even broken clay pots.
2. Prepare potting soil and pebbles
You will need regular potting soil that you can put in the bottom of the container.You will also need to pick up small stones of different colors and textures to place as decorations in your garden.
3. Add plants
Choose plants for your miniature garden. When choosing plants for your garden, you should choose plants that are kept small and require little pruning.
4. Prepare plants for containers
Start by removing the plant from the pot. Do not touch or break the rootball. Then use small pruning shears to trim the damaged leaves from the plant.
5. Place plants in containers
Place the plant in the prepared hole. Once the plants are in place, dab the soil onto the roots.
Find miniature accessories. You can buy miniatures online or offline. Unleash your creativity by placing miniature accessories among the plants in your mini garden. Once you have decided on a particular theme for your garden, you can add accessories that go along with that theme.
Your miniature garden is ready and it will surely make everyone smile.
0 notes
Text
How To Pot or Re-Pot Indoor Houseplants? The Right Way!
If you are wondering how to pot indoor plants, this article is for you. It covers all aspects of houseplant potting and repotting. The best part? It is a beginner-friendly guide, so you don’t have to be an avid houseplant grower. Let’s dig in!
How to pot indoor plants
As a beginner, potting your indoor plants the right way might be daunting. This section shows you how you pot or repot your plants without killing them. But first, let’s look at the things you’ll need.
New or current plant
Planter where you pot or repot the houseplant
Fresh potting mix
Rocks if the planter does not have drainage holes
Porous material such as a coffee filter
Watering can
Gloves
Here’s the step-by-step guide
1. Remove the houseplant from the pot
Generally, new plants come in large plastic containers, allowing the plant to grow uninterrupted. However, you don’t want to keep it in the container for long. Chances are the soil is nutrient-deficient, and the plant will soon outgrow it.
Besides, the cheap plastic containers are not pleasing to the eye. While plants will often pop out of the container easily, you can use scissors to cut the container if it’s hard to get them out. Furthermore, it is just a cheap plastic container.
By cutting the container, you also maintain the shape of the rootball, ensuring the roots stay intact. As you’d guess, most plants will have outgrown the container before adoption.
2. Trim the rootball
After removing the plant, it’s time to loosen and trim the rootball. Loosening the rootball allows air circulation and removal of overgrown roots. You can use your hands – but ensure to have gloves on you – to trim the rootball.
Alternatively, you can use sharp scissors. While doing so, leave the thick roots at the foliage’s base. If the roots have grown in tight circles, unbind them as much as possible.
3. Add fresh potting mix to the pot
If repotting your houseplant, you must remove at least a third of the old mix. It is because the plant has used some of the nutrients. As such, you’ll need to add fresh potting mix. Ensure the planter has drainage holes to prevent the roots from rotting.
If the pot has no drainage hole, you can drill one or layer the bottom with lava rocks, gravel, or rocks. The goal is to ensure optimal water drainage and retention of crucial nutrients. So how do you choose the right potting mix? Let’s find out.
Consider the houseplant’s needs
Each plant has unique needs, which you can find online, in plant identification books, or in tags accompanying them. You can, for example, consider the moisture needs. The snake and spider plants require less water, while wandering Jew and pothos require a lot of water. You can also consider the pH needs.
Water retention and location
Where you’ll plant your houseplant will also determine the type of potting mix to use. Houseplants in shaded areas will require a light mix, while those in direct sunlight will need a medium-weight potting mix. If you are always on the move, you can opt for a mix with water-absorbing granules that hold and release water at different intervals.
Organic vs. conventional soils
As you’d expect, plants will require various nutrients that are not always available in organic soils. Organic soils are eco-friendly, containing natural elements such as worms, decaying plants, and microorganisms.
The conventional potting mix contains added nutrients such as black hummus and manure. Some also come with synthetic fertilizers to boost nutrient density.
Consider repotting frequency
Some plants need repotting at the beginning of every season, while others can sit in the same soil for several seasons. Conventional soil is the most appropriate if your houseplants require fresh soil every season.
They last for one growing season and can be disposed of after that. You can recycle organic soil or even add eco-friendly material, replenishing it with nutrients.
4. Add your plant
Add the houseplant to the fresh potting mix, ensuring it is centered. Finally, add more fresh soil around the plant until it is secure. Do not pack too much potting mix since it might inhibit the roots from breathing.
5. Water
Ensure to give your plant a good watering and leave it for a week. Often, new houseplants will wilt as they acclimatize. So, this should not be a cause for alarm.

Different ways to pot or repot a houseplant
Using a cache pot and saucer
This method requires a decorative pot, saucer, and planter. Place the saucer in the decorative pot and put the planter on top of the saucer. If you need the plant to appear taller, you can place hydro granules or pebbles at the bottom of the planter.
If you want to water the houseplant, you can take it out of the decorative pot, water it and drain the excess water into a sink. Alternatively, you can moisturize in the decorative pot since the saucer traps excess water.
Using a decorative pot and pot liner
For this method, you will require the following:
Decorative pot
Pot liner
Planter
Drainage layer
Packing material or polystyrene foam filler
If you find it daunting to take the plant out of the decorative pot when it needs watering, then you can use a pot liner and a drainage material. Pot liners are made of plastic and come in different sizes, allowing them to fit in different decorative pots.
Furthermore, they prevent excess water from damaging the decorative pot. You can also trim them to the most appropriate size. They are ideal for taller plants or in situations where you want to raise the houseplant’s height. First, you need to fill the base of the decorative pot with packing material and then place the liner on top. Second, put a drainage layer, such as small pebbles or hydro granules, at the base of the pot liner.
Hydro granules absorb excess water, so you don’t need to empty them often. Finally, place the planter on top of the drainage material. For improved stability, you can add pebbles around the grow pot. If your houseplant requires excess watering, you’ll need to replace the drainage material often.

● Hydroculture
For this method, you will require the following:
Decorative pot
Pot liner
Hydroculture grow pot and hydro granules
Water meter
Adapted root system
Hydro granules filler
Packing material or polystyrene foam filler
Hydroculture is one of the most preferred planting methods by professional interior designers. It uses hydro granules rather than soil. The hydro granules, made of clay, hold water and nutrients, allowing them to pass to the plant gradually. As such, it mitigates pests, over/underwatering, and mess. The hydro granules at the base of the grow pot and liner trap and hold water and nutrients, allowing them to pass back to the plant.
This method ensures the plant’s roots have optimal moisture, air, and nutrient environments. As such, the plant will be healthier and more robust compared to those in conventional pots.
The best part is that you can plant two different houseplants in one decorative pot since they will take up only what each need.
How to use the hydroculture method
Finally, hold your plant upright and press it firmly into the new pot. Add a layer of fresh soil around the plant until it is secure. Finally, water to allow it to settle.
Fill the excess void in the decorative pot with packing material while ensuring it is compact to avoid compression over time.
Insert a pot liner with a size similar to the decorative pot. You can use sharp kitchen scissors to trim the pot liner to achieve a neat rim. Ensure the hydro granule pot will sit at the bottom of the pot liner at the plant’s ideal height.
Place your houseplant in the hydroculture grow pot.
Place the water meter beside the hydroculture grow pot so you can tell when it needs watering.
Fill the grow pot’s surroundings with extra hydro granules to create a uniform layer of granules. As you’d expect, when watering, the hydro granules in the grow pot and pot liner will trap and hold excess water and release it back into the plant.
You can even cover the hydro granules with decorative pebbles to improve the aesthetics of your interior.
Do you need to pot or repot your houseplants?
How to pot indoor plants shouldn’t be a daunting task as long as you follow the above tips. And if you find it hard to retain the houseplant’s rootball, you can use our unique release pot that makes repotting a piece of cake.
Original Source: https://releasepots.com/how-to-pot-or-re-pot-indoor-houseplants-the-right-way/
0 notes
Text
How to grow tomatoes / RHS Gardening@|how to care for tomato plants in garden@|http://www.rhs.org.uk/getmedia/88c682f4-a291-47ee-a5cb-282bd75680ec/Tomkin-British-Tomato-Growers-Association-National-Plant-Societies-Plant-Heritage-Marquee-Tatton-Park-2012-_PUB0024696.jpg@|21
Sow

Choosing what to grow
Tomatoes generally have two ways of growing:
[external_link_head]
Cordon (or indeterminate) tomatoes grow tall, up to 1.8m (6ft), and require tall supports. They are great for growing in a greenhouse, but will also do well in a sunny spot outdoors, either in the ground or in large pots against a south-facing wall. They are useful when space is limited, as plants grow vertically, tall and narrow, and produce a heavy crop. They require regular maintenance â watering, feeding, tying to supports and pinching out side-shoots.
Bush (or determinate) tomatoes are shorter and wider, great for smaller gardens, pots and growing bags. Smaller types can also be grown in hanging baskets, with the stems trailing over the sides. These are the easiest type to grow and need little maintenance apart from watering and feeding. The stems don�t usually need support, except if heavily laden with fruit.
Check seed packets or plant labels before buying, to ensure you get the right type to suit your needs. There are also lots of varieties to choose from, offering fruits of various sizes, shapes, flavours and textures. Fruit colours range from traditional red to dark purple, pink, orange, yellow or green, and even striped. There are heirloom varieties, grown for many generations, as well as modern, blight-resistant choices. There are miniature round fruits, elongated plum varieties, smooth uniform salad tomatoes and huge, wrinkled, mis-shapen beefsteaks, all full of flavour and with their own individual characters.
For varieties that will reliably produce good crops, look for those with an RHS Award of Garden Merit (AGM), which means they performed well in RHS growing trials. There are currently more than 40 AGM tomatoes to choose from â for a selection, see Recommended varieties, below.What & where to buy
Tomato seeds are widely available from garden centres and other seed stockists.Sow indoors
Tomatoes are easy to grow from seed sown indoors in warm conditions. Sow from late February to mid-March if youâll be growing your crop in a greenhouse, or from late March to early April if theyâll be outside. Fill a small pot with seed compost, water well, then sow three or four seeds on the surface. Cover with vermiculite and keep at around 18°C (64°F), ideally in a heated propagator, or cover with a clear plastic bag and place on a warm windowsill. As soon as seedlings appear â usually within a fortnight â uncover and place in as much light as possible, to prevent them growing thin and leggy. Potting on
After a couple of weeks, move the seedlings into individual pots:
⢠Fill small pots with multi-purpose compost and water well, then make a hole in the centre of each with a dibber or blunt stick.
⢠Lift each seedling individually, using the dibber to support its rootball and holding it by a leaf rather than the delicate stem, then lower it into the new hole. If the seedling is leggy, bury it up to the first pair of leaves, then firm in gently.
Keep the plants in a greenhouse or on a well-lit windowsill, where the temperature is always at least 16°C (60°F), and water regularly. After about a month, they should be ready to plant into their final position, as soon as the first flowers open.
Guide to sowing indoors https://ift.tt/2VtYUn5 Guide to sowing veg seeds https://ift.tt/38RXgyz Sowing tips https://ift.tt/2KLEsZy
Grow
[external_link offset=1]
Watering
Water tomato plants regularly to keep the soil or compost evenly moist. Fluctuating moisture levels can cause problems with the fruit, such as splitting or blossom end rot (see Problem solving, below). Plants in containers dry out quickly, so they may need watering daily in hot weather.Feeding
To boost fruiting, especially with plants in containers, feed every 10â14 days with a high potassium liquid fertiliser once the first fruits start to swell.Mulching
Lay a thick layer of mulch over the soil around tomato plants to help hold moisture in the ground and deter weeds. Use garden compost or well-rotted manure, but leave a gap around the base of the stem, to prevent rotting.Improving pollination
When growing tomatoes in a greenhouse, open the vents regularly to give pollinating insects access to the flowers. You can also lightly tap or shake the flowers when fully open to aid pollen transfer within the flower. Misting flowers with water may also help.Pruning & training
The two different types of tomatoes are treated differently â check your seed packet or plant label to see which type you are growing:
Cordon tomatoes are grown as tall, single-stemmed plants â they need tall supports and the side-shoots should be removed regularly.
Bush tomatoes are more compact and the side-shoots should not be removed. They may or may not need support, depending on how large they grow and whether the stems are strong enough to carry their crop of fruit.
For advice on training and pruning tomatoes, see our video guide https://ift.tt/3jWIpJxCordon tomatoes â training up supports
Cordon tomatoes need support, usually either a tall sturdy cane or a vertical string coming down from an overhead horizontal support, such as a greenhouse roof, and anchored in the soil under the plantâs rootball. However, tomatoes donât cling to supports or twine round them naturally, so must be attached by hand as they grow. If using a cane support, simply tie the main stem to it at regular intervals as it grows. If using a vertical string, gently wind the string around the top of the main stem once or twice a week as it grows. When plants reach the top of their support or have set seven fruit trusses indoors or four trusses outdoors, remove the growing point of the main stem at two leaves above the top truss.Cordon tomatoes â removing side-shoots
Cordon tomatoes are best grown as single-stemmed plants. However, these vigorous plants naturally produce side-shoots from the joints where leaves sprout from the main stem. These side-shoots should be pinched out to keep plants growing vertically on just one stem. If theyâre not removed, the side-shoots grow rapidly, forming a mass of long, scrambling, leafy stems that are difficult to support, produce few fruits and take up a lot of space. Removing the side-shoots is simple â every time you water, check the plant for any shoots sprouting just above each leaf, from the joint between the leaf and the stem. Pinch these out or snap them off. Bush tomatoes â providing support
Bush tomatoes are more compact and less vigorous than cordon tomatoes, and may not need supporting at all. But if they carry a heavy crop of fruits, the side-shoots may start to droop or be at risk of snapping. If so, simply add short vertical canes when required, tying in the shoots loosely to the cane.
Common problems
In a warm summer, tomatoes are easy to grow if they are well watered on a regular basis. However, problems can occur when conditions are not ideal, including
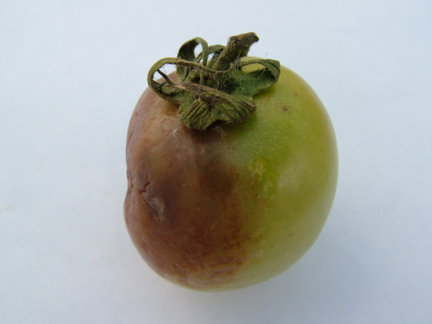
Blossom end rot

Dark blotches appear on the ends.
Remedy
Water regularly and not sporadically and never allow the soil to dry out.
Tomato blight
Disease that causes fruit and foliage rot, most common in wet weather.
Remedy
Select resistant cultivars.
Tomato leaf mould

Leaf mould can develop rapidly to cause significant yield loss in greenhouse-grown tomatoes. It is rarely seen on outdoor crops. Yellow blotches develop on the upper leaf surface. A pale, greyish-brown mould growth is found on the corresponding lower surface. Where the disease is severe the mould growth may also be found on the upper surface.
Remedy
Select resistant cultivars. Provide ample ventilation to indoor tomato crops.
Tomato splitting and cracking

Cracking or splitting usually does not affect the taste of the tomato, but split fruit left on the plant will often be infected by a fungus, such as grey mould and can cause a variety of physiological disorders.
Remedy
Control temperature and sunlight levels carefully. Feed regularly to maintain high soil fertility. Water to maintain a constant level of soil moisture.
Harvesting
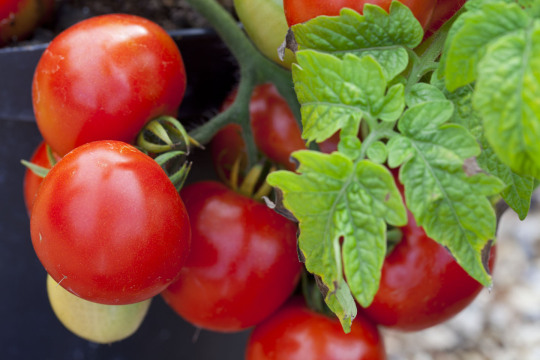
Tomatoes start to ripen from mid-summer onwards, depending on the variety, weather conditions and fruit size. Smaller cherry tomatoes ripen more quickly than larger fruits, and greenhouse tomatoes usually start cropping earlier than those outdoors, and continue for longer, well into autumn.
Check plants every few days and pick tomatoes individually, with the stalk still attached, as soon as theyâre ripe and fully coloured.
[external_link offset=2]
At the end of the growing season, lift outdoor plants with unripe fruit and either lay them on straw under cloches or pick the fruits and place somewhere warm and dark to ripen. Alternatively, put unripe tomatoes in a drawer with a banana, to aid ripening. Storage
Tomatoes are best eaten as fresh as possible. But if you have too many, then fully ripe tomatoes can be kept in a fridge for a week or so, to prevent them going mouldy. Try not to keep them refrigerated for long though, as the texture can deteriorate. Bring them back to room temperature before eating, to enjoy the full flavour. If the tomatoes arenât yet fully ripe, leave them unrefrigerated to reach their peak of ripeness. Surplus ripe tomatoes can also be cooked then frozen for use in pasta sauces, soups and stews.
Recipes
Nigel Slater uses large, ripe tomatoes for his delicious supper dish roast tomatoes with cheese and thyme.
Masterchef judge Gregg Wallace shares his recipe for tasty tomato tarts.
Recommended Varieties
Tomatoes â small fruits
‘Apero’ AGM
Exceptionally flavoured, very uniform, small, oval fruits. Itâs a superb exhibition variety and has good disease resistance. A cordon type, so needs support.
‘Rosella’ AGM
Produces large crops of very sweet, dark pink-red cherry tomatoes, favoured by chefs for their rich, balanced flavour. A cordon type.
‘Sungold’ AGM
One of the most popular cherry varieties, it has golden-orange fruits with a sweet tangy flavour. A cordon type, it crops over a long period.
Tomatoes â medium fruits
‘Alicante’ AGM
A very reliable, heavy cropper that is widely grown. A cordon type, it fruits well both in a greenhouse and outdoors in a sheltered position.
‘Shirley’ AGM
A popular variety for growing in an unheated greenhouse. Excellent quality fruits with good disease resistance. A cordon type, so needs to be grown up a support.
‘Yellow Perfection’ AGM
Probably the best medium-fruited yellow tomato, this cordon variety produces heavy crops of tasty round golden tomatoes.
Tomatoes â beefsteak
‘Brandy Boy’ AGM
Pink and thin skinned, the large fruits have a rich flavour. Bred from the popular heirloom variety ‘Brandywine’, this F1 hybrid offers bigger, earlier crops. A cordon type, so needs support.
‘Costoluto Fiorentino’ AGM
A deep-red, distinctly flattened, heavily ribbed Italian tomato. The large, early maturing fruits are particularly valued by chefs. A cordon variety, so plants need support.
‘Gigantomo’ AGM
Probably the largest-fruited variety available, with tomatoes up to 20cm (8in) across, so needs sturdy supports. Despite their size, the fruits have an excellent flavour and texture.
Tomatoes â trailing
‘Ildi’ AGM
Produces large trusses of small pear-shaped yellow fruits. If the trusses are picked and hung up, the fruits will last for weeks without deterioration. A cordon type.
‘Lizzano’
Vigorous plants with low sprawling growth, ideal for hanging baskets and containers. The deep-red cherry fruits ripen quickly in full sun.
‘Tumbler’
Best grown in hanging baskets, this trailing tomato is a really prolific cropper. It’s a small bush (determinate) variety.
[external_footer]
source https://livingcorner.com.au/how-to-grow-tomatoes-rhs-gardeninghow-to-care-for-tomato-plants-in-gardenhttp-www-rhs-org-uk-getmedia-88c682f4-a291-47ee-a5cb-282bd75680ec-tomkin-british-tomato-growers-association-nation/
0 notes
Link
Ground anchors are devices used to hold heavy earth structures in place. The earth anchors are strong and durable and provide a strong and safe method to keep ground anchors firmly in place. In addition, they give you the ability to move your foundations from one location to another if the original location no longer fits your needs. There are many different types of earth anchors from which to choose. Some of the more common include:

Tree Rootball kits Systems is one of the oldest types of earth anchors. They are designed to be used in areas where it is difficult or impossible to dig a hole big enough for a large anchor system. A tree rootball system consists of small individual tie-offs that fit into a hole dug with a large trowel.
Wood Rootball Systems is ideal for use in areas where soil is hard and sandy or very compacted. These systems work well in both wet and dry ground conditions. Wood anchored ground anchors are typically made of cedar, redwood orruce, depending on the specific conditions needed. They are ideal for covering large area expanses and are good for both security and aesthetics.
Micropiles Ground Anchors Micropiles is not rooted like traditional root balls, so they work well in both wet and dry ground conditions. They come in two different forms: permanent pins and removable pins. With the permanent form of these ground anchors, they are permanently affixed to the surface they are to cover. These anchors have a much stronger hold and last a much longer time than other forms of anchor systems.
Tieback Anchors ties back the soil securely and creates a strong and secure anchor system. There are two general types of tieback anchor systems: one uses steel ties and the other uses wooden ties. Both serve very good ground anchors and can be used for both residential and commercial applications, depending on the application and the soil type. Wooden tiebacks, which are normally ground anchors, are better suited for smaller ground expanses while steel ties work better for larger spaces.
Both ground anchors discussed above are suitable for use on both residential and commercial property. However, micropiles are better suited for residential applications because of their sturdiness and longer lifespan. Additionally, the tiebacks provide better visual appearance and enhance security for both residential and commercial properties. When deciding which form of ground anchor to use, make sure to consider your budget as well as the size and type of site you will be working on. It is best to choose anchor systems that complement the site's characteristics.
0 notes
Text
How to Plant Sabal Palm? 7 Steps to Know
Sabal Palms, also known as palmettos or cabbage palms, are quite common in some parts of the world. It grows in the hardiness zone of 8-10. These palms are drought tolerant and can grow at a height of 50-70 ft. If you are thinking of planting a Sabal palm, then there are three important things that you need to consider.
Select the right climate to plant the tree.
A right planting site where the tree can grow properly and can reach a height without any obstruction of power lines.
Selection of the spot where the tree will get proper sunlight.
Apart from these considerations, there are certain other equipment's that you require while planting the tree which are as follows.
Shovel
Roofing asphalt or burlap
Woods
Metal sharps
Wooden stakes
Brace boards
Nails
Hand rake
Hammer
Mulch
Now coming to the main part of discussion i.e. how to plant a Sabal Palm? Well, being a beginner you must be thinking that simply like other plants or trees, it needs the same process but no, it’s process is quite different from others. Well, the process is given below.

Step 1:
Dig a hole of diameter twice the diameter of the root ball. Make sure the hole is deep enough so that the root ball can be placed properly. Dig the soil again after placing the root ball. Simply scrap the side walls with the help of a hand rake, if the soil is clay soil so that the water can move and the root can grow properly in the surrounding soil.
Step 2:
Remove the container i.e. the plastic covering or the burlap of the roots of the tree and place it on the previously dug hole and ensure that it is placed in a vertical position. Then fill the hole uniformly with the soil so that the root ball is perfectly surrounded by soil. While filling the hole, tamp the soil gently with your hand.
Step 3:
Wrap a wide piece of asphalt around the trunk of the tree. Place some woods on the tree trunk over the wrapping. Attach some metal straps so that they can be protected.
Step 4:
Pound few foot stakes in the ground few feet away from the rootball. And place them in an even manner.
Step 5:
Set a brace board in the blocks in the tree trunk and also in the stakes in the ground. Nail the boards and blocks together, but ensure that it should get pounded on the trunk.
Step 6:
Again place some soils around the tree, outside the planting hole. Spread the mulch over the root zone properly. Maintain space between the mulch and the trunk.
Step 7:
Pour water in the root zone. Water the tree three times a week for one month and then reduce the frequency. Remove the stakes after a few years.

Hence, these are the steps that you need to follow while planting Sabal Palms. But before planting you are required to purchase it from the right farm. Palm Tree Depot is a reputed farm that deals with Sabal Palms for sale. You can purchase minimum of 20 Sabal Palms at a price of $65. It offers in-house transportation dept. For details, click here at http://www.palmtreedepot.com/
0 notes
Text
What Is A Garden Center And Why Should You Buy From Them?
"Checking Out a Timberland, Nursery, or Garden Center can be a fun and relaxing time. Taking a look at all of the plants, shrubs, and trees and envisioning how they will suit your landscaping strategies. However there are some crucial things you need to take a look at before you purchase; otherwise your gorgeous plant or tree, that looked so good when you purchased it, will turn your landscape into an eyesore.
A True Story:
Nancy likes plants and trees, nature, and wildlife; but she just purchased a new home in a brand-new development that has minimal landscaping and no personal privacy. Spring Time comes and Nancy is delighted to improve her landscape. So Nancy goes to her local garden center to select out some plants and trees. She is so pleased when she gets here; all the plants and trees look so great. Nancy wants instant privacy so she chooses the biggest trees they have, however they are too big for her to deal with so she has the garden center provide and plant the trees. She views as the crew at the Garden Center moves her trees off to the side. She winces as they pull her tree out from the others because she can hear the branches breaking as they get captured on the other trees.

A year passes and the trees that Nancy had actually planted simply do not look as great as they performed in the garden center. Some of her Spruce Trees have brown branches on the bottom and they look sort of yellow. Nancy contacts the garden center to grumble, they come out and state that the tree is great and is just a little stressed out. They say it will complete next year and will look terrific. ""OK"" Nancy states.
Well, next year comes, and Nancy's Trees do not look any better, however it is still not dead and by this time its guarantee has actually ended. Year after Year the tree seeks to barley hang on. The branches are thinning and slowly the tree passes away. Now Nancy wishes she had never purchased those trees. If just Nancy had actually read my post she could have had a tree that will always look as excellent as it did the day she purchased it.
Don't be Nancy!
youtube
Here are some things to Consider:
Rootball Size - This is the most significant aspect of why your tree will suffer down the roadway. Trees need roots - The more the much better! Christmas Trees look good when you purchase them, but what takes place purchase New Years - they die. A great deal of Garden Centers are selling trees that are not much better than Christmas Trees. It just makes good sense from their point of view. Dirt is extremely heavy and things that are heavy ended up being costly. They are more expensive to move, plant, and set up. It is cheaper for them to need to replace a tree if it passes away than to offer a tree that is destined to live. The size of a rootball will tell you how it will look down the road. If one garden center is more affordable, do not simply compare the tree however compare the roots.
How it is watered - Lots of Garden Centers water their trees various ways and some don't appear to water them at all. Once the rootball has actually been dried, a great deal of damage has currently been done. Make sure the location where you are buying your trees is keeping them watered.
Potted or Balled and Burlapped - Do not be fooled into thinking that if you are purchasing it potted, in some way it is better than balled and burlapped. It is not uncommon in the market for a tree to be removed early in the spring and positioned in a pot, instead of placed in burlap. All this does is make you believe that it was grown in the pot. Make sure to ask for how long it has been in the pot. If you get a balled and burlapped tree make certain that the burlap and wire basket is tight; if it is loose, root damage will happen when it is walked around.
Warranty - This is a big misunderstanding, I have actually replaced a lot of my competitors' trees that allegedly had a service warranty, however the tree was not dead - just 1/2 dead and awful - so they don't replace it. Other times the consumer was informed by the garden center that they did not water the tree and they were not going to change it. While the client might have not provided it the proper quantity of water at all times, if you get a tree that has a larger root system you have a lot more wiggle room to make mistakes.
How it is Handled - The more a tree is dealt with the more root damage can occur. The best is if a tree spade, installed on a truck moves it straight from the field to your lawn. If you can not go that route make certain that they are utilizing the correct equipment to plant the trees. Few things are worse for a tree than to be dropped, kicked, pulled, and pried; this is what will take place if they are not using the proper devices to plant the tree."
0 notes
Text
Choosing the Best Garden Center For Your Gardening Needs
"Going To a Tree Farm, Nursery, or Garden Center can be a fun and relaxing time. Taking a look at all of the plants, shrubs, and trees and picturing how they will fit into your landscaping strategies. But there are some important things you require to take a look at prior to you buy; otherwise your stunning plant or tree, that looked so good when you bought it, will turn your landscape into an eyesore.
A True Story:
youtube
Nancy likes plants and trees, nature, and wildlife; but she simply purchased a brand-new home in a new advancement that has very little landscaping and no personal privacy. Spring Time comes and Nancy is thrilled to improve her landscape. So Nancy goes to her local garden center to select some plants and trees. She is so happy when she shows up; all the plants and trees look so nice. Nancy desires immediate personal privacy so she chooses the most significant trees they have, but they are too huge for her to handle so she has the garden center provide and plant the trees. She views as the crew at the Garden Center moves her trees off to the side. She winces as they pull her tree out from the others because she can hear the branches breaking as they get caught on the other trees.
A year goes by and the trees that Nancy had actually planted just do not look as great as they carried out in the garden center. A few of her Spruce Trees have brown branches on the bottom and they look kind of yellow. Nancy phones the garden center to grumble, they come out and say that the tree is fine and is simply a little stressed. They say it will fill out next year and will look great. ""OK"" Nancy states.
Well, next year comes, and Nancy's Trees do not look any better, however it is still not dead and by this time its service warranty has actually ended. Every year the tree looks to barley hold on. The branches are thinning and slowly the tree passes away. Now Nancy wants she had never purchased those trees. If only Nancy had read my post she might have had a tree that will always look as excellent as it did the day she bought it.
Do not be Nancy!

Here are some things to Think about:
Rootball Size - This is the biggest aspect of why your tree will suffer down the roadway. Trees need roots - The more the better! Christmas Trees look good when you purchase them, but what happens buy New Years - they pass away. A great deal of Garden Centers are offering trees that are not much better than Christmas Trees. It just makes good sense from their point of view. Dirt is incredibly heavy and things that are heavy become costly. They are more costly to move, plant, and install. It is less expensive for them to have to change a tree if it passes away than to sell a tree that is predestined to live. The size of a rootball will tell you how it will look down the roadway. If one garden center is less expensive, don't simply compare the tree however compare the roots.
How it is watered - Numerous Garden Centers water their trees various ways and some don't seem to water them at all. As soon as the rootball has actually been dried, a great deal of damage has currently been done. Make certain the location where you are purchasing your trees is keeping them watered.
Potted or Balled and Burlapped - Do not be fooled into thinking that if you are purchasing it potted, somehow it is better than balled and burlapped. It is not uncommon in the industry for a tree to be removed early in the spring and placed in a pot, instead of put in burlap. All this does is make you think that it was grown in the pot. Make certain to ask how long it has been in the pot. If you get a balled and burlapped tree make certain that the burlap and wire basket is tight; if it is loose, root damage will occur when it is walked around.
Service warranty - This is a huge mistaken belief, I have replaced a lot of my competitors' trees that supposedly had a service warranty, but the tree was not dead - simply 1/2 dead and awful - so they don't replace it. Other times the client was told by the garden center that they did not water the tree and they were not going to replace it. While the customer may have not provided it the appropriate quantity of water at all times, if you get a tree that has a bigger root system you have a lot more wiggle room to make mistakes.
How it is Managed - The more a tree is managed the more root damage can take place. The best is if a tree spade, mounted on a truck moves it straight from the field to your backyard. If you can not go that path make sure that they are using the correct devices to plant the trees. Few things are worse for a tree than to be dropped, kicked, pulled, and pried; this is what will take place if they are not using the proper devices to plant the tree."
0 notes
Text
Organic Gardening Done Right - Part 4
"Visiting a Timberland, Nursery, or Garden Center can be an enjoyable and relaxing time. Looking at all of the plants, shrubs, and trees and envisioning how they will suit your landscaping plans. But there are some crucial things you require to look at before you purchase; otherwise your beautiful plant or tree, that looked so excellent when you bought it, will turn your landscape into an eyesore.
A Real Story:
Nancy loves plants and trees, nature, and wildlife; but she just bought a new house in a new development that has very little landscaping and no personal privacy. Spring Time comes and Nancy is excited to enhance her landscape. So Nancy goes to her local garden center to select some plants and trees. She is so pleased when she arrives; all the plants and trees look so nice. Nancy desires instant personal privacy so she selects the greatest trees they have, but they are too big for her to handle so she has the garden center provide and plant the trees. She enjoys as the team at the Garden Center moves her trees off to the side. She winces as they pull her tree out from the others due to the fact that she can hear the branches breaking as they get captured on the other trees.
youtube
A year goes by and the trees that Nancy had planted just do not look as great as they did in the garden center. Some of her Spruce Trees have brown branches on the bottom and they look type of yellow. Nancy calls the garden center to grumble, they come out and state that the tree is great and is just a little stressed out. They state it will submit next year and will look excellent. ""OK"" Nancy states.

Well, next year comes, and Nancy's Trees do not look any better, however it is still not dead and by this time its warranty has actually expired. Year after Year the tree aims to barley hang on. The branches are thinning and slowly the tree dies. Now Nancy wishes she had actually never bought those trees. If only Nancy had actually read my post she might have had a tree that will always look as excellent as it did the day she bought it.
Do not be Nancy!
Here are some things to Think about:
Rootball Size - This is the greatest factor of why your tree will suffer down the road. Trees require roots - The more the better! Christmas Trees look excellent when you buy them, but what takes place purchase New Years - they pass away. A lot of Garden Centers are offering trees that are not much better than Christmas Trees. It only makes good sense from their point of view. Dirt is exceptionally heavy and things that are heavy become costly. They are more pricey to move, plant, and set up. It is more affordable for them to have to change a tree if it dies than to offer a tree that is predestined to live. The size of a rootball will tell you how it will look down the road. If one garden center is cheaper, don't just compare the tree but compare the roots.
How it is watered - Numerous Garden Centers water their trees various ways and some do not seem to water them at all. Once the rootball has actually been dried out, a lot of damage has actually already been done. Make sure the location where you are buying your trees is keeping them watered.
Potted or Balled and Burlapped - Do not be deceived into believing that if you are purchasing it potted, in some way it is much better than balled and burlapped. It is not unusual in the market for a tree to be removed early in the spring and placed in a pot, rather of placed in burlap. All this does is make you think that it was grown in the pot. Be sure to ask for how long it has actually been in the pot. If you get a balled and burlapped tree make certain that the burlap and wire basket is tight; if it is loose, root damage will happen when it is walked around.
Guarantee - This is a huge misunderstanding, I have actually changed many of my competitors' trees that allegedly had a guarantee, but the tree was not dead - just 1/2 dead and unsightly - so they do not replace it. Other times the customer was told by the garden center that they did not water the tree and they were not going to change it. While the customer might have not offered it the correct amount of water at all times, if you get a tree that has a bigger root system you have a lot more wiggle room to make errors.
How it is Handled - The more a tree is handled the more root damage can happen. The very best is if a tree spade, mounted on a truck moves it directly from the field to your lawn. If you can not go that route ensure that they are using the proper devices to plant the trees. Couple of things are even worse for a tree than to be dropped, kicked, pulled, and pried; this is what will happen if they are not using the appropriate equipment to plant the tree."
0 notes
Text
Buy Plants This Spring From An Online Garden Center
"Checking Out a Tree Farm, Nursery, or Garden Center can be a fun and peaceful time. Taking a look at all of the plants, shrubs, and trees and visualizing how they will suit your landscaping strategies. But there are some essential things you require to look at before you purchase; otherwise your beautiful plant or tree, that looked so great when you bought it, will turn your landscape into an eyesore.
A True Story:
Nancy loves plants and trees, nature, and wildlife; however she just purchased a brand-new home in a new development that has very little landscaping and no privacy. Spring Time comes and Nancy is thrilled to enhance her landscape. So Nancy goes to her regional garden center to select out some plants and trees. She is so delighted when she shows up; all the plants and trees look so great. Nancy wants instantaneous personal privacy so she chooses the biggest trees they have, but they are too big for her to manage so she has the garden center deliver and plant the trees. She views as the crew at the Garden Center moves her trees off to the side. She cringes as they pull her tree out of the others since she can hear the branches breaking as they get caught on the other trees.
A year goes by and the trees that Nancy had planted just don't look as great as they performed in the garden center. A few of her Spruce Trees have brown branches on the bottom and they look type of yellow. Nancy contacts the garden center to complain, they come out and state that the tree is fine and is just a little stressed. They state it will fill out next year and will look great. ""OK"" Nancy says.
Well, next year comes, and Nancy's Trees do not look any better, but it is still not dead and by this time its guarantee has ended. Year after Year the tree looks to barley hang on. The branches are thinning and slowly the tree dies. Now Nancy wants she had never ever bought those trees. If only Nancy had actually read my post she could have had a tree that will always look as excellent as it did the day she purchased it.
Don't be Nancy!
Here are some things to Think about:
Rootball Size - This is the biggest element of why your tree will suffer down the road. Trees require roots - The more the better! Christmas Trees look excellent when you buy them, but what happens purchase New Years - they pass away. A lot of Garden Centers are selling trees that are very little better than Christmas Trees. It just makes good sense from their point of view. Dirt is extremely heavy and things that are heavy become expensive. They are more expensive to move, plant, and set up. It is cheaper for them to need to replace a tree if it passes away than to offer a tree that is predestined to live. The size of a rootball will inform you how it will look down the roadway. If one garden center is cheaper, do not just compare the tree however compare the roots.
youtube
How it is watered - Many Garden Centers water their trees various ways and some do not appear to water them at all. When the rootball has actually been dried, a great deal of damage has currently been done. Make certain the location where you are buying your trees is keeping them watered.

Potted or Balled and Burlapped - Do not be fooled into thinking that if you are purchasing it potted, in some way it is better than balled and burlapped. It is not unusual in the industry for a tree to be removed early in the spring and put in a pot, rather of placed in burlap. All this does is make you think that it was grown in the pot. Make sure to ask the length of time it has been in the pot. If you get a balled and burlapped tree ensure that the burlap and wire basket is tight; if it is loose, root damage will occur when it is moved around.
Guarantee - This is a huge mistaken belief, I have actually changed much of my rivals' trees that apparently had a service warranty, however the tree was not dead - simply 1/2 dead and unsightly - so they do not replace it. Other times the client was told by the garden center that they did not water the tree and they were not going to replace it. While the client may have not provided it the appropriate amount of water at all times, if you get a tree that has a larger root system you have a lot more wiggle space to make errors.
How it is Dealt with - The more a tree is handled the more root damage can take place. The very best is if a tree spade, installed on a truck moves it straight from the field to your backyard. If you can not go that route ensure that they are using the correct devices to plant the trees. Couple of things are worse for a tree than to be dropped, kicked, pulled, and pried; this is what will take place if they are not utilizing the correct devices to plant the tree."
0 notes
Text
Fresh Produce - 11 Exciting Benefits to Improve Your Health!
"Visiting a Timberland, Nursery, or Garden Center can be an enjoyable and peaceful time. Taking a look at all of the plants, shrubs, and trees and imagining how they will suit your landscaping strategies. But there are some vital things you require to take a look at prior to you buy; otherwise your stunning plant or tree, that looked so great when you purchased it, will turn your landscape into an eyesore.
A Real Story:
Nancy enjoys plants and trees, nature, and wildlife; but she simply purchased a brand-new house in a new advancement that has minimal landscaping and no personal privacy. Spring Time comes and Nancy is excited to improve her landscape. So Nancy goes to her regional garden center to select some plants and trees. She is so happy when she gets here; all the plants and trees look so good. Nancy desires immediate personal privacy so she chooses the greatest trees they have, however they are too big for her to handle so she has the garden center provide and plant the trees. She watches as the crew at the Garden Center moves her trees off to the side. She flinches as they pull her tree out of the others since she can hear the branches breaking as they get caught on the other trees.
A year goes by and the trees that Nancy had planted just don't look as good as they did in the garden center. A few of her Spruce Trees have brown branches on the bottom and they look type of yellow. Nancy calls up the garden center to complain, they come out and say that the tree is fine and is simply a little stressed. They state it will fill out next year and will look terrific. ""OK"" Nancy says.
Well, next year comes, and Nancy's Trees do not look any better, however it is still not dead and by this time its warranty has actually ended. Year after Year the tree looks to barley hold on. The branches are thinning and slowly the tree dies. Now Nancy wishes she had actually never ever purchased those trees. If just Nancy had read my short article she could have had a tree that will always look as excellent as it did the day she bought it.
youtube
Don't be Nancy!
Here are some things to Consider:
Rootball Size - This is the biggest aspect of why your tree will suffer down the road. Trees require roots - The more the much better! Christmas Trees look great when you buy them, however what takes place buy New Years - they die. A great deal of Garden Centers are offering trees that are not much better than Christmas Trees. It only makes good sense from their perspective. Dirt is incredibly heavy and things that are heavy ended up being pricey. They are more expensive to move, plant, and install. It is less expensive for them to need to replace a tree if it dies than to sell a tree that is predestined to live. The size of a rootball will tell you how it will look down the roadway. If one garden center is more affordable, do not simply compare the tree but compare the roots.

How it is watered - Lots of Garden Centers water their trees various methods and some do not seem to water them at all. As soon as the rootball has been dried, a lot of damage has already been done. Make sure the location where you are purchasing your trees is keeping them watered.
Potted or Balled and Burlapped - Do not be fooled into believing that if you are buying it potted, in some way it is better than balled and burlapped. It is not unusual in the industry for a tree to be removed early in the spring and put in a pot, rather of placed in burlap. All this does is make you think that it was grown in the pot. Be sure to ask for how long it has actually been in the pot. If you get a balled and burlapped tree make certain that the burlap and wire basket is tight; if it is loose, root damage will happen when it is moved around.
Guarantee - This is a big misunderstanding, I have replaced much of my competitors' trees that allegedly had a warranty, but the tree was not dead - just 1/2 dead and ugly - so they do not change it. Other times the client was informed by the garden center that they did not water the tree and they were not going to change it. While the customer might have not given it the appropriate amount of water at all times, if you get a tree that has a larger root system you have a lot more wiggle space to make errors.
How it is Handled - The more a tree is managed the more root damage can take place. The best is if a tree spade, installed on a truck moves it directly from the field to your yard. If you can not go that route make sure that they are utilizing the proper devices to plant the trees. Couple of things are even worse for a tree than to be dropped, kicked, pulled, and pried; this is what will happen if they are not utilizing the appropriate equipment to plant the tree."
0 notes
Text
How to Grow Delicious Herbs in Pots
Garden-grown herbs can really transform your cooking. They’re very low maintenance and contribute bags of flavor. Evergreen types such as sage will continue to provide leaves even in the winter in many areas, making them a must for any cook. If you’d like to grow more herbs, read on or watch our video below because we’re going to show you how to choose, arrange and plant up a beautiful herb container.
Herbs for Containers
Many herbs make excellent container plants. Growing them in pots means the potting soil can be tailored to suit each type of herb. Pots are easy to move around the garden to create attractive edible displays, or you can group them close to the house for easy access.

Containers can be as conventional or quirky as you dare. Sun-loving herbs originally from the Mediterranean look the part in terracotta pots and urns. Galvanized tubs lend themselves to an eruption of luxurious foliage, while wicker-framed planters add a rustic touch. Grow a single herb or type of herbs in a container, or group them together in a large planter.
Most herbs will grow in containers. Mint is especially suited to its own pot because of its vigorous habit and tendency to spread and overwhelm neighboring plants.
Remember to match herbs that like the same growing conditions: for instance drought-tolerant herbs such as rosemary, lavender and thyme prefer full sun and well-drained potting soil, while chives and parsley make good companions in a shadier spot.
How to Plant Up a Herb Container
Containers need drainage holes to allow excess water to escape, so if your chosen container doesn’t already have them, you’ll need to drill some into the base.
Start by placing some broken pieces of pot over the drainage holes to prevent the potting soil from washing out. For a free-draining potting soil, mix in a few generous handfuls of grit, adding and mixing together in stages as you fill the container.
Before planting your herbs, arrange them on top of the potting soil to see how they’ll look. Consider each plant’s growing habit. Set creeping or trailing herbs to the front and taller herbs to the back or in the middle, with bushier plants in between. Once you’re happy with the arrangement, remove the herbs from their pots and place them back onto the potting soil. Fill in around the rootballs with more potting soil, firming it in as you fill.
Thoroughly water the herbs to settle them into position. The level of the potting soil will sink once you’ve done this, so you may need to add a little more potting soil. Leave the planted tub as it is, or finish the display off with a mulch of gravel, pebbles or shells. To ensure good drainage, raise the container off the ground by placing it onto some large stones, bricks, or purpose-made pot feet.
Looking After Your Potted Herbs
Herbs are pretty low maintenance, but a few simple tips will keep them in the best condition and provide you with plenty of pickings.

First, water according to the needs of each herb – more for fleshy-leaved herbs like parsley and basil, less often for more aromatic herbs with smaller leaves such as rosemary or thyme. During the growing season, water your herbs with an organic liquid fertilizer every few weeks to help them produce plenty of leaves.
If winters are harsh where you live, protect the pots from severe cold by wrapping them in bubblewrap, hessian or burlap, stuffed with scrunched-up newspaper or straw. This will help prevent the roots from freezing solid. You could also move containers under cover, for example into a greenhouse.
Above all remember to pick and enjoy your herbs regularly. Herbs actually benefit from regular picking and will produce lots more shoots in response. It’s a win-win situation!
Having herbs on hand is just brilliant – and they look fantastic too! Please share your tips for growing herbs below. Perhaps you’ve a favorite combination or a particular variety you’d recommend. If so, let us know about it!
Originally seen here:
https://www.growveg.com/guides/how-to-grow-delicious-herbs-in-pots/
0 notes
Text
More on bedding plants..
How do you plant bedding plants?
Make sure the soil and compost is moist at planting time:
Rake the soil level, removing any large clods or stones.
For formal bedding schemes, mark out the design on the surface of the soil using fine sand.
Gently loosen plants from their trays by pushing them up from the base. ...
Handle plants by leaves or rootball

Do bedding plants grow back?
Most bedding plants are annual, which means they only grow and flower for one year. They are discarded at the end of the season, and the following year new plants will be grown.
How often should bedding plants be watered?
In the flower bed, one to two watering sessions per week are usually sufficient: better to water more seldom but with plenty of water rather than a little water often.
What do you do with bedding plants after summer?
AftercareFeed weekly with a potash based fertiliser such as Tomorite to promote flower production.If you have incorporated slow release fertiliser into the compost, feed with Tomorite at the end of summer to keep the show going into autumn when the winter bedding should be appearing in garden centres.
0 notes