#how to remove cache from chrome
Explore tagged Tumblr posts
Visit Tumblr Blog
Explore Tumblr blogs with no restrictions, modern design and the best experience.
Last Seen Tumblr Blogs


Fun Fact
Tumblr has a low social media market share in South America.
Text
#how do you clear the browser cache in chrome#how to delete browser cache in chrome#how to remove cache from chrome
0 notes
Note
im here from your post looking at the code of the comic website. have you ever thought of like website development/coding/something related as a job in the future? i don’t really know anything on that topic but you seem to know quite a bit!
welllllllllllllllllll
the main reason we know our way around website code/the inspect tool/websites so well is back in middle school well uh
we used to use amino a lot, specifically kirby amino. it was our first social media and we were somehow popular on there for some ungodly reason, and we were constantly talking with our friends on there instead of doing anything productive. we used to use the computer lab a lot during lunch/computer time to just post/talk on amino, which the school quickly blocked. we quickly recovered by downloading a free shitty vpn, which the school later blocked. we then just used a different free vpn, which continued for a while until our school blocked any and all vpns including chrome extensions. we then figured out the school's blocking feature only applied to google chrome, so we downloaded opera instead since it didn't require admin priveleges to download. the school then later blocked opera, so we started using a fun little now defunct feature in google translate where if you inputted a website link, it would proxy the website as a cached version you could look at. it was heavily broken because of that, and it kept popping up with the "hey log into amino to continue!" so we couldnt continue scrolling, so we used the inspect tool to completely remove it manually as well as kind of fix some of the formatting issues with it being cached. school couldn't figure a way around that without banning google translate which they obviously couldn't do. we then figured out that we just needed to carry opera on a flashdrive with us and we could just continue what we did previously
the school got so fucking fed up with our shit that they brought in the best IT person a school salary could buy to stop our little 12 year old ass. we then figured a way around all of their blocks and firewalls within about the duration of a computer class. our teachers then heavily started trying to push us towards an IT career
we'd continue with our bullshit during the period we lived with our dad in high school in texas, where he put major lock downs on all of our electronics. we got given an andorid phone instead of our old iphone, which we used against him by downloading the tor browser and talking with our discord friends, which meant we got our shit taken away until we moved back to our grandmas. we got sent back our old laptop, but it still had all of the network nanny shit on it that would let him control the entire laptop remotely and stop us from getting on discord.
we then realized we could go into the net nanny files, open them in notepad, and then ctrl+a then ctrl+d to remove all of the code, and despite our dad still trying to stop it, we ended up doing this until all of the functionalities of the program were dead and we could just uninstall it
so like, a lot of our computer expertise is BREAKING code. however we've made about 7-8 websites by ourselves with html/css on neocities however i cant show any of them because we have a tendency to gut the code each time :^{
i have thought about doing freelance website work/code editing before but i'd have no idea how to start considering we don't really know "professional" code building aka the shit companies want
4 notes
·
View notes
Text

Please be advised: Criminals want your Cookies
Clear your cookies and cache daily
Regularly clearing your cookies and cache can indeed help improve your browsing experience by freeing up space, enhancing security, and ensuring that you see the most updated version of web pages. Here’s a quick guide on how to do it:
For Google Chrome
Click on the three dots in the upper right corner.
Select More Tools > Clear browsing data.
Choose a time range (e.g., Last 24 hours, Last 7 days).
Check the boxes for Cookies and other site data and Cached images and files.
Click Clear data.
For Mozilla Firefox
Click on the three horizontal lines in the upper right corner.
Select Options.
Go to Privacy & Security.
Under Cookies and Site Data, click Clear Data.
Check the boxes for Cookies and Site Data and Cached Web Content.
Click Clear.
For Microsoft Edge
Click on the three dots in the upper right corner.
Select Settings.
Go to Privacy, search, and services.
Under Clear browsing data, click Choose what to clear.
Select a time range.
Check the boxes for Cookies and other site data and Cached images and files.
Click Clear now.
For Safari (Mac)
Click Safari in the upper left corner.
Select Preferences.
Go to the Privacy tab.
Click Manage Website Data.
Click Remove All.
Regular Maintenance
Schedule: Consider setting a reminder to clear your cookies and cache daily, weekly, or monthly, depending on your browsing habits.
Browsers: Remember to do this for all the browsers you use regularly. Sincerely,
From: Steven P. Miller, @ParkermillerQ, gatekeeperwatchman.org , TM,
Founder and Administrator of Gatekeeper-Watchman International Groups.
#GWIG, #GWIN, #GWINGO, #Sparkermiller
Wednesday, December 11, 2024, Jacksonville, Florida USA
5:48:08 PM
www.facebook.com/gatekeeperwatchnan
www.facebook.com/
Instagram: steven_parker_miller_1956
3 notes
·
View notes
Text
How to Optimize JavaScript for Faster Page Loads
JavaScript plays a critical role in modern web applications, powering everything from UI interactions to backend communication. However, poorly optimized JavaScript can significantly affect load times, especially on mobile or slow connections. As user experience and Core Web Vitals become essential SEO factors, developers and businesses are prioritizing script performance more than ever.
In this guide, we’ll explore key techniques for optimizing JavaScript, helping you reduce load time and improve responsiveness — a standard practice followed by leading JavaScript development companies.
1. Minify and Compress JavaScript Files
Minification removes unnecessary characters (like whitespace and comments) from JavaScript files, reducing file size without affecting functionality.
Use tools like:
UglifyJS
Terser
Google Closure Compiler
For additional compression, enabling Gzip or Brotli on your server ensures your JavaScript files are delivered in a smaller, compressed format.
Many top JavaScript development companies automate this process via build tools like Webpack or Gulp to streamline deployment.
2. Eliminate Unused JavaScript
Dead code or libraries that aren't being used can unnecessarily bloat your files. Audit your codebase and remove:
Unused functions or variables
Legacy plugin scripts no longer in use
Entire libraries if only a small utility is needed
Tools like Chrome DevTools or Lighthouse can help identify unused JavaScript. Expert teams at JavaScript development companies often use tree-shaking and modular design patterns to prevent this issue altogether.
3. Defer or Async JavaScript Loading
Using the defer or async attribute when loading JavaScript files ensures that scripts don’t block HTML rendering.
async loads the script asynchronously but doesn’t guarantee execution order.
defer ensures scripts run after the HTML is parsed, in the correct order.
Example:
html
CopyEdit
<script src="main.js" defer></script>
Strategically applying this across third-party and custom scripts can dramatically reduce render-blocking behavior.
4. Bundle and Split JavaScript Code
Bundling reduces HTTP requests by combining JavaScript files, while code-splitting ensures users only load the code necessary for the current page.
Modern bundlers like Webpack, Parcel, and Vite allow smart code-splitting. This technique is widely adopted by top JavaScript development companies to deliver faster, leaner applications across multiple devices.
5. Use a CDN to Deliver JavaScript
Content Delivery Networks (CDNs) distribute JavaScript files across geographically diverse servers. This reduces latency by serving users from the nearest server, improving load speed.
Additionally, shared libraries like React or jQuery served via CDN are often already cached in users' browsers from previous visits to other sites.
6. Optimize Third-Party Scripts
Analytics, chatbots, marketing trackers — these third-party scripts often run outside your control but significantly impact performance.
To optimize:
Load them after critical content.
Use tag managers with built-in performance settings.
Monitor their impact using performance tools.
Top-performing JavaScript development companies routinely audit these integrations to strike a balance between functionality and performance.
7. Avoid Inline JavaScript and DOM Manipulation on Load
Minimize inline scripts and avoid extensive DOM manipulation during initial page load. Inline scripts block rendering and increase Time to Interactive (TTI).
Instead:
Use event listeners that trigger after page load.
Use frameworks or vanilla JavaScript for efficient DOM handling.
8. Lazy Load Non-Essential Features
Don’t load everything upfront. Features like sliders, comment sections, or offscreen widgets can be loaded when needed.
Lazy loading reduces initial bundle size and allows faster first-paint experiences — a principle JavaScript development companies implement when building modern SPAs or PWA platforms.
9. Monitor and Continuously Improve
Use performance monitoring tools like:
Google Lighthouse
WebPageTest
SpeedCurve
Chrome DevTools
Regular audits and performance reviews help maintain a fast experience. Leading JavaScript development companies often integrate these tools into their CI/CD pipelines for consistent speed checks.
Conclusion
JavaScript optimization isn’t just about performance—it’s about user experience, SEO, and long-term scalability. Whether you’re building a single-page app or a high-traffic eCommerce platform, faster scripts lead to happier users and better conversions.
By implementing these strategies, your development workflow can align with the performance standards set by the top JavaScript development companies worldwide. Investing in optimization is not only beneficial — it's essential in today’s digital environment.
0 notes
Text
Best Practices for Reducing JavaScript and CSS Bloat
When a website takes too long to load, visitors don’t stick around. In most cases, the reason behind this slow experience is something hidden under the hood—too much JavaScript and CSS code. If your site feels sluggish, it’s time to take a closer look at the code that's running in the background.
Let’s talk about what JavaScript and CSS bloat is, and more importantly, what you can do to fix it without getting lost in technical stuff.
What Is Code Bloat and Why Should You Care?
JavaScript and CSS are essential parts of any modern website. They handle everything from styling the layout to making buttons clickable and menus slide open. But when these files get too big or too messy, they slow down your site. That means longer load times, higher bounce rates, and lower rankings on search engines.
And it’s not just about speed. A slow site makes users frustrated. And frustrated users don’t become customers.
If you're running a business website or an online store, this could be the difference between gaining and losing customers. Even the best digital marketing company in Bhubaneswar would agree: speed matters.
Clean Up Unused Code
One of the easiest ways to cut down on bloat is to remove unused code. Websites often include large libraries or frameworks but only use a small part of them. For example, you might load the entire Bootstrap or jQuery library but only use a couple of features.
Use tools like Chrome DevTools, PurifyCSS, or UnCSS to scan your pages and remove the code that's not being used. This step alone can shave off a lot of unnecessary weight from your site.
Combine and Minify Files
Each time a visitor lands on your website, their browser sends requests for different files—CSS, JavaScript, images, fonts, and so on. The more requests, the longer it takes to load everything. A smart move is to combine multiple JavaScript or CSS files into one and then compress (or minify) them.
Minification removes spaces, comments, and unnecessary characters, making your files smaller and faster to load. Tools like UglifyJS for JavaScript or CSSNano for CSS are popular and easy to use.
Load Only What’s Needed
Why load everything on every page if it’s not needed? For example, a slideshow script is not needed on your blog page if the slideshow only appears on the homepage. You can use conditional loading or lazy loading to bring in files only when they’re required.
This reduces the initial load time and keeps your site snappy.
Use Asynchronous and Deferred Loading
JavaScript can block your page from loading if it’s not handled right. By using the "async" or "defer" attributes when linking JavaScript files, you tell the browser not to pause everything just to load a script.
Async loads scripts while the page continues to load. Defer waits until the rest of the page has loaded before running the script. Both can make a huge difference in how fast your page feels.
Avoid Inline Styles and Scripts
Adding CSS and JavaScript directly inside your HTML may seem easy, but it can get messy quickly. It also makes your files larger and harder to manage. Keeping your CSS and JS in separate files makes them easier to update and cache.
Plus, browsers store these external files so they don’t need to be downloaded again the next time someone visits your site.
Keep Your Code Organized
Even if you’re not a developer, it helps to keep your team—or your web agency—in the loop about best practices. Clean code isn’t just for show. It’s easier to maintain, faster to debug, and less likely to cause problems.
The best digital marketing company in Bhubaneswar will always make this part of their process when building or upgrading a website.
Final Thoughts
A fast, smooth website doesn’t just happen on its own. Reducing JavaScript and CSS bloat takes a little planning, a few smart tools, and regular cleanups. But the payoff is big: better user experience, faster load times, and improved search rankings.
You don’t need to be a tech expert to get started. Begin with the basics—remove what you don’t need, compress what you do, and load things wisely. Your visitors (and your bottom line) will thank you.
#online reputation management agencies#website development companies in bhubaneswar#ecommerce website development companies in bhubaneswar#shopify website development agency#best digital marketing company in bhubaneswar#digital marketing company near me
0 notes
Link
0 notes
Text
Introduction to JavaScript Compilers
JavaScript is one of the most widely used programming languages, powering web applications, servers, and even mobile apps. But how does JavaScript code transform from human-readable text into executable instructions? The answer lies in the JavaScript compiler.
A JavaScript compiler translates high-level JavaScript code into optimized machine code or bytecode, improving performance and efficiency. In this article, we’ll explore how JavaScript compilers work, their key components, and their role in modern web development.
What Is a JavaScript Compiler?
A compiler is a software tool that converts source code written in a high-level programming language (like JavaScript) into a lower-level representation (such as machine code or bytecode). Unlike interpreters, which execute code line by line, compilers process the entire codebase at once, optimizing it for better performance.
JavaScript engines like V8 (Chrome), SpiderMonkey (Firefox), and JavaScriptCore (Safari) use Just-In-Time (JIT) compilation to execute JavaScript efficiently.
How Does a JavaScript Compiler Work?
The JavaScript compilation process involves several stages:
1. Parsing (Lexical Analysis & Syntax Tree Generation)
The compiler first breaks down the code into tokens (keywords, variables, operators).
It then constructs an Abstract Syntax Tree (AST), a structured representation of the code’s logic.
2. Compilation (Bytecode or Machine Code Generation)
Modern JavaScript engines use JIT compilation, which combines interpretation and compilation.
The engine converts the AST into bytecode (an intermediate low-level code) or directly into machine code for execution.
3. Optimization (Inlining, Dead Code Elimination, etc.)
The compiler applies optimizations like:
Inline Caching: Speeds up property access.
Hidden Classes: Optimizes object property access.
Dead Code Elimination: Removes unused code.
4. Execution
The optimized code runs in the browser or Node.js environment.
1 note
·
View note
Text
SEO for Developers: Technical Tips to Boost Your Website’s Ranking
As a developer, you might think SEO (Search Engine Optimization) is a marketer’s job. But the truth is, technical SEO is the backbone of every high-ranking website���and it’s your expertise that ensures search engines can crawl, index, and understand your site. At Coding Nectar (codingnectar.com), we’ve helped countless developers bridge the gap between code and visibility. Here’s how to optimize your website’s technical foundation for better rankings.
1. Start with a Lightning-Fast Website
Page speed isn’t just a ranking factor—it’s a user experience game-changer. Google prioritizes fast-loading sites, and studies show that 53% of users abandon pages that take longer than 3 seconds to load.
What to do:
Compress Images: Use modern formats like WebP and tools like Squoosh or ImageOptim.
Minify Code: Remove unnecessary characters from HTML, CSS, and JavaScript.
Leverage Caching: Implement browser and server-side caching (e.g., Redis, Varnish).
At Coding Nectar, we use automated build tools like Webpack to bundle and optimize assets during deployment. For example, lazy-loading images with <img loading="lazy"> can cut load times by 20-30%.
2. Master Mobile-First Indexing
Google now uses mobile-first indexing, meaning it primarily crawls the mobile version of your site. If your site isn’t responsive, you’re invisible to most search traffic.
What to do:
Test Responsiveness: Use Chrome DevTools or Google’s Mobile-Friendly Test.
Avoid CSS/JS Blockers: Ensure critical resources load first.
Use Fluid Layouts: Replace fixed pixels with rem, em, or % units.
Pro Tip: At codingnectar.com, we design all client projects with mobile-first frameworks like Tailwind CSS to ensure seamless responsiveness.
3. Fix Crawlability Issues
Search engines rely on crawlers to index your site. If they hit roadblocks, your content won’t rank.
What to check:
robots.txt: Ensure you’re not accidentally blocking critical pages.
XML Sitemap: Generate and submit a sitemap via Google Search Console.
HTTP Status Codes: Fix 404s (broken links) and 301-redirect old URLs.
Example: A client at Coding Nectar saw a 40% traffic boost after we fixed crawl errors caused by misconfigured rel=canonical tags.
4. Structure Data with Schema Markup
Schema markup helps search engines understand your content, increasing chances of earning rich snippets (e.g., star ratings, FAQs).
What to add:
JSON-LD: Embed structured data for articles, products, or events.
Breadcrumbs: Improve navigation and SEO with BreadcrumbList schema.
Tool Recommendation: Use Google’s Structured Data Testing Tool to validate your markup.
5. Optimize for Core Web Vitals
Google’s Core Web Vitals measure user experience through metrics like:
LCP (Largest Contentful Paint): Load time for the main content.
FID (First Input Delay): Time until the site becomes interactive.
CLS (Cumulative Layout Shift): Visual stability during loading.
What to do:
Prioritize above-the-fold content.
Defer non-critical JavaScript.
Use font-display: swap to prevent layout shifts from fonts.
Case Study: After optimizing Core Web Vitals for a SaaS platform, Coding Nectar reduced their CLS score by 75%, boosting organic traffic by 28% in 3 months.
6. Secure Your Site with HTTPS
HTTPS is a non-negotiable ranking signal. It encrypts data and builds user trust.
Steps:
Buy an SSL certificate (many hosts offer free Let’s Encrypt integration).
Force HTTPS by redirecting HTTP traffic via .htaccess or NGINX configs.
Update internal links to use https://.
7. Audit Regularly with SEO Tools
SEO isn’t a one-time task. Use tools like:
Google Search Console: Track performance and errors.
Ahrefs/Screaming Frog: Analyze backlinks and technical issues.
Lighthouse: Audit performance, accessibility, and SEO.
Pro Tip: Coding Nectar offers custom SEO audits (codingnectar.com/seo-audit) to identify hidden issues like duplicate meta tags or slow API calls.
Final Thoughts
Technical SEO isn’t about chasing algorithms—it’s about building websites that are fast, accessible, and easy for search engines to love. By focusing on speed, mobile optimization, structured data, and regular audits, you’ll create a foundation that drives organic growth.
At Coding Nectar (codingnectar.com), we blend cutting-edge development with SEO best practices to help businesses rank higher and convert better. Ready to optimize your site? Let’s turn your code into a traffic magnet.
1 note
·
View note
Text
How to install Office 365 from portal.office.com on Mac?
Microsoft Office 365 is an essential suite of productivity applications that includes Word, Excel, PowerPoint, Outlook, and more. If you own a Mac and need to install Office 365, the process is straightforward and can be completed via the official Microsoft portal: portal.office.com. This guide will walk you through the steps required to install Office 365 on your Mac efficiently.
System Requirements for Office 365 on Mac
Before installing Office 365, ensure that your Mac meets the minimum system requirements:
Operating System: macOS Monterey (12), macOS Big Sur (11), macOS Catalina (10.15), or later.
Processor: Intel or Apple Silicon (M1/M2) with Rosetta 2.
RAM: At least 4GB.
Storage: Minimum of 10GB of free disk space.
Internet Connection: Required for downloading and activating Office 365.
You can check your macOS version by clicking Apple Menu > About This Mac.
Step-by-Step Guide to Installing Office 365 on Mac
Step 1: Sign in to Your Microsoft Account
Open your preferred web browser (Safari, Chrome, or Firefox).
Navigate to portal office com.
Enter your Microsoft account credentials (email and password) associated with your Office 365 subscription.
If prompted, complete the multi-factor authentication (MFA) process.
Note: If you do not have an active Office 365 subscription, you must purchase one before proceeding. You can subscribe through Microsoft 365 plans.
Step 2: Download the Office 365 Installer for Mac
Once signed in, you will be redirected to the Office 365 homepage.
Click on the Install Office button in the top-right corner.
Choose Office 365 apps to begin downloading the installer.
The download will start automatically, saving a .pkg file in your Mac's "Downloads" folder.
Tip: If the download does not start, refresh the page or try using a different browser.
Step 3: Install Office 365 on Mac
Open Finder and navigate to the Downloads folder.
Double-click the Microsoft_Office_Installer.pkg file.
The Microsoft Office installer will launch. Click Continue.
Read and accept the license agreement, then click Continue.
Select the Install Location (default location is recommended).
Click Install and enter your Mac’s administrator password if prompted.
Wait for the installation to complete.
Click Close once the installation is finished.
Tip: If you encounter a security warning, go to System Preferences > Security & Privacy and allow the installation under the "General" tab.
Step 4: Activate Office 365 on Mac
Open any Office application (e.g., Word, Excel, or PowerPoint).
A welcome screen will appear; click Sign In.
Enter the Microsoft account credentials used to purchase the subscription.
Follow the on-screen instructions to complete activation.
Once activated, click Start Using Office.
Note: If you see an error stating that your subscription cannot be verified, ensure you are connected to the internet and try signing in again.
Troubleshooting Common Installation Issues
1. Office 365 Installation is Stuck or Not Starting
Restart your Mac and try installing again.
Ensure that your internet connection is stable.
Clear your browser cache and try downloading the installer again.
2. macOS Blocks the Installation
Go to System Preferences > Security & Privacy > General.
Click Allow next to "Microsoft Corporation."
Restart the installation process.
3. Unable to Sign in to Activate Office 365
Double-check your Microsoft credentials.
Try signing in through a different browser.
Ensure that your Office 365 subscription is active.
Updating Office 365 on Mac
To keep Office 365 updated with the latest features and security patches:
Open any Office application (e.g., Word or Excel).
Click on Help in the menu bar.
Select Check for Updates.
Follow the on-screen prompts to install available updates.
Uninstalling Office 365 from Mac
If you need to remove Office 365 from your Mac, follow these steps:
Open Finder > Applications.
Locate Microsoft Office apps (Word, Excel, PowerPoint, Outlook, etc.).
Drag each app to the Trash.
Open Finder > Go > Go to Folder.
Type ~/Library and delete the following folders:
Containers/com.microsoft.*
Group Containers/UBF8T346G9.Office
Empty the Trash and restart your Mac.
Final Thoughts
Installing Office 365 on a Mac is a simple and quick process when done through portal.office.com. By following this guide, you can successfully download, install, and activate Microsoft Office 365 on your Mac.
If you encounter any issues, Microsoft's support team is available to help resolve installation or activation problems.
Now that you have Office 365 installed, you can enjoy seamless productivity and collaboration with its suite of powerful applications!
0 notes
Text
How to Troubleshoot Issues with TellCulvers Survey Website?
The TellCulvers survey website offers a convenient way for customers to share feedback about their dining experience at Culver’s. By participating, customers not only help the brand improve but can also receive rewards like free menu items or discounts. However, as with any online platform, users may occasionally face technical issues when trying to complete the survey. In this guide, we’ll walk you through common problems encountered on the TellCulvers survey website and offer detailed troubleshooting tips.
Common Issues with TellCulvers Survey Website
Before diving into solutions, it’s helpful to identify the typical problems users experience when visiting tellculvers.com/survey. These include:
Website Not Loading Some users report that the site doesn’t load or displays an error message.
Survey Code Issues Problems with entering the survey code printed on your receipt are common.
Browser Compatibility Problems Certain browsers may not support the survey site’s functionality.
Slow Website Performance The site may load slowly due to high traffic or connectivity problems.
Errors During Submission Users might encounter issues when submitting their responses, often leading to frustration.
Mobile Device Incompatibility Some users find it challenging to access the survey via their smartphones or tablets.
Expired Survey Link or Code Trying to use an outdated receipt or survey link can lead to errors.
How to Troubleshoot TellCulvers Survey Website Issues
1. Check Your Internet Connection
A stable internet connection is essential for accessing tellculvers.com/survey. If the website doesn’t load:
Ensure your device is connected to Wi-Fi or a cellular network.
Test your connection by visiting other websites.
Restart your router or modem if the issue persists.
2. Verify the Website URL
It’s crucial to type the correct web address. Enter tellculvers.com/survey directly into your browser’s address bar. Avoid clicking on links from unverified sources, as these may lead to phishing sites.
3. Use a Compatible Browser
The TellCulvers website works best with updated browsers. Try the following:
Use popular browsers like Google Chrome, Mozilla Firefox, Safari, or Microsoft Edge.
Clear your browser’s cache and cookies to remove temporary files that may interfere with site performance.
Update your browser to the latest version for optimal compatibility.
4. Resolve Survey Code Issues
The survey code is a critical component for accessing the feedback form. If you encounter problems:
Double-check the code entered. Ensure there are no typos or spaces.
Ensure the receipt is still valid. The survey code typically expires after a specific number of days.
If the code is illegible, contact Culver’s customer service for assistance.
5. Troubleshoot Submission Errors
Encountering issues while submitting your responses can be frustrating. Here’s how to resolve this:
Ensure all required fields in the survey are completed. Missing answers often cause submission errors.
Disable browser extensions or ad blockers that might interfere with the site’s functionality.
Refresh the page and try resubmitting your responses.
6. Optimize Mobile Access
If you’re using a smartphone or tablet to access tellculvers.com/survey:
Switch to a different device if the site doesn’t load properly.
Use the browser’s desktop mode, which can sometimes resolve layout or navigation issues.
Avoid using public Wi-Fi networks that may restrict access to specific websites.
7. Resolve Expired Link or Code Issues
Survey links and codes have an expiration date. If your receipt is outdated:
Ensure you complete the survey promptly after your visit to Culver’s.
If your code has expired, you’ll need a new receipt to participate.
8. Check for Scheduled Maintenance
Occasionally, the TellCulvers survey website may be temporarily unavailable due to maintenance. To verify:
Visit Culver’s official website or social media pages for announcements about downtime.
Wait for a few hours and try accessing the site again.
9. Disable Pop-up Blockers
Some browsers block pop-ups by default, which can interfere with the survey form:
Go to your browser settings and temporarily disable pop-up blockers.
Add tellculvers.com/survey to your browser’s whitelist to ensure smooth navigation.
10. Contact Culver’s Customer Support
If none of the above solutions work, you can reach out to Culver’s customer support:
Visit Culver’s official website to find their contact information.
Call the customer service helpline for guidance on completing the survey.
Mention the issues you’re facing and provide details about your browser and device.
Preventing Issues on TellCulvers Survey Website
Taking a few preventive measures can minimize the likelihood of encountering problems on the TellCulvers survey website:
Keep Devices Updated Ensure your operating system, browser, and antivirus software are updated regularly.
Save Your Receipt Promptly Store your Culver’s receipt in a safe place, and complete the survey as soon as possible to avoid code expiration.
Use Trusted Devices For a smoother experience, access the survey on a reliable device, such as a laptop or desktop, rather than an older smartphone.
Avoid High-Traffic Times Try completing the survey during off-peak hours to prevent slow loading due to high traffic.
Bookmark the Website Save tellculvers.com/survey in your bookmarks to avoid mistyping the URL.
Why Participate in the TellCulvers Survey?
While troubleshooting technical issues is important, don’t forget the benefits of participating in the TellCulvers survey:
Customer Rewards: By sharing your feedback, you can earn discounts, free custard, or other menu items as a thank-you.
Enhanced Dining Experience: Your feedback helps Culver’s improve its service, menu, and overall experience.
Convenience: The survey takes only a few minutes to complete, making it a quick and easy way to contribute.
Conclusion
Experiencing issues with the TellCulvers survey website can be frustrating, but most problems can be resolved with a few simple steps. By ensuring a stable internet connection, using a compatible browser, and verifying the survey code, you can successfully complete your feedback submission. Remember, if you continue to face challenges, Culver’s customer support is always there to help.
Taking the time to troubleshoot ensures you don’t miss out on rewards and allows you to share valuable feedback that helps Culver’s maintain its commitment to excellent service. So, the next time you visit Culver’s and receive a survey invitation, feel confident in your ability to navigate and complete the process smoothly!
0 notes
Text
Enhancing Website Performance with Google PageSpeed Insights

Google PageSpeed Insights is a powerful tool that enables website owners and developers to optimize their site’s performance. By analyzing web pages and providing actionable recommendations, this tool helps improve load times and overall user experience on both desktop and mobile devices. For practical tips to boost your website's speed, explore this guide on 10 Ways to Increase Google Page Speed of WordPress site.
Key Features of Google PageSpeed Insights
Performance Scores: The tool provides a performance score from 0 to 100, with higher scores indicating better performance. This score is based on various factors such as load time, interactivity, and visual stability.
Real-World Data: PageSpeed Insights uses real-world data from Chrome users who have visited your site. This includes metrics like First Contentful Paint (FCP) and Largest Contentful Paint (LCP).
Simulated Data: In addition to real-world data, the tool also generates lab data through simulations, which helps identify potential performance issues.
Improvement Suggestions: PageSpeed Insights offers a list of actionable suggestions to improve your site’s performance, such as optimizing images, leveraging browser caching, and reducing server response times.
Why PageSpeed Matters
Page speed is crucial for both user experience and search engine optimization (SEO). Slow-loading websites can lead to higher bounce rates and lower user engagement. Google also uses page speed as a ranking factor, so faster sites tend to rank higher in search results. For more detailed strategies to enhance your site’s speed, refer to this article: 10 Ways to Increase Google Page Speed of WordPress site.
How to Increase Google Page Speed of WordPress Site?
Enhancing your WordPress site’s speed involves several techniques. Start by optimizing images, minimizing CSS and JavaScript files, and using a content delivery network (CDN). If you’re wondering, "How do I increase my Google page speed?", consider these effective tips:
Optimize Images: Compress and resize images to reduce load times.
Minimize CSS and JavaScript: Remove unnecessary code and minify the remaining code to decrease file sizes.
Use a CDN: Distribute content across multiple servers to speed up delivery globally.
How Do I Improve Search Speed in WordPress?
Improving search speed in WordPress can be achieved by using efficient search plugins, optimizing your database, and reducing server load. For instance, WP Fastest Cache is a plugin that can significantly enhance your site’s search speed.
How Would You Optimize a WordPress for Speed?
Optimizing a WordPress site for speed involves several key steps:
Choose a Fast Theme: Select lightweight, well-coded themes.
Use Caching Plugins: Plugins like W3 Total Cache or WP Super Cache can greatly reduce load times.
Optimize Your Database: Regularly clean your database to remove unnecessary data.
How to Increase WordPress Website Speed Without Plugin
While plugins are useful, you can also boost your WordPress site’s speed without them:
Enable GZIP Compression: This reduces the size of your files and speeds up loading times.
Optimize Web Hosting: Choose a reliable hosting provider that offers fast server speeds.
10 Ways to Increase Google Page Speed of WordPress Site Free
For a comprehensive list of free methods to enhance your site speed, check out the guide mentioned above. Key strategies include:
Leverage Browser Caching
Optimize CSS Delivery
Defer JavaScript Loading
Increase Website Speed WordPress Plugin
Plugins like WP Rocket and WP Fastest Cache can significantly enhance your site’s speed. These plugins offer features such as caching, image optimization, and minification.
Increase Website Speed WordPress Plugin Free
There are several free plugins available to boost your site’s speed, including:
Autoptimize: Aggregates, minifies, and caches scripts and styles.
Smush: Compresses and optimizes images for faster load times.
In summary, Google PageSpeed Insights is an essential tool for improving your website’s performance. By following its recommendations, you can enhance user experience, improve search engine rankings, and achieve a faster, more efficient site.
0 notes
Text
How to Reset Your Browser Settings: A Comprehensive Guide
Modern web browsers are essential tools for accessing the internet, but over time they can become cluttered with extensions, cached data, and customized settings that can impact performance and functionality. Resetting your browser settings can resolve various issues, enhance performance, and provide a fresh start. This guide covers how to reset settings for the most popular browsers: Google Chrome, Mozilla Firefox, Microsoft Edge, and Safari.
Why Reset Your Browser Settings?
Performance Improvement: Over time, browsers accumulate cache, cookies, and extensions that can slow down performance.
Security: Removing unwanted or malicious extensions and resetting settings can enhance security.
Troubleshooting: Fixing issues like browser crashes, slow loading times, or unwanted pop-ups often requires a reset.
Starting Fresh: Sometimes, it's just easier to start from a clean slate rather than manually adjusting settings.
Resetting Google Chrome
Open Settings: Click on the three dots in the upper right corner and select "Settings."
Advanced Settings: Scroll down and click on "Advanced" to expand more options.
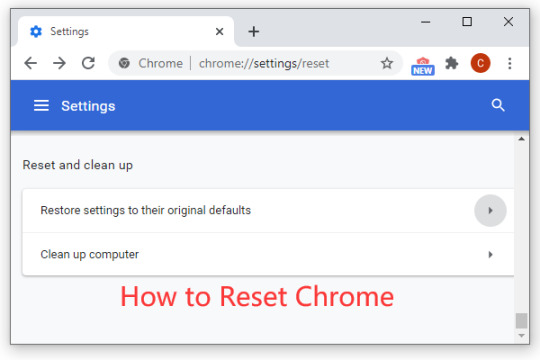
Reset and Clean Up: Under the "Reset and clean up" section, select "Restore settings to their original defaults."
Confirm: A pop-up window will appear; click "Reset settings" to confirm.
This process will disable extensions, clear temporary data, and reset the default search engine, homepage, and pinned tabs without deleting bookmarks, history, or saved passwords.
Resetting Mozilla Firefox
Open Help Menu: Click on the three horizontal lines in the upper right corner and select "Help."
Troubleshooting Information: Choose "More troubleshooting information."
Refresh Firefox: Click the "Refresh Firefox" button on the top right.
Confirm: A confirmation window will appear; click "Refresh Firefox" again to proceed.
Firefox will save your essential information (bookmarks, history, passwords, and open tabs) but will remove extensions, themes, and other custom settings.
Resetting Microsoft Edge
Open Settings: Click on the three dots in the upper right corner and select "Settings."
Reset Settings: Go to the "Reset settings" section in the left-hand menu.
Restore Settings: Click on "Restore settings to their default values."
Confirm: A confirmation dialog will appear; click "Reset" to confirm.
This will reset Edge’s settings, clear temporary data, and disable extensions without affecting your favorites, history, or saved passwords.
Resetting Safari
For Safari, a more manual approach is necessary:
Clear History: Click on "Safari" in the top menu and select "Clear History."
Remove Extensions: Go to "Preferences" from the Safari menu, select the "Extensions" tab, and uninstall any unwanted extensions.
Reset Homepage: In the "Preferences" window, go to the "General" tab and reset the homepage.
Clear Cache: In the "Develop" menu (enable it from "Preferences" > "Advanced" > "Show Develop menu in menu bar"), select "Empty Caches."
Safari does not have a single reset button, so these steps must be done manually to achieve a similar result.
Conclusion
Resetting your browser can significantly improve performance, enhance security, and resolve persistent issues. While each browser has its own specific steps, the general process involves accessing settings, choosing the reset option, and confirming the action. Regularly resetting your browser settings can keep your browsing experience smooth and trouble-free.
0 notes
Text
do vpn extensions not wokr on mac
🔒🌍✨ Get 3 Months FREE VPN - Secure & Private Internet Access Worldwide! Click Here ✨🌍🔒
do vpn extensions not wokr on mac
VPN extension compatibility on Mac
Title: Ensuring VPN Extension Compatibility on Mac: A Guide for Users
For Mac users concerned about online privacy and security, VPN extensions are essential tools. These extensions offer convenient ways to encrypt internet traffic, hide IP addresses, and access geo-blocked content directly from web browsers. However, ensuring compatibility between VPN extensions and Mac systems is crucial to maximize their effectiveness.
Firstly, it's essential to choose a reputable VPN provider known for offering reliable Mac compatibility. Before installing any VPN extension, verify whether the provider offers dedicated apps or browser extensions specifically designed for macOS. Most leading VPN services prioritize compatibility with popular Mac browsers such as Safari, Chrome, and Firefox.
Next, consider the version of macOS running on your Mac device. VPN extensions may not be compatible with older versions of macOS due to technical limitations or security concerns. Ensure your Mac's operating system is up to date to avoid compatibility issues and benefit from the latest security features.
Additionally, check compatibility with other installed browser extensions or software on your Mac. Sometimes, conflicts between extensions or software can cause performance issues or prevent VPN extensions from functioning correctly. It's advisable to disable or remove any conflicting extensions temporarily to determine compatibility with the VPN extension.
Furthermore, review user feedback and reviews regarding the compatibility of specific VPN extensions with Mac systems. Online forums, tech websites, and app store reviews can provide valuable insights into the experiences of other Mac users with a particular VPN extension.
In conclusion, ensuring VPN extension compatibility on Mac involves selecting a reputable provider, keeping macOS updated, resolving conflicts with other software, and researching user feedback. By taking these steps, Mac users can enjoy seamless and secure browsing experiences with their chosen VPN extensions.
Mac VPN extension troubleshooting
When it comes to ensuring your online security and privacy while using a Mac, a VPN extension can be a valuable tool. However, like any technology, VPN extensions can sometimes encounter issues that may affect their performance. Understanding how to troubleshoot common problems with Mac VPN extensions can help you stay protected and connected.
One of the most common issues users face with VPN extensions on Mac is connectivity problems. If you are unable to connect to the VPN server, try switching to a different server location within the extension settings. Sometimes, the issue may lie with the server itself, so switching to another server can help resolve the problem.
Another troubleshooting step to consider is checking for any updates to the VPN extension. Developers regularly release updates to fix bugs and improve compatibility, so ensuring you are using the latest version of the extension can help prevent connectivity issues.
If you are experiencing slow connection speeds while using a VPN extension on your Mac, try switching to a different VPN protocol. Some protocols may offer faster speeds depending on your network configuration.
Additionally, clearing your browser cache and cookies can sometimes help improve the performance of a VPN extension on your Mac. This can help resolve any conflicts that may be affecting the extension's functionality.
By following these troubleshooting steps, you can address common issues with VPN extensions on your Mac and enjoy a secure and seamless browsing experience.
Mac VPN extension not working
If you’re experiencing issues with your Mac VPN extension not working, don’t worry, you’re not alone. There could be several reasons why your VPN extension is not functioning properly on your Mac, but there are some steps you can take to troubleshoot the problem.
First, make sure that your VPN software is up to date. Outdated software can sometimes cause compatibility issues with newer operating systems or other programs on your Mac. Check for updates in the App Store or on the VPN provider’s website and install any available updates.
Another common reason for a VPN extension not working on a Mac is conflicting settings or other installed software. Disable any other VPN services or security software that might be interfering with your VPN extension. Additionally, check your network settings to ensure that they are configured correctly for the VPN service you are using.
If you continue to experience problems with your Mac VPN extension not working, consider contacting your VPN provider’s customer support for assistance. They may be able to provide specific troubleshooting steps based on your setup and software version.
By following these steps and seeking assistance when needed, you can hopefully resolve the issue with your Mac VPN extension and continue browsing the internet securely and privately.
Mac VPN extension issues
Title: Troubleshooting Common Mac VPN Extension Issues
Using a VPN extension on your Mac can enhance your online privacy and security, but occasionally, users encounter issues that can disrupt their browsing experience. Here are some common problems and troubleshooting steps to resolve them:
Connection Failures: If your VPN extension repeatedly fails to connect, start by checking your internet connection. Ensure that your Wi-Fi or Ethernet connection is stable and that there are no network issues on your end. If the problem persists, try connecting to a different server location within the VPN extension's settings. Sometimes, specific servers may be experiencing issues.
Slow Connection Speeds: Slow speeds can be frustrating, but they're not uncommon with VPNs due to encryption and server loads. To improve speed, try connecting to a server closer to your physical location. Additionally, closing unnecessary background applications and browser tabs can free up bandwidth. If the problem persists, consider upgrading to a premium VPN service that offers faster servers and better performance.
Compatibility Issues: Ensure that your VPN extension is compatible with your Mac's operating system version. If you've recently updated your macOS, check for any available updates for the VPN extension. Sometimes, outdated software can cause compatibility issues that affect performance.
DNS Leaks: DNS leaks can expose your browsing activity despite using a VPN. To prevent this, configure your Mac to use the VPN's DNS servers. You can usually find this option in the VPN extension settings. Additionally, consider enabling the VPN's kill switch feature, which automatically disconnects your internet if the VPN connection drops, preventing any potential leaks.
Blocked Websites or Services: Some websites or online services may block access to users connected via VPNs. If you encounter this issue, try switching to a different VPN server location. Alternatively, consider using dedicated IP addresses offered by some VPN providers, which are less likely to be blocked.
By following these troubleshooting steps, you can address common Mac VPN extension issues and enjoy a smoother and more secure online experience.
Fixing VPN extensions on Mac
If you're experiencing issues with VPN extensions on your Mac, there are several troubleshooting steps you can take to try and resolve the problem. VPN extensions are commonly used to enhance security and privacy while browsing the internet, so it can be frustrating when they are not working correctly.
Firstly, ensure that your VPN extension is up to date. Developers regularly release updates to fix bugs and improve performance, so having the latest version installed may resolve any issues you are facing.
Next, check your internet connection. Sometimes, a slow or unstable connection can interfere with the functioning of VPN extensions. Make sure you are connected to a stable network before trying to use the VPN.
If the problem persists, try disabling and re-enabling the VPN extension. This can sometimes reset the connection and resolve any temporary glitches.
Alternatively, you can try reinstalling the VPN extension altogether. Uninstall the extension from your browser, then reinstall it from the official sources. This can often fix any underlying issues with the extension.
Lastly, if none of the above steps work, contact the customer support of the VPN extension provider. They may be able to offer further assistance and troubleshooting specific to their product.
By following these steps, you can hopefully resolve any issues you are experiencing with VPN extensions on your Mac and continue to browse the internet securely and privately.
0 notes
Text
Boosting Browser Speed on Your Mac: Effective Tips and Tricks

In the fast-paced digital world we live in today, web browsing has become an integral part of our daily routines. Whether you're researching information, shopping for the latest deals, or connecting with friends and family, a smooth and speedy browsing experience is nothing short of essential. If you possess a Mac, you're in luck since there are several useful tips and hacks that help boost the efficiency of your browser. In this article, we'll take a deep dive into these methods, ensuring that your Mac serves as a reliable vehicle for seamless web surfing. Clearing Your Browser Cache: A Fresh Start One of the simplest yet most impactful ways to give your browser a speed boost is to clear its cache regularly, and this includes flushing the DNS cache on OS X. The cache, which stores temporary files and data from the websites you visit, can accumulate over time, causing your browser to slow down. To regain that lost speed, follow these steps to clear your cache and flush your DNS cache on Safari: Open Safari Preferences - Click on the "Safari" menu located at the top-left corner of your screen. - Select "Preferences." Visit the "Privacy" Tab - Click on the "Privacy" tab nestled within the Preferences window. Managing Website Data - A new window will appear. It's time to click "Remove All." With a cleared cache, you'll instantly free up precious space and witness a noticeable improvement in your browsing speed. Taming the Extension Jungle Extensions can be your browser's best friend, but like any friend, they can sometimes become a bit too clingy. Having an abundance of extensions can bog down your browser's performance. Here's how to manage your extensions on Safari: Open Safari Preferences - Click on the "Safari" menu at the top-left corner of your screen. - Select "Preferences." Navigate to the "Extensions" Tab - Within the Preferences window, click on the "Extensions" tab. Disable Unnecessary Extensions - It's time to review your collection of installed extensions. Disable any that you no longer require by unchecking the box next to them. By pruning your extensions, you'll reduce the workload on your browser, resulting in a faster and smoother experience. Keeping the Wheels Turning: Updates Are Key Staying updated is crucial in the digital realm. Both your browser and macOS need regular updates to maintain optimal performance. Outdated software can not only slow you down but also expose you to security vulnerabilities. Here's how to stay up-to-date: For Browser Updates - Launch your browser and locate the browser name in the top menu (e.g., "Safari" or "Chrome"). - Select "About ." If an update is available, adhere to the on-screen instructions to install it. For macOS Updates - Look for the Apple logo in the top-left corner of your screen. - Choose "System Preferences" and then select "Software Update" to check for and install macOS updates. Streamlining Your Browsing Experience Having too many tabs open at once, and a plethora of extensions can overwhelm your Mac's resources, causing your browser to lag. Try to limit the number of open tabs and only retain those extensions that are truly indispensable for your browsing needs. Shielding Your Speed: Enable Content Blockers Content blockers can act as your browser's guardian angels, preventing unnecessary content from loading and slowing you down. Safari offers built-in content-blocking options that you can easily enable: Open Safari Preferences - Click on the "Safari" menu at the top-left corner of your screen. - Select "Preferences." Visit the "Websites" Tab - Within the Preferences window, click on the "Websites" tab. Select "Content Blockers" - On the left sidebar, you'll find the "Content Blockers" option. Enable Content Blockers - Simply check the box next to the content blockers you wish to enable. By blocking ads and extraneous content, your browsing experience will become significantly faster and more enjoyable. Optimize Your Browser's Settings Optimizing your browser's settings is akin to fine-tuning the engine of a high-performance car, ensuring it runs at its best. Beyond the fundamentals of cache clearance and extension management, we delve into a realm of settings and tweaks that can significantly elevate your browser's speed and overall performance. Fine-Tuning Privacy and Security Your browser's preferences or settings hold a treasure trove of options, each capable of influencing both your online security and the speed of your browsing experience. Here's how to strike a balance: Disable Location Services Some websites have a habit of requesting your location, a process that can drag down your browser's speed. You can put the brakes on this by disabling location services when they're not needed, ensuring a streamlined browsing journey. Block Pop-ups Pop-up windows, the bane of many online adventures, can not only be exasperating but also slow down your browsing experience. By enabling pop-up blockers in your browser settings, you keep these nuisances at bay, allowing your browser to run smoothly. Managing Cookies for a Speedy Ride Cookies, those diminutive files that websites leave on your computer, wield the power to both enhance and inhibit your browsing experience. Here's how to navigate the cookie conundrum: Limit Third-Party Cookies Configure your browser to take a stand against third-party cookies, either blocking or limiting their reach. This move not only fortifies your privacy defenses but also turbocharges your browsing speed, as the browser is no longer burdened by excessive cookie data. Regular Cookie Cleanup Just like a well-maintained car engine, your browser needs regular cleaning to ensure it runs smoothly and swiftly. Periodically clearing your browser's cache of cookies is a practice that pays dividends in terms of speed and efficiency. Page Loading Made Swift How your browser loads webpages can be tailored to your need for speed: Enable Reader Mode Some browsers offer a reader mode that simplifies webpage layouts, resulting in faster load times and improved readability. Lightweight Themes Opt for minimalistic themes for your browser. These not only look sleek but also reduce the strain on your system, contributing to faster performance. Bypassing Auto-Play Video Traffic Auto-play videos can be notorious speed hogs. Put a stop to them with these steps: Safari Users Open Safari Preferences, navigate to the "Websites" tab and select "Auto-Play" on the left sidebar. Set it to "Never Auto-Play." Chrome Users Type "chrome://settings/content/sound" in the address bar and disable sound. This simple tweak prevents auto-play videos from disturbing your browsing experience. Resource Management: Handling Heavy Tabs Not all tabs are created equal; some devour more resources than others. Take control with these strategies: Task Manager in Chrome Press Shift + Esc in Chrome to open the Task Manager. It reveals which tabs or extensions are resource hogs, allowing you to close or reload them for a smoother browsing experience. Browser Extensions There are extensions designed to help you identify and manage resource-hungry tabs. Installing one can be a game-changer for keeping your browser running smoothly. Read the full article
0 notes
Text
How to make Selenium testing more efficient with Docker

The reliability and compatibility of web applications across different environments are crucial. Docker, a popular containerization platform, offers a streamlined way to achieve this by providing a consistent testing environment.
In 2022, Docker accounted for 27 percent market share of the containerization technologies market. – Statista
What is Docker?
Docker is an open-source platform that automates the deployment of applications in lightweight portable containers. These containers package applications and their dependencies together, ensuring consistency across different environments.
Why to use Docker for Selenium testing
Isolation: Each test runs in a separate container, preventing interference between tests.
Consistency: The testing environment is consistent across different machines and environments.
Efficiency: Tests can be parallelized easily using Docker, reducing execution time.
Scalability: Docker allows you to scale up your testing infrastructure effortlessly.
Using Docker for application compatibility
You need to ensure that your application is compatible with different browsers (e.g., Chrome, Firefox) and different versions of those browsers. Additionally, as your application’s functionality grows, multiple tests need to be run concurrently to maintain efficiency.
Benefits of leveraging Docker
Regression testing: It is a process of testing your application to ensure that it still works correctly after changes have been made to it. By using Docker, you can create a consistent environment for regression testing, which can help you identify and fix bugs more quickly.
Parallel test execution: Docker can help you run multiple tests in parallel, which can significantly reduce the time it takes to execute all your tests. This is especially beneficial for large test suites that can take a long time to execute.
Consistent environment: Docker creates isolated environments for each test, which ensures that each test runs in a clean environment that is free of any dependencies or configurations from other tests. This can help prevent test failures caused by environmental factors.
Scalability: You can easily add or remove containers as needed. This can be helpful if you need to increase the number of tests that you are running or if you need to test on many browsers or devices.
Reduced test execution time: Docker can help reduce the time it takes to execute tests by sharing resources between containers and caching dependencies. This can be a significant benefit for large test suites that can take a long time to execute.
Setting up your environment with Docker
– Installing Docker
To get started, install Docker on your machine by following the instructions on the official Docker website (https://www.Docker.com/).
– Creating a Selenium Test Suite
Develop a Selenium test suite using your preferred programming language (Java, Python, etc.) and testing framework (JUnit, TestNG, etc.). Ensure your tests are organized and ready for execution.
-Configure Docker Compose file
Docker Compose is a tool for defining and running multi-container Docker applications. Create a Docker Compose YML file to configure your container and any other services like Selenium Grid and web browsers like Firefox, Chrome, etc.
– Example of Docker-compose.yml
version: “3” services: Chrome: image: selenium/node-chrome:latest shm_size: 2gb depends_on: – selenium-hub environment: – SE_EVENT_BUS_HOST=selenium-hub – SE_EVENT_BUS_PUBLISH_PORT=4442 – SE_EVENT_BUS_SUBSCRIBE_PORT=4443
Firefox: image: selenium/node-firefox:latest shm_size: 2gb depends_on: – selenium-hub environment: – SE_EVENT_BUS_HOST=selenium-hub – SE_EVENT_BUS_PUBLISH_PORT=4442 – SE_EVENT_BUS_SUBSCRIBE_PORT=4443
Selenium-hub: image: selenium/hub:latest container_name: selenium-hub ports: – “4442:4442” – “4443:4443” – “4444:4444”
You can expand upon this file to include more browser nodes or additional services as needed. Each browser node service should link to the Selenium-hub service to establish communication.
Navigate to the directory containing the compose file and run the “Docker compose -f Docker-compose.yml up” command.
This will start the Selenium hub and the specified browser nodes. You can then configure your Selenium test suite to connect to the Selenium hub at the specified URL http://localhost:4444 and distribute the tests among the available browser nodes.
– Configure Selenium code for execution in the remote web driver DesiredCapabilities chromeCapabilities = DesiredCapabilities.chrome(); // Set any desired capabilities here URL hubUrl = new URL("http://<selenium-hub ip>:4444/wd/hub"); // URL of the Selenium Grid prepared in container. If you have set up Docker in local, then the Selenium hub URL will be http://localhost:4444. WebDriver driver = new RemoteWebDriver(hubUrl, chromeCapabilities ); Copy
– Execute the test
When you run your tests, Selenium will route the commands to the appropriate browser node based on the desired capabilities. The tests will be executed in Docker containers.
Offer better quality software products with QA automation
Docker provides an effective solution for executing Selenium tests in a controlled and reproducible environment. By containerizing your tests, you can achieve consistency, efficiency, and scalability in your testing processes. Ensure the quality of your web applications by integrating Docker into your testing workflow.
Softweb Solutions is one of the leading providers of QA automation services. We automate testing processes to improve quality, efficiency, and scalability for businesses of all sizes. We have a team of experienced QA engineers who are experts in Docker and Selenium. We can help you set up a Docker-based Selenium environment and automate your tests. We also offer training and support to help you get the most out of Docker for Selenium testing.
Originally published at www.softwebsolutions.com on September 1st, 2023.
#QA automation services#Benefits of Test Automation#automation testing services#test automation services#qa automation
0 notes
Text
How to Clear Browser Cache and Improve Internet Speed

Browser cache is a temporary storage location on your computer that stores website files, images, and other data to speed up subsequent visits to the same websites. While cache helps improve web page loading times, it can also accumulate over time and impact your internet speed. Clearing the browser cache can help improve internet speed and resolve issues related to outdated or corrupted cache files. Here’s a guide on how to clear browser cache for popular web browsers:
Clearing Browser Cache in Google Chrome
Open Google Chrome and click on the three-dot menu icon in the top-right corner.
Select “Settings” from the dropdown menu.
Scroll down and click on “Privacy and security” in the left-hand menu.
Under the “Privacy and security” section, click on “Clear browsing data”.
In the popup window, ensure that “Cached images and files” is selected.
Choose the time range for which you want to clear the cache. If you want to clear all cache, select “All time”.
Click on the “Clear data” button to clear the browser cache.
Clearing Browser Cache in Mozilla Firefox
Open Mozilla Firefox and click on the three-line menu icon in the top-right corner.
Select “Options” from the dropdown menu.
In the left-hand menu, click on “Privacy & Security”.
Under the “Cookies and Site Data” section, click on “Clear Data”.
Ensure that “Cached Web Content” is selected.
Click on the “Clear” button to clear the browser cache.
Clearing Browser Cache in Microsoft Edge
Open Microsoft Edge and click on the three-dot menu icon in the top-right corner.
Select “Settings” from the dropdown menu.
Under the “Clear browsing data” section, click on “Choose what to clear”.
Ensure that “Cached data and files” is selected.
Click on the “Clear” button to clear the browser cache.
Clearing Browser Cache in Safari (Mac)
Open Safari and click on “Safari” in the top menu.
Select “Preferences” from the dropdown menu.
In the Preferences window, click on the “Advanced” tab.
Enable the “Show Develop menu in menu bar” option.
Close the Preferences window.
Click on “Develop” in the top menu.
Select “Empty Caches” from the dropdown menu.
Clearing the browser cache can help improve internet speed by removing outdated or corrupted files. Remember that clearing the cache will log you out of websites and may remove saved passwords. However, it will not delete your browsing history or bookmarks. After clearing the cache, you may notice faster page loading times and improved overall browsing performance.
https://www.infradapt.com/news/clear-browser-cache-improve-internet-speed/
0 notes