#i can barely visually process this apps interface as is
Explore tagged Tumblr posts
Visit Tumblr Blog
Explore Tumblr blogs with no restrictions, modern design and the best experience.
Last Seen Tumblr Blogs


Fun Fact
China blocked Tumblr because of pornography and censorship problems in 2013.
Text
MP3 Splitter, APE Cutter, WMA Splitter, WAV Cutter, MP3 Joiner, Join WAV Files
WAV Joiner is an easy-to-use instrument to hitch multiple WAV information into one bigger WAV file. Simple MP3 Cutter Joiner Editor handles at least the following audio codecs. Not simply that, you might also wish to edit the sound information or tune tracks in way where there are particular results and they do not stop awkwardly, but proceed enjoying uninterrupted. Whether for enjoyable, any skilled requirement or for any private causes you positively need a satisfying MP3 joiner. Quick MP3 Cutter Joiner cuts MP3 file by file measurement, pieces rely, time duration, and custom choices. The software provides a slider bar to visually place a minimize points where you wish to reduce. You can also preview every custom piece, mp3 cutter and joiner merger free download and cut with ahead and backward overlap, fade-in and fade-out. The MP3 cutter retains ID3 tags information and supports to customized title of goal MP3 ID3 tag. For example: add sequence quantity to title, which makes you'll be able to determine output pieces in your MP3 participant, iPod, and iTunes simply. Audio Cutter Joiner is a powerful audio editor, which comprises audio splitter and audio joiner in one program. Click Add Recordsdata to open the Choose recordsdata to merge window shown straight beneath. In this guide, you will discover ways to mix 2 audio information into one on-line and how to merge audio recordsdata offline with the perfect audio merger software. Drawback with Merge MP3 and small gamers. After merging a whole bunch of items of classical music (individual movements), all of which play fantastic on a PC using Media Monkey or Home windows Media Participant, I discovered a deadly flaw: when these merged items are positioned on a small player (Sansa or Barnes and Noble Nook), I discovered they both 1. crash the participant; or 2. have horrible noise exactly at the merge level. Till this drawback is fastened, this program should not be used and has effectively price me hundreds of hours. @Peter: You might be right that the iPod and iPhone only organize audiobooks by title, an aggravating limitation. On the very least by author would be extraordinarily useful, and style would help individuals who need to manage numerous shorter works. And with iTunes 10 (and 9, I feel) you may still use the File > Get Info panel to vary the Options to skip when shuffling, and bear in mind playback place, for all media sorts, so sticking with music would not have that draw back. Shuangs Audio Joiner is a straightforward audio merging device to mix WAV, MP3, WMV and different various formats. For the freeware only supplies three audio formats, WAV, MP3 and WMV. One other scarcity for the software is that it brings a single output configuration for bitrate modify only. Also, the absence of a constructed-in audio participant is the opposite notable considering that sometimes you might must preview the sound recordsdata and decide whether it's the proper file order or not. Just in one word, when you need some easy audio joiner to combine WAV, MP3 and WMV, you'll be able to obtain the software for Home windows to have a try. Or else, the software might not be useful for you. X2X Free Video Audio merger helps numerous formats together with (however not restricted to) AAC, MPEG4, AVI and MP3. These are wonderful options for both low- and excessive-quality video reproduction. The management screen may be very simple to navigate and a small file measurement is fitted to computer systems with little obtainable reminiscence. After loading Free MP3 Cutter Joiner, you might be met with the "Cutter" side of the program. The interface is a mishmash of icons stolen from other programs that seem to have been compressed and then enlarged until they are so distorted and ugly that they are nearly exhausting to take a look at. It is a small sized and interesting application that works nice in your Home windows PC. With its simple to use interface, you possibly can even re-prepare the recordsdata conveniently. Good news is that there are not any configuration options that make it simpler for he amateurs and the joining process additionally barely takes time. Step 4. Select the output format and subsequent click on on Destination" to specify output folder. After that, verify "Merge all tracks into one output file" box after which click on on Back. Supported Formats: FLAC, mp3 cutter and joiner merger free download, OGG. Separate Operate: MP3 Cutter and Merger have totally different folders for various operate. It has 4 folder of MP3 Cutter, MP3 Merger, Trimmed Tones and Merged Tones. So, every function is separated by totally different folders. Easily lower the very best a part of your favourite MP3 by this mp3 cutter cellular app. Simply edit, delete, and reserve it as ringtone, alarm tone or notification tone. Set begin & end for the audio clip, utilizing an elective contact interface. There's an incredible option of name the brand new lower clip whereas saving. This wonderful app helps MP3, WAV, AAC, AMR and most other music codecs simply edit any music recordsdata out of your android system and luxuriate in. Simply make your personal MP3 ringtones fast and straightforward with this app.
1 note
·
View note
Text
Merge Video Online — Combine Video Clips — Free Video Joiner
Renderforest is free on-line video manufacturing platform, which helps you create promotional movies, explainer animations, intros, slideshows, special event movies, music visualizations, kinetic typography and more. Merge MP3 can import ID3 tags from any of the tracks being merged, or you may write a new one your self, and hearken to the tracks in the program. There is no restrict to the size, length or variety of tracks than may be merged. The merger has been rumored inside the industry for months, and lately picked up steam after Google mixed the groups engaged on the two streaming providers earlier this yr. After that, merge songs you download with Free Merge MP3. No must convert them into different formats as a result of Free Merge MP3 can deal with all kinds of audio formats as input. Cute Video Audio Merger Free Version can merges audio and video file into a single video file. Free MP3 Joiner - Drag and drop (and can even convert a lot of audio file sorts). • Automated mode of Break up. MP3 Splitter Joiner and analysis, the MP3 file you simply uploaded to ‘Auto. Mode ‘, after which mechanically choose one of the simplest ways to divide for you. A very good MP3 converter for becoming a member of audio info. works pretty fast, without errors. The processing pace of Fre MP3 Joiner is remarkably good, because it took it underneath 5 seconds to merge 21 minutes of audio. As stated above, this utility only helps MP3 and WAV file extensions, and it's doable to add an audio observe by means of the use of both the file browser or the drag and drop" operate. You probably have a lot of tracks that may sound higher merged as one, follow this step-by-step and combine those tracks into one massive file. Observe: Once you see All Free MP3 Cutter listed within the All programs" tab, one other technique is to begin the uninstall from there and if Revo Uninstaller Pro detects an acceptable log from its database it is going to doubtless be robotically used for the uninstall.
To merge, first put the audio objects on track then choose all objects go to File and Export in the format you want. The exported audio might be one file. In case if there are more tracks please mute relaxation which are not wanted before exporting. Another manner which you can try is Audacity that is freed from cost. Aside from that, it contains a highly effective modifying function. So you can begin to merge songs online MP3 files into one as soon as the program is put in. Nonetheless, it is a little bit complex for pc novices, as it has so many tabs on its interface. Perhaps it is going to take you some time to get to know this program totally. ✓you presumably can reduce and merge the mp3 info using Mp3 Cutter & Merger. In case you current little interest in above excessive-listed 5 online MP3 joiners, we right here specially provide you with yet yet another selection, Joyoshare MP3 Joiner It's extremely wanted owing to its wonderful efficiency. Added auto detection of whether or not or not VBR body is required within the merged file. The Merger enables you to take multiple audio recordsdata, rearrange them in whatever order you want, then export it as a single mixed audio file. The Cutter allows you to take a single audio file, choose a begin and finish time, then export that selection as a separate audio file. It counts with a very attractive interface, which makes its use so simple as counting from 1 to five. You possibly can cut and merge MP3 files in few steps. Merge was based by Guitarist Julien in 2011. After a bunch of shows performed the same yr, the band took a brand new start bringing in 'Trapped by Stereo's' singer, Anthony, for what turns into a turning point within the band's history. As the band writes their first tracks they get the prospect to open for bands equivalent to Dance Gavin Dance, La Dispute and Touche Amore. Probability is that you're in want of merging videos online. However, downside is that confronted with quite a few on-line video merger packages, you have no solution to make a decision. The principle purpose is that you are not conversant in each becoming a member of instrument, without realizing all professionals and cons explicitly. To lead you to get extra info, we're going to introduce 5 finest online video mergers to your reference. Once I performed the ensuing file (which was solely barely bigger than the blended 15 information in my folder), I was stunned at how seamless it was, with no discernible breaks (to be sincere, I randomly chosen spots in my pc's MP3 participant program, so, though it's doable that something, someplace within the merged file is amiss, I considerably doubt it). Many business audiobooks provide motivational and advertising techniques that can aid you enhance your online business. Whether you downloaded the audiobook from the Net or transferred the unique CD to your pc, the audiobook probably comprises numerous audio recordsdata. By merging the tracks together, you can create a single, consolidated audiobook file that may play constantly. To join the audiobook recordsdata, use a program resembling iTunes, Free MP3 Joiner or Merge MP3. After you mix the tracks, you possibly can switch the one audiobook file to your iPod or MP3 participant and merge songs online take heed to it on the go.Youtube DJ is a free online music mixer app. It means that you can make beats and mashups of Youtube videos. Though this is able to take longer time to get your files merged, it's at all times an accessible free method so to strive. You should definitely save a reproduction of the unique recordsdata so that you just won't lose something in the event you're not happy with the mixed recordsdata. Free Merge MP3 4.4.9 is a software program program developed by FreeAudioVideoSoftTech. The primary executable is known as The setup package generally installs about 5 information and is usually about 3.87 MB (4,057,119 bytes). Relative to the overall usage of customers who've this put in on their PCs, most are working Home windows 7 (SP1) and Windows 10. While about fifty three% of users of Free Merge MP3 come from the United States, it's also standard in Germany and Canada.Weeny Free Audio Cutter must be one other audio merging and splitting software for you. The software program supports MP3, OGG, WMA and WAV data because the enter audio formats, the DRM protected WMA information excluded. Due to the constructed-in audio editor of Weeny Free audio joiner online Cutter may be very useful for creating customized ringtones or managing prolonged audio recording recordsdata. Another reason to choose the software program ought to be the totally different parameters chances are you'll select to manage the audio information, such as a result of the sampling frequency, channel mode and audio bitrate. Simply add multiple audio info into the checklist, and merge these data into one audio file with the software program program now.
1 note
·
View note
Text
Pros And Cons Of Building An MVP With Low-Code Approach | Dew Studio
The critical aspect of software development is its cost. Many enterprises or developers expend extensive money and resources on software application development without understanding the viability, market, or possible scalability.
Here, two negatives arise. One is the waste of funds and resources that might be utilized in other places or for different programs. The second is that the developed application doesn’t yield any return. So the enterprise has to start the exhausting application development process once again.
So, can’t this situation be avoided? Yes, it can be!
To pre-test the viability of software or an application, a process called MVP is used. The Minimum Viable Product (MVP) approach to low-code and no-code solutions comes in handy.
Low-Code No-Code Solution And MVP (Minimum Viable Product)
The term “low-code, no-code” development approach refers to a method of creating and deploying custom applications that uses little to no traditional coding. Additionally, it has a visual user interface and pre-designed components that can be customized.
MVP refers to a low-code, no-code solution that can be developed and validated without requiring the heavy investment of skilled teams and other resources.
A low-code, no-code development approach brings down the time, usage of resources, and entire software development life cycle to the bare minimum. Understanding this potential, every idea for a software application can be tested in advance to find out its viability.
So even before developing an application, it can be tested economically and quickly. Therefore, understanding and analyzing the pros and cons of MVP is important to moving forward.
Understanding Pros And Cons Of MVP In Low-Code
MVP is one cost-cutting and effective way of testing the viability and possible prospects of a custom mobile application or software product. A low-code development platform empowers enterprises and individuals to have an MVP with little resources and effort.
A basic prototype with minimal but main features is created and released to a dedicated or concentric group of users through a no-code, low-code platform. Thus, MVP helps to gather key customer feedback as well as attract prospective investors.
DEW Studio is a top low-code platform with specially designed software development environments with graphical user interfaces and pre-built templates.
There are different MVP approaches. Based on the need and scope of your application, you can choose one of the following:
Multi-capability MVP: Here, MVP is created with both core functionality and important secondary features. It is created with multiple low-code tools blended with some level of manual coding.
Single Feature MVP: With single feature MVP, we will just be sticking to one key feature aiming at the key problem the people are facing, that is, the public’s primary problem. For that feature to work properly, some additional features may be allowed to complement the primary feature. Low-code platforms are enough to build this MVP.
Manual First or Concierge MVP: Along with the basic product, this approach helps in mimicking the backend processes for the application functionality. Even the employees of the enterprise can provide their recommendations. So without spending too much, we can gather heaps of crucial data about the application along with the assessment of its viability.
As we have learned about different MVP approaches, let us address the main aspect. The pros and cons of MVP are:
Pros Of Building An MVP With Low-Code Solution
As the platform is a no-code/low-code app development solution, there is no need for extensive engineering and technical skills. Anyone can get involved in this easily.
With readymade tools and top-grade customizable components, the whole process and its results will be highly efficient and astoundingly effective.
Lucrativeness and Cost-effectiveness are the primary attributes of this precious approach.
With optimized backend processes and improving outdated systems, reduction of technical debt and overhead resources is possible here.
Not just development, even the deployment happens faster.
Cons Of Building An MVP With Low-Code Approach
Technical constraints may arise when we want to inculcate extensive features that might need traditional programming help.
The app gets locked into the vendor’s proprietary technology stack and deprives you of source code access. So the migration to another platform will be difficult.
Basic knowledge and skills about the features of the platform are necessary. These fundamental skills are necessary for low-code no-code development platforms.
Low-code no-code technology solutions might be highly secured, but integrating third-party software and databases might lead to new security concerns.
Self-safeguarding measures and policies are essential to have for secured database management. These measures demand enough time and resources.
Final Words!
So, these are the primary benefits and drawbacks of creating MVP with a low-code or no-code approach. Analyze them before building the MVP in a low-code approach. With pre-made or minimal custom coding, DEW Studio low-code app development platform enables the creation of avant-garde apps, the automation of workflows, and the integration of features. Get Started!
0 notes
Text
Medium - High Fidelity Prototype

Andrew and I decided to split the tasks up for the development of our app. We separated the work, so that I would be working on the Information Architecture and User Flows of the Application, where as Andrew would focus on the visual design. This was not a successful idea, as the Information Architecture and rationale behind the design informs a lot of the visual aspects. The failure of this was reflected in the User feedback we got from the actual customer group, and other design students.
Mitchell Jones:
Mitchell did not like the the UI of this app, as he thought it was to feminine for him. He thought the gradient was excessive.
Verbatim:
“Why are the fill in fields, the same as the buttons in the previous screen. First, of all I can barely read it, I’m confused are they drop downs?”
“I don’t think you should ask users what their impairments are, it may be a bit too personal for some people.”
“The more I saw the gradient fill in things, the more I hate it.”
“The type on this screen is too small” - referring to the after the picture has been uploaded.
“I don’t like the robot, it looks like something I would do.”
“I hate the green as the background, and the white text. I can seriously not read it. If you keep this up, you’ll piss off all your users and they’ll never use your app again.”
“The map needs text, and the cars look like rectangles. It’s not cool.”
William Tauau:
Being mature, William struggles with technology and desired an easy to use and navigate experience. He really struggled with using this app, suggesting that we need to reconsider the UI, and the Information Architecture.
Verbatim:
“I can’t read anything.”
“An impairment? It’s a bit much to ask.”
“I don’t like the map.”
“How am I supposed to know anything, if there are no maps on the app.”
Verbatim (From other Design Students)
“The gradient has been overused. You seriously shouldn’t have gradient buttons on a gradient background.”
“The fill in fields aren’t centred aligned.”
“The fill in fields, shouldn’t be a gradient because users may think it’s a button as a opposed to a fill in field, based off previous interactions with the app.”
“The app needs more detail.”
“Sorry to be blunt, but the gradient is horrific.”
“I don’t think the colours suit a public transport application.”
“The colour doesn’t match with the concept. It looks like a health app, not a transport app.”
“There is just way too much gradient.”
“The user flow needs improvement, because the on boarding process is too long.”
“I like the idea of the chatbot, but it should be integrated more into the user journey. It’s awkward being forced to choose one path over the other.”
Where to from here:
After the feedback from our users and from other design students, Andrew and I have a lot to reconsider. The Information Architecture and the User Interface both need a lot of improvement. We need to reconsider how:
We ensure that users get an appropriate vehicle. Asking users directly about their impairments was too confrontational, so this needs to be reconsidered.
How to integrate the Chatbot into an integrated, and seamless experience.
Re-evaluation of the Visual Design of the application - this includes the colour scheme, application and use of gradients, the typography and the apps.
1 note
·
View note
Text
Download Virtual Dj Windows 8. 1

And why would I want to do that? No, we're talking about GarageBand's Preferences.I see. Shall we discuss Deleting Preferences?I'm quite happy with my preferences, thank you. Command line deleting garageband files from mac. Sometimes a Mac Preference file, like Permissions (See: ) can get corrupted. Perhaps another program did something that it wasn't supposed to do, or maybe apower failure caused your computer to shut off while it was writing a file, there are any number of possibleways for a file to become corrupt.The GarageDoor Image Gallery.
Dj Mixer is a simple application for Windows 8. DJ Mixer allows you to be a great Dj mixing your music, ideal for partys, you have two decks, and allows you to create your playlist at the moment.
Download virtual dj windows, virtual dj windows, virtual dj windows download free.
Virtual DJ 8 Pro free. download full Version + Patch Crack. Virtual DJ 8 is an application that you can use to create music through mixing audio files. You can also add the music with various effects that are available in this software. We highly recommended vdj 8 pro because of its very easy use interface and the results could be very astonishing. Jan 22, 2020 VirtualDJ is a software used by DJs to replace their turntables and CD players, and use digital music instead of vinyl and CDs. It lets you 'mix' your songs, by playing two or more tracks at the. Virtual DJ is a download software used by DJs to replace their turntables and CD players, and use digital music instead of vinyl and CDs. In the same way that the CD players used by DJs have more options than a regular Hi-Fi CD player, DJ Virtual for Windows has more options than a simple media player like iTunes. Coolvibe Virtual DJ 8 is good program, and can crossfade videos, but uses a lot of RAM, but as with many others online, even with lots of RAM, it also has many problems stutters and freezes on high HD videos. Omnisphere 2. 6 torrents. ( I am using on brand new win 10 pc with 16gb of RAM) Main thing do not like about Virtual DJ, is that it's developers force their huge distracting ugly logo on your video screen which.
Latest Version:
Requirements:
Windows 7 / Windows 8 / Windows 10
Author / Product:
Next Generation Software / Virtual DJ Studio
Old Versions:
Filename:
Crossover mac visual studio. VDJSetup.exe
MD5 Checksum:
dcd25614203283ef171285f565ee0a11
Virtual DJ Studio is the world’s most popular

audio and music production tool that brings the process of virtual DJ performance and karaoke presentation to a whole another level. With over 20 years of experience and millions of downloads, Virtual DJ Studio has managed to grow into a leading mixer-board interface app on the current market. The amount of features that this audio mixing app supports is almost endless, and it covers all the standard DJ tools that are regularly used by both novices and seasoned DJs - management of volume fading, muting, crossfading effects, tempo and pitch controls, 10-band graphic equalizer, spectrum equalizer, full support for external audio plug-ins, playlist management, support for isolated preview mixing, and much more.
Virtual Dj 8 Download For Pc Windows 10 Full Version Free
Karaoke support is handled with great care, with support for a wide variety of Karaoke files, audio discs, MP3, CDG and ZIP files. There is even integration for better handling of Karaoke singers in the crowd around you. The app supports showcasing of future singers that can be displayed on the nearby monitor or TV, and there is even an iOS or Android app that people around you can use to recommend next songs. Virtual DJ Studio is focused on the playback of the already recorded music files. It does not support the mixing of live music, and also it lacks many audio effects, support for pitch modification, VST plug-ins, and the capability to playback video clips. Seasoned and semi-professional DJs and Karaoke will waste no time when adapting to the feature set and interface of the DJ Studio, but novices and first-time users will have to invest some of their time to learn how to take advantage of this app. Features and Highlights
Download Virtual Dj 8 For Windows 10 64 Bit
Download Virtual Dj Windows 8. 12
Easy to install and use
Streamlined and highly customizable interface
Full set of audio mixing tools
Auto-crossfade tool makes mixing easy
Fully-featured Karaoke management
Support for all modern versions of Windows (XP, Vista, 7, 8, 8.1 and 10)
FREE to use during the 14-day shareware trial period
Download Virtual Dj 8 Full Crack Windows 10
While many other similar audio mixing apps are content to give you just a bare minimum of audio controls, the app gives you access to the tools that mimic the entire DJ mixing studio. It cannot handle the mixing of live music, it but it has more than enough tools to enable you to make any musical event a success. With shareware free access to almost all of its capabilities, Virtual DJStudio is a music mixing application that will redefine how you can create music on the fly. Note: 14 days trial version.
0 notes
Text
27 Striking Examples of Minimal Design That'll Kickstart Your Creative Process
New Post has been published on https://tiptopreview.com/27-striking-examples-of-minimal-design-thatll-kickstart-your-creative-process/
27 Striking Examples of Minimal Design That'll Kickstart Your Creative Process

If you’ve been on the internet, chances are you’ve come across stark, simple websites or ad creative. In fact, this design sensibility — known as minimalist design — has been rising in popularity, though it’s far from a passing trend.

What is minimalist design?
Minimalism is a design aesthetic that embodies the phrase “less is more.” With minimalist design, you push an idea by stripping it down to essential (sometimes bare) elements, using clean, modern, and minimal aesthetic, font, and color choices.
Whether you’re curating an Instagram feed or designing a web page, there are plenty of advantages to minimalist design.
Minimalist Graphic Design
Rather than bogging your audience down with vibrant patterns or paragraphs of text, a minimalist approach allows you to focus on a few key components of your brand you feel are truly important.
However, minimalist isn’t as simple as white space. To avoid creating boring or uninspiring designs in your attempt to become minimalist, it’s critical you take a look at some successful examples of minimal design, ranging from posters to logos, to kickstart your creative process.
1. Braga Da Cruz

These Braga Da Cruz jewelry store business cards, designed by Luke Halota, are a good example of how minimalism can help brand name stand out on the page. Halota uses grids to center the company name on one side, with a small, unobtrusive logo placed above. On the back, he makes sure to use simple white space to make Francisco Cruz the focal point.
2. Visme

Minimalism doesn’t have to be boring. Here, Visme created a pop-up ad where the primary focus remains on the “Join us!” blue button, which contrasts nicely against the orange background. Additionally, to grab the viewer’s attention, Visme placed a large lion’s head image on the left side of the ad.
3. Heather Shaw Book Design

Heather Shaw ensures true simplicity in her Ocean Conservancy book, which grabs the reader’s attention with minimal text and colors. The information is plainly outlined and easy-to-follow. Additionally, there’s a lightly outlined sketch of an ocean behind the text — while not overbearing, it adds texture to the design.
4. Helix Sleep by Stefanie Brückler

These Helix Sleep referral cards look both sleek and helpful. Stefanie Brückler uses contrasting colors and clean font to ensure the cards can do their jobs without seeming unoriginal.
5. Pixite by Peter Komierowski

On his page, Komierowski explains, “I was asked by Pixite to create a set of nature-inspired shapes for their app Fragment.” Ultimately, his design is aesthetically-pleasing and fun, with simple, cohesive lines that form the shape of a fox.
6. Mastercard by Pentagram

One of the most iconic minimalist designs, Mastercard’s financial design is undoubtedly a staple of the brand. The simple red and orange circles signify connectedness and seamlessness. The circles are recognizable enough that Mastercard can use the icon in place of any brand text, and still convey its ownership.
Minimalist Web Design
You can take the tenets of minimalist design and apply them to brand websites, resulting in clean interfaces that guide users where you need them to go. Here are great examples of minimalism used on the web:
1. Huge Inc.

Huge Inc.’s homepage is clean and polished, with minimal text to ensure a new viewer doesn’t feel overwhelmed by the page. Additionally, the small details — like the black that appears in the logo as well as the second half of realtor.com, and the small jagged line in the bottom right corner — signify a sense of cohesiveness.
2. Bedow

Bedow, a Stockholm-based design studio, knows its viewers priorities, and thus doesn’t waste time with a busy homepage — instead, they include a short blurb about their studio, and then leave a section of white space before displaying some of their designs.
3. Reducing the Obvious

One of the more simple designs in the list, Reducing the Obvious’s design is compelling and mysterious, with little information displayed on the homepage. However, the page is still helpful and inviting, with a small “Use buttons to navigate!” command in the bottom left.
4. Jorgeriera Flores

Jorgeriera Flores’ page is fun and inviting, with a blinking, life-like design and a clean navigation bar. Additionally, the creature’s nose serves as a “J”, demonstrating Flores’ attention-to-detail.
5. Design Co.

Oftentimes, minimalist design enables a brand to convey its purpose more powerfully than it could with a busier page. Design Co., for instance, is able to capture the viewer’s attention with its compelling message — spreading the creative spirit across 7,107 islands — by ensuring its background, while colorful, is devoid of distracting add-ons. Additionally, the small white logo serves to reinforce their main point.
6. Evoulve

It’s impossible to see a page like this and not find yourself curious to explore further. Evoulve does a good job expressing a sense of innovation and sleekness — with its world-icon and bright, futuristic design — without needing any additional text or imagery to compel the user to explore further.
7. Tim Brack

Brack’s use of white space and overlapping elements serves to create a clean and inviting homepage. Additionally, the photo of himself with a pig highlights a sense of playfulness and humor, and you’re able to obtain most relevant information — including Tim’s title as art director — instantly, without any distraction.
8. Tinker

Minimalism is often accomplished best when a brand knows exactly why a visitor might come across their website. In this case, Tinker understands its viewers are looking to browse and potentially purchase a watch, so it aims its design-elements to drive attention toward that single purpose.
9. ETQ Amsterdam

The close-up of the shoe offers a new viewpoint, making ETQ’s homepage intriguing and original even in its simplicity. Additionally, the small white font looks simple and clean against the photo background.
Minimalist Logo Design
The logo is one of your most important elements in your design arsenal. You don’t want a beautiful minimalist design to be supported by a clunky and overdone logo. These brands used minimal logos to support the feel of the rest of their brand:
1. UBAR

The bold block text and black-and-white contrast lends itself well to Simon McWhinnie’s UBAR design. The simplicity allows the text to dominate the logo and evokes a sense of power and strength.
2. Cloud Bed by Michael Spitz

If you have one product you sell well, why complicate it? This logo, designed by Michael Spitz, communicates the brand’s product — bedding — without text. Additionally, it’s clean and calming, particularly with the use of light blue and white, which ensures a sense of calmness for the viewer.
3. Varnom Ross by Bibliothèque

Varnom Ross’s logo is bold, powerful, and striking. Additionally, the replicated box shape around the Varnom, used again as the “o” in Ross, signifies a sense of cohesiveness.
4. The Row Apartment Homes by PurdyLogo

This logo looks retro and funky, but it uses plenty of white space, as well as white lines within the letters, to maintain simplicity. Additionally, the colors work well together, ensuring “Row” stands out most prominently in the logo.
Minimalist Poster Design
Posters need to say a lot in a finite amount of space. That’s why minimalism works so well in poster design. Here are some great examples that support this idea:
1. Miselu

Miselu’s graphic design undoubtedly supports the notion that less is more. On their page, Miselu explains the design as “simultaneously edgy, approachable, and clearly expresses our core business: music”. Ultimately, these posters, along with their other designs, reinforce their core products while remaining simple enough to be adaptable as their brand changes over time.
2. Ilmars Rumpeters
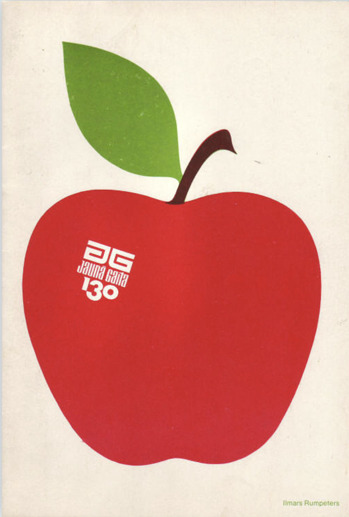
Ilmars Rumpeters created multiple simple covers for Jauna Gaita magazine, and this one in particular stands out as attention-grabbing and bold, with its vibrant colors and intriguing font. With minimalism, you want your focus to be on one or two elements — in this case, Rumpeters succeeded in drawing primary attention to the apple, and then to the magazine title itself.
3. Paul Rand

Paul Rand, a famous logo creator and graphic designer, created this poster to advertise the International Design Conference in Aspen, 1966. Ultimately, the piece is intriguing and complex even in its minimalism, causing viewers to likely pause and wonder over the significance of the black splatters or egg-shape in the background.
Minimalist Text Design
You’ll notice in each of the designs above, the text is chosen intentionally and displayed in a way that adds rather than detracts from the visual elements. With a minimalist design, one of the first things you’ll want to consider is the font choices used throughout the website or marketing collateral. You’ll want to choose fonts that are:
Crisp
Clear
Legible
Easy to read (even at small sizes)
Simple
Consistent
Geometrical
Here are some examples of fonts used in minimalist design:
1. Open Sans

Because serifs can be more difficult to read, especially on the web, minimalist designs often use sans-serif fonts. Open Sans is the quintessential sans-serif font (except perhaps Arial) and is easy-to-read and modern. The body text in particular is particularly crisp, making it ideal for long-form text in a minimalist setting (like a blog).
2. Libre Baskerville

Even though sans-serif fonts are a staple of minimalist design, serifs still have their place. Libre Baskerville does a great job of providing an air of elegance and class without sacrificing readability. The body text is just as easy on the eyes as Open Sans, and even the italicized subeading text is legible (though you wouldn’t want to rely on it too much).
3. Montserrat

Montserrat has some lovely rounded lines, making the letter shapes easily recognizable, and the italicized subheading provides a more dynamic look when paired with the bold headers and clean body font.
4. Poppins

Minimalist text design certainly doesn’t mean devoid of personality, as you can see from the graphic, web, and poster designs above. Poppins is a great font family that adds a bit of fun to the minimalist style with overly rounded and almost cartoonish letters. At the same time, it looks modern and professional.
5. Overpass

Overpass provides a more industrial look with its narrow letter shapes and sharp corners.
Now that you’ve seen several iterations of what minimalist design looks like in action, you can begin to create your visual marketing strategy and design marketing materials that supports your brand in a clean and modern but still attractive way.

Editor’s note: This post was originally published in February 2019 and has been updated for comprehensiveness.
Source link
0 notes
Text
How to Use an OBD-II Scan Tool
The vehicles of yesteryear indicated what they needed if you were keen enough to look and listen. Trained eyes and ears could recognize when a hinge required a touch of grease or when a windshield-wiper motor was ready to expire. Identifying these developing mechanical issues kept you from being left stranded on the side of the road.
Today’s vehicles are far more complicated than those earlier cars, but with the advanced technology built into them, many provide warnings of potential issues automatically. They employ sensors monitoring fuel, ignition, transmission and emissions systems, and they alert the driver if an issue is detected. Certain vehicles also monitor additional systems, including the brakes and safety equipment.

What is OBD-II or OBD2?
Vehicle monitoring systems, or On-Board Diagnostics, have been used in vehicles since the early 1980s and have grown more elaborate and sophisticated over the years. Early systems were vehicle- or manufacturer-specific and provided limited data, usually accessible with proprietary, and often expensive, equipment. The only readily available consumer-level information was in the form of a dashboard-mounted malfunction indicator often referred to as an “idiot light.”
As technology advanced, making for less expensive malfunction indicators, smaller repair shops and even consumers purchased the equipment necessary to read error codes being thrown by automotive on-board diagnostics systems. Unfortunately, if you wanted to diagnose more than one make or model, you needed to purchase numerous manufacturer-specific scan tools. The need for standardization was recognized, especially in the area of emissions requirements. For the 1996 model year, the EPA mandated that all vehicles had to be built according to a universal On-Board Diagnostics II (OBD-II or OBD2) standard.
OBD-II led to the creation of a universal connection interface, typically found just underneath the vehicle’s steering column. By using the appropriate cabling, a computer can be attached to the OBD-II port and the diagnostic messages can be read and analyzed, aiding in the vehicle’s repair and return to service. The single standard led to the development of affordable consumer OBD-II scan tools, many of which can now be purchased for less than the cost of a subcompact car loan payment. A bare-bones code reader can be had for under $50, and this may be enough to meet your needs.

How to Connect and Read an OBD-II Scan Tool
Regardless of your vehicle repair skill level, using an OBD-II code scanner is simple and straightforward. Before you get started, make sure to read the scan tool’s user manual and documentation.
1. Plug the standard OBD-II connector into the vehicle’s port located under the driver’s side of the dashboard.
2. Turn the car’s key to provide power to the scan tool or Auto code reader.
3. If necessary, enter any vehicle-specific information requested. Many tools will ask for the Vehicle Identification Number (VIN).
4. To check for engine codes, press the “scan” button on the code reader, and follow the directions on the screen.
5. A scan normally takes just a few seconds, and once it’s complete, follow the screen prompts to read if the vehicle is reporting any trouble or error codes. Record the data.
6. If you’ve used the data to fix the vehicle or simply want to see if the code was a one-time issue, use the scan tool to clear the reported codes, resetting the check engine light (CEL) in the process.

Different Types of OBD-II Scan Tools
There are hundreds of OBD-II scan tools and code readers on the market, and they cost anywhere from $50 to $3,000. The variety of options is a boon for consumers, but if you’re not properly informed, you could easily purchase a scanner that reads only a small amount of your vehicle’s available information. A scanner such as this provides limited usefulness. With up to five different communication systems used in OBD-II equipped vehicles, it is important to contact your vehicle’s manufacturer or consult another reliable source to discover which OBD-II systems your automobile supports. Once you know what information is available, purchase a scan tool that allows you to conduct a comprehensive download.
Of course, very few people keep the same car forever, and even if you do, it is wise to buy a tool that can be used on more than one vehicle and easily upgraded in the future. If you find your current ride requires just an inexpensive basic scan tool, you might want to buy a relatively cheap unit and retire the scanner with the vehicle when you sell or trade it in. On the other hand, if you are making a costly purchase to cover all of your vehicle’s systems, the ability to upgrade will enhance the scan tool’s value well into the future.
I Have the Diagnostic Trouble Codes (DTC), What’s Next?
Once you have the trouble code, an internet search can help you diagnose repairs. Better yet, many of the more sophisticated scan tools will provide you with both the trouble code and the code description right on the scan tool’s screen. Some will even use vehicle-specific information to report which parts need to be replaced or fixed to remedy the problem. You may be able to live without this extra information if you are handy searching online, but having it all in one place is efficient and worth considering when making a purchase.
Once you’ve established what the code means for your particular vehicle, you can use the information to purchase the necessary parts so you can repair the car yourself, or you can share the data with your mechanic. Even if your mechanic runs the codes and does independent diagnostic work, you can use the information you’ve gathered to confirm or disagree with the mechanic’s assessment.

App-based Wireless Scan Tool Technology
The traditional scan tool uses an interface that plugs into the OBD-II J1962 interface located close to the vehicle’s steering column. Some tools require you to connect the device to a computer to read the diagnostic information, but others are dedicated handheld units with buttons and a display. Many automotive shops and dealers have large computer-based machines that allow deep two-way communication between the scan tool and the vehicle. While the dealer’s pricey super-scanner is completely unnecessary for the home mechanic, the smaller handheld units are very useful for many driveway wrenchers.
Newer wireless Bluetooth OBD-II scan tools that work with a smartphone or tablet are also available. These new tools change the OBD-II rules, making complex code scanning and real-time vehicle information readily available even for those on a shoestring budget. A small Bluetooth-enabled harness plugs into an OBD-II port, and it syncs up to the phone in a matter of seconds to provide easy vehicle scanning, assessment of currently running systems and much more. The system also stores codes on the phone or tablet’s internal memory and keeps extensive logs for future reference.
We’ve spent time with Lemur’s BlueDriver Bluetooth scan tool and highly recommend it. The relatively inexpensive wireless module works with both Android and Apple devices, and the smartphone application is constantly being updated. Similar to many comparably priced standalone scanners, the BlueDriver lets you read and clear diagnostic trouble codes, but that is only the beginning. It also generates repair reports that contain the code’s definition, possible causes and likely fixes. BlueDriver can also let you know if your car is ready to pass a smog test.
Mode 6 data is a category of diagnostic information provided by some OBD-II scan tools, and it can warn you of potential problems that haven’t yet tripped a code. While most home techs won’t require Mode 6 data, it is available through the BlueDriver app. By accessing this information, you’ll be able to view real-time data such as the vehicle’s fuel rail pressure.

Some Scan Tool Technology is Built into Your Vehicle
Cars like the 2016 Hyundai Genesis include a “System Check” visual that pops up in the center of the gauge cluster at start-up. A little investigation revealed that along with checking things such as the sedan’s tire pressure and fluid levels, the Hyundai’s Blue Link system was investigating whether the vehicle was throwing any OBD-II-monitored trouble codes, and then, if enabled, sending the information to the local dealer automatically.
It only takes a few seconds to see if the Genesis is free of trouble-code alerts, and the added convenience provided by the built-in system seems like something all automakers might want to investigate for the future. OBD-II Scan Tools are for Everyone
Whether it’s handheld, wireless or built into your vehicle, an OBD-II scanner is a great way to diagnose many vehicle repairs inexpensively and easily. More importantly, since vehicles built in 1996 and beyond already have the interface, there’s no reason not to take advantage of this capability. Just remember to do some research before you buy, and seek wise counsel before purchasing parts based on a trouble code. Even if you never plan to lift a wrench, owning an OBD-II scan tool empowers you to be a part of repair decisions by arming you with vital and self-confirmed information
0 notes
Text
5 Major Difference Between UI and UX that You Need to Know

When you are developing the application or planning to develop a new app, then you may have a chance to know this term UI/UX.
UI/UX is oriented to the design field. Every application needs a good design to draw the attention of users. As by the stats, 94% of websites’ first impression is got by a design.
The User Interface (UI) and User Experience (UX) seems to be same, but it has different roles. Let’s see how UI varies from UX.
User Interface (UI):
User Interface (UI) is the process of designing user interfaces for your web applications, mobile apps, software products.
Every application or product has a front-end (technically, client-side) and back-end (technically, server-side) design and development process.
User Interface is the client-side part where the user interacts with the app by accessing different features in the application. The success of any website depends on how friendly the website is for users.
User Experience (UX):
As the name implies, User Experience is an activity, where the UX designers design according to the user’s interests.
UX design is the process of developing apps or products that produces a greater and better experience to the users when using that app or product.
If a user finds a particular product or app as meaningful and worthy to use, then that application is made with the best UX design.
Benefits of UI and UX:
UI/UX design benefits your applications:
1. Customer Retention
2. Customer Acquisition
3. Low Cost
4. More Productivity
If you want to know more about what are the benefits of UI and UX for your application then read our blog UI and UX are important for every application.
Difference Between UI and UX:
UI/UX design plays a major role in developing and publishing applications to your targeted audience. UI/UX is a little confusing term but this article will help you to know how UX design is different from UI design in detail.
1. Beautiful vs Useful Interfaces:
“User Interface (UI) helps to make beautiful interfaces but User Experience (UX) helps to make useful interfaces”.
An app or a product will be developed on a purpose either to meet the user’s expectations or to solve the user’s problem in the form of an app. Your application should be unique and does not contain copycat features so that you can stand out from your competitors.
UX designers help you to make your application to drive traffic, for that they make a small analysis of customer needs. The process includes competitor analysis, minimum viable product development, and understanding customer needs. We will discuss this process later below. Hence UX designers design the useful interface. Moving on to UI design, the UI designers will design the interface that is visually appealing to the customers.
Thus, for a complete application, both UI and UX design are used.
2. UX is First and UI is Second:
A step by step and organized development and design process should be maintained properly to finish the project on time. Hence plan your task effectively.
“User Experience design is done first and then the User Interface process is followed”.
The UX designers focus on:
Researching and Analyzing Competitor:
Every process starts with research. UX designers research a lot to find out whether their app’s designing idea is already implemented by their competitor or not. If not, they continue the next step, otherwise, the designers will modify the design plan.
Understanding Customer's Needs:
Since the customer is everything, the UX designer’s task is to understand the customer’s feelings about using the application. UX designers design the app by knowing the features expected by the customers.
Wire Frame:
The wire frame is a visual guide or blueprints to plan the design/structure of the applications. This wire frame helps UX designers to arrange the elements visually, before jumping onto the development and design process.
Minimum Viable Product:
A minimum viable product is a new product version and it is a process where this new product with limited features is provided to existing customers to experience the design. By doing this, the UX designers will easily understand which features work well with the users.
This process will help UX designers to avoid huge expenses on product development and also it saves time.
After producing this minimum viable product and examined the users’ results, the positive features are moved to the next process. Then the apps’ process is forwarded to UI designers.
The UI designers focus on:
Prototyping:
Prototyping is the advanced form of wire frame where UI designers where the project planning and designs are explained visually in detail.
After prototyping, the UI designers start the design process.
Complete Design:
As said before, the design is the prior factor, visual designs grab the visitors. UI designers are taking care of the overall design of the application. The UI designers will design the amazing and appealing application interface according to the wire frame and minimum viable product results.
A catchy layout using the new programming technologies are involved to make the app with the best performance.
Promoting the Product
After the design, the UI designers will also focus on branding the application to reach the targeted audience.
3. UX focus on Connection and UI focus on Navigation:
“When the UX starts the project as groundwork, UI will finish the project”.
As by one-liner, Content is the king, the application will contain design along with greater content. This content will be the solution for the user to use this particular app. Thus, by researching and wire framing, UX designers make the application with features that users expect. So UX design is attached more to the connection between the customers.
Navigation is the crucial factor to consider in app development. If the customer opens the app, the fast loading and navigating speed of the app and better performance will encourage the user to use that app more. The app with low loading and navigating speed will simply navigate the user to another application.
Thus, in UI design process, the designers concentrate on the navigation process, button features, and visual designs. Thus, UI design is attached to the interaction of the users with the application.
4. UI on Interface but UX on Products and Services:
User Interface is the design which includes directly with the customers. The interface should be interactive so that the user finds it more interesting to use.
To make the customer happy, the UI design includes:
Customization options in the app like the text’s font style, color, size of the app.
The button features to access the app
Fast navigation and loading
High-quality images and videos content
Push Notifications to make the user remind about using the app
Continuous up-gradation of content.
To motivate the users to use the app, the UX design includes
Unique features and services in the app or product
Better user experience
Before developing, quick and organized wire frame and the prototype
Competitor analysis to improve the performance
5. UI is Not UX:
UX is a design process, where the UX designers have to identify the pain point of the customers. Firstly UX designers design a sample and rough prototype to understand the project needs. Then by testing it, if the results are matching the expected requirements, the product is ready to build.
Now it is the chance of UI designers. Now the idea is developed into a real-time application where the visual design and interaction design are applied together to enhance the app or the product.
A lot of you think that UX designers are the macro designers followed by the UI (micro) designers. But UX handles the user flow and the features of the app are implemented only by the UI designers. Hence UX and UX contributes equally in the tasks. Thus it is clear that UX is not UI or vice-versa.
Now, you can know that the UX (User Experience) design is a wide process that should be followed carefully to continue the UI (User Interface) design process successfully. Thus, UX and UI together can build your mobile or web applications or a particular product.
Want to go in-depth? Read here: Why UI / UX is important for building applications?
If you ask the question "To which(UI/UX) I have to give more preference?
Just think, if having a pretty design application, that does not work well. Do you really like to go again or work with that website? Alternatively, the site functions are good but not has bare bone design. These two scenarios will turn off a large segment of the user not to have interest in the website.
So, the answer will be concentrate on both UI and UX.
Both UI and UX need to work together to create a website that delights users both visually and functionally.
Three different roles of the UX design team:
As we discussed, UX is the first important task leading to the UI design process. In general, the UX team has three different roles.
1. UX analyst: The UX analyst will take care of research part by analyzing the users’ behavior and requirements. Competitor analysis is also executed by the UX analyst.
2. UX architect: The UX architect will take care of the presentation of the application. The overview of the design planning is properly arranged and organized by the UX architect.
3. UX designer: The UX designer finally take care of the wire frame and prototyping to design the app with a better user experience.
UI designer: At last from the UX design, the UI designers design the applications and make the virtual app ideas into visual applications.
So, the UX team requires UX analysts, architects, and designers to complete the UX design process.
Final words:
"Even though both UI and UX are of different ideas but they need to work together to make an pleasant interface for the users."
Sometimes the UI designers can take the wire frame tasks. At the same time, UX designers need the UI team when layout the customer’s requirements. So, a good design team requires expert UI/UX designers.
I hope, you will get the differences between UI and UX roles.
If you are planning to design the application, then Infinijith Apps & Technologies is the best UI UX design service company to hire designers.
Let us chat and expand your business ideas into visual applications.
Click here to read more: https://www.infinijith.com/blog/ui-ux-design/difference-between-ui-ux
0 notes
Text
Homes for Our Troops builds customized
Nearly every motherboard manufacturer on the market today makes at least one line of products for the "enthusiast" market. Typically, these motherboards are a bit flashier, offer better cooling, enhanced overclocking, more features and are priced significantly higher than their mainstream variants. In the majority of cases, these boards are half hearted attempts to cash in on unknowing buyers who think that these boards will overclock better than their mainstream siblings.
One such platform that's been getting a lot of interest over the last couple of months is the Samsung Gear VR. This is similar in concept to Google Cardboard, but goes way above and beyond in terms of comfort and visual quality. Cheap Jerseys free shipping Gear VR currently works with only one model of smartphone, the Galaxy Note 4, although you can get a sense for the quality of the optics by holding other devices in place..
wholesale jerseys from china But before all that came the controversy over apartheid, with the activist Peter Hain leading the vehement calls for the Lions not to give succour to a repugnant philosophy. The Wales flanker John Taylor had already decided not to go, but nobody else, and I ask McBride whether he had any misgivings himself. He is far too nice a man to snort with derision, but he comes close. wholesale jerseys from china
Cheap Jerseys free shipping As part of the PenFed Promise Card Challenge, PenFed has made donations to Homes for Our Troops and the Marines Toys for Tots program. https://www.wholesalejerseyslan.com/ Homes for Our Troops builds customized, accessible mortgage free homes for severely injured veterans. The Toys for Tots is run by the States Marine Corps Reserve, distributes children whose parents cannot afford to buy gifts for Christmas.. Cheap Jerseys free shipping
Cheap Jerseys free shipping But to let Shaw leave without giving him the chance to prove himself would be a incredible waste of time and money.Shaw is clearly talented but is unlikely to win back his place simply playing lower tier opposition in domestic cup games. The Frenchman was superb against Watford at the weekend and duly got his name on the scoresheet. What he needs now is consistency.. Cheap Jerseys free shipping
He is president of the Atlantic Investment Club. He has a license to sell real estate in Florida and in New Jersey. Dr. Photography is one of the most popular hobbies on the planet. Now the iPhone/iPod toting photographers just got an edge over their counterparts in the form of the dSLR Camera Remote from One on One Software. wholesale nfl jerseys This wonderful app allows the user to control their dSLR from the comfort of their iPhone/iPod touch interface.
Cheap Jerseys free shipping His name is Glenn A. Robinson Sr., though the Gary police also know him by his street name, "Red Cap." He was barely old enough to buy a legal drink when he became a father. Average, almost triple the Indiana average) and the homicide rate per capita is the highest in the nation.. Cheap Jerseys free shipping
cheap nfl jerseys Joel Embiid will miss the rest of the season with a meniscus tear and a bone bruise in his left knee. http://www.okcheapjerseys.com/ First overall pick Ben Simmons has been sidelined the entire season with Jones fracture in his right foot. Jerryd Bayless only played in three games because of torn ligaments in his left wrist. cheap nfl jerseys
Cheap Jerseys china The neatly folded inside the suitcase along with an invitation to a Nike event on Friday. Normally work and Saturdays, but I think I might able to make it how is like key (no disrespect to Coolio appearance at Enclave). After reading the invitation, I took the jerseys out of the suitcase, them began critiquing process.. Cheap Jerseys china
wholesale nfl jerseys The Diabetes Action Research and Education Foundation reviewed multiple studies that were studied to determine the effects of cinnamon on blood sugar control in diabetics. wholesale jerseys Clinical trial findings suggest the possibility of a small to modest effect of supplemental cinnamon on diabetics' blood sugar, likely because of small changes in insulin sensitivity. One study published in the December 2003 issue of "Diabetes Care" studied 60 people with type 2 diabetes. wholesale nfl jerseys
cheap jerseys In 20 cities]. Vindigo can go away. It a public service. Despite New Jersey's seemingly tough law, its Attorney General endorsed can ask why policy makes it easier to get an exemption than to get your child a shot, putting kids really have no say in the matter their communities at risk for preventable illness. The legal justification for the policy was that merely asking people to provide evidence of the bona fide nature of their belief was an unconstitutional infringement on religious freedom. Supreme Court, which has held that it was appropriate to ask conscientious objectors to the military draft for evidence of a constantly held religious belief. cheap jerseys
wholesale nfl jerseys Those seeking clues to England's rise might consider the quality of the decisions taken at the low point, amidst the arranged declarations, lob bowling and worse, https://www.cheapjerseys18.com/ that blighted the county game in the 1980s. The introduction of central contracts, two divisions, and four day matches changed the way the game was played domestically. These decisions were taken despite strong resistance from counties, entities owned by members inclined to focus on their team.. wholesale nfl jerseys
cheap jerseys Work off lunch by walking north to the Lower East Side Tenement Museum (97 Orchard St, between Delancey and Broome), which recreates life in 19th century immigrant New York. It's best to reserve tickets to the small museum in advance, however, and if you haven't done so and can't get in, continue north to the brand new, surprisingly large Ukrainian Museum (222 E. 6th St, between Second and Third Aves) in the East Village, where exhibits range from modern art to folk art cheap jerseys.
0 notes
Text
Post-ILTA>ON Round-up: Tons of Legal Tech News – Acquisitions, Launches, Updates and More
Last week may have been the first-ever virtual annual conference of the International Legal Technology Association, but just like past years’ face-to-face ILTACONs, this year’s ILTA>ON was the occasion for a flood of major news announcements from legal technology companies.
And given my own perfect storm last week of spending three hours a day hosting live coverage of the conference for Litera.TV, plus preparing for my hosting duties, attending conference sessions, and dealing with my day job, I was barely able to come up for air, let alone keep up with the surge.
So allow me this belated opportunity to catch up on some of ILTA>ON week’s more notable developments.
AbacusNext Announces Updates to AbacusLaw
Legal technology company AbacusNext announced the release of new features and enhancements for its online law practice management platform AbacusLaw. The enhancements include:
Updated look. The toolbar, background imagery, dashboard interface, name and matter screens and case previews have all been updated with a cleaner design for quick access to vital information.
New apps available on the dashboard. The Accounting Overview App provides insight into the AR and AP process including not yet billed and past due invoices; the Hours Comparison App shows available, worked, invoiced and collected hours for timekeepers over selected periods.
Customizable dashboard. Users may now control the color and text of app titles to their liking.
Remote API provisioning. This functionality provides easier API access to third parties and streamlines future integrations.
BigHand Acquired by Private Equity Firm
BigHand, a company that specializes in workflow, productivity and profitability software for the legal industry, has been acquired by Levine Leichtman Capital Partners, a global private equity firm.
BigHand says that it has over 3,500 clients and 600,000 users worldwide. Founded as a dictation technology company in 1995, it expanded over the years into a multi-product company and has completed six acquisitions in recent years.
I wrote in April about the law firm Baker Donelson’s accelerated roll-out of the company’s task-delegation platform, BigHand Now, in the wake of the firm’s decision to require its attorneys and staff to work from home.
Previously owned by Bridgepoint Development Capital, BigHand says its new ownership will allow it to further accelerate its growth with the aim of becoming a full workflow business and establishing a wider customer base throughout North America.
Financial details of the transaction were not disclosed.
FileTrail’s New Version Addresses Challenges of Remote Working
FileTrail, the company that provides information governance and records management software for law firms and highly regulated industries, released a new version of its software, FileTrail GPS 5.0. The updates to FileTrail GPS (Governance Policy Suite) are designed to address the IG challenges of remote working, disposition related to critical needs around cost-cutting and eliminating paper and policy management tied to increasingly stringent client and regulatory compliance requirements.
FileTrail GPS 5.0 integrates directly within the user interface of a firm’s electronic document management system, with different configurations to fit the color, design and appearance of popular platforms including NetDocuments, iManage and others.
The company said that it allows attorneys and their staff gain access to the inventory of documents in SharePoint, file shares and other sources without leaving the DMS. They also can directly access centralized disposition review workflows and have visibility into policies, guidelines, timekeepers and other information traditionally difficult to centralize and present.
iManage Acquires Closing Folders
The week kicked off with major news from document management company iManage — its acquisition of the transaction management platform Closing Folders.
Closing Folders is technology that automates many of the steps associated with managing and executing commercial transactions. The company says that more than 4,000 transactions a month are negotiated, signed and closed on its platform, ranging from small commercial lending deals to multi-billion-dollar acquisitions of global companies.
iManage says that the combination of the companies offers a number of business and technology advantages, including a “single source of truth” for transaction documents that reduces risk, integration with iManage RAVN’s artificial intelligence technology to enable analysis of transaction data and trends, and a global training and support network.
Terms of the acquisition were not disclosed.
Intapp Launches Service to Connect All A Firm’s Applications
Intapp, a company that provides software and services for professional services firms, launched Intapp Integration Service, technology that enables interoperability between all of a professional services firm’s software and applications on a single platform.
Available as either a pure cloud or hybrid deployment, the service lowers the cost of software implementation, speeds time to value, and centralizes firm data management to simplify the IT department’s job, Intapp says.
The service is supported by the first-ever Intapp Open API and a set of prebuilt integration processes. Initially, it will enable integrations for four major technology suites — Vuture, Thomson Reuters Elite 3E, iManage, and Dun & Bradstreet. Intapp said it will announce several additional integration partners in the coming months.
Kira’s New Feature Answers Your Questions
The machine-learning company Kira Systems said it will release a new feature in September, Answers & Insights, that will go beyond simply identifying and extracting contract clauses and actually interpret data to provide answers to pressing questions.
The feature will come with a collection of built-in questions commonly asked across legal and business documents. Users will also be able to build their own questions using Kira’s no-code machine learning platform Kira Quick Study.
Kira said that the tool will be able to answer questions such as, “Does the lease name a guarantor of tenant’s obligations?”, “Is LIBOR or Eurocurrency referenced in the agreement?”, or “Does the agreement renew automatically?”
“Answers & Insights represents the next level of our no-code AI technology,” Alexander Hudek, Kira Systems CTO and cofounder, said in announcing the feature. “It allows you to go beyond simply identifying relevant text by additionally assigning fine grained meaning to extractions.”
NetDocuments Unveils New Theme, New Products
The cloud-based document management company NetDocuments introduced new products along with a new vision of how it organizes and thinks about its products.
With the message of enabling its customers to “Work Inspired,” the company introduced two new products: Tasks, a collaborative task management system, and SmartView, a document preview and collaboration engine.
It also introduced a new five-pronged schema for how its various products support its theme of working inspired:
Organize is made up of the core NetDocuments capabilities, including document and email management and OCR technologies.
Protect provides controls and policy tools to reduce data breaches, as well as a geo-aware storage capability that supports compliance while accelerating content delivery around the world.
Plan is designed to bring teams together with one version of work focused on tools for coordinating teams and tasks, providing real-time team communication with ndThread and Microsoft Teams integration, and facilitating task management across matters and projects.
Deliver helps safely organize, package, and share content with clients, customers, outside counsel, and other third parties using built-in extranet and document bundling tools.
Learn provides insights about user activity and documents, and includes enterprise search-driven knowledge management insights.
Tasks gives users a visual snapshot of their workload and project status.
With regard to the two new products announced last week:
Tasks is a task management system designed to provide a holistic view into everything that is important in a project. It provides collaboration inside a workspace for various parties who have interconnected deliverables to help users track project stages, owners, deadlines, and deliverables.
SmartView is designed to simplify document reviews by making it easy to quickly preview, annotate, and mark up documents without ever needing to download the files to the desktop. Users can make Margin Notes to annotate files with colleagues and clients in real-time — and take advantage of findings to easily navigate through people, places, companies, and more.
SimplyAgree Readies New Version of its Signing and Closing Tool
The deal management platform SimplyAgree said that it is rolling out the latest version of its signature and closing management technology for transactional attorneys.
SimplyAgree is a closing management tool that helps deal teams streamline signings and automate the creation of closing sets and other post-closing work. It also provides tools to support professionals in closing deals remotely — including integrated mobile and electronic signing.
The company said that the new version enhances the platform’s performance and flexibility to meet more users’ needs and adds a more modern interface. Other new features include:
Enhanced document visualization and compilation, simulating desktop PDF tools.
Expanded signature packet functionality, including test emails, notifications, group messaging and signature links.
Support for multiple templates and types of binders for different practice groups and users.
Electronic closing binder delivery to securely share closing binders without emailing large files.
TitanFile Unveils New Features and Integrations
TitanFile, a secure file sharing and client collaboration platform focused on the legal industry, announced a number of product improvements. They include:
DocuSign integration: new integration improves work product workflow especially in times of remote office environments due to COVID-19.
Document management system compatible: now compatible with most popular legal document management systems.
Metadata scrubbing feature: upgrade to its “Secure Send” feature where it scrubs and sends and files emails to document management systems.
from Law and Politics https://www.lawsitesblog.com/2020/09/post-iltaon-round-up-tons-of-legal-tech-news-acquisitions-launches-updates-and-more.html via http://www.rssmix.com/
0 notes
Text
Mac Versus PC – Here’s Why I Still Loathe Windows After 20 Years
After two decades of experience with both Mac and PC computers, I still love the Mac OS, and I still utterly loathe Windows. Admittedly, I am no computer expert. But, hear me out. If you’re an artist, this might resonate with you.
Sand Dunes, Death Valley 2005. First Processed in Photoshop CS2, re-processed ~15 years later in Lightroom CC
I built my first PC in high school, it was a Windows XP (or Windows 2000?) machine. My father took me to the local electronics superstore and we picked out the motherboard, etc. I loved the sense of pride when it first turned on, I loved making upgrades, it was fun, at first.
After the tragic “bricking” (electronic death) of that PC, due to viruses or malware or something, (curse you, Napster/LimeWire/Kazaa!) …I got into photography and bought my first Mac. I “went legit” and paid for authentic copies of Adobe Photoshop 6, 7, Creative Suite, and beyond…. (And, yes, I paid for music on iTunes!)
Fast-forward a couple of decades, and I’ve gone back and forth between Mac and PC a few times. As a post-production manager/specialist and private workflow consultant, I have to stay up-to-date on both operating systems for my work.
Shop the Best Computers For Photography Editing: (Adorama) (B&H) (Amazon)
Sony RX100 VII, 2019 Adobe Lightroom Classic
I’d estimate that my time has been split 70/30 or 80/20 between Mac/PC. Whenever I use a PC more routinely than a Mac, though, I have the exact same experience…
With each new version of Windows, my initial reaction is “oh, this isn’t so bad!” After all, I just need a few photo and video editing programs, and they’re virtually identical on both operating systems. As someone who reviews cameras for a living, re-wiring my brain quickly to jive with a few different keyboard shortcuts and Finder VS Explorer comes very easy.
Then, like clockwork, Windows begins to sabotage our relationship. Things get way too complicated, and in a totally new way each time. Each time, I quickly remember why I love my Apple machines. They just work. They’re simple, they run smoothly day in and day out, they’re just idiot-proof. I realize that makes me the idiot, and I’m OK with it; I spent all my energy mastering camera interfaces and customizations, apparently, and I have no patience left for confusing computer problems.
[RELATED READING: The Best Lightroom Keyboard Shortcuts | Quick Reference Guide]
Yosemite, 2017. Nikon D750, Adobe Lightroom “Classic”
Today’s story is just one example of why, personally, as a simple-minded creative person I will probably never truly enjoy the Windows user experience like I do the Apple “sphere”. It’s probably not even a good example, there’s probably a really easy explanation for this problem, but after hours of searching the internet and asking all my PC wizard friends, I still couldn’t fix things, so here it is…
DISCLAIMER: We all have our different computer-related experience & track record. Some people have had numerous Macs crash or die on them. I’ve heard the reports of how overall quality control has declined in recent years. All I am doing today is telling my story. You’re welcome to tell your own story in a comment!
Windows PC Display Calibration Profile
Like any responsible photographer should, I attempt to calibrate my latest new PC display. It’s a 4K HDR laptop display, so the slightly older calibration device was barely up to the task. The default calibration options were very wrong for such an exotic display, and I had to re-calibrate multiple times with a lot of trial-and-error, before getting it right. To be fair, I’m not faulting Windows for this complication at all; it was an older model X-Rite device, and my Apple displays were never 4K HDR with 100% RGB! Moving on…
Even when accurately calibrated, however, Adobe applications still displayed images quite differently from Windows Explorer and other applications. (Kudos to Google Chrome for coming the closest to matching Adobe, though!)
I was confused. I hadn’t encountered this problem on a Mac in 10-15 years. And, the difference was significant enough that if I edited my images “to taste” in Adobe, they didn’t just look slightly different everywhere else, they looked horribly over-cooked.
So, I decided to dive down the rabbit hole, and see if there was a deeper level at which I needed to change a color space/display setting, or designate the new calibration profile, in order for Windows to stop over-cooking colors and contrast so much.
Also, by the way, the calibration profile keeps un-setting itself, every time the computer sleeps, even though X-Rite says it has applied it at the system-wide level. So I have to re-apply the display calibration profile every single time I wake the computer. Another reason to dive deeper and check the system-level settings. Which brings us to the present. Let’s try and figure this out together…
First, unlike on a Mac where display settings are all handled in one place through the OS preferences, on this particular Windows PC each hardware manufacturer has its own little add-on programs besides Windows’ own settings. So, I check those first – Acer has one, Intel has one, NVIDIA has one, and of course there’s one more GeForce…thing. None of them seem to have any control over the actual display profile. (Despite one of them actually having a seemingly useless option deceptively named, “Select profile”…)
So, I’m four applications (each with numerous settings) into my hunt, and I haven’t even found anywhere to force my computer to use the same display profile. Only Adobe applications seem to automatically use the X-Rite-generated display profile.
So, into Windows Display settings we go. Let’s count how many layers there are…
This is the 2nd level of the 1st settings window, where the “Color profile” setting keeps undoing itself despite double-checking in the calibration software that the profile should be saved at a system-wide/admin level. So, we’d better go down to the bottom of this window and click “Advanced display settings”…
Layer 3 – Nothing useful here; we need to click “Display adapter properties for Display 1” and go even deeper…
A whole new (2nd) window pops up. This isn’t very useful either, but I do see a tab called “Color Management”, and that sounds a little more promising!
…Sadly, the “Color Management” tab just shows a “Color Management…” button. I guess I better click it! (Depending on how you count, we are 2 windows or 5 layers deep at this point.)
Now we’re getting somewhere! 3 windows (6 layers) into the bowels of Windows settings, I finally find somewhere to set a default display device profile. Except, it’s already set to the CUSTOM profile, even though I’m definitely having the color/contrast discrepancy problems I described. What’s going on? Well, there is another “Advanced” tab in this window; let’s see where that leads…
Is this the culprit? I finally found a “Device profile” setting that I can change from the factory profile to the custom profile! (Layer 7)
…Unfortunately, changing this setting didn’t seem to help. In the lower corner of the window, however, we see a button for “Change system defaults…”
We get an identical window, except this is named “Color Management – System Defaults”. Unfortunately, the CUSTOM profile is still set as the default. Maybe there’s another “Advanced” tab? Yes, there is. At this point, (4 windows, 8 layers) I feel like I’m in a horror house of mirrors…
Finally, when I can go no further, (layer 9!) I found a “Device profile” option that was set to sRGB, even though this is an AdobeRGB display. Let’s try setting this last option to the CUSTOM profile, and see what happens.
…Surprise, surprise: colors and contrast are, in fact, a little bit closer in Adobe applications and other Windows programs. Still, they’re off by a tiny little bit. It’s a margin of error that I’m willing to accept, though, so let’s call it “good enough”, and get on with our lives!
[Related Reading: Datacolor Launches SpyderX Tool Kits for Digital Photographers for Ultimate Color Calibration]
The real question is, surely after going deeper than Indiana Jones into the bowels of my computer for just one final setting, the computer should remember this display profile at the main level, even if I let it go to sleep, or do a full restart?
…Of course not. There’s that factory calibration again! Apparently, I’ll have to re-enable my calibration profile every single time I sit down at my computer. (Unless some Windows genius comments below and tells me what I’m doing wrong!)
Conclusion: Why, Windows, WHY?
Honestly, to be totally fair, I bet the real problem is ME. I’m sure there’s a totally simple solution to this problem, and if I’m lucky you’ll be polite with your comments even though I deserve to be ashamed of my failure. I probably made some rookie mistake.
But, I did try very hard to find a solution. I spent hours reading everything I could find on Windows display calibration and profile settings. I could only conclude that having colors match in all apps may just not be possible, period, when using an HDR-capable 100% AdobeRGB display. Maybe I’m wrong, and I missed a setting in one of those other proprietary apps.
Adobe Lightroom, Visual Flow “Pastel” preset for correcting green-tinted scenes (Click here to learn more!)
Either way, my point is this: With all the Apple computers I ever owned, at least it was never NINE LAYERS of complicated. (Not to mention the additional apps for managing individual pieces of hardware, as is Windows’ custom…) I don’t care how computer-savvy you are, nine layers of settings is about 6-7 layers too many.
With a Mac, setting up a calibration, or getting it to “stick”, was never a problem. Whenever I got a new Mac, or did a hard drive upgrade and full OS refresh, it was always effortless: install the software, perform the calibration, and tell the program to make the new profile universal. Done!
I might have missed something obvious, but I still can’t get past the fact that there are eight layers, or four different windows of display settings, plus those four aftermarket programs related to the display and graphics. That’s ridiculous. Why, Windows, Why? Is this really necessary?
Why Artists Like (Or Dislike) Mac: The Simplicity
I just need a computer that works. I need a computer that only has one or two levels of complexity, because I’d rather be back outdoors taking more pictures, not “managing” my computer. I know plenty of photographers that have no problems managing their PCs. They’re also very inspiring, creative artists! I guess everybody is a little different.
I understand that PCs, on average, are an incredible value. And, make no mistake, all the PCs I’ve ever used have been awesome computers overall, including this latest one. They’re powerful, fast machines that really let me blast through a batch of high-megapixel photos, even stitching 300-megapixel raw panoramas with ease! So, if you need the best value, a PC is a great choice, even if you might experience a little bit more frustration.
My point is, if you appreciate simplicity, or if you absolutely require it in order to maintain your sanity, that’s OK! We may pride ourselves in being camera masters, or Photoshop masters, but it’s OK to make certain technology-related decisions that help keep our blood pressure down. For me, that means I’ll likely forever reside in the Mac OS camp. I don’t care about brand name status symbols, or sexy outward appeal, I just want a computer that works as smoothly as possible, for as many years as possible. How about you?
Source link
Tags: 20, Heres, Loathe, Mac, PC, Windows, years
from WordPress https://ift.tt/3br3CEI via IFTTT
0 notes
Text
RisingStack in 2019 - Achievements, Highlights and Blogposts.
🎄 How was 2019 at RisingStack? 🥳 - you might ask, as a kind reader already did it in a comment under our wrap-up of 2018.
Well, it was an intensive year with a lot of new challenges and major events in the life of our team!
Just to quickly sum it up:
We grew our team to 16! All of our engineers are full-stack in the sense that we can confidently handle front-end, back-end, and operations tasks as well - as you'll see from this year's blogpost collection.
We launched our new website, which communicates what we do and capable of more clearly (I hope at least). 🤞 Also, a new design for the blog is coming as well!
This year ~1.250.000 developers (unique users) visited our blog! 🤩
We just surpassed 5.7 million unique readers in total, who generated almost 12 million pageviews so far in the past 5 years.
We have now more than 220 articles on the site - written by our team exclusively.
We had the honor to participate in JSconf Budapest by providing a workshop for attendees on GraphQL and Apollo. 🎓
We delivered a 10-weeks-long online DevOps training for around 100 developers in partnership with HWSW, Hungary's leading tech newspaper.
We kept on organizing local Node.js meetups here in Budapest, with more than 100 attendees for almost every event this year. 🤓
We had the opportunity to work with huge companies like DHL, Canvas (market leader e-learning platform), and Uniqa (insurance corp.).
We met with fantastic people all over the world. We've been in LA, Sarajevo, Amsterdam, Prague, and Helsinki too. 🍻
We moved to a new office in the heart of Budapest!
🤔 Okay, okay... But what about blogging?
Blogging in 2019
You might have noticed that we did not write as much blogposts this year as we did before.
The reason is simple: Fortunately, we had so many new projects and clients that we had very little time to write about what we love and what we do.
Despite our shrinking time for writing blogposts, I think we still created interesting articles that you might learn a thing or two from.
Here's a quick recap from the blog in 2019. You can use this list to navigate.
Stripe 101 for JavaScript Developers
Generating PDF from HTML with Node & Puppeteer
REST in Peace. Long Live GraphQL!
Case Study: Nameserver Issue Investigation
RisingStack Joins the Cloud Native Node.js Project
A Definitive React-Native Guide for React Developers
Design Systems for React Developers
Node.js v12 - New Features You Shouldn't Miss
Building a D3.js Calendar Heatmap
Golang Tutorial for Node.js Developers
How to Deploy a Ceph Storage to Bare Virtual Machines
Update Now! Node.js 8 is Not Supported from 2020.
Great Content from JSConf Budapest 2019
Get Hooked on Classless React
Stripe 101 for JavaScript Developers
Sample app, detailed guidance & best practices to help you get started with Stripe Payments integration as a JavaScript developer.
At RisingStack, we’ve been working with a client from the US healthcare scene who hired us to create a large-scale webshop they can use to sell their products. During the creation of this Stripe based platform, we spent a lot of time with studying the documentation and figuring out the integration. Not because it is hard, but there's a certain amount of Stripe related knowledge that you'll need to internalize.
Read: Stripe Payments Integration 101 for JavaScript Developers
Generating PDF from HTML with Node & Puppeteer
Learn how you can generate a PDF document from a heavily styled React page using Node.js, Puppeteer, headless Chrome, and Docker.
Background: A few months ago, one of the clients of RisingStack asked us to develop a feature where the user would be able to request a React page in PDF format. That page is basically a report/result for patients with data visualization, containing a lot of SVGs. Furthermore, there were some special requests to manipulate the layout and make some rearrangements of the HTML elements. So the PDF should have different styling and additions compared to the original React page.
As the assignment was a bit more complex than what could have been solved with simple CSS rules, we first explored possible implementations. Essentially we found 3 main solutions we describe in this article.
Read: Generating PDF from HTML with Node.js and Puppeteer
REST in Peace. Long Live GraphQL!
As you might already hear about it, we're the organizers of the Node.js Budapest meetup group with around ~1500 members. During an event in February, Peter Czibik delivered a talk about GrahpQL to an audience of about 120 ppl.
It was a highly informative and fun talk, so I recommend you to check it out!
Case Study: Nameserver Issue Investigation
In the following blogpost, we will walk you through how we chased down a DNS resolution issue for one of our clients. Even though the problem at hand was very specific, you might find the steps we took during the investigation useful.
Also, the tools we used might also prove to be helpful in case you'd face something similar in the future. We will also discuss how the Domain Name System (works), so buckle up!
Read the blogpost here: Case Study: Nameserver Issue Investigation using curl, dig+trace & nslookup
RisingStack Joins the Cloud Native Node.js Project
In March 2019, we announced our collaboration with IBM on the Cloud Native JS project, which aims to provide best practices and tools to build and integrate enterprise-grade Cloud Native Node.js applications.
As a first step of contribution to the project, we released an article on CNJS’s blog - titled “How to Build and Deploy a Cloud Native Node.js App in 15 minutes”. In this article we show how you can turn a simple Hello World Node.js app into a Dockerized application running on Kubernetes with all the best-practices applied - using the tools provided by CNJS in the process.
A Definitive React-Native Guide for React Developers
In this series, we cover the basics of React-Native development, compare some ideas with React, and develop a game together. By the end of this tutorial, you’ll become confident with using the built-in components, styling, storing persisting data, animating the UI, and many more.
Part I: Getting Started with React Native - intro, key concepts & setting up our developer environment
Part II: Building our Home Screen - splitting index.js & styles.js, creating the app header, and so on..
Part III: Creating the Main Game Logic + Grid - creating multiple screens, type checking with prop-types, generating our flex grid
Part IV: Bottom Bar & Responsible Layout - also, making our game pausable and adding a way to lose!
Part V: Sound and Animation + persisting data with React-Native AsyncStorage
Design Systems for React Developers
In this post, we provide a brief introduction to design systems and describe the advantages and use-cases for having one. After that, we show Base Web, the React implementation of the Base Design System which helps you build accessible React applications super quickly.
Node.js v12 - New Features You Shouldn't Miss
Node 12 is in LTS since October, and will be maintained until 2022. Here is a list of changes we consider essential to highlight:
V8 updated to version 7.4
Async stack traces arrived
Faster async/await implementation
New JavaScript language features
Performance tweaks & improvements
Progress on Worker threads, N-API
Default HTTP parser switched to llhttp
New experimental “Diagnostic Reports” feature
Read our deep-dive into Node 12 here.
Building a D3.js Calendar Heatmap
In this article, we take a look at StackOverflow’s usage statistics by creating an interactive calendar heatmap using D3.js!
We go through the process of preparing the input data, creating the chart with D3.js, and doing some deductions based on the result.
Read the full article here Building a D3.js Calendar Heatmap. Also, this article has a previous installment called Building Interactive Bar Charts with JavaScript.
Golang Tutorial for Node.js Developers
In case you are a Node.js developer, (like we are at RisingStack) and you are interested in learning Golang, this blogpost is made for you! Throughout this tutorial series, we'll cover the basics of getting started with the Go language, while building an app and exposing it through a REST, GraphQL and GRPC API together.
In the first part of this golang tutorial series, we’re covering:
Golang Setup
net/http with Go
encoding/json
dependency management
build tooling
Read the Golang for Node developers tutorial here.
How to Deploy a Ceph Storage to Bare Virtual Machines
Ceph is a freely available storage platform that implements object storage on a single distributed computer cluster and provides interfaces for object-, block- and file-level storage. Ceph aims primarily for completely distributed operation without a single point of failure. It manages data replication and is generally quite fault-tolerant. As a result of its design, the system is both self-healing and self-managing.
Ceph has loads of benefits and great features, but the main drawback is that you have to host and manage it yourself. In this post, we're checking out two different approaches of deploying Ceph.
Read the article: Deploying Ceph to Bare Virtual Machines
Update Now! Node.js 8 is Not Supported from 2020.
The Node.js 8.x Maintenance LTS cycle will expire on December 31, 2019 - which means that Node 8 won’t get any more updates, bug fixes or security patches. In this article, we’ll discuss how and why you should move to newer, feature-packed, still supported versions.
We’re also going to pinpoint issues you might face during the migration, and potential steps you can take to ensure that everything goes well.
Read the article about updating Node here.
Great Content from JSConf Budapest 2019
JSConf Budapest is a JSConf family member 2-day non-profit community conference about JavaScript in the beautiful Budapest, Hungary. RisingStack participated in the conf for several years as well as we did this September.
In 2019 we delivered a workshop called "High-Performance Microservices with GraphQL and Apollo" as our contribution to the event.
We also collected content you should check out from the conf. Have fun!
Get Hooked on Classless React
Our last meetup in 2019 was centered around React Hooks. What is a hook?
A Hook is a function provided by React, which lets you hook into React features from your functional component. This is exactly what we need to use functional components instead of classes. Hooks will give you all React features without classes.
Hooks make your code more maintainable, they let you reuse stateful logic, and since you are reusing stateful logic, you can avoid the wrapper hull and the component reimplementation.
Check out the prezentation about React Hooks here.
RisingStack in 2020
We're looking forward to the new year with some interesting plans already lined up for Q1:
We'll keep on extending our team to serve new incoming business.
We have several blogposts series in the making, mainly on DevOps topics.
We'll announce an exciting new event we'll co-organize with partners from the US and Finnland soon, so stay tuned!
We're going to release new training agendas around Node, React & GraphQL, as well as a new training calendar with open trainings for 2020.
How was your 2019?
RisingStack in 2019 - Achievements, Highlights and Blogposts. published first on https://koresolpage.tumblr.com/
0 notes
Text
How to Run Cross Browser Testing Using LambdaTest
Cross browser testing is a vital part of checking websites and web applications. It allows businesses (and their developers) to verify whether their website is not only compatible with all browsers, but also the relevant versions, operating systems, and devices.
A user’s choice of browser might boil down to their place of work, the country they reside in, their connectivity, their approach to privacy, or even their ethics. As website owners, businesses have no say whatsoever in which browsers users access their websites on.
In this tutorial I will look deeper into cross browser testing, while showing you the process with LambdaTest at the end of the post.
What is Cross Browser Testing?
To make sure your website or app functions properly across different browsers and operating systems you need to check for browser compatibility. Doing so will help you understand where it’s lacking and what you need to improve it.
A Simple Scenario
To better understand the need for cross browser testing, let’s consider a simple scenario. You develop a simple website with three frontend technologies: HTML5, CSS3, and JavaScript. Though there are multiple languages and techniques that you can use during the backend development (such as Python, PHP, and Ruby) rendering the front-end only focuses on these three technologies.
However, every browser has its own rendering engine (though some share the same engine with others) so they compute these technologies differently. For example, Internet Explorer uses edge HTML and Chakra, Firefox uses Gecko, and Google Chrome uses Blink to render a website.
Now, let’s consider that your website goes live, and it starts getting high traffic in just a few days. You come to realize that the high amount of traffic is largely from mobile browsers, which you haven’t tested. And if your website doesn’t function properly on mobile browsers, then there will be a drastic loss in that traffic. So, what should you do?
You’re unlikely to buy multiple machines to install different browsers, operating systems, with all their versions because that’s inefficient. You could visit a device lab (if there’s one nearby) so as not to shoulder the costs yourself, but the simplest solution is web-based cross browser testing that will allow you to test your web app across all browsers.
How to Perform Cross Browser Testing
When it comes to executing cross browser testing, there are generally two ways to go about it: manually and automatically.
Manual Testing
Manual testing refers to testing your website manually on every browser separately. First, you’ll have to identify all the browsers your application must support, then install those browsers with their versions on your system, and then write test cases for testing your web app.
After writing the test cases, you’ll have to re-run the same test cases across different browsers, operating systems, and devices to check application behavior and find any bugs in it. With the manual method, however you do it, it’s unlikely to be cost effective.
Automated Testing
The best alternative to manual testing is automation, where you don’t have to install different browsers on your system to test your application. Cross browser testing requires running the same test cases again and again on different browsers, and automation is the best way to do that. To automate cross browser testing, you’ll need a platform that already has every browser and their versions installed on their servers so that you can test your web app on the targeted versions.
This will not only save you time but will also help in managing costs appropriately. You can run a virtual machine with your required specification, and the tool will run tests for you. With that said, let’s learn more about automated cross browser testing with LambdaTest.
Using LambdaTest for Cross Browser Testing
LambdaTest is an online selenium grid that allows you to perform free, live, interactive cross browser testing for your publicly or locally hosted web app, across a combination of more than 2,000 browsers, operating systems, and devices. It is integrated with extensive features and debugging tools that allow you to debug your web app on both mobile and desktop browsers.
It allows you to record or take screenshots of your testing process so that you can share it with your team while the testing is in process. In short, LambdaTest is a platform that will free you from all the stress of testing your website on multiple browsers and operating systems.
One great thing about LambdaTest is that it gives you the functionality to test your web app in both manual and automated ways. The manual method allows you to select specific browsers, operating systems, and devices from the list on the server, whereas the automated method tests your web app across all combinations automatically. Let’s find out more about these processes in detail.
Note: at the end of this tutorial, we will discuss LambdaTest’s WordPress Plugin and Chrome Extension.
Manual Web App Testing with LambdaTest
You can perform various types of manual cross browser testing with LambdaTest. Here’s each testing technique in detail:
Real-Time Cross Browser Testing
The real-time interactive cross browser testing with LambdaTest allows you to test your web app across multiple combinations of browsers and operating systems on different desktop and mobile devices. Performing real-time testing with LambdaTest will make you feel like you’re working with a real machine and not a virtual machine.
To start with real-time cross browser testing, first, you’ll have to sign up and create an account on LambdaTest. If you already have an account, login to continue.
After signing in, go to the real-time menu on LambdaTest’s screen and enter the URL of the website that you want to test. Now, select the configuration for which you want to perform the real-time cross browser testing, and hit the Start button.
That’s it!
A new virtual machine will start running on your local machine, where you can test your application for cross browser compatibility.
As you’ve already set the configuration, while performing the testing process you can do the following things:
Find bugs and mark them, record video of the test session
Save screenshot to the LambdaTest’s gallery
Change resolution of the machine on the go
Move your test to a project and change basic settings
Once the testing process is complete, you can end the session. However, if you are willing to perform cross browser testing on a different configuration, then click the Switch button on the top-left menu bar. The Switch feature help users in modifying their current testing configuration without ending their current session and re-launching the virtual machine.
Apart from testing your web app on desktop and PCs, you can execute real-time testing on mobile devices as well. To do so, click the mobile icon under the real-time testing field.
Now, select the mobile devices on which you want to perform cross browser testing of your app, and then perform the same steps as you did for desktop device testing. Also, if you’re testing for iOS devices, then you can use the Clear Cache option that enables you to clear cache in your system while testing your web app.
Visual UI Testing with LambdaTest
It takes barely a few seconds for a user to judge a website when visiting it, and a big part of this is the user interface. You should definitely check your site for visual bugs, but as we’ve discussed manual visual testing of web apps is complicated and challenging. However, LambdaTest’s visual UI testing can help you find visual bugs easily.
With LambdaTest, you can perform visual testing of a web app in the following ways: Screenshot Testing, Responsive Testing, and Smart Visual Testing.
Screenshot Testing with LambdaTest
The screenshot testing feature of LambdaTest allows you to take multiple screenshots (up to 25) on different desktop and mobile configurations in a single session.
Select the configuration (up to 25), enter the URL of your website, and then click Generate. After clicking Generate, the screenshots will start appearing on your screen within a few seconds.
Once the screenshots appear on your screen, you can download them to your system. Also, you can mark the bugs that you find during testing, and then move them to the issue tracker tool, or save them to your desktop.
That’s all there is to it!
Responsive Testing With LambdaTest
To perform responsive testing of your website or app, you’ll select Responsive Testing under Visual UI Testing section.
With LambdaTest responsive testing, you can check how your website appears on different screen sizes and devices.
Enter the URL of your website under the responsive testing section and click Generate. The screenshots for selected devices will appear on your screen, helping you determine the responsiveness of your web app/website.
You can improve your responsive testing process by using features like defer time and localhost testing.
Smart Visual UI Testing
It often happens with developers that when they overlook some of the common bugs in newly developed websites, even after analyzing the code properly, they are unable to find the cause, and that’s where LambdaTest smart visual testing comes to the rescue.
LambdaTest smart visual testing helps you find common visual bugs like icon size, font style, padding, text size, images, etc. that are often awkward to find.
LambdaTest Smart visual testing will clarify the difference between two or more images at a time with color change, and then allow you to mark the bugs, move it to a bug management tool, or edit it and leverage it in many other ways.
However, if you want to avoid using a third-party bug management tool, then you can use LambdaTest’s inbuilt issue tracker.
Automated Cross Browser Testing with LambdaTest
There is no denying that most businesses prefer automation over manual methods when it comes to cross browser testing; it is less challenging, less time-consuming, and less expensive. However, choosing the right framework for automated testing is a challenge for most people.
Selenium is the most recommended and trusted framework for automation testing. Also, it supports almost every programming language and comes with four major tools:
Selenium IDE
RC
WebDriver
Selenium Grid
What makes LambdaTest ideal for automated cross browser testing is that it provides you with an online selenium grid that enables you to perform end-to-end automation tests on a reliable, scalable, and secure cloud infrastructure.
With LambdaTest Selenium Grid, you are allowed to test your web app with 2,000+ browsers and operating systems, providing you with higher test coverage and helping you better understand how your website renders across different browsers.
To start with LambdaTest Selenium Grid for automation testing, first, you need to understand its capabilities. LambdaTest uses remote WebDriver instead of Selenium client browser drivers. Therefore, if you want to transfer from locally hosted selenium, then you’ll have to use LambdaTest Selenium remote WebDriver.
Also, you’ll have to specify the browser, browser versions, OS, and screen resolution in your code on which you want to test your website or application. You can get help from LambdaTest’s Capability Generator to define different browser environments.
Once you understand the capabilities, you’re ready to run your test on LambdaTest. Begin by furnishing your code with the required functionality and run it over Selenium Grid. Upon executing the code, the test results will appear on the test console and LambdaTest Dashboard. You can check the screenshots, text logs, and video recording of the testing process in the dashboard. To better understand automated cross browser testing with a step-by-step process check out the example below.
Automated Testing Example
Here we will show how to run Java-based automation test scripts with multiple versions of browsers on LambdaTest Selenium cloud platform for automated cross browser testing. Before performing the automation testing with LambdaTest, make sure you have access to the following things:
A LambdaTest account
Username and Access Key for the account
Java Development Kit - At Least 1.6 or higher version
Selenium Jars
TestNG Jars
Apart from those, you need to know how to write automation test scripts, and have a good understanding of LambdaTest Selenium Grid capabilities as mentioned earlier.
Step 1
Download and install Maven on your system. (You can download it from the Eclipse Marketplace).
Step 2
After installing Maven, restart Eclipse to make the new changes effective.
Step 3
Create a Maven project:
Go to File > New > Other > Maven > Project.
Enter the Group ID and artifact ID and click Finish; your Maven project is created.
Now, create a Java class and give it a name, let’s say CrossbrowserTest, and then click Finish.
Step 4
After creating the class, install the drivers for browsers that you’ll use in your script. Here, we will be using three browsers in the script: Chrome, Firefox, and Opera.
Step 5
Now, add dependency files that are necessary for every framework that you’re using for testing. Here we have used pom.xml dependency file for Selenium.
Step 6
Copy the code below to the workplace of your Java class (Crossbrowsertest.java). After pasting the code, convert it to “testing.xml”.
package com.browsers.Cross_Browser; import org.testng.annotations.Test; import org.testng.AssertJUnit; import org.openqa.selenium.WebDriver; import org.openqa.selenium.chrome.ChromeDriver; import org.openqa.selenium.firefox.FirefoxDriver; import org.openqa.selenium.ie.InternetExplorerDriver; import org.openqa.selenium.opera.OperaDriver; //comment the above line and uncomment below line to use Chrome //import org.openqa.selenium.chrome.ChromeDriver; public class BrowserTest { WebDriver driver; @Test public void AmazonTitleTest() { // declaration and instantiation of objects/variables System.setProperty("webdriver.gecko.driver","C:\\Users\\Admin\\Downloads\\geckodriver.exe"); driver = new FirefoxDriver(); //comment the above 2 lines and uncomment below 2 lines to use Chrome //System.setProperty("webdriver.chrome.driver","G:\\chromedriver.exe"); //WebDriver driver = new ChromeDriver();s String baseUrl = "https://www.amazon.com/"; String expectedTitle = "Amazon.com: Online Shopping for Electronics, Apparel, Computers, Books, DVDs & more"; String actualTitle = ""; // launch Chrome and direct it to the Base URL driver.get(baseUrl); // get the actual value of the title actualTitle = driver.getTitle(); /* * compare the actual title of the page with the expected one and print * the result as "Passed" or "Failed" */ AssertJUnit.assertEquals(expectedTitle, actualTitle); //close Fire fox driver.close(); } @Test public void AmazonTitleTest1() { // declaration and instantiation of objects/variables //comment the above 2 lines and uncomment below 2 lines to use Chrome System.setProperty("webdriver.chrome.driver","C:\\Users\\Admin\\Downloads\\chromedriver_win32\\chromedriver.exe"); WebDriver driver = new ChromeDriver(); String baseUrl = "https://www.amazon.com/"; String expectedTitle = "Amazon.com: Online Shopping for Electronics, Apparel, Computers, Books, DVDs & more"; String actualTitle = ""; // launch Chrome and direct it to the Base URL driver.get(baseUrl); // get the actual value of the title actualTitle = driver.getTitle(); /* * compare the actual title of the page with the expected one and print * the result as "Passed" or "Failed" */ AssertJUnit.assertEquals(expectedTitle, actualTitle); //close Fire fox driver.close(); } @Test public void AmazonTitleTest2() { // declaration and instantiation of objects/variables //comment the above 2 lines and uncomment below 2 lines to use Chrome System.setProperty("webdriver.ie.driver", "C:/Users/Admin/Downloads/IEDriverServer.exe"); driver = new InternetExplorerDriver(); String baseUrl = "https://www.amazon.com/"; String expectedTitle = "Amazon.com: Online Shopping for Electronics, Apparel, Computers, Books, DVDs & more"; String actualTitle = ""; // launch Chrome and direct it to the Base URL driver.get(baseUrl); // get the actual value of the title actualTitle = driver.getTitle(); /* * compare the actual title of the page with the expected one and print * the result as "Passed" or "Failed" */ AssertJUnit.assertEquals(expectedTitle, actualTitle); //close Fire fox driver.close(); }
Step 7
Run this testing.xml file as a testing suite and you’re ready to perform automated cross browser tests!
This code will test amazon.com on Mozilla, Chrome, and Opera browser. If the website opens, it will show the test as a pass, otherwise it will show fail. Similarly, you can test more browsers and change the website for testing.
Using the LambdaTest WordPress Plugin
The WordPress plugin from LambdaTest allows you to take complete screenshots of your web app across different browsers directly from your WordPress admin panel. To install and use the LambdaTest WordPress Plugin, follow the below steps:
Visit WordPress and login with your account. Now, select the Plugin option from the menu tab and click Add New Plugin.
In the search bar, write LambdaTest to find the plugin, and when it appears on the screen, click Install.
Once the plugin is installed, click the Activate button on it, and LambdaTest Screenshot option will appear in your Plugin section. Add LambdaTest profile account details to the plugin, click Activate, and you’re all set with WordPress Plugin.
Now, to generate automated screenshots of your website with LambdaTest plugin, click All Posts and select the LambdaTest icon that you’ll find at the section below. Enter the details related to the browser, version, and device, and then hit the Start button. Screenshots will start generating for your website.
Using the LambdaTest Chrome Extension
Another excellent feature offered by LambdaTest is the Chrome Extension.Adding this extension to your browser will allow you to generate automated screenshots of web pages directly from the browser. Here’s how you can use LambdaTest Chrome Extension.
Open Google Chrome and go to Chrome web store. Search LambdaTest in the search bar, and then click Add to Chrome. A pop-up will appear on the screen, click Add Extension on it.
The LambdaTest Chrome extension will be added to your browser.Now, to activate the Chrome Extension, you’ll have to add LambdaTest profile details. Click the LambdaTest icon in the top right-hand side of the browser. Enter the email address and access key, and then click Activate.
Once it is activated, you can take screenshots from your browser by clicking the LambdaTest icon on your website. Select the specific browsers that you want to test for your web application and click the Capture button. Screenshots will start generating, so you can save them on your local system.
Using the chrome extension is that simple!
Conclusion
LambdaTest is a well recognized platform used by many developers around the world to test their web apps and websites. It helps in analyzing the functionality and performance of web pages on multiple browsers, operating systems, and devices. So, if you want to test your web application for cross browser compatibility, visit LambdaTest.
Further Reading
Know How To Perform Cross Browser Testing Using LambdaTest
Perform Easy Cross Browser Testing With LambdaTest WordPress Plugin
0 notes
Text
How to Edit Your Video Without YouTube's Retired Video Editor
New Post has been published on http://www.readersforum.tk/how-to-edit-your-video-without-youtubes-retired-video-editor/
How to Edit Your Video Without YouTube's Retired Video Editor
Prior to September 2017, YouTube provided a built-in tool that allowed you to edit your videos before publishing to the platform.
However, as of last September 20, 2017, YouTube’s Video Editor tool is no longer an option. On YouTube’s Help Forum, Community Manager Marissa explained, “We’ve seen limited usage of these features, so we’ve retired them to focus our efforts on building new tools and improving on other existing features.”
Ultimately, YouTube’s Video Editor tool was convenient, but only offered basic features — fortunately, there are plenty of alternative editing tools that enable you to create sleeker, more professional-looking videos for the world’s second largest search engine.
Here, we’ll explore all the alternative tools you might consider using to craft better, more engaging YouTube content.
The Best Editing Tools For YouTube Videos
1. Shotcut
Shotcut, a free open source video editor that is available for Windows, Mac, and Linux, offers a variety of impressive features comparable to Windows Movie Maker. For instance, the tool allows you to cut video footage to a certain length before converting it, and offers filters and effects to make your video look sleeker. Shotcut can handle streaming in a variety of formats, ranging from HTTP to RTSP and UDP.
While the interface looks relatively bare, the tool is actually very comprehensive, and all of its video and audio filters are fully customizable. Best of all, you can add, remove, or alter your changes at any time, since editing on Shotcut is non-linear.
Image courtesy of Shotcut .
Price: Free Available for: Windows, Mac, and Linux
2. Wondershare Filmora9
Referred to as “a video editor for all creators”, this tool is incredibly easy-to-use whether you’re a novice video editor, or a professional. With Filmora9 you’re able to use filters, overlays, transitions, and custom titles to spruce up your content for YouTube, and engage an audience.
Additionally, the tool offers audio features for key-framing and background noise removal, as well as an audio equalizer. If you have multiple clips you’re hoping to combine into one cohesive video, this is a good tool for you — it allows you to import up to 100 layers of media, and offers features so you can layer your clips.
Image courtesy of Wondershare.
Price: Free trial, $59.99 one-time fee or $44.99 annually Available for: Windows, Mac, or app version for iOS or Android
3. VSDC Free Video Editor
VSDC allows you to either import existing clips or record directly from your webcam, making it an excellent option for YouTube vloggers. The interface is simple and easy-to-use, and the tool provides options to apply “Instagram-like filters”, voiceovers, titles, shapes, and other impressive visual and audio effects. Additionally, VSDC lets you export straight to YouTube or another social network easily.
It’s important to note, if you want to export your videos from the free version, you’ll want to select the cog icon in the top right, click “Acceleration options” and then uncheck the box marked, “Use hardware acceleration for encoding video”.
Image courtesy of VSDC.
Price: Free, or $19.99 for Pro Version Available for: Windows
4. DaVinci Resolve 15
Matti Haapoja, a YouTuber with a channel that focuses on the filmmaking process, dedicated a video to this tool and compared it in quality to Final Cut Pro and Premiere Pro — except, unlike those programs, DaVinci Resolve 15 is completely free. DaVinci Resolve 15 provides tools for both offline and online editing, color correction, post-production audio effects, and visual effects. Additionally, the software lets you collaborate with others during the editing process, which could be particularly helpful if you have multiple video editors on your team.
Best of all, DaVinci Resolve 15 offers impressive features to help your video rank for SEO — for instance, you can use Smart Bins to automatically sort and display footage based on metadata criteria (you can also sort manually). Additionally, you’re able to enter custom keywords and tags.
Image courtesy of BlackMagicDesign.
Price: Free for DaVinci Resolve 15, or $299 for DaVinci Resolve 15 Studio Available for: Windows, Linux, Mac
5. Premiere Pro
Last but certainly not least, Premiere Pro is one of the highest-quality video editor tools you’ll find. Used by Hollywood filmmakers, TV editors, and YouTubers, the software offers all the creative features you need to craft polished videos. Premiere Pro provides features for color grading, lets you create Motion Graphic visualizations of your data, and offers audio tools to remove background noise. Additionally, Premiere Pro now comes with Premiere Rush CC, which is an app you can use to edit footage on your phone, and then share directly to your social networks, including YouTube.
Image courtesy of Adobe .
Price: As a standalone app, Premiere Pro is $239.88 per year Available for: Mac, Windows
Additional Tools
I spoke with Leticia De Bortoli, a HubSpot Senior Video Editor, to gain insight into tools you might use to take your video editing process to the next level. She uses Premiere when editing her team’s videos, as well as Audition for sound, and DaVinci for color correction.
However, she also mentioned, ‘”You can attach a Zoom iQ6 mic directly to your phone, which is a great tool to get better sound. Additionally, I recommend purchasing a softbox kit for better lighting — both the Zoom iQ6 iOS Lightning X/Y Microphone, as well as the ESDDI 20’X28′ Softbox Photography Lighting Kit, are impressive options that are relatively cheap, as well.”
Additionally, David Guerrera, a HubSpot Senior Video Creator and Animator, mentioned the YouTube channel Film Riot for further inspiration. “Film Riot is a great resource for filmmakers of all skill levels who are looking to learn new techniques to use on their next low budget or big budget video project.”
Ultimately, you’ll need to choose a process that works for your team and your budget — but creating high-quality YouTube videos doesn’t have to break the bank. In fact, plenty of the tools above are either free, or fall under $100.
Want to learn more about using video in your day-to-day? Check out these must-have video strategies for marketers from experts at Hubspot, Later, Uberflip, and Vidyard.
0 notes
Text
PuppyCube Review: Turn Any Surface Into an Interactive Touchscreen
Our verdict of the PuppyCube Projector: The hardware is straight out of a sci-fi movie, and the touchscreen projection actually works. Unfortunately, with dodgy third party app stores and a host of compatibility issues, the OS is unusable at the moment. 410
PuppyCube is an ultra-short throw projector with a built-in camera to detect touch gestures, from a company called Puppy Robot. It turns any surface into a 23″ touchscreen; and when flipped on its back, acts as a regular projector too. Having recently finished crowdfunding, it’ll be shipping shortly on Amazon for a cool $1000 price tag. We’ve got our hands on one of the final devices, so read on to find out what we thought of it. At the end of this review, we’ll be giving our test unit to one lucky reader, so keep reading to find out how to win it!
youtube
PuppyCube Specs
Ultra-short-throw projector @ 1280 x 720p, featuring auto-focus and auto-keystone
300 ANSI lumens brightness from 0.3-inch DLP
23-inch tabletop projection; limited by ambient light in regular projector mode
Battery: 2.5 hour
Connectivity: Bluetooth 4.0, Wi-Fi b/g/n
Input: External HDMI input (though you lose touch capabilities), USB OTG port
Output: 3.5mm Stereo Audio out
CPU: MStar 6A938 quad-core ARM
GPU: Mali T820
RAM: 4GB
Storage: 32GB
Extras: Remote control, mains charger
Inside the box, you’ll find the PuppyCube projector itself, an AC charger, microUSB cable, and remote control. The PuppyCube is a simple looking box, measuring 5.2 x 3.4 x 8.1 inches, and weighing around 3.5lbs. The entire front of the device is glass, protecting the camera and mirror lens.
A back panel slides off to reveal the ports, while a speaker grill on either side hides the dual 5W speakers. They’re not bad speakers, but they’re not great either–functional enough for use on the tabletop, but you’ll find them lacking for movies. You can of course plug external speakers into the 3.5mm stereo out, or use Bluetooth.
The hardware design is sleek and elegant. The back panel slides off to reveal the ports, but can also be placed back without cables obstructing it.
In terms of raw power, it’s a little disappointing. The processor is underpowered and backed by a paltry amount of RAM and only 32GB storage. Antutu scores the device at just over 88,000.
As a Magical Touch Surface
We’ve seen projected touch surfaces before, mainly in the form of virtual keyboards, but this feels almost magical. Out of the box, it just works. Turn it on, and the system automatically resizes, adjusts focus, and the touch system requires no configuration. As with any projected image, you’ll get the best visual quality when using it on a white or grey surface.
Typing works surprisingly well.
It is still functional on other surfaces, but not as visible. My kitchen worksurface is a somewhat glossy oak, and even on an overcast day, I had trouble viewing anything when it placed right next to the window.
Not really visible next to a window, even on a dark and gloomy British day. Also, notice the scaling issues in the browser.
Away from the windows, it worked fine. 300 lumens seems like a good brightness at this size.
Unfortunately, you can’t increase the size of the image by raising the device up. I tried placing it on a shelf about 4 inches above the surface, and apart from projecting an image far too big to even fit on the work surface, it lost the touch features.
Still, in terms of hardware, the PuppyCube is one of the most intriguing, unique and innovative devices I’ve seen lately, and that’s saying something.
I Hope You Like That Homescreen
A custom UI is built on top of Android 6.0 (yes, you did read that correctly), and seems to consist of two screens of apps, neither of which is user configurable. The first screen presents you with Twitter, Netflix, Facebook, and Firefox.
The PuppyCube home screen. I hope you like it.
The second screen has a selection of games that demonstrate the system capabilities nicely, but again, can’t be changed. The games are demos, some with in-app purchases, and some with “watch a video to get more coins” nonsense, which I find a little disgusting in anything aimed so obviously at kids. They’re fun for a short time though and demonstrate the multitouch capabilities through the use of split-screen multiplayer mini-games.
To access other apps, tap the small nine dot icon for the full app list. This will be your primary navigation if you’re not interested in the home screen apps.
How’s The Projection?
Rated at only 300 ANSI lumens, you’ll have trouble seeing anything in daylight when used as a projector.
Don’t expect daytime usage at 300 lumens
However, if you accept this limitation and only use it in darkness, the ultra-short-throw ratio is simply stunning. To give you an idea, my downstairs corridor is barely wide enough to sit down at 2.5 feet wide. Yet even in such a tight space, the PuppyCube was able to project a 50 to 60-inch image onto the wall.
Granted, it’s only 720p, so things look a bit fuzzy at a certain point, but that sort of throw ratio is simply unrivaled.
However, regardless of how technically impressive that is, I’m not sure I could think of a use-case for it. If your child is kept in a cupboard under the stairs, like Harry Potter, I suppose they could at least enjoy a big screen TV experience. At 720p and 300 lumens, it won’t replace even a budget-friendly $300 home cinema projector. Consider the wall projection a bonus, rather than a main feature of the PuppyCube.
In order to use the device in projection mode, you’ll need to set up the Bluetooth-based remote control. Unfortunately, this didn’t work out of the box, and needed to be paired first. I’d be lying if I said this was easy. You’ll need to delve into the settings menu, wake up the remote by ensuring it’s fully charged then pressing some buttons, hope the gods are favoring you today, then add a new remote control in a different settings menu before the remote goes to sleep again. It took me about 3 attempts of the process before it finally worked.
UpToDown and SlideMe
Your only options for getting more apps are through the two third-party app stores included on the system. UpToDown initially appears competent enough and essentially a Google Play clone, but I experienced numerous issues with actually getting anything installed, and cannot speak to how trustworthy the APK sources are. The install process isn’t as seamless either; you need to navigate to downloads and open the APK yourself. A number of packages I tried were corrupted. Even the “working” ones were stuck endlessly on the Installation screen (though did seemingly install once I force closed the UpToDown store). Even after registering an account, SlideMe refused to actually download anything; the app descriptions were all broken too.
Not compatible with Google Play, Play Services, or YouTube
I’ll let that sink in for a moment. Apart from the obvious security implications of being forced to use an unofficial third-party app store, the lack of Play Services support means the most popular video app won’t run. Both Google Play and Play Services can be downloaded and installed from UpToDown, but you’ll immediately be bombarded by the dreaded “Unfortunately Play Service has stopped working error”. I reached out to the PuppyCube team, who confirmed that neither is actually compatible. I managed to get YouTube for Android TV to run, but none of the videos actually played. YouTube in the browser works, sometimes, but only minimized–you can’t make it full screen.
Other app experiences weren’t ideal, either. Plex is my preferred video client. In projector mode, using the included remote control, it worked fine and videos played smoothly. In tabletop mode, it got stuck in a loop of insisting I switch to mobile mode because I had a touch interface, while the Puppy OS seemed to force it into TV mode. Conversely, BBC iPlayer worked fine in tabletop mode, but was useless when projected onto the wall due to the lack of pointer. The remote control didn’t allow me to actually select anything; I could only scroll up and down. On other Android TV-like interfaces, the remote controls have had a pointer mode precisely for cases like this. Yes, these issues are all software specific and not really the fault of PuppyCube, but they’re infuriating none the less and not something I’ve faced on other systems.
Unfortunately, the web browsing experience wasn’t much better, either. Scaling felt wrong, and pages were generally sluggish. Click targets were frequently incorrect (not something I experienced elsewhere I should note, only in the Firefox browser). I wanted to test in Chrome to see if that was any better, but it refused to install.
The Worst Android Experience Possible
The PuppyCube software exemplifies everything that was wrong with the Android ecosystem five years ago. A custom UI, running on an outdated OS, with unreliable third-party app stores that are barely functional, and app incompatibilities. I just thought we were beyond this sort of sheer incompetency with Android software, but apparently not. And it’s such a shame because the hardware is really lovely. Hopefully, they stick to their promise of updating the core OS version, but there’s more that needs fixing.
Our rep at Puppy Robot told us the next generation model would be available in August, and would, in fact, be compatible with Google Play. Unfortunately, that doesn’t bode well for the hope of any updates to this model. If you are interested in the concept, I’d strongly suggest waiting until the issues are ironed out, or the new version is released. The concept is solid, the hardware is proven, but the software just isn’t there yet.
Enter the Competition!
PuppyCube All-in-One Interactive Projector Giveaway
Read the full article: PuppyCube Review: Turn Any Surface Into an Interactive Touchscreen
PuppyCube Review: Turn Any Surface Into an Interactive Touchscreen published first on http://droneseco.tumblr.com/
0 notes
Text
Learnability in UX Design
Constructing a learnable web site is far harder than it sounds.
One thinks one’s design is obvious and understandable; nevertheless, a design that is likely to be apparent for you, is likely to be perceived completely completely different by a consumer with a special set of experiences. Due to this fact, the aim is to design a transparent consumer path that guests can rapidly choose up and perceive.
Why Learnability Issues
Learnability has a robust correlation with usability. It’s vital for customers to rapidly perceive the format and function of an software. Particularly for internet functions, offering a simple to be taught interface is essential. It’s far more handy to design a simple to know cellular app in contrast with an online software; a cellular display simply doesn’t enable to supply a fancy interface or let the consumer accomplish tough duties.
The velocity of adoption just isn’t the one standards why learnability issues. A web site that appears acquainted and offers an comprehensible interface will lead to a decrease bounce charge. That is particularly helpful for web sites that attempt to enhance their conversion charge. A fancy design scares customers and they’re going to resort to different instruments that present a transparent interface. Ultimately, the aim of each web site is to transform an occasional consumer right into a repeated consumer and interact the consumer for interplay.
Learnability by Instance
We will discover a great deal of examples on the web the place learnability has been utilized in the appropriate means. Let’s check out the important thing parts of learnability in design…
Small Hints
Just a few days in the past, I moved to Berlin and I needed to fill in a kind for calculating the fee for my European medical insurance. Sadly, the kind is barely obtainable in German, nevertheless, as a result of nice mixture of visuals and textual content, I might completely perceive what data they required. It is a nice instance of how an icon can mirror a attainable reply.
Different small hints like a tooltip or default textual content may give a consumer an preliminary concept about how the interface can be utilized and what choices can be found. Let’s take the Twitter “Compose new Tweet” modal for instance. The design asks the consumer to inform what is occurring. The preliminary response of a brand new consumer can be to enter what simply occurred into the sector. Moreover that, when the consumer hovers one of many icons under the textual content subject, a tooltip will seem telling the consumer what motion the icon permits. Briefly, no area is wasted on including textual content, the design speaks for itself.
Familiarity by Consistency
Google makes use of its personal design system (Materials Design) which is more and more used throughout all of its merchandise. Due to this fact, a call-to-action button would be the similar throughout instruments. Customers who’ve used Gmail ought to acknowledge quite a lot of the weather when utilizing Google Drive for the primary time.
This familiarity eases the adoption means of a brand new interface as customers are capable of switch their psychological mannequin of 1 product onto one other. Particularly for an older era who didn’t develop up with computer systems, this familiarity is essential as they have an inclination to keep away from change and studying new interfaces.
A psychological mannequin represents an individual’s thought course of for the way one thing works. Psychological fashions are based mostly on incomplete information, previous experiences, and even intuitive perceptions. They assist form actions and habits, affect what folks take note of in difficult conditions and outline how folks method and clear up new issues or interfaces.
A snippet from Susan Carey’s 1986 journal article about ‘Cognitive science and science schooling’.
You could find this familiarity additionally on blogs, however not that specific as solely sure parts are implicitly required. For instance, the hamburger icon signifies a menu is hidden and may be unfolded by clicking the hamburger. Principally, you’ll discover a search icon on the appropriate facet of the navigation bar.
Additionally, the format throughout blogs is kind of constant. A weblog all the time consists of a header with clear navigation adopted by some featured articles after which the physique of the article. We, as customers, grew to become aware of this idea so {that a} weblog with a special format will look, and really feel unusual to us.
Proof of Actions
Along with ensuring actions are understandable, it’s additionally essential to verify the consumer has proof of their actions; this helps to strengthen what response every operation produces all through the journey.
To offer you a easy instance, when finishing a kind, you’re proven a ‘thanks’ or a mail that signifies the completion. For a consumer, that’s clear proof they’ve used the interface accurately. Why does this matter? Offering suggestions throughout the studying course of helps a consumer to recollect the interface higher as he instantly learns what is feasible or not. Correct suggestions mechanisms can scale back the educational curve rapidly and in addition assist the consumer enhance his effectivity whereas utilizing the device.
To offer an instance, as a substitute of solely giving suggestions upon submission of a kind, let’s present suggestions alongside the best way on a subject per subject foundation. This may be so simple as exhibiting a listing of necessities for a password subject: every time the password meets one of many listed necessities, the requirement will get ticked off; when all necessities are met, the enter subject turns inexperienced indicating the consumer can transfer on to the subsequent enter subject.
Learn how to Measure Learnability?
Really, it isn’t that tough to design a stable course of for measuring learnability. Initially, a key indicator for learnability is the bounce charge. Due to this fact, utilizing Google Analytics is essential to realize insights.
Moreover Google Analytics, you’ll be able to carry out exams your self with random take a look at topics: Present an interface to your take a look at topics and provides them 5 easy duties to finish. For instance, you could have a web based platform for creating and sending invoices, let your customers carry out the next duties:
Create an bill with one merchandise;
Edit bill;
Ship bill to receiver;
Observe cost for the bill;
Obtain accomplished bill for private bookkeeping.
Now, let your take a look at topics carry out these easy duties 5 occasions in a row with every time a day of relaxation. It is very important measure the time wanted for finishing every process. A design that gives good learnability capabilities ought to see a rise in effectivity whereas repeating duties. After 5 repetitions it’s regular to see stagnation because the consumer has reached the bounds of effectivity (except they’re superhuman).
Many parts decide the learnability issue. By no means take your design without any consideration, there may be all the time room for optimization. Use the following tips in follow and see how one can optimize the conversion charge of your design.
Featured picture by way of Unsplash
Supply hyperlink
source https://webart-studio.com/learnability-in-ux-design/
0 notes