#i need to do more screenshot/manga panel redraws
Text

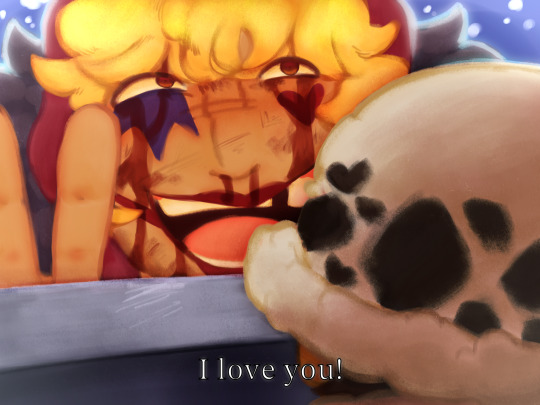
hey law,
i love you!
(version with text)
#one piece#op#one piece fanart#op fanart#corazon#donquixote rosinante#trafalgar law#I ALMOST FORGOT TO POST THIS HERE#i need to do more screenshot/manga panel redraws#citrus art
109 notes
·
View notes
Note
Hehe free realstate 🖍️ 🐻💐 🍀🙊
I was also gonna ask 🌊 but from our conversations i feel like i know every frappe weakness huh 😺
I have the feelings ill reveal too much of myself with this
🖍️ When did you start drawing? Do you remember?
I absolutely have no idea when i started. I think just the moment my hands were big enough to hold a pen, because my grandparents love to show me just HOW MANY of their books i ruined with doodles that are more abstract than a pollock painting. i remember tho that i loved to draw animals! horses were my favorite :3 i needed just a scrap of paper, a pencil, and a hard surface (sometimes even the floor lmao)
🐻 Your go-to things to draw when you need comfort
I like to go through random screenshots or manga panels of my fav characters, you know, the liiil cute dorky ones, and redraw them with zero brain activity whatsoever, heres some

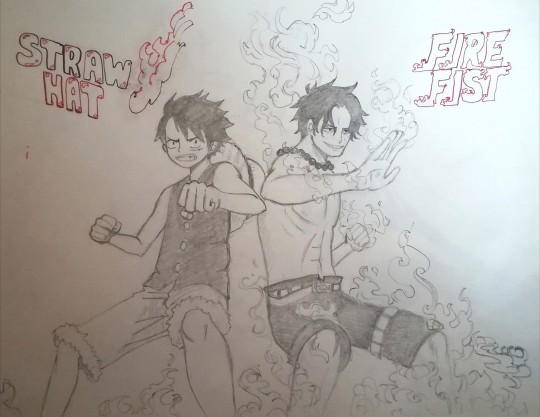
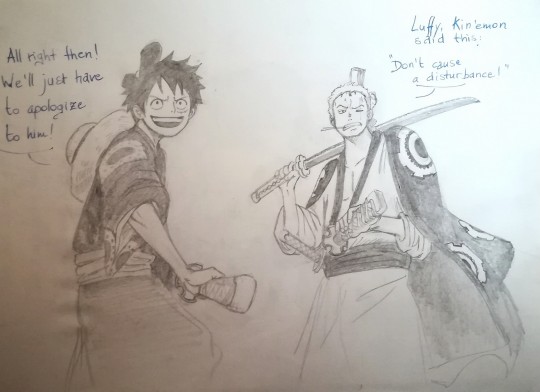

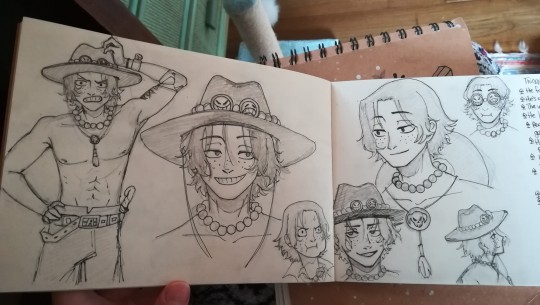
it's just me, them, and our shared flat encephalogram
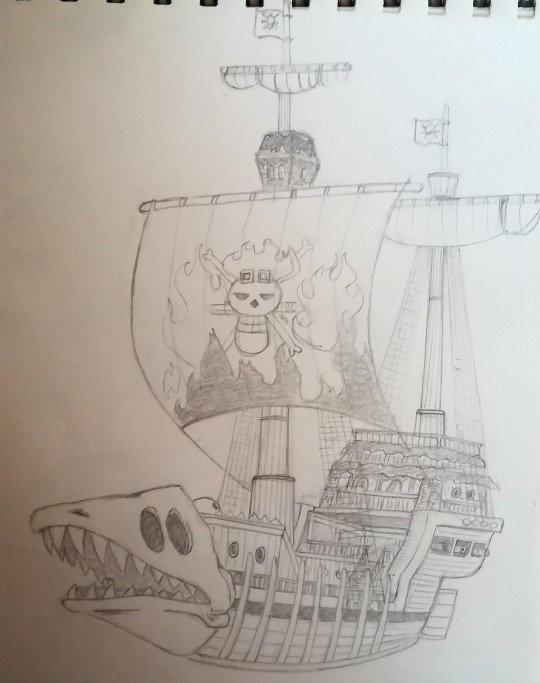
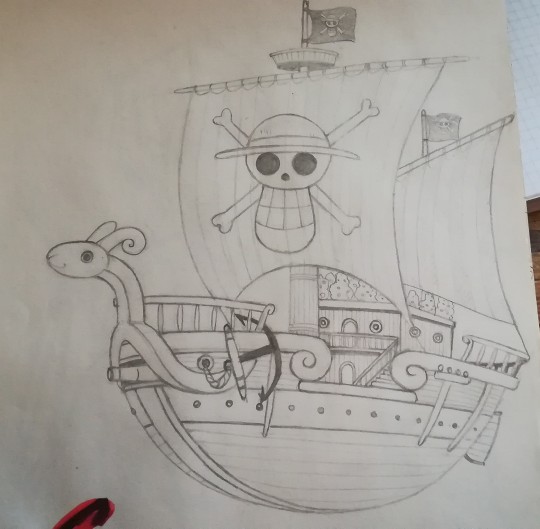
also boats for no reason
💐 do your drawing suits with your aesthetics?
how do I explain this uuuuh, not really. I like confident bright colored drawings, drawings that play a lot with color contrast, in a surreal/abstract way, but I usually tend to go with darker, more realistic ones because it's closer to my comfort zone.
also I like spooky aesthetics and I'm still e experimenting with it, but my art tends to go on the soft, warm n fluffy side anyway because I try to look like a creepy witch just out of her hut in the woods but my personality is just golden retriever asking for cuddles
🍀 you wish your art was more...
clean n distict in the lines and the colors! to look confident, maybe? to give the impression "hey 😎 yep it was all part of the plan to be like that"
I'm so bad at explaining
🙊 share your latest silly doodle with no context
u asked for no context, and no context shall be
🌊 what's the hardest thing for u to draw
butts. no I won't elaborate
8 notes
·
View notes
Text
manga coloring tutorial from start to finish
Thanks so much for 1000 followers! As thanks, I’ll be walking through my manga coloring process from start to finish. I already have a video up of my process here, but I know that some people prefer written tutorials (myself included).
I by no means claim that this is the best method. This is just how I’ve been coloring over the past couple of years.
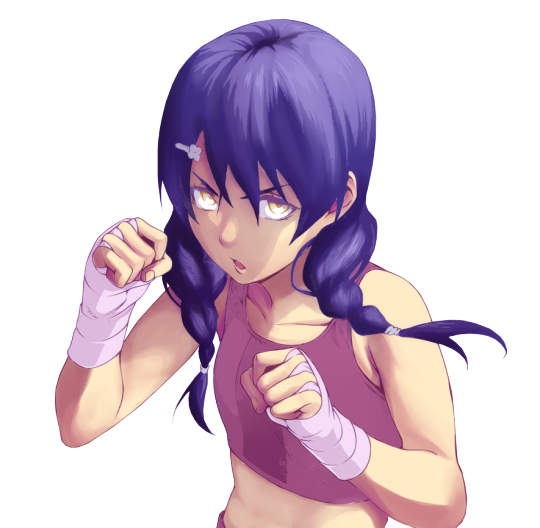
Today I’ll show you how to get from this:
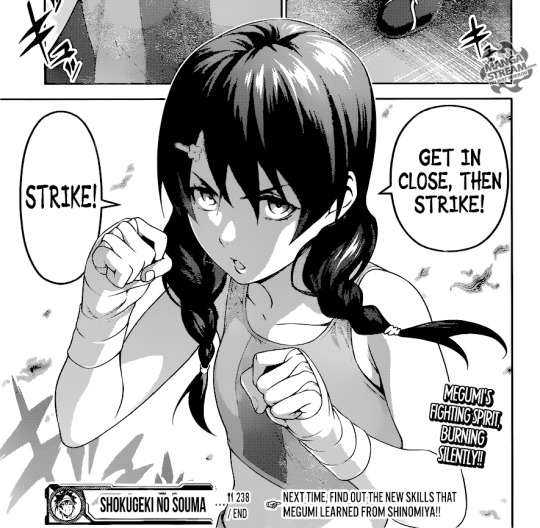
to this:

WHAT YOU’LL NEED:
Photoshop OR Clip Studio Paint OR Paint Tool SAI
a drawing tablet
WHAT YOU MIGHT WANT:
Topaz Clean (Photoshop)
I will be using Photoshop and Clip Studio Paint, but I have colored with SAI before using pretty much the same methods. Feel free to ask me about program-specific things! I will not be providing download links and will assume that you have a basic knowledge of Photoshop. Unfortunately, I don’t own a mouse so I will be unable to provide any tips as to how to color without a tablet.
One thing that I like to do is use Topaz Clean in order to turn the screentones into gradients like so:

It’s okay to lose some detail, as you can add it back in during the coloring process. Turning screentones into flat shades will help make redrawing easier. This step is by no means necessary and can easily be skipped, but I figured I should mention it since I’ve received a lot of asks in the past as to how I get rid of screentone patterns.
Now, you can redraw first or render the part that you wish to color first. Personally, I prefer rendering first so as to minimize what I need to redraw. You can use the pen tool or the polygonal lasso tool.
Personally, I prefer the polygonal lasso, as it is present in more programs and you can go chunk by chunk instead of rendering the whole thing in one shot. If you make a mistake with the polygonal lasso tool, you can undo your last click with the backspace key. If you would prefer to use the pen tool a helpful guide can be found here.
Your picture should now look something like this:

Rendering usually takes me five to twenty minutes, depending on how complicated the hair and clothing are.
All screenshots from here forward are taken in Clip Studio Paint. First, create two layers and clip them to your render. The first layer will be for redrawing lines, and the second layer will be for redrawing tones.
You can either redraw using a pen brush or by continuing to fill in areas using the polygonal lasso/pen tool. You can redraw gradients using a soft brush/airbrush if you used Topaz Clean. Otherwise, use clone stamp tool.

Don’t worry if your lines aren’t 100% perfect or if you feel like something isn’t perfectly redrawn! You can compensate for lack of experience/expertise in redrawing during post-processing/effects.
Clip another layer and set it to Screen. Fill it in with a color of your choice to change the color of the lines. This helps your piece appear more vibrant and also allows you to color in the black areas better in your final piece. I usually prefer to use a shade of purple or magenta, but you can use any color you want!
Using a soft airbrush or watercolor brush, change the colors of some areas if wanted. I like to color in the skin with a more reddish tone, color in whites with a more bluish tone, and color in the eyes at this point.

Now, fill in the flats. Again, you can either do this by selecting large areas using polygonal lasso or pen tool or by using a hard brush. Color each color on a separate layer and place them all into one folder and set it to multiply. You can then either clip this folder to your cap (CSP or SAI) or masking it (PS).
Color in areas that are supposed to be white with the color that you intend the shadow to be so that you can see the colored area better. You will later lighten this area during the shading and highlighting process.

Lock transparency on every single color layer. You can skip around on most of the steps from here on out. I usually like to start with shading the skin. Pick a muted red and add some more complex shading.

Switch from the red to a darker, more vibrant magenta and darken some areas even further. At this point, you can also add some white to the screen layer and soften the transition from the original screentones to the original white areas.

I usually like to save skin highlighting for later, so let’s move onto coloring the hair. Select a darker color that’s a little warmer than the original hair color. You can also invert this, but for the majority of my works I go for warmer shadows and cooler highlights.
Add some shading to the hair. I generally don’t like to get too detailed with hair shading because I feel that it takes away too much from the face/eyes, which are generally the main focal point of the image. Now do the same for the skin and choose an even darker magenta to add the darkest shadows and then add white on the screen layer to add in some of the less bright highlights.
Use a brighter, cooler tint to add in some highlights. Add white on top of that to put in the brightest highlights.’

Repeat the same process for the clothing and other details.

I usually go for more simple gradient backgrounds and just kind of throw them into the background and experiment with different colors until I’m satisfied with the result.
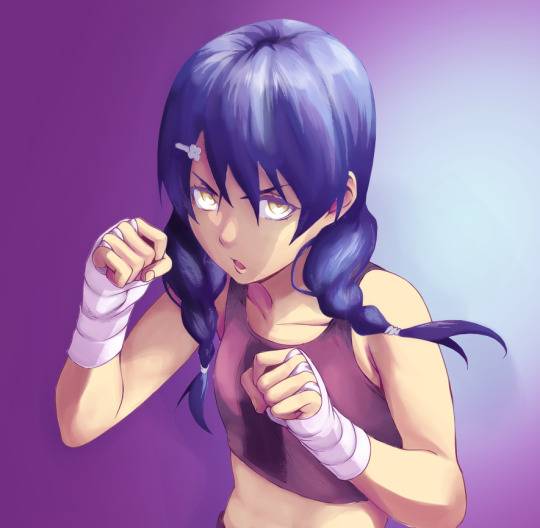
At this point I usually save and import the image into photoshop to do some effects and processing. At this point, if you’re already familiar with photoshop and editing, you can just proceed to edit it normally as you would any other cap. My favorite adjustment layers to use are curves and selective color.
I also slapped some text on the background and added a horizontal motion blur (masking out her face and fists as they’re the focal points) to help lend the final coloring a more dynamic air.

This was an extremely basic and broad look into my coloring process. You can also view commentary-less videos of me coloring here and here. If you have any questions about how to do a specific thing or would like me to color a specific panel for you feel free to send me an ask!
Thank you so much for reading!
53 notes
·
View notes
Last Seen Blogs

thewordswewrite
★Saph & Smoe★

jungjoonyng
hold on


kymberlym7
I Want To Be A Woman!

akimchilife
I Like My Idols Like I Like My Kimchi... SPICY!!!