#laravel query builder tutorial
Explore tagged Tumblr posts
Visit Tumblr Blog
Explore Tumblr blogs with no restrictions, modern design and the best experience.
Last Seen Tumblr Blogs


Fun Fact
70% of Tumblr users say the Dashboard is their favorite place to spend time online.
Text
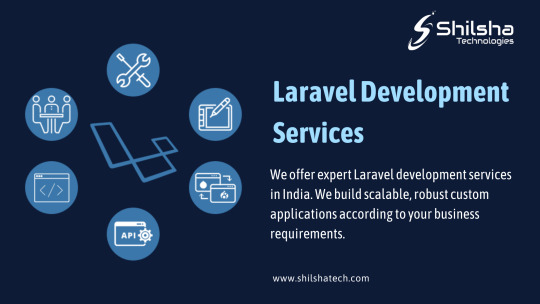
Why Choose Shilsha Technologies for Your Laravel Development Project in India?
Laravel’s rapid growth as a preferred framework for web development is no surprise. Its rich features, scalability, and performance advantages make it an excellent choice for businesses looking to develop modern, secure, and efficient web applications. Shilsha Technologies, as a leading Laravel Development Company in India, is ready to help you harness the power of Laravel for your next project. With a team of skilled developers and a client-first approach, we deliver results that exceed expectations.
As businesses increasingly move toward digital transformation, the demand for robust, scalable, and secure web applications continues to grow. One of the most prominent solutions that has captured the market’s attention is the Laravel framework. As a leading Laravel Development Company in India, Shilsha Technologies understands the growing popularity and potential of Laravel for delivering high-quality web applications based on the needs of the business. But why has Laravel development been on the rise? What makes it so advantageous for development projects?
Why is Laravel Development Rapidly Growing?
Laravel has witnessed a meteoric rise as one of the most popular PHP frameworks due to its flexibility, simplicity, and powerful features. The framework has quickly become a favorite among developers and businesses alike for the following reasons:
Ease of Use: Laravel comes with an intuitive and well-structured syntax that simplifies the development process, allowing even junior developers to start building feature-rich applications quickly.
Large Community Support: As Laravel’s user base grows, so does the community support. Developers have access to a wealth of resources, forums, tutorials, and best practices that make problem-solving and learning much easier.
Robust Features and Tools: Laravel offers various in-built tools such as ORM (Eloquent), authentication, routing, and testing capabilities. This means developers spend less time building from scratch and more time refining functionalities, leading to faster project completion times.
Scalability: Whether you are building a small website or a large enterprise application, Laravel scales effortlessly, making it a preferred choice for projects of any size.
High Performance: Laravel’s in-built caching systems, database management tools, and optimization strategies make it ideal for developing fast and high-performing applications.
With this combination of ease, speed, and scalability, Laravel development has grown into a powerful solution for modern web development needs.
What are the advantages of developing using the Laravel Framework?
The advantages of using the Laravel framework for web development extend beyond its basic functionality. Here’s why developers and businesses are increasingly opting for Laravel:
MVC Architecture: Laravel follows the Model-View-Controller (MVC) design pattern, which is essential for creating clean, maintainable, and efficient applications. This architecture enhances both the scalability and performance of the application.
Blade Templating Engine: Laravel includes the Blade templating engine, which allows developers to create lightweight yet powerful templates. This makes it easier to structure layouts and manage UI components, which results in highly optimized web pages.
Built-in Authentication & Authorization: Laravel simplifies the process of setting up authentication and authorization systems. It ensures secure access to resources and helps manage user permissions seamlessly.
Seamless Database Management: Laravel’s Eloquent ORM simplifies database operations, enabling developers to interact with databases in a more intuitive way. Features like database migrations, seeders, and query builders streamline database management.
Unit Testing: With Laravel, developers can easily test code units to ensure the functionality of applications is error-free. Laravel’s robust testing framework simplifies the process of debugging and testing code before deployment.
API Development: The Laravel framework also facilitates the development of RESTful APIs, ensuring smooth integration with external systems and third-party applications.
What are the benefits of using the Laravel framework for development projects?
When starting a web development project, selecting the right framework is crucial to achieving success. Laravel stands out for several reasons:
Customization: Laravel is highly customizable and can be adapted to meet the specific requirements of any project, whether it's a small business website or a large-scale enterprise platform.
Security: Security is a priority in any development project, and Laravel provides robust mechanisms for data encryption, authentication, and protection against common security vulnerabilities like SQL injection and cross-site scripting.
Faster Time to Market: Thanks to the built-in tools, packages, and libraries Laravel offers, developers can speed up the development process, allowing businesses to launch their applications more quickly and efficiently.
Cost-Effective: Laravel’s open-source nature, combined with its extensive resources and tools, helps reduce development costs. It offers more value for your investment without compromising on quality.
Future-Proofing: Laravel continues to evolve, with regular updates and new features added to meet modern web development standards. This means your project remains future-proof and adaptable to changing technology trends.
What Are the Benefits of Laravel Development?
The Laravel framework offers multiple benefits that make it a strong contender for any web development project:
Enhanced Performance: Laravel’s caching mechanisms, task automation, and query optimization features improve application performance, resulting in a smooth user experience.
Strong Community and Documentation: The Laravel community is vast and active, providing a wide array of tutorials, forums, and plugins to help developers. Laravel’s detailed documentation ensures that developers can find the resources they need at any stage of the development process.
Third-Party Integration: Laravel allows seamless integration with popular third-party tools and APIs, such as payment gateways, cloud storage services, and messaging platforms, without sacrificing performance or security.
Scalable Solutions: Whether your business grows in size or needs more advanced functionalities, Laravel’s flexibility allows developers to scale the application accordingly.
Maintenance and Support: Laravel’s modular structure ensures that web applications are easy to maintain and upgrade over time. This saves businesses from costly maintenance and support issues in the long run.
What is the best company in India to develop Laravel web applications?
India has become a hub for high-quality software development, with many companies offering specialized Laravel development services. However, Shilsha Technologies stands out as the best Laravel Development Company in India for several reasons:
Expert Team of Developers: At Shilsha Technologies, we have a team of experienced Laravel developers who are experts in building customized web solutions that meet our clients' needs.
Excellent Portfolio: With a long list of successful projects across various industries, Shilsha Technologies has a reputation for delivering top-notch Laravel web development services.
Client-Centric Approach: We prioritize understanding our clients' unique requirements, ensuring that we provide personalized solutions that drive business growth.
Comprehensive Support: From project inception to post-launch support, Shilsha Technologies is with you every step of the way, ensuring your project runs smoothly and remains up-to-date.
Cost-Effective Solutions: We offer competitive pricing without compromising on quality, making us the go-to partner for businesses looking to maximize their ROI through Laravel web development.
As businesses strive for dynamic, scalable web solutions, hiring skilled developers is crucial. At Shilsha Technologies, we offer expert Laravel development services to help you create powerful and secure web applications. If you're looking to hire a developer in India with deep expertise in Laravel, our team is here to provide innovative solutions based on your needs. We ensure a seamless development process, from design to deployment, ensuring your project runs smoothly and delivers maximum results.
Source link
#Laravel Development Company#Laravel Development Services#Laravel Development Services Company#Hire a Developer in India#Hire Laravel Developer
0 notes
Text
CODEIGNITER VS LARAVEL CHOOSE YOUR FRAMEWORK

PHP MVC framework works as an indispensable part of PHP apps and web development. Among all PHP frameworks, Codeigniter and Laravel are considered the most crucial ones. Both are strong competitors in providing customized solutions to developers. Whether you hire dedicated CodeIgniter developer or a Laravel developer, you will get plenty of options for customization. Here, we will make a comparative analysis of both frameworks to make you understand their functionality. Accordingly, you can choose the best-suited framework that caters to your web development needs.
What is CodeIgniter Framework?
PHP programming language framework, CodeIgniter comes with elegant and simple toolkits that help you to create full-featured web development applications. Considered as one of the most popular frameworks, it lets the users generate dynamic websites utilizing PHP. While using this framework, you get ample liberty as you don’t need to rely upon the MVC development pattern anymore. Codelgniter sanctions the plugins of third-party so that you can apply complex functionalities with ease. Another aspect to mention is its great data encryption procedures and security.
Salient Features of CodeIgniter:
Model-View-Controller Based System
Full-Featured Database Classes
Query Builder Database Support
Form and Data Validation
Security and XSS Filtering
Session Management
Email Sending Class
Why Use CodeIgniter?
This is one of the most significant questions people ask on the web. First of all, CodeIgniter offers optimum support and stability. It is a well-structured and clear framework that is light in weight. You can easily create documentation in this framework. Secondly, it allows caching of the site for boosted performance where the loading times are simpler than ever. Hence, the routing method is also easy. Thirdly, Codelgniter provides you with active community support where nearly all kinds of framework matters can be discussed. If these reasons are enough, you can find a CodeIgniter development company that provides Codelgniter development service.
Which Well-Known Companies Use CodeIgniter for Web Development?
The Mail & Guardian Feedcamp Casio McClatchy Nissan Bonfire Creditflux Buffer
Pros of Codelgniter:
It facilitates the hooks and class extensions
It authenticates the data and forms
The library with image manipulation curriculums
It presents the session management
Extremely lightweight framework
Cons of Codelgniter:
Not the best framework for large projects
Source code comes with a very low footprint
What is Laravel Framework?
As an open-source PHP framework, Laravel allows full-featured web applications development. The model-view-controller (MVC) architecture of Laravel is based on Symfony. Laravel was first released in 2011 and since then it has successfully made its way to today’s popularity. However, it has extensive language rules that make it a bit complex as compared to the other PHP frameworks. You are allowed to develop extremely powerful web applications using this framework. Moreover, there are expressive tutorials (Laracasts) and documentation provided by this framework. Laravel boasts a huge community that makes your web development easier.
Salient Features of Laravel:
Supreme quality session control
Easy assimilation with Third-Party Libraries
Strong Encryption Packages
Extensive Language Rules
Overloading Capacity
Steady Building Tools
Why Use Laravel?
Why choose Laravel over the other frameworks is definitely a valid question. First of all, it comes with an autoloading feature that can load itself mechanically. It means that the framework does not require any human intervention. Secondly, the modular packaging with the composer-based dependency manager deserves special mention. Thirdly, the database management system (DBMS) platforms like SQL Server, PostgreSQL, and My SQL are supported by this platform. Fourthly, this framework features a version control system, which makes the streamlined organization of migrations easier than ever. If all the above reasons compel you to choose this framework, go ahead and find a Laravel development company for your web and app development.
Which Well-Known Companies Use Laravel for Web Development?
ulair Fox47 Bonappetour Startups Laracasts Explore Georgia Global Dietary Database Toyota Hall of Fame
Pros of Laravel:
It is extremely flexible
It ensures short rapid development time
It can be installed easily
It is suitable for large, complex apps
It is perfect for highly secured websites
Cons of Laravel:
Doesn’t allow shared hosting
Database queries
What’s the Difference?
Codelgniter follows a model-view-controller (MVC) that supplies an easy on-boarding whereas Laravel follows a model-view-controller (MVC) pattern of filing.
Codelgniter supports PostgreSQL, MySQL, MongoDB, and Microsoft BI whereas Laravel supports Microsoft SQL Server, ORACLE, MySQL, IBM DB2, PostgreSQL, JDBC compatible, and orientDB.
Codelgniter does not deliver any inbuilt modularity feature Laravel has inbuilt modularity features.
The template language followed by Codelgniter is PHP proprietary whereas Laravel follows Blade template engine.
Codelgniter is suitable for developing small to medium scale apps whereas Laravel is suitable for large scale apps.
Now that you know everything about Codelgniter and Laravel frameworks, go ahead and choose the best one for your business needs. If you are searching for a well-established web and app development agency, look no further than us. We, Idiosys Technologies, are one of the most eminent web and app development companies across the nation. We provide app development service and marketing solutions to a huge number of multi-national and start-up companies from India, Canada, the USA, Germany, Australia, Brazil, the UK and Panama. You can hire Laravel developer or Codelgniter developer from our company to build modern and high-end apps for your business.
0 notes
Photo

Laravel Tutorial For Beginners Part – 4 | Task Scheduling Using Laravel | PHP Framework | Edureka Full Stack Masters Training: ) This Edureka Tutorial on Laravel is the fourth and the last ... source
#best php frameworks#edureka#frameworks for php#Laravel#laravel crud#laravel framework#laravel installation#laravel model#laravel php#laravel project#laravel project tutorial#laravel query builder#laravel queue#laravel routes#laravel session#laravel task scheduling#laravel training#laravel tutorial#Laravel Tutorial for beginners#laravel validation#php frameworks#php frameworks for beginners#php frameworks tutorial#top 10 php frameworks#yt:cc=on
0 notes
Text
Laravel Eloquent WHERE Like Query Example Tutorial - CodeSolutionStuff
#artificial intelligence#Programming#php#cloud#machine learning#laravel#JavaScript#DataScience#MachineLearning#Analytics#AI#ML#angular#Tech#Python#ReactJS#DataScientist#Coding#SQL#bot#Cloud#Typescript#Github#Data#BigData#DL#machinelearning
0 notes
Text
How to Use Yajra Datatables in Laravel 9 Application

User data display is a fundamental necessity for web development. This tutorial's main goal is to show you how to use Yajra Datatables, a third-party package, to generate Datatables in Laravel. This Laravel datatables tutorial demonstrates how to construct yajra datatables in Laravel while also teaching us the necessary techniques. We will work to eliminate any ambiguity that may have surrounded your creation of the Laravel datatables example. We'll look at a laravel datatables AJAX example and a laravel Bootstrap datatable simultaneously. Consider a scenario where you are presented with thousands of records and must manually search through each one to find the information you need. Doesn't seem easy, does it? To manage the data dynamically in the table, Datatables provides easy search, pagination, ordering, and sorting functions, in my opinion making our task less dreary. A plug-in driven by jQuery, also known as the Javascript library, is called DataTables. It is a remarkably adaptable tool that adds all of these subtle and cutting-edge features to any static HTML table. It was created on the principles of progressive and dynamic augmentation.
Features
- Pagination - Instant search - Multi-column ordering - Use almost any data source - Easily theme-able - Wide variety of extensions - Mobile friendly Even though we will only be using a few functionalities, such as search, sort, and pagination, we will attempt to integrate these elements with aesthetically pleasing HTML tables that are robust from a UI/UX standpoint.
Table of Contents
- Install Laravel App - Install Yajra Datatables - Set Up Model and Migrations - Insert Dummy Data - Create Controller - Define Route - Create View
Install Laravel App
In general, deploying a new Laravel application is the main emphasis of our initial step. Install the sacred canon by executing the artisan command listed below. composer create-project laravel/laravel laravel-yajra-datatables --prefer-dist cd laravel-yajra-datatables
Install Yajra Datatable Package
Yajra Datatables Library is a jQuery DataTables API for Laravel 4|5|6|7, and I wonder whether you've heard of it. By taking into account the Eloquent ORM, Fluent Query Builder, or Collection, this plugin manages the server-side operations of the DataTables jQuery plugin through the AJAX option. The following command should theoretically assist you in installing the Yajra DataTable plugin in Laravel. composer require yajra/laravel-datatables-oracle Expand the basic functions of the package, such as the datatable service provider in the providers section and the alias inside the config/app.php file. ..... ..... 'providers' => 'aliases' => ..... ..... Continue by running the vendor publish command; this step is optional. php artisan vendor:publish --provider="YajraDataTablesDataTablesServiceProvider"
Set Up Model and Migrations
Run a command to generate a model, which contains the database table's schema. php artisan make:model Student -m Add the following code to the file database/migrations/timestamp create students table.php. public function up() { Schema::create('students', function (Blueprint $table) { $table->id(); $table->string('name'); $table->string('email')->unique(); $table->string('username'); $table->string('phone'); $table->string('dob'); $table->timestamps(); }); } Open the Student.php file in app/Models and add the schema to the $fillable array. Read the full article
#howtouseyajradatatablesinlaravel9#laravel9datatablesajaxexample#laravel9datatablesexample#laravel9installyajradatatables#laravel9yajradatatablesexample#laravel9yajradatatablesserversiteserverside
0 notes
Text
Laravel provides simple eloquent and query builder methods to query into database. The where() method is the basic clause to query into database. We almost need where clause in every query. In this throughout tutorial, you will learn how to use multiple where condition into Laravel eloquent and query builder. You can use multiple where condition to filter multiple columns into database. First let's see Laravel where() clause syntax: ->where('column_name', 'operator', 'value') If you want to use where clause on multiple columns, you can constrains them as below: ... ->where('column_name', 'operator', 'value') ->where('another_column', 'operator', 'value') ... Or you can pass array of conditions into where clause. ... ->where([ ['column_name', 'operator', 'value'], ['another_column', 'operator', 'value'] ]) ... The above both query creates same MySQL query: SELECT * FROM `table_name` WHERE column_name = value AND another_column = value Now let's see the query by example: Example 1: /** * Return users * * @return void */ public function index() $users = User::select('*') ->where('is_active', '=', 1) ->where('is_delete', '=', 0) ->get(); dd($users); Example 2: You may omit the operator parameter if you want to pass (=) equal operator into where() condition. /** * Return users * * @return void */ public function index() $users = User::select('*') ->where('is_active', 1) ->where('is_delete', 0) ->get(); dd($users); Example 3: Using array of conditions into where condition. /** * Return users * * @return void */ public function index() $users = User::select('*') ->where([ ['is_active', '=', 1], ['age', '>', 18] ]) ->get(); dd($users); I hope it will help you.
0 notes
Text
Laravel – Where Condition with Two Columns Example
New Post has been published on https://www.codesolutionstuff.com/laravel-where-condition-with-two-columns-example/
Laravel – Where Condition with Two Columns Example
The database query builder in Laravel provides a simple, intuitive interface for generating and performing database queries. It works with every one of Laravel's supported database systems and may be used to conduct most operations on the database in your application. In this tutorial, we'll
0 notes
Text
Best Laravel Hosting Providers
If you've chosen to use the most well-liked PHP framework, Laravel, to begin creating applications, you're probably looking for the best Laravel hosting providers. By creating a PHP framework that makes the most of the PHP language's potential and enables developers to create applications rapidly, Taylor Otwell did the world of good.
Therefore, Laravel is the best framework if you want to use special features like Query Builder, Restful Routing, Eloquent, and Blade Tempting, etc.
Not all shared hosting plans offer you the necessary control and environment necessary for hosting the Laravel framework, therefore you shouldn't choose one blindly. This tutorial can help you choose the finest hosting for Laravel users in that situation.
#Best Laravel Hosting Providers#Laravel hosting#best laravel hosting#laravel hosting providers#managed laravel hosting
0 notes
Text
Job Oriented Courses for PHP Developers 2020 | ExcelPTP
PHP is probably the most widely used language for the creation of the website and it makes the job of developers also easier. It is one of the most prominent languages used for developing websites and it provides fantastic results upon the completion of the process. The reasons are very clear for this, PHP training provides a very appropriate environment for development. It allows the developers to include various things with ease and a maximum number of errors.
What Is PHP?
PHP stands for machine-readable text Preprocessor (no, the signifier does not follow the name). It’s association supply, a server-side, scripting language used for the event of net applications. By scripting language, we tend to mean a program that’s script-based (lines of code) written for the automation of tasks.
Web pages are often designed mistreatment hypertext mark-up language. With HTML, code execution is completed on the user’s browser (client-side). On the opposite hand, with PHP server-side scripting language, it’s dead on the server before it gets to the net browser of the user.
PHP is often embedded in a hypertext mark-up language, and it’s well matched for net development and also the creation of dynamic web content for net applications, e-commerce applications, and info applications. It’s thought-about a friendly language with talents to simply connect with MySQL, Oracle, and different databases.
PHP Use
PHP script can be used on most of the well-known operating systems like Linux, Unix, Solaris, Microsoft Windows, MAC OS, and many others. It also supports most web servers including Apache and IIS. Using PHP affords web developers the freedom to choose their operating system and a web server.
In PHP, server-side is the main area of operation.Server-side scripting with PHP involves:
PHP Parser: a program that converts source and human readable code into a formate easier for the computer to understand
Web server: a Program that executes files that from web pages from user requests
Web browser:an Application used to display content on the world wide web
There are many job oriented PHP Framework course:
CakePHP
Zend
Yii
Laravel
Symfony
Code Igniter
WordPress
Typo3
Drupal
MeanStack
FullStack
CakePHP Framework
CakePHP is a free, open-source, rapid development framework for PHP. it’s a foundational structure for programmers to create web applications. This framework is the best choice for beginners. It also helps in developing brisk commercial web apps. It also provides scaffolding functionality and code generation, which helps in speeding up the development process.
CakePHP has an active developer team and community, bringing great value to the project. In addition to keeping you from the wheel – reinventing, using CakePHP means your application’s core is well tested and is being constantly improved.
Here’s a list of features of CakePHP:
Active, friendly community
Flexible licensing
Integrated CRUD for database interaction
Compatible with versions 4 and 5 of PHP
Fast and flexible templeting (PHP syntax, with helpers)
View helpers for AJAX, JavaScript, HTML Forms and more
Email, cookie, Security, Session, and Request Handling Components
If you are students and want to build a career in CakePHP development in Ahmedabad after CakePHP training this is the right way to you and there is a lot of demand for CakePHP developer in the market and in some field offer high package and hire CakePHP developers in their firms. For More details Visit our website: CakePHP Training in Ahmedabad
Zend Framework
Zend Framework is a fully object-oriented framework, and such as, it utilizes a lot of object-oriented concepts like inheritance and interfaces. This makes most, if not all, of ZF’s components extendable to some point. Being able to customize ZF this way allows you to create functionality that is unique to your project.
Whether you’re starting a new project or improving an existing one, in this article, we will go in-depth about why Zend Framework Development should absolutely be your PHP Framework of choice.
Here’s a list the features of Zend Framework:
Overview
Target Audience
Prerequisites
Expected Duration
Lesson Objectives
Course Number
Expertise Level
Zend packs a spread of options like an easy drag and drop editor, scientific discipline writing tools, a connected information Wizard, and instant on-line debugging tools. Its editor supports front-end technologies like hypertext mark-up language, CSS and JavaScript also. The ascendable framework is right for complicated websites because it offers a myriad of configuration choices. However, it’s one of the foremost troublesome to be told.
If you are students and want to build a career in Zend development in Ahmedabad after Zend training this is the right way to you and there is a lot of demand of Zend developer in the market and in some field offer high package and hire Zend developers in their firms. In this course, the company pays 15k to 20k to the freshers. For More details Visit our website: Zend Training with Live Project in Ahmedabad
Laravel Framework
Laravel may be a comparatively new PHP framework however un-arguably the foremost common PHP Framework out there to this point. Learning Laravel is straightforward since every unleashes is totally documented. They conjointly offer several screencasts, tutorials, and weblog updates.
Laravel has several options that build speedy application development attainable. The craftsman command-line interface provides a variety of useful commands whereas developing the appliance. Laravel contains a powerful templating engine too, that allows common tasks like authentication, caching, sessions, relaxing routing, and queuing easier for developers.
Here Some best features of Laravel are such as:
Simple and Secure
Object-oriented approach
Fast & cost effective
MVC support
Artisan
Blade Template Engine
Unit Testing
Catching
It has an enormous system with an immediate hosting and readying platform. Laravel will be simply developed with the pre-packaged Homestead bundle with Vagrant. After completed this course salary starts from as 15k to 20k. For More details Visit our website: Laravel Training in Ahmedabad
Symfony Framework
Symfony is another common PHP framework that empowers developers with a collection of reusable PHP elements and code. once it involves developing large-scale enterprise comes, Symfony makes an ideal selection among PHP frameworks. The elements of the Symfony framework square measure utilized by several content management systems like Drupal, PHPBB, Piwik, ORO CRM and even the favored Laravel itself uses it.
Symfony’s system is big and is supported by a vigorous community of developers. It provides an innovative and easy to use work environment because of its integrating solutions. Symfony also allows its users to choose the software components as per their interest.
Top Benefits of symfony Framework:
High Flexibility
Commercially supported
Reliable
Well – Managed Documentation
Symfony is a powerful and robust PHP framework to speed up the development process. Symfony ranked 3rd in popularity after Laravel and CodeIgniter. Along with that, it works basically the same as most of the PHP framework work.
CodeIngniter Framework
CodeIgniter is one among the oldest frameworks however is straightforward and powerful. It will simply be put in and needs a stripped user configuration. It works absolutely on most shared and dedicated hosting platforms. CodeIgniter isn’t entirely supported the MVC framework. Models and Views square measure nonmandatory, however Controller categories square measure a requirement. Another strength of CodeIgniter is speed. It runs quicker with information tasks as compared to different frameworks. CodeIgniter is well documented and a decent framework to start out with for PHP beginners.
Here is the list of top features of CodeIngiter:
Model-View-Controller Based System
Extremely Light Weight
Query Builder Database support
Form and Data Validation
Localization
Data Encryption
Error Logging
Zip Encoding Class
XML-RPC Library
Unit Testing Class
Support for Hooks and Class Extensions
CodeIgniter is already a decade recent, however it’s still among the foremost widespread PHP frameworks. CodeIgniter brings speed, dependableness, and security. it’s nice support from the community of developers to stay up with the most recent technology trends. It’s a contemporary framework and is correctly fitted to business internetapplications. type validation, SQL injection hindrance, sensible documentation, cross-site request forgery (CSRF) protection, cross-site scripting (XSS) hindrance area unit unbeatable options of CodeIgniter. For More details Visit our website: CodeIgniter Training with Certification
Yii Framework
Yii is among the oldest PHP frameworks and has come back up with its latest version Yii a pair of to urge a much-needed quality boost. Yii a pair of is solely object-oriented and relies on the DRY (Don’t Repeat Yourself) writing construct. One Yii a pair of sturdy features is that the lazy loading technique, that makes it quicker compared to different frameworks.
It excels for large-scale web site development as a result of it is integrated with Ajax and JQuery options. to boot, it’s a robust category code generator known as Gii that facilitates object-oriented programming and speedy prototyping to supply a web-based interface that enables you to interactively generate the code you would like.
There are top features in yii are as follow:
Easy to install
Applications developed in yii loads very fast.
We can easily generated the User model and its CRUD
Working with form and its validation is one of the essential stuff for any website.
Every part of yii framework is highly extensible
Security is an important feature for an application and yii provides a great feature for security.
MVC Pattern
Error Handling
Yii is a high performance web programming framework, meaning that it can be used for developing all kinds of Web applications using PHP. Its component-based architecture and sophisticated caching support, makes it suitable for developing large – scale application such as forums, portals, content management system, E-commerce projects and so on. For More details Visit our website: Yii training in Ahmedabad
WordPress Framework
WordPress is a framework as well as a framework for web development. Its an open source software written in PHP. WordPress currently shares around 40% of the all open source softwares landscapes. WordPress is basically a software that manages content people put on their websites. It is super flexible and can be extended by using plugins.
Here Some top features of WordPress Framework:
Show/Hide Things Using Screen Options
Move,Add or Delete Dashboard Widgets
Paste URL to make links in Visual Editor
Accessibility Mode for Widgets
Priview Themes Without Activating Them
Edit Images in WordPress
Split Single Post into Multiple Pages
Embed Links, Videos, and Multimedia
Hidden Secret Options Page in WordPress
Markdown and Keyword Shortcuts Help you Write Faster
The platform is simple to use and thanks to plenty of theme builders it can be customized in a variety of ways for everything from blogs, to portfolio sites, to e-commerce. Themes are the element that take WordPress to the next level, giving almost anyone of any skill level, the ability to create a site that doesn’t look like a basic template. For More details Visit our website: WordPress Training in Ahmedabad with 100% Job Guarantee.
Typo3 is a free and open source web content management system written in PHP. Typo3 is along with Dhrupal, Joomla and WordPress, among the most popular content management systems worldwide, however it is more widespread in Europe than in other regions.
Typo3 is a free and open source CMS platform. It is possible to create sites of different size, from small ones to enterprise. One more thing is that the TYPO3 extensions demand more server Parameters for the fast server running. Typo3 is exceedingly adaptable so you can utilize one topic for the entire site or outline each page influencing youe web to extended one of a kind.
Here is a list of top Features of Typo3 Framework:
Smart Content Management
Massively Multisite and Multilingual
Digital Marketing Enabled
Open, Extensible, Customizable
Professional Open Source
Universal Frontend User Experience
Secure, Performant, Scalable
Easy of Use
Runs Everywhere
For More details Visit our website: Typo3 CMS Training in Ahmedabad
Drupal Framework
Drupal is free, open source software that can be used by individuals or grops of users – even those lacking technical skills – to easily create and manage many types of Web sites. The application includes a content management plateform and a development framework.
Drupal is a CMS to build the customized website for business lies from personal blogs, community websites, forums discussions to E-commerce solutions. Across the worldwide, many of the developers are using Drupal CMS for the development to provide the extreme flexible and comprehensive online solutions to their clients.
Here is some features of drupal framework:
Limitless custom Functionality
Interactive custom design
Endless entires of Products & categories
Easy product browsing management
Custom implementation of search options
Maintanance of customer accounts
Allow to customize shopping cart and checkout
Newsletter subscription
Third party integration with ebay
MeanStack Framework
Today another very common stack is the MEAN stack. MEAN stands for MongoDB, Express, AngularJS and Node.JS. It ideal with a full stack JavaScript solution for building websites and web applications. From the database to the back-end and the front-end code, everything is written using JavaScript.From client to server to database, MEAN stack and shows how to create a simple bucket list application.
MEAN is a user-friendly stack which is the ideal solution for building dynamic websites and applications. This free and open-source stack offers a quick and organized method for creating rapid Prototypes for web- based applications.
MEAN is comprised of four different technologies:
MongoDB express is a schemaless NOSQL database systemExpress JS is a framework used to build web applications in Node
AngularJS is a JavaScript framework developed by Google
Node.js is a server side JavaScript execution environment
Here some Features of MEANstack Framework:
MEAN makes the switching between client and server easier
Highly Flexible
MEAN uses JSON
Cost effective
High Speed and Reusability
Open Source and Cloud Compatible
FullStack Framework
A full-stack web application is made up of two portions: a front end and the backend. Every web application that is accessed from a server can be considered a full-stack web application. Likely, a Full Stack Web Framework is a framework that supports the development of Front end interface, back end services, and databases.
A full-stack framework is a framework that attempts to provide nearly everything from web serving to database management right down to HTML generation that a developer could possibly need to build an application. It likely includes components that may not be needed by the majority of applications, but having them available makes it easier to integrate new features. For More details Visit our website: FullStack Training in Ahmedabad
0 notes
Text
Yii Tutorial
http://www.viralleakszone.com/yii-tutorial/
Yii Tutorial
Yii Tutorial
Yii Tutorial for Beginners - Learn Yii in simple and easy steps starting from basic
to advanced concepts with examples including Overview, Installation, Create Page,
Application Structure, Entry Scripts, Controllers, Using Controllers, Using Actions,
Models, Widgets, Modules, Views, Layouts, Assets, Asset Conversion, Extensions,
Creating Extensions, HTTP Requests, Responses, URL Formats, URL Routing, Rules of
URL, HTML Forms, Ad Hoc and AJAX Validations, Sessions, Using Flash Data, Cookies,
Using Cookies, Files Upload, Formatting, Pagination, Sorting, Properties,
Data Providers, Data Widgets, ListView Widgets, GridView Widgets, Events,
Creating Event, Behaviors, Creating a Behavior, Configurations, Dependency
Injection, Database Access, Data Access Objects, Query Builder, Active Record,
Database Migration, Theming, RESTful APIs, RESTful APIs in Action, Fields,
Testing, Caching, Fragment Caching, Aliases, Logging, Error Handling,
Authentication, Authorization, Localization, Gii, Creating a Model, Generating
Controller and Module.
Laravel
Laravel Tutorial
Laravel is a powerful MVC PHP framework, designed for developers who need a simple and elegant toolk
Laravel – Overview
IntroductionLaravel is an open-source PHP framework, which is robust and easy to understand. It foll
Laravel – Installation
For managing dependencies, Laravel uses composer. Make sure you have a Composer installed on yo
Laravel – Application Structure
The application structure in Laravel is basically the structure of folders, sub-folders and files in
Laravel – Configuration
In the previous chapter, we have seen that the basic configuration files of Laravel are included in
Laravel – Routing
In Laravel, all requests are mapped with the help of routes. Basic routing routes the request to the
Laravel – Middleware
Middleware acts as a bridge between a request and a response. It is a type of filtering mechanism. T
Laravel – Namespaces
Namespaces are used in various programming languages to create a separate group of variable, functio
Laravel – Controllers
In the MVC framework, the letter ‘C’ stands for Controller. It acts as a directing traffic between V
Laravel – Request
In this chapter, you will learn in detail about Requests in Laravel.Retrieving the Request URIThe&nb
Laravel – Cookie
Cookies play an important role while dealing a user’s session on a web application. In this chapter,
Laravel – Response
A web application responds to a user’s request in many ways depending on many parameters. This chapt
Laravel – Views
In MVC framework, the letter V stands for Views. It separates the application logic a
Laravel – Blade Templates
Laravel 5.1 introduces the concept of using Blade, a templating engine to design a unique layou
Laravel – Redirections
Named route is used to give specific name to a route. The name can be assigned using the as&nbs
Laravel – Working With Database
Laravel has made processing with database very easy. Laravel currently supports following 4 database
Laravel – Errors and Logging
This chapter deals with errors and logging in Laravel projects and how to work on them.ErrorsA proje
Laravel – Forms
Laravel provides various in built tags to handle HTML forms easily and securely. All the major eleme
Laravel – Localization
Localization feature of Laravel supports different language to be used in application. You need to s
Laravel – Session
Sessions are used to store information about the user across the requests. Laravel provides various
Laravel – Validation
Validation is the most important aspect while designing an application. It validates the incoming da
Laravel – File Uploading
Uploading Files in Laravel is very easy. All we need to do is to create a view file where a user can
Laravel – Sending Email
Laravel uses free feature-rich library SwiftMailer to send emails. Using the library funct
Laravel – Ajax
Ajax (Asynchronous JavaScript and XML) is a set of web development techniques utilizing many we
Laravel – Error Handling
Most web applications have specific mechanisms for error handling. Using these, they track errors an
Laravel – Event Handling
Events provide a simple observer implementation which allows a user to subscribe and listen to vario
Laravel – Facades
Facades provide a static interface to classes that are available in the application’s serv
Laravel – Contracts
Laravel contracts are a set of interfaces with various functionalities and core services provided by
Laravel – CSRF Protection
CSRF refers to Cross Site Forgery attacks on web applications. CSRF attacks are the unauthorized act
Laravel – Authentication
Authentication is the process of identifying the user credentials. In web applications, authenticati
Laravel – Authorization
In the previous chapter, we have studied about authentication process in Laravel. This chapter expla
Laravel – Artisan Console
Laravel framework provides three primary tools for interaction through command-line namely: Art
Laravel – Encryption
Encryption is a process of converting a plain text to a message using some algorithms such that any
Laravel – Hashing
Hashing is the process of transforming a string of characters into a shorter fixed value or a key th
Laravel – Understanding Release Process
Every web application framework has its own version history and it is always being updated and maint
Laravel – Useful Resources
The following resources contain additional information on Laravel. Please use them to get more in-de
Discuss Laravel
Laravel is a powerful MVC PHP framework, designed for developers who need a simple and elegant toolk
Laravel Security
Security is important feature while designing web applications. It assures the users of the websit
0 notes
Text
TOP 10 ADVANTAGES OF USING LARAVEL FRAMEWORK

Laravel is one of the most popular frameworks that offer custom software development. This framework has got the highest stars on Github, which mentions that more than 56000 developers are currently using it across the globe for responsive web development. Based on Github’s report, it’s quite evident that you have ample choices if you want to hire Laravel developer for your online presence.
However, before choosing any framework, it’s essential that you know its pros and cons well. Otherwise, you won’t be able to make the best out of your project. Therefore, we are sharing the top ten advantages of using the Laravel framework for custom software development. Based on these advantages, you can create a plan that aligns with your business goals and your industry niche by discussing it with your Laravel development company
Before we explain the advantages of the Laravel framework to you, here is a snippet of the Laravel framework and its possibilities
What is Laravel and What are its Uses?
Laravel is a free and open-source PHP framework based on MVC architecture that offers effortless web and app development. Taylor Otwell founded this framework, which got released in June 2011. The latest version of the framework is 8.16.1. Laravel is suitable for developing complex and large websites.
Though Laravel is a bit complex as compared to the other PHP frameworks, it is the most suitable one when it comes to developing extremely powerful web applications. Laravel provides expressive tutorials (Laracasts), documentations and boasts a huge community to assist the developers worldwide.
Some of the vital features of the Laravel framework are Bundles, Query Builder, Reverse Routing, Eloquent ORM, Application Logic, IoC, Migrations, Class Auto Loading, Blade Templating Engine, Automatic Pagination and more. The ORM and routing allow one to develop modern applications with sheer perfection.
The Top 10 Advantages of Using Laravel Framework:
1. Fixing Security Vulnerabilities: Be it any web application, the development phase causes some sort of technical glitch that can be a real threat to security vulnerabilities. Some of the most vulnerable elements are cross-site scripting, SQL injection and site request forgery. Laravel can help you secure your web app with its fanatically guarded codebase.
2. Mail Service Integration: Today, it’s essential for businesses to send service emails to the customers after every event, be it registration or purchase. Laravel makes it better for the SwiftMailer library with its simple, clean API to perform the task. Moreover, Laravel can provide drivers for Mailgun, SMTP, SparkPost and a lot more platforms.
3. Authorization Process: For every app, authorization of the users is a common aspect, which makes the owners sure that the users are authentic people. It helps them to secure their purchase options from unauthorised buyers. Laravel’s authentication process is quite advanced and yet simple, which anyone can implement and use with ease.
4. Faster Application: Recent studies show that users prefer fast-loadable and high-responsive apps on every platform. A slow app can be the reason for the loss of revenue for any business and hence, Laravel can provide the best solution. It comes with in-memory caches such as APC and Memcached and also ensures multiple cache configurations.
5. Built with Testing: For any Laravel development company, the process of testing apps is like a cakewalk. Laravel comes with in-built testing features with PHPUnit and hence it offers speedy and error-free testing every time. There are convenient helper methods in this framework that allow expressive testing of complex large apps.
6. Configuration Error: User experience is partially dependent upon the way an app can handle errors. In many apps, users click the Submit button and then errors are identified. It helps the users to understand which steps are taken wrong and should be corrected. For Laravel, error and exception handling are two of its best features.
7. Queue Service: When an app gets more traffic, it has to handle an excessive number of message requests per second. Now, if the app is developed with an ordinary framework, there are chances of data loss or higher expense. With the unified API system of Laravel, there is no reason to worry. The process of sending messages and emails speeds up in this framework.
8. URL Routing Configuration: The users usually use URL links to see something specific such as the service page or a contact form. If the web app doesn’t have URL routing, it won’t be able to show that exact page and instead will show an error. Laravel uses app/Http/routes.php files to identify URL routes and respond quickly to users’ requests.
9. Separation of Codes: If you hire Laravel developer for your business, you will get to know about this advantage in detail. Laravel is an MVC framework, which can separate business logic code from presentation code. As a result, Html Layout Designers do not need to interact with developers while changing the UI/UX of a web page.
10. Task Scheduling: Every web app requires a task scheduling system to track and manage all its ongoing tasks. Earlier, developers had to generate Cron entries to schedule tasks each time but today, Laravel allows the developers to command schedule tasks within the framework and generate a single Cron entry in the server.
If you are planning for a full-stack Laravel app development, therefore, looking for a Laravel development company to partner with, look no further than us. We, Idiosys Technologies, are one of the most eminent web and app development companies providing a plethora of services including Laravel app development. Headquartered in Kolkata, we basically provide web development, app development and marketing solutions to a huge number of multi-national and start-up companies from India, Canada, the USA, Germany, Australia, Brazil, the UK and Panama. Our expertise and long experience in the industry has made us one of the top web development and IT companies in India. You can hire the most efficient Laravel developers’ team and Laravel framework experts from our company to boost your online presence. So, why wait anymore? Contact us today to know the best deals we can offer you.
0 notes
Text
Cara Membuat Website Sederhana dengan 3 Metode
Salah satu langkah dalam menentukan identitas digital Anda adalah dengan membuat website. Adanya kemajuan dalam pengembangan website memudahkan kita dalam membuat website: kita dapat menggunakan sistem manajemen konten, atau memanfaatkan website builder, atau kita bisa mengaplikasikan cara membuat website dari awal. Di tutorial ini, kami akan menjelaskan semua cara yang telah disebutkan di atas dan menampilkan langkah-langkah membuat situs.
Anda tidak perlu khawatir jika belum pernah membuat dan mengembangkan website. Tutorial ini siap membantu Anda memulai dari proses paling dasar.
Isi
Langkah 1 – Memilih Platform
Langkah 2 – Mencari Hosting dan Nama Domain
Langkah 3 – Cara Membuat Website
Kesimpulan
Langkah 1 – Memilih Platform
Seperti yang telah kami sebutkan sebelumnya, ada 3 cara membuat website:
Menggunakan CMS: Sistem manajemen konten merupakan tool pengembangan tingkat lanjut yang dapat digunakan untuk membuat dan mengelola website beserta kontennya. Terkait CMS, ada tiga pilihan terkemuka di pasaran, yaitu WordPress, Drupal, dan Joomla! Ketiga tool ini bersifat gratis dan open-source, tetapi WordPress-lah CMS yang paling sering digunakan. Ketiga sistem ini telah dikembangkan menggunakan PHP, memanfaatkan penggunaan template/tema untuk kustomisasi visual, dan disukai oleh banyak komunitas. Walaupun demikian, Joomla! dan Drupal tidak bisa dibandingkan dengan WordPress dalam hal kegunaan, kemudahan, ketahanan, banyaknya komunitas dan ketersediaan tema dan plugin gratis, dan lain-lain. Bagi mereka yang sedikit atau sama sekali tidak memiliki pengalaman dalam pengembangan web, maka WordPress adalah pilihan yang tepat.
Menggunakan website builder: otomatisasi semakin terwujud dengan adanya website builder. Pada awalnya, opsi kustomisasi terkait fungsionalitas dan desain sangatlah terbatas. Namun sekarang, ada banyak sekali yang bisa Anda dapatkan dengan drag dan dropping menggunakan website builder modern. Apabila dibandingkan dengan CMS dan pengodean website yang harus dilakukan dari dasar, tool website builder sangat cepat, efisien, dan bisa dibilang pilihan jitu bagi siapa pun yang tidak memiliki pengalaman dalam pengembangan website dan juga tak ingin menghabiskan waktu menerapkan tahap-tahap dan proses pengembangan.
Membuat kode untuk pembuatan website dari nol: Opsi ketiga yang tersedia adalah membuat website dari awal. Idealnya proses ini ditujukan bagi para pengguna yang setidaknya sudah memiliki pengalaman dasar pengembangan. Di tutorial ini, teknologi yang digunakan untuk membuat website statis adalah HTML dan CSS.
Langkah 2 – Mencari Hosting dan Nama Domain
Website Anda diibaratkan seperti sebuah bangunan. Sama seperti bangunan pada umumnya, bangunan Anda memiliki alamat yang dapat diakses pengguna dan menjadi tempat untuk ditinggali. Agar website tampil di internet, Anda harus membeli web hosting dan membuat domain agar situs Anda dapat dengan mudah diakses.
Memilih Web Hosting
Layanan web hosting yang baik membutuhkan proses yang cukup panjang guna memastikan website Anda memenuhi standar kualitas, efisiensi, dan ketersediaan. Hostinger menyediakan web hostingdengan harga terjangkau tetapi tidak mengurangi kualitas. Berikut beberapa alasan mengapa sebaiknya Anda memilih kami, sebagaimana yang telah dilakukan oleh jutaan pelanggan yang sudah memercayakan websitenya pada Hostinger:
Hosting Hostinger dioptimalkan untuk WordPress (misalnya,, WP CLI, WordPress caching, dan lain-lain).
Website builder yang mudah digunakan sehingga Anda dapat melakukan drag and drop untuk membuat website yang menarik.
Tak ada kendala saat hendak mengaktifkan dan menjalankan website PHP di hosting Hostinger. Anda dapat menjalankan Laravel, CodeIgniter, mengintegrasikan dengan GIT Anda, dan memperoleh akses SSH ke server Anda.
Sertifikat SSL juga disediakan oleh Hostinger.
Masa trial selama 30 hari bebas risiko memberikan Anda kesempatan mencoba semua layanan sebelum akhirnya Anda melakukan pembelian.
Apabila memilih paket premium atau bisnis, maka Anda akan mendapatkan satu nama domain gratis.
Anda dapat membuat sebanyak mungkin alamat email yang Anda inginkan (Benar sekali, tidak terbatas!).
Jika website Anda mengalami permasalahan atau Anda hanya menginginkan beberapa query, Tim Support kami akan selalu ada membantu Anda selama 24/7/365.
Hanya dengan sekali klik, Anda dapat menginstall semua CMS terpopuler, termasuk WordPress, Joomla!, dan Drupal.
Memilih Nama Domain
Sederhananya, domain adalah nama website Anda. Biasanya domain diketik di baris alamat browser, lalu tekan Enter untuk membuka website Anda. Google.com merupakan nama domain, begitu juga halnya dengan Facebook.com.
Memilih nama domain yang baik dan tepat juga merupakan salah satu hal mendasar dan terpenting. Di samping itu, domain berfungsi untuk mengarahkan pengguna mengunjungi website Anda. Oleh karena itu, jangan sampai salah membuat nama domain. Berikut ada beberapa tips yang sebaiknya Anda ketahui sebelum memilih dan membuat nama domain:
Nama domain harus singkat: Siapa pun pasti tidak ingin mengetik nama domain yang terlalu panjang, seperti Googlebutwithabiggerdomainname.com.
Brand-nya harus spesifik: Nama domain setidaknya memberi gambaran tentang website Anda kepada para pengunjung.
Pilih ekstensi domain yang benar: Ekstensi domain adalah bagian dari domain yang letaknya setelah tanda titik (.). Domain .com paling banyak dipilih. Namun, tentu saja, pemilihan ini berdasarkan pada kebutuhan Anda atau isi website dan ada kemungkinan bagi Anda untuk memilih ekstensi domain yang berbeda.
Cara pengucapan atau pengejaan nama domain: Nama domain Anda harus mudah diucap dan diingat.
Sama seperti layanan hosting lainnya, Hostinger juga menyediakan layanan pendaftaran nama domain. Anda dapat menggunakan tool cek domain untuk memilih nama domain yang diinginkan.
Kabar bagusnya lagi, jika Anda memilih paket hosting Bisnis atau Premium, maka akan tersedia nama domain gratis untuk Anda (benar-benar gratis). Kami juga menjual nama domain yang di masa depan akan laris, yaitu domain .xyz, dengan harga murah, hanya Rp. 13.212/tahun.
Langkah 3 – Cara Membuat Website
Langkah paling dasar sudah Anda ketahui dan kini saatnya memulai cara membuat website sendiri. Setelah mendapat tempat hosting untuk situs Anda dan nama domain yang akan digunakan, Anda sudah bisa memulai membuat website sendiri. Kami akan menjelaskan 3 cara membuat website (menggunakan WordPress, menggunakan website builder, dan membuat website benar-benar dari awal). Pilih cara bikin website yang sesuai kebutuhan Anda.
Opsi 1 – Cara Membuat Website dengan WordPress
Apabila Anda memilih opsi ini, maka itu berarti Anda menggunakan CMS terbaik untuk membuat website.
Menginstall WordPress
Menginstall WordPress benar-benar mudah, hanya dalam beberapa kali klik saja. Tool auto-installer melakukan semuanya untuk Anda; meskipun di bawah ini kami juga akan membahas cara menginstall WordPress menggunakan FTP secara manual.
Menginstall melalui auto-installer
Login ke akun hosting Anda dan di control panel, klik ikon auto-installer.
Di kolom pencarian, ketik WordPress. Apabila yang Anda lihat di hasil pencarian adalah WordPress versi terbaru, jangan ragu untuk mengkliknya.
Masukkan URL (Alamat website Anda. Kosongkan saja jika Anda ingin mengelola WordPress di root nama domain), Bahasa, username, kata sandi atau password, email, Judul WordPress, Tagline WordPress (slogan website Anda), dan klik tombol Install.
Selesai! WordPress telah berhasil diinstall. Auto-installer memberikan Anda kemudahan yang diinginkan dalam membuat website di WordPress. Namun, jika auto-installer tersebut bermasalah, atau Anda ingin membuat website dengan cara manual, maka Anda bisa menginstall WordPress menggunakan FTP untuk mentransfer file. Ikuti beberapa langkah di bawah ini:
Menginstall melalui FTP
Mengonfigurasikan WordPress
Setelah menginstall WordPress, maka langkah selanjutnya adalah mengonfigurasikan website WordPress yang telah dibuat. Berikut beberapa konfigurasi yang sebaiknya Anda lakukan:
Hapus halaman, post, dan komentar default
Post “Hello World” default dibuat setelah proses instalasi selesai. Sebaiknya hapus segera post ini. Untuk melakukannya. buka Post -> Semua post dan hapus.
Buka Laman -> Semua Laman dan hapus halaman contoh.
Terakhir, buka bagian Komentar dan hapus komentar default.
Pengaturan zona waktu dan bahasa situs
Buka Pengaturan -> Umum dan atur zona waktu dan bahasa yang akan Anda gunakan.
Komentar WordPress
Semua pengaturan yang terkait dengan komentar dapat ditemukan di Pengaturan -> Diskusi yang ada di admin panel WordPress. Berdasarkan kebutuhan, Anda bisa:
Memperbolehkan atau tidak memperbolehkan orang-orang untuk menulis komentar di artikel baru.
Memutuskan apakah Anda ingin menerima komentar secara manual atau tidak.
Mengonfigurasikan notifikasi email untuk komentar.
Menampilkan avatar atau tidak.
Tips:
Anda juga dapat menonaktifkan komentar untuk halaman atau post yang spesifik. Untuk melakukannya, ikutilah beberapa langkah di bawah ini:
Klik semua post/halaman melalui admin area WordPress.
Klik Edit Cepat pada halaman yang dimaksud.
Di bawah Tag, Anda akan melihat opsi Izinkan Komentar. Anda hanya perlu menonaktifkanya dan semua proses selesai.
Anda juga bisa menonaktifkan kolom komentar di suatu post setelah periode waktu tertentu.
Mengelola pengaturan media
Nantinya, setelah langkah ini diselesaikan, website WordPress Anda akan menampilkan gambar yang lebih baik. Standarnya, setelah Anda mengupload sebuah gambar, berbagai versi dengan ukuran yang berbeda akan dibuat yang mana tidak efisien bagi para pemula. Untuk mengubah pengaturan tersebut, ikutilah beberapa langkah di bawah ini:
Buka Pengaturan -> Media.
Di ukuran miniatur, masukkan 0 baik di lebar maupun tinggi. Jangan beri tanda centang pada opsi “Pangkas miniatur ke dimensi yang sama (biasanya miniatur bersifat proporsional).
Di ukuran sedang, masukkan 0 baik di lebar maupun tinggi.
Terakhir, di ukuran besar, masukkan 0 baik di lebar maupun tinggi.
Beri tanda centang pada opsi “Organisir unggahan saya dalam folder-folder berdasarkan bulan dan tahun” dan klik Simpan Perubahan.
Menonaktifkan Browsing Direktori
Menonaktifkan browsing direktori merupakan salah satu konfigurasi yang lebih teknis dan akan dilakukan secara bersamaan pada saat Anda hendak meningkatkan keamanan website. Untuk menonaktifkan browsing direktori, Anda harus mengedit file .htaccess. Ikuti beberapa langkah di bawah ini:
Buat koneksi ke akun hosting Anda menggunakan aplikasi file apa pun (misalnya FileZilla)
Cari dan unduh file .htaccess.
Buka file tersebut dan di bagian akhir, tambahkan baris kode ini:
Klik simpan.
Upload kembali file menggunakan aplikasi FTP client.
Options-Indexes
Kustomisasi WordPress
Tampilan website Anda sama pentingnya dengan konten situs itu sendiri. Tema WordPress memungkinkan Anda mengubah desain dan tampilan website sesuai keinginan dan kebutuhan. Selain itu, plugin WordPress juga memberi Anda kesempatan untuk membuat website lebih profesional. Kami akan membahas kedua entitas ini, satu per satu.
Menginstall Tema WordPress
WordPress memberikan kontribusi besar di komunitas sehingga banyak sekali tema, baik gratis maupun berbayar, yang tersedia. Berbagai tema WordPress gratis bisa Anda temukan di sini. Website, seperti ThemeForest, juga merupakan situs yang tepat apabila Anda mencari tema gratis dan berbayar. Jika Anda merasa sulit memilih tema yang tepat untuk website, silakan baca artikel yang memuat tentang tema WordPress gratis dan terbaik.
Menginstall tema di WordPress sangatlah mudah. Berikut langkah-langkahnya:
Klik bagian Apperance di administrator area.
Klik tombol Add New.
Anda bisa mencari tema yang tersedia, lalu klik salah satu. Klik Install, lalu Activate untuk melihat tema baru yang dipilih.
Apabila Anda ingin menambahkan tema baru yang telah dibeli, ikuti langkah-langkah di bawah ini:
Buka Appearance dan klik tombol Add New.
File tema harus dalam bentuk zip. Setelah terbuka, cari dan unggah tema yang diinginkan.
Setelah proses upload tema selesai, klik tombol Activate dan tema Anda akan langsung aktif.
Jika Anda menginginkan tutoial yang lebih mendalam terkait penginstallan tema, silakan baca artikel ini.
Kustomisasi Tema WordPress
Apabila Anda memahami cara mengedit kode dengan baik, maka sudah pasti Anda akan memilih cara manual dalam menginstall tema. Langkah ini melibatkan modifikasi kode yang tertulis dalam file CSS (cascading style sheet) yang berfungsi untuk enforce layout website Anda. Untuk melakukannya, ikutilah langkah-langkah berikut ini:
Buka Appearance di dashboard WP dan klik Editor.
Klik style.css dan editor file tersebut akan terbuka.
Anda bisa membuat editan sebanyak mungkin, tergantung pada kebutuhan dan keinginan Anda. Simpan file tersebut dengan mengklik Update file.
Anda juga dapat mengubah tema dengan memodifikasi konten file functions.php. Dengan demikian, Anda bisa menambahkan/menghapus/mengubah aspek fitur, fungsionalitas, dan desain tema. File fungsi bertanggung jawab terhadap fungsi tema dan dengan menambahkan kode PHP, tema tersebut dapat diganti atau diubah. Anda bisa mengetahuinya lebih jelas dengan membaca artikel functions.php di sini.
Menginstall Plugin WordPress
Plugin memudahkan si pemilik untuk mengelola websitenya. Selain itu, plugin juga bermanfaat secara jangka pendek dan panjang untuk kelangsungan website Anda. Dengan melakukan instalasi plugin melalui cara-cara yang sederhana, Anda dapat menambahkan fungsionalitas ke website tanpa harus menuliskan kode atau mengubah file konfigurasi. Sama seperti tema, ada ribuan plugin WordPress yang gratis dan berbayar. Berikut beberapa plugin yang harus ada di website Anda:
Wordfence Security: Plugin ini akan mengamankan website Anda dari para hacker. Plugin ini pun memiliki segalanya yang dibutuhkan, mulai dari perlindungan terhadap ancaman hingga scan keamanan. Informasi selengkapnya dapat Anda baca di sini.
Google XML Sitemaps: Plugin resmi Google untuk pembuatan site map XML otomatis yang akan membuat website Anda tampil lebih baik di optimasi mesin pencari. Untuk informasi selengkapnya dapat Anda baca di sini.
Yoast SEO: Sebagai salah satu plugin SEO terpopuler untuk WordPress, Yoast SEO memiliki lebih dari 5 juta instalasi yang aktif. Apa pun itu, baik meta-tag atau page analysis, dengan Yoast SEO, Anda tidak perlu menginstall plugin lain untuk meningkatkan peringkat SEO. Informasi selengkapnya dapat Anda baca di sini.
Contact Form 7: Plugin WordPress yang sederhana dan berfungsi untuk membuat formulir kontak. Plugin ini sangat mudah diinstall dan Anda dapat membuat informasi kontak yang responsif dan menentukan formulir. Informasi selengkapnya dapat Anda baca di sini.
Menginstall plugin WordPress sama mudahnya dengan menginstall tema. Ikutilah beberapa langkah di bawah ini:
Buka Plugin di menu utama.
Klik tombol Add new.
Di kolom pencarian yang muncul, masukkan nama plugin yang Anda inginkan untuk diinstall.
Klik Install now.
Setelah proses instalasi selesai, klik tombol Activate.
Meskipun Anda telah membeli sebuah plugin premium, Anda tidak akan menemukannya di direktori resmi. Mau tidak mau, Anda harus mengupload file-nya secara manual. Untuk melakukannya. ikutilah beberapa langkah di bawah ini:
Arahkan mouse di sekitar plugin dan klik tombol Add New.
Klik tombol plugin Upload yang ada di bagian atas.
Klik browse dan pilih file plugin yang diarsipkan.
Setelah proses upload selesai, install plugin terlebih dulu, lalu aktifkan.
Tutorial mendalam mengenai cara menginstall plugin di WordPress dapat ditemukan di sini.
Menambahkan Konten ke WordPress
Pada WordPress, konten dapat ditambahkan dalam dua cara: Anda dipersilakan untuk membuat post baru atau laman baru. Perbedaan di kedua cara tersebut terletak pada fakta bahwa post dibagi ke dalam dua kategori dan dapat di-tag dan/atau di-arsipkan. Umumnya, pos merupakan entri blog atau artikel yang akan ditampilkan secara berurutan di website Anda dan dapat disebut sebagai konten yang dipublikasikan berdasarkan waktu. Sementara itu, laman bersifat statis. Contoh laman adalah halaman tentang kami atau hubungi kami.
Menambahkan post atau laman baru di WordPress
Untuk membuat post baru di website WordPress, ikuti langkah-langkah berikut ini:
Arahkan most ke Pos atau Laman dan klik Tambah Baru.
Masukkan informasi yang dibutuhkan di pos/laman Anda. Konten pos dibuat di kotak besar yang dapat dilihat di gambar di bawah ini. Anda dapat memformat teks atau menambahkan gambar menggunakan toolbar yang tersedia.
Terdapat meta-box di sebelah kanan layar yang bisa Anda gunakan:
Terbitkan: Anda dapat menyimpan pos sebagai konsep atau melakukan pratinjau sebelum menerbitkan pos. Anda juga dapat mengatur Kenampakan dan status pos. Setelah mengklik Terbitkan, pos Anda akan langsung online.
Tag: Di sini, Anda dapat menambahkan tag ke pos. Sayangnya, opsi ini tidak tersedia di laman.
Gambar Unggulan: Anda dapat menambahkan gambar unggulan ke pos. Letak gambar beragam, tergantung pada tema.
Kategori: Tentukan kategori pos Anda. Jika ingin membuat kategori baru, klik tombol + Tambah Kategori Baru. Sayangnya, opsi ini tidak tersedia di Laman.
Menambahkan halaman depan statis:
Ketika Anda menambahkan pos ke WordPress, secara default, halaman depan website Anda akan menampilkan pos terbaru dalam urutan kronologis yang terbalik. Hanya saja, akan lebih baik jika ada halaman depan statis di website Anda yang menyapa para pengunjung, alih-alih deretan pos. Membuat halaman depan statis yang sederhana sangatlah mudah, cukup ikuti langkah-langkah berikut ini:
Login ke administrator area WordPress Anda.
Buka laman Laman -> Tambah Baru.
Masukkan judul laman baru yang berfungsi sebagai halaman utama.
Apabila tema yang Anda pilih saat ini memperbolehkan Anda untuk mengubah halaman depan, maka pilihlah tempate melalui panel box Atribut Laman.
Anda dapat menambahkan konten yang diinginkan di kotak konten dan klik terbitkan.
Buka Pengaturan -> Membaca.
Pilih tombol radio Halaman statis dan di menu dropdown, pilih Beranda.
Klik Simpan Perubahan.
Masih banyak hal yang bisa Anda lakukan dengan WordPress, dan kami berusaha untuk sebisa mungkin menliskan topk-topik mendasar yang sekiranya cukup bagi Anda agar bisa lebih familiar dengan CMS ini dan mengetahui cara membuat website. Untuk lebih jelasnya, kunjungi situs resmi WordPress codexatau baca tutorial WordPress ini.
Opsi 2 – Cara Membuat Website dengan Website Builder
Salah satu cara membuat web di Hostinger adalah dengan menggunakan website builder. Tool ini sangat tepat bagi siapa pun yang tidak ingin direpotkan dengan kode atau proses penginstallan CMS.
Fitur drag and drop memudahkan proses instalasi WordPress – Anda dapat memasukkan berbagai jenis informasi: teks, gambar, tabel, galeri, atau formulir di website Anda dengan mudah.
Site builder Hsotinger memiliki lebih dari 100 template, search engine friendly, dan secara default bersifat responsif. Hal ini berarti tampilan website Anda akan terlihat profesional di perangkat desktop dan mobile tanpa ada masalah. Berikut cara membuat website mengunakan website builder.
Login ke control panel Hostinger. Pada dashboard, scroll ke bawah ke bagian website dan klik Website Builder.
Anda akan melihat daftar template. Di sebelah kiri, ada kategori template sehingga Anda bisa lebih mudah memilih template yang diinginkan.
Klik tombol Preview untuk melihat bagaimana website Anda akan terlihat jika telah ditambahkan template atau klik Select untuk melakukan langkah berikutnya.
Apabila butuh bantuan, panel Steps to do ada di sebelah kanan layar. Anda dapat mengikuti langkah pembuatan website yang disarankan. Anda juga bisa mengklik tanda tanya berwarna hijau untuk melihat penjelasan terhadap menu site builder.
Biasanya terdapat konten standar template yang terload di website. Hal pertama yang harus Anda lakukan adalah mengubahnya sehingga tampilan tentang website Anda sesungguhnya akan terlihat. Anda dapat melakukannya dengan mengklik di mana saja di website di mana teks tersebut ditulis. Anda juga dapat menggubah warna, memformat atau mengubah ukuran teks dengan menggunakan toolbar editing.
Untuk menambahkan teks baru, klik opsi Text di menu dan drag ke mana saja pada kolom yang tersedia.
Untuk menambahkan gambar baru, klik Picture dan drag pada kolom yang tersedia. Segera setelahnya, sebuah jendela (window) akan terbuka, di mana Anda dapat memilih gambar. Setelah di-upload, Anda bisa drag ke cater sesuai keinginan.
Anda dapat menambahkan menu baru menggunakan opsi Menu di toolbar. Setelah menu dibuat, Anda bisa memodifikasi item menu yang berbeda-beda.
Anda juga dapat menambahkan map atau mengintegrasikan media sosial menggunakan tool drag and drop yang sederhana.
Di bagian Advanced, Anda akan melihat opsi, seperti Skype, Music, HTML, Calendar, AdSense, dan lain-lain.
Bagian Commerce akan mencari tool dan sistem pembayaran terpopuler. Gunakan tool tersebut jika Anda ingin membuat website e-commerce.
Tombol Auto-layout di bagian atas halaman akan membantu Anda dalam mensejajarkan semua elemen pada kolom secara otomatis dan menghindarkan Anda dari desain dengan cara manual. Seandainya, Anda tidak menyukai hasilnya, Anda bisa mengembalikannya ke tampilan semula dengan mengklik tombol Undo.
Ketika semua perubahan, penambahan, dan pergantian telah dilakukan sesuai keinginan, Anda dapat mempublikasikan website dengan mengklik tombol Publish di bagian atas sebelah kiri. Anda juga dapat menyimpan website sebagai konsep dengan mengklik Save draft.
Opsi 3 – Cara Membuat Website dari Awal
Di subbab ini, kami akan menunjukkan cara membuat website statis dari awal dengan menggunakan HTML dan CSS. Website statis merupakan web yang tidak berubah, tergantung pada pengguna yang mengakses dan juga memiliki konten tetap. Website statis memiliki kelebihan dan kekurangan.
Kelebihan:
Website statis memiliki performa cepat.
Website statis tidak tertaut ke database apa pun.
Pembuatannya mudah jika dibandingkan dengan cara membuat website lainnya.
Kekurangan:
Membutuhkan lebih banyak waktu untuk mengelola dan memperbarui konten.
Tak ada cara untuk menampilkan konten apa pun secara dinamis kepada user/pengguna.
Cara membuat website statis juga membutuhkan code editor. Beberapa code editor terbaik adalah:
Notepad++
TextWrangler
Sublime Text
Cara membuat website menggunakan laman dasar HTML
Hypertext Markup Language (HTML) adalah markup bahasa untuk membuat halaman website.
Buka code editor yang digunakan dan tempel (paste) ke file kosong berikut ini.
<html> <head> <title>Your website's title here<title> </head> <body> <p> This is where content comes. </p> </body> </html>
Klik save as di code editor dan simpan file dengan ekstensi .html (misalnya, website.html).
Buka file yang telah disimpan di dalam browser Anda. Pada awalnya, halaman website tersebut terlihat tidak menarik dan tidak seperti yang ada di bayangan Anda. Namun, ini hanyalah permulaan jika membuat website dari nol.
Menambahkan CSS untuk membuat tampilan lebih menarik
CSS merupakan singkatan dari Cascading Style Sheets yang memungkinkan Anda untuk mendesain website dan menerapkan style secara konsisten. Dengan CSS, Anda dapat menggnakan jenis huruf untuk area tertentu di website Anda, mengubah warna di beberapa bagian atau mengubah background website, dan lain-lain,
Untuk membuat style sheet, buka file teks baru dan simpan dengan nama style.css. File ini sebaiknya disimpan di direktori yang sama di mana file HTML halaman beranda Anda tersimpan. Untuk membuat file index membaca isyarat desain dari file CSS, buat link atau tautan di antara keduanya dengan menambahkan baris berikut ini ke dalam tag <head>:
<link rel="stylesheet" type="text/css" href="style.css">
Sampai saat ini, yang sudah kita lakukan adalah menautkan file CSS dan file HTML. Gunakan CSS untuk membagi website ke dalam 5 bagian dan dua kolom. Masukkan kode di bawah ini ke dalam file CSS Anda:
body {background: #F6E7E7; margin: 0 auto; padding: 0;text-align: center;} a {color: #310909;} #container {width: 1000px; margin: 0 auto; padding: 0; background;} #header {width: 1000px; height: 180px; margin: 0 auto; padding: 0; border: 0; background: #f346e1;} #sidebar {width: 300px; height: 410px; margin: 0; padding: 0; border: 0; float: left; background: #E83535;} #content {width: 700px; height: 410px; margin: 0; padding: 0; border: 0; float: left; background: #8be0ef;} #footer {width: 1000px; height: 70px; margin: 0; padding: 0; border: 0; float: left; background: #000000; color:#eee; clear:both;}
Value background dapat mengontrol warna bagian yang berbeda-beda, dan Anda dapat mengubahnya sesuai keinginan. Kini kita sudah memiliki lima bagian di halaman: container, header, sidebar, body, dan footer. Nama kelima bagian tersebut mengindikasikan fungsinya; area container pada dasarnya meliput keseluruhan website dan lebarnya dapat diubah ke 1000px jika dibutuhkan. Hanya saja, Anda juga harus mengubah dimensi bagian lainnya agar semuanya sejajar. Anda dapat mengonfigurasikan lebar, tinggi, dan warna dari semua bagian sesuai keinginan. Setelah semuanya selesai, update file beranda utama dengan memasukkan kode berikut ini:
<html> <head> <title>Your website’s title here</title> <link rel="stylesheet" type="text/css" href="style.css"> </head> <body> <div id="container"> <div id="header"><p>Header Goes Here</p></div> <div id="sidebar"><p>Left Navigation Goes Here</p></div> <div id="content"><p>Content Goes Here</p></div> <div id="footer"><p>Footer Goes Here</p></div> </div> </body> </html>
Seperti yang Anda lihat, kami menggunakan tag <div> untuk membagi website ke dalam bagian yang berbeda, dan dengan mengatur id-nya, kami pun menetapkan desain khusus untuk bagian-bagian tersebut yang akan dibaca melalui file CSS.
Masih ada banyak hal yang bisa Anda lakukan hanya dengan menggunakan CSS dan HTML.
Mengatur jenis huruf
Apabila Anda tidak ingin menambahkan spesifikasi huruf di file CSS atau HTML, maka teks akan menampilkan jenis huruf default yang ada di komputer Anda (biasanya Times New Roman). Dengan menggunakan CSS, Anda dapat mengubah jenis huruf sesuai keinginan dan kebutuhan Anda.
#content p {font-family: Open Sans; font-size: 18px}
Ketika Anda menambahkan baris kode di atas ke style sheet (setelah #content), maka teks di paragraf akan menggunakan jenis huurf Open-Sans dan ukuran teks akan diatur ke 18px.
Menambahkan hyperlink
Pada saat membuat website, terkadang Anda harus terhubung ke website eksternal atau ke bagian berbeda yang ada di website Anda. Link, ketika diklik, yang akan mengarahkan Anda ke bagian berbeda yang ada di website Anda atau ke website eksternal disebut hyperlink. “Href” merujuk pada tujuan link dan tag <a> adalah link-nya. Berikut contohnya:
Tambahkan tag <a href=”https://www.google.com”>Go to Google</a> ini ke body website Anda. Link tersebut akan terlihat sebagai Go to Google dan ketika pengunjung mengkliknya. link itu akan mengarahkan mereka ke beranda utama Google.
Menambahkan gambar
Dengan HTML, sangatlah mudah menggunakan tag dan mengarahkannya ke gambar yang Anda miliki. Tag <img> memungkinkan Anda untuk menambahkan gambar.
<img src="cat.jpg" alt="Cute Cat">
Di antara tanda kutip, setelah serc, Anda dapat menambahkan lokasi gambar. Dalam hal ini, gambar harus tersimpan di dalam direktori yang sama dengan file indeks Anda. String setelah alt akan muncul di browser jika gambar tidak bisa diload.
Membuat tabel
Pengelolaan informasi terkadang menjadi suatu keharusan yang fungsional dalam HTML. Anda dapat melakukannya dengan menggunakan tabel. Tabel tersebut dibuat menggunakan tag <table>. Untuk menentukan header di dalam tabel, gunakan tag <th> (table header), sedangkan untuk baris, gunakan tag <tr> (table row). Sementara itu, gunakan tag <td> untuk membuat data tabel.
<table> <tr> <th>My Header 1</th> <th>My Header 2</th> <th>My Header 3</th> </tr> <tr> <td>Data 1 for header 1</td> <td>Data 1 for header 2</td> <td>Data 1 for header 3</td> </tr> <tr> <td>Data 2 for header 1</td> <td>Data 2 for header 2</td> <td>Data 2 for header 3</td> </tr> <tr> <td>Data 3 for header 1</td> <td>Data 3 for header 2</td> <td>Data 3 for header 3</td> </tr> </table>
Setelah kode di atas dimasukkan, tampilan website Anda akan menjadi seperti ini.
Dengan menggunakan HTML dan CSS, Anda memiliki berbagai kemungkinan untuk dilakukan sehingga tampilan website menjadi lebih profesional dan menarik. Kami baru saja merangkumkan hal-hal paling mendasar terkait cara membuat website dari nol. Anda pun bisa menemukan tutorial dan tool yang interaktif di Internet guna membantu Anda mempelajari coding:
codecademy.com
udemy.com
codeschool.com
w3schools.com
Kesimpulan
Melalui tutorial ini, kami ingin membantu para pemula yang ingin mencari tahu cara buat website sendiri menggunakan website builder, WordPress, atau bahkan cara membuat web dari awal. Apa pun metode yang Anda pilih nantinya, kami berharap semoga Anda dapat memanfaatkannya dengan baik. Kami juga berharap semoga Anda berhasil membuat dan mengelola website sendiri.
0 notes
Text
Laravel 6 Advanced - e6 - Pipelines - Laravel
Laravel 6 Advanced – e6 – Pipelines – Laravel
Laravel 6 Advanced – e6 – Pipelines – Laravel
[ad_1]
Pipeline is a design pattern specifically optimized to handle stepped changes to an object. Think of an assembly line, where each step is a pipe and by the end of the line, you have your transformed object. Let’s implement a filtering functionality using the pipeline pattern and Laravel.
For the best experience, follow along in our interactive…
View On WordPress
#container laravel#laravel#laravel 6#laravel 6 tutorial#laravel 6 what&039;s new#laravel advanced#laravel advanced project#laravel container#laravel filter products#laravel filters tutorial#laravel ioc container#laravel ioc service container#laravel pipe dream#laravel pipeline#laravel preview#laravel query builder tutorial#laravel query string route#laravel service container#laravel table filter#service container#service container laravel
0 notes
Text
Laravel Eloquent WHERE Like Query Example Tutorial
#artificial intelligence#Programming#php#machine learning#laravel#JavaScript#DataScience#MachineLearning#Analytics#AI#ML#Tech#Python#ReactJS#DataScientist#Coding#SQL#bot#Cloud#Typescript#Github#Data#BigData#DL#machinelearning
0 notes
Text
Laravel – Where Condition with Two Columns Example

The database query builder in Laravel provides a simple, intuitive interface for generating and performing database queries. It works with every one of Laravel's supported database systems and may be used to conduct most operations on the database in your application. In this tutorial, we'll look at an example of Laravel – Where Condition with Two Columns. We'll go over Laravel – Where Condition with Two Columns Example in detail and show you how to utilise it, as well as provide a demo if necessary. WhereColumn() was introduced in Laravel 5's Query Builder, allowing us to compare two columns using a simple where condition. This type of condition is something that we need to monitor on occasion. I have a simple "items" table in this sample code, and I only want the created at and updated at columns to equal. As a result, you can also look at laravel eloquent as follows:
1. Example
$data = DB::table("items") ->whereColumn('created_at','updated_at') ->get(); print_r($data);
2. Example
$data = DB::table("items") ->whereColumn('created_at','>','updated_at') ->get(); print_r($data); I hope you will like the content and it will help you to learn Laravel – Where Condition with Two Columns Example If you like this content, do share. Read the full article
0 notes
Text
Laravel Eloquent WHERE Like Query Example Tutorial
New Post has been published on https://www.codesolutionstuff.com/laravel-eloquent-where-like-query-example-tutorial/
Laravel Eloquent WHERE Like Query Example Tutorial
The database query builder in Laravel provides a simple, intuitive interface for generating and performing database queries. It works with every one of Laravel's supported database systems and may be used to conduct most operations on the database in your application. This article will teach
0 notes