#learnpress tutorial 2018
Text
WordPress LMS Plugin: Sell Online Courses With LearnPress (FREE)
New Post has been published on https://hititem.kr/wordpress-lms-plugin-sell-online-courses-with-learnpress-free/
WordPress LMS Plugin: Sell Online Courses With LearnPress (FREE)
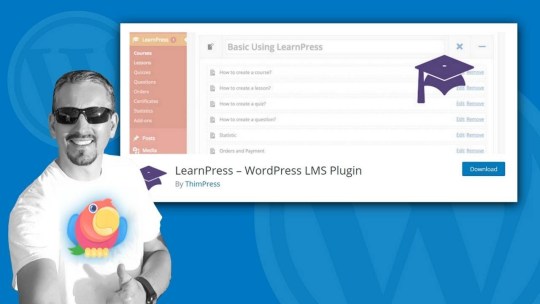
Hi, guys! Robert here from ThemeIsle.Com and in this video i’m gonna exhibit you easy methods to begin selling your online guides making use of the free LearnPress plugin for WordPress. Which you can put in force this option it in any WordPress website even utilizing the simple Twenty Seventeen theme that comes preinstalled whilst you launch your new WordPress internet site. For this tutorial, i’ll use the free Zerif Lite theme which which you can install immediately from the WordPress repository. Are you in a position? Let’s start with the plugin installation! Head to plugins to your dashboard then click on on Add new. Search for LearnPress and set up then spark off the first plugin lower back. There are extra plugins that can lengthen your online university functionalities like path Wishlist and direction review.I encourage you to install and spark off both due to the fact that they will supply a giant raise to your online business. Think free to put in some other related plugin to enable more functionalities for LearnPress. The plugin is mounted now and able to use so what’s next? Head to LearnPress/Settings. First, you have got to do the currency settings and tick in the event you wish to allow instructors registration. This choice will allow you to build a staff of instructors growing online guides for you. The subsequent tab in settings is the place you decide upon wich page will be the path page, the course category base, and course tag base.If your publications want evaluation before publishing tick this and if you wish to permit the modifying of released guides, be certain to tick this. Additional down, set the displayed courses limiting quantity within the archive, turn on and off the path thumbnail and set photograph dimensions in Single path and courses Pages. For instance, if your dimensions listed below are set to 600 px tall and large, like a square photograph for the guides page thumbnail here is the way it appears after setup. Continue with the one course permalink constitution atmosphere after which, for the ultimate thing, set the slug for path items like classes and quizzes. Store the settings and move to the next tab.You will have three option here. Profile, Quiz and come to be a instructor. I suggest you leave them as default however believe free to make your possess customized settings. Right here is how the "Profile page"… And "become a teacher" web page appears like as default. The only approach you could receive payments with this free version of the plugin is by way of PayPal. Head so as to add-ons and decide upon to pay for any extension that will combine extra fee choices as wanted. For now, I stick with the straightforward PayPal payment given that it’s handy to setup and requires no evolved knowledge about fee integrations. Just enter your principal PayPal email address and you’re just right to move. To permit trying out Sandbox Mode tick this box and enter your PayPal Sandbox electronic mail address then store all settings. You need to use Sandbox Mode to participate in the payment system checks without sending any money. The situation the place which you could set how your checkout method will work is right here. For less manual work, choose to auto join a person after they buy a path.Create a Checkout page or effortlessly set and edit the default one. That you may view the web page via clicking this hyperlink and when you want to do away with the default WordPress sidebar, click to edit the page and decide upon the entire-width web page template, if it can be available, from the drop-down list and hit replace. View the web page once more and you’ll see it in full width without sidebar. Certain, that you could go away the default sidebar on each page and use these fields to create a customized navigation menu or to promote other publications as good. The last tab is for communication settings by way of email and that you would be able to personalize messages utilising variables beneath each discipline and with the aid of getting into your possess type phrases. I go away content material as default right here for now. Now that settings are accomplished, let’s move to guides. Which you could set direction categories and tags here and use the Add New button to create a brand new path, of course. You must set a title and a specified description in the text editor beneath. This would be the title and description of your course with a view to be displayed on the only course web page.After you finish entering all details your next step is to enter as many sections as needed. Just set a reputation and hit the enter button for your keyboard then enter a name for the 2d section and many others except the last section of your path. Including lessons and quizzes to the course sections is effortless. Preserve in intellect that you are ready to switch each item to be a Quizz or a Lesson as good. Kind in a title for that object then hit the enter button on your keyboard again, and do the equal except the last one. Before I show you more about settings below, please maintain in mind that you are capable to drag and drop classes and sections around and that you can edit any lesson by clicking the pencil icon correct here. Further down, in the general Settings tab decide upon the duration of the course, highest pupils allowed and what number of scholars have taken this direction. Set how regularly the enrolled user can re-take this path and tick should you wish this path to be featured.The external hyperlink, for example, can be utilized to set an affiliate link for guides on udemy. When pressing the button to "buy this direction" your consumer shall be redirected to udemy by means of an affiliate link and you’ll earn commissions for every sale. You need to signal up for the Udemy affiliate program before using this option. In addition, set the direction outcome and passing situation value in the assessment tab and which you could prefer some advanced options too. Set a fee in your direction right here in the payment Settings tab and form in a minimize sale price if you desire. Schedule the sale rate date and end date right here or leave the sale price clean to remove reduction. For those who provide this direction away free of charge, uncheck the course fee field and hit the shop button. The last tab is where which you can set the author, admin in this case and this would be the default writer for each new course.If in case you have multiple authors which you could choose them from the drop-down record. After you conclude atmosphere all path important points, add the class and related tags then set a featured photograph and hit the store path blue button above. Subsequent, head to lessons for your LearnPress menu. In the end, we’re equipped so as to add content material in those classes and quizzes. Prefer to enable or disable the preview right here, to let your future pupils have an idea about what’s inside. Now, click on to edit your first lesson. You might be free to enter any type of content material you may also suppose for that particular lesson like youtube movies, graphics, text, audio and extra utilising plugins in order to permit you to create customized content material in the textual content editor.Before publishing a lesson, do not forget to set the length then tick if you wish to allow the preview. Once more, that you could permit or disable that in a while making use of the swap in the classes record. Now, let’s examine how you can add quizzes to the top of each and every section or to the end of the direction. This can be a excellent method to let pupils know if they’ve reached a new stage of competencies after completing a piece. Head to Quizzes in LearnPress then add a new quiz or edit the present ones. Enter a description in textual content editor beneath the title then transfer further down and begin adding questions. After you kind in the query, press enter and decide upon answers from the drop-down. That you may decide on authentic or False, Single choice or Multi alternative. Let’s prefer the one alternative for this one then edit the answer with multiple colours like yellow, inexperienced and blue. Tick wich reply is correct then hit replace. The ultimate quiz is able and you’re going to see it in action afterward as a pupil.The direction is finished, lessons are stuffed with content and quizzes are set so, let’s take a preview of this demo direction. Appears best, isn’t it? If you want to make it appear distinct, I recommend you determine out our free and top rate issues in the description field under nd choose your desired one. Now that you could begin selling your first on-line path. Before moving on, I recommend you be certain that "anybody can register" as participant operate is enabled in your normal settings of your dashboard. Let’s see it in motion and the way it works as a scholar. Head to the direction web page and hit the enroll button below the outline. Create a brand new account and assess your e-mail in your username and use the link in that electronic mail to set a password.Now, you are capable to log in and enroll in that direction without cost. Begin with the first lesson and click on complete whenever you suppose you are in a position then transfer to the following lesson. You will see the development of your finding out level within the left upper nook of the display represented in percent of the complete path. The final lesson on this section is truely a quiz, so let’s have a look at how it works. Click start Quiz and as soon as the loading of questions is finished tick the reply you may do not forget correct then click on subsequent or conclude Quiz. Click good enough within the popup message then you’ll be equipped to see detailed know-how about your outcome. As soon as the course is accomplished, I motivate you to let students comprehend that they are able to write a assessment and look for different publications to be saved to their wish record for further finding out.I hope that this tutorial used to be worthwhile ample and i blanketed every detail about the LearPress WordPress plugin. If now not, please let me understand your questions in comments under this video. I’d be glad to reply all of them. .

#building a course website with wordpress#create online course wordpress#learn press#learning management system wordpress#learnpress#learnpress - wordpress lms plugin#learnpress tutorial#learnpress tutorial 2018#learnpress wordpress#learnpress wordpress plugin#lms wordpress#lms wordpress plugin#wordpress course plugin#wordpress lms#wordpress lms plugin#wordpress lms plugin free#wordpress lms website#wordpress online course plugin
0 notes
Photo

[F4LT] Learnpress Wordpress LMS Plugin Tutorial
http://www.tradingprotoolsnews.com/2018/08/07/f4lt-learnpress-wordpress-lms-plugin-tutorial/
The course is a detailed and easy tutorial to get you all setup and going with the use of Learnpress LMS plugin. It is a free and simple plugin to help you create an E-learning courses website easily like Udemy. The tutorial guides you with configuration of the plugin, creation of lessons, quizzes and courses and finally guides you on how to sell your courses. It also shows how you could configure certain additional items like the course layouts and featured images.
0 notes
Last Seen Blogs

jeffcentral
Jeff + Company

rianldavies
RLD

cherryblossomi7353
zabawki kawaii

cherr1-b0n-b0n
Childish Coffee Addict™

generic-whumperz
den of dread