#leatherpaints
Photo

#glittereyes #glitterhair #lavendermood🌸 #wallpaints #leatherpaints #blackcanvas #glitterpaints (at Michael Feldman Art Gallery) https://www.instagram.com/p/CqR7H0LuYWi/?igshid=NGJjMDIxMWI=
0 notes
Text


AVAILABLE!!
New bushcraft chefs knife! $400 shipped in the USA! Link in my bio for more info. Thanks everyone!!
#lunarlightforge#handforged#handmade#hand forged#handcrafted#hand made#viking#vikings#knife#leatherwork#chefsknife#outdoorcooking#leatherpainting#bushcraftgear#bushcraftknife
17 notes
·
View notes
Text
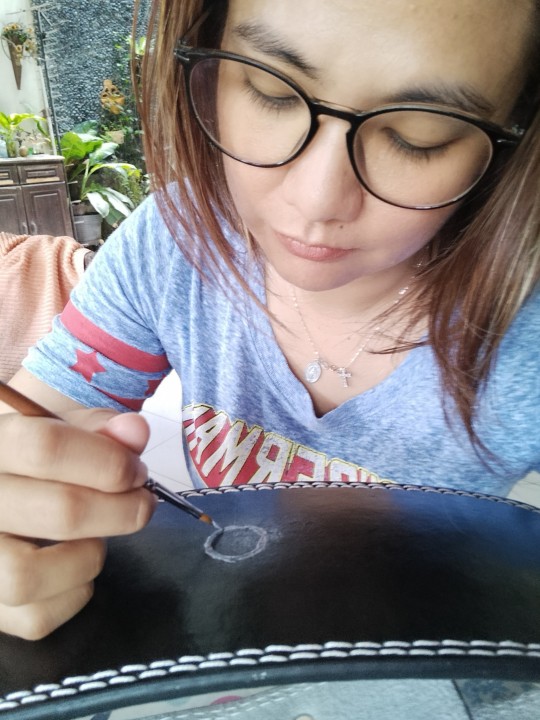
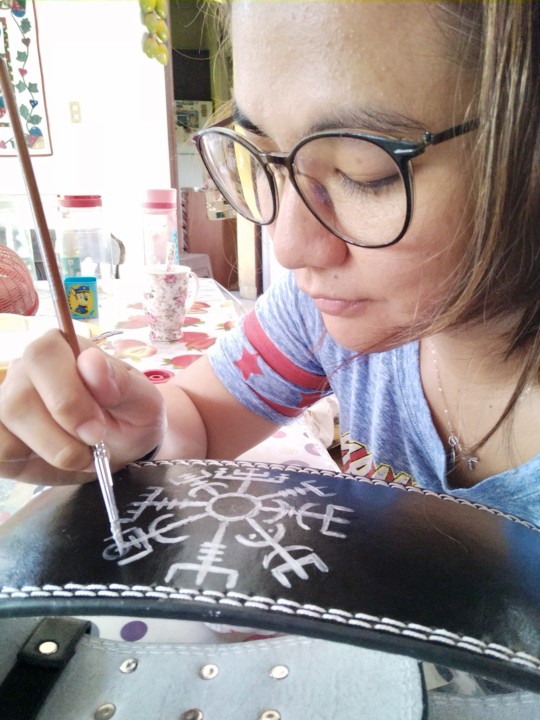
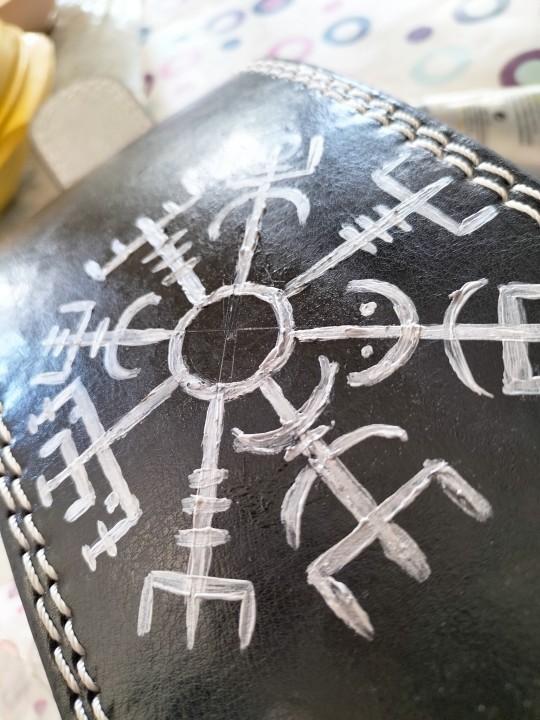
Custom Gym Belt
Hand painted by me.
Using Faber Castell Acrylic
3 notes
·
View notes
Text
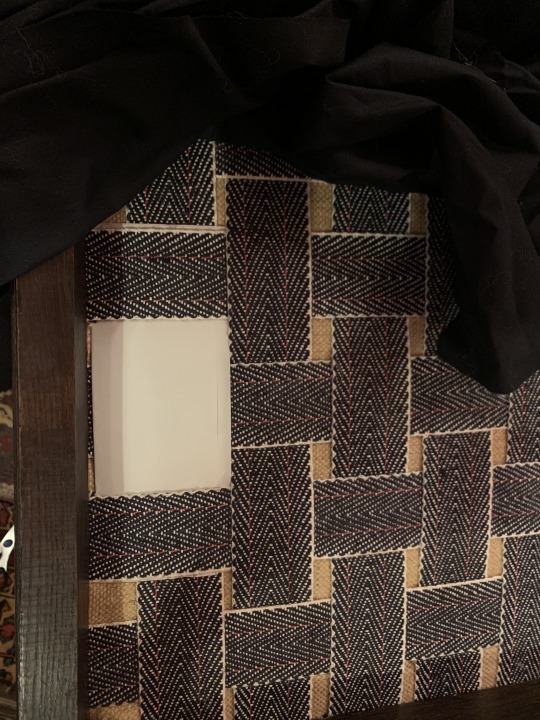
The antique chair restoration project—part 7
The finished paint job is looking good! I may do some more shading after I’ve assembled everything, but I think it will look quite close to the chair back with a coat of wax polish on it (the only real difference now is the level of sheen, because the leather paint has a satin finish).
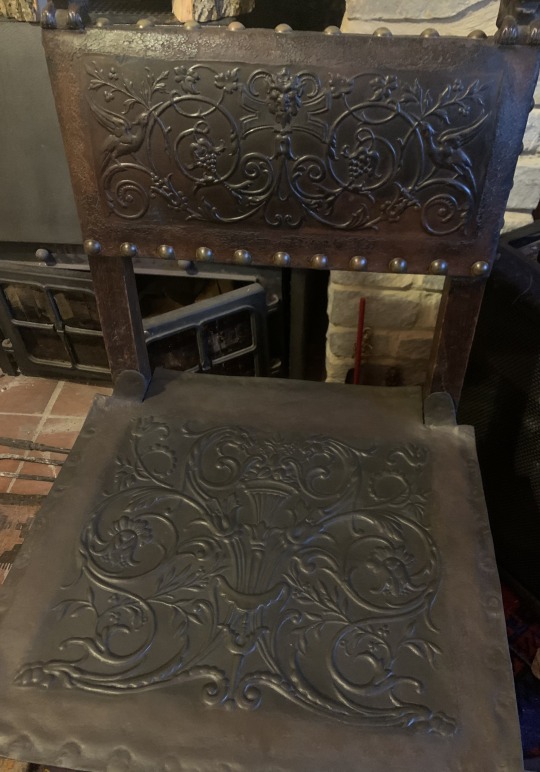
#Antiques#AntiqueChair#AntiqueFurniture#restoration#AntiqueRestoration#LeatherChair#EmbossedLeather#AntiqueChairRestorationProject#LeatherRepair#LeatherDye#LeatherPaint#AntiqueFinish
2 notes
·
View notes
Text
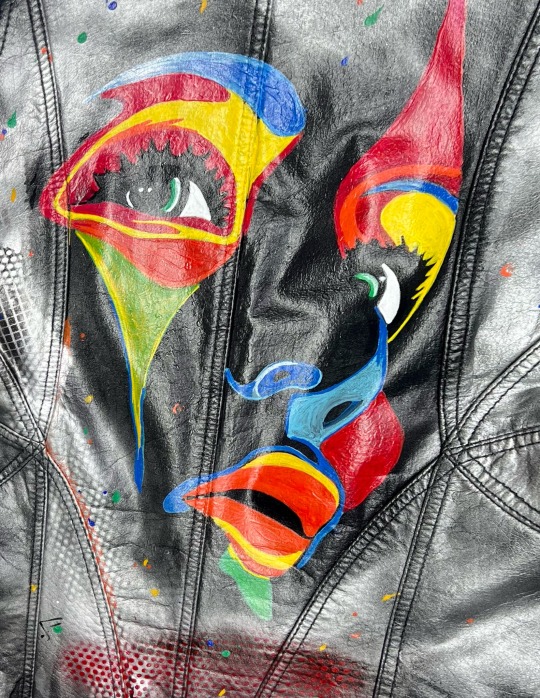
Leather Jacket acrylic
1 note
·
View note
Text

“Krishna with Gopikas in madhuban” Painting based on traditional leather puppetry art known as Tholu Bommalata.
Beauty of Tholu bommalata is enhanced when painting is backlit using illuminated panel . Light can pass through this leather base, cuts and pinholes on it.
.
Shop online at Shilphaat.com
Category: Decor & utilities
Sub-category: wall accessories
https://shilphaat.com/product/madhuban-tholu-bommalata-painting/
.
0 notes
Photo
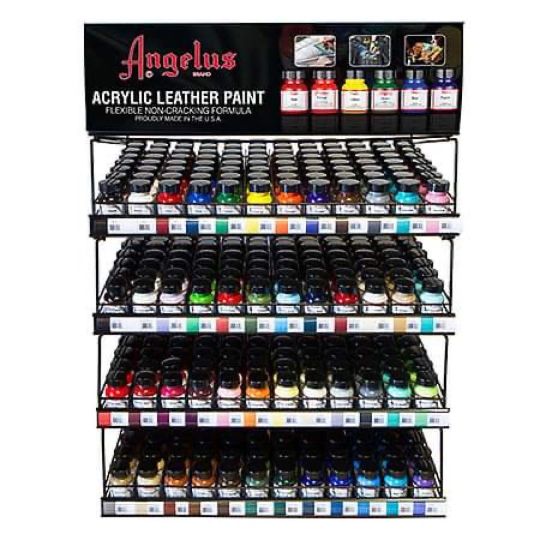
I’m so excited to tell you all that by this time next week we will have a full line of angelus leather paint in stock! #angeluspaint #leatherpaint #comingsoon #cookscrafts (at Cook's Arts & Crafts Shoppe) https://www.instagram.com/p/CkADdtGtNvQ/?igshid=NGJjMDIxMWI=
0 notes
Text
0 notes

Photo

#mixedmedium #leatherpaints (at Life Drawing Barcelona) https://www.instagram.com/p/Cps3hvAvjiU/?igshid=NGJjMDIxMWI=
0 notes
Video
Let’s get this in a run #music #calical_official #leatherpaints #carlifestyle #tattoodesigns #skateboard #tattoo #tattoos #tattoosleeve #artistsoninstagram #artesanato #losangeles #losangelesart #creat #beauty #skateboardingisfun #skateboards #skaterboy #skategirl #pen #microsoftsurface #microsoft #microsoft # (at Los Angeles, California) https://www.instagram.com/p/BymZ6sxAHx5/?igshid=1l838k7env26v
#music#calical_official#leatherpaints#carlifestyle#tattoodesigns#skateboard#tattoo#tattoos#tattoosleeve#artistsoninstagram#artesanato#losangeles#losangelesart#creat#beauty#skateboardingisfun#skateboards#skaterboy#skategirl#pen#microsoftsurface#microsoft
2 notes
·
View notes
Text
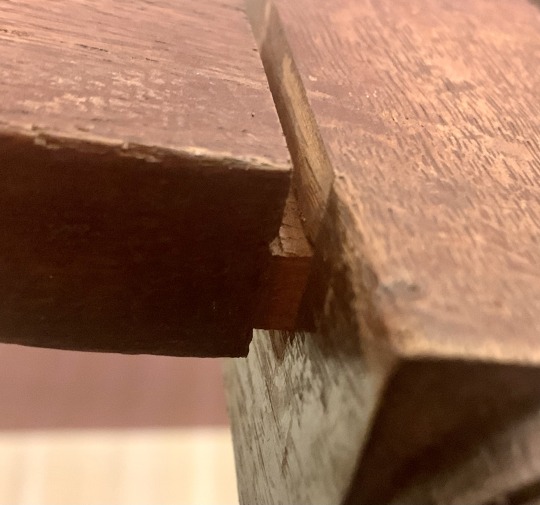
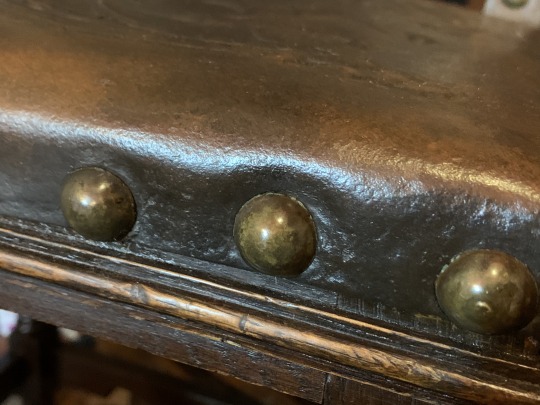
The antique chair restoration project—part 8
So, this is it! I think it’s finally done at last.
I’ve been working on it, but not posting about it, so let me bring this series up to date!
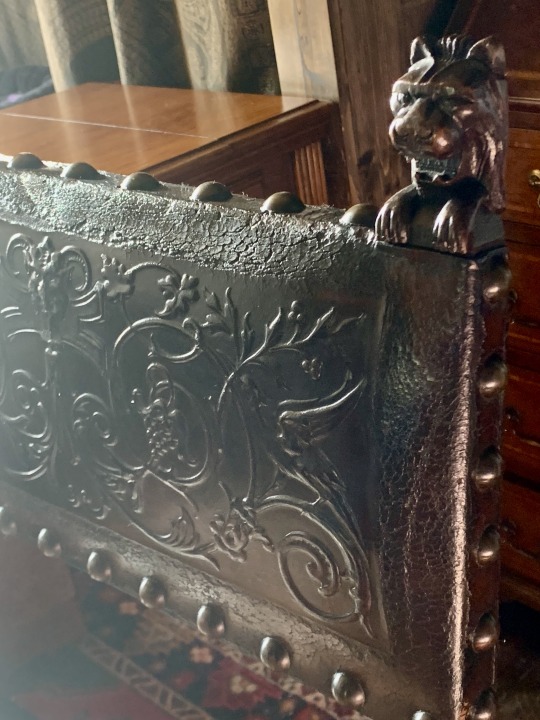
There were a couple of ever so slightly loose joints in the frame, so I whacked them apart with a mallet just enough to get a little bit of hide glue into them. Probably needn’t have bothered, but IME a loose joint just gets looser, and then loosens other things, so may as well nip it in the bud, right? Yeah. Isn’t this a gorgeous bit of joinery? I doubt these tight-fitting joints even needed glue to begin with, but after 150 years (at least…I’m not sure of age, but I’m going with Victorian for my best guess), wood can be expected to shrink a little.

I gave it a few coats of shellac, followed by some paste wax polish, because the original finish was badly worn to nonexistent in places and I wanted to protect the wood. Obviously I left the lovely patina alone though! I did have to glue a few splintery bits back down, and fill a few woodworm and knot holes, but not much work was needed on the frame (apart from the tacking rail, that is).
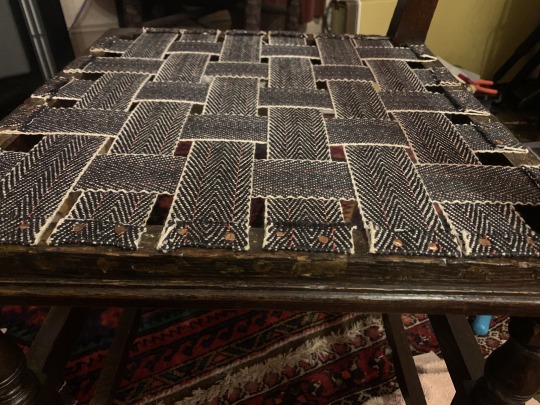
The upholstery was straightforward. I would have liked to use tacks throughout to stay in keeping with the era in which the chair was made, but the tacking rail was in pretty bad shape, and is less than an inch thick (much of that being riddled with holes from previous tacks). I filled all the damage, but decided to do the webbing with tacks and the rest with staples to be kinder and gentler to the frame (much smaller holes and fewer and less violent impacts).
Webbing. (I used copper tacks to attach it, just because removing the incredibly rusty steel ones was such a royal pain in the arse, and I wouldn’t knowingly inflict that on any future person!) Obviously the quality control department had to be involved for this.

This is overkill, I know, but I do not want this seat to sag and cause the leather to split again! That would really piss me off. So, overkill it is! It’s not going anywhere.
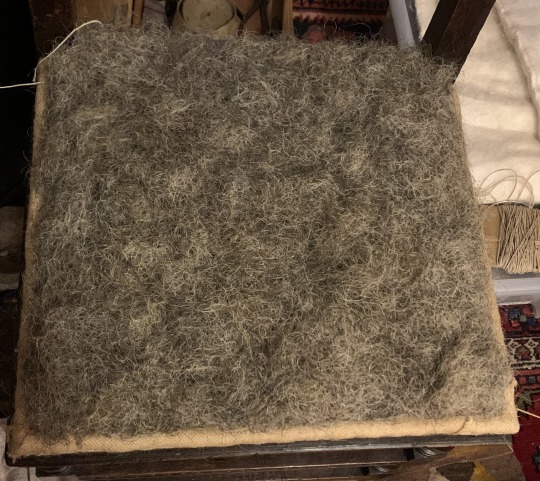
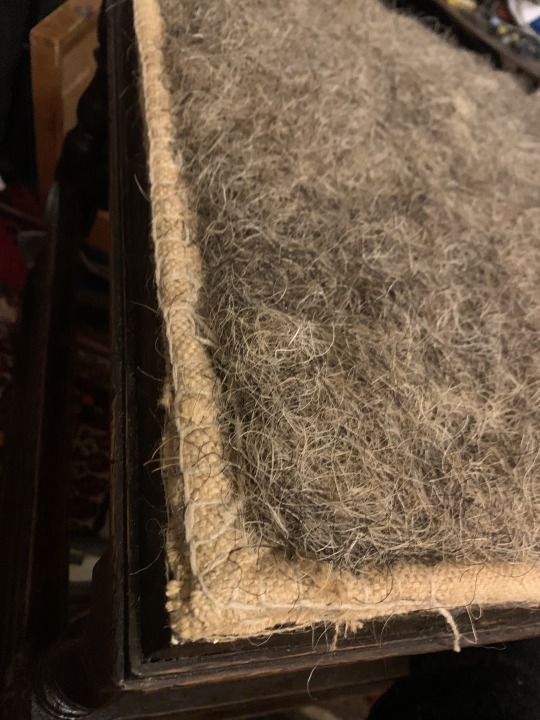
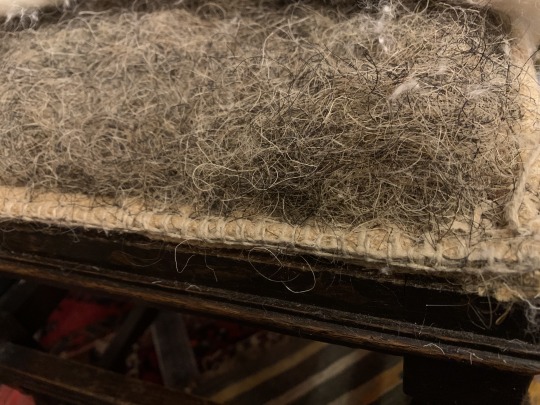
Here’s the hessian foundation. This seat is really shallow, and I’m constrained to the original proportions by the leather cover, so I’m just going to do one layer of hessian with an integral edge roll (stuffed with horsehair), and then stitch around that to create a very firm and defined square edge profile.

I forgot to take a photo when I was sewing in the bridle loops to hold the hair, but I did take one after putting in the horsehair:
Edge stitching:
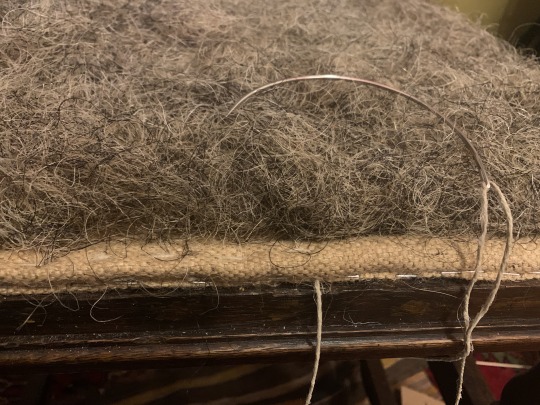
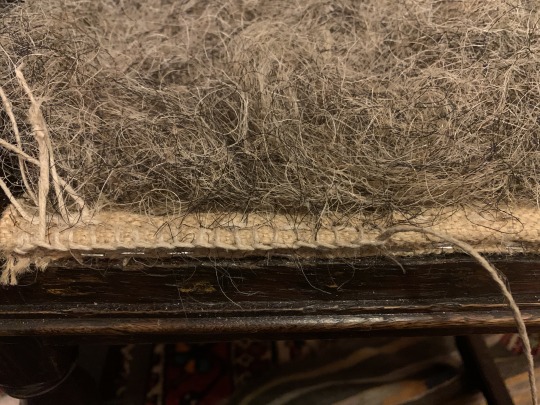
I think I ended up stitching around it three times.
Then some cotton and wool wadding:
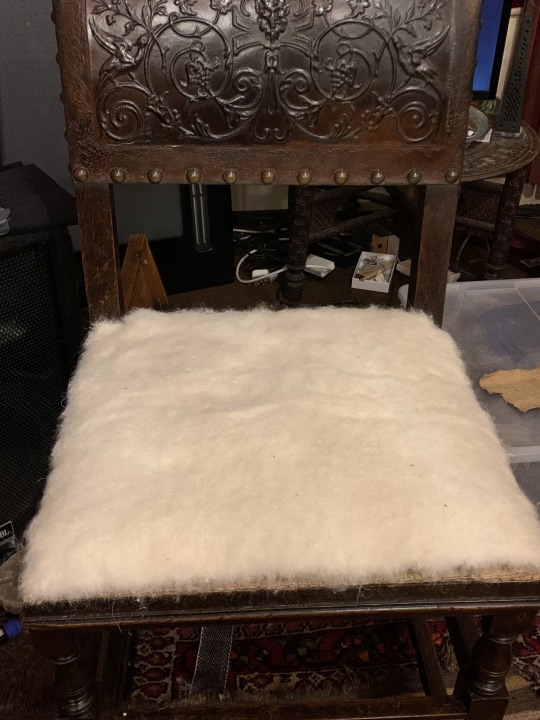
Then calico stretched over tightly:
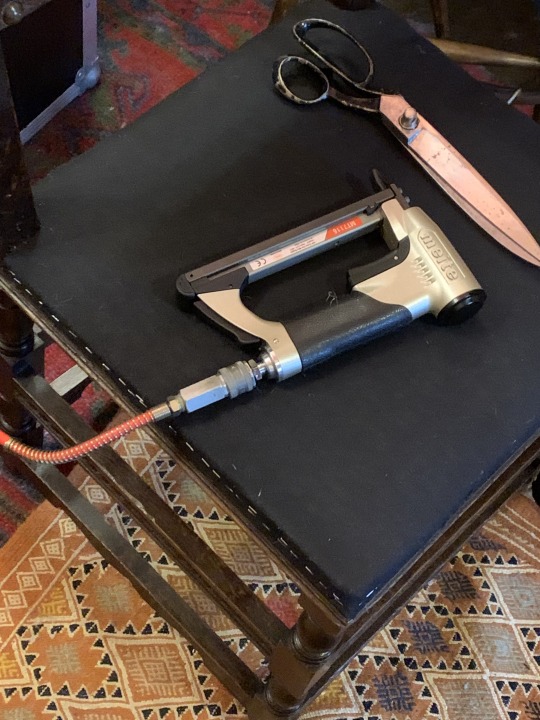
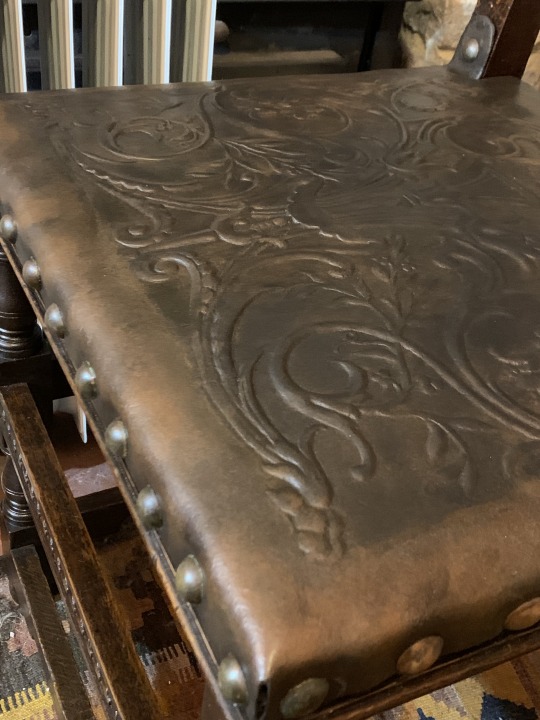
And finally the leather cover:

I fastened it down first with a few tacks, and then started to put in the brass nails. Unfortunately more of them broke in the process (only the heads are brass, and the steel parts were badly rusted and quite fragile). So I found some in my stash that were close to the same size (there were actually two different kinds on it, so who knows what is original anyway), and set about faux-patinating them with vinegar and salt so they didn’t look silly next to the old ones. They’re not as dark as I’d like, but I’m in a hurry to finish this up and don’t want to have to order any specialist patina solution for brass (the ones I have are for silver, and are not very effective on brass). It’ll be fine. They’ll continue to darken with time.

I did a bit more faux painting to perfect the look of the seat:
I couldn’t resist trying it out at this point. The seat is very comfortable and very firm! No sagging is remotely likely for the foreseeable future.
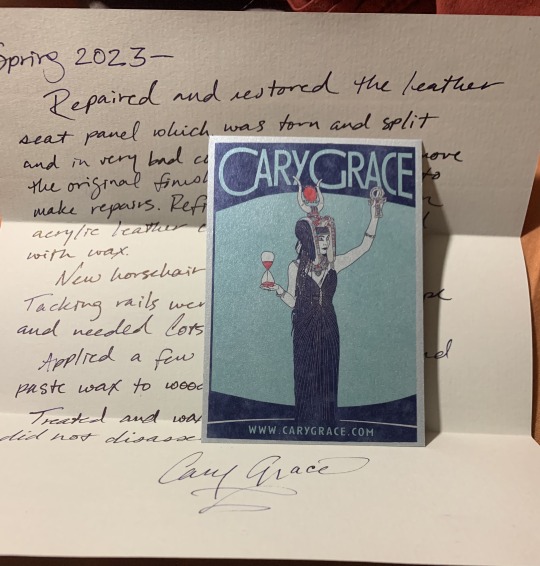
I wrote up an account of what I did, and tucked it into the webbing underneath with one of my cards, in case a future person takes the seat apart again someday.
Finally the bottoming cloth went on.
I did a bit more painting on the seat once it was in place, to emphasise areas of “wear” and “fading” and make it look more authentic.
Next I gave the leather a few coats of Renaissance Wax to polish it and protect it.
A few of the cracks have become visible again now that the leather seat cover has been under tension for a couple days, but it is light surface cracking only, and I’m confident my repairs are structurally sound, strong, and will be fine. I will let it all settle for a few months and then re-fill the surface cracks with some flexible filler to make them invisible again, but there’s no point in doing that until the newly stretched leather has settled in for a while and been used (sat on).
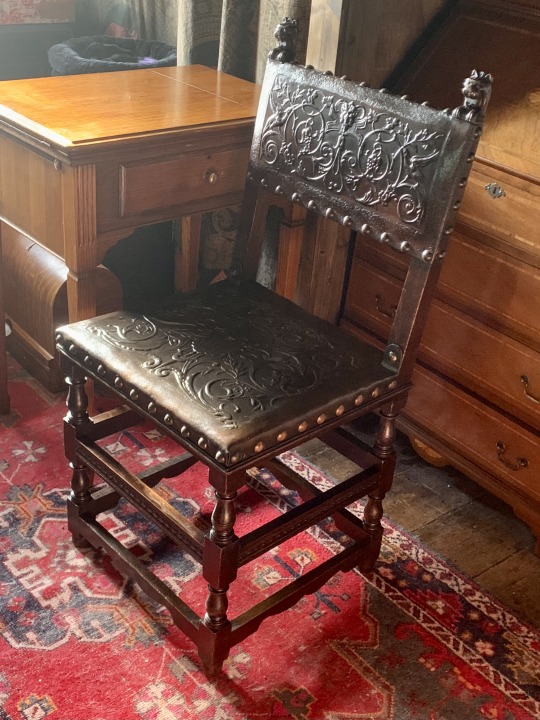

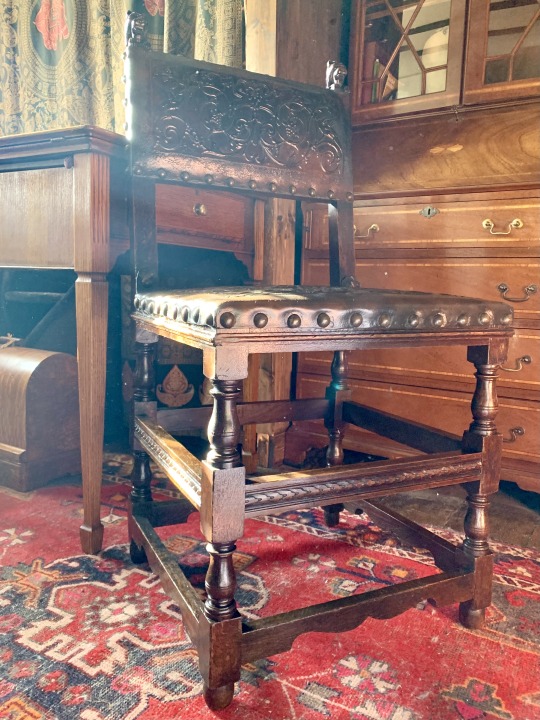
All in all, I’m very pleased with the result!
#Antiques#AntiqueChair#AntiqueFurniture#restoration#AntiqueRestoration#LeatherChair#EmbossedLeather#AntiqueChairRestorationProject#LeatherRepair#LeatherDye#LeatherPaint#AntiqueFinish#LeatherAndOakChair#upholstery#TraditionalUpholstery#horsehair
1 note
·
View note
Text
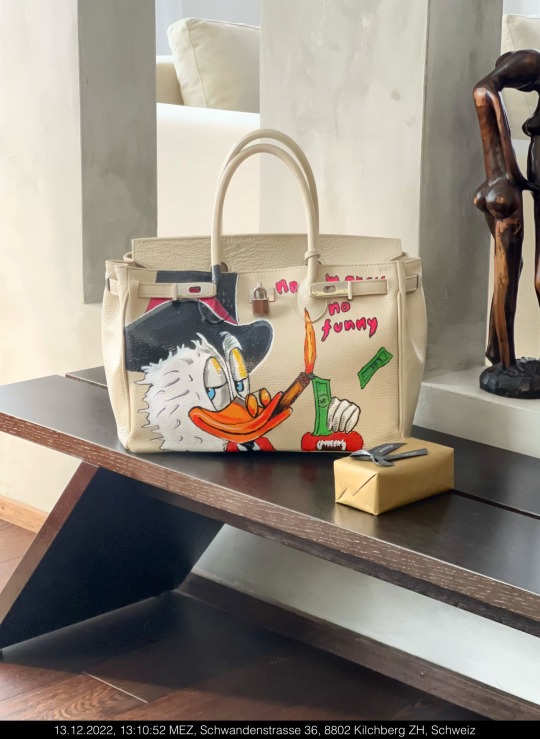
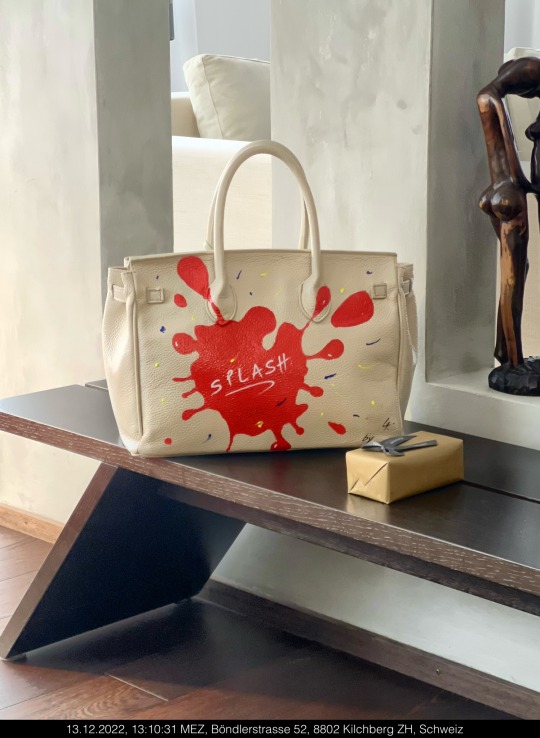

Acrylics meets Birkin
1 note
·
View note
Text

Ganesha and Mushak Tholu Bommalata Painting.
“Lord Ganesha with his Mushak” Painting based on traditional leather puppetry art known as Tholu bommalata.
Beauty of Tholu bommalata is enhanced when painting is backlit using illuminated panel . Light can pass through its leather base and pinholes on it.
Shop online at Shilphaat.com
Category: Decor & utilities
Sub-category: wall accessories
https://shilphaat.com/product/ganesha-and-mushak-tholu-bommalata-painting/
0 notes
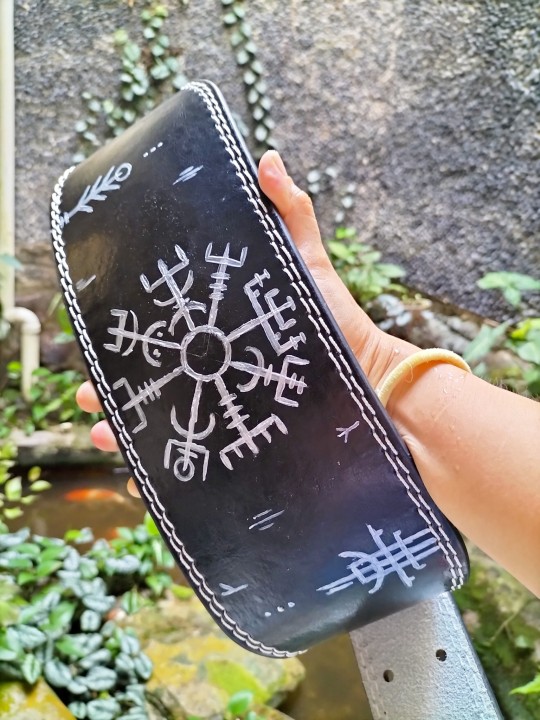
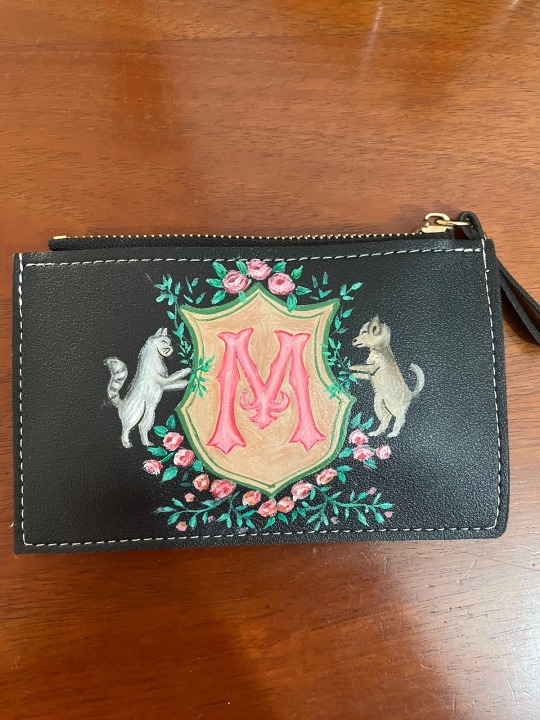
Photo
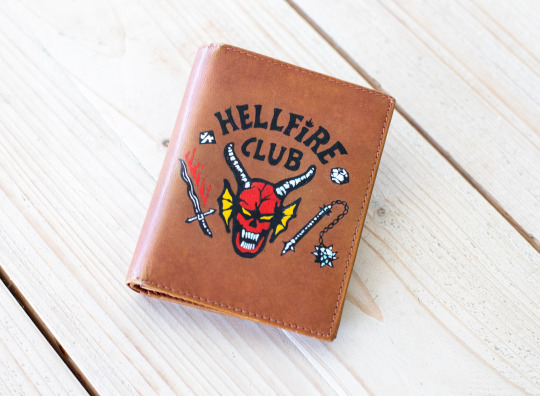
custom painted vintage wallet, made as a birthday gift
14 notes
·
View notes
Text


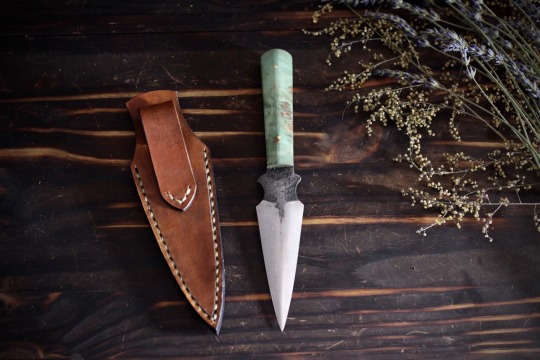

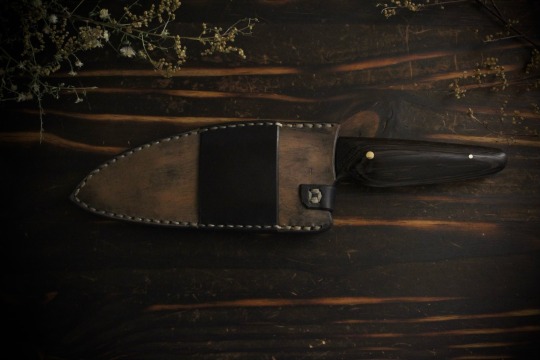
This custom edc dagger with stabilized wood handle is done! One similar to this is $200 shipped in the USA! If you’d like one with a basic wood handle and basic sheath it would be $165 shipped in the USA. Send me a dm for more info. Thank you all!!
#lunarlightforge#handforged#handmade#hand forged#handcrafted#hand made#viking#vikings#etsy#etsyshop#dagger#cottagecore#naturecore#wildflowers#leatherwork#leatherpaint
803 notes
·
View notes
Last Seen Blogs

clicherizar
Unfortunate Soul
clicherizar
Unfortunate Soul

harborstationhottie
#usergirlwonder

kiboriguma-blog
kiborigima

akhil-4855
Untitled