#lora arduino example
Explore tagged Tumblr posts
Visit Tumblr Blog
Explore Tumblr blogs with no restrictions, modern design and the best experience.
Last Seen Tumblr Blogs


Fun Fact
Total funding amounts to $125.3M.
Text
Transferência de Arquivos via LoRa
Um projeto que venho fazendo há alguns meses e que muitas pessoas estavam interessadas em transmitir imagens e agora será possível, mas claro, respeitando as limitações.
Transferência da arquivos via LoRa é possível assim como qualquer outra modulação, mas existem desafios particulares nessa tarefa que em outras modulações podem ser mais fáceis. Sobre a modulação LoRa Antes mesmo de partimos para a transferência de arquivos via LoRa, é preciso entender que o LoRa não foi feito para esse tipo de aplicação e sim para dispositivos IoT, mesmo embora tenha uma taxa…

View On WordPress
#arduino lora antenna#biblioteca lora arduino#esp32 lora arduino#esp32 lora arduino library#lora and arduino#lora arduino#lora arduino adafruit#lora arduino board#lora arduino example#lora arduino library#lora arduino projects#lora transmitter and receiver arduino#module lora arduino#multiple lora arduino#rfm9x lora arduino
0 notes
Text
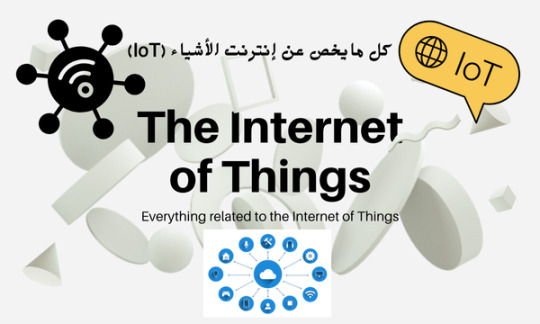
Introduction to Internet of Things (IoT) Programming

The Internet of Things (IoT) is revolutionizing the way we interact with devices, allowing everyday objects to connect to the internet and share data. From smart homes and wearables to industrial automation, IoT is reshaping the world. In this post, we'll dive into the basics of IoT programming and how you can start creating your own smart applications.
What is IoT?
IoT refers to a network of physical devices embedded with sensors, software, and other technologies to connect and exchange data with other devices and systems over the internet.
Key Components of IoT Systems
Devices/Sensors: Physical components that collect data (e.g., temperature sensors, motion detectors).
Connectivity: Wi-Fi, Bluetooth, Zigbee, LoRa, or cellular networks to transmit data.
Data Processing: Microcontrollers or cloud services process the incoming data.
User Interface: Web/mobile applications to monitor and control devices.
Popular IoT Hardware Platforms
Arduino: An open-source electronics platform based on simple microcontrollers.
Raspberry Pi: A small, affordable computer ideal for more powerful IoT applications.
ESP8266/ESP32: Low-cost Wi-Fi-enabled microchips widely used in IoT projects.
Languages Used in IoT Programming
C/C++: Commonly used for low-level programming on microcontrollers like Arduino.
Python: Popular for Raspberry Pi and edge computing due to its simplicity.
JavaScript (Node.js): Useful for IoT dashboards and server-side applications.
MicroPython: A lightweight version of Python optimized for microcontrollers.
Example: Blinking an LED with Arduino
void setup() { pinMode(13, OUTPUT); // Set digital pin 13 as output } void loop() { digitalWrite(13, HIGH); // Turn the LED on delay(1000); // Wait for 1 second digitalWrite(13, LOW); // Turn the LED off delay(1000); // Wait for 1 second }
IoT Data Handling and Cloud Integration
Once your devices are collecting data, you'll need to store and analyze it. Here are some common platforms:
ThingSpeak: A simple platform for IoT data logging and visualization.
Firebase: Real-time database ideal for mobile IoT applications.
AWS IoT Core: Scalable cloud service for managing IoT devices.
MQTT Protocol: Lightweight messaging protocol used for IoT device communication.
Popular IoT Projects to Try
Smart door lock controlled by a mobile app
Home temperature monitor with alerts
Motion detection security camera
Plant watering system based on soil moisture levels
Fitness tracker using accelerometers
Best Practices for IoT Programming
Use lightweight protocols and efficient code to conserve resources.
Secure your devices with strong authentication and encryption.
Plan for over-the-air (OTA) updates to patch software bugs.
Reduce power consumption for battery-powered devices.
Test in real-world conditions to ensure reliability.
Conclusion
IoT programming opens the door to endless possibilities for innovation and automation. Whether you're just blinking LEDs or building a smart home system, learning IoT programming will give you the skills to bring physical objects to life through code. Start simple, keep exploring, and gradually build smarter and more connected projects.
0 notes
Text
The comprehensive guide to the Internet of Things and remote control
The Comprehensive Guide to the Internet of Things and Remote Control
Table of Contents Chapter 1: Introduction to the Internet of Things (IoT) Definition of the Internet of Things. The evolution of the concept of the Internet of Things. How does the Internet of Things work? IoT applications in daily life. Chapter 2: Components of the Internet of Things Smart devices (sensors, actuators, and controllers). Communication and networking in the Internet of Things (Wi-Fi, Bluetooth, LoRa, 5G). Software and cloud platforms (artificial intelligence and data analysis). Protocols used in the Internet of Things (MQTT, CoAP). Chapter 3: Communication technologies in the Internet of Things Overview of communication technologies. The difference between local and wide area networks (LAN vs WAN). Low-power communication networks (LPWAN). Challenges of communication and reliability in the Internet of Things. Chapter 4: Smart home automation using the Internet of Things Definition of the smart home. Smart home appliances (smart lights, smart locks, thermostats). Virtual assistant systems (such as Alexa and Google Assistant). Smart home security and monitoring solutions. Chapter 5: Internet of Things in industrial sectors Smart manufacturing (predictive maintenance, smart robots). Smart agriculture (agricultural sensors, smart irrigation systems). Smart cities (traffic management, smart ecosystems). Smart healthcare (remote monitoring, wearable devices). Chapter 6: Security and privacy in the Internet of Things Potential security risks in the Internet of Things. Privacy and data protection challenges. Security protocols and technologies (encryption, identity management). How to address security threats in smart systems. Chapter 7: Artificial intelligence and the Internet of Things How does artificial intelligence complement the Internet of Things? Predictive analysis and intelligent decision making. Machine learning applications in the Internet of Things. Examples of artificial intelligence in smart systems. Chapter 8: The future of the Internet of Things Future market developments and trends. 5G Internet of Things and its role in supporting developments. Future challenges and new opportunities. How will the Internet of Things change our daily lives? Chapter 9: Examples and Case Studies Practical examples of the use of IoT in various fields. Case studies of the most popular IoT applications (eg: Nest, Tesla, Philips Hue). Utilizing the Internet of Things to improve efficiency and productivity. Chapter 10: How to get started with the Internet of Things? Available tools and platforms for developing IoT solutions (Raspberry Pi, Arduino). Building simple projects using the Internet of Things.
#Internet of Things (IoT) guide - دليل إنترنت الأشياء#Smart home automation - أتمتة المنازل الذكية#IoT for remote control - إنترنت الأشياء للتحكم عن بعد#Connected devices - الأجهزة المتصلة#IoT applications - تطبيقات إنترنت الأشياء#Smart home technology - تقنية المنازل الذكية#Home automation solutions - حلول أتمتة المنازل#Remote monitoring - المراقبة عن بعد#IoT security - أمان إنترنت الأشياء#IoT and smart devices - إنترنت الأشياء والأجهزة الذكية#Future of IoT - مستقبل إنترنت الأشياء#Smart home gadgets - أدوات المنزل الذكي#Wireless control systems - أنظمة التحكم اللاسلكي#IoT for energy efficiency - إنترنت الأشياء لكفاءة الطاقة#IoT in everyday life - إنترنت الأشياء في الحياة اليومية
0 notes
Text
A farming Arduino
Arduino Pro redefines smart agriculture with the new Edge Control
_
Experience the intelligent future of outdoor environments Arduino Pro announces the launch of the Arduino Edge Control, a smart remote solution for monitoring and control, designed to deploy AI on the edge. Optimized for outdoor environments and easy to place anywhere, it is ideal for precision farming, smart agriculture, and any application requiring intelligent control in isolated locations.The Arduino Edge Control can be expanded with 2G, 3G, CatM1, or NB-IoT modems, Lora, Sigfox, Wi-Fi, or Bluetooth connectivity; it can be managed remotely via the Arduino Cloud or third-party solutions and powered via solar panels. The option to power the device via solar panels as well as the range of connectivity options means the Edge Control can be used in the most remote of locations and monitored from afar. The Arduino Edge Control is able to connect sensors, provide real-time monitoring and automatically drive actuators – such as latching valves commonly used in agriculture – reducing production-related risks. Through this advanced solution, smart agriculture sensors collect data about weather conditions, soil quality, crop growth, and more. The data is then sent to the Arduino IoT Cloud, where valuable analytics can be retained to support business at different levels – enabling better decisions about equipment efficiency, plant growth, and staff productivity, or even automating processes such as fertilization, irrigation, and pest control to boost the quality of crops and minimize human error. During product development, Arduino partnered with Challenge Agriculture to integrate the Edge Control into Irriduo®, the French company's new smart irrigation solution and water management application, the first in a new generation of water management products. Combining Challenge Agriculture's R2-DX with the Arduino Edge Control , Arduino MKR GSM1400 for connectivity and firmware, and including access to a dedicated cloud, Irriduo® takes a closer look at the soil to actively tell farmers how to achieve the best yield while minimizing water consumption and maximizing soil preservation. The inherent nature of arable farming sets its own unique set of challenges: remote locations, changeable soil conditions based on field topography, and specific crop rotation schedules to mention but a few. Challenge Agriculture and Arduino worked to create an optimal solution for these needs, with 6 sensors per field providing accurate readings for 6 crop cycles of 3-4 months each (i.e. 4,000 measurements), or for as long as 4 years in the case of perennial crops. Constant sensing and monitoring are only half the story - by automating irrigation controls, Irriduo® also reacts in real-time to changing conditions. This is especially important in regions suffering from droughts, where strict regulations are enforced to limit the volume of water that can be used and the time of day/night irrigation can be activated. Commenting on the launch, Arduino’s CEO Fabio Violante said, “People are constantly needing to solve everyday problems and improve productivity through their own creativity and ingenuity, and we truly believe they can do this with the Edge Control. We are ready to help companies take the next step in agricultural automation, providing smart irrigation solutions and the ability to apply machine learning on the edge to optimize crop production and increase yields.” Xavier Eftimakis, Founder & CEO at Challenge Agriculture, added, “The Edge Control allows many cost-effective solutions for multiple smart agriculture projects.” The Edge Control’s robust design and solar-powered capabilities mean that it is suited for controlling applications in any outdoor environment. For example, it can be used on construction sites and real estate to monitor and automate access control; moreover, swimming pool maintenance and cleaning companies could take advantage of its capabilities to change their service offering by monitoring and controlling the condition of the pool water remotely. As usual, it is expected that countless ingenious solutions will be provided by the Arduino community using this technology. The Arduino Edge Control is available for €166/US$199 on the Arduino Store. For more information, please visit: arduino.cc/pro
About Arduino Arduino is an open-source hardware, software, and content platform with a worldwide community of around 30 million active users. It has powered thousands of projects, from everyday objects to satellites and complex scientific instruments. This success has been made possible by combining a wide variety of electronic boards, easy-to-use tools, a collaborative community, and practical project examples to suit all levels. Press contact Luisa Castiglioni [email protected]
39 notes
·
View notes
Text
[Media] TTGO T-Beam ESP32 LoRa
TTGO T-Beam ESP32 LoRa The TTGO T-Beam is a long-range wireless capable board supporting LoRa, built around a dual-core ESP32 chip with 4MB of SPI flash onboard, providing both Wi-Fi and Bluetooth LE. The board's LoRa support comes in three different variants, operating at 433MHz, 868MHz, and 915MHz depending on region, with an included SMA antenna. Location tracking is provided by the onboard u-blox NEO-6M GPS module with ceramic antenna, and the board offers 26-pin headers with GPIO, ADC, VP/VN, DAC, touch, SPI, I2C, UART, 2דLoRa” pin, and power signals (5V/3.3V/GND). The board can be programmed using the Arduino development environment, and example code shows you how to both send and receive data via LoRa. The board also includes a battery holder for a 18650 Li-Ion cell. Repository: https://github.com/Xinyuan-LilyGO/LilyGo-LoRa-Series Buy online: 🛒 https://alii.pub/6mgzin 🛒 https://amzn.to/3Z2WUh4 #radio #lora #mesh #ESP32

0 notes
Text
Sense the Future of Smart Agriculture with Arduino Edge Control
The Arduino Pro lineup continues to grow with the introduction of the new Arduino Edge Control. This is a remote monitoring and control solution optimized for outdoor environments. Easy deployment makes it suitable for smart agriculture, precision farming, and other intelligent control applications in remote locations.
youtube
Featuring built-in Bluetooth, Arduino MKR boards can expand connectivity with 2G/3G/CatM1/NB-IoT modems, LoRa®, Sigfox and WiFi. With solar power capabilities you can place it anywhere while leveraging AI on the edge. Once installed in the field, it can then be managed remotely using Arduino IoT Cloud (or other services).
Real-Time Monitoring with Edge Control Sensors
You can also connect sensors, provide real-time monitoring, and drive actuators — commonly used in agriculture — thereby reducing production-related risks.
Particularly aimed at smart agriculture, the sensors can collect real-time data. Weather conditions, soil quality, crop growth and any other data you need. Once sent to Arduino IoT Cloud, the data value chain becomes valuable analytics that support business processes at various levels. For example, crop yield, equipment efficiency, staff performance and so forth. The Edge Control can improve crop quality, reduce effort and minimize error by automating processes like irrigation, fertilization or pest control.
Remote Access and Maintenance
With its robust design, the Edge Control is a fitting solution for applications in any outdoor setting. For example, using it on construction sites or in real estate to automate access control. Similarly, swimming pool maintenance and cleaning companies could monitor and control the condition of pool water from remote locations. As usual, we expect the Arduino community to come up with countless ingenious ways to implement this new technology.
To learn more about how you can use the Edge Control, check out how to get started.
The Edge Control is now available for €169/US$199 on the Arduino Store.
The post Sense the Future of Smart Agriculture with Arduino Edge Control appeared first on Arduino Blog.
Sense the Future of Smart Agriculture with Arduino Edge Control was originally published on PlanetArduino
0 notes
Link
For just $22.00 Description:The 868/915MHz antenna needs to be in connection with the IPEX interface (if the antenna is not connected, it may damage the LoRa chip)Lithium battery charge and discharge circuit, when the battery is full, the blue LED will stop working. When using, pay attention to the positive and negative of the battery, otherwise it will be damaged!With IO port touch screen touch signal input, you need to add the 100nF pull-down capacitor to this pin!Example:This product is a SX1276 chip based on ESP32 WIFI increased OLED, namely LoRa remote modem, 868-915MHz Free World Shipping !quency, high sensitivity is over-148dBm, + 20dBm output power, high reliability, long transmission distance.the onboard 32MB Flash wi-fi antenna, 0.96 inch blue oled display, lithium battery charging circuit, CP2102 interface and USB serial chip, the perfect support for Arduino development environment, can be used for program checking and product development is very easy and fast.Operating voltage: 3.3V to 7VOperating temperature range: -40 ° C to + 90 ° CSupport for Sniffer software protocol analysis, Station, SoftAP, and Wi-Fi Direct modesData rates: 150 Mbps @ 11n HT40., 72 Mbps @ 11n HT20, 54 Mbps @ 11g, 11 Mbps @ 11btransmit power: 19.5 dBm @ 11b, 16.5 dBm @ 11g, 15.5 dBm @ 11nreceiver sensitivity up to -98 dBmUDP sustained throughput of 135 Mbps Pin diagram:Test details:Use legend: For example One(1) 868mhz / 915MhzOLED LoRaSender#include #include #include #include SSD1306.h#include images.h#define SCK 5 // GPIO5 - SX1278's SCK#define MISO 19 // GPIO19 - SX1278's MISO#define MOSI 27 // GPIO27 - SX1278's MOSI#define SS 18 // GPIO18 - SX1278's CS#define RST 14 // GPIO14 - SX1278's RESET#define DI0 26 // GPIO26 - SX1278's IRQ (interrupt request)#define BAND 868E6 // 915E6unsigned int counter = 0;SSD1306 display (0x3c, 4, 15);String rssi = RSSI -;String packSize = -;String packet;void setup () { pinMode (16, OUTPUT); pinMode (2, OUTPUT); digitalWrite (16, LOW...
0 notes
Text
Crowdfunding Watch: Raspberry Pi gets Io
Crowdfunding Watch: Raspberry Pi gets Io
Crowdfunding Watch: Raspberry Pi gets IoT LoRa Gateway HAT – Check out some boards that bring LoRa technology into play, for the Raspberry Pi, Arduino and micro:bit, and such like single board computers. For example, there is a IoT LoRa Gateway HAT… This story continues at Crowdfunding Watch: Raspberry Pi gets IoT LoRa Gateway HAT Or just read more coverage at Electronics Weekly http://ow.ly/Nkct…
View On WordPress
0 notes
Text
Crowdfunding Watch: Raspberry Pi gets IoT LoRa Gateway HAT
Check out some boards that bring LoRa technology into play, for the Raspberry Pi, Arduino and micro:bit, and such like single board computers. For example, there is a IoT LoRa Gateway HAT...
This story continues at Crowdfunding Watch: Raspberry Pi gets IoT LoRa Gateway HAT
Or just read more coverage at Electronics Weekly
0 notes
Text
ESP32 Web Server Home Automation Control AC Appliances
youtube
ESP32 Web Server - Home Automation Control AC Appliances | Home Automation using NodeMCU | Build an ESP8266 Web Server with Arduino IDE. ****************************************************************** If You Want To Purchase the Full Project or Software Code Mail Us: [email protected] Title Name Along With You-Tube Video Link Project Changes also Made according to Student Requirements http://svsembedded.com/ è https://www.svskits.in/ M1: +91 9491535690 è M2: +91 7842358459 ****************************************************************** 1. Controlling LEDs using ESP8266 as Web Server - IoT Project 2. ESP32 Home Automation Project, IoT Smart Phone Home 3. MQTT on ESP32 | Controlling Appliances and Monitoring 4. Alexa (Echo) with ESP32 and ESP8266 | Random Nerd 5. ESP32 Web Server & Its Android App 6. ESP8266 NodeMCU Relay Module - Control AC Appliances 7. IoT Based Patient Health Monitoring on ESP32 Web Server 8. ESP32 Arduino HTTP server: Serving image as attachment 9. Controlling RGB Lights From ESP32 Web Server 10. ESP8266 Plot Sensor Data With Websockets-Chart-js 11. ESP32 Arduino HTTP web server - redirects 12. ESP32/ESP8266 RGB LED Strip with Color Picker Web Server 13. IoT Based LED control using Google Firebase and ESP32 14. Setting Up Your Own Arduino IoT Cloud Server - DZone IoT 15. ESP32 with LoRa using Arduino IDE | Random Nerd Tutorials 16. Low Cost Automation ESP32 and 16 Relays | Trybotics 17. ESP8266 mDNS For Web Address URL Using Arduino IDE 18. ESP32 Arduino HTTP web server: Getting started 19. IoT and Touch Based Home Automation | Full IoT Electronics 20. Interfacing ESP8266 with STM32F103C8: Creating a Webserver 21. How to build NodeMCU Webserver and control an LED 22. IoT-Enabled Embedded Web Server Reference Example 23. WiFi Based Distributed IOT Home Automation 24. ESP8266 Web Server (Without Arduino) : 5 Steps - Instructables 25. ESP32 Web Server - Arduino IDE | Random Nerd Tutorials 26. Home Automation using Webserver on ESP32 | Sending HTML Page 27. ESP32 Webserver in Arduino IDE Controlling LEDS 28. Iot Home Automation Using ESP-32 29. Build an ESP8266 Web Server - Code and Schematics 30. ESP32 DHT11/DHT22 Web Server using Arduino IDE 31. ESP32-CAM Video Streaming Web Server 32. ESP32 Servo Motor Web Server with Arduino IDE | Random 33. ESP32 Web Server with BME280 – Advanced Weather Station 34. ESP32 Relay Module - Control AC Appliances (Web Server) 35. ESP32 LoRa Sensor Monitoring with Web Server (Long) 36. ESP8266 Based Webserver to Control LED from Webpage 37. ESP32 Based Webserver for Temperature and Humidity 38. ESP8266 Web Server with Arduino IDE | Random Nerd Tutorials 39. Creating webserver for home automation using Nodemcu 40. ESP32 Arduino web server: Serving HTML 41. Remotely control rely and lamp with ESP32 Web server 42. How to Create a Web Server (with WebSockets) 43. All-in-One ESP32 Weather Station Shield 44. ESP32/ESP8266 Relay Module - Control AC Appliances (Web) 45. Low Cost Automation ESP32 and 16 Relays 46. ESP8266 DHT11/DHT22 Web Server Arduino IDE | Random 47. ESP32 Email Alert Based on Temperature Threshold (web) 48. ESP32 Web Server & Its Android App 49. ESP32-CAM Take Photo and Display in Web Server | Random 50. ESP8266 Web Server Access With JavaScript Client 51. ESP32 Web server in Arduino IDE : controlling three LEDs 52. Home Automation Server - Project Example Tutorial | Random 53. ESP32 Client-Server Wi-Fi Communication Between Two 54. How to Control Your ESP8266 From Anywhere in the World 55. ESP32/ESP8266 RGB LED Strip with Color Picker Web Server 56. Two Temperatures on Gauges - Arduino Web Server 57. WiFiManager with ESP8266 - Autoconnect, Custom 58. Control ESP32 and ESP8266 GPIOs from Anywhere in the world 59. Arduino - Webserver with an Arduino + Ethernet Shield 60. How to Control a Relay Module With an ESP32 | Everything 61. ESP8266 Publishing DHT Readings Raspberry Pi | Random 62. ESP32 Bluetooth Low Energy (BLE) on Arduino IDE | Random 63. Build an ESP32 Web Server with Arduino IDE 64. How to Create a Weather Station With Sensors and an ESP32
0 notes
Text
Embedded machine vision goes pro with the new Portenta Vision Shield
youtube
We’re excited to announce the launch of the Arduino Portenta Vision Shield, a production-ready expansion for the powerful Arduino Portenta H7 that adds a low-power camera, two microphones, and connectivity — everything you need for the rapid creation of edge ML applications.
Always-on machine vision
The Portenta Vision Shield comes with an ultra-low-power Himax camera. The camera module autonomously detects motion while the Portenta H7 is in stand-by — only waking up the microcontroller when needed.

Voice and audio event recognition
The Portenta Vision Shield features two ultra-compact and omnidirectional MP34DT06JTR microphones, bringing voice recognition and audio event detection. Both the video and audio data can be stored on an SD card, and transmitted through Ethernet or LoRa® modules (plus option of the WiFi or BLE on the Portenta H7 module).

Additional LoRa® or Ethernet connectivity
The powerful Arduino Portenta H7 makes machine possible learning on-device — greatly reducing the communication bandwidth requirement in an IoT application. The LoRa® module option is specifically designed for edge ML applications, enabling low-power, long distance communication over LoRa® wireless protocol and LoRaWAN networks.
The Ethernet version is perfect for all those wired applications that need high bandwidth data transfer speed.
(N.B. The LoRa® and Ethernet connectivity options on the Portenta Vision Shield are in addition to the existing WiFi and BLE connectivity provided by the Portenta H7 module.)

Embedded computer vision made easy
In tandem with the launch of the Portenta Vision Shield Arduino has teamed up with OpenMV to make their IDE fully compatible with the Portenta. The OpenMV IDE provides an easy way into computer vision using MicroPython as a programming paradigm. There are an abundance of AI/machine learning algorithms available straight ‘out of the box’ providing a user experience we are sure you will appreciate.
Download the free license to OpenMV for Arduino Editor and browse through the examples we have prepared for you to try out embedded machine vision with your new Portenta Vision Shield.
“Embedded machine learning will transform industries. The Portenta Vision Shield is now the fastest way to go from concept to deployment of low-power machine vision and audio applications — delivering certified, production-ready hardware with support from easy-to-use ML software frameworks,” says Andrea Richetta, Arduino Pro BU leader.
The Ethernet version of the Arduino Portenta Vision Shield is now available in pre-order on the Arduino Store, while the LoRa® version will be in stock by the end of this year.
Embedded machine vision goes pro with the new Portenta Vision Shield was originally published on PlanetArduino
0 notes
Text
Edge Impulse makes TinyML available to millions of Arduino developers
This post is written by Jan Jongboom and Dominic Pajak.

Running machine learning (ML) on microcontrollers is one of the most exciting developments of the past years, allowing small battery-powered devices to detect complex motions, recognize sounds, or find anomalies in sensor data. To make building and deploying these models accessible to every embedded developer we’re launching first-class support for the Arduino Nano 33 BLE Sense and other 32-bit Arduino boards in Edge Impulse.
The trend to run ML on microcontrollers is called Embedded ML or Tiny ML. It means devices can make smart decisions without needing to send data to the cloud – great from an efficiency and privacy perspective. Even powerful deep learning models (based on artificial neural networks) are now reaching microcontrollers. This past year great strides were made in making deep learning models smaller, faster and runnable on embedded hardware through projects like TensorFlow Lite Micro, uTensor and Arm’s CMSIS-NN; but building a quality dataset, extracting the right features, training and deploying these models is still complicated.
Using Edge Impulse you can now quickly collect real-world sensor data, train ML models on this data in the cloud, and then deploy the model back to your Arduino device. From there you can integrate the model into your Arduino sketches with a single function call. Your sensors are then a whole lot smarter, being able to make sense of complex events in the real world. The built-in examples allow you to collect data from the accelerometer and the microphone, but it’s easy to integrate other sensors with a few lines of code.
Excited? This is how you build your first deep learning model with the Arduino Nano 33 BLE Sense (there’s also a video tutorial here: setting up the Arduino Nano 33 BLE Sense with Edge Impulse):
Sign up for an Edge Impulse account — it’s free!
Install Node.js and the Arduino CLI.
Plug in your Arduino Nano 33 BLE Sense development board.
Download the Arduino Nano 33 BLE Sense firmware — this is a special firmware package (source code) that contains all code to quickly gather data from its sensors. Launch the flash script for your platform to flash the firmware.
Launch the Edge Impulse daemon to connect your board to Edge Impulse. Open a terminal or command prompt and run:
$ npm install edge-impulse-cli -g $ edge-impulse-daemon
Collect some data and build a model. We’ve put together two end-to-end tutorials: detect gestures with the accelerometer or detect audio events with the microphone.
Your device now shows in the Edge Impulse studio on the Devices tab, ready for you to collect some data and build a model.
Once you’re done you can deploy your model back to the Arduino Nano 33 BLE Sense. Either as a binary which includes your full ML model, or as an Arduino library which you can integrate in any sketch.

Deploying to Arduino from Edge Impulse
Your machine learning model is now running on the Arduino board. Open the serial monitor and run `AT+RUNIMPULSE` to start classifying real world data!

Keyword spotting on the Arduino Nano 33 BLE Sense
Integrates with your favorite Arduino platform
We’ve launched with the Arduino Nano 33 BLE Sense, but you can also integrate Edge Impulse with your favourite Arduino platform. You can easily collect data from any sensor and development board using the Data forwarder. This is a small application that reads data over serial and sends it to Edge Impulse. All you need is a few lines of code in your sketch (here’s an example).
After you’ve built a model you can easily export your model as an Arduino library. This library will run on any Arm-based Arduino platform including the Arduino MKR family or Arduino Nano 33 IoT, providing it has enough RAM to run your model. You can now include your ML model in any Arduino sketch with just a few lines of code. After you’ve added the library to the Arduino IDE you can find an example on integrating the model under Files > Examples > Your project – Edge Impulse > static_buffer.
To run your models as fast and energy-efficiently as possible we automatically leverage the hardware capabilities of your Arduino board – for example the signal processing extensions available on the Arm Cortex-M4 based Arduino Nano BLE Sense or more powerful Arm Cortex-M7 based Arduino Portenta H7. We also leverage the optimized neural network kernels that Arm provides in CMSIS-NN.
A path to production
This release is the first step in a really exciting collaboration. We believe that many embedded applications can benefit from ML today, whether it’s for predictive maintenance (‘this machine is starting to behave abnormally’), to help with worker safety (‘fall detected’), or in health care (‘detected early signs of a potential infection’). Using Edge Impulse with the Arduino MKR family you can already quickly deploy simple ML based applications combined with LoRa, NB-IoT cellular, or WiFi connectivity. Over the next months we’ll also add integrations for the Arduino Portenta H7 on Edge Impulse, making higher performance industrial applications possible.
On a related note: if you have ideas on how TinyML can help to slow down or detect the COVID-19 virus, then join the UNDP COVID-19 Detect and Protect Challenge. For inspiration, see Kartik Thakore’s blog post on cough detection with the Arduino Nano 33 BLE Sense and Edge Impulse.
We can’t wait to see what you’ll build!
Jan Jongboom is the CTO and co-founder of Edge Impulse. He built his first IoT projects using the Arduino Starter Kit.
Dominic Pajak is VP Business Development at Arduino.
Edge Impulse makes TinyML available to millions of Arduino developers was originally published on PlanetArduino
0 notes
Text
Is that an ESP32 on Your Wrist?
What could you do with a dual-core 240 MHz ESP32 that supports Arduino-style programming, with 16 MB of flash, 8 MB of PSRAM, and 520 k of RAM? Oh, let’s throw in a touchscreen, an accelerometer, Wifi, and Bluetooth. Besides that, it fits on your wrist and can show the time? That’s the proposition behind Lilygo T Watch 2020. If it sounds like a smartwatch, it is. At around $25 –and you can snag the hardware from a few different places — it is not only cheaper than the latest flagship smartwatch, but it is also infinitely more hackable.
OK, so the screen is only 1.54″, but then again, it is a watch. If Arduino isn’t your thing, you can use anything else that supports the ESP32 like Micropython or even Scratch. There are variants that have LoRA and GPS, at slightly higher prices. You can also find ones with heart rate monitors and other features.
If you would like a preview of the firmware, it is all there on GitHub and there is a smattering of documentation. There are even a few examples, although brush up on your Mandarin. The watch actually looks passable for a smartwatch, although the one blemish is that it is 20 mm thick. That’s almost double the thickness of an Apple Watch 5 or a Samsung Active 2.
Still, if you want total hackability, that extra 10 mm is probably worth it. You can, of course, hack some watches that are not meant to be used this way. Besides, this watch is a bit more socially acceptable than one that would earn you hacker street cred.
Is that an ESP32 on Your Wrist? was originally published on PlanetArduino
0 notes
Text
ISM Communications for Arduino
If you want to wirelessly communicate between devices, WiFi and Bluetooth are obvious choices. But there’s also the ISM (industrial, scientific, and medical) band that you use. There are inexpensive modules like the SX1278 that can handle this for you using LoRa modulation, but they haven’t been handy to use with an Arduino. [Jan] noticed the same thing and set out to build a shield that allowed an Arduino to communicate using LoRa. You can find the design data on GitHub. [Jan] calls it the LoRenz shield.
According to [Jan], the boards cost about $20 to $30 each to make, and most of that cost was in having PC boards shipped. LoRa lets you trade data rate for bandwidth, but typical data rates are fairly modest. As for range, that depends on a lot of factors, too, but we’ve seen ranges quoted in terms of miles.
Depending on where you live, there may be legal restrictions on how you use a radio like the SX1278. You should understand your local laws before you buy into using the ISM bands. We aren’t sure it would be wise, but the board can coexist with three other similar shields. So you could get 4 radios going on one Arduino if you had too and could manage the power, RF, and other issues involved. The breakout board the module uses has an antenna connector, so depending on your local laws, you could get a good bit of range out of one of these.
[Jan] promises a post on the library that makes it all work shortly, but you can find the code on GitHub now. If you look at the code in the examples directory, it seems pretty easy. You’d have to sling some software, but the SX1278 can support other modes in addition to LoRA including FSK and other data modulation techniques.
We’ve seen other LoRa shields, but not many. If you are interested in other wireless technologies, we’ve talked about them quite a bit. If you want a basic introduction to LoRa, [Andreas Spiess’] video below is a good place to start.
Filed under: Arduino Hacks, wireless hacks
ISM Communications for Arduino was originally published on PlanetArduino
0 notes
Text
CES17: Arduino Unveils LoRa Modules For The Internet Of Things
WiFi and Bluetooth were never meant to be the radios used by a billion Internet of Things hats, umbrellas, irrigation systems, or any other device that makes a worldwide network of things interesting. The best radio for IoT is something lightweight which operates in the sub-Gigahertz range, doesn’t need a lot of bandwidth, and doesn’t suck down the power like WiFi. For the last few years, a new low-power wireless communication standard has been coming on the scene, and now this protocol — LoRa — will soon be available in an Arduino form factor.
The Primo, and NRF
It’s not LoRa, but the Arduino Primo line is based on the ESP8266 WiFi chip and a Nordic nRF52832 for Bluetooth. The Primo comes in the ever-familiar Arduino form factor, but it isn’t meant to be an ‘Internet of Things’ device. Instead, it’s a microcontroller for devices that need to be on the Internet.
Also on display at CES this year is the Primo Core which we first saw at BAMF back in May. It’s a board barely larger than a US quarter that has a few tricks up its sleeve. The Primo Core is built around the nRF52832, and adds humidity, temperature, 3-axis magnetometer and a 3-axis accelerometer to a square inch of fiberglass.
The Primo Core has a few mechanical tricks up its sleeve. Those castellated pins around the circumference can be soldered to the Alice Pad, a breakout board that adds a USB port and LiPo battery charger.
LoRa
Also on deck at the Arduino suite were two LoRa shields. In collobration with Semtech, Arduino will be releasing the pair of LoRa shields later this year. The first, the Node Shield, is about as simple as it can get — it’s simply a shield with a LoRa radio and a few connectors. The second, the Gateway Shield, does what it says on the tin: it’s designed to be a gateway from other Arduino devices (Ethernet or WiFi, for example) to a Node shield. The boards weren’t completely populated, but from what I could see, the Gateway shield is significantly more capable with support for a GPS chipset and antenna.
A partnership with Cayenne and MyDevices
Of course, the Internet of Things is worthless if you can’t manage it easily. Arduino has struck up a partnership with MyDevices to turn a bunch of low-bandwidth radio and serial connections into something easy to use. Already, we’ve seen a few builds and projects using MyDevices, but the demos I was shown were extremely easy to understand, even if there were far too many devices in the room.
All of this is great news if you’re working on the next great Internet of Things thing. The Primo Core is one of the smallest wireless microcontroller devices I’ve seen, and the addition of LoRa Arduino shields means we may actually see useful low-bandwidth networks in the very near future.
Filed under: Arduino Hacks, news
CES17: Arduino Unveils LoRa Modules For The Internet Of Things was originally published on PlanetArduino
0 notes