#mywifiext setup guide
Explore tagged Tumblr posts
Visit Tumblr Blog
Explore Tumblr blogs with no restrictions, modern design and the best experience.
Last Seen Tumblr Blogs


Fun Fact
Celebrities use Tumblr as well.
Text
Troubleshooting Guide 2024: Mywifiext Not Working — Resolving Common Issues

Check the Basics: Before delving into complex troubleshooting, ensure the basics are in order.
Confirm that your WiFi extender is powered on.
Verify that the extender is within the range of your existing WiFi network.
Make sure you’re using the correct web address for the Mywifiext setup.
Browser Compatibility: Mywifiext is optimized for certain browsers. Incompatibility issues might arise if you’re using an outdated or unsupported browser. Try accessing the setup page using different browsers like Chrome, Firefox, or Edge.
Clear Browser Cache: Cached data can interfere with the loading of web pages. Clear your browser cache and try accessing Mywifiext again.

Connectivity Issues:
Ensure a stable and active internet connection. If possible, connect your computer directly to the extender with an Ethernet cable to rule out WiFi issues.
Reboot your modem, router, and extender to refresh the network.
Firewall and Antivirus Settings: Security software may sometimes block access to Mywifiext. Temporarily disable your firewall and antivirus programs and attempt to access the setup page. Remember to re-enable them after troubleshooting.
Firmware Updates: Ensure that your extender’s firmware is up to date. Check the Netgear support website for the latest firmware version and update if necessary.
Factory Reset: If all else fails, consider performing a factory reset on your WiFi extender. This will revert the settings to default, and you can start the setup process anew.
Contact Support: If the issue persists, it might be time to seek professional help. Contact Our support (+1855–201–8071) for assistance. Be prepared to provide detailed information about your setup, including the extender model and any error messages you encountered.
Conclusion: The “Mywifiext not working” issue can be caused by various factors, ranging from simple configuration errors to more complex network issues. By systematically troubleshooting each potential problem, you increase your chances of resolving the issue and enjoying a seamless WiFi extender experience. Remember to document any changes you make during troubleshooting for future reference.
#Mywifiext Not Working#mywifiext net not working#www mywifiext net refused to connect#mywifiext net is not working
0 notes
Link
192.168.1.250 is the default IP address that lets you set up Netgear extender with ease. But sometimes, users face issues while accessing the default IP address and stuck with error messages saying ‘this site can’t be reached’. 92.168.1.250 is a local website that is provided by Netgear, that helps people to set up their new Netgear wifi range extender device using the android device. There are a lot of other things that you can do such as firmware update and reset your Netgear wifi range extender device. Here, we have listed all the tips using which you can access the Netgear default IP without any hassle.
#92.168.1.250#mywifiext genie setup#netgear ext#mywifiext setup guide#netgear extender login#netgear extender no ip address#netgear extender won't connect to internet#netgear wifi extender ip configuration failure
0 notes
Link
Configure Genie Smart Setup – Mywifiext Setup Guide
Genie is a useful app for desktop and mobile. It allows users to manage, monitor and extend their home and office network. The app is also used to resolve the login issue with www.mywifiext.net web interface and analyze all the networks and devices connected to your WiFi network. With NETGEAR Genie, one can even check the internet speed coming from the ISP (Internet Service Provider). Configure Genie Smart Setup – Mywifiext Setup Guide
0 notes
Text
How do i connect with mywifiext.net setup page?
The Mywifiext.net setup web-based installation procedure connects the Netgear WIFI extender to the primary network or modem. If you've never installed a Netgear extender before, we'll guide you through the process step-by-step. Using the www.mywifiext.net setup wizard web URL, you may connect your WiFi booster, whether it is new or already installed.
How do i connect with mywifiext?
The methods below should let you connect to mywifiext:
Connect the power supply to the booster.
Hold on while you watch for the LED to become green.
The extension's power light then changes to green.
Eventually, the device's LED should change to a solid shade of green.
Anything may be typed in the address bar.
Do a search for "Mywifiext.net" there.
How do i connect with mywifiext.local?
Using Mywifiext.local to setup your Netgear Nighthawk Extender is simple.The mywifiext.local configuration page may only be viewed on MAC or IOS devices. Continue reading to find out how to access mywifiext.local.
For the mywifiext.local setup? The steps are as follows:
Before turning on your Nighthawk WiFi Extender, wait until the power light is firm.
Look at a computer or a phone.
Open a web browser and navigate to mywifiext.local.
Verify your device's network connection to the nighthawk extender.
Follow the instructions displayed on the screen to complete the Mywifiext local setup process.
Place the extender in the chosen spot once the installation is complete.
How to get access to Mywifiext.net
You must have a wireless device in order to access mywifiext.net. Use the wireless management of your device to join the Netgear_ext network.
To access mywifiext.net, perform these steps:
Connect the Extender to a power source after opening it.
Turn on the extender and then launch a web browser.
In the address bar, type mywifiext.net and wait for it to load.
If mywifiext.net does not load, for instance, try 192.168.1.250.
You will see the Netgear genie screen, which will request your login details.
To manage or set up your Wi-Fi extender, go to mywifiext.net and log in using your login information.
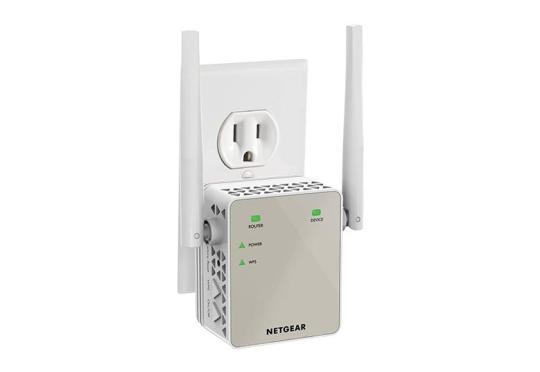
When constructed properly, an extender may increase the network's coverage area, enabling you to get service outside, such as in your yard.
Extenders take up only a little amount of room. The majority of them are single-piece electrical appliances that resemble bulkier plug-in air fresheners.
#How do i connect with mywifiext.net setup page?#How do i connect with mywifiext?#How do i connect with mywifiext.local?#How do i connect with mywifiext net setup page?#How do i connect with mywifiext setup page guide#mywifiext.net#mywifiext.local
0 notes
Text
How to Setup Mywifiext Ex2700 Extender Without WPS?
Wifi range extension has now become essential to carry. Settling down with provided wi-fi range is so conventional; chart out with mywifiext ex2700 setup and never let wifi range come in your way to success.
0 notes
Link
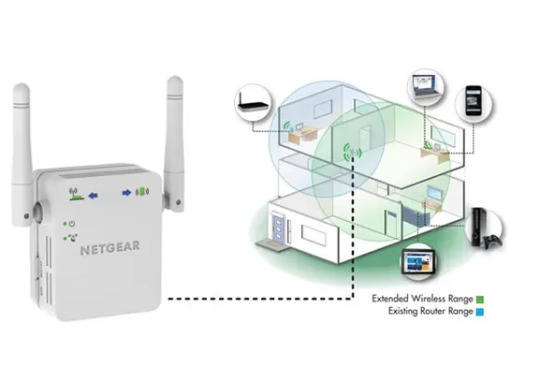
A wifi extender is a device that works as a middleman or bridge between a Wi-Fi router and a Wi-Fi device that is beyond of the router's signal range. A Wi-Fi extender is a device that connects to an existing Wi-Fi network and serves as a wireless access point for other Wi-Fi devices. You must reset your Wi-Fi extender if Wifi extender not working is unable to connect to the Wi-Fi router. Depending on the brand, the reset button in the extender may be located in a different location. The reset button will be located on the back of your extension; use a needle to press it for 10 seconds. This will clear all consists of an interconnected group and allow you to customise your extender as desired.
#troubleshooting guide#WiFi Extender Not Working#WiFi Extender Not#wifi extender#netgear nighthawk raxe300 tri-band wifi 6e router price usd 399 specifications netgear nighthawk raxe300 tri band wi fi 6e#Mywifiext#mywifiext setup#wifi not working#wifi#reset modem wifi indihome#cara reset wifi first media#wifi router#wifi 6e#Dlink extender login#linksys extender setup#netgear extender setup#range extender#Extender
1 note
·
View note
Text
Guide on Mywifiext | www.mywifiext.net Login / Setup
By asking you questions, Guided Assistance assists you in resolving the problem you are experiencing with your NETGEAR equipment.
You can log into your netgear WiFi range extender after installation to examine and modify the settings.
Visit NETGEAR Support and obtain the quick start guide for your model if you haven't installed and connected your WiFi range extender to your current WiFi network before continuing.
Check to see whether your model is listed under "This article pertains to:" If you own a Nighthawk Mesh or Mesh WiFi Extender, check How can I access my Nighthawk Mesh Extender or WiFi Mesh Extender?
To access your WiFi extender, log in as follows:
From a computer or mobile device linked to your extender's network, open a web browser. It's possible that the names of your router and extender's WiFi networks differ (SSIDs). Check to see if you are linked to the network of your extension. In the URL bar of your web browser, write www.mywifiext.net if your extender and router have distinct WiFi network names (SSIDs). Enter http://extender's IP address> (for instance, http://192.168.1.3) into your browser's address bar if your extender and router share the same WiFi network name (SSID). See How can I find the IP address of a device connected to my router? for additional details. Hit the Enter key or press. A login screen appears.
Enter your admin password and user name. Note: An email address could be part of your user name. Click the Username & Password Help link if you can't remember your user name or password. To change your login information, see How can I reset my NETGEAR range extender to factory settings? Tap or click LOG IN. It shows the Status page. Click or press the Menu symbol if your browser displays it. A menu for the extender appears. To view and modify the extender's settings, select Settings.
1 note
·
View note
Text
Mywifiext | Mywifiext local
Mywifiext extenders are an assiduity standard. they've been erected around robust technologies that make them both dependable and fast. The extenders that we're visiting bandy are EX7000, EX6200, EX6150, and EX6100. While these routers have the FastLane technology and MU-MIMO common, they differ in vacuity of Ethernet anchorages and form factor. the choice of extender must be made on base of the problems that you simply just face and what is an honest option for your specific script. The installation process also differs from extender to extender. Utmost of the instructions and software that is needed is accessible on the online point, and videotape coffers on Youtube. Then we'll try to give you with an eagle's eye view of the installation process. Installing the Mywifiext extender The EX6100 and also the EX6150 both have analogous form factor. they'll be mounted on the wall, therefore reducing your must produce fresh space. Their installation procedure is also analogous. They both is installed by the cybersurfer setup system, or the EX6150 are installed by the WPS system. The EX6200 could also be actuated by the Ethernet harborage of your Wi-Fi access point. The EX7000 is about because the access point or Wi-Fi extender using the Ethernet installation system also. Cybersurfer system of installation The cybersurfer installation system is also a draw-n- play system that needs being Internet connection to place within the extender. Plug the extender in power outlet and appearance forward to the inflexibility LED to come a solid green. Using a Wi-Fi customer, attach with NETGEAR_EXT wireless network. Confirm the connection when the device LED turns a solid green. Open the web cybersurfer to http//www.mywifiext.net Click on the New Extender Setup and follow the instructions. WPS system This system is valid only for the EX6150 router and requires minimal hindrance from you. the way involved are Plug the extender I the inflexibility outlet and appearance forward to the power LED to come a solid green. Press and hold the WPS button on side of the router for five seconds till the LED blinks. Within two twinkles press the WPS button on your wireless router or access point. If the router is binary band reprise way 2 and three. Confirm the connection by WPS LED on router getting switched on and WPS LED on extender turning a solid green. Ethernet connection system Plug the extender within the installation outlet, and press the capability button if necessary to indicate it on. Make sure that the pc is not connected to Wi-Fi network or Ethernet network. Connect your computer to the extender employing a coax. Open the online cybersurfer and it'll be directly guided to MYWIFIEXT genie screen. From there just follow the setup instruction to place within the extender.
While these are the three introductory styles, all troubleshooting pointers are available on the Mywifiext website. Also their support platoon and client care is helpful, and will guide you through any problems that you just just might face .
2 notes
·
View notes
Text
How To Restart Your Home Wi-Fi Network?
Are you facing connection issues on your Mywifiext device in this COVID 19 epidemic? If yes, also perform a complete renew function on your network. This will surely break the connection lost problem and renew your work at home in the lockdown period. You might be wondering as to what the way for resuming the bias is.
To renew the home network, first, switch off all the bias presently connected to the network. It includes a modem, router, and extender. However, also you'll have to turn it off and if possible, you'll have to run the Mywifiext setup wizard again if our network does not work duly If you're using a Netgear extender with your router. Turn them on in the same sequence in which you have turned them off. Resuming the home network will break the below-mentioned problems related to it.
No internet access on any smart device.
Unfit to pierce any webpage.
Internet connection not established on the router or modem.
Internet LED blinking amber on the router panel.
Note For proper reset of the network, as said before the sequence to turn off and on the bias must be followed in the same fashion.
Now, we're going to exfoliate light on the way to power cycle the home internet.
Case 1 Using a standalone string modem with the router
Switch off all the networking biases like string modem, router, and wireless bias. Some modems have erected-in batteries for power backup. You must remove the batteries before switching it off for a complete reboot. The way to reboot similar models of modem is also given on the runner.
Turn no the string modem first and stay until it gets duly boggled. This will take a couple of seconds. The lights will get stable when the connection to the ISP is established. For further instructions or guided primers, go to the modem manufacturer website and check the status of LEDs from there.
Now is the turn to switch on the router. The router will now take some twinkles to get connected to the modem. Stay for a while and check the status of the LED on it. When the status light turns green, it means the router is successfully connected to the modem. In case of any problem, relate the guided primer of your router.
Switch on all the wired as well as MYWIFIEXT devices. However, also you should launch MYWIFIEXT to troubleshoot your network If your extender fails to connect to the router after this process.
Case 2 Using the gateway/ DSL modem only The way to renew similar type of network are
The first step is the same as that of case 1. Turn out all the networking biases like gateway router, modem, and wireless bias.
Switch on the DSL/ Gateway and stay for the booting to get finished. This will hardly take many twinkles. Thus, you do not need to hustle. On a successful connection, the LED on the utmost of the router gets stable else; you can check the guided homemade online for complete operation and status of the light.
Once the DSL gateway completes and connected to the ISP, you can turn on the wired and wireless bias now and check if the problem has been resolved or not.
After performing the way mentioned above, you'll be suitable to troubleshoot colorful problems like unfit to pierce the internet cybersurfer runner, unfit to go online, or router light amber issues. However, also you can get in touch with experts to get the stylish result, If you're still facing issues with your router or if your Netgear WiFi Extender not working.
#Mywifiext#Extendersetuphelp#Mywifiext local#mywifiext Setup#Mywifiext Login#Mywifiext Local Setup#New Extender Setup#Netgear Extender Setup#Netgear_Ext#www.Mywifiext.Net#mywifiext net login
2 notes
·
View notes
Text
COMPLETE GUIDE TO GET NETGEAR EXTENDER
COMPLETE GUIDE TO GET NETGEAR EXTENDER SETUP USING
https://www-mywifiext-net.net
1 note
·
View note
Link
Netgear EX6250 AC1750 extender allows you to create a whole-home WiFi mesh using your existing router. It comes with a Gigabit Ethernet port to let you connect a wired device such as a streaming player, gaming console, Blu-ray player, or smart TV to your wireless network. Talking about the Netgear AC1750 setup, the EX6250 extender is quite easy to set up and install. We have provided you with all the important points and steps that are necessary to follow. We are very sure that you will be able to perform netgear wifi extender AC1750 setup once you have gone through the blog post, But in case you face any problem while setting up the extender, feel free to call our expert technicians at toll-free number (888) 346 4070 who are always ready to help you.
#mywifiext setup#Ac1750 wifi extender manual guide#How to setup wifi extender#Wifi extender setup#Mywifi ext#Netgear ac1750 extender setup guide#AC1750 ex6250 wifi extender setup
0 notes
Text
New Extender Setup | My Wifi Range Extender Setup

The manual establishment technique for the WiFi extender arrangement is known as mywifiext arrangement. At the point when go to mywifiext.net for your Wifi extender, it gives you on-screen Setup steps to do. That is the reason your WiFi range extender is regularly alluded to as a shrewd arrangement wizard. In this part, you can discover direction on the most proficient method to get to your Netgear Extender Setup page:
Snap the Setup button for the new extender.
Enter your username and secret key to login to www.mywifiext.net.
After that the Netgear Genie Setup wizard will open up.
Follow the means gave on mywifiext's setup screen and introduce your extender.
Anyway these rules are exceptionally thorough and are hard to fathom for easygoing clients.
So on the off chance that you are stuck anytime on mywifiext arrangement page, don't spare a moment to get quick help from our specialized master. They will have your new Extender System running very quickly.
Manual for Manual Setup by means of Mywifiext Setup Login page:
For those that don't care for the WPS design, the Mywifiext Setup is for those. This is on the grounds that WPS isn't the occupation of those switches.. In contrast with the WPS arrangement, the manual arrangement is somewhat redundant. You should go to the arrangement page to set up a shiny new Netgear Extender framework. For the manual arrangement, the bit by bit directions are beneath:
Connection the force supply to your remote extender.
The force light on the extender will illuminate you that the arrangement cycle is all set through.
Next, join the extender with your switch.
Just Netgear-Ext. It will end up being the tag of your organization now.
Open an internet browser on your Desktop and associate through mywifiext.local.
The Netgear extender login page will show up after that.
Round out the username and secret key for mywifiext.net in the fields gave. Snap the Proceed-just catch.
Besides, select your WiFi network at home and enter your secret phrase.
By adhering to the extra on-screen guidelines, finish the arrangement.
Understand More: NEW WIFI EXTENDER CONFIGURATION
Note: If you can't open www.mywifiext.net, open the 192.168.1.250.
Mywifiext Installation Wizard from mywifiext.local:
It is as simple as attachment and play to get the Mywifiext Setup to work. You should simply unpack your Mywifiext.net arrangement, associate with mywifiext.net's Setup Wizard, and that is it. Whenever set up, the extender can be mounted and any remote framework can be associated with it where you need to help the Wifi signals. The best part about mywifiext.net is that when you are in your home, you don't need to arrangement it over and over.
Due to such arrange slipups, there are cases when the extender doesn't sign into the Mywifiext.local Setup tab. It could be the settings or the overall convention for network access which forestalls the reach extender from making an association. nearby additionally has a wide assortment of capacities, for example, tweaking the arrangement of the extender, redesigning the firmware update, changing the organization name and secret word, and so on
At the point when you are in a difficult situation, our master group won't need to stress over getting you out of any basic conditions. At our complementary number with a very much qualified expert, you simply send us a solitary call and talk. Our specialists will assist you with appending your expansion and get your augmentation going all out with mywifiext.net.
Administrator LOGIN GUIDE: MYWIFIEXT FOR SMART WIZARD SETUP
A wifi range extender is a kind of remote repeater used to grow the scope of a remote LAN, frequently alluded to as a Netgear Extender Setup. The reach extender distantly ingests and afterward retransmits the sign associated with the turn or hitting the objective. Anyway you can depend on us whenever to get committed help for mywifiext brilliant wizard administrator arrangement.
Extension extenders are very proficient for shoppers to get to an awful sign as opposed to for individuals who need to go to the signs in any capacity. Mywifiext Admin Login for Smart Wizard Setup depends on these inclinations with regards to the sort and extent of the extender being utilized.
Focuses to note while designing the administrator arrangement of mywifiext.net's keen wizard:
The New Extender Configuration should be set up for both the client gadget and the sign source.
In the event that the sign is set, there is a requirement for comparable encryption keys.
It ought to have a set IP address to ensure it tends to be acknowledged as a customer.
The sign that the device communicates should be like the sign that the source sends.
The system strategy is best when the extension extender utilizes a similar programming and chipsets as the passageway or the base switch.
Hugeness of the administrator login design for www.mywifiext.net and the Smart Wizard.
With PDAs, PCs, media players with a protected association are associated with wifi, and the all-inclusive reach on one or the other side of the room gives you a great deal of help from Netgear's wifi range extender.
The Mywifiext Range Extender empowers your present wifi organization to develop:
By utilizing both reach augmentation and development, you can promptly expand the quantity of passageways from your anteroom to the yards and even in your office.
It stretches out the wifi reach to each side of your home with great effectiveness and generally works with any standard switch.
net Configuration Network Login gives rapid just as an organization for your versatile PCs, workstations, cell phones, and numerous different gadgets.
When To Get An Extender?
Netgear Wifi Extender Setup is required distinctly if there should arise an occurrence of availability issues with your current WiFi Network. As such, you ought to get a Netgear Extender just if your WiFi Device is put in a "No man's land". To put it plainly, your current Network's Connection is poor or non-existent at this area. In such a circumstance, you should go for Netgear Extenders.
Working Of An Extender
Netgear Extender spans up network holes between your WiFi Router/WiFi Access Point and a Computing Device situated past the Router's reach. Principally, it works in two different ways as referenced underneath.
➥ As a Network Extender
It basically interfaces with your current WiFi Network and intensifies its reach to give you upgraded inclusion. As such, it associates with the Network like some other WiFi Device as a Network Client.
➥ As A WiFi Access Point
Aside from that, it can likewise be utilized as a WiFi Access Point like your WiFi Router. To place it in straightforward terms, it imparts its own WiFi Network. Other WiFi Devices associate with its Network as opposed to interfacing with your Router's Network. Along these lines, it acts like your WiFi Router..
How To Perform Netgear Extender Setup?
Netgear Extender Setup
You can perform Netgear Extender Setup in two different ways relying on the foundation of your Router/Network Access Point. For example, go for the WPS Connection Method just if your Router has an actual press button for WPS. Something else, choose the Installation Assistant or Web Browser Setup. Notwithstanding, prior to continuing further, ensure that you have just enlisted your Netgear Extender at "netgear.com/mynetgear".
1 note
·
View note
Text
Netgear Extender Setup via 192.168.1.250 or mywifiext.net
Lets Setup Netgear Extender via mywifiext
Netgear extenders might be plug and play device but it gets real tricky when it comes to setup this device. Sometimes even after having clear instructions in quick guide we are not able to set it up. For that purpose we are here to help you out to setup your devices. You can follow this blog for tech related day to day troubles we face. I will be posting the troubleshooting and will answer you queries if you have any.
1. First of all all we need is a computer or a cell phone to get online and access mywifiext local.
2. Now connect your range extender online either via ethernet cable or wirelessly to your device.
3. In case your mywifiext not working, then try switching to different browser or Reset your Netgear range Extender.
4. Now open a browser and in the URL type mywifiext.net or 192.1681.250
5. It will take you to New Extender Setup.
6. Create your netgear account there and follow the on screen instructions.
7. Once the Setup of your New netgear Extender is done unplug it and place it halfway between your router and the place where you need WiFi connectivity.
NOTE:- In case you need help for your Tp-Link devices follow the Link
NOTE:- In case you need help for your Linksys devices (extender and routers) follow the Link
THANK YOU

#netgear#netgear extender setup#netgear extender login#netgear extender support#192.168.1.250#mywifiext.net#mywifiext login#mywifiext setup#mywifiext local#extender.linksys.com#extender.linksys setup#tplinkrepeater.net
1 note
·
View note
Text
How to Setup Mywifiext Ex2700 Extender Without WPS?
Wifi range extension has now become essential to carry. Settling down with provided wi-fi range is so conventional; chart out with mywifiext ex2700 setup and never let wifi range come in your way to success.
0 notes
Link
Users who are experiencing the Mywifiext not working issue should not be concerned because it is a fairly frequent and simple problem to resolve. As a result, users need carefully read the entire information provided below in order to remedy the issue. Mywifiext is not working is a very common error that users go into during the setup process. Furthermore, those who are experiencing this problem should not be concerned because it is simple to resolve.
#Mywifiext Not Working#troubleshooting guide#wifi extender#WiFi Extender Not#WiFi Extender Not Working#mywifiext setup#Mywifiext
1 note
·
View note
Text
Mywifiext Netgear Extender
Mywifiext guide for the setup of your netgear extender. You will find all the steps for installation of it on your PC and Laptops.
6 notes
·
View notes