#Netgear_Ext
Explore tagged Tumblr posts
Visit Tumblr Blog
Explore Tumblr blogs with no restrictions, modern design and the best experience.
Last Seen Tumblr Blogs


Fun Fact
The total number of visits Tumblr.com received during January 2021 is 327 million.
Text
Netgear WiFi range extender setup
A Netgear WiFi range extender is a device that can help you extend the reach of your home's WiFi network. If you have areas in your home where your WiFi signal is weak or nonexistent, a range extender can be a great solution.
Here are the steps on how to set up your Netgear WiFi extender via mywifiext:
Connect your extender to a power outlet.
Connect your computer or mobile device to the extender's WiFi network.
The extender's WiFi network will have a name that is similar to your home's WiFi network name, but with an "_EXT" at the end. For example, if your home's WiFi network is called "NETGEAR," the extender's WiFi network might be called "NETGEAR_EXT."
Open a web browser and enter mywifiext.net in the address bar.
Enter the extender's default password in the password field.
The default password is usually printed on a sticker on the extender. If you have lost the sticker, you can reset the extender to factory defaults by holding down the reset button on the extender for 5 seconds.
0 notes
Text
Netgear EX6150 Setup
Enhance your WiFi coverage with a Netgear EX6150 setup. This high-performance extender delivers faster internet speeds and extended range. To set up, connect to the Netgear_EXT network, visit mywifiext.net, and follow the installation steps. If the page doesn’t load, try 192.168.1.250. Troubleshoot login or connectivity issues by resetting your device. Enjoy uninterrupted streaming, gaming, and browsing. Need expert setup support? Contact us now for a seamless Netgear EX6150 setup!
1 note
·
View note
Text
How do I reset my Netgear Extender Login?
Use these procedures to reset your Netgear extender login:
First, find your Netgear extender's "Reset" button.
Usually located on the device's back or side, this is a tiny, inset button.
Press and hold the button with a paperclip or other pointed item until the power LED begins to blink.
This restores the extender to its factory default settings, erasing any previously saved login credentials.
Await the extender's reboot after the reset.
Then, connect to the extender's default Wi-Fi network.
The network name will typically be something like “NETGEAR_EXT,” and you won’t need a password initially.
Open a web browser and go to either www.mywifiext.net or 192.168.1.250. This will take you to the Netgear extender login page.
You will be asked to create a new admin username and password on the login page.
To configure the extender for your network, according to the setup wizard's instructions. For future reference, be sure you write down your updated login information.
Make sure your browser's cache is empty and that the device you are using is linked to the extender network if you are having trouble seeing the login page.
Your Netgear extender login should be successfully reset after completing this method. Go to our website to know more about it.
0 notes
Text
Can’t Find New Extender Setup Button After Connecting To Netgear_Ext? -
Netgear WiFi range extender can be set up and installed using various different ways. However, the most used way to install a Netgear extender is the manual method. Whether you want to perform the Netgear EX3700 setup or the latest Nighthawk model setup, the manual method requires you to connect to Netgear_Ext SSID and access mywifiext.net.
Once you have logged in to mywifiext, you will see the ‘New Extender Setup’ button. That’s where a majority of users often stuck! If you are also not able to find the New Extender Setup button, we have got your back. This post is all about to get rid of this issue. Scroll down to read more.
For More Info - https://streamingwords.com/cant-find-new-extender-setup-button-after-connecting-to-netgear_ext/
0 notes
Text
Netgear WiFi Extender: Maximizing Connectivity for Smart Homes
Plugging your Netgear extender into a power outlet close to your Wi-Fi network will enable you to set it up. Use WPS configuration or join the extender's Wi-Fi network. For configuration, use a web browser or the Netgear installation aid to follow the on-screen instructions. By visiting our website, you can simplify the configuration of your Netgear wifi extender. Should you require more assistance with the process execution, don't hesitate to reach out to our experts.
1 note
·
View note
Text
https://www.authortalking.com/netgear_ext-not-showing-up-reasons-and-quick-fixes/
Don’t you just hate it when the name of your Netgear extender isn’t showing on the network list? If the answer to the question is yes, then it’s time to ease out those worry lines on your forehead because our experts are here to help you out. In this blog post, we’ve mentioned the topmost reasons why your Netgear_ext isn’t showing on the network list along with the ways to resolve the issue. So, what are you waiting for? Let’s get started.
0 notes
Text
Netgear wireless extender login
The Netgear wireless extender login is a crucial step in enhancing and optimizing your home or office network. Designed to boost the existing Wi-Fi signal range, Netgear extenders require a seamless setup process, and the login interface serves as the gateway to configuration. To initiate this process, connect your extender to a power source and access its default network using a device like a computer or smartphone. Once connected, open a web browser and enter the default login web address or the extender's IP address. This prompts the Netgear extender login page, where users input their credentials, typically a username and password. After successful authentication, users gain access to the extender's settings, enabling them to customize network parameters, update firmware, and optimize performance. A user-friendly interface ensures a smooth Netgear wireless extender login experience, empowering individuals to tailor their network extension according to specific needs and preferences.
#Netgear wireless extender login#Netgear extender setup#netgear wifi extender setup#netgear extender set up#netgear extender setup wizard#netgear extender not working#wifi extender login netgear#netgear wireless extender login
1 note
·
View note
Text
How do I setup Netgear Ex6110?

The Netgear EX6110 setup is a fast procedure. First, connect it to a power source. Open a web browser and navigate to http://www.mywifiext.net/ after connecting your device to the extender’s WiFi network. To choose and establish a connection to your current WiFi network, adhere to the on-screen directions. After adjusting the extender’s parameters or leaving them as they are, click “Finish” to finish the configuration. Move the extender to a location with a strong WiFi signal for best coverage.
How to setup Netgear EX6110 setup manually?
When the Power LED on the Netgear EX6110 illuminates, it is ready to be used.
Make that your device is connected to the “NETGEAR_EXT” default WiFi network.
Type http://www.mywifiext.net/ or http://192.168.1.250/ into the address bar of an open web browser.
Select the WiFi network you already have and input its password by following the on-screen directions.
You may choose to use the default values or modify the extension settings.
In order to maximize WiFi coverage, move the extender and click “Finish” to finish the manual setup.
Read More:-
1 note
·
View note
Text
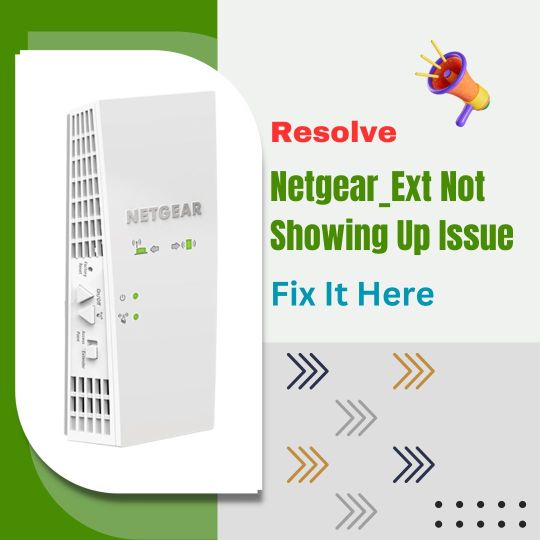
Resolve Netgear_Ext Not Showing Up Issue | Fix It Here
If your Netgear_ext not showing up, there could be several reasons behind this issue.First, ensure that the extender is powered on and in the range of your router. We are here to help you! Our expert team will provide complete steps to you in an easy and quick way. Our team is available 24/7 so you can obtain immediate support and solutions. If the problem persists, contact Netgear support for further assistance. We offer instant and best ways to solve the netgear extender issues.
1 note
·
View note
Link
A Wi-Fi Range Extender from Mywifiext is a gadget that increases the range of a wireless network. The Mywifiext Wi-Fi Range Extender is a gadget that extends the range of your existing Wi-Fi network. Assume you have a router on the ground floor of a building with poor Wi-Fi service on the second floor. Using a Wi-Fi netgear_ext range extender, you may boost the Wi-Fi signal on the second floor.
#mywifiext#mywifiext.net#mywifiextnetlogin#mywifiextlocal#mywifiextsetup#mywifiextlocalsetup#mywifiextnet#netgear_ext#extendersetuphelp
2 notes
·
View notes
Text
How to Set Up Your Netgear Extender
Step 1: Plug in Your Extender
The first step is to plug in your extender to an electrical outlet. The power LED should light up to indicate that the extender is on. If the power LED does not light up, check that the extender is plugged in correctly and that the outlet is working.
Step 2: Connect to the Extender's WiFi Network
Connect your computer or mobile device to the extender's WiFi network. The extender's default WiFi network name (SSID) is NETGEAR_EXT. The extender network either has no password or the default password is password.
Step 3: Launch a Web Browser and Enter mywifiext.net or 192.168.1.250
Open a web browser and enter mywifiext.net or 192.168.1.250 in the address bar. This will open the New Extender Setup page.
Step 4: Click or Tap NEW EXTENDER SETUP
Click or tap NEW EXTENDER SETUP to begin the setup process.
Step 5: If Prompted to Accept Terms and Conditions, Click or Tap YES or I AGREE
If you are prompted to accept the terms and conditions, click or tap YES or I AGREE to continue.
Step 6: Select Your WiFi Network
Select your home WiFi network from the list of available networks.
Step 7: Enter Your WiFi Password
Enter your home WiFi password in the Password field.
Step 8: Click or Tap NEXT
Click or tap NEXT to continue.
Step 9: Select an Extender Name
Enter a name for your extender. This name will be used to identify your extender on your network.
Step 10: Click or Tap FINISH
Click or tap FINISH to complete the setup process.
0 notes
Text
How To Restart Your Home Wi-Fi Network?
Are you facing connection issues on your Mywifiext device in this COVID 19 epidemic? If yes, also perform a complete renew function on your network. This will surely break the connection lost problem and renew your work at home in the lockdown period. You might be wondering as to what the way for resuming the bias is.
To renew the home network, first, switch off all the bias presently connected to the network. It includes a modem, router, and extender. However, also you'll have to turn it off and if possible, you'll have to run the Mywifiext setup wizard again if our network does not work duly If you're using a Netgear extender with your router. Turn them on in the same sequence in which you have turned them off. Resuming the home network will break the below-mentioned problems related to it.
No internet access on any smart device.
Unfit to pierce any webpage.
Internet connection not established on the router or modem.
Internet LED blinking amber on the router panel.
Note For proper reset of the network, as said before the sequence to turn off and on the bias must be followed in the same fashion.
Now, we're going to exfoliate light on the way to power cycle the home internet.
Case 1 Using a standalone string modem with the router
Switch off all the networking biases like string modem, router, and wireless bias. Some modems have erected-in batteries for power backup. You must remove the batteries before switching it off for a complete reboot. The way to reboot similar models of modem is also given on the runner.
Turn no the string modem first and stay until it gets duly boggled. This will take a couple of seconds. The lights will get stable when the connection to the ISP is established. For further instructions or guided primers, go to the modem manufacturer website and check the status of LEDs from there.
Now is the turn to switch on the router. The router will now take some twinkles to get connected to the modem. Stay for a while and check the status of the LED on it. When the status light turns green, it means the router is successfully connected to the modem. In case of any problem, relate the guided primer of your router.
Switch on all the wired as well as MYWIFIEXT devices. However, also you should launch MYWIFIEXT to troubleshoot your network If your extender fails to connect to the router after this process.
Case 2 Using the gateway/ DSL modem only The way to renew similar type of network are
The first step is the same as that of case 1. Turn out all the networking biases like gateway router, modem, and wireless bias.
Switch on the DSL/ Gateway and stay for the booting to get finished. This will hardly take many twinkles. Thus, you do not need to hustle. On a successful connection, the LED on the utmost of the router gets stable else; you can check the guided homemade online for complete operation and status of the light.
Once the DSL gateway completes and connected to the ISP, you can turn on the wired and wireless bias now and check if the problem has been resolved or not.
After performing the way mentioned above, you'll be suitable to troubleshoot colorful problems like unfit to pierce the internet cybersurfer runner, unfit to go online, or router light amber issues. However, also you can get in touch with experts to get the stylish result, If you're still facing issues with your router or if your Netgear WiFi Extender not working.
#Mywifiext#Extendersetuphelp#Mywifiext local#mywifiext Setup#Mywifiext Login#Mywifiext Local Setup#New Extender Setup#Netgear Extender Setup#Netgear_Ext#www.Mywifiext.Net#mywifiext net login
2 notes
·
View notes
Text
How to login netgear wifi extender?
It is easy to modify and customize the settings of your Netgear WiFi extender by logging in.
Make that the extender is within range of your current WiFi network and that it is correctly connected to a power supply before starting.
After the extender has been turned on, link your PC or mobile device to the default network—usually called "NETGEAR_EXT."
Once connected, use a web browser and input 192.168.1.250 or http://mywifiext.net into the address bar.
This will launch the Netgear WiFi extender login page. When logging in for the first time, you'll be asked to either set up an account or configure the extender by providing the login credentials for your router.
If you’ve previously set it up, log in with the credentials you created during the first setup.
It's typically possible to reset the extender if you've forgotten your login information.
To accomplish this, press and hold the reset button for around ten seconds, which will reset the extender to its initial configuration. Resetting it will require you to set it up again.
Once signed in, you may adjust settings like the WiFi network name (SSID), password, or security options, and check the connection status between your router and the extender. You can keep an eye on performance, fix problems, and upgrade firmware for improved security and performance by logging in frequently.
For more details visit our website.
0 notes
Text
NETGEAR Installation — Assistant to Set Up a Netgear Extender
Netgear is one of the most elegant networking brands that offer many similar services. Its routers are quite common with users. This is because of its security and innovations that make it different. Now some cases happen when you face issues while handling them. Although these are simple issues and can be fixed in no time. Now some face problems in configuring area extender setup with Netgear installation assistant. Well, it’s an easy method but seldom gets a bit trickier. Below we have discussed some of the easiest and quick steps to help with this; check out the entire article.
Follow Few Steps to Connect with the Netgear Installation Assistant:
No uncertainty that it’s a confusing process but a doable one; you don’t want to have any special knowledge. You can do this quickly with the help of the given directions and actions. So to make the process of range extender setup with Netgear installation assistant understand the steps:
You initially want to place the extender near a power outlet.
Turn ON the supply and wait for the LED to lighted green.
Later this connects your device using your wifi connection or Ethernet cable. For wifi connection, open the connection manager and find the connection named NETGEAR_EXT.
On this site click the New NETGEAR EXTENDER SETUP button and insert the details in the given field and press the NEXT
In the next step, you need to verify that the Way Point/Extender switch is set to Extender only then proceed to the next step.
Enter the password and head over to the next start.
After this set, the SSID and key of your extender and then move to next.
Now make sure that your extender device is placed midway between your router and other devices. This step will ensure the Netgear installation partner is done successfully.
This is the simple process to configure or complete the Netgear extender setup. You can also take the help of Netgear installation assistant videos. IF you find any problems in the process then try revolving them. The above process will help you in the process of Netgear installation assistant download. At last, you can choose to do a Netgear router reset and then go through these steps.
Queries raised by Netgear Wifi Extender:
How do I set up Netgear WiFi Extender?
Many ways can help you to fix up Netgear wifi extender problems. You can also take the advice of Netgear installation assistant videos. You may want to go through some simple steps like Netgear extender login and then complete the mywifiext setup.
How do I set up my Netgear WiFi Extender without WPS?
If we discuss any specific type of Netgear like Netgear installation assistant ac1200 or Netgear installation assistant ac750 then the best point is that the method is almost related for every extender. You just require to use the common actions and make the setup.
Company: Wifi Extender Hub
Call on 833–666–7003
Email: [email protected]
#netgear installation#netgear extender setup#netgear extender#netgear extender login#netgear installation assistant#netgear#tplink extender setup#wavlink extender setup#range extender#extender#wifi extender#ac1200#ac1900#mywifiext#mywifiext setup#netgear_ext#range extender setup#networking#wifi not working#wifi#wifisetup#wifinetwork#assistant
3 notes
·
View notes
Text
Optimizing Your Network: A Guide to Netgear Extender Setup?
Inputting your Netgear WiFi extender into a power outlet that is adjacent to your current wireless internet connection is how you set it up. First, press the WPS button on your router, then on your extender. Await the LED lights turning on to show that the connection was successful. Visiting our website will be a terrific first step towards finding the answers to any additional questions you may have regarding the Netgear extender setup. If you need further help, you may connect with our specialists using the live chat option on our website.
1 note
·
View note