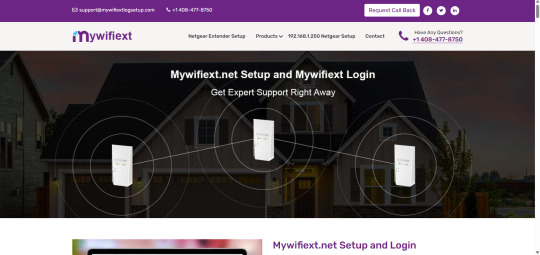
#netgear wifi range extender
Explore tagged Tumblr posts
Visit Tumblr Blog
Explore Tumblr blogs with no restrictions, modern design and the best experience.
Last Seen Tumblr Blogs


Fun Fact
China blocked Tumblr because of pornography and censorship problems in 2013.
Text
How To Setup WiFi Range Extender Netgear, plug it in, connect to the default WiFi network, and launch a web browser. Visit mywifiext.net, connect to your existing WiFi network using the setup wizard, and then configure the extender's SSID and password. Once set up, insert the extender halfway between your router and the desired coverage area.
#How To Setup WiFi Range Extender Netgear#How To Setup#WiFi Range Extender Netgear#Netgear WiFi range extender
0 notes
Text
Step-by-Step Guide to Setting Up Your Netgear Extender!
For easy Netgear extender setup, open the web browser and type the mywifiext.net web address in the browser bar. Now, enter the login details and you reach the smart setup dashboard of the repeater. Here, visit the basic and advanced settings to configure the further settings accordingly. To know more information regarding the same, get in touch with us!

0 notes
Text
Netgear Wifi Extender Setup

"Netgear WiFi Extender Setup is simple: plug it in, connect to its network, and use the web browser setup guide or Netgear Genie app for easy configuration. Extend your WiFi coverage effortlessly."
1 note
·
View note
Text
Sometimes I wish I could threaten computers.
#This is a callout post for the Netgear AC750 Dual Band Wifi Range Extender#technology#is a blight on this earth
0 notes
Text
Netgear AC3000 Setup: Steps To Follow By Beginners
Netgear AC3000 is a networking device that offers a reliable network connection. Get buffer free internet with the netgear AC3000 setup. Add the device into your existing network to uplift the coverage and eliminate wireless dead zones. Even all persons who are new to networking can perform the setup easily. Step by step guide to configure netgear AC3000 device is sanctioned in this article, check the content further and uplift the home network.
Netgear AC3000 Setup Requirements
Netgear AC3000 devices can easily be set up if you have all the significant items.
Netgear AC3000 Wifi Extender
Ethernet Cable
Power Adapter
Electricity Outlet
Computer/ Laptop/ Smartphone
Netgear AC3000 Installation
Netgear AC3000 installation of the hardware device is super easy. You just have to perform the installation by follow the given steps:
Unbox your netgear AC3000 range extender device first. While unboxing, be sure the box contains ethernet cable, power adapter and user manual also along with the range extender.
Step forward towards the netgear AC3000 setup and start looking for a location.
Choose a position closer to the host router but not too far from the area where you were facing network problems.
A location where the device is able to receive the signals from the router and amplify it to eliminate network trouble is ideal.
Once an ideal location is found, keep the device and look for a nearby power socket to power up the device.
Use the power adapter to turn on the device and wait until it get booted completely.
LED lights get stable when bootup completes.
Step ahead and connect the device with the client device using ethernet cable or wireless network.
Wireless connection requires a wireless network name and password, on the contrary, wired methods need a working ethernet cord.
As the connection is done you may proceed to perform netgear AC3000 setup.
Netgear AC3000 Setup
Netgear AC3000 setup includes easy to follow process as specified:
Embark the netgear AC3000 setup process with the launch of a web browser of your choice.
Rush to the browser’s address bar, mention the default IP or web address “www.mywifiext.net”
On the keyboard connected to the laptop or computer, tap on the enter button to initiate the search.
As the setup page appears on the screen, get its access by entering the username and password in the shown field.
After mentioning the information hit on the login tab and web admin panel appears on the screen.
Netgear installation assistant will help you to complete the setup.
Prior to all choose the language, then change the admin account login details. Default login details may risk your network security.
Once you change the admin security, go to the link device option.
Now you need to search for the SSID of the host router device. Choose your network among all the available networks which you desire to extend.
After selection the screen will ask for the password of the main network with which you wish to connect the extender.
Now, enter the password and step ahead to create a new network name for your netgear ac3000 setup.
After deciding the network name, form a security key as well. Keeping the network secure is very important. While creating a security key you should create at least 8 character passwords.
Once you make changes in the wireless network security, remember to check for the firmware update.
Tap on the submit option at last to end the setup and then test it.
Netgear AC3000 Network Boost
To boost the network you have to perform a network test. This will help you know what exactly you should do to boost the network:
Check the network by using a smartphone, link it with the netgear extender network and browse the internet.
In case the coverage of the device network is weak as before in the area previously you were facing trouble then you need to relocate it.
Again search for the location and then test it again.
In case the device is not receiving proper signals from the router device then relocate it and put it closer to the router device.
Also you should check the firmware version of the extender. If required then update it.
Stepping ahead you need to boost the network by eliminating the nearby radio frequency device or heavy metal objects.
Conclusion
I would like to end my words by saying that the netgear AC3000 range extender device is perfect for the users to create a strong network. This device will eliminate wifi dead zones and offer signals to the location where the router's signals are hard to reach. Above available step by step breakdown of the setup process will help you in adding the device into the network very conveniently. Netgear AC3000 setup will change your online experience and enhance your working.
0 notes
Text
Uplift Your Home Network With Netgear EX6150 Setup
A single networking device is not enough to create a reliable network. If you are facing signal issues at your home or office then you can add netgear range extender to your network. Uplift your home network with netgear EX6150 range extender, a dual band device especially created to eliminate WiFi dead spots. Netgear ex6150 Setup helps you in forming a better network at home or office. Way to set up this range extender is super easy to follow by anyone. Even those who don't have technical knowledge can add this device into their existing network very conveniently.
Gather the detailed information from this article about the setup of netgear EX6150 range extender device. Further we mentioned step by step setup guides that help in uplifting your network without any technical help. So, what are you waiting for! Scroll down the page and read the article till the end.
Netgear EX6150 Setup Step By Step
Embark with the netgear EX6150 setup process using web UI or WPS button based methods. Both the methods are very efficient. WPS method allows you quick connection whereas Web based method allows you several customizations in the network. Check out the further specified step by step guide to add the extender in your home network and uplift your current network.
Placement & Power Up
Placement is the first step of the setup process. Adequate placement of the extender is mandatory for the smooth setup. You need to keep the extender closer to your host router device. Also you have to eliminate heavy metal objects or radio frequency devices placed around where you wish to keep the extender. Remember no to keep the extender in the corner as it interrupts signal transmission. As it is a wall plug based compact device, you don’t need additional space to place it. Once placement is decided plug-in the device into the wall outlet. Turn on the power and monitor the LED.
Configuration
Embark the setup process with any of the specified methods. Follow the guide as given:
WPS
WPS based netgear ex6150 setup is a simple method of configuring. In this method you just have to push the WPS button on the extender following which on the router. The whole setup process is 8-10 minutes out of which you need to hit the button within 2 minutes on both the extender and router. Once the connection is done successfully, the LED turns solid green.
Web
Web based netgear extender setup is not a difficult task but it's time consuming and allows you to make several changes. Check out the steps you have to follow:
Firstly take a computer/ laptop device.
Connect it with the extender’s network.
Open google chrome or other browser.
Search for www.mywifiext.net web address.
Choose a new extender setup and follow the screen.
Step next you have to connect the extender with the router using SSID & Password of the host router.
Create a password for a new network of extenders.
Check for firmware updates and make other changes.
End the setup by pressing the submit button.
Test Network
Testing the new network is very simple by using a smartphone or tablet device with WiFi enabled feature. Connect the device to the new network and then you have to surf the internet. You can watch online videos, play online games and more from different locations of your home. If needed then you have to relocate the extender strategically.
Troubleshoot Common Errors
Even with the best gadgets like netgear ex6150 extender you face trouble. If at your home you have a netgear ex6150 setup then you might experience slow network, sudden connection drop and other issues occasionally. Resolving all these errors is very simple if you know how to troubleshoot them. Here are few tips to resolve the common errors with netgear extender:
Firstly verify the host device network & then if there is an issue connect your ISP.
Thereafter check the hardware setup and if there is any damaged cable then replace it.
Relocate the extender strategically so it keeps in the range of the router and also expend signals across your space.
Further try rebooting the device to eliminate temporary issues.
Next you can try out firmware updates by accessing the extender’s login page.
Lastly you can try factory resetting the device by using the reset button. Erasing the configuration and set it up again will definitely help.
Conclusion
We conclude that the netgear ex6150 setup will uplift your existing network performance and create a network on which you can rely. There are two ways following which you can add the extender to your existing network. Netgear extender will eliminate dead zones by amplifying your router’s signals and rebroadcasting to the area where you were facing the issue. Hope the above information about the netgear range extender setup is useful for you.
0 notes
Text
There’s a lot of choice out there when it comes to Wi-Fi home technology. The latest addition to the Wi-Fi world is the mesh router. Mesh networks are used in large places that require protected secure networks, such as businesses and military bases. These mesh networks have recently become available for residential users but the question is “do you need one?” If you live in a large home – such as one over 3,000 square feet – or in a home with an unusual layout, with more than two stories, then chances are you have a lot of internet dead zones in your home. If that sounds like you then you might benefit from installing a mesh network and mesh router. Several big names in the industry have started offering their own mesh routers, such as Linksys, Netgear, Samsung, and even Google are getting involved. With all of that choice and the improved popularity of mesh networks, many people are questioning what mesh Wi-Fi routers are and if they need one. What are Mesh Wireless Routers?You most likely know what a router is as it’s at the heart of every Wi-Fi network. This is the central part of the network that broadcasts wireless signals to connected devices. The router essentially routes internet traffic between devices and modems. It’s what sends the signal from the modem to your computer or phone. Most people completely forget that their router even exists until there’s a problem with their connection and they have to reset it to start things going again. The main problem with the traditional wireless router is that they have a limited range. Large buildings with multiple floors that all need wireless access are limited and have almost non-existent internet coverage. These lands where the internet forgot are known as “dead zones” and are created when a single-point router can’t reach a particular area. Mesh wifi routers can help to eliminate the problem of dead zones. Instead of sending out signals from a single fixed location, these networks offer a range of network access points. There is one main connection to the modem that works similar to a router, but there are other access points – called satellites – that capture this signal and broadcast it as if they were another router. The Benefits of Using a Mesh Router There are several benefits to using a mesh router for your network. The most obvious benefit is the increased range and reliability of the Wi-Fi signal, but it’s not the only benefit. Better Network Management Something that sets mesh networks apart from traditional routers is that they make it much easier to manage the network. Most mesh routers operate on a fully automated basis. Administrators can control and access the network through an app, even when out of the home or office.Mesh routers come with apps that allow users to control speeds, prevent access to particular networks and websites, establish guest networks for other users, test the connection quality of access points, and establish a connection to the wider Internet of Things of smart devices at home. The most expensive and high-tech mesh routers have even more features, but these features can only be controlled from the local network. Streamlined Connections If you want to extend the range of a traditional Wi-Fi network you would have to use a range extender. These work similar to the satellites of a mesh network by capturing and rebroadcasting the signal. The difference is that they often require users to manually create separate networks with unique names for the extender. They also aren’t as effective as a mesh network at maintaining a constant signal. Mesh networks mean that you don’t have to constantly reconnect to networks as you move your device through the home because it’s all on a single network. It also means that there’s less lag involved as everything uses the same signal instead of bouncing a signal across multiple networks. Better Security As well as being easier to control and manage, many mesh routers come with better security than standard network routers.
Because they are so much easier to manage, users will have an easier time keeping their network safe. Mesh Wi-Fi routers automatically check for firmware updates and automatically install them too. Some of them even come with the ability to block known malicious websites that present a security risk to computers. The Negatives of Using Mesh Routers Mesh routers may come with a lot of great benefits, but that doesn’t mean they don’t have their drawbacks. Here are some of the negatives of using mesh routers in your home. More Expensive Mesh routers can cost up to – and over - $300 for a good starter set. Additional satellites will cost an extra fee, often up to $100 per satellite. Traditional routers by themselves can cost around $100 for a good one, with range extenders costing between $20 and $100. You could create your own extended network for less than the cost of a mesh network. Can Waste Resources Mesh networks are only worth installing in homes that need them. The average mesh network is more than a small building or home needs. If you don’t have connection problems or you don’t have a high demand for the internet, then it’s probably excessive to invest in a mesh network. Range extenders can help cover up Wi-Fi dead zones and you can consider investing in a regular router with a greater range. Uses More Equipment While the access points of a mesh router are small and easily hidden, there’s still the fact that you might need several of them to take full advantage of a mesh network. You’ll need to find somewhere to store them in your home. That could be an issue for people who prefer having their network equipment in a single location out of the way. Do You Need a Mesh Wi-Fi Router?The biggest weakness of traditional routers is that they don’t cover large areas and buildings with walls that block signals. If you want a network that does, and you’re also interested in the other benefits of a mesh network system, then they could be the right choice for you. If you live in a small home or apartment and don’t have any issue with Wi-Fi dead zones though, then the investment in a mesh network probably won’t be worth it. The question of whether or not you need a mesh Wi-Fi router depends on your needs and circumstances.
0 notes
Text
Amplify Your Existing Network With Netgear
Having a router in today's households is very common but users still face the issues of inconsistent speed and poor connectivity in certain corners of the home. Now what is the solution that can solve all your connectivity issues? The answer is a good and reliable WiFi range extender. You might have heard this name before, so today let's know what exactly it is and why it is used. A Wi-Fi range extender is also known by many other names like Wi-Fi repeater and WiFi booster. As the name itself suggests it amplifies and boosts up the signals of your existing network. This amplification of signals helps in kicking out all the dead zones from your abode. Wi-Fi range extenders are the perfect networking devices for modern households that have multiple devices running simultaneously and have a larger area with multiple rooms and floors.
Now the market is flooded with so many range extenders, choosing the one for your home or office space can be a little difficult task but do not worry as we have got you all covered. So, today we will explore one of the best sellers in the Wi-Fi extender category which is none other than Netgear AC1750 Wifi Range Extender.
What Makes Netgear AC1750 Setup The Bestseller?
The various reasons that are listed below are what makes the Netgear AC1750 Setup stand out from other range extenders:
✓ High-Speed Performance
The Netgear AC1750 setup has the ability to remove all the dead zones from your home effectively. It provides its users with a combined speed of up to 1750 Mbps. Thus making it ideal for every modern need. It won't disappoint you in any circumstances, whether you are playing high-intensity games, watching high-definition videos, downloading heavy files or having an important work meeting. It will only provide a seamless and buttery smooth internet experience at every step that you take in your home.
✓ Extended Coverage
Now you do not need to sit in front or near your networking device to get full coverage because the Netgear AC1750 setup can extend its reach to every single corner of your home. Be it your balcony, terrace, basement or your rooms on the second floor you will get full signals without a single drop.
✓ Feature Set
The Netgear AC1750 range extender offers its users multiple features and this is what makes it the number one choice.
Its dual-band technology makes it ideal for both near and far-away devices.
It comes equipped with two external antennas that enhance signal strength and overall coverage.
Its fast-lane technology makes your networking experience more fun.
It also comes with ethernet ports, so you can directly connect your wired devices to the extender.
Further, its auto-connect feature automatically connects to the best Wi-Fi band and extends the network thus simplifying the whole management process.
Netgear AC1750 setup supports WPA/WPA2 security protocols to protect your network from unauthorized access which is very important in today's digital era.
✓ User-Friendly Setup Process
Unlike other technical devices that take hours to set up, Netgear has made everything super user-friendly so even non-tech users can easily and independently set up this magical range extender. The availability of a user manual with the extender makes it very convenient to know all the details. The extender can be easily set up via the Netgear app or you can also use the WPS button to set the extender in under two minutes. Yes, it's that easy to set up Netgear AC1750.
✓ Brand Reliability
Netgear is a well-known and trusted brand when it comes to networking equipment and one of the major reasons why more and more people are buying Netgear AC1750 wifi range extenders is due to their trust in Netgear's commitment to quality.
✓ Universal Compatibility
You do not need to worry about whether the extender will be compatible with your existing setup or not because the Netgear AC1750 range extender comes with universal compatibility. It works amazingly with any standard router thus making it a versatile option for every user. Further, its extremely small size doesn't take up much space and sits amazingly well with your interiors.
✓ Price-To-Performance Ratio
The Netgear AC1750 WiFi range extender provides you with good performance at a relatively affordable price. Thus offering value for money as compared to some higher-end models. So if you want a deal that is highly qualitative yet easy on your pocket then surely the Netgear AC1750 setup should be your go-to choice.
So, if you are also looking for a device that can provide you with smooth and super fast internet speed and coverage then look no further and just invest your money in Netgear’s range extender as they will make you forget what poor connectivity, and dead zone looks like.
1 note
·
View note
Link
Check out this listing I just added to my Poshmark closet: EUC NETGEAR WiFi Range Extender.
0 notes
Text
0 notes
Text
How To Setup WiFi Range Extender Netgear
Learn How to Setup WiFi Range Extender Netgear, plug it into a power outlet within the range of your existing WiFi network. Wait for the power LED to light up solid green. Connect to the extender's WiFi network on your device. Open a web browser and enter "www.mywifiext.net in the address bar. Follow the on-screen instructions to complete the setup process, including connecting the extender to your existing WiFi network.
#How To Setup WiFi Range Extender Netgear#How To Setup WiFi Extender Netgear#How To Setup Extender Netgear#Extender Netgear Setup
1 note
·
View note
Text
What to Do When 'mywifiext.net' Refuses to Connect?
If mywifiext.net refused to connect then, this happens when there is a power outage, wrong admin credentials, browser issues, network interruptions, and more. To fix this, ensure to have an adequate power supply, enter the correct login details, fix the browser issues, and remove the network obstacles. To know more troubleshooting steps regarding the same, reach us here freely!
0 notes
Text
Wi-fi Antanna In Chennai
WiFi antennas in India come in various types and are used to extend the range and improve the signal strength of wireless networks. Here’s an overview of some common WiFi antenna types available in India and their typical uses:
Types of WiFi Antennas
Omnidirectional Antennas
Description: These antennas radiate signals in all directions (360 degrees horizontally).
Use Cases: Ideal for general-purpose WiFi coverage in homes, offices, and small outdoor areas.
Directional Antennas
Description: These antennas focus the signal in a specific direction, providing longer range and better performance in that direction.
Use Cases: Used for point-to-point connections, such as between buildings or for targeted coverage in large open areas.
Yagi Antennas
Description: A type of directional antenna with a high gain, often used for long-distance communications.
Use Cases: Suitable for rural areas where the WiFi source is far from the user, such as connecting to distant WiFi hotspots.
Parabolic Grid Antennas
Description: These antennas have a parabolic shape, providing very high directional gain.
Use Cases: Used for very long-distance point-to-point links, often in combination with outdoor WiFi systems.
Panel Antennas
Description: Flat antennas that can be mounted on walls or poles, offering moderate to high gain.
Use Cases: Ideal for point-to-multipoint setups, covering a specific area with stronger signal.
Popular Brands and Models in India
TP-Link
Models: TP-Link TL-ANT2408C (omnidirectional), TP-Link TL-ANT2415D (directional)
Known for: Reliability and good performance for home and small business use.
Ubiquiti
Models: Ubiquiti NanoStation (directional), Ubiquiti AirGrid (parabolic)
Known for: High-performance antennas suitable for professional and enterprise use.
Netgear
Models: Netgear AC1200 WiFi Range Extender (includes antennas for extended range)
Known for: Easy-to-use solutions for home and small office networks.
D-Link
Models: D-Link ANT24–0700 (omnidirectional), D-Link ANT24–2100 (directional)
Known for: Affordable and effective WiFi solutions.
Buying Considerations
Range and Gain
Higher gain antennas provide better range but may have a narrower coverage area.
Consider the environment (indoor vs. outdoor) and the distance you need to cover.
Compatibility
Ensure the antenna is compatible with your router or access point.
Check for connectors (RP-SMA, N-Type) and ensure they match your equipment.
Usage Environment
Indoor antennas are typically less rugged than outdoor models.
For outdoor use, look for weatherproof and durable designs.
Regulations
Be aware of local regulations regarding the use of high-gain antennas and frequency bands.
Where to Buy
Online Retailers: Amazon India, Flipkart, Snapdeal, etc.
Electronics Stores: Reliance Digital, Croma, Vijay Sales, etc.
Specialized IT Shops: Local computer and networking equipment stores.
Tips for Optimal Use
Position antennas in a central location for omnidirectional coverage.
Elevate antennas to reduce obstructions and improve line-of-sight.
Use quality cables and connectors to minimize signal loss.
By considering these factors, you can choose the right WiFi antenna to improve your network’s performance in India.
#UWB antenna in India#RFID antenna in India#IoT antenna in India#SMD antenna in India#GPS antenna in India#Antenna design in India#Antenna simulations in India#Chip antenna in India
0 notes
Text
Netgear EX6150 Setup
Enhance your WiFi coverage with a Netgear EX6150 setup. This high-performance extender delivers faster internet speeds and extended range. To set up, connect to the Netgear_EXT network, visit mywifiext.net, and follow the installation steps. If the page doesn’t load, try 192.168.1.250. Troubleshoot login or connectivity issues by resetting your device. Enjoy uninterrupted streaming, gaming, and browsing. Need expert setup support? Contact us now for a seamless Netgear EX6150 setup!
1 note
·
View note
Text
0 notes
Text
Can’t Find New Extender Setup Button After Connecting To Netgear_Ext? -
Netgear WiFi range extender can be set up and installed using various different ways. However, the most used way to install a Netgear extender is the manual method. Whether you want to perform the Netgear EX3700 setup or the latest Nighthawk model setup, the manual method requires you to connect to Netgear_Ext SSID and access mywifiext.net.
Once you have logged in to mywifiext, you will see the ‘New Extender Setup’ button. That’s where a majority of users often stuck! If you are also not able to find the New Extender Setup button, we have got your back. This post is all about to get rid of this issue. Scroll down to read more.
For More Info - https://streamingwords.com/cant-find-new-extender-setup-button-after-connecting-to-netgear_ext/
0 notes