#nhair
Text
- ABOUDIAMOND Animation Studio - www.youtube.com/@aboudiamond
0 notes
Text


Beautiful Black Women 👑
@jorjasmith_ for @portermagazine. Story by @charliebcuff.\n\nHair: @danielleigor\n\n#blackmagcovers #jorjasmith
I don’t want no problems
#WWERawMichin, that bullet Babe. 📸
8 notes
·
View notes
Text
iahav d to wahsmy nhair and go get fucked ovre at school tomorro FUCKEEEED!!! ILOVE PAIN I LOVE PAIN I LOVE PAIN
2 notes
·
View notes
Text
Forefront 7
An article on 80. lvl offered insight into the project of Nick Gaul. He was inspired by the "Masters of the Universe" character King Grayskull and aimed to bring the character to life using Unreal Engine and Maya. The artist collaborated with Chay Johansson, who handled CFX and simulation, to push their understanding of character creation and animation in Unreal Engine.
Starting with a generic MetaHuman model, the character was exported to Maya for rigging and then used in Unreal for motion testing and simulation. The character’s wardrobe and hair were simulated using a combination of tools like Ziva, nCloth, and nHair, with XGen used for hair grooming. For the facial rig, a MetaHuman face was created and then customized to match the unique features of King Grayskull using Wrap3 and Maya.
The facial motion was driven by the Live Link app, allowing the artist to capture and apply their own facial performance to the character. Once all animations were completed, the character and simulations were exported as USD and Alembic files for lighting and final setup in Unreal.

King Grayskull (Gaul, 2024b)
The creator also developed a method to create the character's dreaded hair, focusing on efficiency and control to avoid overloading Unreal Engine. The final scene was built quickly using Quixel Bridge assets, with custom elements created in ZBrush and textured in Substance 3D Painter.
I think, this project showcases a high level of skill, creativity, and technicality. The decision to use MetaHuman as a foundation and then customize it to fit King Grayskull's unique design is a smart move, leveraging existing tools while pushing the boundaries of what's possible in Unreal Engine. The collaboration with Chay Johansson adds another layer of depth, particularly in the complex simulations of hair and clothing, which are often challenging aspects of character creation.
Overall, this project reflects a solid blend of artistic vision and technical execution. It pushes the boundaries of what's achievable with current tools and workflows, particularly in Unreal Engine, and serves as a great example of how to bring a character to life in a way that's both visually stunning and technically possible.
Gaul, N. (2024a). Character Production in Unreal Engine’s MetaHuman & XGen. Available at: https://80.lv/articles/character-production-in-unreal-engine-s-metahuman-xgen/.
Gaul, N. (2024b). King Grayskull. Available at: https://www.artstation.com/artwork/49rArq.
0 notes
Text
Character Production in Unreal Engine: Integrating MetaHuman and XGen
The evolution of character production in game development has been significantly influenced by tools like Unreal Engine's MetaHuman and XGen. A recent project by Nick Gaul, recreating the character King Grayskull, showcases the potential of combining these technologies with traditional techniques to create highly detailed and animated characters.
MetaHuman as a Foundation
Gaul's workflow began with Unreal Engine's MetaHuman as the base for character creation. This approach leverages pre-existing data and rigging, providing a solid foundation for custom character development. The MetaHuman mesh was exported to Maya, allowing for further customization while retaining the benefits of the MetaHuman system.
Advanced Rigging and Animation
The project demonstrates a sophisticated approach to rigging and animation:
Custom rigging in Maya
Utilization of Unreal's IK Retargeting for motion warping
Integration of various simulation techniques including Ziva, nCloth, and nHair
This multi-software approach allowed for complex simulations of hair and clothing, enhancing the character's realism and dynamism.
Facial Rigging and Motion Capture
A notable aspect of the project was the facial rigging process:
Creation of a MetaHuman face in Unreal Engine
Refinement in Maya using Bridge
Use of Wrap3 for precise 1-to-1 matching with custom geometry
This method enabled the use of live facial motion capture data while maintaining the flexibility of the MetaHuman facial rig.
Innovative Hair Creation
Gaul's approach to creating King Grayskull's distinctive dreadlocks demonstrates creative problem-solving in game character design:
Focus on the outer shell of each dread to reduce complexity
Use of a template system for efficient replication
Application of Maya XGen for detailed grooming
Export as Alembic caches for integration into Unreal Engine
This technique balanced visual fidelity with performance considerations, crucial for real-time rendering in game engines.
Integration with Unreal Engine
The final stages of the project highlight the strengths of Unreal Engine in character production:
Seamless integration of custom assets with Quixel Bridge resources
Efficient shader and lighting setup
Rapid environment creation
Gaul's project demonstrates how Unreal Engine can serve as a central hub, bringing together various aspects of character and environment creation into a cohesive whole.
This case study illustrates the evolving landscape of character production in game development, showcasing how artists can leverage cutting-edge tools like MetaHuman while incorporating traditional techniques and custom solutions to achieve unique and highly detailed character designs.
Reference:
Gaul, N., 2024. Character Production in Unreal Engine's MetaHuman & XGen. [online] 80 Level. Available at: https://80.lv/articles/character-production-in-unreal-engine-s-metahuman-xgen/
0 notes
Text
3ds Max vs Maya: Detailed Comparison of Features and Capabilities
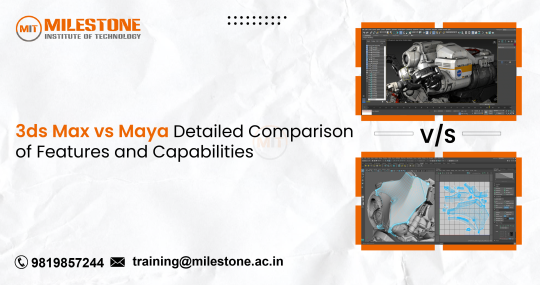
When it comes to 3D modeling, animation, and rendering, two names often come up: Autodesk's 3ds Max and Maya. Both are industry-standard tools used by professionals worldwide, from game developers and filmmakers to architects and designers. However, each software has its unique strengths and nuances that make it better suited for certain tasks and workflows. In this detailed comparison of 3ds Max vs Maya, we'll explore the features and capabilities of 3ds Max and Maya to help you decide which one might be the best fit for your needs.
User Interface and Ease of Use
3ds Max
3ds Max is known for its user-friendly interface, which makes it particularly popular among beginners and intermediate users. The software features a customizable and intuitive UI with a wide array of toolsets that are easily accessible. Its modifier stack system allows for non-destructive editing, making it easier to experiment and iterate on designs.
Maya
Maya, on the other hand, has a steeper learning curve but offers immense flexibility and power once mastered. The interface is highly customizable, allowing users to tailor the workspace to their specific needs. Maya’s node-based architecture provides a deeper level of control, which is highly beneficial for complex animations and simulations. However, this can be daunting for new users.
Modeling Capabilities
3ds Max
3ds Max excels in polygon modeling and is often the go-to choice for architectural visualization, game development, and industrial design. Its precision and control in handling vertices, edges, and faces make it ideal for creating detailed and complex models. The software also includes robust spline-based modeling tools, which are useful for creating smooth and flowing surfaces.
Maya
Maya is highly regarded for its organic modeling capabilities, making it a favorite among character artists and animators. Its advanced sculpting tools and ability to handle high-resolution meshes allow for the creation of intricate and lifelike models. Maya’s NURBS modeling tools are also powerful, enabling the creation of smooth, mathematically-defined surfaces, which are crucial for character rigging and animation.
Animation and Rigging
3ds Max
3ds Max offers solid animation tools and is particularly strong in keyframe animation. Its Character Studio feature provides an efficient rigging and animation system, especially for bipedal characters. The software also includes CAT (Character Animation Toolkit), which simplifies the process of rigging and animating characters.
Maya
Maya is renowned for its superior animation and rigging capabilities. It is the industry standard for character animation in film and television, thanks to its advanced rigging tools and flexibility. Maya’s HumanIK system and powerful skeleton rigging tools enable precise control over character movements. Additionally, its animation layers and nonlinear animation capabilities offer animators extensive creative freedom.
Dynamics and Simulation
3ds Max
3ds Max provides a range of dynamics and simulation tools, including particle systems, cloth simulation, and rigid body dynamics. The MassFX toolset integrates these features, allowing for complex physical simulations. While capable, 3ds Max’s dynamics tools are generally considered less advanced than Maya’s.
Maya
Maya stands out in the realm of dynamics and simulation. Its nDynamics system, including nCloth, nHair, and nParticles, allows for highly detailed and realistic simulations. Maya’s Bifrost procedural effects platform enables the creation of complex simulations like fluids and smoke. These capabilities make Maya a preferred choice for visual effects artists.
Rendering
3ds Max
3ds Max offers robust rendering capabilities with its native Arnold renderer and the legacy Scanline Renderer. The integration with third-party renderers like V-Ray and Corona enhances its rendering power, making it a strong contender for architectural visualization and product design. The ActiveShade interactive rendering feature allows users to see real-time updates as they adjust lighting and materials.
Maya
Maya also features the Arnold renderer, providing high-quality rendering outputs. Its integration with other render engines, such as RenderMan and Redshift, makes it versatile for different production needs. Maya’s Hypershade material editor and extensive shader networks give artists fine control over textures and materials, essential for achieving photorealistic results.
Scripting and Customization
3ds Max
3ds Max supports MAXScript, a scripting language that allows users to automate repetitive tasks and create custom tools. While powerful, MAXScript is generally considered less flexible than Maya’s scripting options.
Maya
Maya excels in scripting and customization, supporting both MEL (Maya Embedded Language) and Python. This dual-language support provides unparalleled flexibility for creating complex scripts and custom tools, making it a favorite among technical directors and pipeline developers.
Industry Use and Integration
3ds Max
3ds Max is widely used in architecture, product design, and game development. Its integration with other Autodesk products, such as AutoCAD and Revit, makes it a preferred choice for architectural visualization and engineering workflows.
Maya
Maya is the tool of choice for the film and television industry, especially for character animation and visual effects. Its extensive toolset and flexibility make it ideal for high-end productions and large studio environments.
Conclusion
Choosing between 3ds Max and Maya ultimately depends on your specific needs and industry. If you are focused on architectural visualization, product design, or game development, 3ds Max’s user-friendly interface and robust modeling tools may be more suitable. On the other hand, if you are working in film, television, or character animation, Maya’s advanced animation and simulation capabilities provide the depth and flexibility required for these demanding fields.
Both software packages offer powerful tools and features that can cater to a wide range of 3D design and animation tasks. Understanding their strengths and how they align with your workflow will help you make the best choice for your projects.
0 notes
Text
Creating Expressive Characters: Rigging Best Practices

Rigging is the unsung hero of 3D animation. It’s the invisible art that gives life to characters, allowing them to move, emote, and interact with their virtual world. In this blog post, we’ll delve into rigging best practices that elevate your characters from stiff puppets to expressive beings. Whether you’re a beginner or a seasoned animator, these tips will enhance your rigging skills and bring your characters to life.
1. Understanding Character Anatomy
Before diving into rigging, understand the anatomy of your character. Study how joints connect, where muscles flex, and how bones move. This knowledge informs your rigging decisions and ensures natural movement.
Rigging the Spine
Use a hierarchical spine rig with controls for each vertebra.
Add squash-and-stretch attributes for flexibility during animations.
Facial Rigging
Rig facial muscles (brows, lips, cheeks) individually.
Blend shapes (morph targets) allow precise facial expressions.
2. Creating Custom Control Rigs
Control rigs are your animator’s toolbox. Let’s explore advanced techniques:
NURBS Curves and Custom Shapes
Create custom NURBS curves as control handles.
Attach them to joints for intuitive manipulation.
IK/FK Switching
Implement IK/FK (inverse kinematics/forward kinematics) switching.
Seamlessly switch between posing (FK) and natural movement (IK).
3. Enhancing Facial Expressions
The face is the canvas of emotions. Rigging expressions adds depth to characters:
Joint-Based Facial Rigging
Use joints for basic facial movements (smiles, blinks).
Combine with blend shapes for nuanced expressions.
Rigging Eyes and Eyelids
Rigging eyes involves aim controllers and eyelid joints.
Simulate eye blinks and squints for realism.
4. Simulating Secondary Motion
Lifelike animations go beyond primary movements. Let’s explore secondary motion:
Cloth Simulations
Rig clothing with cloth simulations (nCloth, Marvelous Designer).
Achieve realistic folds, wrinkles, and draping.
Hair Dynamics
Rig hair with dynamic simulations (nHair, XGen).
Add wind forces for natural hair movement.
Conclusion:
Enroll in our 3D Animation Course in Hyderabad and take your skills to the next level. Whether you’re a beginner or an experienced animator, our expert instructors will guide you toward animation excellence.
0 notes
Text
sphere practise


I started this process by adding in a generic sphere and selecting the faces of it, I then went to the fx tab and selecting the nhair it added the basic strands of hair.
using the playbar to scub along the hair falls over a time, I feel this was a good start to trying to understand nhair
0 notes


Text
Character Modeling...p1
I started working on my characters for my short film for school (technically starting early-- maybe a good thing, maybe not...)
Luckily I get free/cheap licenses for these expensive programs that are required to even function as a 3D artist with my tuition (which is way more expensive than those licenses ever would have been...)
Anyway-- to start, I modeled a character in zbrush. I save a lot of backups, so I can go back and see most of the steps of my process (pics below)
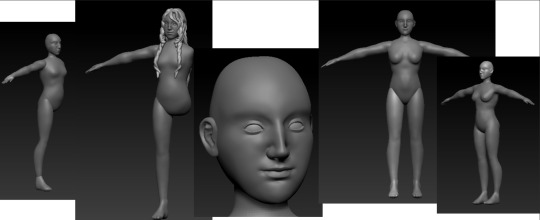
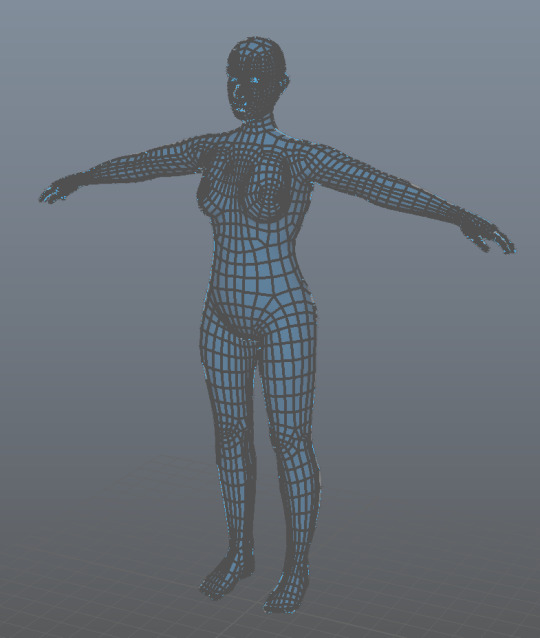
Then I brought the highres mesh into maya, did a little retop fun where I zoned out for like 3-5 hours as I made my cute little loops and such:
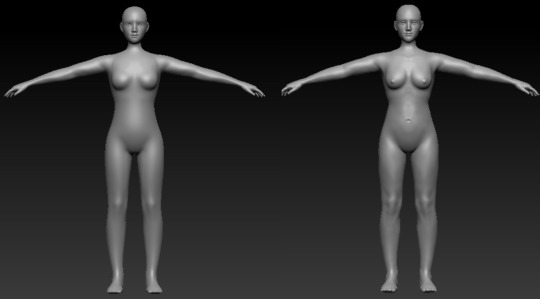
Then the whole operation was brought back to zbrush for that sweet sweet projection action to then bake maps in substance...(lowres(subdivided a ton but pre-projection) vs highres mesh below)
So I imported the maya retopologized file into substance, baked my mesh, and got to work painting by hand <3 (base color display on left, material display on right)
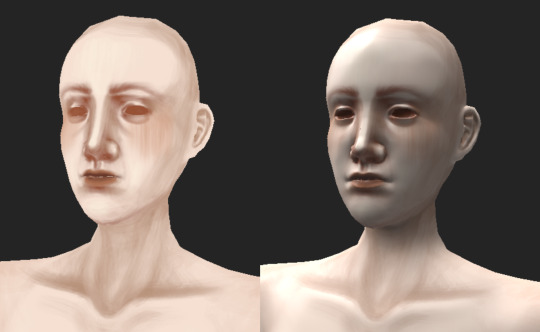
She's beautiful! For my first real attempt at painting textures, I think it looks pretty good, if a bit scary without... hair and eyes and such.
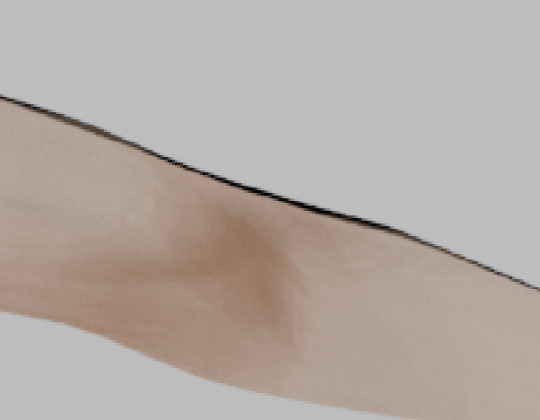
And I'm realizing the retop job I did might not have enough topology, especially since I'm planning on using her for a short film, so I didn't really need to worry about having too many verts or anything, especially since she has soo few that I can see issues around the edges of the geometry where (I'm assuming) the normal maps are adding shadows to where the geometry oversteps the map, for example this black line on her arm:
But I'm not even sure if I'm going to use the normal maps anyway because I want to experiment with trying to make the renders look painted/flat (rip to all that sculpting work... at least it helped me figure out how to paint details in substance even if I don't end up using the map)
...
So onto hair! I wanted dynamic hair so her gorgeous locks could blow in the simulated wind, and I wanted her to have curly hair. When I looked up how to use nHair in maya, I saw people recommend xgen. I have some limited experience in xgen thanks to one class of one course I took last semester, but really I had to relearn it through a YouTube video (thank you J Hill on Youtube! linked at end of post). It seems like I might've gotten rid of the file that had my xgen attempt so I don't have a picture to show, but... my girl was balding, and xgen wasn't letting me create maps because of issues with the file paths that I coudn't resolve despite going through the path and not finding any issues?? so I gave up. I tried to mess around with it for a bit, but really xgen wouldn't have fit the style I was going for anyway. I wanted chunky hair that I could paint textures for. To fix the mess I made, I would've needed time, and though it would've been good practice and a learning experience, I really wanted to focus on finishing my project following the intended aesthetic than branching out and forgetting about my original goal. So, raincheck xgen. We'll meet again on another day. To make up for no xgen pics, heres a screenie from the file I do have where I tried paint effects on my hair curves:

lol.
I wanted the hair curly anyway, and I didn't really want to use paint effect hair so... onwards:
Then I saw a video on using curve warp deformers for hair (GGP_Animation on Youtube) which was a cool introduction to something in maya I didn't even know existed (plugin wasn't even loaded on my machine) but I realized that if I had the curves and wanted curly hair, I could just make a sweep mesh that followed the curves! So I did, and then followed ANOTHER tutorial (CG MAGUS on Youtube) on how to make dynamic hair to figure out which option in the nHair menu I should choose ^.^ and finally! the curves were moving! --But the sweeps weren't... So I saved the preset I had made for them and applied it to the NEW hair system curves-- and finally, she had beautiful dynamic curls (ignore the eyes--temporary, just a quick 3-color ramp on spheres).
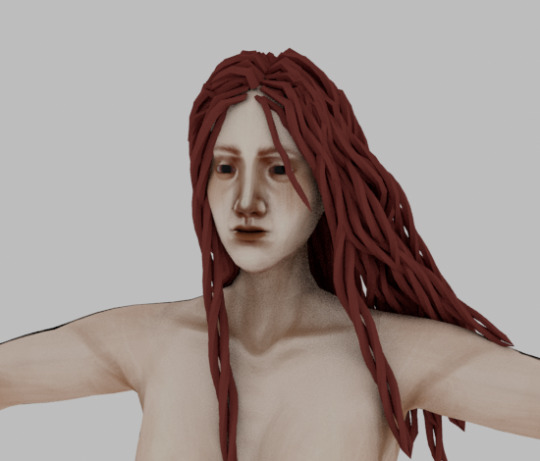
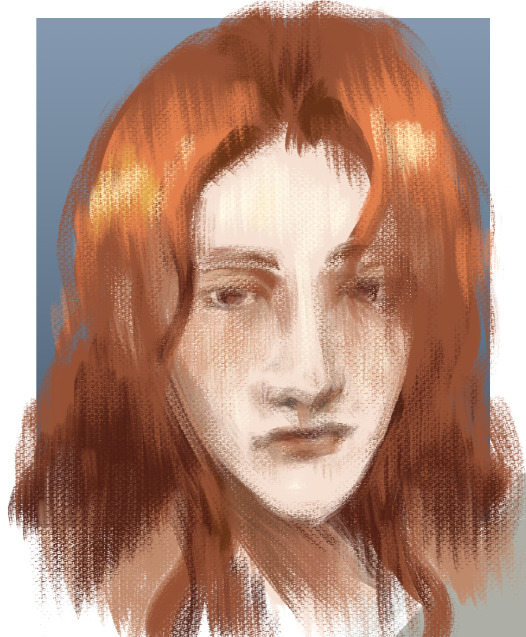
Just kidding, they're kinda ugly lol :,) but that's hopefully just because it's just a generic aistandardsurface shader with no texture. I'm going to repaint the texture on the scalp so even if it shows through it doesn't look like her hair is thinning. I'm also planning on using flair renderer (linked below), so I have to pay for that and do some testing with it to figure out how I can get the final look I'm going for. Concept portrait design below:
youtube
youtube
youtube
1 note
·
View note
Text


Beautiful Black People 👑
wwenxt:
@jadecargill has a front row seat for this #NXTWomensTitle Match! #HalloweenHavoc
jeffmadorephoto:
First time I met and worked with always liked this portrait
Fun portrait shoot with
Photo I had never posted of and .
Was always a fun time working with them both.
(Photos of Bianca Belair and Montez Ford)
victoriamonet:
Y’all!!🥹😭 I sat down with THE @kellyrowland for @rollingstone’s musicians on musicians, and let me tell you… there were laughs tears and possible bloodline realizations but above all it was a complete honor and holds a super special place in the “I can’t believe this actually happened Wtf is life” part of my brain! FULL Video out on Friday!!\n\nKELLY I love you!!!!!! 🤎🤎🤎\n\nThank you @rollingstone and everyone involved: \nPhotographer\n@kanyaiwana x @delarevolucion \nWriter & Interview Moderator\n@mankaprr \nCreative Director\n@joe_hutchinson \nDirector of Photography & Deputy Creative Director\[email protected] \nStyled by @timothyluke_ \nMake up @mua.alexander \nHair: @jstayready_ and me lol\nPR: @genesisegarcia \nmanagement: @rachelle_jl
6 notes
·
View notes
Text
I have managed to fix the problem with my fur so that it moves properly when affected by dynamics like wind. What my problem was before, was that when I was using the curves to create nhair, I wasn't selecting the sphere as a base so the hairs weren't attaching at a follicle. This has mostly been fixed, and now when I import an animated fbx cache back into the xgen file I have fur affected by wind. The only problem now is the fuzzy effect around the edge. I don't know if this is because of the noise I have applied to to the fur, or if it just something that happens, but I need to try and resolve this before moving forward with modelling my creature.
1 note
·
View note
Text
MAYA ROOM #12


Here are all the curves I made before extruding. It took quite a while to make the curves fit the right shape and contour and I really had to familiarise myself not only with the curves tool but also how to tweak the curves once made. It took some time to figure out how to alter the angles and positioning of the points on the curves until it was the right shape but once it was done it worked really well.


These are the finished product of all the wires, they came out really well. I don't think I have time to use the nhair tool to give them actual weight but I tried to give them natural contours and droops so that I didn't need to use the nhair tool.


I did the same with the plug socket next to the bed and started work on a lava lamp. I started off with the basic shape and made the central face transparent before I moved onto the blobs. But before I started making the blobs I remade the bedside table so it matched the rest of the furniture in the room.

Up until this point I hadn't really used the sculpting tool and I wanted to use this as my chance to figure them out. Initially the shapes were coming out really angular and not as soft and rounded as I had hoped.

I found that this flattened sphere worked really well as the base blob and experimented with the sculpting tools to build up the shape I had in mind. The Inflate tool and Build up a Surface tool were a great starting point so get the initial angular forms which I could then gradually smooth out whilst tweaking the shape normally with the move, scale and rotate tools. I kept messing around with the tools until I had something fairly random and natural looking and it worked pretty well. I selected the shapes once finished and pressed 3 to make them even smoother which helped add to the overall look.

This is the lamp I ended up with, I scaled it up a bit later because it was a bit small but all in all it turned out well.
0 notes
Photo
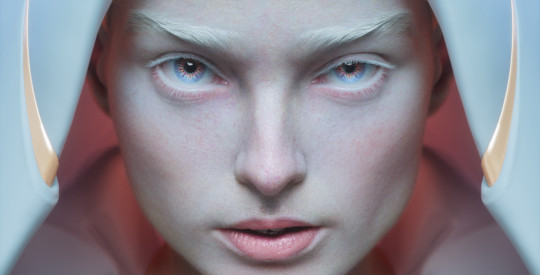
FHNT | 3D PORTRAIT
“Zbrush sculpt without scan; Texture using "3D Scan Store", Rendered in Maya with Arnold, Used Xgen core for the hair, Iris with Nhair”
Artstation.com/artfhnt
0 notes
Video
youtube
Maya绑定教学:nHair头发动力学 Maya Rigging Tutorial: nHair Hair Dynamics
0 notes
Last Seen Blogs

plush-archive
archive of stuffed animals i find online

ours62
Ours 🐻

shoujo-ly
少女

albba-rubbi
Ruby

jackswanton
Kämpfen für die freiheit