#pentax program plus
Explore tagged Tumblr posts
Visit Tumblr Blog
Explore Tumblr blogs with no restrictions, modern design and the best experience.
Last Seen Tumblr Blogs


Fun Fact
If you dial 1-866-584-6757, you can leave an audio post for your followers.
Text

0 notes
Text

Elemental III Ashley, September 2017
philipweller.com
#photography#film photography#girlsonfilm#35mm#photographers on tumblr#analog#35mm photography#filmisnotdead#filmwave#beautiful#woman#grain is good#film grain#pentax program plus#pentax#double exposure#art nude
4 notes
·
View notes
Text


#collage#street style#fashion#aime leon dore#tote bags#noah#pentax#pentax program plus#fujifilm#fujifilm superia x tra 400#new balance#new balance 550#picnic#nyc#central park#nyc date#metropolitan museum of art#coffee#cafe leon dore
33 notes
·
View notes
Photo

Mary
Echo Park, CA
#mary#pentax program plus#pentax 85mm#35mm#film#analog#ishootfilm#filmisnotdead#street#Portrait#hapa#hafu#echo park#la#los angeles#Palm trees#sidewalk
15 notes
·
View notes
Photo


light leaks buffalo, ny pentax program plus 35mm
#photography#film#film photography#35mm#35mm film#35 mm#pentax#pentax program plus#art#mine#my art#light leaks
12 notes
·
View notes
Text
Which 35mm or 120 Film Should I buy?
Ever wonder as to “which 35mm or 120 medium format film I should buy?” or “35mm film shop near me” or “where can I buy 35mm or 120 or C41 film?” or “where can I black & white film near me?” or “where can I buy color film?”
If you asked any of the above questions, this post is for you. So, you are just starting into film photography, let’s take an estimate of costs associated with your new passion:
Camera - handed-down, inherited - no cost. Unless it needs light-seals or mirror foam replaced. Then, $15-75. $15 to DIY, cheaply. Go to a hobby store and buy felt and foam and watch YouTube to DIY. Yay! $75 to buy laser-cut seals + cost of labor to remove the old seals and foam completely otherwise, the new seals and foam won’t adhere (stick) correctly. $75 also includes the cost to film-test your camera after the pro installs the new light seals and foam to make sure that they were installed correctly and no light leaks exist. Otherwise, let’s say, you miraculously find both, a film-tested and a camera with replaced light seals and mirror foam online - say, a Pentax K1000 ($150-250) or a Canon AE-1 ($250-350) or an Olympus OM-2 series ($250-400) with the costs varying based on what lens you get with it.
Cost of the film - you can get basic black and white 35mm rolls for as low as $5. These would be like the Arista or Fomapan, 36 exposures. Of course, you will have the so-called learned folks on Facebook Groups having you believe that those films are of inferior quality or sh*t in their opinion. But, show them an image taken with those film stocks next to one taken with the more expensive film stocks taken with identical camera + lens setup and developed similarly and they would not be able to tell you which is which even if their life depended on it. Seriously. Try it. I have more than once done this test on various Facebook Groups with hilarious outcomes. So, you can follow a YouTube film photography guru and spend your money on a film that costs twice or thrice as much or you can tell yourself “I am a newbie to film photography, and $5 film that gives me 36 exposure is an affordable way to trial and error my learning.” I sell 25 varieties of films for color films, I typically recommend the $6 24 exp color films.
Cost of developing film - call it developing or processing, it all means the same. Your negative has to be treated with chemicals to make the images appear on them so that they can be scanned or printed. Your neighbor may do it for $5 a roll or even for free. Take it to CVS, Walgreens, Walmart, or, Target and they will charge you $18 or so and give you a set of prints and, a CD with your scanned images. What about your negatives? They destroy them. Yup. Too costly to return negatives back to the store or the Customer. Logistics and labor involved. And, they take 3-4 weeks. If you can live with that, go for it. Otherwise, there are several online outfits that do a fine job - The Dark Room is one of the most popular ones. For $20 including shipping and prints, negatives returned along with scans and, a 2-3 week turnaround, it is a good deal. I charge $36 inclusive of taxes to develop and scan a roll. No prints. $46 includes prints. I return the negatives. Scans are done at a pro lab that uses a Noritsu scanner and if you drop off the film on Monday before 3p, I return everything by Friday after 3p. So, take your pick - don’t mind waiting 2-3 weeks, go with a decent online pro lab. Want it sooner, come to me. Oh, one more thing. That neighbor that does it for free or for $5 - it is highly unlikely that they have a dedicated film developer and scanner like pro labs do. Chances are that they hand-develop the film. Meaning that there is no consistency from one roll to the next. Colors, contrast, dust, etc., may shift from roll to roll. Meaning that if you are a newbie learning film photography, you don’t know if your picture taking is off or if the development is off. I have one Customer that prides himself in learning film photography and developing simultaneously as he wants to save money. Wow. He has no reference or benchmarking on either his development or photography and therefore, in the long run, he is spending more than if he were to send his film to a pro lab for development. He would know where his photography is off. Oh well.
So here are my recommended films. I have shot all the films that I sell and developed them - you can find my pricing here:
NEWBIES
Black and white - Arista 100 or 400 24-36 exp. Fomapan is made by the same facility in Czechoslavia so, highly likely it is the same film but, slightly more in cost.
Color - Kodak Gold 200 or 400, Color Plus 24-36 exp. Oh, of course, Fuji Superia XTRA or Fuji 200.
POST-NEWBIES meaning you are ready for the next step
Black and white - Any of the Ilford or Kodak films with 50 ISO to 400 ISO such as Ilford PanF 50, Ilford Delta 100, Ilford FP4+ 125, Kodak TMAX 100, Ilford Delta 400, Ilford HP5+ 400, Kodak TMAX 400, Kodak TRIX 400. Plan on shooting in low light on 35mm, try out the Ilford Ilford Delta 3200 or the Kodak TMAX 3200. And, of course, there are boutique and rebranded films such as those marketed by Adox, Agfa, Bregger, Kosmo, and, others.
Color - Cine Still 50, Kodak Pro Image 100, Kodak Ektar 100, Portra 160, Portra 400, and, of course, Portra 800 which I find to be the most versatile color film I have ever shot with. Regardless of when I shoot with it - middle of a sunny day or evening or indoors, I am always happy with the results. The grain is noticeable given the higher ISO but, I find it quite pleasing.
DISPOSABLE CAMERAS
Having shot with the small variety of disposable film cameras out there, my preferred one is the Kodak 800 which goes by a couple of different names such as Kodak FunSaver 800 and Kodak Power Flash 800. As long it says 800 in the name which is for the ISO, you are good. It uses the Portra 800 film stock which as I explained above is the most versatile color film stock in my perception. Fujifilm QuickSnap disposable film cameras are okay as long as you are shooting in good light. Note that they use 400 ISO film as Fuji doesn’t make 800 ISO film as of 06/16/2021.
If you shoot regularly, you are spending more money than necessary if all you shoot with is disposable cameras. And, you are getting inferior results when compared to an SLR. Better to buy a quality point & shoot camera and then buy the film separately. Better yet, buy something like a Canon AE-1 Program and use it in point & shoot mode. Disposable cameras are made with the cheapest components that have to last just long enough for you to shoot one roll. The lens is made up of cheap plastic so the optics are okay. The Canon AE-1 Program is built from metal and the lens is made from metal and glass. No plastic there. So, your optics are superior which means superior images.
5 notes
·
View notes
Video

flickr
Vincent Stafford 1989 2010 01 01_old 35mm scans_0139 by Stephen or Steve? Via Flickr: More scans of transparencies taken with my 35 mm Pentax program A
1 note
·
View note
Photo

The extreme shadows and highlights loving black and white more landscapes from the charlotte pass look out This shot was on the pentax program plus with ilford ortho 80 loving it ill need to get more roll of ortho stat #mtkosciuszko #filmphotography #filmisnotdead #landscape #snowymountains #pentax #pentaxprogramplus #beginningfilm @beginningfilm @walkensfilm @rewindphotolab (at Charlotte Pass, New South Wales) https://www.instagram.com/p/CQi-w0pF12F/?utm_medium=tumblr
#mtkosciuszko#filmphotography#filmisnotdead#landscape#snowymountains#pentax#pentaxprogramplus#beginningfilm
1 note
·
View note
Photo


Manila Photowalk
December 8 - 9, 2019
Asis and I went on a photo walk in December of last year. I know, I know, this post is so long overdue. I've just been so lazy to update this blog since this year started. Anyway, I remember we really wanted to take a break from work and stress at that time, and since it was already December, I knew lots of people opted to go to nearby destinations like Tagaytay, Baguio, Subic, Zambales, La Union, Bataan, and Antipolo. So, we just chose to go to Manila.
We were both really looking forward to this activity. Asis got his new Fujifilm X-T20, while I also started venturing into film photography in November of last year, so it was very timely to do this. We've always wanted to join big photo walk events, but we didn't find any available on those dates, so we just made our budget-friendly photo walk/weekend getaway within the Metro.
By the way, these photos were taken using my Canon AE-1 Program and Pentax Espio P (the images with date-stamp). I used a total of 3 and a half rolls of film: just a couple of photos here in Lomography 800 (I thought my camera got jammed, so I panicked and rewound the film, but it turned out the lens wasn't installed properly. Hahaha! Fail.), Kodak ColorPlus 200, Fujifilm 200 Speedfilm, Fujicolor C200, & Ilford HP5 Plus 400 (ran out of colored film that day).
Our first stop: Quiapo
We rode the LRT1 from Roosevelt to Carriedo, and then we walked for a few minutes to get to the Minor Basilica of the Black Nazarene in Quiapo.
Second stop: Intramuros
We took the LRT1 again from Carriedo to Central Terminal, and from there, we walked for a couple of minutes to reach Intramuros. We only went to Baluarte de San Andres, landmarks, and historical buildings along the street of General Luna. We didn't get to see other attractions since we didn't have a lot of time to roam every street in Intramuros.
Third stop: National Museum of Natural History
From Manila Cathedral, we rode an e-jeepney to the National Museum. It was our first time visiting the National Museum, and we were amazed by the humongous structure of the place. It was so beautiful. We didn't stay for too long, though, but we made sure to see every floor. I also wanted to go to the National Museum of Fine Arts, but we ran out of time. So next time!
Fourth stop: Rizal/Luneta Park
We walked again to Rizal Park. It was just a street away from the National Museums.
Fifth stop: Aristocrat, Malate
We finally decided to eat our very late lunch at Aristocrat in Malate. We rode a taxi from Rizal Park since it was pretty far. My goodness, I was famished and exhausted. This was what I was really looking forward to that day: the food at Aristocrat (first-timer). I love their desserts!
Sixth stop: Manila Baywalk
After regaining our energy, we went to Manila Baywalk, which was just across from the Aristocrat Restaurant. We just sat there, chilled, and waited for the sun to set. It was so nice.
Final stop: Manila Crown Palace Hotel
We walked and walked again to find a nice cheap hotel to stay for the night, and we found the Manila Crown Palace Hotel. It was a so-so hotel, pretty expensive, but it was the cheapest one we saw.
So that's it. By the way, Malate comes alive at night, so after we freshened up, we also went to a nearby cafe and restaurant to kill time.
Next day stop: Lucky Chinatown, Binondo
We woke up early to get ready for our day. We were contemplating where to go next. We were planning on going to Ocean Park but ended up at Lucky Chinatown in Binondo, which was a wrong decision. The traffic was just bad, and yes, it was too crowded. So we just went to buy some fruits and cheese tarts, roamed around to take some photos, and that's it. We headed back home.
All in all, it was such a nice experience. Our feet hurt, our bodies were sore, but it was so fun. A nice bonding activity for couples. Now, I can't wait for our next photo walk! ♡
P.S. No decent photos of myself. No decent photos of us together. Meh.
11 notes
·
View notes
Text
Vintage PENTAX Program Plus 35mm Film Camera with 50mm Lens & Carry Strap Japan
CAMERA DEALS: Seller: ree_quina (100.0% positive feedback) Location: US Condition: Used List price: 79.99 USD You save: 24.00 USD (30% off) Current price: 55.99 USD Shipping cost: 10.95 USD Buy It Now https://www.ebay.com/itm/266279578999?hash=item3dff7fed77%3Ag%3AlmEAAOSwWHZkd9IB&mkevt=1&mkcid=1&mkrid=711-53200-19255-0&campid=5338779481&customid=&toolid=10049&utm_source=dlvr.it&utm_medium=tumblr
0 notes
Text

Elemental II
Ashley, 2017
philipweller.com
#film photography#girlsonfilm#35mm#photographers on tumblr#analog#filmisnotdead#beautiful#woman#film grain#dreamy#leaves#plants#pentax program plus#double exposure#multiple exposure#nude art#artists on tumblr
5 notes
·
View notes
Photo

Marion
Beverly Hills, CA
#marion#french#stylish#shades#pentax program plus#85mm#35mm#fuji c200#film#analog#ishootfilm#filmisnotdead#Photographers on Tumblr
10 notes
·
View notes
Text
Exif Viewer For Mac Os

Simple EXIF Viewer for Mac OS X 2.7.1 file size: 122.10 KB EXIF Viewer is a small Mac OS X application to display EXIF information in JPEG files coming from digital cameras. You can easily view photo metadata, called Exif, using Preview Inspector. Preview is an app built into macOS that has multiple uses, like viewing PDFs, photos and more.
If you want to change the exif data in photos of various formats, you may simply use exif editing tool that allows you to modify file the description, tags, authors, copyright information, data modified and many more. By using exif editing tool, you may modify different metadata formats including EXIF, GPS, JFIF, GeoTIFF, Photoshop IRB, FlashPix, IPTC, XMP, ICC Profile, AFCP and ID3, as well as the description provided by many digital cameras by Canon, Casio, FLIR, FujiFilm, GE, HP, JVC/Victor, Minolta/Konica-Minolta, Kodak, Leaf, Nikon, Nintendo, and more. Exif editing tool is extremely useful when you want to search through and organize a huge collection of photos. Here is a list of the 5 best exif data editing for your Mac.
It offers complete secure and encrypted severs for communication keeping IP address safe and providing with ease of mind. This app is specifically designed for use while gaming so it does not affect CPU performance as much. This app is easily configurable which does not require any driver or tool. Download discord for mac. It provide with seamless connection also with mobile app and sends push notifications as well.Moreover, Discord 0.0.255 provide latest features of chatting like easily sharing images, videos, and links from mac as well support sharing of GIFs. This app is completely free for everyone with support for making as many server as required without any limitation.

1. EXIF Studio – Metadata Editor
Simple Exif Viewer For Mac Os X
If you are looking for the simplest way to view and edit image’s EXIF data, IPTC data, XMP data and GPS data, EXIF Studio is the best metadata editor that helps you edit EXIF, IPTC, GPS & XMP metadata of several photos or images in just few clicks. It is very easy to use, all you need to do is just select images, folders with images or the Photos Library into the application and list all images. Once the images are added, you can and edit image’s EXIF metadata, IPTC metadata, XMP metadata and GPS metadata. Moreover, you may use this tool to edit exif data in batch of photos and not just a single image. You may apply metadata values or modifications to a group or batch of Photos with ease. Additionally, you may edit GPS location of photos by selecting location on a GSP map simply by entering the location name in the search box or by specifying the coordinates. You can also easily drag a pin to set a new location for where your photos were taken. Apart from editing, you may also remove the metadata information of your photos in entirety. You can also clean user comments, GPS information, EXIF data individually as well.

You may download EXIF Studio – Metadata Editor from here.
Paragon NTFS for Mac is fully compatible with Apple's new security policy ensuring fast, hassle-free and safe access to NTFS partitions from macOS 10.12 Sierra. Paragon ntfs free download - Paragon NTFS for Mac, Paragon NTFS for Mac Special Edition, Microsoft exFAT/NTFS for USB by Paragon Software, and many more programs. Microsoft NTFS for Mac by Paragon Software is the best such software solution: reliable, fast, and now affordable as well Fast, seamless, and easy to use, Microsoft NTFS for Mac by Paragon Software is required for those who need to write to Windows volumes. And now it’s more affordable than ever. MacWorld, USA 2016, macworld.com. https://ohioload211.tumblr.com/post/658173228401950720/ntfs-paragon-for-mac-download-free.
EXIF Studio is now also available for Windows PC and you can download EXIF studio for Windows from here. Download wget for mac os. Lord of the rings battle for middle earth 2 download full game mac.
Exif Viewer Windows 10
2. Image Exif Editor
Dicom Viewer Mac Os X
Image Exif Editor is one of the best and easiest exif editor that you may have on your Mac for quick editing of photo metadata. It offers the fast and easy way to view and edit exif data. It is specially designed to show details about how a photo was taken in a clear and easy to understand format with powerful EXIF metadata editing features. It is a very powerful tool to handle the exif information in your favourite photos. Image Exif Editor supports Batch images edit, you may apply one image modify to other, and you may modify or clear exif metadata for photos in batch. With this tool, you may easily find the image you want to edit by typing the name to search from many images.
File Viewer For Mac
3. Exif Editor Fusion download for mac.
Exif Editor is also one of the most popular exif editing tools that allows you to edit metadata in directly your images. It is very helpful, when you don’t want to share or expose your camera details to your customers. You may use this tool for applications like Adobe Bridge, Lightroom or Aperture to reload metadata as they are heavily cached. It is very simple to use, all you need to do is just select image, right click and in the popup menu, select Metadata > Read Metadata from Files. Exif editor supports various image formats including JPEG, TIFF, Canon CR2, Nikon NEF, Olympus ORF, Adobe DNG, Leaf MOS, Fuji RAF, Panasonic RW2, Pentax PEF, Phase One IIQ SONY ARW, and more.
4. MetaImage
MetaImage is one of the best Mac tools to read, write and edit images metadata. With this ultimate tool, you may edit EXIF, IPTC, XMP and Maker tags in a friendly interface. You may use this metadata editor for the largest number of tags. Moreover, you may select which tags are shown in the app. So, you may keep only the one you want to use. Besides that, it is also designed to edit GPS metadata easily. You may directly enter GPS coordinates. Plus, you can also search for an address by typing it or by clicking on the map.
5. Photo Meta Edit
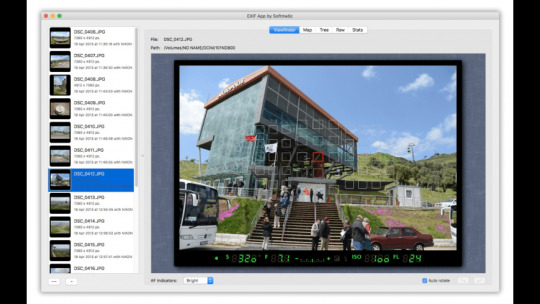
Photo Meta Edit is a simple photo metadata, Exif, GPS, IPTC and other types, editor for Jpeg and Tiff image files. You may use it to edit embedded metadata in image files, enable to embed metadata into image files. It has many powerful features including batch editing, embedding thumbnails into JPEG files and removing thumbnails from JPEG files. You may easily edit IPTC Photo Metadata and preset IPTC Creator’s contact details.
Now read: 5 best PPT to video converters for Windows and Mac in 2019
If you are looking for a Mac Maintenance Application, Check out Wise Mac Care. Wise Mac Care is your one-stop Mac maintenance application that can remove several types of junk files and can optimize Mac’s hard drive to boost your Mac to the peak performance for FREE. Wise Mac Care will also help protect your privacy and safeguard your activities from prying eyes.
0 notes
Photo

Here are the rest of the photos that are eligible for posting from the last buncho trip that i took a roll of film and a camera on You know the drill canon cannonet ql-17 g-III and pentax program plus were the cameras used film was kodak ektar 100, ilford delta 400 and illford ortho 80 plus #kodakektar100 #kodak #ilford #ilfordorthoplus80 #ilforddelta400 #pentax #pentaxprogramplus #canon #canonql17giii #filmphotography #filmisnotdead #beginningfilm @beginningfilm @walkensfilm @rewindphotolab (at Just Amazing Photos) https://www.instagram.com/p/CRTgEwul0jF/?utm_medium=tumblr
#kodakektar100#kodak#ilford#ilfordorthoplus80#ilforddelta400#pentax#pentaxprogramplus#canon#canonql17giii#filmphotography#filmisnotdead#beginningfilm
0 notes
Text
Pentax Program Plus 35mm SLR Film Camera Body Only [Camera fires] AS IS
CAMERA DEALS: Seller: geranalogico (100.0% positive feedback) Location: US Condition: Used Price: 52.00 USD Shipping cost: Free Buy It Now https://www.ebay.com/itm/204354598418?hash=item2f947bb612%3Ag%3AhP8AAOSwnrVkd-O~&mkevt=1&mkcid=1&mkrid=711-53200-19255-0&campid=5338779481&customid=&toolid=10049&utm_source=dlvr.it&utm_medium=tumblr
0 notes
Video
Trip to Granada Studios - early 1990's by Stephen or Steve? Via Flickr: 1,000 Flickr views by 11-01-18
0 notes