#quickformat
Explore tagged Tumblr posts
Visit Tumblr Blog
Explore Tumblr blogs with no restrictions, modern design and the best experience.
Last Seen Tumblr Blogs


Fun Fact
There are dozens of funny blogs to kill time on Tumblr.
Text
3 Ways to Format an SSD in Windows 10/11
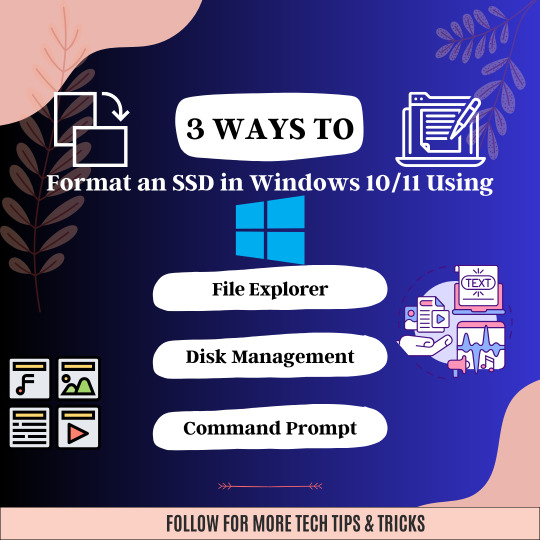
✅💻Get the most out of your Solid-State Drive (SSD) in Windows 10 or 11 with these three easy ways to format it🥉💸
🚀💻 Boost your PC's performance with a simple SSD format 😎
💪Whether you're upgrading to Windows 10 or 11, formatting your SSD is crucial for optimal speed and efficiency.🔥🚅
😊🎓Learn the 3 easy ways to do it and say goodbye to slow loading times and hello to lightning-fast performance🚀💥
#ssd#windows10#windows11#storage#performanceboost#datamanagement#computertips#techtips#formatssd#diskmanagement#cleaninstall#pcmaintenance#techtutorial#upgrade#newPC#datapartition#performance#isyoussdready#quickformat#partitioning#fileexplorer#commandprompt
0 notes
Text
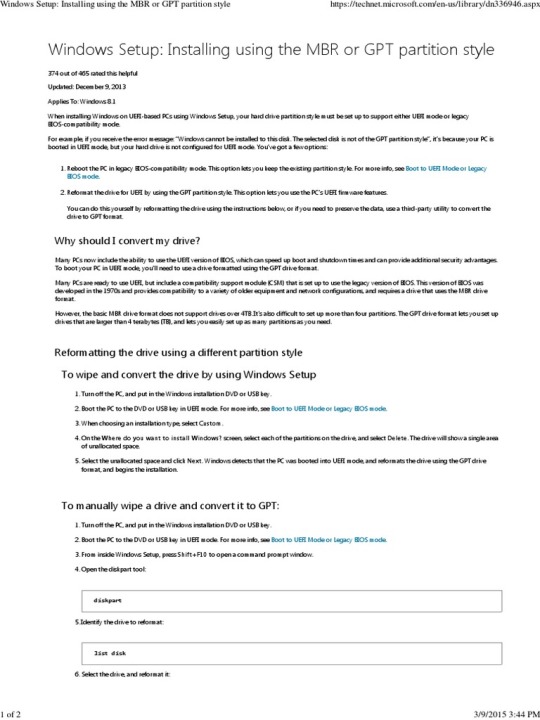
Windows Setup Gpt Partition Style

For some reasons, you would need to install or re-install Windows on your machine, probably when you want to do a clean install or when your PC has a crash on startup.
I had an issue in booting with my Windows 8 PC, and as all repair tools provided by them did not work, I had to do a clean install. However, another issue appeared when I proceed the installation.
The GPT drive format lets you set up drives that are larger than 4 terabytes (TB), and lets you easily set up as many partitions as you need. Reformatting the drive using a different partition style. To wipe and convert the drive by using Windows Setup. Turn off the PC, and put in the Windows installation DVD or USB key. After Windows 10 finally boots up, you can now check up if Windows 10 is installed on your GPT disk partition by following tips here: Boot into Windows Open 'Disk Management'. You see three partitions including the EFI System Partition. Right-click the disk select 'Properties 'Volumes'.
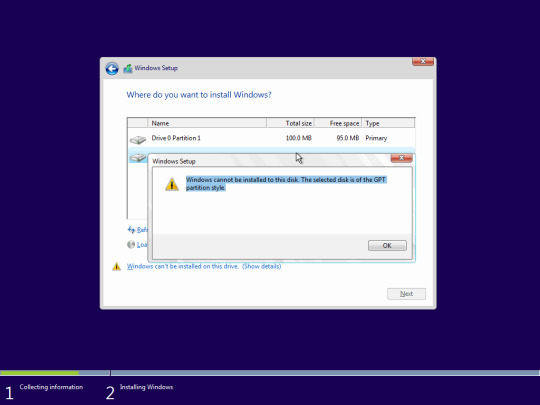
As normal, I boot up with Windows 8 Installation USB and follow steps to install Windows. Then, the error showed up when I chose partition to install the Windows:
Windows cannot be installed on this disk. The selected disk is of the GPT partition style.
Mobile Phone Hacking software, free download - Phone to PC, Nokia Software Updater, AV Voice Changer Software, and many more programs. What is a Free Download Hacking Software for Android and iPhone. A hacking software is a medium through which one can have access to any vital information that is primarily associated with a device. Usually a tracker or a bug is executed on a phone in the hacking tools. It immediately registers the related information and tracks it on its server. Compatibility: Android/iPhone. Price: One plan gets all premium festure. Free pc hacking software download.
Yes, the problem is caused by GPT based disk. GPT (GUID Partition Table) is the standard for partition table on our hard drive. The GPT based disk has some great benefits over MBR disk, for example, it supports up to 128 primary partitions, its data structures are well defined and that helps detect data corruption easier, and also improve the odds of successful data recovery when our hard drives are damaged or have bad sectors. The drawback of GPT is that it is not supporting booting through BIOS mode, you are required to have Unified Extensible Firmware Interface (UEFI).
When you have a hard drive with capacity smaller than 2TB, the GPT is unnecessary. Therefore, you can remove the GPT protective partition and continue installing Windows. Here are the simple steps:
1. Go to Command Prompt. You can also find it in the Windows 8 Installation Disk/USB, navigate to Repair Your Computer -> Advanced Options -> Command Prompt.
2. Type in diskpart in the command line.
3. Type in list disk to see all your disks and which one is GPT styled. The GPT based disk is marked with asterisk icon in the last column Gpt.
4. Choose the disk you want to delete GPT by typing select disk n (remember to change n to your disk number).
5. After the disk is selected, you can clean the disk by typing in clean.
Now you can check again and see that your disk is not GPT anymore. Just go ahead and install Windows 8, let me know if you have any problem in the process.
Disclosure: As an Amazon Associate, I earn from qualifying purchases. The commission help keep the rest of my content free, so thank you!
-->
This article describes how to successfully set up dynamic boot partition mirroring on GUID Partition Table (GPT) disks.
Original product version: Windows Server 2012 R2 Original KB number: 814070
Summary
Unlike Master Boot Record (MBR) mirrors in 32-bit Windows, there are more steps to successfully create and boot to mirrored boot volumes on GPT disks. This article also describes how to recover after a primary disk failure if the shadow disk did not already have an EFI partition established. The disk must have an EFI partition to boot.
You must have the built-in Diskpart.exe and Bootcfg.exe utilities to create bootable mirror volumes on GPT disks. You can do some of these steps with the Disk Management console, but others you can do only with the built-in Diskpart.exe utility.
For consistency and ease of use, this article uses the Diskpart.exe utility to perform the steps. For help with any Diskpart.exe commands, start Diskmgmt.msc, and then open the help topics on the Help menu.
The steps are performed with real examples. The steps show the expected results returned from each command. Disk 0 is the primary system and boot drive. Disk 1 is the shadow drive.
Prepare the shadow drive for mirroring
Before you set up boot volume mirroring, it is a good idea have another GPT disk in the computer that contains an Extensible Firmware Interface (EFI) partition. The EFI partition contains the system files used to boot the operating system. If the primary system drive (disk-0) fails, you can use the EFI partition on the shadow drive (disk-1) to boot. This step creates and prepares new EFI and Microsoft Reserved (MSR) partitions on the shadow drive. You can use only the Diskpart.exe utility to create the required EFI and MSR partitions. You cannot use the Disk Management console to create or mirror EFI or MSR partitions.
Before you start, make sure that you have another BASIC disk with all unallocated free space of equal or greater capacity than the primary disks system and boot partitions. If you already converted the spare drive to dynamic, revert it back to basic before you follow these steps.
At a command prompt, run the Diskpart.exe utility.
This starts the diskpart console. After it is initialized, DISKPART> is displayed. It waits for your input commands.
Select the disk that you want to be the shadow drive, and then convert the drive to GPT. In this example, disk 1 is used for the mirror (shadow) drive.
Note
The disk that you select must not contain any data partitions and must be a raw basic disk with only unallocated space of equal or greater capacity than the primary system disk.
The following are the commands that you type at the command prompt.
DISKPART> Select disk 1
Disk 1 is now the selected disk.
DISKPART> Convert GPT
Diskpart successfully converted the selected disk to GPT format.
DISKPART> List partition
Partition ### Type Size Offset
Partition 1 Reserved 32 MB 17 KB
Note
If you show more than one partition at this point, you have either selected the wrong drive, or you did not start with a raw drive. Correct this before you continue, or data loss may occur.
Select partition 1 on disk 1, then delete it - you must use the override command to delete the Microsoft Reserved (MSR) partition. You will re-create a new MSR partition after you create the required EFI partition.
DISKPART> Select partition 1
Partition 1 is now the selected partition.
DISKPART> Delete partition override
Diskpart successfully deleted the selected partition.
Select disk-0, and then list the partitions on disk-0. With the output of the list command, create new EFI and MSR partitions on disk 1 that are the same sizes as those on disk 0.
DISKPART> Select disk 0
Disk 0 is now the selected disk.
DISKPART> List partition
Partition ### Type Size Offset
Partition 1 System 204 MB 32 KB <---- EFI PARTITION Partition 2 Primary 4996 MB 204 MB Partition 3 Reserved 32 MB 9 GB <---- MSR PARTITION
DISKPART> select disk 1
Disk 1 is now the selected disk.
DISKPART> create partition efi size=204
Diskpart succeeded in creating the specified partition.
DISKPART> create partition msr size=32
Diskpart succeeded in creating the specified partition.
DISKPART> list partition
Partition ### Type Size Offset
Partition 1 System 204 MB 17 KB <---- NEW EFI PARTITION ON SHADOW *Partition 2 Reserved 32 MB 204 MB <---- NEW MSR PARTITION ON SHADOW
Select the EFI partition on the shadow drive, and then assign a letter to the EFI partition so it can be formatted. In this example, the drive letter S is assigned to the shadow EFI partition. You can use any available drive letter for this step.
Gmail app change font size. DISKPART> Select disk 1
Disk 1 is now the selected disk.
DISKPART> Select partition 1
Partition 1 is now the selected partition.
DISKPART> Assign letter=S
Diskpart successfully assigned the drive letter or mount point.
Open a new command prompt, and then use the format utility to format the EFI partition (S:) with the FAT file system. You must do this so that you can copy the system files from the primary EFI partition to this new EFI partition. Do not format with NTFS. The system cannot boot from an EFI partition unless it is formatted with the FAT file system.
C:> format s: /fs:fat /q /y
The type of the file system is RAW. The new file system is FAT. QuickFormatting 204M Initializing the File Allocation Table (FAT).. Format complete.
213,680,128 bytes total disk space. 213,680,128 bytes available on disk.
4,096 bytes in each allocation unit. 52,168 allocation units available on disk.
16 bits in each FAT entry.
Volume Serial Number is EA34-03C7
Press ALT+TAB to return to the diskpart command window. Select the EFI partition on the primary drive (disk-0), and then assign a drive letter to that EFI partition. In this example, the drive letter P is assigned to the primary EFI partition on disk-0. You can use any available drive letter for this step.
DISKPART> Select disk 0
Disk 0 is now the selected disk.
DISKPART> Select partition 1
Partition 1 is now the selected partition.
DISKPART> Assign letter=P
Diskpart successfully assigned the drive letter or mount point.
Press ALT+TAB again to return to the other command prompt. Use the xcopy command to copy the system files from the primary EFI partition (P:) to the Shadow EFI partition (S:). You must do this to make sure that the shadow drive can boot the system if disk-0 fails. Make sure that you use the correct drive letters if you used different letters for your EFI partitions.
C:> xcopy p:*.* s: /s /h
p:EFIMicrosoftWINNT50Boot0003 p:EFIMicrosoftWINNT50ia64ldr.efi
p:EFIMicrosoftEFIDriversfpswa.efi p:MSUtildiskpart.efi
p:MSUtilfdisk.efi p:MSUtilformat.efi p:MSUtilnvrboot.efi
7 File(s) copied
Remove the drive letters assigned to both EFI partitions. This step is optional, because after a reboot they will not be re-assigned.
DISKPART> Select volume P
Volume P is the selected volume.
DISKPART> Remove
Diskpart successfully removed the drive letter or mount point.
Repeat the steps for the S volume.
Convert the primary and shadow drives to Dynamic
Before you can establish a mirror, both the primary (source) drive (Disk-0) and the shadow (destination) drive (Disk-1) must be converted to Dynamic. After the disks are Dynamic (after a reboot), you can then establish the mirror. You can do this step with either the Disk Management console or the Diskpart.exe utility.
With Diskpart.exe, select the disk that you want to convert to dynamic, and then convert it to dynamic. Perform this on both the shadow and primary GPT disks. Start with the shadow disk.
DISKPART> Select disk 1
Disk 1 is now the selected disk
DISKPART> Convert dynamic
Diskpart successfully converted the selected disk to Dynamic format.
DISKPART> Select disk 0
Disk 0 is now the selected disk
DISKPART> Convert dynamic
You must reboot your computer to complete this operation.
DISKPART> Exit
Leaving Diskpart..
Shut down and restart your computer to complete the conversion of the system drive (disk-0) to dynamic. This may require two reboots.
Establish a mirror from the boot drive to the shadow drive
After both the primary (disk-0) and shadow (disk-1) drives are dynamic, you can then establish the mirror of the boot volume to the shadow drive. You can do this step with either the Disk management console or the Diskpart.exe utility.
With Diskpart.exe, select the boot volume (C:), and then mirror the volume to the shadow disk (disk-1).
DISKPART> Select volume C
Volume 1 is the selected volume.
DISKPART> add disk=1
Diskpart succeeded in adding a mirror to the volume.
Wait for the volume synchronization to complete, and then quit Diskpart.
Use Bootcfg.exe to add new EFI partition boot entries to NVRAM
Now that you have successfully established the boot mirror, a new boot entry was automatically added to NVRAM so that you can boot to the shadow drive. This new entry is displayed as Boot Mirror C: - secondary plex on the boot menu. If you select it, it will boot into the operating system on the shadow drive. However, if something were to happen to any of the system files or the EFI partition itself on disk-0 or if disk-0 failed completely, you would have to boot from the EFI partition on disk-1. Before this will work, you have to add boot entries into NVRAM with the Bootcfg.exe utility.
At a command prompt, run the Bootcfg.exe utility to display the current boot entries. You have one boot entry for the main operating system (boot entry id:1), and one boot entry for the Mirror (shadow) drive (boot entry id:5).
C:> bootcfg
Boot Options
Timeout: 30 Default: DeviceHarddiskDmVolumesPhysicalDmVolumesBlockVolume1WINDO CurrentBootEntryID: 5
Boot Entries
Boot entry ID: 1 OS Friendly Name: Windows 2003 Server, EnterpriseOsLoadOptions: N/A BootFilePath: DeviceHarddiskVolume1EFIMicrosoftWINNT50ia64ldr.efi OsFilePath: DeviceHarddiskDmVolumesPhysicalDmVolumesBlockVolume1WINDOWS
Boot entry ID: 2 OS Friendly Name: LS120
Boot entry ID: 3 OS Friendly Name: CDROM
Boot entry ID: 4 OS Friendly Name: EFI Shell
Boot entry ID: 5 OS Friendly Name: Boot Mirror C: - secondary plex OsLoadOptions: N/A BootFilePath: DeviceHarddiskVolume1EFIMicrosoftWINNT50ia64ldr.efi OsFilePath: DeviceHarddiskDmVolumesPhysicalDmVolumesBlockVolume1WINDOWS
Before you can add the new entries for the EFI partition and boot partition on the shadow drive to NVRAM, you have to list the existing partitions on disk-0 so that you can extract partition GUID information about the current EFI partition. Use the bootcfg /list command against disk-0 to display all the partitions:
C:> bootcfg /list 0
Partition table info for Disk: 0
Partition No: 1 Partition Style: GPT Starting offset: 32,256 Partition length: 213,825,024 Partition GUID: (68d298c0-1b6a-01c1-507b-9e5f8078f531) GUID type: (c12a7328-f81f-11d2-ba4b-00a0c93ec93b) Partition name: EFI system partition
Partition No: 2 Partition Style: GPT Starting offset: 213,857,280 Partition length: 5,142,056,960 Partition GUID: (68d298c0-1b6a-01c1-f1b3-12714f758821) GUID type: (af9b60a0-1431-4f62-bc68-3311714a69ad) Partition name: LDM data partition
Partition No: 3 Partition Style: GPT Starting offset: 9,153,031,680 Partition length: 1,048,576 Partition GUID: (73e47280-0d38-11d7-b47f-806e6f6e6963) GUID type: (5808c8aa-7e8f-42e0-85d2-e1e90434cfb3) Partition name: LDM metadata partition
Partition No: 4 Partition Style: GPT Starting offset: 9,154,080,256 Partition length: 32,505,856 Partition GUID: (1ca4672d-a37c-4e12-bacb-c5ae97924965) GUID type: (e3c9e316-0b5c-4db8-817d-f92df00215ae) Partition name: Microsoft reserved partition
Make a note of the EFI partition GUID. (________-____-____-____-____________) This will be used as the SOURCE GUID in a later command.
In this example, the value is (68d298c0-1b6a-01c1-507b-9e5f8078f531) and will be used in a later command.
Use the bootcfg /list command against disk-1 to display all of its partitions:
C:> bootcfg /list 1
Partition table info for Disk: 1
Partition No: 1 Partition Style: GPT Starting offset: 17,408 Partition length: 213,909,504 Partition GUID: (476688c5-8ebf-47d2-80e7-cf9d065edb81) GUID type: (c12a7328-f81f-11d2-ba4b-00a0c93ec93b) Partition name: EFI system partition
Partition No: 2 Partition Style: GPT Starting offset: 213,926,912 Partition length: 1,048,576 Partition GUID: (b72d10f6-e94e-4a4d-bb8e-4da985cc1679) GUID type: (5808c8aa-7e8f-42e0-85d2-e1e90434cfb3) Partition name: LDM metadata partition
Partition No: 3 Partition Style: GPT Starting offset: 214,975,488 Partition length: 32,505,856 Partition GUID: (824858f3-b8d5-4b4d-a3c7-18aac4442b7e) GUID type: (e3c9e316-0b5c-4db8-817d-f92df00215ae) Partition name: Microsoft reserved partition
Partition No: 4 Partition Style: GPT Starting offset: 247,481,344 Partition length: 5,142,056,960 Partition GUID: (f3d11286-2582-4d76-889c-b82c346be44e) GUID type: (af9b60a0-1431-4f62-bc68-3311714a69ad) Partition name: LDM data partition
Make a note of the EFI partition GUID. (________-____-____-____-____________) This will be used as the TARGET GUID in a later command.
In this example, the value is (476688c5-8ebf-47d2-80e7-cf9d065edb81) and will be used in a later command.
Now you have the SOURCE and TARGET EFI GUID values that you have to clone the boot entries in NVRAM. The new entries use the new EFI partition GUID on the shadow drive to boot the system if disk-0 fails in any way. Use the bootcfg /clone command to add new NVRAM boot entries with your source and target GUID values recorded in steps 2 and 3.
C:>bootcfg /clone /sg (68d298c0-1b6a-01c1-507b-9e5f8078f531) /tg (476688c5-8ebf-47d2-80e7-cf9d06 5edb81) /d+ Cloned_Entry
INFO: Boot entry whose id is '1' successfully cloned. INFO: Boot entry whose id is '5' successfully cloned. SUCCESS: The operation completed successfully.
To see the new Cloned entries added to NVRAM, use the bootcfg command and notice you now have seven entries instead of five. The bottom two entries are the cloned entries and will use the EFI partition on the shadow drive (disk-1) to boot.
C:>bootcfg
Boot Options
Timeout: 30 Default: DeviceHarddiskDmVolumesPhysicalDmVolumesBlockVolume1WINDOWS CurrentBootEntryID: 5
Boot Entries
Boot entry ID: 1 OS Friendly Name: Windows 2003 Server, Enterprise OsLoadOptions: N/A BootFilePath: DeviceHarddiskVolume1EFIMicrosoftWINNT50ia64ldr.efi OsFilePath: DeviceHarddiskDmVolumesPhysicalDmVolumesBlockVolume1WINDOWS
Boot entry ID: 2 OS Friendly Name: LS120
Boot entry ID: 3 OS Friendly Name: CDROM
Boot entry ID: 4 OS Friendly Name: EFI Shell
Boot entry ID: 5 OS Friendly Name: Boot Mirror C: - secondary plex OsLoadOptions: N/A BootFilePath: DeviceHarddiskVolume1EFIMicrosoftWINNT50ia64ldr.efi OsFilePath: DeviceHarddiskDmVolumesPhysicalDmVolumesBlockVolume1WINDOWS
Boot entry ID: 6 OS Friendly Name: Windows 2003 Server, Enterprise Cloned_Entry OsLoadOptions: N/A BootFilePath: DeviceHarddiskVolume3EFIMicrosoftWINNT50ia64ldr.efi OsFilePath: DeviceHarddiskDmVolumesPhysicalDmVolumesBlockVolume1WINDOWS
Boot entry ID: 7 OS Friendly Name: Boot Mirror C: - secondary plex Cloned_Entry OsLoadOptions: N/A BootFilePath: DeviceHarddiskVolume3EFIMicrosoftWINNT50ia64ldr.efi OsFilePath: DeviceHarddiskDmVolumesPhysicalDmVolumesBlockVolume1WINDOWS
Test-boot the shadow drive with the new boot entries
After you have created the new boot entries in NVRAM, test the entries to make sure that the system can boot to the shadow drive if disk-0 fails.
Perform a graceful shutdown and restart of Windows.
On the boot menu, select the boot entry named Boot Mirror C: - secondary plex Cloned_Entry to boot to the shadow drive. The EFI partition on the shadow drive will be used to boot the Windows operating system. Although you do not have to, you can also turn off the computer, remove disk-0, and then redo the test to make sure that the system will be bootable if the original system disk really fails and is removed.
Recover a shadow boot drive with missing or damaged EFI partition
If the original Windows operating system was software mirrored to a Dynamic GPT disk that did not contain an EFI partition, or the EFI partition becomes damaged, or if the primary system disk (disk-0) fails, you may receive the following error message when you try to boot to the shadow disk:
LOADING.: Boot Mirror C: - Secondary plex
Load of Boot Mirror c: - secondary plex failed: Not Found
Paused - press any key to continue.
You must now use the following procedure to recover the original operating system (shadow) drive. These following steps show you the whole process. The process includes replacing the failed disk-0, re-installing Windows on the new replacement disk, which creates a new EFI system partition, and then adding new boot entries into NVRAM so that you can boot back into the original operating system on the shadow disk-1.
Remove the failed system drive (disk-0) and replace it with a good disk. See your hardware manuals for the correct way to replace the failed disk. The replacement disk does not have to be partitioned or formatted. It can be a brand new disk.
Insert the Windows 2003 Server installation CD into the computer's CD-ROM drive, then power on the system.
When the system boot options menu is displayed, select to boot from CD-ROM. When you are prompted to press any key to boot from the CD, press any key.
This starts Windows 2003 Server setup.
On the Welcome to Windows Setup screen, press ENTER to install and allow Setup to automatically create the new system partition.
You must do this to boot and allow Setup to continue.
After the new EFI and MSR partitions are created, select the free space on disk-0 and create a new partition large enough to install Windows and hold a page file.
Select the newly created partition to install Windows on, and then select the format option that you want to format the partition. Setup continues. Answer all appropriate questions that you are prompted with, and then let Setup finish.
After Setup is complete, log on the console as Administrator.
At a command prompt, run the bootcfg command to display the current boot menu items from NVRAM.
C:>bootcfg
Boot Options
Timeout: 5Default: DeviceHarddiskVolume3WINDOWSCurrentBootEntryID: 1
Boot Entries
Boot entry ID: 1 OS Friendly Name: Microsoft Windows Server 2003, Enterprise Edition OsLoadOptions: N/A BootFilePath: DeviceHarddiskVolume1EFIMicrosoftWINNT50ia64ldr.efi OsFilePath: DeviceHarddiskVolume3WINDOWS
Boot entry ID: 2 OS Friendly Name: Windows Server 2003, Enterprise Edition OsLoadOptions: N/A BootFilePath: (null) OsFilePath: (null)
Boot entry ID: 3 OS Friendly Name: LS120
Boot entry ID: 4 OS Friendly Name: CDROM
Boot entry ID: 5 OS Friendly Name: EFI Shell
Boot entry ID: 6 OS Friendly Name: Boot Mirror C: - secondary plex OsLoadOptions: N/A BootFilePath: (null) OsFilePath: (null)
Use the bootcfg /list command to display all of the partitions on the shadow disk (disk-1). Locate the original Windows boot partition. It has the name of LDM data partition and has a partition length the same size as the original boot partition.
In this example, the boot partition is entry No: 3 with the GUID of (9aee294a-fa7d-4d4a-8a47-51a1dd1f9867)
C:bootcfg /list 1
Partition table info for Disk: 1
Partition No: 1 Partition Style: GPT Starting offset: 17,408 Partition length: 1,048,576 Partition GUID: (646091f1-b826-47e8-a72c-f22072e9a769) GUID type: (5808c8aa-7e8f-42e0-85d2-e1e90434cfb3) Partition name: LDM metadata partition
Partition No: 2 Partition Style: GPT Starting offset: 1,065,984 Partition length: 32,505,856 Partition GUID: (afb1e6b9-d8a6-456d-8df1-31327f94f3fe) GUID type: (e3c9e316-0b5c-4db8-817d-f92df00215ae) Partition name: Microsoft reserved partition
Partition No: 3 Partition Style: GPT Starting offset: 33,571,840 Partition length: 3,142,056,960 Partition GUID: (9aee294a-fa7d-4d4a-8a47-51a1dd1f9867) GUID type: (af9b60a0-1431-4f62-bc68-3311714a69ad) Partition name: LDM data partition
Partition No: 4 Partition Style: GPT Starting offset: 3,175,628,800 Partition length: 1,174,758,912 Partition GUID: (ab104fde-0782-4810-842e-0fb291e385ad) GUID type: (af9b60a0-1431-4f62-bc68-3311714a69ad) Partition name: LDM data partition
Use the bootcfg /mirror command to add a boot entry into NVRAM for the shadow disks boot partition and give it a meaningful description. Use the Partition GUID from the boot partition extracted earlier.
C:>bootcfg /mirror /add (9aee294a-fa7d-4d4a-8a47-51a1dd1f9867) /D 'Original Shadow drive'
SUCCESS: The mirrored boot entry has been added.
Use bootcfg to display the boot menu items again. Notice the new entry was added to the bottom of the list. You can now use this entry to boot to the original Windows operating system.
-C:>bootcfg
Boot Options
Timeout: 5 Default: DeviceHarddiskVolume3WINDOWS CurrentBootEntryID: 1
Boot Entries
Boot entry ID: 1 OS Friendly Name: Microsoft Windows Server 2003, Enterprise Edition OsLoadOptions: N/A BootFilePath: DeviceHarddiskVolume1EFIMicrosoftWINNT50ia64ldr.efi OsFilePath: DeviceHarddiskVolume3WINDOWS
Boot entry ID: 2 OS Friendly Name: Windows Server 2003, Enterprise Edition OsLoadOptions: N/A BootFilePath: (null) OsFilePath: (null)
Boot entry ID: 3 OS Friendly Name: LS120
Boot entry ID: 4 OS Friendly Name: CDROM
Boot entry ID: 5 OS Friendly Name: EFI Shell
Boot entry ID: 6 OS Friendly Name: Boot Mirror C: - secondary plex OsLoadOptions: N/A BootFilePath: (null) OsFilePath: (null)
Boot entry ID: 7 OS Friendly Name: Original Shadow drive OsLoadOptions: N/A BootFilePath: DeviceHarddiskVolume1EFIMicrosoftWINNT50ia64ldr.efi OsFilePath: (null)
Shut down the computer, and then restart it. Select the boot menu item Original Shadow Drive to boot into the original operating system. This brings the server back into production. To fix the mirroring so that you can use the new disk-0 as your primary operating system drive and again be in a fault tolerant environment, continue with the following steps.
Re-establish the primary boot drive mirror
While booted into the shadow drive (disk-1), you must 'remove' the broken mirror, and then delete the missing disk. You can do this with either the Disk Management console or the Diskpart.exe utility.
Note
Remove Gpt Partition Windows 10
If there were additional volumes on the original failed dynamic disk-0, they must also be deleted before you are permitted to delete the missing disk.
Windows 10 Installation Gpt Partition Style
With Diskpart.exe, list the volumes, and then make a note of the volume number (Volume #) of the failed mirror. Select the mirror volume (volume #), and then view the details to see what missing disk (m#) you need to break the mirror from. In this example, you are working with volume 0 on missing disk m0.
DISKPART> list volume
Volume ### Ltr Label Fs Type Size Status Info
Volume 0 C PRIMARY NTFS Mirror 2996 MB Failed Rd Boot Volume 1 D CD-ROM 0 B Healthy Volume 2 Partition 2996 MB Healthy Volume 3 Partition 102 MB Healthy System
DISKPART> select volume 0
Volume 0 is the selected volume.
DISKPART> detail volume
Disk ### Status Size Free Dyn Gpt
Disk M0 Missing 2996 MB 0 B * Disk 1 Online 4149 MB 1120 MB **
Break the mirror by specifying the missing disk (m0), and then use the no keep option to remove the plex (partition) from the missing disk. List the volumes to make sure the mirror is gone and the volume is now listed as a simple volume.
DISKPART> break disk=m0 nokeep
The service did not update the boot file.
Diskpart successfully broke the mirror volume.
DISKPART> list volume
Volume ### Ltr Label Fs Type Size Status Info
Volume 0 C PRIMARY NTFS Simple 2996 MB Healthy Boot Volume 1 D CD-ROM 0 B Healthy Volume 2 Partition 2996 MB Healthy Volume 3 Partition 102 MB Healthy System
Select the missing disk (m0), and then delete it.
DISKPART> select disk m0
Disk M0 is now the selected disk.
DISKPART> delete disk
Diskpart successfully deleted the missing disk.
Delete the new Windows Server operating system partition on disk-0, because it is no longer required. This makes room to re-mirror back to disk-0.
Note
This step is optional if you have sufficient free space on disk-0 to re-establish the mirror.
DISKPART> select disk 0
Disk 0 is now the selected disk.
DISKPART> list partition
Partition ### Type Size Offset
Partition 1 System 102 MB 32 KB Partition 2 Reserved 31 MB 102 MB Partition 3 Primary 2996 MB 133 MB
DISKPART> select partition 3
Partition 3 is now the selected partition.
DISKPART> delete partition
Diskpart successfully deleted the selected partition.
Convert disk-0 to Dynamic, and then select the operating system volume on disk-1 and re-establish the mirror back to disk-0. This puts the computer back into a fault tolerant environment, and after the mirror is healthy you can boot back into disk-0 with the new boot option that was automatically added to the NVRAM.
DISKPART> convert dynamic
Diskpart successfully converted the selected disk to dynamic format.
DISKPART> list volume
Volume ### Ltr Label Fs Type Size Status Info
Volume 0 C PRIMARY NTFS Simple 2996 MB Healthy Boot Volume 1 D CD-ROM 0 B Healthy Volume 3 Partition 102 MB Healthy System
DISKPART> select volume 0
Volume 0 is the selected volume.
DISKPART> add disk=0
Diskpart succeeded in adding a mirror to the volume.
Wait for the mirror status to become healthy. You can use the list volume command repeatedly until the status changes from Rebuild to Healthy. Quit the Diskpart utility.
DISKPART> list volume
Volume ### Ltr Label Fs Type Size Status Info
Volume 0 C PRIMARY NTFS Mirror 2996 MB Healthy Boot
DISKPART> exit
Leaving Diskpart..
Use the bootcfg command to view the new boot option that was added to the NVRAM. This new entry is named Boot Mirror C: - secondary plex and is most likely menu item ID 1. You can now clean up the original boot entries for the original operating system and the original secondary plex with the bootcfg /delete /ID # command.
C:>bootcfg
Boot Options
Timeout: 30 Default: (null) CurrentBootEntryID: 7
Boot Entries
Boot entry ID: 1 OS Friendly Name: Boot Mirror C: - secondary plex OsLoadOptions: N/A BootFilePath: DeviceHarddiskVolume1EFIMicrosoftWINNT50ia64ldr.efi OsFilePath: (null)
Boot entry ID: 2 OS Friendly Name: Windows Server 2003, Enterprise OsLoadOptions: N/A BootFilePath: (null) OsFilePath: DeviceHarddiskDmVolumesPhysicalDmVolumesBlockVolume1WINDOWS
Boot entry ID: 3 OS Friendly Name: LS120
Boot entry ID: 4 OS Friendly Name: CDROM
Boot entry ID: 5 OS Friendly Name: EFI Shell
Boot entry ID: 6 OS Friendly Name: Boot Mirror C: - Secondary Plex OsLoadOptions: N/A BootFilePath: (null) OsFilePath: DeviceHarddiskDmVolumesPhysicalDmVolumesBlockVolume1WINDOWS
Boot entry ID: 7 OS Friendly Name: original shadow system OsLoadOptions: N/A BootFilePath: DeviceHarddiskVolume1EFIMicrosoftWINNT50ia64ldr.efi OsFilePath: DeviceHarddiskDmVolumesPhysicalDmVolumesBlockVolume1WINDOWS
C:>bootcfg /delete /ID 6
SUCCESS: Specified boot entry has been deleted.
C:>bootcfg /delete /ID 2
SUCCESS: Specified boot entry has been deleted.
This concludes this procedure and the remaining boot entries in the boot menu are all valid boot entries to boot to both the primary and shadow drives.
GPT mirroring in Windows Server 2008
Windows Setup Gpt Partition Style Windows 7
If you are using Windows Server 2008, visit the following article to set up a GPT mirror:
0 notes