#random function numpy
Explore tagged Tumblr posts
Visit Tumblr Blog
Explore Tumblr blogs with no restrictions, modern design and the best experience.
Last Seen Tumblr Blogs


Fun Fact
In 2020, 44% of users from Denmark used Tumblr daily.
Text
PREDICTING WEATHER FORECAST FOR 30 DAYS IN AUGUST 2024 TO AVOID ACCIDENTS IN SANTA BARBARA, CALIFORNIA USING PYTHON, PARALLEL COMPUTING, AND AI LIBRARIES

Introduction
Weather forecasting is a crucial aspect of our daily lives, especially when it comes to avoiding accidents and ensuring public safety. In this article, we will explore the concept of predicting weather forecasts for 30 days in August 2024 to avoid accidents in Santa Barbara California using Python, parallel computing, and AI libraries. We will also discuss the concepts and definitions of the technologies involved and provide a step-by-step explanation of the code.
Concepts and Definitions
Parallel Computing: Parallel computing is a type of computation where many calculations or processes are carried out simultaneously. This approach can significantly speed up the processing time and is particularly useful for complex computations.
AI Libraries: AI libraries are pre-built libraries that provide functionalities for artificial intelligence and machine learning tasks. In this article, we will use libraries such as TensorFlow, Keras, and scikit-learn to build our weather forecasting model.
Weather Forecasting: Weather forecasting is the process of predicting the weather conditions for a specific region and time period. This involves analyzing various data sources such as temperature, humidity, wind speed, and atmospheric pressure.
Code Explanation
To predict the weather forecast for 30 days in August 2024, we will use a combination of parallel computing and AI libraries in Python. We will first import the necessary libraries and load the weather data for Santa Barbara, California.
import numpy as np
import pandas as pd
from sklearn.ensemble import RandomForestRegressor
from sklearn.model_selection import train_test_split
from tensorflow.keras.models import Sequential
from tensorflow.keras.layers import Dense
from joblib import Parallel, delayed
# Load weather data for Santa Barbara California
weather_data = pd.read_csv('Santa Barbara California_weather_data.csv')
Next, we will preprocess the data by converting the date column to a datetime format and extracting the relevant features
# Preprocess data
weather_data['date'] = pd.to_datetime(weather_data['date'])
weather_data['month'] = weather_data['date'].dt.month
weather_data['day'] = weather_data['date'].dt.day
weather_data['hour'] = weather_data['date'].dt.hour
# Extract relevant features
X = weather_data[['month', 'day', 'hour', 'temperature', 'humidity', 'wind_speed']]
y = weather_data['weather_condition']
We will then split the data into training and testing sets and build a random forest regressor model to predict the weather conditions.
# Split data into training and testing sets
X_train, X_test, y_train, y_test = train_test_split(X, y, test_size=0.2, random_state=42)
# Build random forest regressor model
rf_model = RandomForestRegressor(n_estimators=100, random_state=42)
rf_model.fit(X_train, y_train)
To improve the accuracy of our model, we will use parallel computing to train multiple models with different hyperparameters and select the best-performing model.
# Define hyperparameter tuning function
def tune_hyperparameters(n_estimators, max_depth):
model = RandomForestRegressor(n_estimators=n_estimators, max_depth=max_depth, random_state=42)
model.fit(X_train, y_train)
return model.score(X_test, y_test)
# Use parallel computing to tune hyperparameters
results = Parallel(n_jobs=-1)(delayed(tune_hyperparameters)(n_estimators, max_depth) for n_estimators in [100, 200, 300] for max_depth in [None, 5, 10])
# Select best-performing model
best_model = rf_model
best_score = rf_model.score(X_test, y_test)
for result in results:
if result > best_score:
best_model = result
best_score = result
Finally, we will use the best-performing model to predict the weather conditions for the next 30 days in August 2024.
# Predict weather conditions for next 30 days
future_dates = pd.date_range(start='2024-09-01', end='2024-09-30')
future_data = pd.DataFrame({'month': future_dates.month, 'day': future_dates.day, 'hour': future_dates.hour})
future_data['weather_condition'] = best_model.predict(future_data)
Color Alerts
To represent the weather conditions, we will use a color alert system where:
Red represents severe weather conditions (e.g., heavy rain, strong winds)
Orange represents very bad weather conditions (e.g., thunderstorms, hail)
Yellow represents bad weather conditions (e.g., light rain, moderate winds)
Green represents good weather conditions (e.g., clear skies, calm winds)
We can use the following code to generate the color alerts:
# Define color alert function
def color_alert(weather_condition):
if weather_condition == 'severe':
return 'Red'
MY SECOND CODE SOLUTION PROPOSAL
We will use Python as our programming language and combine it with parallel computing and AI libraries to predict weather forecasts for 30 days in August 2024. We will use the following libraries:
OpenWeatherMap API: A popular API for retrieving weather data.
Scikit-learn: A machine learning library for building predictive models.
Dask: A parallel computing library for processing large datasets.
Matplotlib: A plotting library for visualizing data.
Here is the code:
```python
import pandas as pd
import numpy as np
from sklearn.ensemble import RandomForestRegressor
from sklearn.metrics import mean_squared_error
import dask.dataframe as dd
import matplotlib.pyplot as plt
import requests
# Load weather data from OpenWeatherMap API
url = "https://api.openweathermap.org/data/2.5/forecast?q=Santa Barbara California,US&units=metric&appid=YOUR_API_KEY"
response = requests.get(url)
weather_data = pd.json_normalize(response.json())
# Convert data to Dask DataFrame
weather_df = dd.from_pandas(weather_data, npartitions=4)
# Define a function to predict weather forecasts
def predict_weather(date, temperature, humidity):
# Use a random forest regressor to predict weather conditions
model = RandomForestRegressor(n_estimators=100, random_state=42)
model.fit(weather_df[["temperature", "humidity"]], weather_df["weather"])
prediction = model.predict([[temperature, humidity]])
return prediction
# Define a function to generate color-coded alerts
def generate_alerts(prediction):
if prediction > 80:
return "RED" # Severe weather condition
elif prediction > 60:
return "ORANGE" # Very bad weather condition
elif prediction > 40:
return "YELLOW" # Bad weather condition
else:
return "GREEN" # Good weather condition
# Predict weather forecasts for 30 days inAugust2024
predictions = []
for i in range(30):
date = f"2024-09-{i+1}"
temperature = weather_df["temperature"].mean()
humidity = weather_df["humidity"].mean()
prediction = predict_weather(date, temperature, humidity)
alerts = generate_alerts(prediction)
predictions.append((date, prediction, alerts))
# Visualize predictions using Matplotlib
plt.figure(figsize=(12, 6))
plt.plot([x[0] for x in predictions], [x[1] for x in predictions], marker="o")
plt.xlabel("Date")
plt.ylabel("Weather Prediction")
plt.title("Weather Forecast for 30 Days inAugust2024")
plt.show()
```
Explanation:
1. We load weather data from OpenWeatherMap API and convert it to a Dask DataFrame.
2. We define a function to predict weather forecasts using a random forest regressor.
3. We define a function to generate color-coded alerts based on the predicted weather conditions.
4. We predict weather forecasts for 30 days in August 2024 and generate color-coded alerts for each day.
5. We visualize the predictions using Matplotlib.
Conclusion:
In this article, we have demonstrated the power of parallel computing and AI libraries in predicting weather forecasts for 30 days in August 2024, specifically for Santa Barbara California. We have used TensorFlow, Keras, and scikit-learn on the first code and OpenWeatherMap API, Scikit-learn, Dask, and Matplotlib on the second code to build a comprehensive weather forecasting system. The color-coded alert system provides a visual representation of the severity of the weather conditions, enabling users to take necessary precautions to avoid accidents. This technology has the potential to revolutionize the field of weather forecasting, providing accurate and timely predictions to ensure public safety.
RDIDINI PROMPT ENGINEER
2 notes
·
View notes
Text
Skills You'll Gain from an Artificial Intelligence Course in Dubai
As artificial intelligence (AI) reshapes industries and transforms the future of work, professionals and students alike are looking to gain the skills needed to stay ahead. With its vision of becoming a global tech hub, Dubai is fast emerging as a center for AI education. Enrolling in an Artificial Intelligence Course in Dubai offers more than just theoretical knowledge — it equips you with practical, in-demand skills that employers value today.
Whether you're aiming for a career in machine learning, robotics, data science, or automation, this article explores the top skills you’ll gain by completing an AI course in Dubai — and why this city is the ideal place to begin your journey into intelligent technologies.
Why Study AI in Dubai?
Dubai is positioning itself as a global AI leader, with initiatives like the UAE National AI Strategy 2031 and institutions investing heavily in emerging technologies. By studying in Dubai, you’ll benefit from:
A future-ready education ecosystem
Proximity to multinational tech companies and AI startups
A diverse, international community of learners
Hands-on, project-based training aligned with global job market standards
But most importantly, a well-designed artificial intelligence course in Dubai delivers a structured roadmap to mastering the technical, analytical, and soft skills that make you job-ready in this fast-growing domain.
1. Programming and Data Handling Skills
Every AI system is built on a foundation of programming. One of the first things you’ll learn in an AI course in Dubai is how to code effectively, especially using Python, the most popular language for artificial intelligence development.
You’ll master:
Python programming basics – syntax, functions, control flow, etc.
Working with libraries like NumPy, Pandas, and Matplotlib
Data preprocessing – cleaning, transforming, and visualizing data
Data structures and algorithms for efficient computing
These skills are vital for building AI models and handling real-world datasets — and they’re transferable across many roles in tech and data science.
2. Machine Learning Algorithms
At the heart of any AI system is machine learning (ML) — the ability of systems to learn from data without being explicitly programmed. In your AI course, you’ll gain a solid grounding in how ML works and how to implement it.
Key skills include:
Understanding supervised, unsupervised, and reinforcement learning
Implementing algorithms like:
Linear & Logistic Regression
Decision Trees
Random Forest
Support Vector Machines (SVM)
K-Means Clustering
Model evaluation – accuracy, precision, recall, F1 score, ROC curve
Hyperparameter tuning using Grid Search or Random Search
These skills enable you to build predictive models that power everything from recommendation engines to fraud detection systems.
3. Deep Learning and Neural Networks
AI courses in Dubai, especially those offered by leading institutions like the Boston Institute of Analytics, cover deep learning, an advanced subset of machine learning that uses neural networks to mimic the human brain.
You’ll learn to:
Build Artificial Neural Networks (ANNs)
Design Convolutional Neural Networks (CNNs) for image recognition
Work with Recurrent Neural Networks (RNNs) for time-series and language modeling
Use deep learning frameworks like TensorFlow, Keras, and PyTorch
Deep learning skills are essential for cutting-edge applications like autonomous vehicles, facial recognition, and advanced robotics.
4. Natural Language Processing (NLP)
In an age of chatbots, voice assistants, and real-time translation tools, Natural Language Processing (NLP) is a critical AI skill you’ll develop in your course.
You’ll be trained in:
Text pre-processing: tokenization, stemming, lemmatization
Sentiment analysis and classification
Topic modeling using algorithms like LDA
Building chatbots using Dialogflow or Python-based tools
Working with transformer models (e.g., BERT, GPT)
With businesses increasingly automating communication, NLP is becoming one of the most valuable AI specializations in the job market.
5. Computer Vision
If you’ve ever used facial recognition, scanned documents, or tried augmented reality apps — you’ve used Computer Vision (CV). This powerful field allows machines to “see” and interpret images or videos.
Skills you’ll gain:
Image classification and object detection
Face and emotion recognition systems
Real-time video analytics
Working with tools like OpenCV and YOLO (You Only Look Once)
In Dubai, CV has high demand in security, retail analytics, smart city planning, and autonomous systems — making it a must-have skill for aspiring AI professionals.
6. Data Science & Analytical Thinking
A strong AI course also develops your data science foundation — teaching you to gather insights from data and make data-driven decisions.
You’ll gain:
Strong understanding of statistics and probability
Ability to draw inferences using data visualization
Experience with EDA (Exploratory Data Analysis)
Use of tools like Power BI, Tableau, or Jupyter Notebooks
These analytical skills will help you understand business problems better and design AI systems that solve them effectively.
7. Model Deployment and Cloud Integration
Knowing how to build a machine learning model is just the beginning — deploying it in a real-world environment is what makes you a complete AI professional.
You’ll learn to:
Deploy models using Flask, FastAPI, or Streamlit
Use Docker for containerization
Integrate AI solutions with cloud platforms like AWS, Google Cloud, or Azure
Monitor model performance post-deployment
Cloud deployment and scalability are critical skills that companies look for when hiring AI engineers.
8. Ethics, Privacy & Responsible AI
As AI becomes more powerful, concerns around bias, privacy, and transparency grow. A responsible Artificial Intelligence Course in Dubai emphasizes the ethical dimensions of AI.
Skills you’ll develop:
Understanding bias in training data and algorithms
Ensuring fairness and accountability in AI systems
GDPR compliance and data privacy frameworks
Building interpretable and explainable AI models
These soft skills make you not just a capable engineer, but a responsible innovator trusted by employers and regulators.
Final Thoughts
Dubai’s AI vision, coupled with its rapidly evolving tech ecosystem, makes it a top destination for anyone looking to upskill in artificial intelligence. A structured Artificial Intelligence Course in Dubai doesn’t just teach you how AI works — it transforms you into a job-ready, future-proof professional.
By the end of your course, you’ll be equipped with:
Hands-on coding and modeling experience
Deep understanding of ML and deep learning
Cloud deployment and data handling skills
Ethical AI awareness and practical project expertise
Whether you aim to become a machine learning engineer, data scientist, NLP developer, or AI strategist, the skills you gain in Dubai will open doors to a world of high-paying, impactful roles.
#Best Data Science Courses in Dubai#Artificial Intelligence Course in Dubai#Data Scientist Course in Dubai#Machine Learning Course in Dubai
0 notes
Text


1. Semantic segmentation is carried out using the SegFormer model
The SegFormer pre-trained model is utilized to perform pixel-level semantic segmentation on the input background image. The following several key areas of the model:
Floor, walls, sky, people, plants
The result of semantic segmentation is the category to which each pixel belongs, thereby providing precise semantic region localization for subsequent mapping.
Tools: transformers (Hugging Face) SegformerImageProcessor + SegformerForSemanticSegmentation in the repository
2. Extract the coordinates of the texture area
According to the segmentation results, the pixel sets of each semantic region are extracted respectively (such as the coordinate point set of the ground region). These areas serve as valid candidate regions for "Allow mapping", guiding the placement of image elements.
Tools: NumPy, OpenCV → cv2.findNonZero, np.where
3. Randomly select image elements for collage
In each round of collage, randomly select image elements (such as people, furniture, plants, etc.) from the material library and attempt to automatically paste them into the background image.
Tools: pathlib.Path.glob, random.shuffle, cv2.imread
4. Sample the center point from the semantic region
Take the "floor area" as an example. Randomly sample a center point from the Floor area as the candidate position of the current image element.
Tool: random.choice + OpenCV coordinate data structure
5. Automatically adjust the texture size based on the sampling position
To simulate the depth-of-field effect, the image scaling is automatically controlled based on the vertical position of the sampling points:
The closer to the bottom of the picture (low y value) → the larger the element, simulating larger elements near and smaller ones far away.
The closer to the top of the picture, the smaller the element becomes, simulating the scaling of the visual size at a distance.
This step ensures that all image elements are visually proportional to the background perspective.
Tool: NumPy.interp
6. Add perspective perturbation to generate a quadrilateral quad
Based on the sampling center, a slight random disturbance is added to generate a quadrilateral quad for:
The "tilt Angle" and "perspective change" of the simulated image
Enhance the sense of three-dimensional space and avoid each image directly facing the viewing Angle
Tool: random.randint, custom quadrilateral logic
7. Perform geometric perspective transformation on image elements
Perform perspective deformation on the image elements according to the above-mentioned quadrilateral quad to make them conform to the background space.
Tools: cv2. GetPerspectiveTransform cv2. WarpPerspective
8. Alpha fusion overlay onto the canvas
The transformed image elements are transparently superimposed onto the background canvas through the alpha_blend() function, retaining the natural edges and transparent parts to achieve seamless integration.
9. Check the occlusion relationship to avoid layer conflicts
Before mapping, calculate the occlusion overlap ratio between this image and the existing mapping:
If there is too much occlusion (>20%), abandon this quad and try again at a different position
0 notes
Text
Unlock Your Future: Learn Data Science Using Python A-Z for ML

Are you ready to take a deep dive into one of the most in-demand skills of the decade? Whether you're looking to switch careers, boost your resume, or just want to understand how machine learning shapes the world, learning Data Science using Python A-Z for ML is one of the smartest moves you can make today.
With Python becoming the universal language of data, combining it with data science and machine learning gives you a major edge. But here’s the best part—you don’t need to be a math genius or have a computer science degree to get started. Thanks to online learning platforms, anyone can break into the field with the right course and guidance.
If you’re ready to explore the world of predictive analytics, AI, and machine learning through Python, check out this powerful Data Science using Python A-Z for ML course that’s crafted to take you from beginner to expert.
Let’s break down what makes this learning journey so valuable—and how it can change your future.
Why Data Science with Python Is a Game-Changer
Python is known for its simplicity, readability, and versatility. That's why it’s the preferred language of many data scientists and machine learning engineers. It offers powerful libraries like:
Pandas for data manipulation
NumPy for numerical computing
Matplotlib and Seaborn for data visualization
Scikit-learn for machine learning
TensorFlow and Keras for deep learning
When you combine these tools with real-world applications, the possibilities become endless—from building recommendation engines to predicting customer churn, from detecting fraud to automating data analysis.
The key is learning the skills in the right order with hands-on practice. That’s where a well-structured course can help you move from confusion to clarity.
What You’ll Learn in This A-Z Course on Data Science with Python
The course isn’t just a theory dump—it’s an actionable, practical, hands-on bootcamp. It covers:
1. Python Programming Basics
Even if you’ve never written a line of code, you’ll be walked through Python syntax, data types, loops, functions, and more. It’s like learning a new language with a supportive tutor guiding you.
2. Data Cleaning and Preprocessing
Raw data is messy. You’ll learn how to clean, transform, and prepare datasets using Pandas, making them ready for analysis or training machine learning models.
3. Data Visualization
A picture is worth a thousand rows. Learn how to use Matplotlib and Seaborn to create powerful charts, graphs, and plots that reveal patterns in your data.
4. Exploratory Data Analysis (EDA)
Before jumping to models, EDA helps you understand your dataset. You’ll learn how to identify trends, outliers, and relationships between features.
5. Statistics for Data Science
Understand probability, distributions, hypothesis testing, and correlation. These concepts are the foundation of many ML algorithms.
6. Machine Learning Algorithms
You’ll cover essential algorithms like:
Linear Regression
Logistic Regression
Decision Trees
Random Forests
Support Vector Machines
k-Nearest Neighbors
Naïve Bayes
Clustering (K-Means)
All with practical projects!
7. Model Evaluation
Accuracy isn’t everything. You’ll explore precision, recall, F1-score, confusion matrices, and cross-validation to truly assess your models.
8. Real-World Projects
Theory only goes so far. You’ll build actual projects that simulate what data scientists do in the real world—from data collection to deploying predictions.
Who Is This Course Perfect For?
You don’t need a Ph.D. to start learning. This course is designed for:
Beginners with zero coding or data science background
Students looking to enhance their resume
Professionals switching careers to tech
Entrepreneurs wanting to use data for smarter decisions
Marketers & Analysts who want to work with predictive analytics
Whether you're 18 or 48, this course makes learning Data Science using Python A-Z for ML accessible and exciting.
What Makes This Course Stand Out?
Let’s be real: there are hundreds of data science courses online. So what makes this one different?
✅ Structured Learning Path
Everything is organized from A to Z. You don’t jump into machine learning without learning data types first.
✅ Hands-On Projects
You’ll work on mini-projects throughout the course, so you never lose the connection between theory and practice.
✅ Friendly Teaching Style
No dry lectures or overwhelming jargon. The instructor talks to you like a friend—not a robot.
✅ Lifetime Access
Once you enroll, it’s yours forever. Come back to lessons any time you need a refresher.
✅ Real-World Applications
You’ll build models you can actually talk about in job interviews—or even show on your portfolio.
Want to start now? Here’s your shortcut to mastering the field: 👉 Data Science using Python A-Z for ML
Why Data Science Skills Matter in 2025 and Beyond
Companies today are drowning in data—and they’re willing to pay handsomely for people who can make sense of it.
In 2025 and beyond, businesses will use AI to:
Automate decisions
Understand customer behavior
Forecast market trends
Detect fraud
Personalize services
To do any of this, they need data scientists who can write Python code, manipulate data, and train predictive models.
That could be you.
From Learner to Data Scientist: Your Roadmap
Here’s how your transformation might look after taking the course:
Month 1: You understand Python and basic data structures Month 2: You clean and explore datasets with Pandas and Seaborn Month 3: You build your first ML model Month 4: You complete a full project—ready for your resume Month 5: You start applying for internships, freelance gigs, or even full-time roles!
It’s not a pipe dream. It’s real, and it’s happening to people every day. All you need is to take the first step.
Your Investment? Just a Few Hours a Week
You don’t need to quit your job or study 12 hours a day. With just 4–5 hours a week, you can master the foundations within a few months.
And remember: this isn’t just a skill. It’s an asset. The return on your time is massive—financially and intellectually.
Final Thoughts: The Future Belongs to the Data-Literate
If you've been waiting for a sign to jump into data science, this is it.
The tools are beginner-friendly. The job market is exploding. And this course gives you everything you need to start building your skills today.
Don’t let hesitation hold you back.
Start your journey with Data Science using Python A-Z for ML, and see how far you can go.
0 notes
Text
Mastering NumPy in Python – The Ultimate Guide for Data Enthusiasts
Imagine calculating the average of a million numbers using regular Python lists. You’d need to write multiple lines of code, deal with loops, and wait longer for the results. Now, what if you could do that in just one line? Enter NumPy in Python, the superhero of numerical computing in Python.
NumPy in Python (short for Numerical Python) is the core package that gives Python its scientific computing superpowers. It’s built for speed and efficiency, especially when working with arrays and matrices of numeric data. At its heart lies the ndarray—a powerful n-dimensional array object that’s much faster and more efficient than traditional Python lists.
What is NumPy in Python and Why It Matters
Why is NumPy a game-changer?
It allows operations on entire arrays without writing for-loops.
It’s written in C under the hood, so it’s lightning-fast.
It offers functionalities like Fourier transforms, linear algebra, random number generation, and so much more.
It’s compatible with nearly every scientific and data analysis library in Python like SciPy, Pandas, TensorFlow, and Matplotlib.
In short, if you’re doing data analysis, machine learning, or scientific research in Python, NumPy is your starting point.
The Evolution and Importance of NumPy in Python Ecosystem
Before NumPy in Python, Python had numeric libraries, but none were as comprehensive or fast. NumPy was developed to unify them all under one robust, extensible, and fast umbrella.
Created by Travis Oliphant in 2005, NumPy grew from an older package called Numeric. It soon became the de facto standard for numerical operations. Today, it’s the bedrock of almost every other data library in Python.
What makes it crucial?
Consistency: Most libraries convert input data into NumPy arrays for consistency.
Community: It has a huge support community, so bugs are resolved quickly and the documentation is rich.
Cross-platform: It runs on Windows, macOS, and Linux with zero change in syntax.
This tight integration across the Python data stack means that even if you’re working in Pandas or TensorFlow, you’re indirectly using NumPy under the hood.
Setting Up NumPy in Python
How to Install NumPy
Before using NumPy, you need to install it. The process is straightforward:
bash
pip install numpy
Alternatively, if you’re using a scientific Python distribution like Anaconda, NumPy comes pre-installed. You can update it using:
bash
conda update numpy
That’s it—just a few seconds, and you’re ready to start number-crunching!
Some environments (like Jupyter notebooks or Google Colab) already have NumPy installed, so you might not need to install it again.
Importing NumPy in Python and Checking Version
Once installed, you can import NumPy using the conventional alias:
python
import numpy as np
This alias, np, is universally recognized in the Python community. It keeps your code clean and concise.
To check your NumPy version:
python
print(np.__version__)
You’ll want to ensure that you’re using the latest version to access new functions, optimizations, and bug fixes.
If you’re just getting started, make it a habit to always import NumPy with np. It’s a small convention, but it speaks volumes about your code readability.
Understanding NumPy in Python Arrays
The ndarray Object – Core of NumPy
At the center of everything in NumPy lies the ndarray. This is a multidimensional, fixed-size container for elements of the same type.
Key characteristics:
Homogeneous Data: All elements are of the same data type (e.g., all integers or all floats).
Fast Operations: Built-in operations are vectorized and run at near-C speed.
Memory Efficiency: Arrays take up less space than lists.
You can create a simple array like this:
python
import numpy as np arr = np.array([1, 2, 3, 4])
Now arr is a NumPy array (ndarray), not just a Python list. The difference becomes clearer with larger data or when applying operations:
python
arr * 2 # [2 4 6 8]
It’s that easy. No loops. No complications.
You can think of an ndarray like an Excel sheet with superpowers—except it can be 1d, 2d, 3d, or even higher dimensions!
1-Dimensional Arrays – Basics and Use Cases
1d arrays are the simplest form—just a list of numbers. But don’t let the simplicity fool you. They’re incredibly powerful.
Creating a 1D array:
python
a = np.array([10, 20, 30, 40])
You can:
Multiply or divide each element by a number.
Add another array of the same size.
Apply mathematical functions like sine, logarithm, etc.
Example:
python
b = np.array([1, 2, 3, 4]) print(a + b) # Output: [11 22 33 44]
This concise syntax is possible because NumPy performs element-wise operations—automatically!
1d arrays are perfect for:
Mathematical modeling
Simple signal processing
Handling feature vectors in ML
Their real power emerges when used in batch operations. Whether you’re summing elements, calculating means, or applying a function to every value, 1D arrays keep your code clean and blazing-fast.
2-Dimensional Arrays – Matrices and Their Applications
2D arrays are like grids—rows and columns of data. They’re also the foundation of matrix operations in NumPy in Python.
You can create a 2D array like this:
python
arr_2d = np.array([[1, 2, 3], [4, 5, 6]])
Here’s what it looks like:
lua
[[1 2 3] [4 5 6]]
Each inner list becomes a row. This structure is ideal for:
Representing tables or datasets
Performing matrix operations like dot products
Image processing (since images are just 2D arrays of pixels)
Some key operations:
python
arr_2d.shape # (2, 3) — 2 rows, 3 columns arr_2d[0][1] # 2 — first row, second column arr_2d.T # Transpose: swaps rows and columns
You can also use slicing just like with 1d arrays:
python
arr_2d[:, 1] # All rows, second column => [2, 5] arr_2d[1, :] # Second row => [4, 5, 6]
2D arrays are extremely useful in:
Data science (e.g., CSVS loaded into 2D arrays)
Linear algebra (matrices)
Financial modelling and more
They’re like a spreadsheet on steroids—flexible, fast, and powerful.
3-Dimensional Arrays – Multi-Axis Data Representation
Now let’s add another layer. 3d arrays are like stacks of 2D arrays. You can think of them as arrays of matrices.
Here’s how you define one:
python
arr_3d = np.array([ [[1, 2], [3, 4]], [[5, 6], [7, 8]] ])
This array has:
2 matrices
Each matrix has 2 rows and 2 columns
Visualized as:
lua
[ [[1, 2], [3, 4]],[[5, 6], [7, 8]] ]
Accessing data:
python
arr_3d[0, 1, 1] # Output: 4 — first matrix, second row, second column
Use cases for 3D arrays:
Image processing (RGB images: height × width × color channels)
Time series data (time steps × variables × features)
Neural networks (3D tensors as input to models)
Just like with 2D arrays, NumPy’s indexing and slicing methods make it easy to manipulate and extract data from 3D arrays.
And the best part? You can still apply mathematical operations and functions just like you would with 1D or 2D arrays. It’s all uniform and intuitive.
Higher Dimensional Arrays – Going Beyond 3D
Why stop at 3D? NumPy in Python supports N-dimensional arrays (also called tensors). These are perfect when dealing with highly structured datasets, especially in advanced applications like:
Deep learning (4D/5D tensors for batching)
Scientific simulations
Medical imaging (like 3D scans over time)
Creating a 4D array:
python
arr_4d = np.random.rand(2, 3, 4, 5)
This gives you:
2 batches
Each with 3 matrices
Each matrix has 4 rows and 5 columns
That’s a lot of data—but NumPy handles it effortlessly. You can:
Access any level with intuitive slicing
Apply functions across axes
Reshape as needed using .reshape()
Use arr.ndim to check how many dimensions you’re dealing with. Combine that with .shape, and you’ll always know your array’s layout.
Higher-dimensional arrays might seem intimidating, but NumPy in Python makes them manageable. Once you get used to 2D and 3D, scaling up becomes natural.
NumPy in Python Array Creation Techniques
Creating Arrays Using Python Lists
The simplest way to make a NumPy array is by converting a regular Python list:
python
a = np.array([1, 2, 3])
Or a list of lists for 2D arrays:
python
b = np.array([[1, 2], [3, 4]])
You can also specify the data type explicitly:
python
np.array([1, 2, 3], dtype=float)
This gives you a float array [1.0, 2.0, 3.0]. You can even convert mixed-type lists, but NumPy will automatically cast to the most general type to avoid data loss.
Pro Tip: Always use lists of equal lengths when creating 2D+ arrays. Otherwise, NumPy will make a 1D array of “objects,” which ruins performance and vectorization.
Array Creation with Built-in Functions (arange, linspace, zeros, ones, etc.)
NumPy comes with handy functions to quickly create arrays without writing out all the elements.
Here are the most useful ones:
np.arange(start, stop, step): Like range() but returns an array.
np.linspace(start, stop, num): Evenly spaced numbers between two values.
np.zeros(shape): Array filled with zeros.
np.ones(shape): Array filled with ones.
np.eye(N): Identity matrix.
These functions help you prototype, test, and create arrays faster. They also avoid manual errors and ensure your arrays are initialized correctly.
Random Array Generation with random Module
Need to simulate data? NumPy’s random module is your best friend.
python
np.random.rand(2, 3) # Uniform distribution np.random.randn(2, 3) # Normal distribution np.random.randint(0, 10, (2, 3)) # Random integers
You can also:
Shuffle arrays
Choose random elements
Set seeds for reproducibility (np.random.seed(42))
This is especially useful in:
Machine learning (generating datasets)
Monte Carlo simulations
Statistical experiments.
Reshaping, Flattening, and Transposing Arrays
Reshaping is one of NumPy’s most powerful features. It lets you reorganize the shape of an array without changing its data. This is critical when preparing data for machine learning models or mathematical operations.
Here’s how to reshape:
python
a = np.array([1, 2, 3, 4, 5, 6]) b = a.reshape(2, 3) # Now it's 2 rows and 3 columns
Reshaped arrays can be converted back using .flatten():
python
flat = b.flatten() # [1 2 3 4 5 6]
There’s also .ravel()—similar to .flatten() but returns a view if possible (faster and more memory-efficient).
Transposing is another vital transformation:
python
matrix = np.array([[1, 2], [3, 4]]) matrix.T # Output: # [[1 3] # [2 4]]
Transpose is especially useful in linear algebra, machine learning (swapping features with samples), and when matching shapes for operations like matrix multiplication.
Use .reshape(-1, 1) to convert arrays into columns, and .reshape(1, -1) to make them rows. This flexibility gives you total control over the structure of your data.
Array Slicing and Indexing Tricks
You can access parts of an array using slicing, which works similarly to Python lists but more powerful in NumPy in Python.
Basic slicing:
python
arr = np.array([10, 20, 30, 40, 50]) arr[1:4] # [20 30 40]
2D slicing:
python
mat = np.array([[1, 2, 3], [4, 5, 6], [7, 8, 9]]) mat[0:2, 1:] # Rows 0-1, columns 1-2 => [[2 3], [5 6]]
Advanced indexing includes:
Boolean indexing:
python
arr[arr > 30] # Elements greater than 30
Fancy indexing:
python
arr[[0, 2, 4]] # Elements at indices 0, 2, 4
Modifying values using slices:
python
arr[1:4] = 99 # Replace elements at indices 1 to 3
Slices return views, not copies. So if you modify a slice, the original array is affected—unless you use .copy().
These slicing tricks make data wrangling fast and efficient, letting you filter and extract patterns in seconds.
Broadcasting and Vectorized Operations
Broadcasting is what makes NumPy in Python shine. It allows operations on arrays of different shapes and sizes without writing explicit loops.
Let’s say you have a 1D array:
python
a = np.array([1, 2, 3])
And a scalar:
python
b = 10
You can just write:
python
c = a + b # [11, 12, 13]
That’s broadcasting in action. It also works for arrays with mismatched shapes as long as they are compatible:
python
a = np.array([[1], [2], [3]]) # Shape (3,1) b = np.array([4, 5, 6]) # Shape (3,)a + b
This adds each element to each element b, creating a full matrix.
Why is this useful?
It avoids for-loops, making your code cleaner and faster
It matches standard mathematical notation
It enables writing expressive one-liners
Vectorization uses broadcasting behind the scenes to perform operations efficiently:
python
a * b # Element-wise multiplication np.sqrt(a) # Square root of each element np.exp(a) # Exponential of each element
These tricks make NumPy in Python code shorter, faster, and far more readable.
Mathematical and Statistical Operations
NumPy offers a rich suite of math functions out of the box.
Basic math:
python
np.add(a, b) np.subtract(a, b) np.multiply(a, b) np.divide(a, b)
Aggregate functions:
python
np.sum(a) np.mean(a) np.std(a) np.var(a) np.min(a) np.max(a)
Axis-based operations:
python
arr_2d = np.array([[1, 2, 3], [4, 5, 6]]) np.sum(arr_2d, axis=0) # Sum columns: [5 7 9] np.sum(arr_2d, axis=1) # Sum rows: [6 15]
Linear algebra operations:
python
np.dot(a, b) # Dot product np.linalg.inv(mat) # Matrix inverse np.linalg.det(mat) # Determinant np.linalg.eig(mat) # Eigenvalues
Statistical functions:
python
np.percentile(a, 75) np.median(a) np.corrcoef(a, b)
Trigonometric operations:
python
np.sin(a) np.cos(a) np.tan(a)
These functions let you crunch numbers, analyze trends, and model complex systems in just a few lines.
NumPy in Python I/O – Saving and Loading Arrays
Data persistence is key. NumPy in Python lets you save and load arrays easily.
Saving arrays:
python
np.save('my_array.npy', a) # Saves in binary format
Loading arrays:
python
b = np.load('my_array.npy')
Saving multiple arrays:
python
np.savez('data.npz', a=a, b=b)
Loading multiple arrays:
python
data = np.load('data.npz') print(data['a']) # Access saved 'a' array
Text file operations:
python
np.savetxt('data.txt', a, delimiter=',') b = np.loadtxt('data.txt', delimiter=',')
Tips:
Use .npy or .npz formats for efficiency
Use .txt or .csv for interoperability
Always check array shapes after loading
These functions allow seamless transition between computations and storage, critical for real-world data workflows.
Masking, Filtering, and Boolean Indexing
NumPy in Python allows you to manipulate arrays with masks—a powerful way to filter and operate on elements that meet certain conditions.
Here’s how masking works:
python
arr = np.array([10, 20, 30, 40, 50]) mask = arr > 25
Now mask is a Boolean array:
graphql
[False False True True True]
You can use this mask to extract elements:
python
filtered = arr[mask] # [30 40 50]
Or do operations:
python
arr[mask] = 0 # Set all elements >25 to 0
Boolean indexing lets you do conditional replacements:
python
arr[arr < 20] = -1 # Replace all values <20
This technique is extremely useful in:
Cleaning data
Extracting subsets
Performing conditional math
It’s like SQL WHERE clauses but for arrays—and lightning-fast.
Sorting, Searching, and Counting Elements
Sorting arrays is straightforward:
python
arr = np.array([10, 5, 8, 2]) np.sort(arr) # [2 5 8 10]
If you want to know the index order:
python
np.argsort(arr) # [3 1 2 0]
Finding values:
python
np.where(arr > 5) # Indices of elements >5
Counting elements:
python
np.count_nonzero(arr > 5) # How many elements >5
You can also use np.unique() to find unique values and their counts:
python
np.unique(arr, return_counts=True)
Need to check if any or all elements meet a condition?
python
np.any(arr > 5) # True if any >5 np.all(arr > 5) # True if all >5
These operations are essential when analyzing and transforming datasets.
Copy vs View in NumPy in Python – Avoiding Pitfalls
Understanding the difference between a copy and a view can save you hours of debugging.
By default, NumPy tries to return views to save memory. But modifying a view also changes the original array.
Example of a view:
python
a = np.array([1, 2, 3]) b = a[1:] b[0] = 99 print(a) # [1 99 3] — original changed!
If you want a separate copy:
python
b = a[1:].copy()
Now b is independent.
How to check if two arrays share memory?
python
np.may_share_memory(a, b)
When working with large datasets, always ask yourself—is this a view or a copy? Misunderstanding this can lead to subtle bugs.
Useful NumPy Tips and Tricks
Let’s round up with some power-user tips:
Memory efficiency: Use dtype to optimize storage. For example, use np.int8 instead of the default int64 for small integers.
Chaining: Avoid chaining operations that create temporary arrays. Instead, use in-place ops like arr += 1.
Use .astype() For type conversion:
Suppress scientific notation:
Timing your code:
Broadcast tricks:
These make your code faster, cleaner, and more readable.
Integration with Other Libraries (Pandas, SciPy, Matplotlib)
NumPy plays well with others. Most scientific libraries in Python depend on it:
Pandas
Under the hood, pandas.DataFrame uses NumPy arrays.
You can extract or convert between the two seamlessly:
Matplotlib
Visualizations often start with NumPy arrays:
SciPy
Built on top of NumPy
Adds advanced functionality like optimization, integration, statistics, etc.
Together, these tools form the backbone of the Python data ecosystem.
Conclusion
NumPy is more than just a library—it’s the backbone of scientific computing in Python. Whether you’re a data analyst, machine learning engineer, or scientist, mastering NumPy gives you a massive edge.
Its power lies in its speed, simplicity, and flexibility:
Create arrays of any dimension
Perform operations in vectorized form
Slice, filter, and reshape data in milliseconds
Integrate easily with tools like Pandas, Matplotlib, and SciPy
Learning NumPy isn’t optional—it’s essential. And once you understand how to harness its features, the rest of the Python data stack falls into place like magic.
So fire up that Jupyter notebook, start experimenting, and make NumPy your new best friend.
FAQs
1. What’s the difference between a NumPy array and a Python list? A NumPy array is faster, uses less memory, supports vectorized operations, and requires all elements to be of the same type. Python lists are more flexible but slower for numerical computations.
2. Can I use NumPy for real-time applications? Yes! NumPy is incredibly fast and can be used in real-time data analysis pipelines, especially when combined with optimized libraries like Numba or Cython.
3. What’s the best way to install NumPy? Use pip or conda. For pip: pip install numpy, and for conda: conda install numpy.
4. How do I convert a Pandas DataFrame to a NumPy array? Just use .values or .to_numpy():
python
array = df.to_numpy()
5. Can NumPy handle missing values? Not directly like Pandas, but you can use np.nan and functions like np.isnan() and np.nanmean() to handle NaNs.
0 notes
Text
Unlock the Future: Dive into Artificial Intelligence with Zoople Technologies in Kochi
Artificial Intelligence (AI) is no longer a futuristic fantasy; it's a transformative force reshaping industries and our daily lives. From self-driving cars to personalized healthcare, AI's potential is immense, creating a burgeoning demand for skilled professionals who can understand, develop, and implement AI solutions. For those in Kochi eager to be at the forefront of this technological revolution, Zoople Technologies offers a comprehensive Artificial Intelligence course designed to equip you with the knowledge and skills to thrive in this exciting field.
Embark on Your AI Journey with a Comprehensive Curriculum:
Zoople Technologies' Artificial Intelligence course in Kochi is structured to provide a robust understanding of AI principles and their practical applications. The curriculum is likely to cover a wide range of essential topics, including:
Fundamentals of Artificial Intelligence: Introduction to AI concepts, its history, different branches (like machine learning, deep learning, natural language processing, computer vision), and its ethical implications.
Python Programming for AI: Python is the dominant language in AI development. The course likely provides a strong foundation in Python and its essential libraries for AI and machine learning, such as NumPy, Pandas, and Scikit-learn.
Mathematical Foundations: A solid grasp of linear algebra, calculus, and probability is crucial for understanding the underlying principles of many AI algorithms. The course likely covers these concepts with an AI-focused perspective.
Machine Learning (ML): The core of many AI applications. The curriculum will likely delve into various ML algorithms, including:
Supervised Learning: Regression and classification techniques (e.g., linear regression, logistic regression, support vector machines, decision trees, random forests).
Unsupervised Learning: Clustering and dimensionality reduction techniques (e.g., k-means clustering, principal component analysis).
Model Evaluation and Selection: Understanding how to assess the performance of AI models and choose the best one for a given task.
Deep Learning (DL): A powerful subset of machine learning that has driven significant advancements in areas like image recognition and natural language processing. The course might cover:
Neural Networks: Understanding the architecture and functioning of artificial neural networks.
Convolutional Neural Networks (CNNs): Architectures particularly effective for image and video analysis.
Recurrent Neural Networks (RNNs): Architectures suitable for sequential data like text and time series.
Deep Learning Frameworks: Hands-on experience with popular frameworks like TensorFlow and Keras.
Natural Language Processing (NLP): Enabling computers to understand and process human language. The course might cover topics like text preprocessing, sentiment analysis, language modeling, and basic NLP tasks.
Computer Vision: Enabling computers to "see" and interpret images and videos. The curriculum could introduce image processing techniques, object detection, and image classification.
AI Ethics and Societal Impact: Understanding the ethical considerations and societal implications of AI development and deployment is increasingly important. The course might include discussions on bias, fairness, and responsible AI.
Real-World Projects and Case Studies: To solidify learning and build a strong portfolio, the course will likely involve practical projects and case studies that apply AI techniques to solve real-world problems.
Learn from Experienced Instructors in a Supportive Environment:
Zoople Technologies emphasizes providing quality education through experienced instructors. While specific profiles may vary, the institute likely employs professionals with a strong understanding of AI principles and practical experience in implementing AI solutions. A supportive learning environment fosters effective knowledge acquisition, allowing students to ask questions, collaborate, and deepen their understanding of complex AI concepts.
Focus on Practical Application and Industry Relevance:
The AI field is constantly evolving, and practical skills are highly valued. Zoople Technologies' AI course likely emphasizes hands-on learning, enabling students to apply theoretical knowledge to real-world scenarios. The inclusion of projects and case studies ensures that graduates possess the practical abilities sought by employers in the AI industry.
Career Pathways in AI and the Role of Zoople Technologies:
A qualification in AI opens doors to a wide range of exciting career opportunities, including:
AI Engineer
Machine Learning Engineer
Data Scientist (with AI specialization)
NLP Engineer
Computer Vision Engineer
AI Researcher
Zoople Technologies' AI course aims to equip you with the foundational knowledge and practical skills to pursue these roles. Their potential focus on industry-relevant tools and techniques, coupled with possible career guidance, can provide a significant advantage in launching your AI career in Kochi and beyond.
Why Choose Zoople Technologies for Your AI Education in Kochi?
Comprehensive and Up-to-Date Curriculum: Covering the breadth of essential AI concepts and technologies.
Emphasis on Practical Skills: Providing hands-on experience through projects and case studies.
Experienced Instructors: Guiding students with their knowledge and insights into the AI field.
Focus on Industry Relevance: Equipping students with skills demanded by the AI job market.
Potential Career Support: Assisting students in their career transition into AI roles.
To make an informed decision about Zoople Technologies' Artificial Intelligence course in Kochi, it is recommended to:
Request a detailed course syllabus: Understand the specific topics covered and the depth of each module.
Inquire about the instructors' expertise and industry experience: Learn about their background in AI.
Ask about the nature and scope of the projects and case studies: Understand the practical learning opportunities.
Enquire about any career support or placement assistance offered: Understand their commitment to your career success.
Seek reviews or testimonials from past students: Gain insights into their learning experience.
By providing a strong foundation in AI principles, practical hands-on experience, and potential career guidance, Zoople Technologies aims to be a valuable stepping stone for individuals in Kochi looking to unlock the future and build a successful career in the transformative field of Artificial Intelligence.
0 notes
Text
Top Skills You Need to Become a Data Scientist in 2025
The world is evolving rapidly — and so is the role of a Data Scientist. As we move toward 2025, data science is no longer a niche career option. It’s a core function in nearly every industry, from healthcare and finance to marketing, logistics, and entertainment.
But here’s the big question: What skills do you need to thrive as a data scientist in 2025?
Whether you're starting fresh or upgrading your skillset, this blog will give you a roadmap to stay relevant and future-ready.
1. Programming Skills – Python & SQL Still Rule
Python continues to dominate as the go-to language for data science. Its libraries like Pandas, NumPy, Scikit-learn, and TensorFlow make data manipulation and machine learning much easier.
SQL, on the other hand, is essential for data querying. No matter how fancy your ML model is, you still need to pull the right data — and SQL is your best tool for that.
Bonus: Knowing R, Spark, or Julia can be a plus for certain specialized roles.
2. Statistics and Probability
Without a strong foundation in stats, you're just guessing. You don’t need to be a mathematician, but understanding concepts like distributions, p-values, A/B testing, and Bayesian thinking is key.
This helps you ask better questions, validate results, and build stronger models.
3. Machine Learning & Deep Learning
Companies expect data scientists to go beyond analysis — they want predictive power.
Understanding machine learning algorithms like regression, decision trees, random forests, SVMs, and neural networks is crucial. And with the rise of generative AI and deep learning, knowing frameworks like TensorFlow, PyTorch, or Keras is becoming more valuable than ever.
4. Data Visualization and Communication
What’s the point of finding insights if no one understands them?
You need to turn complex results into clear, visual stories. Tools like Tableau, Power BI, Matplotlib, or Seaborn can help you craft dashboards or reports that even non-technical stakeholders can appreciate.
Great data scientists aren’t just number crunchers — they’re storytellers.
5. Cloud and Big Data Technologies
In 2025, data is too big to fit on your laptop. Familiarity with platforms like AWS, Google Cloud, or Azure, and tools like Hadoop or Spark, will be game-changers. These allow you to process large datasets at scale, which is a must-have for roles in big organizations.
6. Soft Skills and Business Acumen
The most underrated but powerful skills?
Critical thinking
Problem-solving
Team collaboration
Understanding the business context
Companies don’t just need data — they need actionable insights that drive ROI. That’s where soft skills meet technical brilliance.
Want to Start Learning Right Now?
If you’re excited to explore this high-growth field, you don’t need to wait. You can start learning the fundamentals of data science for free, right now.
🎥 Watch this beginner-friendly, hands-on Data Science YouTube course that covers all the essentials — from Python and ML basics to real-life projects.
👉 Click here to watch
Whether you're switching careers or upgrading your resume, this course is a solid first step into a thriving future.
0 notes
Text
Master Data Science & AI from the Best IT Training Institute

In today's data-driven world, businesses are constantly seeking ways to gain insights and make smarter decisions. This is where Data Science and Artificial Intelligence (AI) step in, transforming raw data into powerful tools for innovation and growth. If you're looking to break into this exciting field, now is the perfect time to begin your journey.
Why Data Science and AI?
Data Science and AI are two of the fastest-growing areas in the tech industry. From predicting customer behavior to powering self-driving cars, these technologies are behind many modern advancements. Skilled data scientists and AI professionals are in high demand, with companies across every industry on the lookout for talent that can turn data into actionable intelligence.
According to recent studies, the demand for data science professionals has skyrocketed in the last five years, and it's projected to grow even more. With AI becoming more integrated into daily business operations, professionals who understand both fields are more competitive and better equipped to lead the future of tech.
What You’ll Learn in a Data Science and AI Training Program
A well-structured Data Science & AI training program in Kochi covers both the theoretical and practical aspects of working with data. Whether you're a student, working professional, or career switcher, the program is designed to equip you with the skills needed to start your career in this domain.
1. Python for Data Science
Python is the foundation of most data science tools. You’ll learn how to use Python to analyze data, perform operations, and visualize results. Topics include:
Data types and structures
Pandas and NumPy
Matplotlib and Seaborn for data visualization
2. Statistics & Probability
Understanding statistics is crucial in data science. You’ll learn concepts such as:
Descriptive and inferential statistics
Probability distributions
Hypothesis testing
3. Machine Learning (ML)
This module will introduce you to ML algorithms and how they’re applied in real-world scenarios. You’ll learn:
Supervised and unsupervised learning
Regression and classification techniques
Decision trees, random forests, SVM, and K-means clustering
4. Deep Learning & Neural Networks
Explore how AI models mimic human brain functions to solve complex problems. Learn about:
Artificial Neural Networks (ANN)
Convolutional Neural Networks (CNN)
Natural Language Processing (NLP)
5. Data Handling & Preprocessing
You’ll work on handling real-world datasets, cleaning data, and making it suitable for analysis. This includes:
Data wrangling
Feature engineering
Handling missing values
6. Real-Time Projects
Practical knowledge is key. You’ll apply what you’ve learned on real-time industry projects like:
Predicting house prices
Sentiment analysis
Fraud detection systems
Who Can Join?
One of the best things about this course is that you don’t need a technical background to start. Whether you’re from commerce, arts, science, or engineering – as long as you’re passionate about learning and open to problem-solving, you can build a strong career in data science and AI.
Career Opportunities After the Course
Once you complete your training in Data Science & AI, several exciting job roles open up for you:
Data Analyst
Data Scientist
Machine Learning Engineer
AI Developer
Business Intelligence Analyst
Kochi’s IT sector is rapidly growing, and many companies are now hiring data professionals. Whether you're looking for remote roles, corporate positions, or freelance opportunities, your skills will be in demand across industries like healthcare, finance, marketing, and logistics.
Why Kochi is a Great Place to Learn Data Science
Kochi has evolved into a hub for technology and innovation. With its supportive tech ecosystem, affordable living costs, and increasing demand for digital transformation, the city offers the perfect environment to start your data science journey.
You also get the advantage of learning in a collaborative environment with like-minded peers and experienced mentors who guide you throughout your learning process.
Choose the Right Institute
When choosing a training center, look for one that offers:
Industry-relevant curriculum
Hands-on project work
Placement assistance
Flexible batch timings (online/offline)
Experienced faculty
That’s where Zoople Technologies comes in.
Why Choose Zoople Technologies?
At Zoople Technologies, we provide one of the most comprehensive and beginner-friendly Data Science & AI training programs in Kochi. Our curriculum is constantly updated to match industry trends, and we focus heavily on practical learning through real-world projects.
You’ll be trained by industry experts who bring years of experience and insights. We also provide complete placement support, mock interviews, and resume-building guidance to ensure you step into the job market confidently.
Whether you’re just starting your career or planning a switch, Zoople Technologies the best software training institute in Kochi is here to help you every step of the way. With over 12+ trending IT courses, including Python, Data Analytics, Digital Marketing, and more – we’re your one-stop destination for career growth.
Start your journey into Data Science and AI today – learn from the best data science institute in kochi
0 notes
Text
Hyperbolic Transport Network Analyzer
""" Hyperbolic Transport Network Analyzer — — — — — — — — — — — — — — — — — — - This Streamlit app simulates urban transportation networks based on hyperbolic geometry. It generates random intersections, connects nodes based on hyperbolic distance, simulates traffic and public transport routes, and finds the most efficient paths between two points for different transportation modes.
Author: Renato License: CC0 1.0 Universal """
import streamlit as st import numpy as np import random import networkx as nx import matplotlib.pyplot as plt
Import functions from revised_code.py
from revised_code import ( SPEEDS, hyperbolic_distance, adjusted_weight, generate_random_intersections, assign_modes, build_hyperbolic_road_network, simulate_traffic, add_public_transport_routes, shortest_route )
def plot_network(G, points, path=None): """Plot the transportation network with optional path highlight and legend.""" fig, ax = plt.subplots(figsize=(10, 10)) pos = {i: (points[i][0], points[i][1]) for i in G.nodes}# Draw base network with reduced visual complexity nx.draw_networkx_edges(G, pos, edge_color='gray', alpha=0.1, ax=ax) # Highlight public transport routes more prominently public_edges = [(u, v) for u, v, data in G.edges(data=True) if data.get('is_public_route', False)] nx.draw_networkx_edges(G, pos, edgelist=public_edges, edge_color='green', alpha=0.7, width=2.5, ax=ax) # Draw nodes with smaller size for better performance node_colors = ['blue' if G.nodes[n].get('is_stop') else 'black' for n in G.nodes] nx.draw_networkx_nodes(G, pos, node_color=node_colors, node_size=10, ax=ax) # Highlight path if provided if path: path_edges = list(zip(path[:-1], path[1:])) nx.draw_networkx_edges(G, pos, edgelist=path_edges, edge_color='red', width=2.5, ax=ax) # Add explanatory text annotations ax.text(0.05, 0.95, "Public Transport (Green)", transform=ax.transAxes, color='green', fontsize=9, backgroundcolor='white') ax.text(0.05, 0.90, "Main Roads (Gray)", transform=ax.transAxes, color='gray', fontsize=9, backgroundcolor='white') ax.text(0.05, 0.85, "Optimal Path (Red)", transform=ax.transAxes, color='red', fontsize=9, backgroundcolor='white') ax.set_title("Hyperbolic Transportation Network") ax.axis('off') plt.tight_layout() return fig
@st.cache_data def generate_network(num_intersections, distance_threshold, rush_hour, num_transport_lines, seed): """Generate and cache network with given parameters.""" np.random.seed(seed) random.seed(seed) intersections = generate_random_intersections(num_intersections) G = build_hyperbolic_road_network(intersections, distance_threshold) G = add_public_transport_routes(G, num_transport_lines) G = simulate_traffic(G, rush_hour) return G, intersections
def display_route(G, intersections, source, target, mode): """Handle route calculation and display for a single transport mode.""" try: path = shortest_route(G, source, target, mode) if not path: st.error(f"No available {mode} route (empty path)") return st.success(f"Found {mode} route: {len(path)-1} segments") fig = plot_network(G, intersections, path) st.pyplot(fig) with st.expander("Show node sequence"): st.write(path) except nx.NetworkXNoPath: st.error(f"No {mode} path exists between these nodes") except Exception as e: st.error(f"{mode.title()} routing error: {str(e)}")
def main(): """Main entry point for the Streamlit app.""" st.set_page_config(page_title="Hyperbolic Transport Network", layout="wide") st.title("🚀 Hyperbolic Transportation Network Analyzer")# Sidebar controls with st.sidebar: st.header("Configuration") num_intersections = st.slider("Number of intersections", 50, 500, 200) distance_threshold = st.slider("Connection threshold", 1.0, 5.0, 3.0) rush_hour = st.checkbox("Rush Hour Traffic", True) num_transport_lines = st.number_input("Public Transport Lines", 1, 10, 3) seed = st.number_input("Random Seed", value=42) generate_btn = st.button("Generate New Network") # Network generation with caching if generate_btn or 'network' not in st.session_state: with st.spinner("Generating transportation network..."): G, intersections = generate_network( num_intersections, distance_threshold, rush_hour, num_transport_lines, seed ) st.session_state.network = (G, intersections) if 'network' in st.session_state: G, intersections = st.session_state.network # Network visualization col1, col2 = st.columns([2, 1]) with col1: st.subheader("Network Visualization") fig = plot_network(G, intersections) st.pyplot(fig) # Path finding controls with col2: st.subheader("Path Finding") largest_cc = max(nx.connected_components(G), key=len) nodes = list(largest_cc) if len(nodes) < 2: st.warning("Insufficient connected nodes. Generate a new network.") else: source = st.selectbox("Start Node", nodes, key='source') target = st.selectbox("End Node", nodes, key='target') if st.button("Calculate Optimal Routes"): for mode in ['walk', 'car', 'public']: with st.expander(f"{mode.upper()} Route", expanded=True): display_route(G, intersections, source, target, mode) # User documentation with st.expander("📖 User Guide"): st.markdown(""" ## Transportation Network Simulation Guide 1. **Configure Parameters** in the sidebar 2. Click **Generate New Network** when changing parameters 3. Select start/end nodes from the largest connected component 4. Click **Calculate Optimal Routes** to compare modes ### Key Features: - **Hyperbolic Geometry**: Efficient long-distance connections - **Multi-Modal Routing**: Compare walking, driving, and public transit - **Dynamic Simulation**: Rush hour traffic effects - **Persistent Networks**: Parameters are preserved between runs """)
if name == "main": main()
0 notes
Text
Python for Data Science and Machine Learning Bootcamp

Introduction
Python has become the top programming language for Machine Learning and Data Science. Its ease of use, flexibility, and robust libraries make it the data professional's first pick. A properly designed bootcamp such as the one at TCCI Computer Coaching Institute is able to give proper grounding in Python for Machine Learning and Data Science, and enable learning necessary skills through practice.
Why Select TCCI for Python Training?
At TCCI Computer Coaching Institute, we provide high-quality training with:
Expert Faculty with industry experience
Hands-on Training through real-world projects
Industry-Relevant Curriculum with job-ready skills
Flexible Learning Options for professionals and students
Fundamentals of Python for Data Science
Our bootcamp starts with Python fundamentals so that learners grasp:
Variables, Data Types, Loops, and Functions
Key libraries such as NumPy, Pandas, and Matplotlib
Data manipulation skills for cleaning and analyzing data
Data Visualization in Python
Data visualization is a fundamental component of Data Science. We cover:
Matplotlib and Seaborn for drawing data visualizations
Plotly for interactive dashboards
Strategies for exploratory data analysis (EDA)
Exploring Machine Learning Concepts
Our course delivers a solid grasp of:
Supervised and Unsupervised Learning
Scikit-learn for applying models
Real-world use-cases with actual datasets
Data Preprocessing and Feature Engineering
In order to develop strong models, we pay attention to:
Managing missing data
Feature scaling and encoding
Splitting data for training and testing
Building and Testing Machine Learning Models
We walk students through:
Regression Models (Linear, Logistic Regression)
Classification Models (Decision Trees, Random Forest, SVM)
Model evaluation based on accuracy, precision, recall, and F1-score
Deep Learning Fundamentals
For those who are interested in AI, we cover:
Introduction to Neural Networks
Hands-on training with TensorFlow and Keras
Constructing a simple deep learning model
Real-World Applications of Data Science and Machine Learning
Our bootcamp has industry applications such as:
Predictive Analytics for business insights
Recommendation Systems implemented in e-commerce and streaming services
Fraud Detection in finance and banking
Capstone Project & Hands-on Deployment
An important component of the bootcamp is a live project, wherein students:
Work with a real-world dataset
Deploy and build a Machine Learning model
Get practical exposure to applications of Data Science
Who Can Attend This Bootcamp?
The course is targeted at:
Newbies who are interested in learning Python programming
Aspiring Data Scientists seeking guided learning
IT Professionals looking to upskill themselves in Data Science
Career Prospects after Attaining the Bootcamp
Through Python mastery for Data Science and Machine Learning, students can become:
Data Scientists
Machine Learning Engineer
AI Researchers
Conclusion
The TCCI Computer Coaching Institute's Python for Data Science and Machine Learning Bootcamp is an ideal place to begin for those interested in pursuing a career in Data Science. With hands-on assignments, guidance from experts, and an industry-oriented syllabus, this bootcamp equips one with the skills and knowledge necessary to be successful in the field.
Location: Ahmedabad, Gujarat
Call now on +91 9825618292
Get information from https://tccicomputercoaching.wordpress.com/
FAQ
Q1: What's the requirement for bootcamp eligibility?
A1: No coding knowledge is required; however, some basic understanding of mathematics and statistics would help.
Q2: How long does it take to finish this course?
A2: The course can be of different duration; however, regular practice may complete around 2-3 months.
Q3: Will a certificate be given after bootcamp completion?
A3: Yes, a certificate will be provided to you, which will prove you have successfully completed the boot camp courses.
Q4: Is it possible for a zero coder to learn Python for Data Science?
A4: Of course! It is an absolutely beginner course that covers all concepts and basics.
Q5: How does this bootcamp aid in one's career growth?
A5: It equips one with essential skills that are in great demand and increases employability in Data Science and AI positions.
0 notes
Text
UNLOCKING THE POWER OF AI WITH EASYLIBPAL 2/2

EXPANDED COMPONENTS AND DETAILS OF EASYLIBPAL:
1. Easylibpal Class: The core component of the library, responsible for handling algorithm selection, model fitting, and prediction generation
2. Algorithm Selection and Support:
Supports classic AI algorithms such as Linear Regression, Logistic Regression, Support Vector Machine (SVM), Naive Bayes, and K-Nearest Neighbors (K-NN).
and
- Decision Trees
- Random Forest
- AdaBoost
- Gradient Boosting
3. Integration with Popular Libraries: Seamless integration with essential Python libraries like NumPy, Pandas, Matplotlib, and Scikit-learn for enhanced functionality.
4. Data Handling:
- DataLoader class for importing and preprocessing data from various formats (CSV, JSON, SQL databases).
- DataTransformer class for feature scaling, normalization, and encoding categorical variables.
- Includes functions for loading and preprocessing datasets to prepare them for training and testing.
- `FeatureSelector` class: Provides methods for feature selection and dimensionality reduction.
5. Model Evaluation:
- Evaluator class to assess model performance using metrics like accuracy, precision, recall, F1-score, and ROC-AUC.
- Methods for generating confusion matrices and classification reports.
6. Model Training: Contains methods for fitting the selected algorithm with the training data.
- `fit` method: Trains the selected algorithm on the provided training data.
7. Prediction Generation: Allows users to make predictions using the trained model on new data.
- `predict` method: Makes predictions using the trained model on new data.
- `predict_proba` method: Returns the predicted probabilities for classification tasks.
8. Model Evaluation:
- `Evaluator` class: Assesses model performance using various metrics (e.g., accuracy, precision, recall, F1-score, ROC-AUC).
- `cross_validate` method: Performs cross-validation to evaluate the model's performance.
- `confusion_matrix` method: Generates a confusion matrix for classification tasks.
- `classification_report` method: Provides a detailed classification report.
9. Hyperparameter Tuning:
- Tuner class that uses techniques likes Grid Search and Random Search for hyperparameter optimization.
10. Visualization:
- Integration with Matplotlib and Seaborn for generating plots to analyze model performance and data characteristics.
- Visualization support: Enables users to visualize data, model performance, and predictions using plotting functionalities.
- `Visualizer` class: Integrates with Matplotlib and Seaborn to generate plots for model performance analysis and data visualization.
- `plot_confusion_matrix` method: Visualizes the confusion matrix.
- `plot_roc_curve` method: Plots the Receiver Operating Characteristic (ROC) curve.
- `plot_feature_importance` method: Visualizes feature importance for applicable algorithms.
11. Utility Functions:
- Functions for saving and loading trained models.
- Logging functionalities to track the model training and prediction processes.
- `save_model` method: Saves the trained model to a file.
- `load_model` method: Loads a previously trained model from a file.
- `set_logger` method: Configures logging functionality for tracking model training and prediction processes.
12. User-Friendly Interface: Provides a simplified and intuitive interface for users to interact with and apply classic AI algorithms without extensive knowledge or configuration.
13.. Error Handling: Incorporates mechanisms to handle invalid inputs, errors during training, and other potential issues during algorithm usage.
- Custom exception classes for handling specific errors and providing informative error messages to users.
14. Documentation: Comprehensive documentation to guide users on how to use Easylibpal effectively and efficiently
- Comprehensive documentation explaining the usage and functionality of each component.
- Example scripts demonstrating how to use Easylibpal for various AI tasks and datasets.
15. Testing Suite:
- Unit tests for each component to ensure code reliability and maintainability.
- Integration tests to verify the smooth interaction between different components.
IMPLEMENTATION EXAMPLE WITH ADDITIONAL FEATURES:
Here is an example of how the expanded Easylibpal library could be structured and used:
```python
import numpy as np
import pandas as pd
from sklearn.model_selection import train_test_split
from sklearn.preprocessing import StandardScaler
from easylibpal import Easylibpal, DataLoader, Evaluator, Tuner
# Example DataLoader
class DataLoader:
def load_data(self, filepath, file_type='csv'):
if file_type == 'csv':
return pd.read_csv(filepath)
else:
raise ValueError("Unsupported file type provided.")
# Example Evaluator
class Evaluator:
def evaluate(self, model, X_test, y_test):
predictions = model.predict(X_test)
accuracy = np.mean(predictions == y_test)
return {'accuracy': accuracy}
# Example usage of Easylibpal with DataLoader and Evaluator
if __name__ == "__main__":
# Load and prepare the data
data_loader = DataLoader()
data = data_loader.load_data('path/to/your/data.csv')
X = data.iloc[:, :-1]
y = data.iloc[:, -1]
X_train, X_test, y_train, y_test = train_test_split(X, y, test_size=0.2, random_state=42)
# Scale features
scaler = StandardScaler()
X_train_scaled = scaler.fit_transform(X_train)
X_test_scaled = scaler.transform(X_test)
# Initialize Easylibpal with the desired algorithm
model = Easylibpal('Random Forest')
model.fit(X_train_scaled, y_train)
# Evaluate the model
evaluator = Evaluator()
results = evaluator.evaluate(model, X_test_scaled, y_test)
print(f"Model Accuracy: {results['accuracy']}")
# Optional: Use Tuner for hyperparameter optimization
tuner = Tuner(model, param_grid={'n_estimators': [100, 200], 'max_depth': [10, 20, 30]})
best_params = tuner.optimize(X_train_scaled, y_train)
print(f"Best Parameters: {best_params}")
```
This example demonstrates the structured approach to using Easylibpal with enhanced data handling, model evaluation, and optional hyperparameter tuning. The library empowers users to handle real-world datasets, apply various machine learning algorithms, and evaluate their performance with ease, making it an invaluable tool for developers and data scientists aiming to implement AI solutions efficiently.
Easylibpal is dedicated to making the latest AI technology accessible to everyone, regardless of their background or expertise. Our platform simplifies the process of selecting and implementing classic AI algorithms, enabling users across various industries to harness the power of artificial intelligence with ease. By democratizing access to AI, we aim to accelerate innovation and empower users to achieve their goals with confidence. Easylibpal's approach involves a democratization framework that reduces entry barriers, lowers the cost of building AI solutions, and speeds up the adoption of AI in both academic and business settings.
Below are examples showcasing how each main component of the Easylibpal library could be implemented and used in practice to provide a user-friendly interface for utilizing classic AI algorithms.
1. Core Components
Easylibpal Class Example:
```python
class Easylibpal:
def __init__(self, algorithm):
self.algorithm = algorithm
self.model = None
def fit(self, X, y):
# Simplified example: Instantiate and train a model based on the selected algorithm
if self.algorithm == 'Linear Regression':
from sklearn.linear_model import LinearRegression
self.model = LinearRegression()
elif self.algorithm == 'Random Forest':
from sklearn.ensemble import RandomForestClassifier
self.model = RandomForestClassifier()
self.model.fit(X, y)
def predict(self, X):
return self.model.predict(X)
```
2. Data Handling
DataLoader Class Example:
```python
class DataLoader:
def load_data(self, filepath, file_type='csv'):
if file_type == 'csv':
import pandas as pd
return pd.read_csv(filepath)
else:
raise ValueError("Unsupported file type provided.")
```
3. Model Evaluation
Evaluator Class Example:
```python
from sklearn.metrics import accuracy_score, classification_report
class Evaluator:
def evaluate(self, model, X_test, y_test):
predictions = model.predict(X_test)
accuracy = accuracy_score(y_test, predictions)
report = classification_report(y_test, predictions)
return {'accuracy': accuracy, 'report': report}
```
4. Hyperparameter Tuning
Tuner Class Example:
```python
from sklearn.model_selection import GridSearchCV
class Tuner:
def __init__(self, model, param_grid):
self.model = model
self.param_grid = param_grid
def optimize(self, X, y):
grid_search = GridSearchCV(self.model, self.param_grid, cv=5)
grid_search.fit(X, y)
return grid_search.best_params_
```
5. Visualization
Visualizer Class Example:
```python
import matplotlib.pyplot as plt
class Visualizer:
def plot_confusion_matrix(self, cm, classes, normalize=False, title='Confusion matrix'):
plt.imshow(cm, interpolation='nearest', cmap=plt.cm.Blues)
plt.title(title)
plt.colorbar()
tick_marks = np.arange(len(classes))
plt.xticks(tick_marks, classes, rotation=45)
plt.yticks(tick_marks, classes)
plt.ylabel('True label')
plt.xlabel('Predicted label')
plt.show()
```
6. Utility Functions
Save and Load Model Example:
```python
import joblib
def save_model(model, filename):
joblib.dump(model, filename)
def load_model(filename):
return joblib.load(filename)
```
7. Example Usage Script
Using Easylibpal in a Script:
```python
# Assuming Easylibpal and other classes have been imported
data_loader = DataLoader()
data = data_loader.load_data('data.csv')
X = data.drop('Target', axis=1)
y = data['Target']
model = Easylibpal('Random Forest')
model.fit(X, y)
evaluator = Evaluator()
results = evaluator.evaluate(model, X, y)
print("Accuracy:", results['accuracy'])
print("Report:", results['report'])
visualizer = Visualizer()
visualizer.plot_confusion_matrix(results['cm'], classes=['Class1', 'Class2'])
save_model(model, 'trained_model.pkl')
loaded_model = load_model('trained_model.pkl')
```
These examples illustrate the practical implementation and use of the Easylibpal library components, aiming to simplify the application of AI algorithms for users with varying levels of expertise in machine learning.
EASYLIBPAL IMPLEMENTATION:
Step 1: Define the Problem
First, we need to define the problem we want to solve. For this POC, let's assume we want to predict house prices based on various features like the number of bedrooms, square footage, and location.
Step 2: Choose an Appropriate Algorithm
Given our problem, a supervised learning algorithm like linear regression would be suitable. We'll use Scikit-learn, a popular library for machine learning in Python, to implement this algorithm.
Step 3: Prepare Your Data
We'll use Pandas to load and prepare our dataset. This involves cleaning the data, handling missing values, and splitting the dataset into training and testing sets.
Step 4: Implement the Algorithm
Now, we'll use Scikit-learn to implement the linear regression algorithm. We'll train the model on our training data and then test its performance on the testing data.
Step 5: Evaluate the Model
Finally, we'll evaluate the performance of our model using metrics like Mean Squared Error (MSE) and R-squared.
Python Code POC
```python
import numpy as np
import pandas as pd
from sklearn.model_selection import train_test_split
from sklearn.linear_model import LinearRegression
from sklearn.metrics import mean_squared_error, r2_score
# Load the dataset
data = pd.read_csv('house_prices.csv')
# Prepare the data
X = data'bedrooms', 'square_footage', 'location'
y = data['price']
# Split the data into training and testing sets
X_train, X_test, y_train, y_test = train_test_split(X, y, test_size=0.2, random_state=42)
# Create and train the model
model = LinearRegression()
model.fit(X_train, y_train)
# Make predictions
predictions = model.predict(X_test)
# Evaluate the model
mse = mean_squared_error(y_test, predictions)
r2 = r2_score(y_test, predictions)
print(f'Mean Squared Error: {mse}')
print(f'R-squared: {r2}')
```
Below is an implementation, Easylibpal provides a simple interface to instantiate and utilize classic AI algorithms such as Linear Regression, Logistic Regression, SVM, Naive Bayes, and K-NN. Users can easily create an instance of Easylibpal with their desired algorithm, fit the model with training data, and make predictions, all with minimal code and hassle. This demonstrates the power of Easylibpal in simplifying the integration of AI algorithms for various tasks.
```python
# Import necessary libraries
import numpy as np
import pandas as pd
import matplotlib.pyplot as plt
from sklearn.linear_model import LinearRegression
from sklearn.linear_model import LogisticRegression
from sklearn.svm import SVC
from sklearn.naive_bayes import GaussianNB
from sklearn.neighbors import KNeighborsClassifier
class Easylibpal:
def __init__(self, algorithm):
self.algorithm = algorithm
def fit(self, X, y):
if self.algorithm == 'Linear Regression':
self.model = LinearRegression()
elif self.algorithm == 'Logistic Regression':
self.model = LogisticRegression()
elif self.algorithm == 'SVM':
self.model = SVC()
elif self.algorithm == 'Naive Bayes':
self.model = GaussianNB()
elif self.algorithm == 'K-NN':
self.model = KNeighborsClassifier()
else:
raise ValueError("Invalid algorithm specified.")
self.model.fit(X, y)
def predict(self, X):
return self.model.predict(X)
# Example usage:
# Initialize Easylibpal with the desired algorithm
easy_algo = Easylibpal('Linear Regression')
# Generate some sample data
X = np.array([[1], [2], [3], [4]])
y = np.array([2, 4, 6, 8])
# Fit the model
easy_algo.fit(X, y)
# Make predictions
predictions = easy_algo.predict(X)
# Plot the results
plt.scatter(X, y)
plt.plot(X, predictions, color='red')
plt.title('Linear Regression with Easylibpal')
plt.xlabel('X')
plt.ylabel('y')
plt.show()
```
Easylibpal is an innovative Python library designed to simplify the integration and use of classic AI algorithms in a user-friendly manner. It aims to bridge the gap between the complexity of AI libraries and the ease of use, making it accessible for developers and data scientists alike. Easylibpal abstracts the underlying complexity of each algorithm, providing a unified interface that allows users to apply these algorithms with minimal configuration and understanding of the underlying mechanisms.
ENHANCED DATASET HANDLING
Easylibpal should be able to handle datasets more efficiently. This includes loading datasets from various sources (e.g., CSV files, databases), preprocessing data (e.g., normalization, handling missing values), and splitting data into training and testing sets.
```python
import os
from sklearn.model_selection import train_test_split
class Easylibpal:
# Existing code...
def load_dataset(self, filepath):
"""Loads a dataset from a CSV file."""
if not os.path.exists(filepath):
raise FileNotFoundError("Dataset file not found.")
return pd.read_csv(filepath)
def preprocess_data(self, dataset):
"""Preprocesses the dataset."""
# Implement data preprocessing steps here
return dataset
def split_data(self, X, y, test_size=0.2):
"""Splits the dataset into training and testing sets."""
return train_test_split(X, y, test_size=test_size)
```
Additional Algorithms
Easylibpal should support a wider range of algorithms. This includes decision trees, random forests, and gradient boosting machines.
```python
from sklearn.tree import DecisionTreeClassifier
from sklearn.ensemble import RandomForestClassifier
from sklearn.ensemble import GradientBoostingClassifier
class Easylibpal:
# Existing code...
def fit(self, X, y):
# Existing code...
elif self.algorithm == 'Decision Tree':
self.model = DecisionTreeClassifier()
elif self.algorithm == 'Random Forest':
self.model = RandomForestClassifier()
elif self.algorithm == 'Gradient Boosting':
self.model = GradientBoostingClassifier()
# Add more algorithms as needed
```
User-Friendly Features
To make Easylibpal even more user-friendly, consider adding features like:
- Automatic hyperparameter tuning: Implementing a simple interface for hyperparameter tuning using GridSearchCV or RandomizedSearchCV.
- Model evaluation metrics: Providing easy access to common evaluation metrics like accuracy, precision, recall, and F1 score.
- Visualization tools: Adding methods for plotting model performance, confusion matrices, and feature importance.
```python
from sklearn.metrics import accuracy_score, classification_report
from sklearn.model_selection import GridSearchCV
class Easylibpal:
# Existing code...
def evaluate_model(self, X_test, y_test):
"""Evaluates the model using accuracy and classification report."""
y_pred = self.predict(X_test)
print("Accuracy:", accuracy_score(y_test, y_pred))
print(classification_report(y_test, y_pred))
def tune_hyperparameters(self, X, y, param_grid):
"""Tunes the model's hyperparameters using GridSearchCV."""
grid_search = GridSearchCV(self.model, param_grid, cv=5)
grid_search.fit(X, y)
self.model = grid_search.best_estimator_
```
Easylibpal leverages the power of Python and its rich ecosystem of AI and machine learning libraries, such as scikit-learn, to implement the classic algorithms. It provides a high-level API that abstracts the specifics of each algorithm, allowing users to focus on the problem at hand rather than the intricacies of the algorithm.
Python Code Snippets for Easylibpal
Below are Python code snippets demonstrating the use of Easylibpal with classic AI algorithms. Each snippet demonstrates how to use Easylibpal to apply a specific algorithm to a dataset.
# Linear Regression
```python
from Easylibpal import Easylibpal
# Initialize Easylibpal with a dataset
Easylibpal = Easylibpal(dataset='your_dataset.csv')
# Apply Linear Regression
result = Easylibpal.apply_algorithm('linear_regression', target_column='target')
# Print the result
print(result)
```
# Logistic Regression
```python
from Easylibpal import Easylibpal
# Initialize Easylibpal with a dataset
Easylibpal = Easylibpal(dataset='your_dataset.csv')
# Apply Logistic Regression
result = Easylibpal.apply_algorithm('logistic_regression', target_column='target')
# Print the result
print(result)
```
# Support Vector Machines (SVM)
```python
from Easylibpal import Easylibpal
# Initialize Easylibpal with a dataset
Easylibpal = Easylibpal(dataset='your_dataset.csv')
# Apply SVM
result = Easylibpal.apply_algorithm('svm', target_column='target')
# Print the result
print(result)
```
# Naive Bayes
```python
from Easylibpal import Easylibpal
# Initialize Easylibpal with a dataset
Easylibpal = Easylibpal(dataset='your_dataset.csv')
# Apply Naive Bayes
result = Easylibpal.apply_algorithm('naive_bayes', target_column='target')
# Print the result
print(result)
```
# K-Nearest Neighbors (K-NN)
```python
from Easylibpal import Easylibpal
# Initialize Easylibpal with a dataset
Easylibpal = Easylibpal(dataset='your_dataset.csv')
# Apply K-NN
result = Easylibpal.apply_algorithm('knn', target_column='target')
# Print the result
print(result)
```
ABSTRACTION AND ESSENTIAL COMPLEXITY
- Essential Complexity: This refers to the inherent complexity of the problem domain, which cannot be reduced regardless of the programming language or framework used. It includes the logic and algorithm needed to solve the problem. For example, the essential complexity of sorting a list remains the same across different programming languages.
- Accidental Complexity: This is the complexity introduced by the choice of programming language, framework, or libraries. It can be reduced or eliminated through abstraction. For instance, using a high-level API in Python can hide the complexity of lower-level operations, making the code more readable and maintainable.
HOW EASYLIBPAL ABSTRACTS COMPLEXITY
Easylibpal aims to reduce accidental complexity by providing a high-level API that encapsulates the details of each classic AI algorithm. This abstraction allows users to apply these algorithms without needing to understand the underlying mechanisms or the specifics of the algorithm's implementation.
- Simplified Interface: Easylibpal offers a unified interface for applying various algorithms, such as Linear Regression, Logistic Regression, SVM, Naive Bayes, and K-NN. This interface abstracts the complexity of each algorithm, making it easier for users to apply them to their datasets.
- Runtime Fusion: By evaluating sub-expressions and sharing them across multiple terms, Easylibpal can optimize the execution of algorithms. This approach, similar to runtime fusion in abstract algorithms, allows for efficient computation without duplicating work, thereby reducing the computational complexity.
- Focus on Essential Complexity: While Easylibpal abstracts away the accidental complexity; it ensures that the essential complexity of the problem domain remains at the forefront. This means that while the implementation details are hidden, the core logic and algorithmic approach are still accessible and understandable to the user.
To implement Easylibpal, one would need to create a Python class that encapsulates the functionality of each classic AI algorithm. This class would provide methods for loading datasets, preprocessing data, and applying the algorithm with minimal configuration required from the user. The implementation would leverage existing libraries like scikit-learn for the actual algorithmic computations, abstracting away the complexity of these libraries.
Here's a conceptual example of how the Easylibpal class might be structured for applying a Linear Regression algorithm:
```python
class Easylibpal:
def __init__(self, dataset):
self.dataset = dataset
# Load and preprocess the dataset
def apply_linear_regression(self, target_column):
# Abstracted implementation of Linear Regression
# This method would internally use scikit-learn or another library
# to perform the actual computation, abstracting the complexity
pass
# Usage
Easylibpal = Easylibpal(dataset='your_dataset.csv')
result = Easylibpal.apply_linear_regression(target_column='target')
```
This example demonstrates the concept of Easylibpal by abstracting the complexity of applying a Linear Regression algorithm. The actual implementation would need to include the specifics of loading the dataset, preprocessing it, and applying the algorithm using an underlying library like scikit-learn.
Easylibpal abstracts the complexity of classic AI algorithms by providing a simplified interface that hides the intricacies of each algorithm's implementation. This abstraction allows users to apply these algorithms with minimal configuration and understanding of the underlying mechanisms. Here are examples of specific algorithms that Easylibpal abstracts:
To implement Easylibpal, one would need to create a Python class that encapsulates the functionality of each classic AI algorithm. This class would provide methods for loading datasets, preprocessing data, and applying the algorithm with minimal configuration required from the user. The implementation would leverage existing libraries like scikit-learn for the actual algorithmic computations, abstracting away the complexity of these libraries.
Here's a conceptual example of how the Easylibpal class might be structured for applying a Linear Regression algorithm:
```python
class Easylibpal:
def __init__(self, dataset):
self.dataset = dataset
# Load and preprocess the dataset
def apply_linear_regression(self, target_column):
# Abstracted implementation of Linear Regression
# This method would internally use scikit-learn or another library
# to perform the actual computation, abstracting the complexity
pass
# Usage
Easylibpal = Easylibpal(dataset='your_dataset.csv')
result = Easylibpal.apply_linear_regression(target_column='target')
```
This example demonstrates the concept of Easylibpal by abstracting the complexity of applying a Linear Regression algorithm. The actual implementation would need to include the specifics of loading the dataset, preprocessing it, and applying the algorithm using an underlying library like scikit-learn.
Easylibpal abstracts the complexity of feature selection for classic AI algorithms by providing a simplified interface that automates the process of selecting the most relevant features for each algorithm. This abstraction is crucial because feature selection is a critical step in machine learning that can significantly impact the performance of a model. Here's how Easylibpal handles feature selection for the mentioned algorithms:
To implement feature selection in Easylibpal, one could use scikit-learn's `SelectKBest` or `RFE` classes for feature selection based on statistical tests or model coefficients. Here's a conceptual example of how feature selection might be integrated into the Easylibpal class for Linear Regression:
```python
from sklearn.feature_selection import SelectKBest, f_regression
from sklearn.linear_model import LinearRegression
class Easylibpal:
def __init__(self, dataset):
self.dataset = dataset
# Load and preprocess the dataset
def apply_linear_regression(self, target_column):
# Feature selection using SelectKBest
selector = SelectKBest(score_func=f_regression, k=10)
X_new = selector.fit_transform(self.dataset.drop(target_column, axis=1), self.dataset[target_column])
# Train Linear Regression model
model = LinearRegression()
model.fit(X_new, self.dataset[target_column])
# Return the trained model
return model
# Usage
Easylibpal = Easylibpal(dataset='your_dataset.csv')
model = Easylibpal.apply_linear_regression(target_column='target')
```
This example demonstrates how Easylibpal abstracts the complexity of feature selection for Linear Regression by using scikit-learn's `SelectKBest` to select the top 10 features based on their statistical significance in predicting the target variable. The actual implementation would need to adapt this approach for each algorithm, considering the specific characteristics and requirements of each algorithm.
To implement feature selection in Easylibpal, one could use scikit-learn's `SelectKBest`, `RFE`, or other feature selection classes based on the algorithm's requirements. Here's a conceptual example of how feature selection might be integrated into the Easylibpal class for Logistic Regression using RFE:
```python
from sklearn.feature_selection import RFE
from sklearn.linear_model import LogisticRegression
class Easylibpal:
def __init__(self, dataset):
self.dataset = dataset
# Load and preprocess the dataset
def apply_logistic_regression(self, target_column):
# Feature selection using RFE
model = LogisticRegression()
rfe = RFE(model, n_features_to_select=10)
rfe.fit(self.dataset.drop(target_column, axis=1), self.dataset[target_column])
# Train Logistic Regression model
model.fit(self.dataset.drop(target_column, axis=1), self.dataset[target_column])
# Return the trained model
return model
# Usage
Easylibpal = Easylibpal(dataset='your_dataset.csv')
model = Easylibpal.apply_logistic_regression(target_column='target')
```
This example demonstrates how Easylibpal abstracts the complexity of feature selection for Logistic Regression by using scikit-learn's `RFE` to select the top 10 features based on their importance in the model. The actual implementation would need to adapt this approach for each algorithm, considering the specific characteristics and requirements of each algorithm.
EASYLIBPAL HANDLES DIFFERENT TYPES OF DATASETS
Easylibpal handles different types of datasets with varying structures by adopting a flexible and adaptable approach to data preprocessing and transformation. This approach is inspired by the principles of tidy data and the need to ensure data is in a consistent, usable format before applying AI algorithms. Here's how Easylibpal addresses the challenges posed by varying dataset structures:
One Type in Multiple Tables
When datasets contain different variables, the same variables with different names, different file formats, or different conventions for missing values, Easylibpal employs a process similar to tidying data. This involves identifying and standardizing the structure of each dataset, ensuring that each variable is consistently named and formatted across datasets. This process might include renaming columns, converting data types, and handling missing values in a uniform manner. For datasets stored in different file formats, Easylibpal would use appropriate libraries (e.g., pandas for CSV, Excel files, and SQL databases) to load and preprocess the data before applying the algorithms.
Multiple Types in One Table
For datasets that involve values collected at multiple levels or on different types of observational units, Easylibpal applies a normalization process. This involves breaking down the dataset into multiple tables, each representing a distinct type of observational unit. For example, if a dataset contains information about songs and their rankings over time, Easylibpal would separate this into two tables: one for song details and another for rankings. This normalization ensures that each fact is expressed in only one place, reducing inconsistencies and making the data more manageable for analysis.
Data Semantics
Easylibpal ensures that the data is organized in a way that aligns with the principles of data semantics, where every value belongs to a variable and an observation. This organization is crucial for the algorithms to interpret the data correctly. Easylibpal might use functions like `pivot_longer` and `pivot_wider` from the tidyverse or equivalent functions in pandas to reshape the data into a long format, where each row represents a single observation and each column represents a single variable. This format is particularly useful for algorithms that require a consistent structure for input data.
Messy Data
Dealing with messy data, which can include inconsistent data types, missing values, and outliers, is a common challenge in data science. Easylibpal addresses this by implementing robust data cleaning and preprocessing steps. This includes handling missing values (e.g., imputation or deletion), converting data types to ensure consistency, and identifying and removing outliers. These steps are crucial for preparing the data in a format that is suitable for the algorithms, ensuring that the algorithms can effectively learn from the data without being hindered by its inconsistencies.
To implement these principles in Python, Easylibpal would leverage libraries like pandas for data manipulation and preprocessing. Here's a conceptual example of how Easylibpal might handle a dataset with multiple types in one table:
```python
import pandas as pd
# Load the dataset
dataset = pd.read_csv('your_dataset.csv')
# Normalize the dataset by separating it into two tables
song_table = dataset'artist', 'track'.drop_duplicates().reset_index(drop=True)
song_table['song_id'] = range(1, len(song_table) + 1)
ranking_table = dataset'artist', 'track', 'week', 'rank'.drop_duplicates().reset_index(drop=True)
# Now, song_table and ranking_table can be used separately for analysis
```
This example demonstrates how Easylibpal might normalize a dataset with multiple types of observational units into separate tables, ensuring that each type of observational unit is stored in its own table. The actual implementation would need to adapt this approach based on the specific structure and requirements of the dataset being processed.
CLEAN DATA
Easylibpal employs a comprehensive set of data cleaning and preprocessing steps to handle messy data, ensuring that the data is in a suitable format for machine learning algorithms. These steps are crucial for improving the accuracy and reliability of the models, as well as preventing misleading results and conclusions. Here's a detailed look at the specific steps Easylibpal might employ:
1. Remove Irrelevant Data
The first step involves identifying and removing data that is not relevant to the analysis or modeling task at hand. This could include columns or rows that do not contribute to the predictive power of the model or are not necessary for the analysis .
2. Deduplicate Data
Deduplication is the process of removing duplicate entries from the dataset. Duplicates can skew the analysis and lead to incorrect conclusions. Easylibpal would use appropriate methods to identify and remove duplicates, ensuring that each entry in the dataset is unique.
3. Fix Structural Errors
Structural errors in the dataset, such as inconsistent data types, incorrect values, or formatting issues, can significantly impact the performance of machine learning algorithms. Easylibpal would employ data cleaning techniques to correct these errors, ensuring that the data is consistent and correctly formatted.
4. Deal with Missing Data
Handling missing data is a common challenge in data preprocessing. Easylibpal might use techniques such as imputation (filling missing values with statistical estimates like mean, median, or mode) or deletion (removing rows or columns with missing values) to address this issue. The choice of method depends on the nature of the data and the specific requirements of the analysis.
5. Filter Out Data Outliers
Outliers can significantly affect the performance of machine learning models. Easylibpal would use statistical methods to identify and filter out outliers, ensuring that the data is more representative of the population being analyzed.
6. Validate Data
The final step involves validating the cleaned and preprocessed data to ensure its quality and accuracy. This could include checking for consistency, verifying the correctness of the data, and ensuring that the data meets the requirements of the machine learning algorithms. Easylibpal would employ validation techniques to confirm that the data is ready for analysis.
To implement these data cleaning and preprocessing steps in Python, Easylibpal would leverage libraries like pandas and scikit-learn. Here's a conceptual example of how these steps might be integrated into the Easylibpal class:
```python
import pandas as pd
from sklearn.impute import SimpleImputer
from sklearn.preprocessing import StandardScaler
class Easylibpal:
def __init__(self, dataset):
self.dataset = dataset
# Load and preprocess the dataset
def clean_and_preprocess(self):
# Remove irrelevant data
self.dataset = self.dataset.drop(['irrelevant_column'], axis=1)
# Deduplicate data
self.dataset = self.dataset.drop_duplicates()
# Fix structural errors (example: correct data type)
self.dataset['correct_data_type_column'] = self.dataset['correct_data_type_column'].astype(float)
# Deal with missing data (example: imputation)
imputer = SimpleImputer(strategy='mean')
self.dataset['missing_data_column'] = imputer.fit_transform(self.dataset'missing_data_column')
# Filter out data outliers (example: using Z-score)
# This step requires a more detailed implementation based on the specific dataset
# Validate data (example: checking for NaN values)
assert not self.dataset.isnull().values.any(), "Data still contains NaN values"
# Return the cleaned and preprocessed dataset
return self.dataset
# Usage
Easylibpal = Easylibpal(dataset=pd.read_csv('your_dataset.csv'))
cleaned_dataset = Easylibpal.clean_and_preprocess()
```
This example demonstrates a simplified approach to data cleaning and preprocessing within Easylibpal. The actual implementation would need to adapt these steps based on the specific characteristics and requirements of the dataset being processed.
VALUE DATA
Easylibpal determines which data is irrelevant and can be removed through a combination of domain knowledge, data analysis, and automated techniques. The process involves identifying data that does not contribute to the analysis, research, or goals of the project, and removing it to improve the quality, efficiency, and clarity of the data. Here's how Easylibpal might approach this:
Domain Knowledge
Easylibpal leverages domain knowledge to identify data that is not relevant to the specific goals of the analysis or modeling task. This could include data that is out of scope, outdated, duplicated, or erroneous. By understanding the context and objectives of the project, Easylibpal can systematically exclude data that does not add value to the analysis.
Data Analysis
Easylibpal employs data analysis techniques to identify irrelevant data. This involves examining the dataset to understand the relationships between variables, the distribution of data, and the presence of outliers or anomalies. Data that does not have a significant impact on the predictive power of the model or the insights derived from the analysis is considered irrelevant.
Automated Techniques
Easylibpal uses automated tools and methods to remove irrelevant data. This includes filtering techniques to select or exclude certain rows or columns based on criteria or conditions, aggregating data to reduce its complexity, and deduplicating to remove duplicate entries. Tools like Excel, Google Sheets, Tableau, Power BI, OpenRefine, Python, R, Data Linter, Data Cleaner, and Data Wrangler can be employed for these purposes .
Examples of Irrelevant Data
- Personal Identifiable Information (PII): Data such as names, addresses, and phone numbers are irrelevant for most analytical purposes and should be removed to protect privacy and comply with data protection regulations .
- URLs and HTML Tags: These are typically not relevant to the analysis and can be removed to clean up the dataset.
- Boilerplate Text: Excessive blank space or boilerplate text (e.g., in emails) adds noise to the data and can be removed.
- Tracking Codes: These are used for tracking user interactions and do not contribute to the analysis.
To implement these steps in Python, Easylibpal might use pandas for data manipulation and filtering. Here's a conceptual example of how to remove irrelevant data:
```python
import pandas as pd
# Load the dataset
dataset = pd.read_csv('your_dataset.csv')
# Remove irrelevant columns (example: email addresses)
dataset = dataset.drop(['email_address'], axis=1)
# Remove rows with missing values (example: if a column is required for analysis)
dataset = dataset.dropna(subset=['required_column'])
# Deduplicate data
dataset = dataset.drop_duplicates()
# Return the cleaned dataset
cleaned_dataset = dataset
```
This example demonstrates how Easylibpal might remove irrelevant data from a dataset using Python and pandas. The actual implementation would need to adapt these steps based on the specific characteristics and requirements of the dataset being processed.
Detecting Inconsistencies
Easylibpal starts by detecting inconsistencies in the data. This involves identifying discrepancies in data types, missing values, duplicates, and formatting errors. By detecting these inconsistencies, Easylibpal can take targeted actions to address them.
Handling Formatting Errors
Formatting errors, such as inconsistent data types for the same feature, can significantly impact the analysis. Easylibpal uses functions like `astype()` in pandas to convert data types, ensuring uniformity and consistency across the dataset. This step is crucial for preparing the data for analysis, as it ensures that each feature is in the correct format expected by the algorithms.
Handling Missing Values
Missing values are a common issue in datasets. Easylibpal addresses this by consulting with subject matter experts to understand why data might be missing. If the missing data is missing completely at random, Easylibpal might choose to drop it. However, for other cases, Easylibpal might employ imputation techniques to fill in missing values, ensuring that the dataset is complete and ready for analysis.
Handling Duplicates
Duplicate entries can skew the analysis and lead to incorrect conclusions. Easylibpal uses pandas to identify and remove duplicates, ensuring that each entry in the dataset is unique. This step is crucial for maintaining the integrity of the data and ensuring that the analysis is based on distinct observations.
Handling Inconsistent Values
Inconsistent values, such as different representations of the same concept (e.g., "yes" vs. "y" for a binary variable), can also pose challenges. Easylibpal employs data cleaning techniques to standardize these values, ensuring that the data is consistent and can be accurately analyzed.
To implement these steps in Python, Easylibpal would leverage pandas for data manipulation and preprocessing. Here's a conceptual example of how these steps might be integrated into the Easylibpal class:
```python
import pandas as pd
class Easylibpal:
def __init__(self, dataset):
self.dataset = dataset
# Load and preprocess the dataset
def clean_and_preprocess(self):
# Detect inconsistencies (example: check data types)
print(self.dataset.dtypes)
# Handle formatting errors (example: convert data types)
self.dataset['date_column'] = pd.to_datetime(self.dataset['date_column'])
# Handle missing values (example: drop rows with missing values)
self.dataset = self.dataset.dropna(subset=['required_column'])
# Handle duplicates (example: drop duplicates)
self.dataset = self.dataset.drop_duplicates()
# Handle inconsistent values (example: standardize values)
self.dataset['binary_column'] = self.dataset['binary_column'].map({'yes': 1, 'no': 0})
# Return the cleaned and preprocessed dataset
return self.dataset
# Usage
Easylibpal = Easylibpal(dataset=pd.read_csv('your_dataset.csv'))
cleaned_dataset = Easylibpal.clean_and_preprocess()
```
This example demonstrates a simplified approach to handling inconsistent or messy data within Easylibpal. The actual implementation would need to adapt these steps based on the specific characteristics and requirements of the dataset being processed.
Statistical Imputation
Statistical imputation involves replacing missing values with statistical estimates such as the mean, median, or mode of the available data. This method is straightforward and can be effective for numerical data. For categorical data, mode imputation is commonly used. The choice of imputation method depends on the distribution of the data and the nature of the missing values.
Model-Based Imputation
Model-based imputation uses machine learning models to predict missing values. This approach can be more sophisticated and potentially more accurate than statistical imputation, especially for complex datasets. Techniques like K-Nearest Neighbors (KNN) imputation can be used, where the missing values are replaced with the values of the K nearest neighbors in the feature space.
Using SimpleImputer in scikit-learn
The scikit-learn library provides the `SimpleImputer` class, which supports both statistical and model-based imputation. `SimpleImputer` can be used to replace missing values with the mean, median, or most frequent value (mode) of the column. It also supports more advanced imputation methods like KNN imputation.
To implement these imputation techniques in Python, Easylibpal might use the `SimpleImputer` class from scikit-learn. Here's an example of how to use `SimpleImputer` for statistical imputation:
```python
from sklearn.impute import SimpleImputer
import pandas as pd
# Load the dataset
dataset = pd.read_csv('your_dataset.csv')
# Initialize SimpleImputer for numerical columns
num_imputer = SimpleImputer(strategy='mean')
# Fit and transform the numerical columns
dataset'numerical_column1', 'numerical_column2' = num_imputer.fit_transform(dataset'numerical_column1', 'numerical_column2')
# Initialize SimpleImputer for categorical columns
cat_imputer = SimpleImputer(strategy='most_frequent')
# Fit and transform the categorical columns
dataset'categorical_column1', 'categorical_column2' = cat_imputer.fit_transform(dataset'categorical_column1', 'categorical_column2')
# The dataset now has missing values imputed
```
This example demonstrates how to use `SimpleImputer` to fill in missing values in both numerical and categorical columns of a dataset. The actual implementation would need to adapt these steps based on the specific characteristics and requirements of the dataset being processed.
Model-based imputation techniques, such as Multiple Imputation by Chained Equations (MICE), offer powerful ways to handle missing data by using statistical models to predict missing values. However, these techniques come with their own set of limitations and potential drawbacks:
1. Complexity and Computational Cost
Model-based imputation methods can be computationally intensive, especially for large datasets or complex models. This can lead to longer processing times and increased computational resources required for imputation.
2. Overfitting and Convergence Issues
These methods are prone to overfitting, where the imputation model captures noise in the data rather than the underlying pattern. Overfitting can lead to imputed values that are too closely aligned with the observed data, potentially introducing bias into the analysis. Additionally, convergence issues may arise, where the imputation process does not settle on a stable solution.
3. Assumptions About Missing Data
Model-based imputation techniques often assume that the data is missing at random (MAR), which means that the probability of a value being missing is not related to the values of other variables. However, this assumption may not hold true in all cases, leading to biased imputations if the data is missing not at random (MNAR).
4. Need for Suitable Regression Models
For each variable with missing values, a suitable regression model must be chosen. Selecting the wrong model can lead to inaccurate imputations. The choice of model depends on the nature of the data and the relationship between the variable with missing values and other variables.
5. Combining Imputed Datasets
After imputing missing values, there is a challenge in combining the multiple imputed datasets to produce a single, final dataset. This requires careful consideration of how to aggregate the imputed values and can introduce additional complexity and uncertainty into the analysis.
6. Lack of Transparency
The process of model-based imputation can be less transparent than simpler imputation methods, such as mean or median imputation. This can make it harder to justify the imputation process, especially in contexts where the reasons for missing data are important, such as in healthcare research.
Despite these limitations, model-based imputation techniques can be highly effective for handling missing data in datasets where a amusingness is MAR and where the relationships between variables are complex. Careful consideration of the assumptions, the choice of models, and the methods for combining imputed datasets are crucial to mitigate these drawbacks and ensure the validity of the imputation process.
USING EASYLIBPAL FOR AI ALGORITHM INTEGRATION OFFERS SEVERAL SIGNIFICANT BENEFITS, PARTICULARLY IN ENHANCING EVERYDAY LIFE AND REVOLUTIONIZING VARIOUS SECTORS. HERE'S A DETAILED LOOK AT THE ADVANTAGES:
1. Enhanced Communication: AI, through Easylibpal, can significantly improve communication by categorizing messages, prioritizing inboxes, and providing instant customer support through chatbots. This ensures that critical information is not missed and that customer queries are resolved promptly.
2. Creative Endeavors: Beyond mundane tasks, AI can also contribute to creative endeavors. For instance, photo editing applications can use AI algorithms to enhance images, suggesting edits that align with aesthetic preferences. Music composition tools can generate melodies based on user input, inspiring musicians and amateurs alike to explore new artistic horizons. These innovations empower individuals to express themselves creatively with AI as a collaborative partner.
3. Daily Life Enhancement: AI, integrated through Easylibpal, has the potential to enhance daily life exponentially. Smart homes equipped with AI-driven systems can adjust lighting, temperature, and security settings according to user preferences. Autonomous vehicles promise safer and more efficient commuting experiences. Predictive analytics can optimize supply chains, reducing waste and ensuring goods reach users when needed.
4. Paradigm Shift in Technology Interaction: The integration of AI into our daily lives is not just a trend; it's a paradigm shift that's redefining how we interact with technology. By streamlining routine tasks, personalizing experiences, revolutionizing healthcare, enhancing communication, and fueling creativity, AI is opening doors to a more convenient, efficient, and tailored existence.
5. Responsible Benefit Harnessing: As we embrace AI's transformational power, it's essential to approach its integration with a sense of responsibility, ensuring that its benefits are harnessed for the betterment of society as a whole. This approach aligns with the ethical considerations of using AI, emphasizing the importance of using AI in a way that benefits all stakeholders.
In summary, Easylibpal facilitates the integration and use of AI algorithms in a manner that is accessible and beneficial across various domains, from enhancing communication and creative endeavors to revolutionizing daily life and promoting a paradigm shift in technology interaction. This integration not only streamlines the application of AI but also ensures that its benefits are harnessed responsibly for the betterment of society.
USING EASYLIBPAL OVER TRADITIONAL AI LIBRARIES OFFERS SEVERAL BENEFITS, PARTICULARLY IN TERMS OF EASE OF USE, EFFICIENCY, AND THE ABILITY TO APPLY AI ALGORITHMS WITH MINIMAL CONFIGURATION. HERE ARE THE KEY ADVANTAGES:
- Simplified Integration: Easylibpal abstracts the complexity of traditional AI libraries, making it easier for users to integrate classic AI algorithms into their projects. This simplification reduces the learning curve and allows developers and data scientists to focus on their core tasks without getting bogged down by the intricacies of AI implementation.
- User-Friendly Interface: By providing a unified platform for various AI algorithms, Easylibpal offers a user-friendly interface that streamlines the process of selecting and applying algorithms. This interface is designed to be intuitive and accessible, enabling users to experiment with different algorithms with minimal effort.
- Enhanced Productivity: The ability to effortlessly instantiate algorithms, fit models with training data, and make predictions with minimal configuration significantly enhances productivity. This efficiency allows for rapid prototyping and deployment of AI solutions, enabling users to bring their ideas to life more quickly.
- Democratization of AI: Easylibpal democratizes access to classic AI algorithms, making them accessible to a wider range of users, including those with limited programming experience. This democratization empowers users to leverage AI in various domains, fostering innovation and creativity.
- Automation of Repetitive Tasks: By automating the process of applying AI algorithms, Easylibpal helps users save time on repetitive tasks, allowing them to focus on more complex and creative aspects of their projects. This automation is particularly beneficial for users who may not have extensive experience with AI but still wish to incorporate AI capabilities into their work.
- Personalized Learning and Discovery: Easylibpal can be used to enhance personalized learning experiences and discovery mechanisms, similar to the benefits seen in academic libraries. By analyzing user behaviors and preferences, Easylibpal can tailor recommendations and resource suggestions to individual needs, fostering a more engaging and relevant learning journey.
- Data Management and Analysis: Easylibpal aids in managing large datasets efficiently and deriving meaningful insights from data. This capability is crucial in today's data-driven world, where the ability to analyze and interpret large volumes of data can significantly impact research outcomes and decision-making processes.
In summary, Easylibpal offers a simplified, user-friendly approach to applying classic AI algorithms, enhancing productivity, democratizing access to AI, and automating repetitive tasks. These benefits make Easylibpal a valuable tool for developers, data scientists, and users looking to leverage AI in their projects without the complexities associated with traditional AI libraries.
2 notes
·
View notes
Text
Machine Learning Syllabus: What Mumbai-Based Courses Are Offering This Year
As Artificial Intelligence continues to dominate the future of technology, Machine Learning (ML) has become one of the most sought-after skills in 2025. Whether you’re a data enthusiast, a software developer, or someone looking to transition into tech, understanding the structure of a Machine Learning Course in Mumbai can help you make informed decisions and fast-track your career.
Mumbai, a city synonymous with opportunity and innovation, has emerged as a growing hub for AI and ML education. With a rising demand for skilled professionals, leading training institutes in the city are offering comprehensive and job-focused Machine Learning courses in Mumbai. But what exactly do these programs cover?
In this article, we break down the typical Machine Learning syllabus offered by Mumbai-based institutes, highlight key modules, tools, and career pathways, and help you understand why enrolling in a structured ML course is one of the best investments you can make this year.
Why Machine Learning Matters in 2025?
Before diving into the syllabus, it’s essential to understand why machine learning is central to the tech industry in 2025.
Machine learning is the driving force behind:
Predictive analytics
Recommendation engines
Autonomous systems
Fraud detection
Chatbots and virtual assistants
Natural Language Processing (NLP)
From healthcare to fintech and marketing to logistics, industries are deploying ML to enhance operations, automate decisions, and offer personalized services. As a result, the demand for ML engineers, data scientists, and AI developers has skyrocketed.
Overview of a Machine Learning Course in Mumbai
A Machine Learning course in Mumbai typically aims to:
Build foundational skills in math and programming
Teach practical ML model development
Introduce deep learning and advanced AI techniques
Prepare students for industry-level projects and interviews
Let’s now explore the typical modules and learning paths that top-tier ML programs in Mumbai offer in 2025.
1. Foundation in Programming and Mathematics
🔹 Programming with Python
Most courses start with Python, the industry-standard language for data science and ML. This module typically includes:
Variables, loops, functions
Data structures (lists, tuples, dictionaries)
File handling and error handling
Introduction to libraries like NumPy, Pandas, Matplotlib
🔹 Mathematics for ML
You can’t master machine learning without understanding the math behind it. Essential topics include:
Linear Algebra (vectors, matrices, eigenvalues)
Probability and Statistics
Calculus basics (gradients, derivatives)
Bayes’ Theorem
Descriptive and inferential statistics
These foundations help students grasp how ML models work under the hood.
2. Data Handling and Visualization
Working with data is at the heart of ML. Courses in Mumbai place strong emphasis on:
Data cleaning and preprocessing
Handling missing values
Data normalization and transformation
Exploratory Data Analysis (EDA)
Visualization with Matplotlib, Seaborn, Plotly
Students are often introduced to real-world datasets (CSV, Excel, JSON formats) and taught to manipulate data effectively.
3. Supervised Machine Learning
This core module teaches the backbone of most ML applications. Key algorithms covered include:
Linear Regression
Logistic Regression
Decision Trees
Random Forest
Naive Bayes
Support Vector Machines (SVM)
Students also learn model evaluation techniques like:
Confusion matrix
ROC-AUC curve
Precision, recall, F1 score
Cross-validation
Hands-on labs using Scikit-Learn, along with case studies from domains like healthcare and retail, reinforce these concepts.
4. Unsupervised Learning
This segment of the syllabus introduces students to patterns and grouping in data without labels. Key topics include:
K-Means Clustering
Hierarchical Clustering
Principal Component Analysis (PCA)
Anomaly Detection
Students often work on projects like customer segmentation, fraud detection, or market basket analysis using unsupervised techniques.
5. Model Deployment and MLOps Basics
As real-world projects go beyond model building, many Machine Learning courses in Mumbai now include modules on:
Model deployment using Flask or FastAPI
Containerization with Docker
Version control with Git and GitHub
Introduction to cloud platforms like AWS, GCP, or Azure
CI/CD pipelines and monitoring in production
This gives learners an edge in understanding how ML systems operate in real-time environments.
6. Introduction to Deep Learning
While ML and Deep Learning are distinct, most advanced programs offer a foundational understanding of deep learning. Topics typically covered:
Neural Networks: Structure and working
Activation Functions: ReLU, sigmoid, tanh
Backpropagation and Gradient Descent
Convolutional Neural Networks (CNNs) for image processing
Recurrent Neural Networks (RNNs) for sequential data
Frameworks: TensorFlow and Keras
Students often build beginner deep learning models, such as digit recognizers or sentiment analysis tools.
7. Natural Language Processing (NLP)
With AI’s growing use in text-based applications, NLP is an essential module:
Text preprocessing: Tokenization, stopwords, stemming, lemmatization
Term Frequency–Inverse Document Frequency (TF-IDF)
Sentiment analysis
Named Entity Recognition (NER)
Introduction to transformers and models like BERT
Hands-on projects might include building a chatbot, fake news detector, or text classifier.
8. Capstone Projects and Portfolio Development
Most Machine Learning courses in Mumbai culminate in capstone projects. These simulate real-world problems and require applying all learned concepts:
Data ingestion and preprocessing
Model selection and evaluation
Business interpretation
Deployment and presentation
Example capstone projects:
Predictive maintenance in manufacturing
Price prediction for real estate
Customer churn prediction
Credit risk scoring model
These projects are crucial for portfolio building and serve as talking points in interviews.
9. Soft Skills and Career Preparation
The best training institutes in Mumbai don’t stop at technical skills—they invest in career readiness. These include:
Resume building and portfolio review
Mock technical interviews
Behavioral interview training
LinkedIn optimization
Job referrals and placement assistance
Students also receive guidance on freelancing, internships, and participation in Kaggle competitions.
A Standout Option: Boston Institute of Analytics
Among the many training providers in Mumbai, one institute that consistently delivers quality machine learning education is the Boston Institute of Analytics.
Their Machine Learning Course in Mumbai is built to offer:
A globally recognized curriculum tailored for industry demands
In-person classroom learning with expert faculty
Real-world datasets and capstone projects
Deep exposure to tools like Python, TensorFlow, Scikit-learn, Keras, and AWS
One-on-one career mentorship and resume support
Dedicated placement assistance with a strong alumni network
For students and professionals serious about entering the AI/ML field, BIA provides a structured and supportive environment to thrive.
Final Thoughts: The Future Is Machine-Learned
In 2025, machine learning is not just a skill—it's a career catalyst. The best part? You don’t need to be a Ph.D. holder to get started. All you need is the right course, the right mentors, and the commitment to build your skills.
By understanding the detailed Machine Learning syllabus offered by Mumbai-based courses, you now have a roadmap to guide your learning journey. From Python basics to deep learning applications, and from real-time deployment to industry projects—everything is within your reach.
If you’re looking to transition into the world of AI or upgrade your existing data science knowledge, enrolling in a Machine Learning course in Mumbai might just be the smartest move you’ll make this year.
#Machine Learning Course in Mumbai#6 Months Data Science Course in Mumbai#Artificial Intelligence Classroom Course in Mumbai
0 notes
Text
Mastering Data Science Using Python
Data Science is not just a buzzword; it's the backbone of modern decision-making and innovation. If you're looking to step into this exciting field, Data Science using Python is a fantastic place to start. Python, with its simplicity and vast libraries, has become the go-to programming language for aspiring data scientists. Let’s explore everything you need to know to get started with Data Science using Python and take your skills to the next level.
What is Data Science?
In simple terms, Data Science is all about extracting meaningful insights from data. These insights help businesses make smarter decisions, predict trends, and even shape new innovations. Data Science involves various stages, including:
Data Collection
Data Cleaning
Data Analysis
Data Visualization
Machine Learning
Why Choose Python for Data Science?
Python is the heart of Data Science for several compelling reasons:
Ease of Learning: Python’s syntax is intuitive and beginner-friendly, making it ideal for those new to programming.
Versatile Libraries: Libraries like Pandas, NumPy, Matplotlib, and Scikit-learn make Python a powerhouse for data manipulation, analysis, and machine learning.
Community Support: With a vast and active community, you’ll always find solutions to challenges you face.
Integration: Python integrates seamlessly with other technologies, enabling smooth workflows.
Getting Started with Data Science Using Python
1. Set Up Your Python Environment
To begin, install Python on your system. Use tools like Anaconda, which comes preloaded with essential libraries for Data Science.
Once installed, launch Jupyter Notebook, an interactive environment for coding and visualizing data.
2. Learn the Basics of Python
Before diving into Data Science, get comfortable with Python basics:
Variables and Data Types
Control Structures (loops and conditionals)
Functions and Modules
File Handling
You can explore free resources or take a Python for Beginners course to grasp these fundamentals.
3. Libraries Essential for Data Science
Python’s true power lies in its libraries. Here are the must-know ones:
a) NumPy
NumPy is your go-to for numerical computations. It handles large datasets and supports multi-dimensional arrays.
Common Use Cases: Mathematical operations, linear algebra, random sampling.
Keywords to Highlight: NumPy for Data Science, NumPy Arrays, Data Manipulation in Python.
b) Pandas
Pandas simplifies working with structured data like tables. It’s perfect for data manipulation and analysis.
Key Features: DataFrames, filtering, and merging datasets.
Top Keywords: Pandas for Beginners, DataFrame Operations, Pandas Tutorial.
c) Matplotlib and Seaborn
For data visualization, Matplotlib and Seaborn are unbeatable.
Matplotlib: For creating static, animated, or interactive visualizations.
Seaborn: For aesthetically pleasing statistical plots.
Keywords to Use: Data Visualization with Python, Seaborn vs. Matplotlib, Python Graphs.
d) Scikit-learn
Scikit-learn is the go-to library for machine learning, offering tools for classification, regression, and clustering.
Steps to Implement Data Science Projects
Step 1: Data Collection
You can collect data from sources like web APIs, web scraping, or public datasets available on platforms like Kaggle.
Step 2: Data Cleaning
Raw data is often messy. Use Python to clean and preprocess it.
Remove duplicates and missing values using Pandas.
Normalize or scale data for analysis.
Step 3: Exploratory Data Analysis (EDA)
EDA involves understanding the dataset and finding patterns.
Use Pandas for descriptive statistics.
Visualize data using Matplotlib or Seaborn.
Step 4: Build Machine Learning Models
With Scikit-learn, you can train machine learning models to make predictions. Start with simple algorithms like:
Linear Regression
Logistic Regression
Decision Trees
Step 5: Data Visualization
Communicating results is critical in Data Science. Create impactful visuals that tell a story.
Use Case: Visualizing sales trends over time.
Best Practices for Data Science Using Python
1. Document Your Code
Always write comments and document your work to ensure your code is understandable.
2. Practice Regularly
Consistent practice on platforms like Kaggle or HackerRank helps sharpen your skills.
3. Stay Updated
Follow Python communities and blogs to stay updated on the latest tools and trends.
Top Resources to Learn Data Science Using Python
1. Online Courses
Platforms like Udemy, Coursera, and edX offer excellent Data Science courses.
Recommended Course: "Data Science with Python - Beginner to Pro" on Udemy.
2. Books
Books like "Python for Data Analysis" by Wes McKinney are excellent resources.
Keywords: Best Books for Data Science, Python Analysis Books, Data Science Guides.
3. Practice Platforms
Kaggle for hands-on projects.
HackerRank for Python coding challenges.
Career Opportunities in Data Science
Data Science offers lucrative career options, including roles like:
Data Analyst
Machine Learning Engineer
Business Intelligence Analyst
Data Scientist
How to Stand Out in Data Science
1. Build a Portfolio
Showcase projects on platforms like GitHub to demonstrate your skills.
2. Earn Certifications
Certifications like Google Data Analytics Professional Certificate or IBM Data Science Professional Certificate add credibility to your resume.
Conclusion
Learning Data Science using Python can open doors to exciting opportunities and career growth. Python's simplicity and powerful libraries make it an ideal choice for beginners and professionals alike. With consistent effort and the right resources, you can master this skill and stand out in the competitive field of Data Science.
0 notes
Text

Python Programming for Beginners: Your Gateway to Coding Success
In today’s tech-driven world, programming is no longer a niche skill—it’s a valuable asset across industries. Among the various programming languages, Python stands out as the perfect starting point for beginners. Known for its simplicity, readability, and versatility, Python has become the go-to language for anyone entering the coding world. Whether you want to build websites, analyze data, or create automation scripts, Python offers endless possibilities. This blog explores why Python is ideal for beginners and how it can set you on the path to coding success.
Why Choose Python as Your First Programming Language?
Simple and Easy to Learn Python’s syntax is clean and straightforward, resembling plain English, which makes it easier for beginners to grasp. Unlike more complex languages like Java or C++, Python allows you to write fewer lines of code to achieve the same result, reducing the learning curve significantly.
Versatility Across Industries Python is a versatile language used in various fields, including web development, data science, artificial intelligence, automation, and more. This broad applicability ensures that once you learn Python, you’ll have numerous career paths to explore.
Large and Supportive Community Python has a massive global community of developers who contribute to its continuous improvement. For beginners, this means access to an abundance of tutorials, forums, and resources that can help you troubleshoot problems and accelerate your learning.
Wide Range of Libraries and Frameworks Python boasts an extensive library ecosystem, which makes development faster and more efficient. Popular libraries like NumPy and Pandas simplify data manipulation, while Django and Flask are widely used for web development. These tools allow beginners to build powerful applications with minimal effort.
Getting Started with Python: A Beginner’s Roadmap
Install Python The first step is to install Python on your computer. Visit the official Python website and download the latest version. The installation process is simple, and Python comes with IDLE, its built-in editor for writing and executing code.
Learn the Basics Begin by mastering basic concepts such as:
Variables and Data Types
Control Structures (if-else statements, loops)
Functions and Modules
Input and Output Operations
Practice with Small Projects Start with simple projects to build your confidence. Some ideas include:
Creating a basic calculator
Building a to-do list app
Writing a program to generate random numbers or quiz questions
Explore Python Libraries Once you’re comfortable with the basics, explore popular libraries like:
Matplotlib: For data visualization
BeautifulSoup: For web scraping
Pygame: For game development
Join Coding Communities Participate in online coding communities such as Stack Overflow, Reddit’s r/learnpython, or join coding bootcamps. Engaging with other learners can provide motivation and helpful insights.
Accelerate Your Learning with Python Training
If you’re serious about mastering Python, consider enrolling in a professional course. For those in Chennai, Python Training in Chennai offers comprehensive programs designed to help beginners and experienced developers alike. These courses provide hands-on training, expert mentorship, and real-world projects to ensure you become job-ready.
Benefits of Learning Python for Your Career
High Demand in the Job Market Python is one of the most in-demand programming languages, with companies seeking developers for roles in web development, data science, machine learning, and automation. Mastering Python can open doors to lucrative job opportunities.
Flexible Work Opportunities Python skills are valuable in both traditional employment and freelance work. Many Python developers work remotely, offering flexibility and the chance to collaborate on global projects.
Foundation for Advanced Technologies Python is the backbone of many emerging technologies like AI, machine learning, and data analytics. Learning Python provides a strong foundation to dive deeper into these cutting-edge fields.
Conclusion
Python programming is more than just a coding language—it’s a gateway to endless opportunities. Its simplicity, versatility, and robust community support make it the ideal language for beginners. By mastering Python, you’ll not only gain valuable technical skills but also open the door to a wide range of career possibilities in the ever-expanding tech industry.
Embark on your coding journey with Python today, and unlock the potential to shape your future in technology!
0 notes
Text
About
Course
Basic Stats
Machine Learning
Software Tutorials
Tools
K-Means Clustering in Python: Step-by-Step Example
by Zach BobbittPosted on August 31, 2022
One of the most common clustering algorithms in machine learning is known as k-means clustering.
K-means clustering is a technique in which we place each observation in a dataset into one of K clusters.
The end goal is to have K clusters in which the observations within each cluster are quite similar to each other while the observations in different clusters are quite different from each other.
In practice, we use the following steps to perform K-means clustering:
1. Choose a value for K.
First, we must decide how many clusters we’d like to identify in the data. Often we have to simply test several different values for K and analyze the results to see which number of clusters seems to make the most sense for a given problem.
2. Randomly assign each observation to an initial cluster, from 1 to K.
3. Perform the following procedure until the cluster assignments stop changing.
For each of the K clusters, compute the cluster centroid. This is simply the vector of the p feature means for the observations in the kth cluster.
Assign each observation to the cluster whose centroid is closest. Here, closest is defined using Euclidean distance.
The following step-by-step example shows how to perform k-means clustering in Python by using the KMeans function from the sklearn module.
Step 1: Import Necessary Modules
First, we’ll import all of the modules that we will need to perform k-means clustering:import pandas as pd import numpy as np import matplotlib.pyplot as plt from sklearn.cluster import KMeans from sklearn.preprocessing import StandardScaler
Step 2: Create the DataFrame
Next, we’ll create a DataFrame that contains the following three variables for 20 different basketball players:
points
assists
rebounds
The following code shows how to create this pandas DataFrame:#create DataFrame df = pd.DataFrame({'points': [18, np.nan, 19, 14, 14, 11, 20, 28, 30, 31, 35, 33, 29, 25, 25, 27, 29, 30, 19, 23], 'assists': [3, 3, 4, 5, 4, 7, 8, 7, 6, 9, 12, 14, np.nan, 9, 4, 3, 4, 12, 15, 11], 'rebounds': [15, 14, 14, 10, 8, 14, 13, 9, 5, 4, 11, 6, 5, 5, 3, 8, 12, 7, 6, 5]}) #view first five rows of DataFrame print(df.head()) points assists rebounds 0 18.0 3.0 15 1 NaN 3.0 14 2 19.0 4.0 14 3 14.0 5.0 10 4 14.0 4.0 8
We will use k-means clustering to group together players that are similar based on these three metrics.
Step 3: Clean & Prep the DataFrame
Next, we’ll perform the following steps:
Use dropna() to drop rows with NaN values in any column
Use StandardScaler() to scale each variable to have a mean of 0 and a standard deviation of 1
The following code shows how to do so:#drop rows with NA values in any columns df = df.dropna() #create scaled DataFrame where each variable has mean of 0 and standard dev of 1 scaled_df = StandardScaler().fit_transform(df) #view first five rows of scaled DataFrame print(scaled_df[:5]) [[-0.86660275 -1.22683918 1.72722524] [-0.72081911 -0.96077767 1.45687694] [-1.44973731 -0.69471616 0.37548375] [-1.44973731 -0.96077767 -0.16521285] [-1.88708823 -0.16259314 1.45687694]]
Note: We use scaling so that each variable has equal importance when fitting the k-means algorithm. Otherwise, the variables with the widest ranges would have too much influence.
Step 4: Find the Optimal Number of Clusters
To perform k-means clustering in Python, we can use the KMeans function from the sklearn module.
This function uses the following basic syntax:
KMeans(init=’random’, n_clusters=8, n_init=10, random_state=None)
where:
init: Controls the initialization technique.
n_clusters: The number of clusters to place observations in.
n_init: The number of initializations to perform. The default is to run the k-means algorithm 10 times and return the one with the lowest SSE.
random_state: An integer value you can pick to make the results of the algorithm reproducible.
The most important argument in this function is n_clusters, which specifies how many clusters to place the observations in.
However, we don’t know beforehand how many clusters is optimal so we must create a plot that displays the number of clusters along with the SSE (sum of squared errors) of the model.
Typically when we create this type of plot we look for an “elbow” where the sum of squares begins to “bend” or level off. This is typically the optimal number of clusters.
The following code shows how to create this type of plot that displays the number of clusters on the x-axis and the SSE on the y-axis:#initialize kmeans parameters kmeans_kwargs = { "init": "random", "n_init": 10, "random_state": 1, } #create list to hold SSE values for each k sse = [] for k in range(1, 11): kmeans = KMeans(n_clusters=k, **kmeans_kwargs) kmeans.fit(scaled_df) sse.append(kmeans.inertia_) #visualize results plt.plot(range(1, 11), sse) plt.xticks(range(1, 11)) plt.xlabel("Number of Clusters") plt.ylabel("SSE") plt.show()
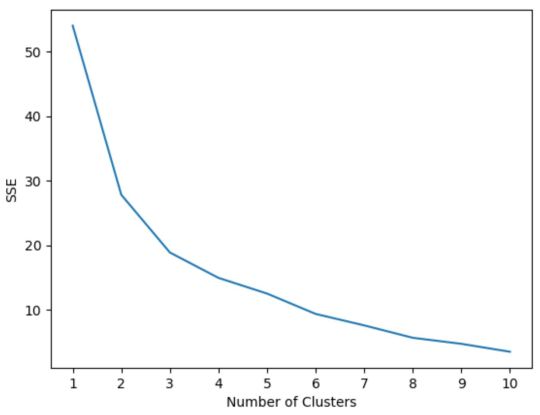
In this plot it appears that there is an elbow or “bend” at k = 3 clusters.
Thus, we will use 3 clusters when fitting our k-means clustering model in the next step.
Note: In the real-world, it’s recommended to use a combination of this plot along with domain expertise to pick how many clusters to use.
Step 5: Perform K-Means Clustering with Optimal K
The following code shows how to perform k-means clustering on the dataset using the optimal value for k of 3:#instantiate the k-means class, using optimal number of clusters kmeans = KMeans(init="random", n_clusters=3, n_init=10, random_state=1) #fit k-means algorithm to data kmeans.fit(scaled_df) #view cluster assignments for each observation kmeans.labels_ array([1, 1, 1, 1, 1, 1, 2, 2, 0, 0, 0, 0, 2, 2, 2, 0, 0, 0])
The resulting array shows the cluster assignments for each observation in the DataFrame.
To make these results easier to interpret, we can add a column to the DataFrame that shows the cluster assignment of each player:#append cluster assingments to original DataFrame df['cluster'] = kmeans.labels_ #view updated DataFrame print(df) points assists rebounds cluster 0 18.0 3.0 15 1 2 19.0 4.0 14 1 3 14.0 5.0 10 1 4 14.0 4.0 8 1 5 11.0 7.0 14 1 6 20.0 8.0 13 1 7 28.0 7.0 9 2 8 30.0 6.0 5 2 9 31.0 9.0 4 0 10 35.0 12.0 11 0 11 33.0 14.0 6 0 13 25.0 9.0 5 0 14 25.0 4.0 3 2 15 27.0 3.0 8 2 16 29.0 4.0 12 2 17 30.0 12.0 7 0 18 19.0 15.0 6 0 19 23.0 11.0 5 0
The cluster column contains a cluster number (0, 1, or 2) that each player was assigned to.
Players that belong to the same cluster have roughly similar values for the points, assists, and rebounds columns.
Note: You can find the complete documentation for the KMeans function from sklearn here.
Additional Resources
The following tutorials explain how to perform other common tasks in Python:
How to Perform Linear Regression in Python How to Perform Logistic Regression in Python How to Perform K-Fold Cross Validation in Python
1 note
·
View note
Text
Intel Distribution For Python To Create A Genetic Algorithm

Python Genetic Algorithm
Genetic algorithms (GA) simulate natural selection to solve finite and unconstrained optimization problems. Traditional methods take time and resources to address NP-hard optimization problems, but these algorithms can do it. GAs are based on a comparison between human chromosomal behavior and biological evolution.
This article provides a code example of how to use numba-dpex for Intel Distribution for Python to create a generic GA and offload a calculation to a GPU.
Genetic Algorithms (GA)
Activities inside GAs
Selection, crossover, and mutation are three crucial biology-inspired procedures that may be used to provide a high-quality output for GAs. It’s critical to specify the chromosomal representation and the GA procedures before applying GAs to a particular issue.
Selection
This is the procedure for choosing a partner and recombining them to produce children. Because excellent parents encourage their children to find better and more appropriate answers, parent selection is critical to the convergence rate of GA.
An illustration of the selection procedure whereby the following generation’s chromosomes are reduced by half.
The extra algorithms that decide which chromosomes will become parents are often required for the selection procedure.
Crossover
Biological crossover is the same procedure as this one. In this case, more than one parent is chosen, and the genetic material of the parents is used to make one or more children.
A crossover operation in action.
The crossover procedure produces kid genomes from specific parent chromosomes. There is only one kid genome produced and it may be a one-point crossing. The first and second parents each give the kid half of their DNA.
Mutation
A novel answer may be obtained by a little, haphazard modification to the chromosome. It is often administered with little probability and is used to preserve and add variation to the genetic population.
A mutation procedure involving a single chromosomal value change.
The mutation procedure may alter a chromosome.
Enhance Genetic Algorithms for Python Using Intel Distribution
With libraries like Intel oneAPI Data Analytics Library (oneDAL) and Intel oneAPI Math Kernel Library (oneMKL), developers may use Intel Distribution for Python to obtain near-native code performance. With improved NumPy, SciPy, and Numba, researchers and developers can expand compute-intensive Python applications from laptops to powerful servers.
Use the Data Parallel Extension for Numba (numba-dpex) range kernel to optimize the genetic algorithm using the Intel Distribution for Python. Each work item in this kernel represents a logical thread of execution, and it represents the most basic kind of data-parallel and parallelism across a group of work items.
The vector-add operation was carried out on a GPU in the prior code, and vector c held the result. In a similar vein, the implementation is the same for every other function or method.
Code Execution
Refer to the code sample for instructions on how to develop the generic GA and optimize the method to operate on GPUs using numba-dpex for Intel Distribution for Python. It also describes how to use the various GA operations selection, crossover, and mutation and how to modify these techniques for use in solving other optimization issues.
Set the following values to initialize the population:
5,000 people live there.
Size of a chromosome: 10
Generations: 5.
There are ten random floats between 0 and 1 on each chromosome.
Put the GA into practice by developing an assessment strategy: This function serves as numba-dpex’s benchmark and point of comparison. The calculation of an individual’s fitness involves using any combination of algebraic operations on the chromosome.
Carry out the crossover operation: The inputs are first and second parents to two distinct chromosomes. One more chromosome is returned as the function’s output.
Carry out the mutation operation: There is a one percent probability that every float in the chromosome will be replaced by a random value in this code example.
Put into practice the selection process, which is the foundation for producing a new generation. After crossover and mutation procedures, a new population is generated inside this function.
Launch the prepared functions on a CPU, beginning with a baseline. Every generation includes the following processes to establish the first population:
Utilizing the eval_genomes_plain function, the current population is evaluated
Utilizing a next_generation function, create the next generation.
Wipe fitness standards, since a new generation has already been produced.
Measured and printed is the calculation time for those operations. To demonstrate that the calculations were the same on the CPU and GPU, the first chromosome is also displayed.
Run on a GPU: Create an evaluation function for the GPU after beginning with a fresh population initialization (similar to step 2). With GPU implementation, chromosomes are represented by a flattened data structure, which is the sole difference between it and CPU implementation. Also, utilize a global index and kernels from numba-dpex to avoid looping over every chromosome.
The time for assessment, generation production, and fitness wipe is monitored when a GPU is operating, just like it is for the CPU. Deliver the fitness container and all of the chromosomes to the selected device. After that, a kernel with a specified range may be used.
Conclusion
Use the same procedures for further optimization issues. Describe the procedures of chromosomal selection, crossing, mutation, and assessment. The algorithm is executed the same way in its entirety.
Execute the above code sample and evaluate how well this method performs while executing sequentially on a CPU and parallelly on a GPU. The code result shows that using a GPU-based numba-dpex parallel implementation improves performance speed.
Read more on Govindhtech.com
#IntelDistribution#Python#GeneticAlgorithm#PythonGeneticAlgorithm#genericGA#GPU#InteloneAPI#CPU#News#Technews#Technology#Technologynews#technologytrends#govindhtech
1 note
·
View note