#rsync command usage
Explore tagged Tumblr posts
Visit Tumblr Blog
Explore Tumblr blogs with no restrictions, modern design and the best experience.
Last Seen Tumblr Blogs


Fun Fact
Tumblr Inc. has $15.1M in annual revenue.
Text
Shell
Manpage
Most of Unix systems are managed by using Shell. Just as you need to know a minimum number of words to have a discussion in a language, you need to know a minimum number of commands to be able to easily interact with a system. Unix systems all have, sometimes with slight differences, the same set of commands. While it is not too hard to remember commands, it might be hard to remember all of their options and how exactly to use them. The solution to this is the man command. Let’s go through a part of the ssh one, as there are few elements to know to be able to read a man page:
NAME ssh — OpenSSH SSH client (remote login program) SYNOPSIS ssh [-1246AaCfgKkMNnqsTtVvXxYy] [-b bind_address] [-c cipher_spec] [-D [bind_address:]port] [-E log_file] [-e escape_char] [-F configfile] [-I pkcs11] [-i identity_file] [-L [bind_address:]port:host:hostport] [-l login_name] [-m mac_spec] [-O ctl_cmd] [-o option] [-p port] [-Q cipher | cipher-auth | mac | kex | key] [-R [bind_address:]port:host:hostport] [-S ctl_path] [-W host:port] [-w local_tun[:remote_tun]] [user@]hostname [command] DESCRIPTION ssh (SSH client) is a program for logging into a remote machine and for executing commands on a remote machine. It is intended to replace rlogin and rsh, and provide secure encrypted communications between two untrusted hosts over an insecure network. X11 connections and arbitrary TCP ports can also be forwarded over the secure channel.
Some tips:
The NAME will summarize what the command is doing. As it is usually super short, you might want to look at DESCRIPTION (bellow) if ever it does not gives clear enough information
The SYNOPSIS will help you to understand the structure of the command:
A shell command usually have this format: command options parameters
Options inside [] are optional
The string without [] are mandatory
ssh [-1246AaCfgKkMNnqsTtVvXxYy] [-D [bind_address:]port]
ssh is mandatory
-1246AaCfgKkMNnqsTtVvXxYy is optional
-D [bind_address:]port is optional (with bind_address: being itself optional within -D [bind_address:]port
Commands
Here is the (non-exhaustive) list of commands & concepts you should master to be verbose with Unix systems:
awk # pattern scanning and processing language basename # strip directory and suffix from filenames bg # resumes suspended jobs without bringing them to the foreground cat # print files cd # change the shell working directory. chmod # change file mode chown # change file owner and group crontab # maintain crontab files curl # transfer a URL cut # remove sections from each line of files date # display or set date and time dig # DNS lookup utility df # report file system disk space usage diff # compare files line by line du # estimate file space usage echo # display a line of text find # search for files in a directory hierarchy fg # resumes suspended jobs and bring them to the foreground grep # print lines matching a pattern kill # send a signal to a process less # read file with pagination ln # create links ls # list directory contents lsb_release # print distribution-specific information lsof # list open files mkdir # create mv # move files nc # arbitrary TCP and UDP connections and listens netstat # print network connections, routing tables, interface statistics... nice # execute a utility with an altered scheduling priority nproc # print the number of processing units available passwd # change user password pgrep # look up processes based on name and other attributes pkill # send signal to processes based on name and other attributes printenv # print all or part of environment pwd # print name of current/working directory top # display Linux processes tr # translate or delete characters ps # report a snapshot of the current processes rm # remove files or directories rmdir # remove directories rsync # remote file copy scp # secure copy (remote file copy program) sed # stream editor for filtering and transforming text sleep # suspend execution for an interval of time sort # sort lines of text file ssh # OpenSSH SSH client (remote login program) ssh-keygen # SSH key generation, management and conversion su # substitute user identity sudo # execute a command as another user tail # output the last part of files tar # manipulate archives files tr # translate or delete characters uname # Print operating system name uniq # report or omit repeated lines uptime # show how long system has been running w # Show who is logged on and what they are doing whereis # locate the binary, source, and manual page files for a command which # locate a command wc # print newline, word, and byte counts for each file xargs # build and execute command lines from standard input | # redirect standard output to another command > # redirect standard output < # redirect standard input & # send process to background
Shortcuts
Some handy shortcuts:
CTRL+A # go to beginning of line CTRL+B # moves backward one character CTRL+C # stops the current command CTRL+D # deletes one character backward or logs out of current session CTRL+E # go to end of line CTRL+F # moves forward one character CTRL+G # aborts the current editing command and ring the terminal bell CTRL+K # deletes (kill) forward to end of line CTRL+L # clears screen and redisplay the line CTRL+N # next line in command history CTRL+R # searches in your command history CTRL+T # transposes two characters CTRL+U # kills backward to the beginning of line CTRL+W # kills the word behind the cursor CTRL+Y # retrieves last deleted string CTRL+Z # stops the current command, resume with fg in the foreground or bg in the background
0 notes
Text
GNU/Linux most wanted
How can I find the version of Ubuntu that is installed? lsb_release -a No LSB modules are available. Distributor ID: Ubuntu Description: Ubuntu 16.10 Release: 16.10 Codename: yakkety
ref: GNU/Linux most wanted
Handling files and directories Changing directories: cd ~bill (home directory of user bill) Copy files to a directory: cp file1 file2 dir
Copy directories recursively: cp -r source_dir/ dest_dir/ rsync -a source_dir/ dest_dir/ rsync -av --exclude='path/to/exclude' source_dir/ dest_dir
Create a symbolic link: ln -s linked_file link ln -sf linked_file link s: make symbolic links instead of hard links f: remove existing destination files
Rename a file, link or directory: mv source_file dest_file mv -T /path/src /path/dst -T: treate DESTINATION (/path/dst) as a normal file
Remove non-empty directories: rm -rf dir
Remove non-empty directories Recursively: rm -rf `find . -name .git`
Listing files ls l: long listing a: list all files (including hidden files) t: by time (most recent files first) s: by size (biggest files first) r: reverse sort order
List link file recursively: ls -alR | grep "/home/chhuang/500G" -B10 R: recursive
grep B NUM: --before-context=NUM o: only matching 只取出找到的pattern片段 例 dmesg | grep -o 'scsi.*Direct-Access.*ADATA'
awk 以空白做分隔,並列印指定的第幾欄 (從1開始) 例:以空白做分隔,印出第2欄 dmesg | grep -o 'scsi.*Direct-Access.*ADATA' | awk '{print $2}'
How to grep for contents after pattern? https://stackoverflow.com/questions/10358547/how-to-grep-for-contents-after-pattern 取冒號之後的文字:
grep 'potato:' file.txt | sed 's/^.*: //' or
grep 'potato:' file.txt | cut -d\ -f2 or
grep 'potato:' file.txt | awk '{print $2}'
example: Long list with most recent files last: ls -ltr
Displaying file contents Display the first 10 lines of a file: head -10 file
Display the last lines of a file: tail -10 file
********************************************************************************
Looking for files Find *log* files in current (.) directory recursively find . -name "*log*"
Find all the .pdf files in current (.) directory recursively and run a command on each find . -name "*.pdf" -exec xpdf {} ';'
對每個找到的檔案執行xxx.sh find . -type f | xargs -n | xxx.sh
在當前目錄遞迴找某關鍵字,並忽略find和grep警告訊息 find . -type f 2>/dev/null | xargs grep -H keyword_to_find 2>/dev/null > find_result.txt
在當前目錄找某關鍵字 grep -Ire keryword_to_find l: Do not list binary files (--binary-files=without-match) R: Recursively. Follow all symbolic links. -e PATTERN
尋找linked files (並看完整路徑) find . -type l -ls | grep mnt
locate "*pub*"
copy: https://stackoverflow.com/questions/5410757/delete-lines-in-a-text-file-that-contain-a-specific-string Remove the line and print the output to standard out: sed '/pattern to match/d' ./infile
Remove lines with specified pattern directly from the file: sed -i '/pattern to match/d' ./infile
Archiving Create a compressed archive (TApe ARchive): tar jcvf archive.tar.bz2 dir
tar xvf archive.tar.[gz|bz2|lzma|xz] tar jxvf archive.tar.bz2
tar jxvf archive.bz2
c: create t: test x: extract j: on the fly bzip2 (un)compression
tar xvf archive.tar -C /path/to/directory
********************************************************************************
File and partition sizes Show the total size on disk of files or directories (Disk Usage): du -sh dir1 dir2 file1 file2 -s: summarize -h: human
Number of bytes, words and lines in file: wc file (Word Count)
Show the size, total space and free space of the current partition: df -h .
Display these info for all partitions: df -h
********************************************************************************
mount samba in Linux (/etc/fstab)
sudo vi /etc/fstab
//172.16.70.151/your_name /path/to/your/local/directory/ cifs rw,username=your_name,password=your_password,uid=your_uid,gid=your_gid,iocharset=utf8,file_mode=0777,dir_mode=0777,noperm 0 0
Make zip file zip -0r bootanimation.zip desc.txt part0 part1 0: not use any compression r: recursively
start to use screen $ screen And press [space] key to skip the spash list screen(s) you used $ screen -ls There are screens on: 19668.pts-14.Aspire-M7720-build-machine (11/21/2017 05:35:28 PM) (Detached) 2345.pts-19.Aspire-M7720-build-machine (11/17/2017 10:44:58 AM) (Detached) delete a specified screen format: screen -X -S [session id] quit example: $ screen -X -S 2345 quit re-attach a screen $ screen -r or format: screen -r [session id] $ screen -r 19668
force attach to a specified session screen -d -r 19668
for loop END=5 for i in $(seq 1 $END); do echo $i; done
make sequence numbers: for i in {1..4}; do printf "hello '%s'\n" input.mp4 >> list.txt; done
$ for i in {01..05}; do echo "$i"; done 01 02 03 04 05
$ foo=$(printf "%02d" 5) $ echo "${foo}" 05
multimedia: ffmpeg
make mp4 video from bmp files ffmpeg -framerate 60 -i img%03d.bmp -c:v libx264 -pix_fmt yuv420p -crf 0 output_60f.mp4 -crf 0: to create a lossless video
Repeat/loop Input Video with ffmpeg: copy: https://video.stackexchange.com/questions/12905/repeat-loop-input-video-with-ffmpeg This allows you to loop an input without needing to re-encode.
1. Make a text file. Contents of an example text file to repeat 4 times.
file 'input.mp4' file 'input.mp4' file 'input.mp4' file 'input.mp4' Then run ffmpeg:
2. ffmpeg -f concat -i list.txt -c copy output.mp4
dd /data/local/bin/dd 'if=/data/local/tmp/rnd_64M.img' 'of=/mnt/user/rnd_64M.img' 'bs=1024k' 'count=64' 'iflag=fullblock'
/data/local/bin/dd 'if=/mnt/sdc2_mmc/rnd_64M.img' 'of=/mnt/user/rnd.img_64M' 'bs=1024k' 'count=64' 'iflag=direct'
https://community.mellanox.com/s/article/how-to-set-cpu-scaling-governor-to-max-performance--scaling-governor-x
Performance CPU echo performance > /sys/devices/system/cpu/cpu0/cpufreq/scaling_governor echo performance > /sys/devices/system/cpu/cpu1/cpufreq/scaling_governor echo performance > /sys/devices/system/cpu/cpu2/cpufreq/scaling_governor echo performance > /sys/devices/system/cpu/cpu3/cpufreq/scaling_governor echo performance > /sys/devices/system/cpu/cpu4/cpufreq/scaling_governor echo performance > /sys/devices/system/cpu/cpu5/cpufreq/scaling_governor echo performance > /sys/devices/system/cpu/cpu6/cpufreq/scaling_governor echo performance > /sys/devices/system/cpu/cpu7/cpufreq/scaling_governor
# cat /sys/devices/system/cpu/cpu0/cpufreq/scaling_max_freq
3300000
# cat /sys/devices/system/cpu/cpu0/cpufreq/scaling_min_freq
1200000
# cat /sys/devices/system/cpu/cpu0/cpufreq/cpuinfo_cur_freq
3210156
1 note
·
View note
Text
Install Xcode For Mojave

Until you access your Mojave system via SSH and face a whole new raft of permission wrangling headaches. Mojave has been a real disappointment. Apple Server app lost DHS, DHCP, Mail, Webpretty much everything you’d use a server for, permissions/access are now so walled off it’s a constant game of access whack-a-mole.
After Sierra, High Sierra, Mojave, the next one is macOS Catalina. Now Catalina includes a huge deal of fresh green stuff. First off, starting off with iTunes, Apple’s Senior VP Craig Federighi nailed it with making fun of showing off some apps in iTunes.
On iOS, install the WireGuard app from the iOS App Store. Then, use the WireGuard app to scan the QR code or AirDrop the configuration file to the device. On macOS Mojave or later, install the WireGuard app from the Mac App Store. A default install only requires the user to sit patiently and, less than ten times, press enter when prompted by the script, without interacting with the virtual machine. Tested on bash and zsh on Cygwin. Works on macOS, CentOS 7, and Windows. Should work on most modern Linux distros. Can you clarify how you upgraded? I have a macpro5,1 running the latest mojave (10.14.6). Unclear to me how to upgrade to catalina (10.15.3), as the installer says “Install a new version of the OS” (or similar) as opposed to “upgrade or install new” from the normal installers.
Quickstart
Install Xcode and the Xcode Command Line Tools
Agree to Xcode license in Terminal: sudo xcodebuild -license
Install MacPorts for your version of the Mac operating system:
Installing MacPorts
MacPorts version 2.6.4 is available in various formats for download and installation (note, if you are upgrading to a new major release of macOS, see the migration info page):
“pkg” installers for Big Sur, Catalina, Mojave, and High Sierra, for use with the macOS Installer. This is the simplest installation procedure that most users should follow after meeting the requirements listed below. Installers for legacy platforms Sierra, El Capitan, Yosemite, Mavericks, Mountain Lion, Lion, Snow Leopard, Leopard and Tiger are also available.
In source form as either a tar.bz2 package or a tar.gz one for manual compilation, if you intend to customize your installation in any way.
Git clone of the unpackaged sources, if you wish to follow MacPorts development.
The selfupdate target of the port(1) command, for users who already have MacPorts installed and wish to upgrade to a newer release.
Checksums for our packaged downloads are contained in the corresponding checksums file.
The public key to verify the detached GPG signatures can be found under the attachments section on jmr's wiki page. (Direct Link).
Please note that in order to install and run MacPorts on macOS, your system must have installations of the following components:
Apple's Xcode Developer Tools (version 12.2 or later for Big Sur, 11.3 or later for Catalina, 10.0 or later for Mojave, 9.0 or later for High Sierra, 8.0 or later for Sierra, 7.0 or later for El Capitan, 6.1 or later for Yosemite, 5.0.1 or later for Mavericks, 4.4 or later for Mountain Lion, 4.1 or later for Lion, 3.2 or later for Snow Leopard, or 3.1 or later for Leopard), found at the Apple Developer site, on your Mac operating system installation CDs/DVD, or in the Mac App Store. Using the latest available version that will run on your OS is highly recommended, except for Snow Leopard where the last free version, 3.2.6, is recommended.
Apple's Command Line Developer Tools can be installed on recent OS versions by running this command in the Terminal:
Older versions are found at the Apple Developer site, or they can be installed from within Xcode back to version 4. Users of Xcode 3 or earlier can install them by ensuring that the appropriate option(s) are selected at the time of Xcode's install ('UNIX Development', 'System Tools', 'Command Line Tools', or 'Command Line Support').
Xcode 4 and later users need to first accept the Xcode EULA by either launching Xcode or running:
(Optional) The X11 windowing environment for ports that depend on the functionality it provides to run. You have multiple choices for an X11 server:
Install the xorg-server port from MacPorts (recommended).
The XQuartz Project provides a complete X11 release for macOS including server and client libraries and applications. It has however not been updated since 2016.
Apple's X11.app is provided by the “X11 User” package on older OS versions. It is always installed on Lion, and is an optional installation on your system CDs/DVD with previous OS versions.
macOS Package (.pkg) Installer
Microsoft office 2019 free. download full version for mac download. The easiest way to install MacPorts on a Mac is by downloading the pkg or dmg for Big Sur, Catalina, Mojave, High Sierra, Sierra, El Capitan, Yosemite, Mavericks, Mountain Lion, Lion, Snow Leopard, Leopard or Tiger and running the system's Installer by double-clicking on the pkg contained therein, following the on-screen instructions until completion.
This procedure will place a fully-functional and default MacPorts installation on your host system, ready for usage. If needed your shell configuration files will be adapted by the installer to include the necessary settings to run MacPorts and the programs it installs, but you may need to open a new shell for these changes to take effect.
The MacPorts “selfupdate” command will also be run for you by the installer to ensure you have our latest available release and the latest revisions to the “Portfiles” that contain the instructions employed in the building and installation of ports. After installation is done, it is recommended that you run this step manually on a regular basis to to keep your MacPorts system always current:
Download iMovie 9.0.9. What's New in Version 9.0.9. Addresses issues where iMovie does not recognize video cameras connected to your Mac. Imovie 9 download mac.
At this point you should be ready to enjoy MacPorts!
Type “man port” at the command line prompt and/or browse over to our Guide to find out more information about using MacPorts. Help is also available.
Source Installation
If on the other hand you decide to install MacPorts from source, there are still a couple of things you will need to do after downloading the tarball before you can start installing ports, namely compiling and installing MacPorts itself:
“cd” into the directory where you downloaded the package and run “tar xjvf MacPorts-2.6.4.tar.bz2” or “tar xzvf MacPorts-2.6.4.tar.gz”, depending on whether you downloaded the bz2 tarball or the gz one, respectively.
Build and install the recently unpacked sources:
cd MacPorts-2.6.4
./configure && make && sudo make install
Optionally:
cd ./
rm -rf MacPorts-2.6.4*
These steps need to be perfomed from an administrator account, for which “sudo” will ask the password upon installation. This procedure will install a pristine MacPorts system and, if the optional steps are taken, remove the as of now unnecessary MacPorts-2.6.4 source directory and corresponding tarball.
To customize your installation you should read the output of “./configure --help | more” and pass the appropriate options for the settings you wish to tweak to the configuration script in the steps detailed above.
You will need to manually adapt your shell's environment to work with MacPorts and your chosen installation prefix (the value passed to configure's --prefix flag, defaulting to /opt/local):
Add $(prefix)/bin and $(prefix)/sbin to the start of your PATH environment variable so that MacPorts-installed programs take precedence over system-provided programs of the same name.
If a standard MANPATH environment variable already exists (that is, one that doesn't contain any empty components), add the $(prefix)/share/man path to it so that MacPorts-installed man pages are found by your shell.
For Tiger and earlier only, add an appropriate X11 DISPLAY environment variable to run X11-dependent programs, as Leopard takes care of this requirement on its own.
Install Xcode For Mojave 10.14
Lastly, you need to synchronize your installation with the MacPorts rsync server:
Upon completion MacPorts will be ready to install ports!
It is recommended to run the above command on a regular basis to keep your installation current. Type “man port” at the command line prompt and/or browse over to our Guide to find out more information about using MacPorts. Help is also available.
Jw library download mac. Download JW Library - JW LIBRARY is an official app produced by Jehovah’s Witnesses. It includes multiple Bible translations, as well as books and brochures for Bible study. Download JW Library for PC – Windows 7, 8, 10, Mac: To start, you need to download BlueStacks on your PC & Mac. Run the installation wizard and follow the on-screen instructions.
Git Sources
If you are developer or a user with a taste for the bleeding edge and wish for the latest changes and feature additions, you may acquire the MacPorts sources through git. See the Guide section on installing from git.
Purpose-specific branches are also available at the https://github.com/macports/macports-base/branches url.
Alternatively, if you'd simply like to view the git repository without checking it out, you can do so via the GitHub web interface.
Selfupdate
If you already have MacPorts installed and have no restrictions to use the rsync networking protocol (tcp port 873 by default), the easiest way to upgrade to our latest available release, 2.6.4, is by using the selfupdate target of the port(1) command. This will both update your ports tree (by performing a sync operation) and rebuild your current installation if it's outdated, preserving your customizations, if any.
Other Platforms
Running on platforms other than macOS is not the main focus of The MacPorts Project, so remaining cross-platform is not an actively-pursued development goal. Nevertheless, it is not an actively-discouraged goal either and as a result some experimental support does exist for other POSIX-compliant platforms such as *BSD and GNU/Linux.
The full list of requirements to run MacPorts on these other platforms is as follows (we assume you have the basics such as GCC and X11):
Tcl (8.4 or 8.5), with threads.
mtree for directory hierarchy.
rsync for syncing the ports.
cURL for downloading distfiles.
SQLite for the port registry.
GNUstep (Base), for Foundation (optional, can be disabled via configure args).
OpenSSL for signature verification, and optionally for checksums. libmd may be used instead for checksums.
Normally you must install from source or from an git checkout to run MacPorts on any of these platforms.
Install Xcode For Mojave Installer
Help
Help on a wide variety of topics is also available in the project Guide and through our Trac portal should you run into any problems installing and/or using MacPorts. Of particular relevance are the installation & usage sections of the former and the FAQ section of the Wiki, where we keep track of questions frequently fielded on our mailing lists.
Install Xcode Mojave Command Line
If any of these resources do not answer your questions or if you need any kind of extended support, there are many ways to contact us!
0 notes
Text
Rsync Directory Example

Rsync is a popular tool for file syncing, both locally and remotely. Unlike other syncing tools, rsync uses an interesting algorithm that minimizes bandwidth consumption. It simply moves the portion of the file(s) that have changed.
Rsync Mirror Directory Example
Rsync Directory Example Software
Rsync Exclude Directory Example
Rsync Directory Example Pdf
Rsync Directory Example Online
It’s a powerful utility that can serve in lots of situations. In this article, I’ll showcase how to get started with rsync with a demonstration. The demonstration will be performed on Ubuntu 18.04.
Rsync
This is to tell rsync that the source is all the contents of the source directory. If the “/” at the end of the source directory isn’t used, rsync will simply create a copy of the source directory instead of its contents. Let’s check it out with an example. $ rsync -v -a primary target. For example, the following creates a copy of file foo as bar in the sub/dir directory, creating dirs 'sub' and 'sub/dir' if either do not yet exist: rsync -ai -mkpath foo sub/dir/bar If you instead ran the following, it would have created file foo in the sub/dir/bar directory: rsync -ai -mkpath foo sub/dir/bar/ -links.
Jan 23, 2021 This rsync example is a bit more complicated since it's set up to not copy files if they're larger than 2,048 KB. It only copies files smaller than the specified size. Use k, m, or g to indicate kilobytes, megabytes, and gigabytes in the 1,024 multiplier, or kb, mb, or gb to use 1,000.
Jan 31, 2018 The rsync command is used to copy the file or sync the single file from local computer.If the target location is not available then it will create the target directory and sync the file there. Following command is used to sync the files from source to destination. root@localhost# rsync -zvh Amit.txt /home/NewFolder/Amit.txtsent.
Rsync stands for the term remote sync. Despite the name, it can handle file synchronization remotely and locally. The term rsync is also used to refer to the rsync protocol that rsync uses for syncing. In this article, rsync will always denote the tool, not the protocol.
Because of its sheer popularity, rsync is available on almost every single Linux and UNIX-like system. There’s a good chance that it comes pre-installed. If not, do a little research on how to install rsync in your system.
Here’s a shortlist of features rsync offers.
Directory copying
Easy backup configuration
Can work over SSH
Can run as daemon/server
File permission retention

Rsync usage
Before jumping into rsync, we need some dummy files to work with. Let’s create a dummy directory first.
Once created, it’s time to create a handful of dummy files. To create a file, I’ll be using the touch command. Learn more about the touch command.
Voila! We’re now ready to use rsync to perform actions using these dummy files.
Rsync Command structure
Rsync uses the following command structure.
Sync local directories
Now, it’s time to use rsync for syncing files across multiple destinations. In this example, we’ll be syncing the contents of dir_primary to dir_target.
Tell rsync to sync the contents of both the directories.
Here, we’ve used two different arguments.
-v: Tells rsync to run into verbose mode -r: Recursive, required for directory syncing.
In this next example, we’ll be using a different flag.
-a: A combination flag that stands for “archive”.
Using this flag, rsync will sync the contents recursively while preserving any symbolic, special/device files, modification times, file permissions, group, owner, etc. It’s more commonly used than the “-r” flag. For archival, this is a more recommended method.
Did you notice that in all the commands we’ve run so far, in the case of source, we always retain the “/” after the name of the directory? This is to tell rsync that the source is all the contents of the source directory. If the “/” at the end of the source directory isn’t used, rsync will simply create a copy of the source directory instead of its contents.
Let’s check it out with an example.
Check the output result.
Most of the time, this is not something we need. However, depending on the situation, it might come in handy.
Rsync test run
Before running a rsync command, it’s always important to verify that the command will perform the action as expected. If you want to test the rsync action for a certain command, use the “-n” or “-dry-run” flag.
Here, the output shows what rsync would perform if the command was actually run. Karabiner elements uninstall mac. Whenever you’re testing, don’t forget to use the “-v” flag to get an accurate representation of what’s happening.
Rsync over a remote connection
This is another interesting feature rsync supports. If your backup location is somewhere remote, you can easily configure rsync to perform backup on the remote location through SSH. However, both the machines must have rsync installed. Moreover, both systems also need to have SSH keys set.
Ready? Let’s get started. At first, it’s the archive syncing.
$ rsync -a<local_dir><username>@<remote_host>:< destination_dir>
Here, this operation is called a “push” because it pushes a directory from the local system to a remote system. The opposite is known as “pull”.
Rsync Mirror Directory Example
$ rsync -a<username>@<remote_host>:<source_dir><local_dir>
Rsync treats the first argument as the source, the second as the destination.
Useful rsync options
Rsync supports a ton of options. All of them serve their own purpose. However, for the most part, only a handful of them are used most of the time. In this section, let’s have a look at some useful rsync options.
Most of the time, the file(s) you’re about to sync aren’t compressed. Using compression, you can save both time and bandwidth at the cost of a little bit extra processing power. Rsync offers compression by default. To perform compressed sync, use the “-z” flag.
This interesting flag combines the function of both “-progress” and “-partial” flag. The first one is to show a progress bar of the transfer and the second one is to enable resuming interrupted transfer. Both of these features are combined into the “-P” flag.
Now, let’s check out how rsync handles file syncing intelligently. Run the previous command again.
Rsync Directory Example Software
Here, rsync didn’t re-upload all the files. Instead, it skipped those that didn’t change at all. In this example, it skipped all the files as all of them are present in the destination directory.
What if you deleted a file from the source directory? By default, rsync won’t delete anything from the destination directory. To force rsync delete files, use the “–delete” flag. However, use the dry run to test if the command works as you want.
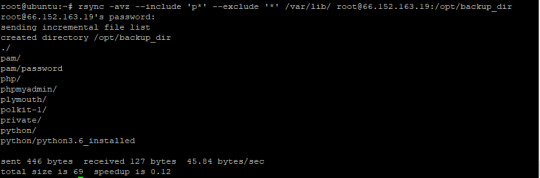
By default, rsync will sync every single file/directory from the source to the destination directory. In certain situations, you may want to include/exclude certain files from syncing. Rsync offers handy options like “–exclude” and “–include” to exclude/include certain files. Pass the file pattern as the value for these arguments.
$ rsync -avn--exclude=<pattern>--include=<pattern>
You can also define the largest file size that rsync should sync. To do that, use the “–max-size” flag followed by the file size.
Rsync has another interesting feature in its sleeve. No longer need the source file after syncing? Rsync can do that, no problem. However, make sure that you’re not running rsync with “-delete” flag. Otherwise, rsync will delete the synced files from the destination!
$ rsync -av--remove-source-files<source><destination>
Final thoughts
Rsync Exclude Directory Example
These are just some common and simple scenario of rsync usage. It offers much more than that. It’s possible to automate rsync operations using either rsync daemon or other scripting. Hopefully, this guide was helpful in getting started with rsync.
Rsync Directory Example Pdf
Interested in more rsync? Well, you can use rsync as a file copier. It’s more efficient and intelligent than cp. More in-depth features and usage can be found in rsync man page.
Rsync Directory Example Online
Enjoy!
0 notes
Text
Maemo For Mac

Memo For Management
Memo For Mac
Maemo For Mac Os
Maemo For Macbook Air
Memo For Microsoft Word
IMO for Mac pc: With the help of IMO for Mac we can able to stay connected with our friends, Imo families and relations no matter whatever may be the distance IMO for Mac pc is not just a social app by which we can send a message to the people worth to us. This is a TECHNOLOGY PREVIEW of a new development tool for Maemo. MADDE stands for Maemo Application Development and Debugging Environment and offers the following features: Command-line cross-compiling Multi-platform support (Linux (32-bit/64-bit), Windows, Mac OS X) Configurable for different targets & toolchains. Maemo Community e.V. Invitation to the General Assembly 01/2015 Nomination period closed for Q4 2014 council election Announcement of the Q4 2014 Community Council election. GPE is a suite of applications that was ported to Maemo. Search for GPE in the downloads section for your version of Maemo. (You'll probably want GPE Calendar, GPE Contacts, gpesyncd to start with.) These are standalone applications, there's no integration with the Maemo address book. You'll not find data from GPE in the Mail client or Chat.
Download
Thank you for using our software library. Use the link below and download Maemo Flasher legally from the developer's site.
We wish to warn you that since Maemo Flasher files are downloaded from an external source, FDM Lib bears no responsibility for the safety of such downloads. We recommend checking your downloads with an antivirus. FDM Lib shall include an option for direct download from developers, should it become available in the future.
Often downloaded with
Flash WallpaperCreate and distribute Flash Wallpapers! Flash Wallpaper converts a Flash...DOWNLOAD
Flash Media PlayerFlash Media Player is a handy flash tool kit designed as Macromedia flash...DOWNLOAD
Flash JoinerFlash Joiner provides a new way to create your SWF easily. You can merge...$39.95DOWNLOAD
Flash SecurerFlash Securer is program which will allow you to carry your sensitive documents...DOWNLOAD
Flash WiperMany people believe formatting the drive or deleting the file will complete...$19.95DOWNLOAD
iWisoft Flash SWF to Video Converter
Editors & Converters
The Nokia 770, N800 andN810are 'Internet Tablets'running Maemo: a handheld Linux distribution based on Debian.
Although there is acommand line flasher availablefor Mac OS X from Maemo, there's no officialGUI interface for it. This has been written usingPlatypus and CocoaDialog and is, of course,supplied with no warranty.
This is not affiliated with Nokia and so if your machine turns into amongoose and starts dancing ballet, don'tblame me. Or blame me, but don't complain - or, more importantly, sue.
Usage

Download the latestNokia image (large file ending in .bin, for exampleNokia_770_0.2005.45-8.bin) and either selectthis file when prompted by 770Flasher, or just drag the file on to the770Flasher icon.
Screenshot
770Flasher-2.0.dmg(Mac OS X disk image, 361K, requires 10.3 or above)
tablet-encode (aka 770-encode)
770-encode has now been renamed tablet-encodeand moved to a larger project called mediautils.
Due to the unreliability of garage.maemo.org, there is a mirror here:
mediaserv
mediaserv is a project which allows you to convert, on-the-fly,video from a Linux, Unix or Mac OS X box and watch it on your Nokia InternetTablet. It even integrates with VideoCenter.
Like tablet-encode, this is part of mediautils.
Due to the unreliability of garage.maemo.org, there is a mirror here:
mediaserv.tar.gz(Perl tarball, v0.05, 29K)
mud-builder
MUD is anauto-builder, designed to make it easier for people to port, in a simple andmaintainable fashion, software to Maemo; customising the resulting packages toMaemo's subtle requirements.
More info can be found on its Garage page.
Wikipedia
Wikipedia is anexcellent online resource and tied with a network connection through aNokia 770 is almost equivalent to the Hitchhiker's Guide to the Galaxy.Although not yet available offline for Maemo, it is possible to enhanceWikipedia to make it look better on the 770's screen.
The default skin contains a long left-hand column, however by creatingan account with Wikipedia (which is free), you can change the 'skin'to one more suited to a device such as the 770.
Default style
'MySkin' style
Usage
Create an account on Wikipedia.
Go to the URL, http://en.wikipedia.org/wiki/User:YourUserName/myskin.css.='detail'>
Paste the code below into the text area andclick Save:
/* <pre><nowiki>*/ @import url('http://www.bleb.org/software/maemo/wikipedia/myskin.css'); /* </nowiki></pre> */
Go to your Preferences page and selectthe Skin category.
Select MySkin and click Save.
Backgrounds
Under development
I've currently got the following under development. For each there is a short description and links to screenshots and photos. If you have any questions on them, please don't hesitate to contact me. Updates will be provided in my diary.
Better Maemo planet layout
I don't like the new MaemoPlanet that much. I've developed a user style for Firefox to turnit into this.
ArcEm
Acorn Archimedes emulator, allowing RISC OS to be run on an ARM device inyour pocket. [1], [2],[photo 1], [photo 2].
NetSurf
A lightweight open source web browser, for when Opera is deciding to betempremental. [1], [2], [3], [photo].
Galculator
A scientific calculator. No screenshots available, but a straight-forward port of a Glade application.
Java
Following on from Alexander Lash's work porting JamVM/Classpath/Jikesto Maemo, I've some thoughts on auto-Hildonisation of Javaapplications which could help make Java a suitable high-level language forMaemo application development.
Older stuff
Sylpheed
Sylpheed is a full-featured email client: supporting POP3,IMAP, SSL and everything else you'd expect. The full feature list can beseen at the Sylpheed homepage.
This is a port and Hildonisation of Sylpheed to integrate it as a properMaemo application. It's not finished, and so should be viewedas an alpha-release. You may be better off using Claws or (even better, hopefully)Modest.
Known bugs
Not all windows are Hildonised yet (that is, many have menubars ratherthan pop-up menus, and so on).
Fix dependencies on N800 to avoid start-up problem (see this solution in the mean time).
Full-screen button doesn't work.
Some windows appear too small, others too big.
Select from middle of direction pad should open message in proper viewwindow.
Problems with (some?) LDAP servers.
...
Limitations
No GPG support as yet.
Address book functionality removed due to a bug.
Built-in FAQ, manual and support for non-English languages removed forspace reasons.
Screenshots
sylpheed.deb(Maemo v2 package, v2.2.0rc-3, 511K)
Rebuilding from source
If the binary above whets your appetite for Maemo development,and you want to help with this port, the Maemo port is being maintained in aSubversion repository.
Username/password: guest/guest.[Browse the source]
Synchronisation and backup using rsync & make
Please note this has not been updated for 2006 OS,instead I prefer bind-mounts, however it is easily customisable.
The built-in backup/restore tool doesn't backup all yourdevice's configuration or installed applications. This script (aMakefile)meets those requirements and allows for maintaining patched parts of the rootfilesystem across firmware upgrades.
Usage
Requires rsync and SSH (on both 770 & hostcomputer) and make on the host.
Memo For Management
To 'install' the script:
Create a new, empty directory, on a Unix-like box (e.g. Mac OS X,Linux, *BSD, Windows with cygwin) and ensure you have rsync, make and SSHinstalled.
Download Makefile.770sync and move it to thenew directory, named Makefile.
Modify the line beginning REMOTE_DEVICE topoint to your 770. For example, my 770 has a fixed IP, I have root accesson it (by enablingR&D mode) and Dropbear is running on port 22 (the default), thereforethe line in my local copy says:
There are three 'targets' which can be executed to act onyour device. To execute them, run the following command:
Memo For Mac

make target
push
Push changes in the local copy to the remote device. This is effectivelya restore from a backup, if pull has been previously run.
pull
Pull changes from the remote device to your local copy. Effectivelyperforming a backup.
bootstrap
Similar to push but doesn't use rsync. This is useful when yourdevice has just been reflashed and is missing any software. By just installingand starting SSH, thistarget can be used to restore your documents, changes and applications (suchas rsync). An article on dillernet.com,Recovering From A Firmware Flash, has some techniqueswhich may also help in this regard (specifically scripts to install theneeded packages & SSH keys from the MMC card).
Since bootstrap will generally be required when reflashing andbefore SSH is running as root; SSH may well be listening on port 2222 (ifstarted by an unprivileged user), rather than port 22. Therefore, you canoverride the REMOTE_DEVICE variable:

make [email protected]:2222/ bootstrap
Note: in this example, as the SSH server was started as anormal user, it would not be possible to restore symlinks in /etc.
Example
One common requirement when SSH is installed is startingit automatically when your device is turned on. This is easily done bycreating a symlink, as described in the InstallSsh document in the wiki.
Unfortunately, when you reflash your device, this symlink will be lost.However, by using the script you can ensure that this (and similar changes)are put back on the device when you restore:
$ mkdir ~/770-sync $ cd ~/770-sync $ wget http://bleb.org/software/maemo/Makefile.770sync $ mv Makefile.770sync Makefile $ mkdir -p etc/rc2.d $ ln -s /var/lib/install/etc/init.d/dropbear-server etc/rc2.d/S99dropbear-server $ make push
As you can see, the local 770-sync directorycontains a copy of any changes you've made to the file system. In addition,the user's home directory, the configuration and the installed applications are pulled back on a pull operation.
Citrix ICA client
The below screenshots show that theCitrixARM Linux client can be got to run on a Nokia 770, although it iscurrently much use: the virtual keyboard is tied to onboard GTK+applications. A USB keyboard, or a Bluetooth keyboard using kbddshould work, however.
The Citrix install file won't work with busybox's 'expr' implementation andwithout 'cpio'. The application itself requires a few extra debs (whichfortunately Debian/ARM can provide):
libxaw6_4.3.0.dfsg.1-14sarge1_arm.deb
libxmu6_4.3.0.dfsg.1-14sarge1_arm.deb
libxp6_4.3.0.dfsg.1-14sarge1_arm.deb
libxpm4_4.3.0.dfsg.1-14sarge1_arm.deb
Maemo For Mac Os
Unfortunately, with the advent of 2006 OS and the use of EABI, older ARMLinux binaries will no longer work on the 770 without recompilation. Therefore,unless Citrix recompile and provide new binaries, or an open source clientis made available, Citrix is not easily possible on a modernMaemo device.
Maemo For Macbook Air
vim/rsync
Memo For Microsoft Word
These ports were for the 2005 OS, and have now been removed.mud-builder isa project which aims to simplify simple ports like thesein future.
0 notes
Text
OneinStack: How to install it on Ubuntu and CentOS
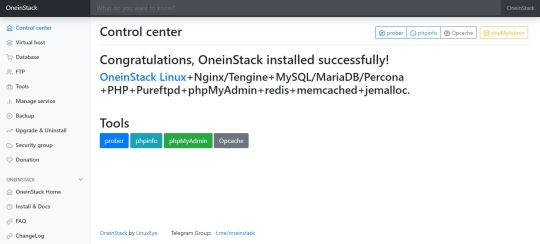
What is OneinStack? It is an active project that uses to set up an environment for the development of PHP/JAVA applications in just one-click on Linux operating systems such as CentOS (including Redhat), Debian, Ubuntu, Fedora, Deepin, Amazon Linux and other same family Distros. Just like WAMP or XAMPP server for Windows, OneinStack allows creating different Linux web server environment such as: Lnmp(Linux + Nginx+ MySQL/MongoDB+ PHP) Lamp(Linux + Apache+ MySQL/MongoDB+ PHP) Lnmpa (Linux + Nginx+ MySQL/MongoDB+ PHP+ Apache): Nginx handles static, Apache handles dynamic PHP Lnmt (Linux + Nginx+ MySQL/MongoDB+ Tomcat): Nginx handles static, Tomcat (JDK) handles JAVA Lnpp(Linux + Nginx+ PostgreSQL+ PHP) Lapp(Linux + Apache+ PostgreSQL+ PHP) Lnmh(Linux + Nginx+ MySQL+ HHVM) All the above-mentioned web servers combination can be installed using pre-given OneinStack script. OneinStack updates are timely which makes it very reliable to use. The script of OneinStack provides a wide range of features such as: All the command and auto installation will be done in Terminal only using the command line. Good for server usage. Most of the time up to date. Some security optimization Wide range of database versions (MySQL-8.0, 5.7, 5.6, 5.5; MariaDB-10.4, 10.3, 10.2, 5.5, Percona-8.0, 5.7, 5.6, 5.5, AliSQL-5.6, PostgreSQL, MongoDB) Multiple PHP versions (PHP-7.3, 7.2, 7.1, 7.0, 5.6, 5.5, 5.4, 5.3) Provide Nginx, Tengine, OpenResty and ngx_lua_waf Tomcat version (Tomcat-9, Tomcat-8, Tomcat-7, Tomcat-6) JDK version (JDK-11.0, JDK-1.8, JDK-1.7, JDK-1.6) Apache version (Apache-2.4, Apache-2.2) OneinStack provides option to install PHP Cache Accelerator provides ZendOPcache, xcache, apcu, eAccelerator. And php extensions, include ZendGuardLoader, ionCube and more... can be installed with one click. Installation of Pureftpd, phpMyAdmin, memcached, redis Provide upgrade script for above-mentioned tools Virtual host script Support local, remote(rsync between servers), Aliyun OSS, Qcloud COS, UPYUN, QINIU, Amazon S3, Google Drive and Dropbox backup script And more... It also comes with the Let's Encrypt certificate that means those want to use the SSL certificate for their project; just only need to enter the domain name with you want to use SSL. After that, it automatically configures the SSL certificate for the domain name. Moreover, OneinStack will also set the auto-renewal of Let's Encrypt certificate. The OneinStack project is available on GitHub and free to download, install and use.
Read the full article
0 notes
Text
Original Post from Microsoft Secure Author: Todd VanderArk
As more and more enterprises move to the cloud, they also bring their own set of security challenges. Today, almost half of Azure virtual machines (VMs) are running on Linux, and as the Linux server population grows, so are the attacks targeting them. As detection capabilities advance, attackers are using new and stealthier techniques to stay undetected and persist with their motives. Azure Security Center, Microsoft’s cloud-based cyber solution, helps customers safeguard their cloud workloads as well as protect them from these threats.
In this blog post, we detail a real-world Linux attack whose purpose initially looked like crypto mining, but it turned out that the attacker’s intent was to use the compromised host as a launchpad for further large-scale attacks.
Incident details
After the initial successful SSH brute force compromise, the attacker proceeds to download a first stage ‘tddwrt7s.sh’ script using utilities like ‘wget’ that delivers further payload to the host. Azure Security Center surfaces this behavior via a “Detected suspicious file download” alert.
Post stage 1 download, the attacker executed the script to find ‘dota.tar.gz’ by enumerating multiple hosting URLs. Once a live hosting IP was found, the second stage file gets delivered in directory ‘/tmp/.mountfs.’ Most of these exploitation and persistence techniques are observed from the /tmp folder. In this case all activities were tracked under /tmp/.mountfs and /tmp/.mountfs/.rsync directories. Creating directories with a dot keeps the activity hidden from the user interface, a common technique used by attackers.
Later, we see traffic to different mining pools including ‘mine.moneropool.com’ but nothing further that would confirm the purpose as mining cryptocurrency. The “Detected suspicious network activity” analytic triggered on this activity along with “Digital currency mining” analytic. This was followed by reconnaissance grep activity used by the attacker to get more information on the target machine to see if it had already been compromised and in use by other actors.
The attackers then used a bash script to search and kill processes on some of the above-mentioned miners that they grepped using command:
“ps auxf|grep -v grep|grep “xmrig” | awk ‘{print $2}’|xargs kill -9”
Let’s talk more about what this command does. The first command helps to show a tree view of parent-child processes in the output of ps (process status).The first grep removes the grep process from this list and the second grep will extract any xmrig (a well-known miner) process in the filtered list. Awk pattern matches the specified pattern and xargs executes the SIGKILL signal.
What follows next is a series of pkill commands to kill processes using couple of techniques that:
Match the entire process and argument list pattern.
Forcefully terminate a process.
To get the maximum CPU usage and efficiency, attackers generally start deleting the existing coin miner instances and focus on deploying new instances of mining payload.
Generally, after this activity, the traces of cryptocurrency wallet or other activities related to mining becomes evident but what followed next was a little surprise.
It turns out that this machine appeared to have been used to target 20,000 different endpoints based on our timeline of attack analysis detailed below:
Azure Security Center caught most of the suspicious activities observed above that triggered security alerts. To further our investigation, we collaborated with our internal memory forensics team. The analysis of the ELF payload unfolded even more details in this attack campaign:
The payload had three important components:
tsm64: An ELF executable.
Libraries that tsm64 relied on for execution.
tsm: Code used to launch the tsm64 executable.
To ensure that the attacker payload was able to run on most distributions, the attackers supplied the libraries tsm64, which was dependent on for successful execution.
tsm: tsm is ld.so renamed. ld.so is a helper program that loads the shared libraries needed by the program executable, prepares the program to run, and then runs it.
Dependent libraries: The dependency analysis of the tsm64 executable showed that it needed four libraries at the runtime. Namely, libpthread.so.0, libdl.so.2, libc.so.6, and ld-linux-x86-64.so.2.
tsm64: This is the executable that the attacker eventually wants to run. Turns out, tsm64 is a multi-threaded SSH brute force tool that can attack a set of IP’s with provided passwords.
The analysis of the Procedure Linkage Table (PLTs) for tsm64 showed the multi-threaded, network communication, and password file reading capabilities. A subset of the system apis are listed below:
Networking: setsockopt, getsockopt, getsockname, connect, gethostname, socket, inet_ntoa, recvfrom, recv, bind, getaddrinfo, inet_pton, getpeername
Multi-threaded (pthread): pthread_getspecific, pthread_setspecific, pthread_cond_signal, pthread_mutex_init, pthread_create, pthread_cond_init, pthread_key_delete, pthread_self, pthread_join, pthread_equal, pthread_cond_wait, pthread_detach, pthread_once, pthread_mutex_lock, pthread_key_create, pthread_mutex_destroy, pthread_cond_broadcast, pthread_mutex_unlock, pthread_kill
Password file entry: getpwnam, getpwnam_r, getpwuid_r
The IP address list and user credentials to be used for the brute force attack were downloaded into innocuous sounding file names ‘a’ and ‘b.’ File ‘a’ contained a list of 20,000 different IP addresses while file ‘b’ had a listing of credentials. These files were later renamed to ‘ip’ and ‘p’ respectively and passed into tsm64.
Using the inbuilt timeout utility, the tool was programmed to run for a maximum time of 90 minutes.
Adversaries are always finding new and novel ways to evade detection. As cyber defenders, we need to constantly innovate and track these latest threats in order to thwart new and deceptive attacks that are making rounds in the cloud cyber world.
Recommended actions
Azure Security Center can automatically correlate such multiple triggered alerts into a single security incident. This capability provides a single overview of any attack campaign and all the related alerts to understand the action attackers took and what resources were impacted.
While Azure Security Center alerted on the activity, the intrusion could have been prevented through good password hygiene. It’s recommended to utilize passwords and passphrases that are not easily guessed. Some of our previous blogs cover this topic: Just In Time (JIT) , Password-less sign-in, and Azure Key Vault.
Azure Security Center alerts can also be integrated in existing SIEM solution for a centralized view of security posture across your organization or with Microsoft’s new SIEM Azure Sentinel.
Learn more
To learn more about the Azure Security Center, see the following:
Azure Security Center FAQs—Find frequently asked questions about using the service.
Setting security policies in Azure Security Center—Learn how to configure security policies for your Azure subscriptions and resource groups.
Managing and responding to security alerts in Azure Security Center—Learn how to manage and respond to security alerts.
Operations Management Suite (OMS) Agent for Linux—Enables rich and real-time analytics for operational data (Syslog, Performance, Alerts, and Inventory) from Linux servers, Docker Containers, and monitoring tools like Nagios, Zabbix, and System Center.
The post Uncovering Linux based cyberattack using Azure Security Center appeared first on Microsoft Security.
#gallery-0-5 { margin: auto; } #gallery-0-5 .gallery-item { float: left; margin-top: 10px; text-align: center; width: 33%; } #gallery-0-5 img { border: 2px solid #cfcfcf; } #gallery-0-5 .gallery-caption { margin-left: 0; } /* see gallery_shortcode() in wp-includes/media.php */
Go to Source Author: Todd VanderArk Uncovering Linux based cyberattack using Azure Security Center Original Post from Microsoft Secure Author: Todd VanderArk As more and more enterprises move to the cloud, they also bring their own set of security challenges.
0 notes
Text
New Post has been published on Add Crazy
New Post has been published on https://addcrazy.com/golden-dawn-reviews-new-drilling-outcomes-mac-mine/
Golden Dawn Reviews New Drilling Outcomes Mac Mine
VANCOUVER, BC–(Marketwired – February 23, 2017) – Golden Sunrise Minerals Inc., (TSX Assignment: GOM) (FRANKFURT: 3G8A) (OTC Purple: GDMRF) (the “Company” or “Golden Sunrise”) broadcasts Effects from underground drilling underway at its a hundred% owned May additionally Mac mine in early 2017.
A complete of 1,320 meters has been completed in 10 underground diamond drill holes to this point this year. This is A complete of 2125 meters which include the nine underground drill holes drilled in late 2016. All the holes have been drilled in the May Mac mine to further take a look at the mineralized zones recognized at the Skomac vein and to test for parallel veins. All 19 holes intersected the target Skomac system vein, with the Consequences indicating the primary Skomac vein consists of silver-gold-lead-zinc mineralization that maintains from the #6 stage down to and below the No. 7 degree, and that parallel veins additionally comprise mineralization locally. The brand new Results consist of the very best gold and silver assays obtained thus far from the Stomach vein gadget.
Analytical Results have been obtained for precedence samples from the first 9 holes. Hole MU17-10 has no longer been completed yet however to this point intersected intermittent mineralized quartz veins from 185 meters to 260 meters. Samples from this Hole are currently being analyzed in the lab and Outcomes are anticipated quickly. Good sized Outcomes for precedence samples for the preliminary 9 holes from 2017 are presented in Table 1 beneath.
All of the holes (MU17-01 to 10) were drilled on a fan sample out to the northeast from drill station # three, the private of 3 drill stations excavated in 2016. Desk 2 offers the orientations and lengths of the holes.
These intercept Results suggest continuity of mineralization in the Stomach Vein gadget, parallel to and above and under the #7 adit. inclusive of Outcomes from 2016 surface drilling, the mineralization also extends as a minimum a hundred meters to the north-east on strike, beyond the termination of the #7 adit.
The Business enterprise will maintain underground diamond drilling on the May also Mac Mine to complete extra holes from drill station #3 before transferring to drill from stations #2 and #1. The Enterprise is also preparing additional information requested by means of the authorities to help its allow software to extend the May additionally Mac 7 level float to the northwest to facilitate additional diamond drilling and bulk sampling of up to ten,000 tons. A collection of samples became accrued for metallurgical testing to determine the requirements for processing within the Business enterprise’s Greenwood Mill, placed 15 km southeast of the May Mac Mine.
The Enterprise is also pursuing a surface exploration permit for diamond drilling (up to ten,000 meters) at the Golden Crown property, and is making plans floor investigations of the 70 showings including 29 historical mines of the recently bought Kettle River Sources Ltd. With its Greenwood residences.
Samples stated above have been collected under the supervision of Dr. Mathew Ball, P.Geo. And added to Activation Laboratories (Act-Labs) in Kamloops, B.C. Act-Labs is an unbiased business laboratory that is ISO 9001 licensed and ISO 17025 approved. Analyses for gold had been through the heart assay technique using 30-gram samples with an ICP-OES finish. Replica gold analyses were achieved on samples containing abundantly seen sulfide mineralization. Silver and other elements have been analyzed through ICP-OES using a near total, four acid digestion. Results above one hundred g/t silver were re-analyzed in Reproduction for ore grade concentrations by using the heart Assay approach the usage of a 30-gram pattern. Samples containing Great seen lead and zinc mineralization had been additionally analyzed by assay grade, Peroxide Fusion assay for Pb, Zn, and Cu. Great control changed into monitored the usage of reference and blank samples inserted into the sample series at durations.
Technical disclosure on this information release has been authorized through Dr. Mathew Ball, P.Geo., a Certified Individual as defined by way of Countrywide Instrument 43-101, and Chief Operating Officer of the Business enterprise.
Backup Your Mac to Hidden Location With Rsync
This last weekend I nearly lost all the pics. We’ve got four kids, and feature lots of pics. I had installation the user accounts on our Mac on an outside reflected power, linked by Firewire. This becomes generally correct, but this weekend all of the applications simply refused to attach due to a few kind of bizarre permissions difficulty. I went through all forms of stuff to get it running, however, at the crease of the day I just created a new account and copied all the documents over to internal power on the Mac, then modified possession of all of the documents, and thought I used to be appropriate to go.
That was until my spouse went to make a Christmas e-book for her grandmother. A number of the images had been missing, and all were blurry. The entire sized pix were gone. I ended up having to restore the entirety from Time System, which is right for the one’s styles of things, so the whole thing became out adequate. but I have continually been worried about what would appear if the Mac and the related drives have been stolen. I could use an online backup service… but I don’t like to do this. There needed to be a higher way.
I discovered that you may use the UNIX utility sync to create a little script that might lower back up every document to a far-flung sync server. I did now not have one of those, but I did have a USB drive linked to my domestic wireless router, so I figured I could set is up to copy the documents to that. No cross. Rsync does not paintings thoroughly connecting to a samba server on the other cease. I had to set up a real sync server.
There has been an old Pc within the basement that I had installation a copy of Ubuntu Linux on ultimate 12 months. Putting in Ubuntu is ridiculously smooth, particularly on a Laptop that is a few years vintage. just visit ubuntu.Com, download the modern replica, put it on a USB stick, and boot to it. It sets up the whole thing routinely.
As I researched this, I found out I may want to very without problems set up a Rsync server on the Linux container and duplicate over documents from the Mac, but it turned into too smooth. It becomes too easy because sync isn’t comfy. all of the files had been sent over my wireless unencrypted. I don’t like doing things unencrypted, no longer covered by way of passwords. When safety is so easy to feature into a machine, it’s far well worth taking some extra minutes to do matters properly.
What I discovered was that you could set up sync to operate over at ease shell (ssh), that’s encrypted. Moreover, there’s a function built into ssh that allows trusted computers to log in while not having to apply a username or password by the usage of public/private key encryption. So That is what I set up. there is a simple line script I put on the Mac that I set to run as soon as a week, and it copies over simply the modified files from the Mac to the Linux field hidden inside the basement. I’ve moved over to an 802.11n gadget, so the wireless runs quality and speedy, precise for shifting all the one’s gymnastics pictures and videos.
This isn’t always limited to backing up Mac’s. You could do the equal factor with Windows containers by using putting in Cygwin on the Home windows Machine and going thru a similar system. just create any other listing at the backup power, create a 2nd profile within the sync.Conf report that uses a different profile name and points to The new drive Region, and you are off and strolling.
If you do need to use your backup, You could use the other command to copy the files returned to the Mac. Optimistically you might not have to do that, even though! Something like this must paintings:
https://addcrazy.com/
0 notes