#securing wordpress with htaccess
Explore tagged Tumblr posts
Visit Tumblr Blog
Explore Tumblr blogs with no restrictions, modern design and the best experience.
Last Seen Tumblr Blogs


Fun Fact
Average visit duration of Tumblr.com is 10 mins and 25 secs.
Text
Want to enhance your WordPress site’s security?
Changing the default admin URL is a simple but effective step! Check out our step-by-step guide to learn how to do it the right way.
0 notes
Text
Troubleshooting Common WordPress Errors – Easy Fixes
WordPress is a popular platform, but users often face common errors. Knowing how to fix them can save time and frustration.
One common issue is the White Screen of Death (WSOD), where your site turns blank. This may be due to a plugin or theme conflict. Deactivating plugins or switching to a default theme can help. Another issue is the Internal Server Error, often caused by a corrupt .htaccess file. Renaming the file and refreshing your site can fix it.
Users may also face the Error Establishing a Database Connection if database credentials are incorrect. Updating them in the wp-config.php file usually solves the problem.
Other errors include 404 Page Not Found, memory limit issues, and stuck updates. Fixing permalinks, increasing PHP memory, or manually updating WordPress can resolve these. Keeping WordPress, themes, and plugins updated helps prevent many errors. Regular backups and security scans also protect your site. Read this blog for a detailed insight into the topic.
0 notes
Text
HTTPS và SEO: Tại sao HTTPS là yếu tố quan trọng giúp website của bạn lên top Google? 🔒🚀
Trong thế giới số hiện đại, HTPPS và SEO không thể tách rời. Nếu bạn đang sở hữu một website, bạn cần hiểu rằng HTTPS không chỉ là một lớp bảo mật, mà còn là một yếu tố SEO quan trọng.
Google đã chính thức xác nhận HTTPS là một tín hiệu xếp hạng trong thuật toán tìm kiếm. Vậy HTTPS là gì? Nó ảnh hưởng như thế nào đến SEO và làm sao để chuyển đổi từ HTTP sang HTTPS mà không mất thứ hạng? Hãy cùng Lê Khang Digital tìm hiểu ngay!
🌐 HTTP vs. HTTPS: Điểm khác biệt là gì?
1️⃣ HTTP là gì?
HTTP (HyperText Transfer Protocol) là giao thức giúp truyền tải dữ liệu giữa máy chủ và trình duyệt của người dùng. Nó được sử dụng phổ biến từ những ngày đầu của Internet. Tuy nhiên, HTTP không có cơ chế mã hóa dữ liệu, khiến thông tin người dùng có nguy cơ bị đánh cắp.
2️⃣ HTTPS là gì?
HTTPS (HyperText Transfer Protocol Secure) là phiên bản bảo mật của HTTP, sử dụng SSL/TLS để mã hóa dữ liệu trước khi gửi đi. Khi website sử dụng HTTPS, trình duyệt sẽ hiển thị biểu tượng 🔒 Secure, giúp người dùng an tâm hơn khi truy cập.
🎯 Lợi ích chính của HTTPS:
✅ Mã hóa dữ liệu: Bảo vệ thông tin người dùng khỏi hacker. ✅ Tăng độ tin cậy: Trình duyệt sẽ không cảnh báo "Không an toàn". ✅ Tối ưu SEO: Google ưu tiên các trang web có HTTPS.
📈 HTTPS ảnh hưởng đến SEO như thế nào?
1️⃣ Google chính thức ưu tiên HTTPS trong xếp hạng tìm kiếm
Google đã xác nhận rằng HTTPS là một yếu tố xếp hạng, và các trang web sử dụng HTTPS có khả năng xếp hạng cao hơn so với HTTP.
🔥 Thực tế: Một nghiên cứu của Moz cho thấy hơn 50% trang web trên trang đầu tiên của Google đều sử dụng HTTPS.
2️⃣ Tăng độ tin cậy & trải nghiệm người dùng
🔹 Khi truy cập vào một trang web HTTP, trình duyệt Chrome sẽ hiển thị cảnh báo "Không an toàn". Điều này khiến người dùng mất niềm tin và rời bỏ trang ngay lập tức.
🔹 Một trang web có HTTPS giúp người dùng cảm thấy an toàn hơn, từ đó tăng thời gian ở lại trang và giảm tỷ lệ thoát trang (Bounce Rate).
3️⃣ Bảo vệ dữ liệu người dùng khỏi hacker
HTTPS giúp mã hóa dữ liệu, ngăn chặn các cuộc tấn công Man-in-the-Middle (MITM), giúp bảo vệ thông tin như: 🔹 Mật khẩu & thông tin đăng nhập. 🔹 Số thẻ tín dụng & thông tin cá nhân.
4️⃣ Cải thiện hiệu suất quảng cáo Google Ads
Nếu bạn chạy quảng cáo Google Ads, HTTPS là bắt buộc. ✅ Google ưu tiên các trang đích có HTTPS. ✅ Giảm chi phí quảng cáo (CPC) do điểm chất lượng (Quality Score) cao hơn. ✅ Tăng tỷ lệ chuyển đổi (Conversion Rate).
5️⃣ Tăng tốc độ tải trang với HTTP/2
HTTP/2, phiên bản mới của giao thức HTTP, yêu cầu HTTPS để hoạt động. HTTP/2 giúp tăng tốc độ tải trang bằng cách: 🚀 Cho phép tải nhiều file cùng lúc. 🚀 Giảm độ trễ mạng. 🚀 Cải thiện hiệu suất website.
6️⃣ Hỗ trợ AMP & tối ưu hiển thị trên di động
Nếu bạn muốn triển khai AMP (Accelerated Mobile Pages) để cải thiện tốc độ trên di động, bạn bắt buộc phải sử dụng HTTPS.
🔄 Hướng dẫn chuyển từ HTTP sang HTTPS đúng cách
Bạn đã sẵn sàng chuyển sang HTTPS nhưng lo ngại ảnh hưởng đến thứ hạng SEO? Đừng lo, làm theo hướng dẫn này để đảm bảo mọi thứ diễn ra suôn sẻ!
📌 Bước 1: Mua chứng chỉ SSL/TLS
Bạn có thể chọn các loại chứng chỉ SSL: 🔹 Let’s Encrypt (Miễn phí): Phù hợp cho blog, website cá nhân. 🔹 Comodo, GlobalSign, DigiCert (Trả phí): Bảo mật mạnh hơn, phù hợp cho website thương mại điện tử.
📌 Bước 2: Cài đặt chứng chỉ SSL trên máy chủ
Việc cài đặt SSL sẽ khác nhau tùy vào loại hosting: 🔹 Apache: Cấu hình file .htaccess. 🔹 Nginx: Chỉnh sửa file cấu hình .conf. 🔹 WordPress: Dùng plugin Really Simple SSL để tự động chuyển đổi.
📌 Bước 3: Cập nhật toàn bộ liên kết nội bộ
🔹 Kiểm tra tất cả các URL trong trang web và thay đổi từ HTTP → HTTPS. 🔹 Dùng công cụ Screaming Frog hoặc Ahrefs để tìm và sửa các liên kết cũ.
📌 Bước 4: Thiết lập chuyển hướng 301
Chuyển hướng 301 giúp: ✅ Giữ nguyên giá trị SEO của các trang HTTP cũ. ✅ Thông báo với Google rằng website đã chuyển sang HTTPS.
Ví dụ chuyển hướng 301 trên Apache:
apache
Sao chépChỉnh sửa
RewriteEngine On RewriteCond %{HTTPS} !=on RewriteRule ^(.*)$ https://yourwebsite.com/$1 [R=301,L]
📌 Bước 5: Cập nhật Google Search Console & Google Analytics
🔹 Thêm phiên bản HTTPS vào Google Search Console. 🔹 Cập nhật URL mới trong Google Analytics.
📌 Bước 6: Kiểm tra lỗi Mixed Content
Mixed Content xảy ra khi trang web HTTPS vẫn tải nội dung từ HTTP. Sử dụng công cụ Why No Padlock? để kiểm tra và sửa lỗi.
🔥 Kết luận
🔹 HTTPS không chỉ giúp bảo mật website, mà còn là một yếu tố SEO quan trọng. 🔹 Google ưu tiên HTTPS trong kết quả tìm kiếm, giúp bạn có thứ hạng cao hơn. 🔹 Tăng độ tin cậy & trải nghiệm người dùng, giảm tỷ lệ thoát trang. 🔹 Bắt buộc đối với quảng cáo Google Ads & AMP.
Nếu bạn chưa chuyển sang HTTPS, hãy thực hiện ngay hôm nay để tối ưu SEO & bảo vệ website khỏi các mối đe dọa bảo mật! 🚀
📌 Bạn đã chuyển sang HTTPS chưa? Nếu có thắc mắc, hãy để lại bình luận nhé!
Công ty TNHH Lê Khang Digital Địa chỉ: 69/19/10 Đường 138, Tân Phú, TP Thủ Đức, TP Hồ Chí Minh. Điện thoại: 0906273102 Email: [email protected] Mã số thuế: 0317438032
0 notes
Text
How to Fix a Google Ads Disapproved Compromised Site

If Google Ads has disapproved of your site due to a "Compromised Site" status, it means Google has detected security issues such as malware, phishing, or unauthorized access. This can severely impact your advertising efforts and website reputation. In this guide, we’ll go step-by-step on how to resolve this issue and get your google ads compromised site account reinstated.
Step 1: Understand Why Google Disapproved Your Site
Google disapproves ads if your website is compromised due to one of the following reasons:
Malware Infection: Malicious software embedded in your site.
Phishing: A website designed to steal user information.
Hacked Content: Unauthorized changes made by hackers.
Unwanted Software: Downloads that mislead users.
To check for these issues, Google Search Console and Google Transparency Report are useful tools.
Step 2: Scan Your Website for Malware
Before fixing the problem, scan your website google ads compromised site checker for security vulnerabilities. Use the following tools:
Google Search Console: Visit the "Security Issues" section.
Google Safe Browsing: Check your site’s status at Google’s Transparency Report.
Third-Party Scanners: Use tools like Sucuri SiteCheck, VirusTotal, or Quttera.
If malware is detected, note the affected files or URLs and move to the next step.
Step 3: Remove the Malware or Security Threats
Depending on how your site was compromised, take the following actions:
For WordPress Users
Update Everything: Update WordPress core, themes, and plugins.
Remove Suspicious Plugins: Delete unknown or outdated plugins.
Reset Passwords: Change all admin passwords.
Scan with Security Plugins: Use Wordfence, Sucuri, or MalCare to scan and clean your site.
For Other CMS Platforms or Custom Websites
Restore a clean backup if available.
Identify and delete suspicious code or files (check .htaccess, index.php, and JavaScript files).
Replace compromised files with fresh copies from official sources.
Secure database access by updating credentials.
Step 4: Secure Your Website Against Future Attacks
Use HTTPS: Ensure your website has an SSL certificate.
Enable Web Application Firewall (WAF): Services like Cloudflare or Sucuri offer WAF protection.
Limit Login Attempts: Protect against brute-force attacks.
Regular Backups: Use backup tools like UpdraftPlus or JetBackup.
Monitor Website Activity: Set up alerts for suspicious activities.
Step 5: Request a Review from Google
Once your website is clean and secure, you need to request a review from Google:
Go to Google Search Console
Navigate to the "Security Issues" section.
Click "Request a Review" and describe the steps taken to fix the issue.
Submit an Appeal in Google Ads
Visit the Google Ads Policy Manager.
Select "Disapproved Ads" → "Compromised Site".
Explain your security fixes and attach supporting documents.
Step 6: Monitor and Prevent Future Disapprovals
After Google reviews your request (which may take a few days), your ads should be reinstated. To prevent future disapprovals:
Perform regular security audits.
Keep your CMS, plugins, and scripts updated.
Set up Google Alerts for security breaches.
Educate team members about cybersecurity best practices.
Conclusion
Fixing a Google Ads disapproved compromised site requires immediate action to remove malware, secure your site, and request a review from Google. By implementing strong security measures, you can prevent future attacks and ensure your website remains compliant with Google Ads policies.
0 notes
Text
10 Ways to Speed Up Your WordPress Website

Introduction
Having a fast-loading WordPress website is essential for keeping visitors happy and improving your search engine rankings. A slow website can drive people away and hurt your SEO. Thankfully, there are simple steps you can take to speed things up. If you’re looking for WordPress development services, these tips will help you optimize your site for speed and performance.
Here are 10 easy ways to speed up your WordPress website and enhance its overall performance:
1. Choose a Lightweight Theme
Your theme plays a huge role in how fast your website loads. Some themes come packed with extra features you might not even use, which can slow things down. Pick a lightweight theme, or better yet, hire a Custom WordPress development company to design one that’s fast and efficient.
2. Optimize Your Images
Large images are one of the biggest culprits when it comes to slow websites. Use image optimization tools like TinyPNG or WP Smush to compress images before uploading them. A WordPress plugin development solution can also help automate image compression to save time.
3. Install a Caching Plugin
Caching stores static versions of your website’s pages, reducing server load and speeding up page load times. Plugins like W3 Total Cache or WP Super Cache are great tools for this. If you're unsure which plugin works best for your site, a WordPress website developer can help set it up properly.
4. Minimize HTTP Requests
Every time someone visits your site, their browser makes multiple requests to load images, scripts, and other elements. Reduce the number of elements on each page by combining files and removing unnecessary resources.
5. Use a Content Delivery Network (CDN)
A CDN helps speed up your website by storing copies of your static files (images, stylesheets, etc.) on servers worldwide. This means visitors can access your site from a server that’s closer to them, speeding up load times. A WordPress development services provider can assist you in setting this up easily.
6. Upgrade Your Hosting
If you're on shared hosting, your site might be sharing resources with other sites, which can slow it down. Upgrading to VPS or dedicated hosting can improve speed and performance. It's worth investing in a hosting plan that’s optimized for WordPress.
7. Limit Plugins
While plugins add useful features, too many of them can slow down your site. Be selective with the plugins you use, and remove any that aren’t essential. If you need custom functionality, consider working with a custom WordPress development company to build lightweight solutions tailored to your site.
8. Optimize Your Database
Over time, your WordPress database can get cluttered with post revisions, spam comments, and other junk. Use a plugin like WP-Optimize to clean up and optimize your database, reducing its size and improving site speed.
9. Enable GZIP Compression
GZIP compression reduces the size of files sent from your server to visitors’ browsers, which helps pages load faster. Most hosting providers support GZIP, and if they don’t, it’s easy to enable via your website’s .htaccess file.
10. Keep Everything Updated
Outdated themes, plugins, and WordPress versions can lead to slow performance and security issues. Make sure everything is up to date to keep your site running smoothly.
Conclusion
Speeding up your WordPress website is a must for both user experience and SEO. By following these 10 simple tips, you can improve your site’s performance without a hassle. If you need help with any of these optimizations, consider reaching out to a WordPress development services provider who can guide you in the right direction.
#WordPress development company#Custom WordPress development services#WordPress website developers#Website speed optimization#WordPress performance tips#WordPress plugin development#Speed up WordPress website
0 notes
Text
How to Easily Upload Large Files to Your WordPress Site
If you’ve ever tried to upload a large file to WordPress, you know how frustrating it can be when you hit size limits. Understanding how to handle these restrictions can make the process much simpler. A key step is to learn how to Increase WordPress Max Upload Size, which is essential for a smoother uploading experience.
The Importance of Upload Limits
WordPress imposes upload limits to optimize server performance and maintain security. These limits can vary based on your hosting provider, typically ranging from 2MB to over 128MB. Knowing your current upload capacity will help you manage your uploads more effectively.
How to Check Your Current Upload Limit
To find out your upload limit, log into your WordPress dashboard and go to the Media section. The maximum upload file size will be displayed there, allowing you to determine if you need to make any adjustments.
Method 1: Adjusting the php.ini File
One way to increase your upload limit is by modifying the php.ini file, assuming you have access. This file contains settings that can be changed to allow for larger file uploads, providing a straightforward solution.
Method 2: Editing the .htaccess File
If you can’t access the php.ini file, editing the .htaccess file is another option. This file can also be modified to increase your upload limits without requiring extensive technical expertise.
Method 3: Using a Plugin for Convenience
For a user-friendly option, consider installing a plugin designed to help increase your upload size. These plugins make it easy to adjust your settings without needing to navigate through complex code.
Method 4: Reach Out to Your Hosting Provider
If you’re still having trouble, reaching out to your hosting provider is a great option. They can assist you in increasing your upload limits directly, ensuring that you can upload large files without any hassle.
Conclusion
Uploading large files to WordPress doesn’t have to be a complicated process. By following the methods outlined above, you can effectively manage your upload limits and enhance your overall experience. For more details on adjusting these settings, be sure to check out how to Increase WordPress Max Upload Size. With the right strategies, you’ll improve your content management and get the most out of your WordPress site.
0 notes
Text

https://www.fiverr.com/emonbd/fix-deceptive-site-ahead-and-wordpress-malware-removal
When Google shows a Deceptive Site Ahead warning to your website visitors, it means they think your website might be harmful due to malware, phishing, malicious codes, and other security risks. This alarming message can scare away your visitors and make your site look untrustworthy.
If your site has been hacked, or infected with malware, phishing, or malicious codes I'm here to help you recover it.
Malware Cleaning:
Full Vulnerability Scan
Recover Hacked Website
Remove Redirect Malicious Code
Japanese Keyword Hack
Japanese SEO spam
Pharma Hack Removal
Clean Malware, Backdoor From Website or Hosting Server
Remove Blacklist & Red Warning from your site
Warning Removal:
Deceptive site ahead
Deceptive content
Suspicious site
Phishing pages
The site ahead contains malware
The site ahead contains harmful programs
Visiting this website may harm your compute
Blacklist Removal:
Google, McAfee, Yandex, Bing
Security Firewall:
Install and Configuration Security Plugin
Hide WP-Admin Login URL
Disable PHP/Shell Execution Uploads
Protect wp-config
Protect .htaccess
Disable Directory Browsing
Restrict All Access To wp-Includes
Restrict Direct Access To Plugins/Themes
0 notes
Text
Curious about the role of the .htaccess file in WordPress?
This powerful file controls everything from redirects to site security. Learn how to edit, optimize, and troubleshoot it in our comprehensive guide. Click below to dive in and take control of your WordPress site!
0 notes
Text
How to Protect Your WordPress Website with .htaccess: Essential Security Rules

My website was under siege. A relentless digital assault. Someone was trying to break in. It was a wake-up call. I dove into research, determined to fortify my WordPress site. I discovered the power of .htaccess, a seemingly simple file with the potential to shield against cyber threats.The truth is, WordPress sites are prime targets. Statistics show that countless websites fall victim to attacks every day. Your site could be next.This is why I'm sharing what I learned. This guide is a lifeline for any WordPress user, whether you're a seasoned pro or just starting out. We'll uncover the essential .htaccess security rules that every WordPress website needs.What You'll Learn:- The simple tweaks that can make your site a fortress. - How to block bad bots, prevent hotlinking, and more. - Why these security measures are non-negotiable. - Anyone with a WordPress website. - Those who value their data and their visitors' safety. - Anyone ready to take control of their website's security. - What it does: This rule acts as a bouncer at your website's door. It identifies known bad bots and crawlers by their "user agent" (a string of text that identifies the browser or application). If a suspicious agent tries to enter, it gets shown the door. - Why it's crucial: Bad bots can overload your server, steal content, and spread malware. Blocking them keeps your site running smoothly and your data safe. - What it does: Hotlinking is when another site directly uses your images or media on their pages, stealing your bandwidth. This rule prevents that by checking where the request is coming from. If it's not your domain, access is denied. - Why it's crucial: Hotlinking wastes your resources. Blocking it saves you money and ensures your website performs optimally. - What it does: This simple rule stops visitors from seeing the structure of your website's directories. Think of it as closing the blinds on your house – you don't want strangers peering in. - Why it's crucial: Directory browsing gives attackers a roadmap to your sensitive files. Disabling it adds an extra layer of protection. - What it does: This rule puts a lock on your most important files – the ones that control your site's configuration and access. It ensures that only you (or those you authorize) can view or modify them. - Why it's crucial: These files, if compromised, can give attackers control of your website. Protecting them is non-negotiable. - What it does: Websites communicate using different methods (GET, POST, etc.). This rule only allows the safe ones (GET, POST, HEAD), blocking others that could be used for malicious purposes. - Why it's crucial: Limiting request methods reduces the attack surface of your website, making it harder for hackers to find vulnerabilities. - What it does: SQL injection is a common attack where hackers try to manipulate your database. This rule acts as a filter, blocking requests that contain suspicious SQL code. - Why it's crucial: SQL injection can have devastating consequences, from data leaks to complete site takeover. This rule offers a basic level of protection. Implementing the Rules: Your .htaccess Cheat Sheet Here's the complete set of rules you can add to your .htaccess file: .htaccess Security Rules for WordPress # BEGIN WordPress Security Rules # Block Suspicious User Agents RewriteEngine On RewriteCond %{HTTP_USER_AGENT} ^$ RewriteCond %{HTTP_USER_AGENT} (BadBot|EvilRobot|SpamCrawler) # Customize this list RewriteRule ^.*$ - # Prevent Hotlinking (replace "yourdomain.com" with your actual domain) RewriteEngine On RewriteCond %{HTTP_REFERER} !^$ RewriteCond %{HTTP_REFERER} !^https://(www.)?yourdomain.com/.*$ RewriteRule .(gif|jpg|jpeg|png|bmp)$ - # Disable Directory Browsing Options -Indexes # Protect Sensitive Files Order allow,deny Deny from all # Limit Request Methods Order deny,allow Deny from all # Block Basic SQL Injection Attempts RewriteEngine On RewriteCond %{QUERY_STRING} () RewriteCond %{QUERY_STRING} (UNION|SELECT) RewriteRule .* - # END WordPress Security Rules How to Add the Rules: Using a Plugin (File Manager):- Install a file manager plugin (e.g., WP File Manager). - Navigate to your website's root directory. - Locate the .htaccess file. - Open it for editing and paste the rules at the beginning of the file. - Connect to your website using an FTP client (e.g., FileZilla). - Navigate to your website's root directory. - Download the .htaccess file.Open it in a text editor, add the rules at the beginning, and save. - Upload the modified file back to the server. Using Terminal Access:The command to find the .htaccess file in the terminal depends on where you think it might be located. Here are some options:1. Search from the root directory:If you're not sure where the .htaccess file is, start by searching from the root directory:Bash find / -name ".htaccess" -printThis command will search the entire filesystem for files named ".htaccess".2. Search from a specific directory:If you have an idea of where the file might be, you can narrow down the search:Bash find /path/to/directory -name ".htaccess" -printReplace /path/to/directory with the actual path to the directory you want to search in.Important Note: The .htaccess file is a hidden file (starts with a dot), so you might not see it by default in your file manager.Example: If you're searching within your website's document root, which is often /var/www/html, the command would be:Bash find /var/www/html -name ".htaccess" -printAlternative: If you want to search for all .htaccess files on the server, you can omit the -print option:Bash find / -name ".htaccess"This will list all .htaccess files without printing their full path. Your Website's Security: It's In Your Hands A secure website isn't a luxury; it's a necessity. Your data, your visitors' trust, and your hard work are all on the line. The .htaccess file is a powerful tool in your arsenal. It's your shield against the unseen threats lurking in the digital shadows.Don't wait for disaster to strike. Implement these essential rules today. It's a small investment of time with a huge payoff. A fortified website is a resilient website, ready to withstand whatever the internet throws its way.Protect what you've built. Secure your WordPress site. Your future self will thank you.PS: Complementary reading: 50 Web Security Stats You Should Know In 2024 Read the full article
0 notes
Text
11 Things You Can Do to Increase the Security of Your WooCommerce Store

Keeping your WooCommerce store secure is important. Hackers discover new exploits every day. In fact, more than thirty thousand websites get hacked on a daily basis. Don’t be a part of that statistic. Increase the security of your WooCommerce store before it’s too late.
At Wooassist, we’ve had our fair share of clients that have had their websites hacked. Cleaning up after a hack is a lot of trouble. You have to get rid of the exploit and weed out any remaining backdoors that would allow the hacker to regain access to the hacked site. Worse, a hacking incident can lead to a website being penalized by search engines for containing malware. In this post, we’ll share some tips that you can do right now to increase the security of your WooCommerce store. Following these tips will reduce the odds of your site getting hacked.
1. Check Your Login Information.
Often, hacks happen because of the user’s fault. Almost 90% of cyber-attacks are caused by human error or behavior.
The first step to increase your website’s security is to make sure that your login information is secure. First, don’t use “admin” as your username. Why? Because brute force attacks usually target this username. And if you use admin as your username and have a weak password, it is almost guaranteed that your site will fall victim to a brute force attack. But what if you are already using admin as your username? You’ll just need to create a new administrator account using a unique username and a strong password. WordPress will already recommend a strong password that you can use. After creating a new account, log in to the new account and you can then proceed to delete the “admin” account.
2. Keep your WordPress/WooCommerce Site Updated

Keeping your WooCommerce store updated will protect your site from the latest known vulnerabilities. Developers regularly patch exploits that are found in their systems so it is imperative that you update on a regular basis.
Before updating however, it is important to test your updates first on a development site or at least create a backup. Often, updates can break your site and this can harm your conversion rates if you don’t have a backup that you can revert to. Websites breaking due to site updates are common. Some hosting providers such as WPEngine provide their customers an easy-to-set-up staging environment. Here you can test your updates before applying them to your live site.
3. Use Two-Factor Authentication.
Using 2-factor authentication greatly increases the security of your website. Even when a brute force attack manages to get into your site, you can block the hack with two-factor authentication. Unless the hackers get a hold of your phone, you’re safe.
4. Install a Security Plugin
A WordPress/WooCommerce site without a security plugin is like a computer without anti-virus software. Wordfence and Sucuri Security are some good options. Just install the plugins and then activate. After activating, just go to the plugin’s settings and configure depending on your needs.

5. Limit Login Attempts.
Limiting login attempts will deter brute force attacks. A brute force attack will attempt to guess your username and password sending hundreds if not thousands of requests every minute. Limiting login attempts pretty much renders brute force attacks powerless unless you have a weak password. There are a couple plugins that can help you limit login attempts such as Login Lockdown.
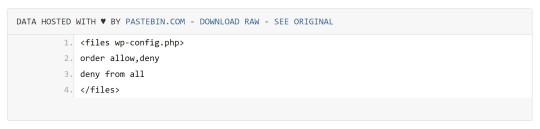
6. Protect your wp-config File
The wp-config file is a crucial part of the WordPress ecosystem. It contains important configuration information of your WordPress site which is why many hackers try to target this file. There is however a workaround to block intruders from getting access to this file. Simply place this code in your .htaccess file.
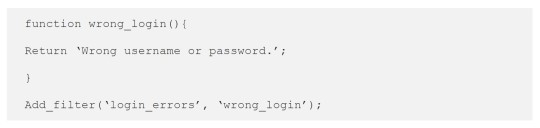
7. Hide Login Error Messages
Whenever you enter the wrong login credentials on WordPress, it returns an error message saying your username is wrong, your password is wrong, or your password does not match the username. You may think little of this, but for hackers, this bit of information is priceless. You can prevent hackers from getting clues on your WordPress logins. You can hide these error messages by adding the script below to your functions.php file. Do note however that making a mistake when tinkering with your functions.php file can cause your entire site to go down. Unless, you’re a web developer or know your way around the file, it is recommended to have a developer do this for you.
8. Hide WordPress Version

For hackers, discovering that your WordPress version is outdated is like finding a gold mine. So it is imperative that you always update to the latest version of WordPress. Many hosting providers will automatically update your WordPress version. However, this is not always ideal since automatic updates can mess up your site. If you’d like to do your WordPress updates at your own pace, then you should hide your WordPress version. To hide your WordPress version, paste the following code on your functions.php file.
9. Do a Plugin Audit
A plugin audit is a process of reviewing the plugins installed on your site. You’ll want to look out for plugins that are no longer being updated by the developer. Outdated plugins usually become backdoors for hackers. When analyzing your plugins, you can categorize them in a number of ways.
Plugins that you want to keep.
Plugins that you don’t use or your customer’s don’t use. If you have a plugin that adds a certain functionality to your site but your customers are not using it, you might as well get rid of it. This just adds extra bloat to your site.
Plugins that are no longer being updated by the plugin author. This is a major security threat and you should get rid of these immediately. If you still need the functionality that the plugin provides, just find an alternative plugin. Just make sure that the new plugin is being constantly updated.
You can do a plugin audit every few months to keep your site spiffy clean.
10. Install Only Reliable Plugins
You’ve done your plugin audit. Great! Now, don’t go down the same road. Don’t just install any plugin that you find. Look at the plugin rating. Check reviews. Check when the plugin was last updated. If the plugin fails any of those three elements, consider finding something else.
11. Prevent Directory Access
If you do not block directory access on your WordPress site, users may be able to freely view the files on your site. These files may contain sensitive information that hackers can use to exploit vulnerabilities on your site. Disabling directory access can be done with a minor tweak. Just place the following code in your .htaccess file:

If you’ve done all these things, your WooCommerce store will be protected from most known threats. Should you need help getting any of these done, you can contact the Wooassist team and we’ll be able to help you out.
Do you know of any other things that you can do to help keep your WooCommerce store more secure? Let us know in the comments.
1 note
·
View note
Text

Optimizing WordPress for Speed and Performance
The speed and performance of your WordPress website can make or break your online success. With users expecting lightning-fast loading times and seamless browsing experiences, optimizing your WordPress site for speed and performance is not just a choice but a necessity. Here's how you can supercharge your WordPress website to achieve optimal speed and performance.
Understanding the Importance of Speed Optimization
In the hyper-competitive online world, speed is paramount. Research indicates that even a one-second delay in page load time can result in a significant drop in conversions and user engagement. Slow-loading websites not only frustrate visitors but also suffer from lower search engine rankings, impacting organic traffic and overall visibility.
Choosing the Right Hosting Provider
Your choice of hosting provider plays a pivotal role in determining the speed and performance of your WordPress website. Opt for a reliable hosting provider that offers optimized servers, SSD storage, and scalable resources. Consider managed WordPress hosting services that come bundled with performance-enhancing features such as server-level caching, content delivery networks (CDNs), and automatic backups.
Optimizing Images for Web
Images are often the main culprit behind sluggish website performance. Ensure that you optimize images for the web by compressing them without compromising on quality. Leverage image optimization plugins or online tools to reduce file sizes and enable lazy loading, which defers the loading of off-screen images until they are needed, thereby speeding up initial page load times.
Implementing Caching Mechanisms
Caching can significantly boost the speed and performance of your WordPress website by storing static versions of your web pages and serving them to users upon request, reducing server load and bandwidth consumption. Install and configure a caching plugin such as WP Super Cache or W3 Total Cache to generate and serve cached content efficiently, ensuring swift page rendering and improved user experience.
Minifying CSS and JavaScript Files
Minification involves removing unnecessary characters, such as comments, whitespace, and line breaks, from CSS and JavaScript files, thereby reducing file sizes and improving load times. Utilize minification plugins or online tools to automatically minify CSS and JavaScript files before deployment, optimizing your WordPress site for faster performance and seamless user interaction.
Enabling Gzip Compression
Gzip compression is a web server feature that compresses website files before transmitting them to users' browsers, significantly reducing file sizes and speeding up page loading times. Enable Gzip compression on your web server either through your hosting provider's control panel or by adding code snippets to your .htaccess file, ensuring efficient data transfer and enhanced performance across all devices.
Regularly Updating WordPress and Plugins
Keeping your WordPress core and plugins up to date is essential for maintaining optimal performance and security. Updates often include bug fixes, performance improvements, and new features that can positively impact your website's speed and functionality. Set up automatic updates for WordPress core, themes, and plugins, or regularly check for updates and apply them manually to ensure your site remains fast, secure, and reliable.
Conclusion
In today's competitive online world, optimizing your WordPress site for speed and performance is essential. By choosing the right hosting provider, optimizing images, using caching mechanisms, and minifying CSS and JavaScript files, you unlock your site's full potential. Remember, in the digital realm, speed is king. Hire WordPress developers to ensure your site delivers lightning-fast experiences, keeping users engaged and coming back for more.
#wordpress development#wordpress#wordpress website development#wordpress expert#hire wordpress development#hire wordpress expert
0 notes
Text
How to Add Security through WordPress
WordPress itself provides several built-in security features, and you can further enhance security by utilizing various plugins and best wordpress hosting india. Here's how you can add security to your WordPress site:
Step 1: Update WordPress Core, Themes, and Plugins: - Keep your WordPress installation, themes, and plugins up to date to patch any known security vulnerabilities. Step 2: Use Secure Hosting: - Choose a reputable hosting provider that offers security features like firewalls, malware scanning, and regular backups. Step 3: Strong Admin Passwords: - Use strong, unique passwords for your WordPress admin accounts and encourage all users to do the same. Step 4: Limit Login Attempts: Install a plugin to limit the number of login attempts from a single IP address to protect against brute force attacks. Step 5: Two-Factor Authentication (2FA): - Implement 2FA for WordPress logins using plugins like Google Authenticator or Duo Two-Factor Authentication. Step 6: Secure wp-config.php: - Protect your wp-config.php file by moving it to a higher-level directory or adding code to your .htaccess file to restrict access. Step 7: Disable Directory Listing: - Prevent directory listing by adding Options -Indexes to your .htaccess file to hide directory contents. Step 8: Disable XML-RPC: - If you're not using XML-RPC functionality, disable it to prevent potential exploitation by attackers.
Step 9: Limit File Permissions: - Set appropriate file permissions for your WordPress files and directories to restrict unauthorized access. Step 10: WordPress Security Headers: - Implement security headers like Content Security Policy (CSP), X-Frame-Options, X-XSS-Protection, and others to enhance browser security. Step 11: WordPress Security Plugins: - Install reputable security plugins like Word fence, Sucuri Security, or themes Security to monitor and protect your site from various threats. Step 12: Regular Backups: - Set up regular backups of your WordPress site, including files and the database, and store them securely offsite. Step 13: WordPress Salts and Keys: - Update your WordPress salts and keys regularly to enhance encryption and protect against brute force attacks. Step 14: Disable File Editing: - Prevent file editing within the WordPress dashboard by adding define ('DISALLOW_FILE_EDIT', true); to your wp-config.php file. Step 15: Security Headers: - Add security headers to your site's HTTP responses to protect against various types of attacks. You can do this manually or by using a security plugin. Step 16: Monitor File Changes: - Install a plugin or set up alerts to monitor and notify you of any unauthorized changes to your WordPress files and cheap wordpress hosting india. Note: By implementing these security measures, you can significantly improve the security of your WordPress site and protect it from various threats. Additionally, staying informed about security best practices and regularly auditing your site's security can help you stay one step ahead of potential attackers.
0 notes
Text
Changing Your WordPress Login URL

Changing your WordPress login URL is a smart move to enhance your website’s security. It helps to protect your site from unauthorized access and brute-force attacks. Here’s a comprehensive guide on how to change your WordPress login URL effectively.
How to Change Your WordPress Login URL: The default WordPress login URL is easy to guess, making it a target for hackers. By changing it, you add an extra layer of security. Let’s explore the methods you can use to change the login URL.
Change WordPress Admin Login URL Without Plugin
If you prefer not to use plugins, you can change the WordPress admin login URL without a plugin. This involves editing your site’s files directly. Here’s how you can do it:
Backup Your Site: Always start by backing up your website to prevent any data loss.
Edit the .htaccess File: You can use cPanel to access and edit your .htaccess file. Add the following code to redirect the wp-admin URL:
RewriteRulenew−login$/wp−login.php[NC,L]𝑅𝑒𝑤𝑟𝑖𝑡𝑒𝑅𝑢𝑙𝑒𝑛𝑒𝑤−𝑙𝑜𝑔𝑖𝑛$/𝑤𝑝−𝑙𝑜𝑔𝑖𝑛.𝑝ℎ𝑝[𝑁𝐶,𝐿]
Replace”new−login”withyourdesiredloginURL.𝑅𝑒𝑝𝑙𝑎𝑐𝑒”𝑛𝑒𝑤−𝑙𝑜𝑔𝑖𝑛”𝑤𝑖𝑡ℎ𝑦𝑜𝑢𝑟𝑑𝑒𝑠𝑖𝑟𝑒𝑑𝑙𝑜𝑔𝑖𝑛𝑈𝑅𝐿.
How to Change WP-Admin URL in cPanel
To change the wp-admin URL in cPanel, follow these steps:
Access cPanel: Log in to your cPanel account.
File Manager: Open the File Manager and navigate to your site’s root directory.
Edit wp-login.php: Rename the wp-login.php file to something unique.
Update Links: Update links pointing to the old wp-login.php to reflect the new URL.
Change WordPress Login URL with Wordfence
Wordfence is a popular security plugin that can also help you change the WordPress login URL with Wordfence. Follow these steps:
Install Wordfence: Install and activate the Wordfence plugin.
Login Security: Go to Wordfence > Login Security.
Custom Login Page: Set your custom login URL.
Using WPS Hide Login
WPS Hide Login is a straightforward plugin for changing your login URL. Here’s how to use it:
Install the Plugin: Go to Plugins > Add New and search for “WPS Hide Login”. Could you install and activate it?
Configure Settings: Go to Settings > WPS Hide Login and enter your new login URL.
Save Changes: Save the changes and your login URL will be updated.
Change WordPress WP-Admin URL Programmatically
You can change the wp-admin URL programmatically by adding code to your theme’s functions.php file. Here’s a sample code snippet:
function custom_login_url() {function custom_login_url() { returnhomeurl(′/new−login−url/′);𝑟𝑒𝑡𝑢𝑟𝑛ℎ𝑜𝑚𝑒𝑢𝑟𝑙(′/𝑛𝑒𝑤−𝑙𝑜𝑔𝑖𝑛−𝑢𝑟𝑙/′); }} addfilter(′loginurl′,′customloginurl′);𝑎𝑑𝑑𝑓𝑖𝑙𝑡𝑒𝑟(′𝑙𝑜𝑔𝑖𝑛𝑢𝑟𝑙′,′𝑐𝑢𝑠𝑡𝑜𝑚𝑙𝑜𝑔𝑖𝑛𝑢𝑟𝑙′);
Replace “/new-login-url/” with your desired login URL.
How to Find WordPress Admin URL from Database
If you’ve forgotten your custom login URL, you can find the WordPress admin URL from the database:
Access phpMyAdmin: Log in to your hosting account and open phpMyAdmin.
Navigate to wp_options: Look for the wp_options table and find the login_url row.
Retrieve URL: The value in this row is your current login URL.
How Do I Change the URL of My WordPress Site After Login?
To change the URL of your WordPress site after login, follow these steps:
Settings: Go to Settings > General.
Update URLs: Update the WordPress Address (URL) and Site Address (URL) fields.
Save Changes: Save the changes and your site URL will be updated.
Should I Change My WordPress Login URL?
Should I change my WordPress login URL? Absolutely. Changing your login URL reduces the risk of brute force attacks and unauthorized access, enhancing your site’s security significantly.
Conclusion
Changing your WordPress login URL is a crucial step towards securing your website. Whether you use plugins like Wordfence and WPS Hide Login or prefer manual methods through cPanel or code snippets, ensuring your site’s safety is paramount. Follow the steps outlined above to successfully change your WordPress login URL and secure your site.
0 notes
Text
[solved] Use .htaccess to redirect HTTP to HTTPs
[solved] Use .htaccess to redirect HTTP to HTTPs
Using .htaccess to redirect HTTP to HTTPS is a crucial step in enhancing the security and confidentiality of a website. By enforcing the use of HTTPS, you can encrypt the data transmitted between the server and the client, which helps prevent eavesdropping, data tampering, and impersonation of the website. If you have a WordPress website and want to redirect HTTP to HTTPS, you can achieve this by…
View On WordPress
0 notes
Text
WordPress .htaccess security
Security Tips For WordPress .htaccess The .htaccess file is the easiest and the cheapest (actually, it’s free!) solution to secure a WordPress blog. The .htaccess file is a configuration file used on web servers running the Apache Web Server software. When a .htaccess file is placed in a directory, which is in turn “loaded via the Apache Web Server, ” the .htaccess file is detected and executed…
View On WordPress
0 notes
