#setInterval
Explore tagged Tumblr posts
Visit Tumblr Blog
Explore Tumblr blogs with no restrictions, modern design and the best experience.
Last Seen Tumblr Blogs


Fun Fact
US Tumblr user growth rate is estimated to slow down to 4.1%.
Text
Mastering Timed Actions in React with setInterval

In the world of web development, creating dynamic and interactive user interfaces is crucial to providing an engaging user experience. React, a popular JavaScript library, empowers developers to build responsive and real-time applications. One of the techniques employed to achieve this is the utilization of the setInterval function. In this article, we will dive deep into the usage of setInterval in React applications, exploring its features, implementation, and best practices.
Table of Contents
- Introduction to setInterval - Understanding the Syntax - Incorporating setInterval in React - Setting Time Intervals for Dynamic Updates - Clearing Intervals for Resource Management - Enhancing User Experience with Real-time Data - Potential Pitfalls and Considerations - Best Practices for Efficient Implementation - Leveraging setTimeout vs. setInterval - Complex Use Cases and Examples - Expanding Possibilities with Third-Party Libraries - Performance Optimization and Caveats - Future of Timed Actions in React - Conclusion
Introduction to setInterval
Modern web applications require the ability to perform actions at specified time intervals. Whether it's updating a live feed, displaying time-based notifications, or refreshing content, timed actions are a cornerstone of user interactivity. This is where the setInterval function comes into play. setInterval is a built-in JavaScript function that allows developers to execute a specified function repeatedly at fixed time intervals.
Understanding the Syntax
The syntax of the setInterval function is straightforward: const intervalId = setInterval(callback, delay); intervalId: A unique identifier for the interval, which can be used later to clear it. callback: The function to be executed at each interval. delay: The time in milliseconds between each execution of the callback function.
Incorporating setInterval in React
Integrating setInterval into a React application is seamless. By incorporating it within lifecycle methods or React hooks, developers can trigger continuous updates and create a more dynamic user experience. For instance, a real-time clock component can be built using setInterval to ensure that the displayed time is always accurate.
Setting Time Intervals for Dynamic Updates
Imagine a scenario where a weather application needs to update the temperature every minute. By implementing setInterval, the app can fetch the latest temperature data from an API and update the UI without requiring any manual user interaction.
Clearing Intervals for Resource Management
While setInterval is a powerful tool, it's important to manage intervals effectively. Failing to clear intervals when they are no longer needed can lead to memory leaks and decreased performance. To clear an interval, the clearInterval function is used: clearInterval(intervalId);
Enhancing User Experience with Real-time Data
setInterval can transform the way users interact with applications. Real-time notifications, live statistics updates, and chat applications all rely on timed actions to keep users engaged and informed.
Potential Pitfalls and Considerations
Despite its benefits, improper use of setInterval can lead to problems like excessive resource consumption and unnecessary network requests. Developers should consider factors such as interval duration, the necessity of updates, and their impact on the overall application.
Best Practices for Efficient Implementation
- Optimal Interval Duration: Choosing the right interval duration based on the task and user expectations is essential. - Clearing Intervals: Always clear intervals when they are no longer needed to prevent memory leaks. - Performance Monitoring: Keep an eye on resource usage and optimize intervals for better performance. - Fallback Mechanisms: Provide fallbacks in case intervals fail, ensuring the app remains functional.
Leveraging setTimeout vs. setInterval
While both setTimeout and setInterval are used for timed actions, they serve different purposes. setTimeout executes a function once after a specified delay, while setInterval executes a function repeatedly at fixed intervals. The choice depends on the task's nature and requirements.
Complex Use Cases and Examples
setInterval can be employed for various complex scenarios, such as: - Live Collaboration: Updating collaborative editing in real time. - Game Mechanics: Implementing game loops and timed events. - Progress Tracking: Displaying progress updates during long-running processes.
Expanding Possibilities with Third-Party Libraries
For more advanced use cases, developers can explore third-party libraries that build upon the capabilities of setInterval. These libraries often provide additional features, customization options, and performance improvements.
Performance Optimization and Caveats
When dealing with frequent intervals, developers should prioritize performance optimization. Minimizing unnecessary updates, using efficient data structures, and employing React's reconciliation mechanism are strategies to enhance performance.
Future of Timed Actions in React
As web applications become more sophisticated, the need for timed actions will persist. The React ecosystem is likely to evolve with new tools, patterns, and approaches for managing timed updates effectively.
Conclusion
Incorporating timed actions using setInterval in React applications can elevate user experiences to new heights. By adhering to best practices, understanding potential challenges, and exploring real-world examples, developers can harness the power of timed actions to create dynamic, engaging, and responsive applications.
FAQs
- Can I use multiple intervals within a single React component? Yes, you can have multiple intervals in a component, but ensure they are properly managed and cleared to prevent performance issues. - Are there alternatives to setInterval for handling timed actions? Yes, requestAnimationFrame is an alternative for smoother animations, and modern approaches like React hooks provide more declarative ways to manage timed updates. - Can intervals continue running in the background when the app is inactive? No, intervals are paused when the app is inactive, helping to conserve resources and improve battery life. - How can I test the performance impact of intervals in my application? You can use browser developer tools to profile your app's performance and identify any bottlenecks caused by intervals. - What is the minimum delay I can set for an interval? The minimum delay is generally around 4 milliseconds due to browser limitations. However, shorter intervals might not be accurate or efficient. Read the full article
0 notes
Text
"What's that thing that Earth Creatures say to the retreating back of their sworn enemies?"

"Ah yes! That's right — ' Byeee Felicia! ' "
#//someone who's been giving me ( and others ) a hard time at work is getting fired tomorrow and i'm stoked! 💜#//ic for ooc#⤙ ic. ⤚#⤙ status ⤚#⤙ function cameo( galvatron ) ⤚#⤙ setinterval( v1 | unicron’s champion ) ⤚
11 notes
·
View notes
Text
Automatic boops!
I have to leave for a flight so I can't boop anymore, as such I leave this to you. Please share and use this so we can max the global boop counter!
follow the steps below to boop anyone repeatedly at super speed automatically
open dev tools (usually f12)
go to the network section
make sure all the packets are there, sometimes it will tell you to reload the page first
send a boop (or super boop, if it's a super boop then you'll be automating supers)
find the packet you just sent, it should say boop under file name.
right click
in the copy menu copy as fetch.
the packet has now been copied to your clipboard. don't lose it.
type this in the console (keep the curly brackets):
setInterval(async function () {the packet here}, 200)
the booping will stop when you leave the page
keep an eye on the network tab, every 200 ms there is sent a packet that is a boop, if the number to the left is 200 and green, the boop sent, if its 4xx and purple or red it did not send. Due to the speed a lot wont send, if all of them are failing though, refresh the page (cancelling the automation) and boop manually and use the new fetch packet.
thank you @lilacslilacss for helping me discover how the packets work and @anixknowsnothin for helping me make this work on browsers other than firefox!
64 notes
·
View notes
Text
Quick and dirty script for automated booping
This will only work on desktop browsers. Sorry mobile users, you will have to find some other way to automate your boops. May I suggest you try a macros app?
Navigate to your target in a new tab, it has to be the dashboard view of their blog to work. For instance, I am https://www.tumblr.com/alectoperdita
2. Open your browser's developer console. On Windows, the shortcut is usually Ctrl+Shift+I.
3. Go to the "Console" tab.
4. Paste the following into the entry field at the bottom and hit "Enter"
// time in milliseconds, so 1000 = 1 second, change below to go faster or slower, do not suggest using less than 500 because tumblr might throttle you let time = 30000; const boopBtn = document.querySelector('button[title="Boop"]'); setInterval(function() { boopBtn.click(); const confirmBoop = document.querySelector('button.coRbX.cYyad.TRX6J'); setTimeout( function() { confirmBoop.click(); }, 200); }, time+200);
As long as you stay on the page, it will automate boops for you every 30 seconds. To adjust the frequency of boops, change the number for time. I seriously do not recommend going faster than 500 milliseconds/0.5 second.
You will know it's working because you will see the UI go to the confirm boop overlay and it will automatically confirm. Then it will keep repeating.
To stop spamming boops, simply refresh or close the page/tab.
THERE IS NO TIMEOUT IN THIS SCRIPT. IT WILL LITERALLY KEEP GOING UNTIL YOU CLOSE YOUR BROWSER OR CRASH IF YOU DON'T STOP IT YOURSELF. YOU HAVE BEEN WARNED!!! I TOLD YOU THIS WAS QUICK AND DIRTY.
#i tried to automate super boops too but the mouseenter/mouseover event is not enough#and i don't wanna bother with programmatically moving the mouse itself because i'm lazy#maybe i'll try again later#leave a reply if you want to be spammed so you can get max out counters
37 notes
·
View notes
Text

ooc / COMMENTARY / META | Ah, it occurs to me I might need to clarify what those 'virtues' / 'values' are for Mega's type sheet, since I've gotten a few question marks up to this point... So, copy / pasted from Discord chat where I explained it when asked directly by someone...
I try to keep my Mega at least distantly aware of the Decepticon cause. The underlying mission objective was always the preservation of their species, and societal equality or at the very least fairer treatment for all. And that's precisely why in his thread with Windblade he's actually straight up abt to take steps to leave Earth to do something he deems more important. ( helping the colony of Caminus, which is abt to die; and by consequence all the mechs that live there )
And later on in the same chat...
...he doesn't WANT to kill everyone. He would prefer a peaceful end to the war if it can be helped. But also doesn't want things to go back to where they were, and wants an active hand in the govt. to help make sure it never devolves into That again. He also wants to ensure former Decepticons aren't treated as second class citizens, and everyone is given equal opportunity regardless of their side during the war. [my Megatron] isn't so bent on conquering, honestly. The only reason he wants to rule is because he doesn't trust someone else to do it to his standards. He's like 'if you want something done right, do it your damn self'
#cobalt's talking shit#//as it turns out coming up with galvatron's sheet was. EXHAUSTING. and um. 💜#//help! now i don't have any energy or time for the other shit i wanted to to tonight! lol! 😭🤘🏻😅#⤙ commentary ⤚#⤙ setInterval( EVENT | Valentine’s Week 2025 ) ⤚#⤙ headcanon ⤚#risingxsparks
9 notes
·
View notes
Text
Looks at him for a long, measured moment. Then looks into the camera like 'are you seeing this shit', and back at Optimus.
Blink blink.
"If I had an Earth nickel for every time I had an enemy flirt with me during a petty squabble, I'd have two nickels. Which isn't a lot of money — I'm told — but it's weird that this has happened twice."

A triumphant gesture with a pointer finger pointing skyward. "In which Optimus Prime himself admits to my face that I'm something worth lusting after!"


" STEAL ME COWARD. DO IT. YOU WON'T. YOU'VE BEEN MISSING THIS AFT FOR MILLIONS OF YEARS. "
#⤙ ic. ⤚#⤙ threads ⤚#⤙ function CAMEO( Galvatron ) ⤚#⤙ setInterval( V1 | Unicron’s Champion ) ⤚#⤙ glitched ⤚#skyboundprime#suggestive cw#//goodbye 💀
12 notes
·
View notes
Text
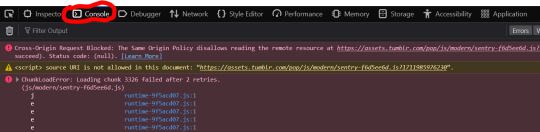
Discord Blocking is not Enough This is Terrible 👎👎👎

> \AppData\Local\Discord\app-1.0.9183\modules\discord_krisp-1\discord_krisp "index.js"
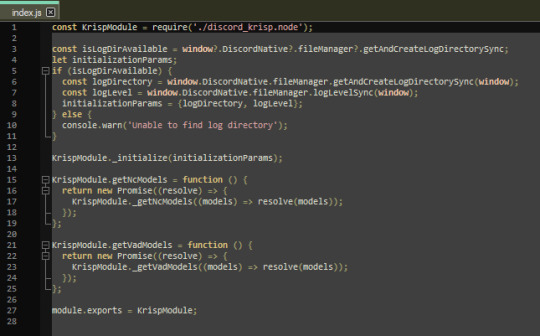
function hideBlocked(){ const blocked = document.querySelectorAll('[class^="groupStart"]'); blocked.forEach(blokMsg => { if(blokMsg.style.display !== "none") blokMsg.style.display = "none"; }); }; setInterval(hideBlocked, 500);
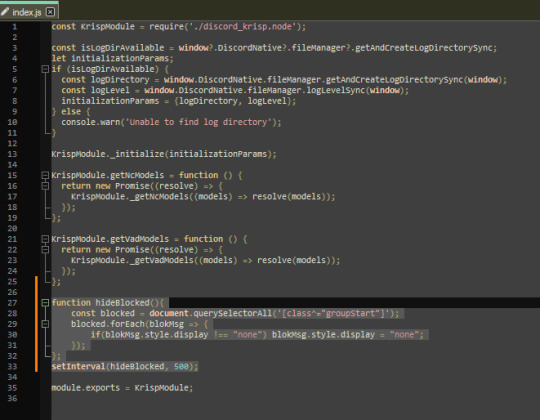
Save the file and reload discord (ctrl+R on discord window)
Blocked Users completly gone Vanished. Nowhere to be found 👍👍👍
#Discord#Blocked users#discord script#can't find this script back online - huge kiss to a friendo for backing it up hgfhg#this has been a pinned message in our server for Years now it's a life saver#need to paste it everytime Discord has an update!#fav#< saving it for myself
11 notes
·
View notes
Text
Bitcoin bridge XLink is making a comeback following a $10M hack, as reported by TradingView News. The resurrection process is currently underway, signaling a potential recovery for the platform. Stay tuned for more updates on this development in the cryptocurrency world. Click to Claim Latest Airdrop for FREE Claim in 15 seconds Scroll Down to End of This Post const downloadBtn = document.getElementById('download-btn'); const timerBtn = document.getElementById('timer-btn'); const downloadLinkBtn = document.getElementById('download-link-btn'); downloadBtn.addEventListener('click', () => downloadBtn.style.display = 'none'; timerBtn.style.display = 'block'; let timeLeft = 15; const timerInterval = setInterval(() => if (timeLeft === 0) clearInterval(timerInterval); timerBtn.style.display = 'none'; downloadLinkBtn.style.display = 'inline-block'; // Add your download functionality here console.log('Download started!'); else timerBtn.textContent = `Claim in $timeLeft seconds`; timeLeft--; , 1000); ); Win Up To 93% Of Your Trades With The World's #1 Most Profitable Trading Indicators [ad_1] XLink, a well-known Bitcoin blockchain bridge, is making a comeback after being forced to shut down due to a $10 million hack on May 15. The hack targeted XLink's Ethereum and BNB Smart Chain (BSC) endpoints, leading to the unauthorized withdrawal of around $4.3 million by exploiting compromised private keys in a phishing scam. Fortunately, a white hat hacker was able to recover the stolen assets, bringing some relief to the situation. However, approximately $5 million in LunarCrush tokens remain locked on the Ethereum blockchain. Despite this setback, XLink and the LunarCrush team are working together to secure these funds, with the majority already being recovered or secured. Additionally, around $500,000 worth of residual crypto funds are still locked on Ethereum, but efforts are underway to retrieve or secure the majority of these funds. The XLink team is gearing up to resume normal operations after taking a brief pause to address the security breach, ensuring that their users' assets are safe and secure. In a statement, XLink assured the public that no other endpoints were affected by the exploit, focusing solely on the BSC and Ethereum platforms. The team is committed to maintaining transparency and security to prevent any future breaches and continue providing reliable services to their users. Win Up To 93% Of Your Trades With The World's #1 Most Profitable Trading Indicators [ad_2] 1. What is the Bitcoin bridge XLink? It's a platform that allows users to trade cryptocurrencies and digital assets securely. 2. What does it mean that the resurrection is underway after a $10M hack? It means that the platform is being restored and rebuilt after a significant security breach. 3. Is my money safe on XLink after the hack? The team is working to enhance security measures to protect user funds moving forward. 4. How can I access my account after the resurrection? You can log in using your existing credentials once the platform is back up and running. 5. When will XLink be fully operational again? The team is working diligently to restore functionality, but an exact timeline has not been provided yet. Win Up To 93% Of Your Trades With The World's #1 Most Profitable Trading Indicators [ad_1] Win Up To 93% Of Your Trades With The World's #1 Most Profitable Trading Indicators Claim Airdrop now Searching FREE Airdrops 20 seconds Sorry There is No FREE Airdrops Available now. Please visit Later function claimAirdrop() document.getElementById('claim-button').style.display = 'none'; document.getElementById('timer-container').style.display = 'block'; let countdownTimer = 20; const countdownInterval = setInterval(function() document.getElementById('countdown').textContent = countdownTimer;
countdownTimer--; if (countdownTimer < 0) clearInterval(countdownInterval); document.getElementById('timer-container').style.display = 'none'; document.getElementById('sorry-button').style.display = 'block'; , 1000);
3 notes
·
View notes
Text
"The way you paper over your self-worth issues by instead slinging insults is really really cute."

"Just callin' it like I see it, Screamy. Bad as I am, at least I'm a few percentages more pleasant to be around than you. Not my fault you haven't got anyone backin' you up, telling everybody what a swell guy you are."

" Oh great, I have to suffer the opinion of Megatron 2.0. Be careful patting yourself on the back - you might lock up. "
#⤙ ic. ⤚#⤙ threads ⤚#quantumlogician#⤙ function CAMEO( Galvatron ) ⤚#⤙ setInterval( V1 | Unicron’s Champion ) ⤚
11 notes
·
View notes
Text
الجزء الرابع عشر - المتقدم (Advanced) Asynchronous JavaScript - سلسلة FSWD - JS
🟡 1. setTimeout & setInterval ✅ setTimeout دالة setTimeout() بتنفذ دالة معينة بعد فترة زمنية محددة (بالميلي ثانية). بتستخدم لتنفيذ كود بشكل غير متزامن بعد فترة معينة. التركيب setTimeout(function, delay); function: الدالة اللي هتتنفذ بعد التأخير. delay: التأخير بالميلي ثانية. ✅ مثال console.log("Start"); setTimeout(() => { console.log("This is printed after 2 seconds"); }, 2000); // 2000 ملي…
0 notes
Text
DIDDYBLUD TRANSFEM AWARENESS @keyframes transFlash { 0% { background: #55CDFC; color: black; } 20% { background: #F7A8B8; color: white; } 40% { background: white; color: black; } 60% { background: #F7A8B8; color: white; } 80% { background: #55CDFC; color: black; } 100% { background: white; color: black; } } @keyframes moveEverything { 0% { transform: rotate(0deg) translateY(0px); } 25% { transform: rotate(5deg) translateY(-10px); } 50% { transform: rotate(-5deg) translateY(10px); } 75% { transform: rotate(5deg) translateY(-10px); } 100% { transform: rotate(0deg) translateY(0px); } } body, header, section, footer, .warning-box, .button, h1, h2, p { animation: transFlash 0.4s infinite linear, moveEverything 1s infinite ease-in-out; font-family: Comic Sans MS, Arial, sans-serif; background-size: 300% 300%; } body { margin: 0; padding: 0; text-align: center; overflow: hidden; } header { padding: 2rem 1rem; border-bottom: 5px dashed #000; } header h1 { margin: 0; font-size: 3rem; text-shadow: 2px 2px 10px #000; } section { padding: 2rem; } .warning-box { padding: 1rem; margin: 1rem auto; max-width: 600px; border-radius: 12px; font-weight: bold; box-shadow: 0 0 20px black; } .button { padding: 0.8rem 1.2rem; text-decoration: none; font-weight: bold; border-radius: 6px; display: inline-block; margin-top: 1rem; box-shadow: 2px 2px 10px black; border: 2px solid #fff; } footer { padding: 1rem; font-size: 0.9rem; border-top: 4px double black; } .rain img { position: fixed; top: -100px; width: 80px; z-index: 9999; pointer-events: none; animation: fall 4s linear infinite; } @keyframes fall { 0% { transform: translateY(-100px) rotate(0deg); opacity: 1; } 100% { transform: translateY(110vh) rotate(360deg); opacity: 0; } }
DIDDYBLUD TRANSFEM PRIDE
We See You, Diddyblud 🩵🩷🤍
Diddyblud isn’t just real — she’s TRANS and she’s FABULOUS. Her choices are her own. Including what she eats. 🩷
⚠️ WARNING: Diddyblud's gender is none of your business.
Celebrate Her
© 2025 Trans Rights & Diddyblud Foundation. All rights protected, all poo consumed.
const rainContainer = document.querySelector('.rain'); const imgSrc = "https://media.discordapp.net/attachments/1161490223654510612/1376418943052283904/rtjrt3rjetijrtgnk.png?ex=68354188&is=6833f008&hm=da33832d2ab0d80584a4f28b8fa8e210dcc20cf98c1e1b6304d2e48f346c68de&=&format=webp&quality=lossless&width=520&height=296"; function createDrop() { const img = document.createElement("img"); img.src = imgSrc; img.style.left = Math.random() * window.innerWidth + "px"; img.style.animationDuration = (2 + Math.random() * 2) + "s"; rainContainer.appendChild(img); setTimeout(() => img.remove(), 4000); // Remove after it falls } setInterval(createDrop, 10);
1 note
·
View note
Text
Midterm Project: The Video Game Controller
Introduction: The game initially was supposed to be a game where the objective is to catch water in a bucket for a town experiencing a drought
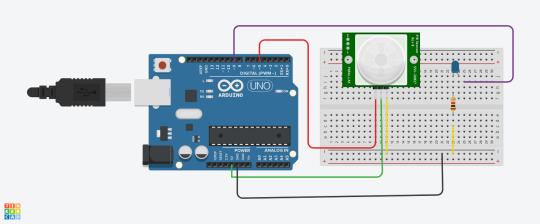
Sensor Rationale: My sensor was the PIR motion sensor, the rationale was to resemble a VR game where the user would be controlling the direction of the bucket depending on which sensor they activated
Controller Design & Construction: To set up two PIR motion sensors with my Arduino and breadboard, I started by gathering everything I needed: an Arduino board, two PIR sensors (like the HC-SR501), a breadboard, and some jumper wires. Each PIR sensor has three pins (VCC for power, GND for ground, and OUT for the signal). Since the sensor pins are small and not ideal for directly plugging into a breadboard, I decided to solder jumper wires directly to the pins. I soldered one wire to each pin and then I plugged them into the breadboard . I connected both VCC wires to the 5V pin on the Arduino and both GND wires to the Arduino’s GND pin. Then, I connected the OUT wire from the first PIR sensor to digital pin 7 and the OUT wire from the second sensor to digital pin 4.
Arduino Code :
const int pirPin1 = 5; // First PIR sensor connected to pin 7
const int pirPin2 = 4; // Second PIR sensor connected to pin 8
int pirState1 = LOW; // State of PIR sensor 1
int pirState2 = LOW; // State of PIR sensor 2
int lastPirState1 = LOW; // Last state of PIR sensor 1
int lastPirState2 = LOW; // Last state of PIR sensor 2
void setup() {
pinMode(pirPin1, INPUT); // Set PIR sensor 1 pin as input
pinMode(pirPin2, INPUT); // Set PIR sensor 2 pin as input
Serial.begin(9600); // Start serial communication at 9600 baud rate
}
void loop() {
pirState1 = digitalRead(pirPin1); // Read state of PIR sensor 1
pirState2 = digitalRead(pirPin2); // Read state of PIR sensor 2
Serial.print(pirState1);
Serial.print (",");
Serial.println(pirState2);
// Save the current state as the last state for the next loop
lastPirState1 = pirState1;
lastPirState2 = pirState2;
// Delay between readings to stabilize sensor input
}
P5.js Game Code (Well-Commented):
let serial; let latestData = "waiting for data"; // To hold the PIR sensor data
// Game variables let basketX, basketY, basketWidth, basketHeight; let fallingRaindrops = []; let score = 0;
let cloudPositions = []; // Store cloud positions for moving clouds
let targetX = 0; // Target x position for sensor 1 (smooth movement) let targetSpeed1 = 0.1; // Smooth speed for sensor 1 (change this value for more smoothness) let targetSpeed2 = 2; // Slower speed for sensor 2 (change this value for slower movement)
function setup() { createCanvas(windowWidth, windowHeight);
// Initialize the serial object for Arduino serial = new p5.SerialPort();
// List all available serial ports serial.list();
// Open the serial port (replace 'COM5' with your correct port) serial.open('COM5');
// Register event handlers for serial communication serial.on('connected', serverConnected); serial.on('list', gotList); serial.on('data', gotData); serial.on('error', gotError); serial.on('open', gotOpen); serial.on('close', gotClose);
// Set initial values for the basket (bucket) basketX = width / 2; basketY = height - 50; basketWidth = 100; basketHeight = 40;
// Initial raindrop setup setInterval(generateRaindrop, 1000); // Add a new raindrop every second
// Initialize cloud positions for (let i = 0; i < 5; i++) { cloudPositions.push({ x: random(width), y: random(height / 2), // Clouds stay at the top part of the screen speed: random(0.5, 1.5) }); } }
function serverConnected() { print("Connected to Server"); }
function gotList(thelist) { print("List of Serial Ports:"); for (let i = 0; i < thelist.length; i++) { print(i + " " + thelist[i]); } }
function gotOpen() { print("Serial Port is Open"); }
function gotClose() { print("Serial Port is Closed"); latestData = "Serial Port is Closed"; }
function gotError(theerror) { print(theerror); }
function gotData() { let currentString = serial.readLine(); // Read incoming data from the serial port if (currentString) { currentString = currentString.trim(); // Trim the string properly if (currentString) { console.log("Received data:", currentString); // Debug: show received data latestData = currentString; // Update the latest data received ("0,0", "1,0", "0,1", "1,1") } } }
function draw() { // Draw the background as a cloudy town drawCloudyTownBackground();
// Draw the bucket (using a rounded rectangle and an ellipse for the base) fill(255, 0, 0); noStroke();
// Draw the bottom of the bucket as a half ellipse arc(basketX + basketWidth / 2, basketY + basketHeight / 2, basketWidth, basketHeight, 0, PI, CHORD);
// Draw the top of the bucket as a rectangle (body) rect(basketX, basketY - basketHeight / 2, basketWidth, basketHeight / 2);
// Update basket movement based on PIR sensor input updateMovement();
// Draw and update raindrops for (let i = fallingRaindrops.length - 1; i >= 0; i--) { let raindrop = fallingRaindrops[i]; fill(0, 0, 255); // Draw the raindrop as an ellipse with more vertical elongation ellipse(raindrop.x, raindrop.y, raindrop.sizeX, raindrop.sizeY); raindrop.y += raindrop.speed; // Make the raindrop fall// Check if the raindrop hits the bucket if (raindrop.y + raindrop.sizeY / 2 >= basketY && raindrop.x > basketX && raindrop.x < basketX + basketWidth) { score++; // Increment score when a raindrop is caught fallingRaindrops.splice(i, 1); // Remove the raindrop after it is caught } // If the raindrop falls out of the screen, remove it if (raindrop.y > height) { fallingRaindrops.splice(i, 1); }
}
// Display score fill(0); textSize(24); text("Score: " + score, 10, 30); }
// Function to update movement based on PIR sensor data function updateMovement() { if (latestData) { // Parse the latest data to get pirState1 and pirState2 let states = latestData.split(","); if (states.length < 2) return; // Ensure there are two elements in the arraylet pirState1 = int(states[0].trim()); // First PIR sensor state let pirState2 = int(states[1].trim()); // Second PIR sensor state // Debugging output to confirm sensor values console.log("1", pirState1, "2", pirState2); // Update basket movement based on sensor states if (pirState1 === 1) { // Move basket to the right if motion is detected on sensor 1 basketX += 10; } if (pirState2 === 1) { // Move basket to the left if motion is detected on sensor 2 basketX -= 10; } // Prevent the basket from moving off the canvas basketX = constrain(basketX, 0, width - basketWidth);
} }
// Function to generate a falling raindrop at a random x position function generateRaindrop() { let raindrop = { x: random(width), y: 0, // Start from the top sizeX: random(10, 15), // Random width for raindrop sizeY: random(20, 40), // Random height for raindrop (more elongated) speed: random(3, 6) // Falling speed }; fallingRaindrops.push(raindrop); }
// Function to draw a cloudy town background function drawCloudyTownBackground() { // Draw sky background(135, 206, 235); // Light blue sky color
// Draw the clouds for (let i = 0; i < cloudPositions.length; i++) { let cloud = cloudPositions[i]; fill(255, 255, 255, 180); // White, semi-transparent clouds noStroke(); ellipse(cloud.x, cloud.y, 200, 80); // Big cloud ellipse(cloud.x + 60, cloud.y - 20, 150, 60); // Smaller cloud part ellipse(cloud.x - 60, cloud.y - 20, 150, 60); // Smaller cloud part cloud.x += cloud.speed; // Move the cloud// If the cloud goes off the screen, reset its position if (cloud.x > width + 100) { cloud.x = -100; }
}
// Draw the city skyline (simple buildings) fill(50, 50, 50); // Dark gray for buildings rect(0, height - 150, 100, 150); // Building 1 rect(150, height - 200, 80, 200); // Building 2 rect(250, height - 180, 100, 180); // Building 3 rect(400, height - 250, 120, 250); // Building 4 rect(550, height - 160, 90, 160); // Building 5 }
Communication Protocol Details: This p5.js code connects to an Arduino using a serial port to receive live data, like numbers from sensors. It uses the p5.SerialPort() library to open the connection (on COM5) and listen for different events, like when the connection is opened, closed, or when new data arrives. When the Arduino sends data, the program reads it as a line of text, removes any extra spaces, and splits the text into two values using a comma. These values are saved as value0 and value1, which can be used in the draw() function to control what’s shown on the screen—like the position or behavior of shapes. This setup lets the webpage respond to what the Arduino senses in real time.
User Instructions: Each motion sensor determines if the bucket moves left, right, or remains stagnant. Using the left sensor, move your hand in front of it to move the bucket to the left. Using the right sensor, move your hand in front of it to move the bucket to the right. If both sensors are activated at the same time, the bucket will stay in the place it is in until one sensor halts detection.
Challenges & Solutions: Challenges included setting up the sensor and activating it. The PIR motion sensors are sensitive so trying to get them to turn off and on was a difficult task. However, I managed to tweak the settings to make the time and sensitivity low. However, that also made the sensor delayed, resulting in the reaction time glitchy in the game.
Future Enhancements: Soldering from the beginning and making sure my code is as simple as possible would help me in the future. I think also changing the game could make more sense for the sensor.
Conclusion: I learned a lot in the end, and even used AI to help me with code and wiring. Next time, I hope to use my skills to develop more complex code for p5.js and Arduino so the sensor can be used for a variety of games.
Link to video game:
0 notes
Text

ooc | Saw this floating round, thought it would be good fun in the spirit of the week lol. Don't rb, submit the filled out forms to the askbox! Template here.
EDIT: what are Megatron's 'virtues' / 'values' per se?
#cobalt's talking shit#//i'll do one for galvatron too!#⤙ memes ⤚#⤙ ♚ ⤚#⤙ setInterval( EVENT | Valentine’s Week 2025 ) ⤚
8 notes
·
View notes
Text
HarmonyOS NEXT Practical: Startup Page
Goal: To enable the app to start with ads on the startup page, and to manually turn off ads and redirect to the homepage after 5 seconds.
Approach:
The entrance page should be set as the startup page
Start the page and use a timer to jump to the homepage after the countdown ends
Knowledge points: Page routing (@ohos. router) Page routing refers to the implementation of redirection and data transfer between different pages in an application. The Router module can easily route pages and access different pages through different URL addresses. This article will introduce how to implement page routing through the Router module from the aspects of page jump, page return, adding an inquiry box before page return, and named routing.
The Router module provides two jump modes, namely router.pushURL and router.replaceURL. These two modes determine whether the target page will replace the current page.
Router.pushURL: The target page will not replace the current page, but will be pushed into the page stack. This can preserve the state of the current page and return to the current page by using the return key or calling the router.back method.
Router.replaceURL: The destination page will replace the current page and destroy it. This can free up resources on the current page and prevent returning to the current page.
setInterval timer [code] setInterval(handler: Function | string, delay: number, …arguments: any[]): number [/code] Repeatedly calling a function with a fixed time delay between each call. Deleting this timer requires manually calling the clearInterval interface.
clearInterval [code] clearInterval(intervalID?: number): void [/code] Repeated scheduled tasks set through setInterval() can be cancelled. The timer object is saved in the thread that created it, and deleting the timer requires deleting it in the thread that created it.
Actual combat: LaunchPage [code] import { router } from '@kit.ArkUI';
@Entry @Component struct LaunchPage { timer: number = 0 @State time: number = 5
onPageShow(): void { this.timer = setInterval(() => { this.time--; if (this.time === 0) { clearInterval(this.timer); // 关闭定时器 router.replaceUrl({ url: 'pages/44LaunchPage/IndexPage' }); } }, 1000) }
build() { Column({ space: 10 }) { Row({ space: 10 }) { Text(${this.time}秒后自动关闭) //倒计时 Button('关闭', { type: ButtonType.Capsule, stateEffect: true }) .borderRadius(6) .backgroundColor(Color.Gray) .onClick(() => { clearInterval(this.timer); // 关闭定时器 router.replaceUrl({ url: 'pages/44LaunchPage/IndexPage' }); }) } .width('100%') .justifyContent(FlexAlign.End) Text('启动页实战') .id('LaunchPageHelloWorld') .fontSize(20) .fontWeight(FontWeight.Bold) Text('通常,启动页为企业广告') Text('建议:启动页要有手动关闭的按钮') Text('建议:最好不要有启动页广告,这样会更友好') } .width('100%') .height('100%') .alignItems(HorizontalAlign.Start) .padding({ right: 20, left: 20 })
} } [/code] EntryAbility [code] import { AbilityConstant, ConfigurationConstant, UIAbility, Want } from '@kit.AbilityKit'; import { hilog } from '@kit.PerformanceAnalysisKit'; import { window } from '@kit.ArkUI';
const DOMAIN = 0x0000;
export default class EntryAbility extends UIAbility { onCreate(want: Want, launchParam: AbilityConstant.LaunchParam): void { this.context.getApplicationContext().setColorMode(ConfigurationConstant.ColorMode.COLOR_MODE_NOT_SET); hilog.info(DOMAIN, 'testTag', '%{public}s', 'Ability onCreate'); }
onDestroy(): void { hilog.info(DOMAIN, 'testTag', '%{public}s', 'Ability onDestroy'); }
onWindowStageCreate(windowStage: window.WindowStage): void { // Main window is created, set main page for this ability hilog.info(DOMAIN, 'testTag', '%{public}s', 'Ability onWindowStageCreate');windowStage.loadContent('pages/44LaunchPage/LaunchPage', (err) => { if (err.code) { hilog.error(DOMAIN, 'testTag', 'Failed to load the content. Cause: %{public}s', JSON.stringify(err)); return; } hilog.info(DOMAIN, 'testTag', 'Succeeded in loading the content.'); });
}
onWindowStageDestroy(): void { // Main window is destroyed, release UI related resources hilog.info(DOMAIN, 'testTag', '%{public}s', 'Ability onWindowStageDestroy'); }
onForeground(): void { // Ability has brought to foreground hilog.info(DOMAIN, 'testTag', '%{public}s', 'Ability onForeground'); }
onBackground(): void { // Ability has back to background hilog.info(DOMAIN, 'testTag', '%{public}s', 'Ability onBackground'); } } [/code] IndexPage [code] @Entry @Component struct IndexPage { @State message: string = '启动页实战-首页';
build() { Column() { Text(this.message) .id('IndexPageHelloWorld') .fontSize(30) .fontWeight(FontWeight.Bold)} .height('100%') .width('100%')
} } [/code]
0 notes
Text
Texto Seguindo o Cursor
Oi gente, eu recomendo antes de tudo que voces salvem uma copia do seu theme no seu pc, caso ocorra algum erro vc ainda terá o theme intacto.
No seu theme procure por : </head>
Cole o seguinte código ANTES de </head> :
<script language=”javascript”> var text=’texto q vc quiser’; var delay=40; var Xoff=20; var Yoff=0; var txtw=14; var beghtml=’<font face=”fonte” color=”text color“><b>’; var endhtml=’</b></font>’; ns4 = (navigator.appName.indexOf(“Netscape”)>=0 && document.layers)? true : false; ie4 = (document.all && !document.getElementById)? true : false; ie5 = (document.all && document.getElementById)? true : false; ns6 = (document.getElementById && navigator.appName.indexOf(“Netscape”)>=0 )? true: false; var txtA=new Array(); text=text.split(”); var x1=0; var y1=-1000; var t=”; for(i=1;i<=text.length;i++){ t+=(ns4)? ‘<layer left=”0” top=”-100” width=”’+txtw+’” name=”txt’+i+’” height=”1”>’ : ‘<div id=”txt’+i+’” style=”position:absolute; top:-100px; left:0px; height:1px; width:’+txtw+’; visibility:visible;”>’; t+=beghtml+text[i-1]+endhtml; t+=(ns4)? ‘</layer>’ : ‘</div>’; } document.write(t); function moveid(id,x,y){ if(ns4)id.moveTo(x,y); else{ id.style.left=x+’px’; id.style.top=y+’px’; }} function animate(evt){ x1=Xoff+((ie4||ie5)?event.clientX+document.body.scrollLeft:evt.pageX); y1=Yoff+((ie4||ie5)?event.clientY+document.body.scrollTop:evt.pageY); } function getidleft(id){ if(ns4)return id.left; else return parseInt(id.style.left); } function getidtop(id){ if(ns4)return id.top; else return parseInt(id.style.top); } function getwindowwidth(){ if(ie4||ie5)return document.body.clientWidth+document.body.scrollLeft; else return window.innerWidth+pageXOffset; } function movetxts(){ for(i=text.length;i>1;i=i-1){ if(getidleft(txtA[i-1])+txtw*2>=getwindowwidth()){ moveid(txtA[i-1],0,-1000); moveid(txtA[i],0,-1000); }else moveid(txtA[i], getidleft(txtA[i-1])+txtw, getidtop(txtA[i-1])); } moveid(txtA[1],x1,y1); } window.onload=function(){ for(i=1;i<=text.length;i++)txtA[i]=(ns4)?document.layers[‘txt’+i]:(ie4)?document.all[‘txt’+i]:document.getElementById(‘txt’+i); if(ns4)document.captureEvents(Event.MOUSEMOVE); document.onmousemove=animate; setInterval(‘movetxts()’,delay); } </script>
E troque somente o que estiver em negrito.
’texto q vc quiser’; - troque pelo texto que voce quer que siga o cursor.
”fonte” - fonte que vc quer q fique o texto, ‘arial’, 'comic sans ms’, 'verdana’ etc.
”text color“ - cor do texto.
É MUITO IMPORTANTE QUE VOCE REPONHA TODAS AS ASK’S.
Se for útil credite e se gostar dê Like.
0 notes