#so if you try to watch an iphone video on the native windows player it doesnt work
Text
raising my glass to seth rn cheers mate
#smashy the cache#for context: hevc/h.265 is what iphone videos are#so if you try to watch an iphone video on the native windows player it doesnt work#however microsoft WILL give you a helpful popup saying you can pay $.99 to install the codec#and the ms store page for that is FULL of reviews from suckers who did and are mad abt it lol#however there is a free version. ALSO DISTRIBUTED BY MICROSOFT. ALSO IN THE MS STORE. THAT YOU CAN JUST INSTALL.#saw that popup and immediately went to google#like hell am i paying for a codec ill install malware before i give microsoft a cent
1 note
·
View note
Text
How Merge(be a part of) Two OGG Music Information To One?
Online MP3 cutter - make your private exclusive ringtone. Want to merge several MP3s into one file? Look no additional… Our Free Merge MP3 is your final station. It will possibly allow you to merge numerous audio information with totally different codecs into one larger file with one format similar to MP3, WAV, WMA and OGG with out problem. With this powerful utility, you can also combine many separate music tracks into one non-stop audio CD. We only accepting demos in digital kind. Please e-mail enter@ with links to MP3 recordsdata with 320kbit (but NO MP3 e mail attachments please!), SoundCloud pages or links to different on-line streaming players.
Freemake Audio Converter converts music recordsdata between 50+ audio joiner online codecs. WAV joiner for Mac is a very extremely efficient video joiner or merger that will assist be a part of numerous small wav segments into one huge WAV file. Merge mp3 recordsdata on-line mp3 merge data mp3 merge online receive merge mp3 merge mp3 file be part of mp3 on-line merge mp3 on-line wav merger free mergemp3 mp3 merger merge music collectively on-line merge mp3 on-line be a part of songs collectively on-line merge two mp3 information on-line merge mp3 free mp3 merger software program program program free get hold of merge songs online free merge two songs collectively on-line free merge mp3 audacity.
Helium Audio Joiner, as its title suggests, helps you to merge numerous audio tracks into one single file using an intuitive interface and superior tools. 1. Mix your MP3 music tracks to at least one file with easy steps. The headers of mp3-recordsdata are moreover merged. You'll be able to't merge mp3 info along with out the usage of a software program, let's go deep into the various methods that may be utilized in combining multiple mp3 tracks all collectively. As talked about earlier, the Free MP3 Cutter and Joiner boasts a straightforward and nicely-organized with a delightful design.

So, in case you are feeling that a music is just too prolonged and in addition you merely can not take that dimension, use this software program to trim off any irrelevant portions of the MP3 file. With Merge MP3 you can merely merge mp3's right right into a single mp3, aac, ape, flac, m4a, m4b, mp4, ogg, wav or wma file. Free Merge MP3 is really an beautiful MP3 merger for mp3 clients to hitch a wide range of recordsdata into massive one. Lastly, it is often worth noting that Mp3 Audio Splitter Joiner can even convert between Mp3, WAV, WMA and OGG codecs. Properly, the resultant wav recordsdata have a software program operate to concentrate preview by utilizing play after merge choices. However watch out as this participant has no quantity administration and it will play the audio file on primarily probably the most amount by default. The resulting WAV or MP3 recordsdata can then be burned to an audio CD using any CD recording program.
So if it is advisable to alternate the placement of few mp3 data, merely free drag them to your needed place. This article will touch on a number of packages that you may put up for consideration to merge video and audio with ease. Optimistic, this text will present 5 easy-handle on-line corporations for audio editing specifically. View detailed details about MP3 information to be merged, including MPEG header information and ID3v1 and ID3v2 info. The principle downside is that this program only works with MP3 files. The others on this listing are appropriate with other audio formats however when you've got a set of MP3s you wish to merge, this gets the job executed. The UI is easy and all you need do it load up your tracks, put them so as and be part of them. The result's one giant MP3 file with all your merged tracks in a single.
four. As soon as you are satisfied that your content is safely in iTunes, safely eject your machine and repeat steps 2-three on your different iPods or iPhones. This can effectively merge content of all of your gadgets in a single iTunes library. sixteen Free Greatest Mp3 splitter and http://www.mergemp3.com Joiner instruments to separate and merge Mp3 information: - When you have simply these days purchased an MP3 participant, try to be excited about digging further about find out how to separate audio recordsdata or merge music recordsdata. Clips which might be merged throughout the Timeline are synchronized from Clip Start for every part clip.
Though this could take longer time to get your recordsdata merged, it's at all times an obtainable free means so that you can try. You should definitely save a replica of the original information so that you simply won't lose something if you're not satisfied with the mixed recordsdata. Merges non-replacer soundtrack versions of Celtic Music, Further Music Pack, Musical Lore, Hun Lovaas, Nonetheless, Vindsvept, Fanmade Nordic Exploration and Fight; Vanilla OST will nonetheless play along with the brand new music.
Though the audio high quality could be a bit staggering for the specialists as you possibly can notice a slight bounce at the merge level, it does a good job for the novice. The truth that Merge MP3 is a conveyable software and requires no set up makes it wanted. So, you can merely obtain the program, export it to your thumb drive and it is possible for you to to affix MP3 recordsdata in conjunction on any COMPUTER with Home windows OS. Step 2. Click on on Add Monitor" and choose the mp3 files you wish to merge in your pc then click Open" on the files explorer.

Click on the Be part of" button to merge the added audio tracks according to the settings you have beforehand customized. There is no such thing as a limit on the number of mp3 information you can be a part of or merge. А free online app you can use to affix multiple audio tracks into one. It supports crossfading and all popular file codecs. Filesmerge is a superb on-line software able to merging a number of mp3 files right into a single file with speed and ease. Users can add files to be merged from the native save location within the computer or from a website by coming into the respective url code. If you want to merge greater than three mp3 information, then this is a good program for you.Freeware functions like Shuangs Audio Joiner for Windows are extra devoted to combining MP3 recordsdata. Several free cell apps exist as nicely, including Mp3 Cutter & Merger for Android, so you possibly can combine two small MP3 ringtones to create a new ring tone. This MP3 merger software is actually free to use with out asking you to supply your non-public data like bank card and email tackle for registration. It comes with no have hidden price or expensive surprises. It's totally practical with out strings hooked up or malware to hurt your pc.
1 note
·
View note
Text
Free MP4, M4A, M4B, M4R, AAC To MP3 Or WAV Converter
We suggest the H.264 MP4 format for video on the web because nearly all of web browsers and devices assist it. SiteBuilder can convert a video to H.264 MP4 whenever you add it. For http://www.audio-transcoder.com/ large videos though, or once you need a high-quality degree of control over the video quality, we recommend you use the open source software, HandBrake , to organize your video before importing to SiteBuilder. So far, we support native video file conversion; you possibly can add your native video or audio file to our server, then our server will evaluation and mp3 to mp4 converter convert it to text, at similar time, the transformed textual content will likely be shown on display. click 'Select file' button to select the file you want to convert. Then specify language utilized in video or audio file. This is essential, as a result of improper language you indicated, then you will get completely messed up or mismatched text.
To transform to MP4, you need to choose in Select Video Codec as No Video. Above all, simply obtain the AnyMP4 Video Converter Ultimate from AnyMP4 website, and then you need to set up it on your laptop. Once you exchange MP3 to MP4, you can play the audio format on extra gadgets. What is more, you too can select the presets with the optimum format. As for the case, you possibly can at all times get pleasure from MP3 music on a lot of the gadgets with ease. Works as a professional MP4 to MOV converter, FonePaw Video Converter Ultimate can helps you change MP4 movies and flicks to QuickTime supported MOV, MP4 formats for playback. Also, this program can convert AVI to MP4, WMV to MOV, M4V to MP4 in order that any video can successfully play on QuickTime, iPhone, iPad and iPod.
We've got developed a instrument that may do this conversion robotically and convert all incorrect audio information in your 3CX Installation. Hello the button beneath Output Profile on the highest proper nook to pick out the output format. In the checklist of Output Profile, choose "MP3 Audio(.mp3)". MP3 is a standard title for MPEG-1 and MPEG-2. It is an audio coding format for digital audio that uses a type of lossy knowledge compression. It is not uncommon for client audio storage and streaming. Changing MP4 to MP3 isn't difficult - so long as you've gotten the proper software. When a program like Audio & Music Lab Premium options a variety of clever solutions in addition to features that assure an audio fanatic much more fun with their music assortment, then it isn't solely a logical addition to your software assortment, but an absolute should.

This free converter will allow you exchange your video files from YouTube to transform them into MP3 music recordsdata in addition to into other audio formats in line with your needs. You can use this converter to download YouTube video files and might save them in MP3 format, as properly. It makes the conversion process simple, moreover offering you the MP3 recordsdata with the superior HD quality. The excellent format options, additional filters, as well as the results, make the instrument the very best conversion device from video to audio codecs.
Set bitrate, restrict video resolution and file measurement, mix multiple clips or rotate video before you change. Even save a customized preset to reuse your favourite settings time and again. Step 1: Launch Wondershare MP4 to MP3 converter. Convert MP4 to WAV - Convert your file now - online and free - this page also contains information on the MP4 and WAV file extensions. The very best audio converter software supports multiple enter and output file codecs like MP4, MP3, WAV, WMA and so forth. In addition they make file conversion job easier along with sustaining excessive-quality sound. On this article, we will focus on the most effective audio converter software that you must use.
CloudConvert is a free online file conversion tool with help for over 200 file sorts, including 20 of the most well-liked audio codecs. The free plan limits you to five concurrent conversions with a most file size of 1GB. It additionally limits you to 25 complete conversions per day, and free customers are on the bottom of the priority record, so it may take a long time to convert recordsdata throughout peak usage hours. CloudConvert is straightforward to make use of and out there as a Chrome Extension and iOS app, in case you don't need to use the web tool.
This system helps you to queue up a number of recordsdata for conversion and encompasses a clean interface that clearly displays what recordsdata are ready to be transformed. There's even the choice to obtain a whole channel, although this can be time-consuming so you might desire to be selective. Click on Format" > Common Audio", and choose "MP3-MPEG Layer Audio (mp3)" as output format. BTW, you also can choose AAC, AC3, WMA, WAV, and so forth. audio codecs as the output profile according to your request. Thirdly, you can make the most of an online MP4 to MP3 converter to convert MP4 to MP3 for Mac, similar to CloudConvert , which is ready to to transform any audio (M4A, WMA, WAV…) or video (MP4, AVI…) to MP3 with out installing any software program! CloudConvert does this conversion for you with highest quality. Try the next guide to extract MP3 audio file from MP4 video file.
Whereas RealPlayer can play a large number of file varieties, you may also use RealPlayer to convert recordsdata into the format that best fits your watching or listening needs. ItвЂs an ideal answer for simply converting music or other audio recordsdata into codecs that you wish to make moveable or extra versatile. Do you have some outdated Windows Media Audio (.wma) recordsdata that you simply want to convert to MP3 information so you may take heed to them on your cellphone? Perhaps you'll be able to solely get your favourite track or lecture within the wma format.VOB information are usually reserved for DVD rips and comprise both audio and video. Although these files might be played on desktop or laptop computer computer systems with particular players, using those same files to watch movies and movies on your smartphone can prove to be difficult. Fortunately, Free VOB to MP4 Converter has created a convenient answer to the problem with its capability to show those recordsdata into the universal MP4 file kind. Not only do these recordsdata work on more video players and units, customers won't lose quality, so motion pictures might be enjoyed the best way they have been meant to be.However is it legal to convert YouTube music movies into downloads, with the intention to view them later? Or, make every other sort of video conversion? That continues to be a complicated question, although here are just a few more issues to bear in mind. Free MP4 to AVI Converter is the freeware software which converts MP4, M4V and MP4V recordsdata to AVI or MPG (MPEG-1, MPEG-2). MP4 files are generally used by video websites (YouTube), moveable gamers (iPod, PSP), cellphones (iPhone, Samsung Galaxy) and other units. Unfortunately, many players and video enhancing software program doesn't support the MP4 format. On this case, it is essential to convert MP4 file to more standard format equivalent to AVI or MPG.
1 note
·
View note
Text
AVS4YOU AVS Audio Converter Changing To M4A Format
Convert MP4, MP3, WAV, MOV and extra to any format online. I have tried different apps that record in wav however to get them on to the Imac typically includes sending every sound file individually by e-mail or sending to the cloud and then when retrieving from the cloud the timestamps are changed. On a gps monitor on my cycle I'll file hundreds of individuals sound recordsdata. Observe the converting M4A to WAV step by step guide to fast and simply convert M4A to WAV. Tremendous is a highly regarded and free audio converter. You'll be surprised on the long listing of audio formats it supports. If you have an audio file recorded in a uncommon format and also you want it converted to a more frequent format, you must try out the Tremendous audio converter. Enter codecs include MP3, MP2, WMA, WAV, WV, TTA, RM, RAM, OGG, MPP, M4A, FLAC, MMF, APE, AAC, AMR, and AC3.
When it comes to free software that converts audio recordsdata, many individuals are understandably concerned in regards to the quality. This resolution not solely does the work quickly and without spending a dime, but it surely also gives high quality outcomes without reducing the quality of the original file in any respect. All of the supported codecs have their own settings so you will get the optimized outcomes that you just want. For instance, if you want to have the very highest quality MP3 recordsdata on your audio system, you should utilize the converter to maintain the songs in professional audio quality of as much as 320kbps.
Home windows Integration: m4a to mp3 converter 320 kbps Property, Thumbnail Handlers and Shell Integration lengthen home windows to offer tag editing inside Windows explorer. Particularly useful is the flexibility for dBpoweramp so as to add assist for file varieties Windows does not natively assist, or lengthen help similar to mp3 IDv2.four tags. Album art display and in depth popup data tips are additionally provided, dBpoweramp is a lot more than a easy mp3 converter. Sony Vegas and older versions will assist all three audio codecs provided by Free Inventory Music without having to render or compress them until you export your project.
A: AllMusicConverter Platinum version converts 2 recordsdata at the identical time and has maximum audio conversion velocity 6X, whereas Skilled edition can convert up to sixteen files simultaneously with summary conversion velocity up to 50X ( relying in your LAPTOP efficiency). AllMusicConverter Skilled version also consists of audio CD Ripper. So, I paid the primary month's payment, and it took me the higher a part of two weeks to convert most of my music from backups of former saved music. After a few conversions, you get a discover that it will probably't discover the files. So that you return to the start of your backups, and attempt to remember where you left off after you restart this app. And there we discover the recordsdata they couldn't discover. This occurred so many occasions I lost count.
It supports widespread audio formats like MP3, WAV, AAC, M4A and others. Any Audio Converter supplies you probably the most handy solution to enjoy music on iPod, iPhone, PSP, other transportable media players and cell phones. Now, let's take a look at how to use the Free and User-friendly audio converter. Some formats, comparable to MP4 or FLV can retailer each audio and video streams. MP3 Converter (music ogg flac wav wma aac) is a music converter that means that you can rework songs and audio information to other extensions: you possibly can convert mp3 to ogg, flac, wav, wma, aac, m4a, and many extra. Select the extension, choose an output format and convert any music, perfect for creating albums of songs and folders of audios, compose musical themes and works with music.
Now click on the Convert All button to start out converting FLAC to MP3, AIFF or any format you want in your Mac system, the converting course of will likely be completed inside a few seconds and you can swap to the Transformed tab to locate the convertedflac recordsdata in your Mac. If you have already got a music file in a lossy audio format and need to make it even smaller, you can use the FonePaw audio compressor to cut back the bitrate and pattern price of the audio file. Step 5. As soon as clicked, a window will pop up. Click on Obtain Page after which select Obtain for Windows. Then, click on Save File and watch for it to download.

Many individuals have questions on M4A, since it is relatively new. M4A stands for MPEG 4 Audio, and it's a widespread file extension used to signify audio files. Convert your audio like music to the WAV format with this free on-line WAV converter. Add your audio file and the conversion will begin immediately. You may also extract the audio observe of a file to WAV in the event you add a video. Good point. I have additionally heard it instructed that one of the ways to get around DRM (Apple's or Microsoft's) is to burn the purchased tracks to CD and then rip the CD to MP3. That does not appear to be a good idea to me - the unique file was compressed within the first place and ripping to MP3 simply strips away even more constancy. It's like making photocopies of photocopies - the standard deteriorates with every technology.
What is the difference between M4A and MP4 files? I am a bit confused. Convert Apple device m4a to mp3 converter 320 kbps music and all the other audio codecs to any gamers. The M4A audio might be easily set as a Ringtone (iPhone) directly just by changing or renaming the extension (file) from M4A to M4R. 1). Batch Convert Mode: helps batch convert multiple totally different formats audio recordsdata to similar WAV format on the identical time; Scorching Listing Mode: helps robotically convert audio recordsdata written in monitor folder into WAV format; Command Line Mode: supports writing command line to complete audio conversion work.
Remove audio noise from audio like MP3, WAV, WMA, M4A, 3GA, Apple Lossless ALAC, CAF, FLAC, OGG, M4B, MKA, AAC, AC3, DTS, RA, RAM, APE, AU, AUD, AIFF, AIF, AIFC, MPC, QCP, SHN, TTA, PCM, AMR, AWB, VOC, VOX, MPC and extra. As soon as the MP3 file is added to the software program, click on drop-down menu subsequent to Convert all information to: and choose WAV and file quality from the Audio tab. First of all, we're speaking about lossy" audio formats. For those who're an audiophile and require the utmost in sound quality, you may need to use a lossless audio format like FLAC or WMA lossless. These codecs have the same sound quality as a music CD. You may additionally need to check out OGG Vorbis lossy format, or WMA skilled. These are the only 2 lossy audio formats which help bitrates past 320 kbps.

So what can you do if you have information in one in every of these formats and want to add them to iTunes? There are a selection of packages that may convert audio recordsdata from one format to a different. tmkk's free XLD is my tool of choice, because it manages each audio file format I've ever come across, together with some I've by no means heard of, and even supports cue recordsdata. Stephen Booth's free Max is another instrument that converts many audio file formats. And in case you have Roxio's Toast 11 Titanium (and some earlier variations), you may convert from FLAC or Ogg Vorbis to iTunes-pleasant formats.
1 note
·
View note
Text
Converter Mov To Avi For Mac

Performing as professional MOV to AVI converter for Mac, it converts MOV to AVI on Mac easily. Not restrained in converting MOV to AVI, it could also convert video and audio files in more than 180 formats like MP4, FLV, MKV, 3GP, MOV, M4V, etc. With lucid and intuitive design, it is easy to use and works fast.
The program can, conversely, convert MOV to AVI on Mac for playback on a certain device (or convert your.mov files to the widely used format - mp4 on the planet). AVI is a multimedia container format and it has not a standardized encoding method. You can manually set the output avi files with video codec like XviD, H.264, MPEG-4, MJPEG if.
Convert mov to avi free download - Front End Convert Drop, AnyMP4 MOV Converter, Free AVI to iMovie Converter, and many more programs.
How to Convert AVI to MOV? Click the “Choose Files” button to select your AVI files. Click the “Convert to MOV” button to start the conversion. When the status change to “Done” click the “Download MOV” button; Best Quality. We use both open source and custom software.
by Brian Fisher • Jul 24,2019 • Proven solutions
AVI is a wildly popular video container format which can be found virtually anywhere. It's quite easy to play AVI files in Windows, but things are totally different if you're using Mac, even in the latest macOS 10.15 Catalina. The fact is that only a couple of video formats are supported natively on Mac, namely M4V, MP4 and MOV. To play AVI video, you have to install third party codecs. The direct solution to this AVI problem is to install a Mac player that can decode AVI videos. But that has its own limitations. Apple products are inherently incapable of playing AVI files. With an AVI video player, you will be able to play AVI video on your Mac without problem. However, the problem will come back to haunt you when you transfer these AVI files to mobile devices like iPhone X/8/8 Plus/7/7 Plus/6s Plus/6s, iPod shuffle, iPad Pro, and iTouch.
Best 5 AVI Converter for Mac
#1. UniConverter
So, the best choice is to get an AVI video converter and convert all AVI files into Mac-compatible formats. Here UniConverter is humbly recommended. It's a specially desired AVI converter for Mac that not only allows you convert AVI to Mac-friendly video format, but lets you directly convert AVI to play on iPhone, iPod, iPad, PSP, Android phones, etc. Will you be giving it a try?
UniConverter - Video Converter
Get the Best AVI Video Converter:
Convert AVI videos to 150+ video and audio format on Mac or Windows without any quality loss at 90X faster speed.
Download or record online video from any online video sharing sites such as YouTube, Vevo, Hulu, Netflix, etc.
Convert to preset format for mobile devices, and then use Transfer feature to easily watch your video on the go.
Edit your AVI videos before converting them with functions like Trim, Crop, Rotate, Add Effects, Watermark, Subtitles, etc.
Provide with a set of useful handy tools like GIF maker, screen recorder, VR converter, cast to TV, etc.
Fully compatible with macOS 10.7 and above up to the lastest, and Windows 10/8/7/XP/Vista.

How to Convert AVI Videos to Other Formats on Mac
Step 1. Import AVI files to the converter
Mov File Converter
After locating AVI files in the Finder, drag and drag them to the program interface. Alternatively, open the built-in Media Browser and locate AVI files in the frequently used folders. Or use 'Add Files' button to browse and load AVI files in the popup dialog.
Tips: This AVI converter for Mac supports batch conversion, you can import multiple AVI files on Mac, hold down the 'Command' or 'Shift' key and click on the AVI files one by one. You can also use your mouse to click and drag to select multiple files.
Step 2. Choose an output format
The next step is to choose an output format for AVI files. More than 150 output formats are provided, including all popular mobile devices. It's easy to do this. Just go the Format tray and click an output format you want from Video tab or Device tab directly. In each output format, select the desired resolution and click the Setting icon beside if you want to change more encode settings like frame rate, bit rate, encoder, etc.

The iPhone, iPod, iPad, PSP, Xbox 360, Android Generic and other device presets locate in the Device category. If you want to play AVI on these devices, you can simply choose the preset. No need to change video settings manually.
Step 3. Start to convert AVI to your selected format
At last, hit the 'Convert' button to start AVI conversion. If you have imported more than 1 video, tap the 'Convert All' button to convert them one by one automatically. The required time depends on the AVI video length. Usually only a few minutes are required. You'll get a prompt message when complete. You can then choose to open the 'Output' folder or just click 'OK'.
#2. Aiseesoft Video Converter for Mac
Aiseesoft AVI Converter for Mac is an efficient and effective tool in converting any video files. It supports multiple conversions and has an easy to use interface. You just need to add the files for conversion and choose an output format. Then click “Convert” to complete the conversion. Even though this application costs more, it is a versatile program which enables you to convert any video format efficiently with zero quality loss. It supports various file formats like MPEG, DAT, MP4, MTS, FLV, AVI, DivX, MPV and many more. This program is known for its super speedy conversions and other features. You could adjust the output format with its editing features such as crop, trim, watermark and combine videos.
Pros:
Supports several formats.
You can set video encoder, audio sample rate, video/audio bitrate, frame rate and resolution.
Cons:
Pop-up window which asks you to buy full version of this software. The cost of its Full version is $45.
#3. Bigasoft AVI Converter for Mac
Bigasoft AVI Converter for Mac is a professional video converting tool which allows you to convert any video file into any output format. It supports several file formats such as AVI, Xvid, ASF, WMV, MKV, VOB, MOD, RMVB, TOD, AVCHD, MP4, H.264, RM and several other formats. It converts any file with excellent output quality. You can preview the video before conversion, combine several videos, watermark, take screenshots, trim and add several other special effects. It also supports YouTube video downloads. You could also convert the videos to Apple iPhone 5, iPad 3 and iPad Mini. It is fully compatible with macOS 10.10.
Pros:
Unique editing features to adjust and enhance the video quality.
Filter and Preview options.
Cons:
Slow conversions and Time-Consuming.
#4. Cisdem AVI Converter
Mov Converter Free
Cisdem AVI Converter has many attractive features which makes it a powerful tool for video conversions. You can extract soundtracks from video files and rip DVD movies. You could download videos from various video sharing websites like YouTube, Dailymotion, Vimeo, Yahoo, Metacafe and several other sites. It provides video editing options such as crop, trim, rotate, watermark, subtitle (.srt), supports 3D videos and many more options.
Pros:
Extracts soundtracks from videos.
Supports video downloads from various video-sharing websites.
Creates subtitle with .srt file.
Cons:
Time consuming during file conversions.
#5. Wondershare Video Converter
Wondershare Video Converter provides quick and easy conversion of AVI file formats. It has an in-built video editor, DVD burner, media player and several other features. It provides 30X faster conversion of files with zero quality loss. It also enables file transfers to your Android and Apple devices with its Wireless transfer software. This converter is popular due to its powerful and excellent editing features. It supports many file formats and portable devices too. You could also download online videos with ease. You could either save them on your computer or convert them for playback on your desired portable device. It automatically converts videos whenever needed. You could also download YouTube subtitles and audios from YouTube videos directly.
Pros:
In-Built Video Editor.
DVD Burner.
Supports several file formats and portable devices.
Cons:
Issues with DVD Burning.
Sometimes merging of multiple videos may not work.
Tip 1: Free Ways to Play AVI on Mac
See? It's easy to fix the AVI compatibility problem. An alternative option is to install media players that can directly playback AVI files. One of the best media players on Mac is VLC, a popular open source media player on Mac. This well-known media player can play a wide array of media formats including AVI, MKV, MOV and so on. Different from media player, if you prefer QuickTime player to other players, you can also install a QuickTime plugin called Perian, which is also free and open sourced. Unfortunately, this open source program is no longer in active development and you may encounter problems when using it with the latest Mac OS. Also, older version QuickTime doesn't work with it, and you will need to have the latest QuickTime installed on your Mac. Otherwise you will be unable to install it.
All in all, an AVI converter is the easy way to go and the other 2 options require some technical know-how on part of the users. And if you feel you are not equipped with the required knowledge to install them successfully, you will be better off sticking to the first recommendation.
Tip 2: Can I Convert AVI in Windows?

To convert AVI videos in Windows PCs, download the Windows version - UniConverter for Windows.
Apart from converting AVI to MOV and WMV formats, iSkysoft AVI converter software can also convert video between a broad range of other media formats. All major Mac and Windows operating systems are supported, like Sierra/El Capitan/Yosemite/Mavericks/Mountain Lion/Lion/Snow Leopard and Windows 10/8/7/Vista/XP. Try it youself now!
by Brian Fisher • Jul 25,2019 • Proven solutions
If you are using Mac and need to sent several files which are in MOV format to your workmates, who are still use computers running Windows operating system, you need to change MOV files, because Windows computers cannot recognize MOV files. Second, if you've bought a new Android-based smartphone, BlackBerry or Nokia phone, these nice MOV files are not compatible with any of them. Watching MOV videos on them could be a problem. In cases like these, you need to convert MOV to AVI on Mac. Let's learn 3 methods to convert MOV flies to AVI on Mac easily.
Solution 1: (Best) How to Convert MOV to AVI on Macbook, iMac, iMac Pro/Air, etc
To convert MOV to AVI file on Mac, you need a professional video converting tool, like the UniConverter for Mac. The app introduced here is a user-friendly tool, which has won good fame from Mac users. It can convert MOV files to AVI format without lossing quality and it supports HD videos. Let' know more about it below:
Convert MOV to AVI on Mac with Zero Quality Loss:
Easily convert MOV file to AVI with 3 simple steps. You can also convert among other 150+ video or audio format.
Edit your MOV videos before converting to AVI files. You can trim, crop, rotate or add effects, watermark, etc. to your video at will.
Download or capture online videos from 1,000+ online video sites like YouTube, Vevo, Vimeo, Hulu, Netflix and more.
Transfer the converted or downloaded MOV/AVI video to your mobile devices easily with USB cable connected.
Burn MOV or AVI videos to DVD with customized templates.
Offer a series of interesting handy tools for your convenience such as GIF maker, VR converter, cast to TV, record screen, etc.
Perfectly compatible with every Mac running macOS 10.15 Catalina, 10.14 Mojave, 10.13 High Sierra, 10.12 Sierra, 10.11 El Capitan, 10.10 Yosemite, 10.9 Mavericks, 10.8 Mountain Lion, 10.7 Lion, etc. (It also works on Windows PC)
Step-by-step Guide to Convert MOV to AVI on Mac (Including latest macOS 10.15 Catalina)
Step 1. Load MOV videos to the MOV to AVI converter Mac
Use the Add Files button on top left of the main interface to locate the MOV videos to be converted. Or you can directly drag and drop the MOV videos to this MOV to AVI converter for Mac.
Step 2. Select 'AVI' as the output format
When opened the format tray, you can click on the Video tab and select AVI as output format. Apart from this, you could also modify the configurations of the output AVI files by changing the resolution, frame rate, bit rate, quality, etc.
Step 3. Start MOV to AVI Mac conversion
Click the big Convert All button at the bottom right to start the conversion. This program is specifically designed for Mac OS operating system, including macOS 10.15 Catalina, 10.14 Mojave, 10.13 High Sierra, 10.12 Sierra, 10.11 El Capitan, 10.10 Yosemite, 10.9 Mavericks, 10.8 Mountain Lion, 10.7, 10.6, MacBook, Mac Pro, MacBook Air, MacBook Pro, etc. When the conversion is done, you can share the output AVI videos with your friends without limitations.
Part 2. How to Convert MOV to MP4 in Freemake on a Mac
Freemake as the name states is an open source video converter, i.e., you can download it for free. It helps you convert your MOV files into MP4 and many other formats. Although it’s not an online converter, it’s power-packed with lots of features and supported conversions. Despite that, the conversion process and simple and a few easy steps allow you to convert your MOV files into MP4 on Mac without any difficulty.
Step 1. Open the Freemake converter and click on the +Video button. Add the MOV video you want to convert.
Step 2. Now look at the presets in the bottom of the window and select “to MP4” to convert your video into MP4. If you don’t find it, use the arrows on the left and right to scroll through options.
Step 3. Now go to the Convert tab and choose the destination folder and name of the output file. After this click on ‘Convert’ and your MOV video will start converting into MP4.
Once done, you can find it in the destination folder you selected earlier.
Part 3. How to Convert MOV to MP4 in VLC on Mac
There’s hardly anyone who hasn’t used VLC media player. The VLC media player is not only used for playback but is also an easy way to convert video formats. In just five simple steps, you can convert your source files like MOV into any target format like MP4.
Step 1. In the VLC player, go to the MEDIA menu and select Convert/Save.
Step 2. In the Open Media window, under the File tab, click on Add and then add the MOV file that you want to convert. It should be located on your device. Now click on the Convert/Save button at the bottom.
Step 3. When you hit the convert button, it will direct you to the window containing Profile and Destination settings. In the Profile settings, select Video-H.264+ MP3 (Mp4) as your Output format.
Step 4. After saving the profile settings, go to the Destination section and name your output file as you like, with a .mp4 extension.
Step 5. Now just click Start and VLC will start converting your MOV file into MP4.
When do we need to convert MOV files to AVI?
MOV and AVI are multimedia container file formats, and you can use top MOV to AVI converters online to convert one into the other. Apple developed the MOV file format whereas Microsoft is the manufacturer of the AVI file format.
The features that distinguish MOV from AVI are that MOV files can store multiple tracks each having different media like audio, video, text or graphics, whereas AVI can store one track at a time. AVI, on the other hand, is one of the most compatible formats supported by almost every existing media player. MOV is mainly associated with QuickTime Player but is compatible with both Mac and Windows operating systems. AVI as compared to MOV uses less compression, but despite that, most DVD players support AVI file format.
MOV is quite flexible as compared to AVI but not all players support this format, whereas simplicity of AVI makes it one of the most popular and compatible format. To smoothly run your favorite MOV files on different media players (not supporting MOV format), you have to convert them to AVI.
0 notes
Text
Spotify Won't Draw Over Other Apps

What the actual f*** is wrong with Spotify’s Shuffle?
Spotify Won't Draw Over Other Apps Automatically
Spotify Won't Draw Over Other Apps Free
Spotify Draw Over Other Apps
Spotify Won't Draw Over Other Apps Together
The West Coast Pop Art Experimental Band, Category: Artist, Albums: A Child's Guide To Good And Evil, Vol. 2, Part One, Singles: Rhino Hi-Five: The West Coast Pop Art Experimental Band, Top Tracks: I Won't Hurt You, Shifting Sands, A Child of a Few Hours Is Burning to Death, Eighteen Is over the Hill, If You Want This Love, Biography: One of the more offbeat acts to emerge during the. But as a customer of Spotify Premium, it was more annoying than anything to be paying for something that failed to work. And it kept happening, and happening, and happening. Over the course of years. Use Spotify’s other tools Beyond promoting to the followers you already have, there are some key ways to get your music to more ears on Spotify: Make sure you regularly update your Artist Pick: It’s at the top of your artist profile, giving you control over what song, album, or playlist people see when they land on your page.
On desktop, download the Discord app and open it. Click Connections in the menu on the left. A web page will open to connect. If you’re not already logged into Spotify on the device, you’re directed to log in or sign up first. Click CONFIRM to confirm. Fortunately, it’s a pretty easy fix once you know what’s causing the error: a feature found in Marshmallow and beyond that allows apps to “draw” over other apps. For example, Facebook Messenger uses chat heads to stay in the foreground of whatever you’re doing—this is the app using the “Draw over other apps” feature. Download this app from Microsoft Store for Windows 10. See screenshots, read the latest customer reviews, and compare ratings for Spotify Music. LiveXLive is also free, which means you won’t have to spend a lot to get their content. Watching the live performances is the big draw of this streaming app, but it has plenty of other features as well. You can go beyond music here and catch the news or hear the latest scores of your favorite sports teams.
You’re on the go (maybe in a little hurry) you hit up that carefully curated playlist on Shuffle mode.
Only to get after two to three songs that Spotify plays the same song over again and again, and the very idea of you having to take out your device and adjust your Spotify doesn’t really make life any easier.
It’s frustratingly annoying.
But don’t worry.
Just hit up that Marvin Gaye and I’ll show you how you can fix when your Spotify Shuffle play is not random. 🙂
How to Fix When Spotify Shuffle Play is Not Random : 5 Ways
Make sure to go from 1-5 accordingly
1.Restart your Spotify App
Step 1: Go ahead and Log Out from your Spotify account by heading to Your Library and then your Settings (gear icon) which is to your top right hand corner.
Step 2: Once you’ve logged out from your Spotify, restart your Spotify app by closing the app, and clearing it from your apps which are running in your background.
Step 3: Now after you’ve done all that, select your Spotify app and log back in.
Now try a playlist of yours if Spotify Shuffle is indeed shuffling your music.
If you find that Spotify Shuffle play is not random then move on to the next method.
2.Sort Your Tracks By Title
This one’s apretty popular one amongst the Spotify community and for some it has provided a fix to their music shuffling crisis.
Here’s how you do it
Step 1: Head over to your Spotify and select the playlist that you want to listen to.
Step 2: Now you’re in your playlist right? Okay. So what you do is swipe your finger down on the screen. You will see a Filter search bar at the top and a hamburger-like symbol to its right.
Step 3: Select that hamburger symbol and once you’re in, you can select how you would like to sort out your songs in your playlist. Just select Title. Spotify mac os x 10.5.8 download.
Step 4: Now tap on that big green Shufflebutton in your playlist screen and see if your music plays randomly.
If you still feel that your music often plays the same song over and over again then.
Keep reading.
Spotify Won't Draw Over Other Apps Automatically
3.Update Your Spotify App
Make sure that your Spotify app is updated to the latest version.
More often than not, the reason why your Spotify Shuffle play is not random is because Spotify could have already updated their Shuffle play algorithm and you’ll never know since you are on a older version of Spotify and when it still plays that same song over again and again.
I’ll show you how you can update your Spotify app whether you’re on iOS (iPhone, iPad, iPod Touch) or Android.
If you’re on iOS

Step 1:Head over to your App Store.
Step 2: Then go on to the Updates tab to your far right hand side and check if your Spotify app needs to be updated.
If you’re on Android
Step 1: Go ahead and open your Google Play Store app.
Step 2: Next, tap the Menu symbol (yeah it’s the one that kinda looks like a hamburger). Then select My apps & games.
Step 3: Look for Spotify. If you see Update next to it, then select Update. If not your Spotify is already updated to the latest version.
That’s it. 🙂
The Last.fm Desktop Scrobbler for Windows is a simple app that runs in the background and automatically updates your profile with what you’ve been playing on your computer via native media players such as Windows Media Player or iTunes. Download now for Windows Compatible with Windows 7, Windows 8, and Windows 10. Not using Windows? 1.7.0 (2019-9-22) codename: mingus. Login notification bug. Music App Activity bug. Rate Limit Exceeded status for Last.fm. Get the official Last.fm Scrobbler App to keep track of what you're listening to on Apple Music. Check out your top artist, album and song charts from all-time to last week, view detailed artist information and watch videos of your favourite tracks. Note: only tracks stored locally in. Last fm spotify scrobbler downloader.
Now try your Spotify again and hit up a playlist to see it if does shuffle your music randomly.
If it does, great!
If not, you are to going need to use your last resort.
4.Use Spotify Shuffler (It’s Free)
Basically Spotify Shuffler is a completely free (and safe) third party application which helps shuffle all your music for you much better than Spotify ever does.
The only caveat is though you’re going to need to return to Spotify Shuffler every time you want your music to be shuffled. (But if you’re going to listen to a 50-100 song playlist on the go, you don’t need to shuffle all that often right?).
I’ll show you how it works.
Step 1: Go ahead and login to your Spotify account via Spotify Shuffler.
Spotify Won't Draw Over Other Apps Free
Step 2: Signed in? Great! Now go ahead and choose any playlist you like and randomize it.
Step 3: In order to listen to the playlist that you just randomized you need to listen to the playlist in your Spotify app with the shuffle turned off. (This is so that Spotify’s Shuffle doesn’t interfere with our already-randomized playlist)
That’s it!
Now just return to the site whenever you want to repeat the process when you would like your tracks in a new order. 🙂
If you get any errors then you can drop them an email on their Contact page and they’ll let you know if there is any maintenance with their service (it’s a free service after all).But if you find that the errors you get still doesn’t get fixed, then keep reading.
Even if you have tried all the 4 methods above and you find that it still doesn’t do the trick then you can always…
5. Switch to Apple Music or Google Play Music
I know this is not really a fix, but it is certainly indeed an option.
Spotify Draw Over Other Apps
Both Apple Music and Google Play Music have a great algorithm to shuffle your music and both of which comes at the same price of Spotify at $9.99 or $14.99 with a Family Plan (up to six people).
Spotify Won't Draw Over Other Apps Together
I’ll only encourage you to move if you really use Shuffle play almost everyday and if you just about had it enough with Spotify’s efforts of improving their Shuffle algorithm.
0 notes
Text
X Mplayer2 Download

Freeware
Feb 13, 2014 mplayer2 is a command-line video player that was developed from the initial MPlayer, providing you with the original functions and more, along with various improvements of. Hi, what a long absence, I'm still alive, MPlayerX too. Now I'm planning some, relatively, big feature into MPlayerX for the next major release. It may cost some time. Before doing it, I thought I'd better release once. So actually 1.0.1 isn't a exciting release, just a little step forward. MPlayerX is armed by FFmpeg and MPlayer, which means it could handle any media format in the world without extra plug-ins or codec packages. Dance on your fingers. Pinch, tap or swipe, MPlayerX provides you the easiest way to control the playback. Click to download the Control Script for Sofa. Dec 13, 2018 Download MPlayer. MPlayer is a movie player which runs on many systems. Login Social Sharing. Tech news in your inbox. Get TechSpot's weekly newsletter Facebook.

Windows
46.0 MB
57,533
Aug 28, 2019 Bandwidth Analyzer Pack analyzes hop-by-hop performance on-premise, in hybrid networks, and in the cloud, and can help identify excessive bandwidth utilization or unexpected application traffic. Download a free trial for real-time bandwidth monitoring, alerting, and more. NOTE: The MPlayer App is optimised for iOS 7 or later.Download the MPlayer App free of charge before your next Monarch flight to enjoy our exciting.
It plays most MPEG/VOB, AVI, Ogg/OGM, VIVO, ASF/WMA/WMV, QT/MOV/MP4, RealMedia, Matroska, NUT, NuppelVideo, FLI, YUV4MPEG, FILM, RoQ, PVA files, supported by many native, XAnim, and Win32 DLL codecs. You can watch VideoCD, SVCD, DVD, 3ivx, DivX 3/4/5, WMV and even H.264 movies.
Another great feature of MPlayer is the wide range of supported output drivers. It works with X11, Xv, DGA, OpenGL, SVGAlib, fbdev, AAlib, DirectFB, but you can use GGI, SDL (and this way all their drivers), VESA (on every VESA compatible card, even without X11!) and some low level card-specific drivers (for Matrox, 3Dfx and ATI), too! Most of them support software or hardware scaling, so you can enjoy movies in fullscreen. MPlayer supports displaying through some hardware MPEG decoder boards, such as the Siemens DVB, DXR2 and DXR3/Hollywood+.
MPlayer has an onscreen display (OSD) for status information, nice big antialiased shaded subtitles and visual feedback for keyboard controls. European/ISO 8859-1,2 (Hungarian, English, Czech, etc), Cyrillic and Korean fonts are supported along with 12 subtitle formats (MicroDVD, SubRip, OGM, SubViewer, Sami, VPlayer, RT, SSA, AQTitle, JACOsub, PJS and our own: MPsub). DVD subtitles (SPU streams, VOBsub and Closed Captions) are supported as well.
What's New:
After a long pause, we decided that it might be a good idea to make a new release. While we had our fun with the naming scheme with lots of 'pre' and 'rc' it seemed time to move on and with everyone incrementing major versions between weekly and monthly we hope to be forgiven for jumping ahead to 1.1.
This release is intended to be compatible with the recent FFmpeg 0.11 release. We hope it will be useful to distros and other users relying on FFmpeg 0.11. Everyone else is encouraged to follow Subversion HEAD to always get the latest features and bug fixes. You might still want to read the release announcement to get a short summary of any bigger changes and improvements.
Mplayer For Windows 7
Among the bigger news is that we found a maintainer for the X11 gmplayer GUI, so those holding out on it against our earlier recommendations will get a lot of bug fixes.
There is also support for more subtitle types (Bluray, DVB, DVB closed-caption for example), many improvements to -vo gl including output of 10 bit video, very basic but usable OpenGL ES support and much better SDL support which makes it a usable choice on OSX (particularly on older PowerPC variants much faster than corevideo or quartz). MPlayer will now also try much harder to handle intermittent network failures, for example trying to reconnect.
As part of the code cleanup efforts, the internal libfaad2 copy has been removed since the FFmpeg decoder is working well. Also the internal mp3lib copy is no longer used by default since the many alternatives (FFmpeg, libmpg123, libmad) avoid its recurring issues like incorrect decoding with newer compilers. However it can still be forced at runtime for easier tracking of regressions. Please do not rely on this since it will be removed in the future. If you do not actually need it consider disabling it at compile time with --disable-mp3lib.
As a first for this release, the tarballs are available in two variants: compressed with xz and compressed with gzip. Please get the xz variant if you can to save bandwidth, the gzip version is for everyone that cannot use it. Should you never have encountered xz compressed files, newer versions of tar can uncompress it via 'tar xJf MPlayer-1.1.tar.xz'.
What's New:
Upgraded gcc to 7.3, enabled lto in FFMpeg
Enabled dash demuxer in FFMpeg
Enabled libopenmpt in FFMpeg
Updated gnutls to 3.5.18
Updated libvpx (git)
Updated openh264 (git)
Updated kvazaar (git)
Updated x265 (hg)
Apps similar to MPlayer 6
8914 votes
iTunes is a free application for Mac and PC. It plays all your digital music and video. It syncs content to your iPod, iPhone, and Apple TV.
Freeware
Windows
182 votes
A highly portable and popular multimedia player for multiple audio and video formats.
Freeware
Windows/macOS/Linux
67 votes
Freeware media player that supports many features for advanced users who desire to watch video files at the best quality.
Freeware
Windows
Application/x-mplayer2 Chrome Download
thx
I needed a simple command-ling media player, and this was perfect! Extremely lightweight and very versatile. I use it for some custom clip management and window capture for streamers to use when broadcasting using the OBS Studio streaming/broadcasting software on Twitch. I take chat commands that create a text semaphore/trigger file, and when the script sees the trigger, it uses this Mplayer utility to play. I am just doing this for fun, and to help streamers offer a little something extra. if a streamer wants to rotate 8 different 'Hug' clips when a viewer runs the '!hug @somename' command in chat, there should be a utility that can launch the clips when the commands are run, then rotate the clips so if 4 or 5 people use the 'Hug' command to hug each other, it doesn't just play the same clip over and over. The fact that you can title the player window allows a streamer to have a few different windows captures set up. Maybe 1 for fullscreen clips with a chromakey filter, a regular fullscreen clip fo speciual event clips, and maybe ones for subscriber 'intro clips' they use when they join chat to announce their presence in style. Maybe another for 'accent clips/memes', so users can add commentary by launching clips at proper moments, like a '!rip' command that plays a rotation of funny 'I'm dead' clips when the streamer dies playing a game. The streamer just ads these 3 or 4 window capture sources to each scene they want clips to be available, then the script/utility launches each clip with the appropriate window title to have it play at the right size and location. I'd love to see someone actualy do this properly. I have it all working. I just needed a 'lighter' player that was flexible enough to support all the different clip types. I was using VLC Media Player, but it did noy play smoothly, often hitching/lagging for a split second when launching clips, making it seems rough and 'unfinished'. This gives a smooth and polished feel when playing the clips.
This is awesome. No more need to fire-up some heavy graphical user interface just to listen to audio streams! (Sorry I couldn't do this, due to a complete lack of free time here!) The only thing lacking, instructions how to install mplayer.exe and instructions concerning how to use with Cygwin. Basically, the mplayer.exe goes within your $PATH. I'm not sure where the other sub-folders should reside, but I simply created a symbolic link using Cygwin for my usage here. (ie. See below Cygwin Instructions) Initial execution of mplayer.exe seemed to search all of Windows fonts. Successive exections of mplayer.exe appeared to forgo the font searching, resulting in the usual quick start of the program. For cygwin users: 1) Unpackage the mplayer package to a folder. 2) Start cygwin and make sure you have a local bin folder (ie. /home/user/bin) within your path. If not, create the folder and modify your local $PATH to include your /home/user/bin folder, replacing the 'user' with your user name. 3) Type 'ln -s /place/where/you/unpackaged/mplayer/mplayer.exe /home/user/bin/' 4) If you prefer using .exe' command suffixes or are required to, and you have 'mplayer' aliases within you Linux bashrc and are copying the Linux bashrc over to Windows' Cygwin, then open the bashrc file within vim and type ':%s/mplayer /mplayer.exe /gc' without quotes. The command will aide in replacing the 'mplayer ' with 'mplayer.exe '. Most Cygwin users can skip this as Cygwin seems to recognize commands without the '.exe' suffix!
Nice work ! Version 37051 has not any more WMV bug. Really nice Job ! Don't stop working on mplayer, i use it everyday for a project i'll publish soon... Thanks again ;)
Application X-mplayer2 Downloads
Read more reviews >
0 notes
Text
The Best Blu Ray Burning Software For Mac Free

The Best Blu Ray Burning Software For Mac Free Software
The Best Blu Ray Burning Software For Mac Free 2017
The Best Blu Ray Burning Software For Mac Free Download
The Best Blu Ray Burning Software For Mac Free Full
How to burn Blu-ray discs on a Mac. A Blu-ray Disc has advantages over a standard DVD: the picture and audio quality are better, and if you haven't got a fast internet connection, buying a disc.
Making a mixtape or accumulating your favorite videos on a DVD on a Mac can be hectic if you don’t know what you are doing. To accomplish this task seamlessly, you can always use DVD burning apps for Mac. Although, it is hard to decide which software could solve the purpose.
Jul 07, 2015 BurnAware is a very simple and easy to use CD/DVD/Blu-ray disc-burning app. You can use it to create data backups, audio CDs and to create or burn ISO image files. The free version also lets you create bootable discs, which is really handy.
Best DVD Burner for Mac 1. Burn is open source DVD/CD burner software, it has gained wide reputation for doing basic burning tasks. You can even use Burn for Mac to copy DVD files (.dmg, iso, cue/bin, etc.). This DVD burner even supports authoring.
Jan 23, 2019 The best free Blu-ray player software VLC Media Player is a free, open-source program that’s been around since 2001. It has adapted quite well to new audio and video formats as they’ve been developed and released. If you want a free Blu-ray player application, this is probably your best bet.
Leawo Blu-ray Creator It is one of the best Blu-ray burning software that allows you to burn the videos directly to the Blu-ray disc or save them in your PC as Blu-ray folder. It lets you customize the video and preview it before burning to the Blue-ray disc. Here are some of its features.
In this post, we have listed some of the DVD burning software for Mac.
Why To Choose CD/ DVD Burner Software for Mac?
Everyone has different reasons when it comes to choosing software which could burn a DVD on Mac. Some want to keep their media collection safe while some want to keep a backup of their data as there is always a risk of theft, data loss. The basic reason for using software is to make copies to ensure the data is safe.
You might be thinking at this time when people love to watch movies, TV shows on online streaming services, DVD burning seems to be a bit old-fashioned. However, some of us still want to keep the collection as many of old classics or prevalent TV shows and movies are not yet available on online streaming service. This may also come handy if you want to keep your favorite shows and movies offline
How Does it Work?
The DVD burning software extracts ISO image of a DVD and copies it to your hard drive or allows you to burn a new DVD. The software makes it possible to choose what you want to copy.
Let’s check out some of the best software to burn CD/DVD on Mac.
Best DVD Burner For Mac In 2020
1. iSkysoft DVD Creator (Mac)
iSkysoft DVD Creator is a DVD burner for Mac which consists of all the great quality of software which helps to burn CD & DVD. You can easily burn a disc and copy your content. It enables you not only burn DVD but you can also create a slideshow of your favorite photos with music. The software has a user-friendly interface so anyone can use it. All you need to do is drag the videos and drop them into the software window. Now select edit videos or DVD menu, then click “Burn” to start the process. The process will get completed in no time as the software burns the disc with high speed. No quality loss of the content.
See Also:10 Best Data Recovery Software for Mac
2. Any DVD Cloner for Mac
Any DVD Cloner for Mac is one of the best DVD burning software for Mac as it helps to burn DVD to DVD, ISO image file, DVD folder. It enables you to eliminate all DVD copy protections including RC, CSS, RCE, APS, and UOP. It can make copies of your DVDs with high speed. With the help of the software, you can get movies from DVD to iPod, PSP, iPad, iPhone, Xbox360, and Android devices in different formats such as M4V, MP4, MKV formats.
3. Xilisoft DVD Copy for Mac
Xilisoft DVD Copy for Mac is another DVD burner for Mac which can make it extremely easy to copy and backup a DVD. You also get to choose what file or movie you want to copy at a destination. This software has a capability to duplicate DVDs on Mac OS with original video and audio quality. One of the easiest software to use with a clean interface. It is compatible with DVD-RAM, DVD+-R/RW, and almost all DVD burners and players.
4. DVD Cloner for Mac
One of the best DVD burner software, DVD Cloner for Mac makes it easy to copy DVD with quality. The software is capable of copying protection systems and accessing all the region codes. It gives freedom to copy DVDs no matter what encryptions it has, to various destinations such as ISO image file, blank DVD disc and more. It also provides you with different options while copying the file from the source such as movie-only copy, customized copy, movie complete copy and more. You can preview the movie title with an inbuilt DVD player to make sure that you have copied the correct content.
5. Leawo Bluray Copy for Mac
Leawo Bluray Copy for Mac is one of the best DVD/CD burners for mac which could be used to burn a DVD/CD. It helps you to backup DVD disc & Blu-ray and allows you to create a folder, ISO film disc with fast speed. The software can take 1:1 disc to disc backup of, DVD-9, BD25, DVD-5, and BD50 with original quality. The software can also copy 3D Blu-ray disc with 3D effect intact. With 1:1 Blu-ray disc copy mode, a 3D effect of a source file is not changed when copied to destination disc.
6. Filmora Video Editor
Yet another good DVD burning software for Mac is not only good for burning discs but also can edit videos with advanced tools such as Picture in Picture, audio mixer, split screen, screen recording and more. Import audio, videos, and photos of any format apply effects, make changes to the video with editing tools and then send the video to DVD. You will not face quality loss in videos, photos, and other content on burning DVD. It is compatible with MOV, FLV, MP4 and more.
7. Burn
Burn is an amazing DVD burner for Mac software which solves the purpose of burning DVDs and comes with advanced options too. It is considered as one of the best CD burner software for Mac as it burns audio-CD discs easily. All you need to do is drag and drop your audio files on Burns audio list. You can also change advanced settings such as file dates, file permissions and more. Moreover, you don’t have to worry about conversion, the software does that for you. You can also choose what quality and size of the content you want.
8. Disk Burner
One of the best CD burner software for Mac, Disk Burner makes it easy to store all your media and other content on CDs and DVDs. Moreover, it heeds attention to data security as well. The software is powerful and works fastly. To burn the disc, all you need to do is insert CD or DVD, select the folder and choose “Burn CD or DVD”
See Also: Best Free CD Recovery Software For Mac
9. Simply Burns
Simply Burns is one of the best DVD burning software for Mac which has a simpler interface. Simply Burns is an open source software. The software allows you to burn videos and photos to DVDs. 1:1 Copy mode helps to get the exact copy of the content. The Rip Disc mode enables you to grab the tracks from an Audio CD.
10. iTunes
iTunes is a default software for Mac which helps to organize, play and buy media files. Additionally, the native app acts as a DVD burner for Mac as well. You can burn DVDs and store your music files, movies, and other content. To do so, you need to create a playlist and drag and add content to the playlist. Then control-click the playlist and choose Burn Playlist to disc to initiate the process.
So, these are some of the best DVD burning software for Mac. Try the one that matches your requirements and let us know what worked for you in the comments section below. You can also subscribe to our Newsletter for the latest tech updates
What Do You Think?
1 Responses
If you are looking for the Blu-ray disc burner that you can use on your Mac then you have definitely come at the right place. Though a large number of such software are available, but many of them have no compatibility with Mac. If you are a Mac user and are looking for an efficient Blu-ray burning software then you have come at the right place. Here, we are enlisting the best Blu-ray burners that you can rely on. What's more, we also recommended the best Blu-ray disc converter for Windows users.
Part 1. Top 6 Blu-ray Burning Software for Mac
Here we list top 6 Blu-ray disc burning software for Mac system, which allow you to convert videos to Blu-ray disc easily and clearly, so that you can play them on TV or other playable devices.
Blu-ray creator is the perfect software that you can use to burn any video or audio files to Blu-ray discs on your Mac. The user-friendly interface of this software is much easy to use that even the new users will be able to use it without any problem. It is not only the Blu-ray burning that this software supports, but it also enables you to edit the video before burning them to CD. You can add title, watermarks and special effects to the videos before burning them. It is available for $39.99.
Features:
Is able to convert all the major video formats.
Supports a great range of Blu-ray output formats which include BD-RE, BD-50, BD-25, BD-R and more.
Along with burning the videos to Blu-ray disc, it also saves their copy to the hard drive.
Fast and quality burning.
The entire conversion process occurs in transparency, you will be able to see the real statistics.
Enable you to burn the video to Blu-ray disc or save them into a Blu-ray folder.
Looking for an easy way to burn videos to Blu-ray? Then you must go for choosing the Express Burn. With a good support to all the video formats, BD formats and a simple conversion procedure, Express Burn enables you to burn whichever format and video you want to burn. The simple Blu-ray burning process enables you to burn the videos at fast speed, ensuring good quality at same time. It is available for $49.99.
Features:
Express Burn supports all the well-known video formats.
You can choose among the standard or wide screen formats.
Provides you the option to edit videos before you burn them to Blu-ray disc.
Simple but decent interface that you will love to use.
Blu-ray disc burning without affecting the quality of the video.
Though Roxio Toast was there to meet all your video conversion related needs, but the Blu-ray burning has only been enabled in Roxio Toast 14 Pro. Like above given software, the process of Blu-ray burning is also simple with this software. You just need to load the videos, select various customization options and click on the burn button. You will be thinking that how this software is better than others, so, let us tell you some features of this software. Roxio Toast 14 Pro will cost you $150.
Features:
Easy to use interface.
A large of options for selecting output formats.
Can burn almost all the video formats to Blu-ray disc efficiently.
Fast and quick burning which is not affected by the size.
It provides you a large number of editing options for your videos.
It is best for all- new as well as experienced users.
It is one of the best Blu-ray burning software that allows you to burn the videos directly to the Blu-ray disc or save them in your PC as Blu-ray folder. It lets you customize the video and preview it before burning to the Blue-ray disc. Here are some of its features.
Features:
Clear and concise user interface that enhances the user experience.
High speed Blu-ray burning.
Full quality retention.
Undoubtedly, supports all the major audio and video formats.
Multi-language support
It is a powerful application that enables you to burn different video formats to Blu-ray disc. Along with creating the Blu-ray copy of the video files, it also enables you to do the basic editing and customizing various output options before clicking on the “burn”. Its user-friendly interface lets the users to create the Blu-ray copies of the videos.
Features:
Different tools and configurations are available.
Fast processing
Easy to use interface.
Provide support for various video and audio formats.
If you are looking for a program with high performance and flexible burning then Blu-ray creator for Mac is the best option. The built-in editing tools feature a highly intuitive interface for video creation and Blu-ray burning. Its customization options let you have plenty of control on the videos to be burned. It is available at $39. 95.
Features:
Support all video formats for Blu-ray creation
Customize menu
Easy software operating mode for BD creation
Fast conversions without affecting the quality of video
Interface with multilingual support
Part 2. Recommended Easy-to-use Blu-ray Burner for Windows Users
However, if you are a Windows user and are looking for the Blu-ray burning software, then we would like to recommend you Wondershare DVD creator. It allows you to burn the videos and image files in any format to the Blu-ray disc. With a lot of customization options, it allows you to edit the videos to required format and customize DVD menu with different parameters before burning them to the Blu-ray disc. Here are some features of this burning software:
Wondershare DVD Creator
Burn videos or photos in any format to Blu-ray/BDMV/DVD/ISO file.
Additional tools like burning Data Disc, ISO to DVD, creating photo slideshow, editing videos, copying DVD, converting DVD to video, one-click to burning DVD/Blu-ray disc, etc.
Built-in video editor with functions of Trim, Crop, Rotate, Subtitle, Watermark, Effects, and others.
Create Blu-ray disc menu with 100+ DVD menu templates and customization such as changing background picture/music, adding text, editing thumbnail, etc.
Burn videos to Blu-ray disc with real-time preview, super fast burning speed, and high-quality output.
Supported OS: Mac OS X 10.14, 10.13, 10.12, 10.11, 10.10, 10.9, 10.8, 10.7, 10.6, Windows 10/8/7/XP/Vista.
Security Verified.5,150,814people have downloaded it.
Video Tutorial of How to Burn Videos to Blu-ray Disc with Recommended Blu-ray Burning Software for Windows
How to Burn Video to Blu-ray Disc on Windows with Wondershare DVD Creator
The Best Blu Ray Burning Software For Mac Free Software
Step 1 Choose Blu-ray Disc Type
Download, install and open Wondershare Blu-ray creator on your PC, then choose Create a Blu-ray(BDMV) Disc option to begin with.
Step 2 Add and Edit Video to Blu-ray Disc
To add files to the program, click the ' + ' icon on the interface and you can browse and add videos or photos present on your PC. Simply drag and drop to import files is also supported.
You can see all added files on the letf pane as thumbnail. Click the pencil-like icon on the thumbnail to open the Video Editor window, and you can edit videos here by cropping, trimming, rotating, applying effects, adding watermarks, and others. Feel free to skip this step if you want to keep your video original.
The Best Blu Ray Burning Software For Mac Free 2017
Step 3 Choose Menu Template and Make Customization
Click the Menu tab and you can see 100+ free templates for your Blu-ray disc menu on the right panel. Choose one you like and double-click to apply. Hit the icons upon the active window and you'll be allowed to make further customization such as changing background images, adding music, adjusting aspect ratio, etc.
The Best Blu Ray Burning Software For Mac Free Download
Step 4 Preview and Burn Blu-ray Disc
You're allowed to check your creation under the Preview tab, go back and make changes if something dissatisfied you. Next, move to the Burn tab and choose Burn to disc option, select Burning Settings like Disc Label, Burner, TV Standard and others. Finally, click the Burn button to start converting videos to Blu-ray disc on Windows quickly and easily.
With Wondershare DVD Creator, you can also burn videos and photos to DVD on Mac system with the same high-quality output of Blu-ray disc.
The Best Blu Ray Burning Software For Mac Free Full
0 Comment(s)
0 notes
Text
Stop Motion Technical
What are the four most important rules for creating stop motions?
DON'T bump the camera.
DON'T change your camera settings.
DON'T alter your lighting.
DO shoot some test frames.
DO try to complete each scene without interruption.
DO take more shots than you think you'll need.
What equipment do you need?
You need your props (subject of the video) could be food, an ornament etc, you need a tripod to stop any uneven or any bumpy photographs, you need a table or a steady surface to place your objects on and you may also use an app on your phone to control your camera settings so you don't have to touch your camera which may cause shaking.
What are the standard resolutions for (resolution Width x Height e.g. 6000 x 4000):
• a TV at home -
480p Standard 720x480
• HD (high Definition TV) -
The most common native resolution for a high-definition TV screen is 1920 x 1080.
• UHD (Ultra High Definition TV) -
3840 x 2160 (UHD) resolutions as standard
• a Laptop you use-
MacBook Air models introduced in 2018 or later. Native resolution: 2560 x 1600 at 227 pixels per inch.
• a Desktop PC you use-
19-inch screen (standard ratio): 1280 x 1024 pixels. 20-inch screen (standard ratio): 1600 x 1200 pixels.
• a top spec iMac-
The 5K 27-inch iMac has a resolution of 5120 by 2880, while the 4K 21.5-inch iMac has a resolution of 4096 x 2304, and both models feature 500 nits brightness and wide color support for vivid, vibrant colors and impeccable picture quality.
• a smart Phone you use?
The iPhone 8 Plus has a 5.5-inch screen, which isn't especially big by today's standards. The iPhone 8 Plus' resolution is 1,920 x 1,080 with a pixel density of 401ppi.
What does the term ‘Aspect Ratio’ mean?
The ratio of the width to the height of an image or screen.
For the below screens, what are the different aspect ratio’s?
• a TV at home-
All TVs sold today have an aspect ratio of 16:9, which means that if the width is divided into 16 equal parts, the height of the TV or picture should be 9 parts
• HD (high Definition TV)-
16:9 (1.77:1) is a widescreen aspect ratio with a width of 16 units and height of 9.
• UHD (Ultra High Definition TV)
On the television side, Ultra-High Definition (UHD) was developed using the same number of horizontal lines of resolution as 4K (2160), but using the standard HDTV aspect ratio of 16:9 (or about 1.78:1). So the full resolution of a UHD display is 3840 by 2160 (or 256 pixels narrower than Cinema 4K).9 Sept 2015.
• a Laptop you use
Most current Macbook laptops other than the 11" Air use 16:10.
• a Desktop PC you use
As of 2016, most computer monitors use widescreen displays with an aspect ratio of 16:9, although some portable PCs use narrower aspect ratios like 3:2 and 16:10 while some high-end desktop monitors have adopted ultrawide displays.
• a top spec iMac
The 27" iMac display has a physical size of approximately 23.5" x 13.2" which is 16:9 aspect ratio.
• a smart Phone you use?
iPhone 8 Plus - 736 × 414 (16:9)
What is the PPI for the below devices?
• a TV at home -
13.3"
PPI
262.25
Resolution -3200 x 1800
Device - Samsung Ativ Q
• HD (high Definition TV) -
A 24 inches display that shows a Full HD image (1920×1080) has a density equal to 91,79 PPI.
• UHD (Ultra High Definition TV)-
At 100% magnification, the 3840 x 2160 pixel UHD 4K resolution can be fully utilised, but the pixel density is around 140 ppi, and the pixel pitch is about 0.18 mm
• a Laptop you use
MacBook Air 11 11.6 1366x768 (135.094)
• a Desktop PC you use-
When it comes to PC displays, most products have a pixel density of about 96 ppi to match the display density of 96 dpi (dots per inch) which has been the standard for the Windows desktop UI.
• a top spec iMac
iMac 27 27 2560x1440 (108.786)
• a smart Phone you use?
iPhone 7/8 Plus 5.5 1920x1080 (400.528)
The number of Frames Per Second (FPS) can vary, research commonly used FPS for Stop Motion / Animation / Video and consider the effect this has visually?
Most moving images you watch are shot at 24 frames per second or thirty frames per second. Which give a smoother, more steady effect when watching your film. When you're shooting stop motion, you might not have time to shoot that many, but you can get away with shooting 12 frames per second or even 7-10 frames per second if you are okay with a little bit of a jerky style.
The most common use of Stop Motion is probably in Social Media, what are the recommended aspect ratios & Resolutions & FPS for the below:
• Instagram -
Videos should be vertical (not landscape) with an aspect ratio of 9:16. Videos should have a minimum frame rate of 30 FPS (frames per second) and minimum resolution of 720 pixels. The maximum file size is 4 GB.
• Facebook
Minimum width: 120 pixels
Supported aspect ratios: 16:9 (horizontal) to 9:16 (full portrait)
Facebook recommends uploading videos in .MP4 and .MOV format with H.264 compression, square pixels, fixed frame rate, progressive scan, and stereo AAC audio compression at 128kbps+. Videos can be up to 240 minutes long, up to 4GB large, and have a maximum frame rate of 30fps.
• YouTube
Content should be encoded and uploaded in the same frame rate it was recorded. Common frame rates include 24, 25, 30, 48, 50, 60 frames per second (other frame rates are also acceptable).
The standard aspect ratio for YouTube on a computer is 16:9.
Interlaced content should be deinterlaced before uploading.
• Vimeo
Your video's resolution can vary, but most videos will fit a standard definition (SD) resolution of 640 x 480 (4:3 aspect ratio) or 640 x 360 (16:9 aspect ratio), 720p HD resolution of 1280 x 720 (16:9 aspect ratio), or a 1080p HD resolution of 1920 × 1080 (16:9 aspect ratio).
What would happen if you had too many pixels (resolution & PPI) when playing your Stop Motion on the above devices?
Instagram -
Instagram can often reduce the quality of your images during uploads for a wide number of reasons, but if you're looking to maintain quality then you should look to upload a high-quality, compressed JPEG file (max resolution: 1080 x 1350px) directly from your mobile or tablet to avoid any further compression.
Facebook -
Videos must be less than 240 minutes long. The longer your video is, the larger its file size will be. This may affect the quality of the video and the time it takes to upload. Lots of times I see people say they uploaded a 1080 video, and Facebook only lets them view it in 720.
While you can upload videos of virtually any aspect ratio, anything other than full portrait (9:16) will shrink your video and add unused space (colored gradient bars) to the top and bottom of the screen.
Youtube -
If you upload videos with a different aspect ratio, the player will “automatically frame them to ensure they are displayed correctly, without cropping or stretching, regardless of the size of the video or player.”For different aspects ratios, such as 9:16 (vertical videos on desktop browsers), YouTube will "add padding for optimal viewing. The padding is white by default, and dark gray when you use the Dark theme."
Vimeo -
If your footage exceeds 60 FPS, they will automatically reduce the frame rate.
Not all programs or websites can play back variable frame rate videos, and the audio can fall out-of-sync.
What does a TV do if it doesn’t have enough pixels & what is Photoshops equivalent?
In theory, the more pixels there are then the better the picture will be - as we will be able to see more detail.Now, you don't see each pixel at work as they are too small to see from a distance, but if you go up very close to your TV screen you will see how the image is built from this grid of small coloured dots. Any images that aren't actually in high-definition will just look slightly 'softer' and lack the sharpness you get with an HD image.The non-HD image will have always looked this way - it is just your new big-screen high-resolution TV that will highlight the low image resolution, and you will just notice it more.
Photoshop: Pixel Aspect Ratio: If you display rectangular pixels on a square-pixel monitor without alteration, images appear distorted; for example, circles distort into ovals. However, when displayed on a broadcast monitor, the images appear correctly proportioned because broadcast monitors use rectangular pixels.
When copying or importing images into a nonsquare pixel document, Photoshop automatically converts and scales the image to the pixel aspect ratio of the document. Images imported from Adobe Illustrator are also properly scaled.
How many pixels (resolution WxH e.g. 6000 x 4000) does your camera have:
Canon EOS 800D - 6000 × 4000 pixels
What is the resolution (WxH) of the recommended Stop Motion Brief?
1080 x 1920
What is the aspect ratio of the Brief submission?
Ratio 16:9
Draw a proportional sketch (or print from PhotoShop) of the difference between your camera aspect ratio and the brief submission.

How much of the image area do you need to crop out from your camera image
I had to crop about 1/3 of my full image out of the frame.
Does your camera allow you to change the aspect ratio so you can see the crop in camera when shooting?
My camera doesn't allow me to do this when shooting but when I view my images after I can use the crop tool to change the aspect ratio.
0 notes
Text
Spotify Equalizer Mac 2014

Spotify Equalizer Desktop
Spotify Equalizer Download
Spotify Equalizer Mac
EQ, or equalizer, settings are a very overlooked feature of the iPhone. If you’re not happy with the sound being delivered out of your built-in speakers or even through headphones or a third-party speaker, you can alter it using EQ settings.
Spotify is a digital music service that gives you access to millions of songs. Spotify is all the music you’ll ever need. Skip to content. Spotify Click the install file to finish up. If your download didn't start, try again. Bring your music to mobile and tablet, too.
Step 1: Open Spotify on either your Android or iOS devices. Step 2: Visit settings on your Spotify app and tap on “Playback.”. Step 3: Proceed to tap on “Equalizer” to open the Spotify.
I'm using AirPods on a daily basis combined with Spotify, which features a built-in equalizer on mobile so I can change the sound the way I want. My only regret was the absence of this feature on Mac, I just discovered this app called «EqMac». This is life changing if you're using high quality headphones for example.
There’s no true way to have the perfect EQ settings because everyone’s taste is different, but you can use the settings for either Apple Music or Spotify to customize sound to your liking. The presets adjust frequencies in sound that affect properties like treble and bass, and optimize them for your listening preferences and environment. So yes, adjusting EQ might be able to improve the sound coming out of your inexpensive or low-end speakers.
Adjusting EQ for Apple Music
Since Apple Music is baked into iOS, the settings to change EQ for your Apple Music playback (or just standard iTunes playback) is found in the Settings app.
So that was how you can get the equalizer for Spotify on Windows, and on iOS and Android. Though it’d have been better if it was available natively, this tool worked quite well in my tests. If Spotify admins are listening it would be nice to include a link to the mac app mentioned above in the March update post notifying the user community that this feature is.
Tap Settings and scroll down to select Music. Scroll once more to select EQ under Playback.
Free spotify 2018 premium. We hope you like the article on Spotify premium accounts free 2018, On behalf of my search related to Spotify, I can say that it is best songs and video streaming app. It has two types of accounts. First one is free and second one is premium. Free accounts have limited features. Spotify is a digital music service that gives you access to millions of songs. Spotify is all the music you’ll ever need. Listening is everything - Spotify.
Apple doesn’t let you fine-tune EQ settings for music playback in the same way Spotify does, so instead you’ll have to choose from one of the presets. (Though on your desktop, you can also customize EQ for each individual iTunes song.) The presets are crafted based on the genre of music best suited for that particular sound arrangement. EQ is off by default, but your choices are:
Acoustic
Bass Booster (makes the booming lows more prominent)
Bass Reducer (makes the booming lows less prominent)
Classical
Dance
Deep
Electronic
Flat (overrides any preset iTunes setting in favor of flat frequencies)
Hip Hop
Jazz
Late Night (turns down typically loud sounds and boosts quiet parts; ideal if you’re at a distance)
Latin
Loudness
Lounge
Piano
Pop
R&B
Rock
Small Speakers
Spoken Word
Treble Booster (makes the highs more prominent)
Treble Reducer (makes the highs less prominent)
Vocal Booster
Tip: Before settling on one that seems most appealing, play one of your favorite songs — something you think largely represents your music collection. Then while the song is playing, start switching through the different EQ settings to get a feel for which one complements the song sound best.
Adjusting EQ for Spotify
To adjust the EQ settings in your Spotify app, tap the Menu icon on the top left. Then tap the small Settings icon next to your name. Choose Playback and finally choose Equalizer.
Spotify features all of the same EQ presets as the iOS Settings except for Late Night. (See above for those options and some explanations.) But unlike Apple’s options, Spotify also includes a visual equalizer that you can drag to your liking.
Spotify Equalizer Desktop
A word on frequencies: all you really need to know about them is that the lower the frequency, the lower the sound that knob will control. For instance, the 60Hz and 150Hz controls on the left will primarily work the bass, so dragging up will increase the bass sounds and dragging down will decrease. On the other side, the 2.4KHz and 15KHz frequencies surround the treble, or highs.
If you aren’t happy with any of the presets but still want to turn on EQ, once again I recommend playing one of your favorite songs. While it’s playing, start dragging the different frequencies up or down to see what you like best.
READ ALSO:How to Experience Hi-Fi Audio on Your Mobile Device
The above article may contain affiliate links which help support Guiding Tech. However, it does not affect our editorial integrity. The content remains unbiased and authentic.Also See#Apple Music #iphone
Did You Know
Oppo used to make portable media players before they ventured into the field of mobile phones.
More in iOS
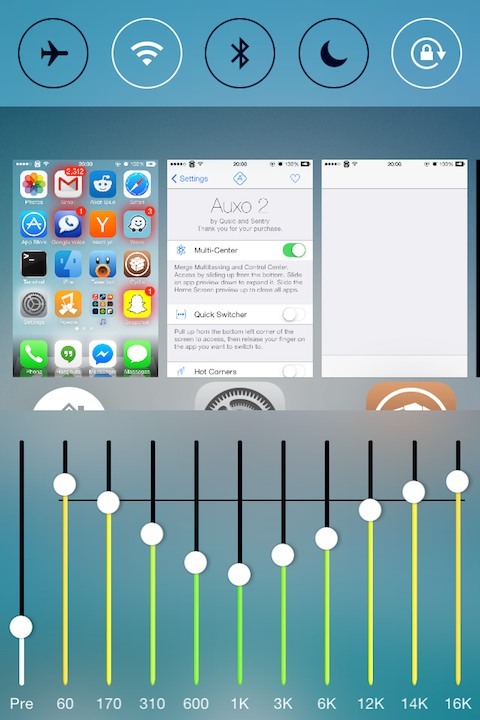
Top 5 RSS Reader Apps for iPhone
Spotify is gaining popularity at a very fast pace and I would not be surprised to know if it has completely replaced the default music player on your desktop and smartphones. But one thing that I am sure you might be missing on Spotify is a sound equalizer.='grcorrect'>
Sound equalizer is one of the very basic features of a music player but still after tons of updates, it continues to remain absent on Spotify. However as Steve Jobs once told, “There’s an app for that”, so today I am going to show you how can get sound equalizer for Spotify across all your devices using third-party software/apps.
First let’s have a look at how we can get the equalizer for Spotify on Windows.
Spotify Equalizer for Windows='grcorrect'>
Getting the equalizer for Spotify on Windows is simple enough. All you need to do is to download and run the installer of Equalify and install the package. The installer can be run without the admin access but then you will have to provide the path to Spotify Windows user profile manually. Running the installer as administrator will take care of that on its own.
After the application is installed, restart Spotify. You will not notice any change until you play the first song after installing the package. Once you have done that, you will see a small EQ button next to the search box.
Click on the button to expand the equalizer. You can now edit the bands manually or choose from one of the many presets available. The option to save a manual setting is also available.
Note: If your sound card configuration supports sound enhancements, you can use it to modify any sound that’s coming out of your speakers or headphone. This can help you not only with the Windows Spotify application, but also the web based player that Spotify has started rolling out.
After configuring it on Windows, let’s now have a look at how we can get the similar feature on Spotify app for Android and iOS.='grcorrect'>
Spotify Equalizer for Android and iOS='grcorrect'>
When I was doing my research work for this article, I came across many online posts which claimed that Spotify introduced the equalizer feature in one of its latest app update on Android. But when I tried it on my own, I didn’t find the feature. Further when I read the comments, it seemed that I was not alone whose app was missing it. Best couch to 5k app that works with spotify. But now I know a way we can get it working and that’s by installing the Equalizer app.
Spotify Equalizer Download
There are many equalizer apps available for Android that can modify the sound, but the best thing about this eponymous app is that it integrates seamlessly with the Spotify app. Spotify tool apk. After you have installed Equalizer, navigate to Spotify settings and select the option Sound settings. Once you select the option, the equalizer app will open up and you will be able to change the sound settings. The app comes in both free and pro versions, and the only limitation of the free version is that you cannot save the manual settings you do on the equalizer.
Surprisingly the iOS version of Spotify has a built-in equalizer but there’s no button or option using which you can access it. To open the equalizer you will have to draw a weird gesture while the song is playing and it’s very hard to explain that in words. This video should do a better job of it.='grcorrect'>
Don’t worry if you don’t get the equalizer in the first few attempts, I too failed quite a few times before I got it working. This built-in equalizer is very basic and lacks presets and the ability to create one manually.
Conclusion
So that was how you can get the equalizer for Spotify on Windows, and on iOS and Android. Though it’d have been better if it was available natively, this tool worked quite well in my tests. Try it out and enhance your music listening experience on Spotify.
Top Image Credits: fcstpauligab
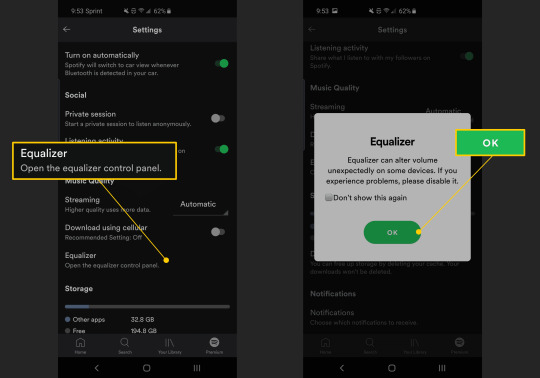
The above article may contain affiliate links which help support Guiding Tech. However, it does not affect our editorial integrity. The content remains unbiased and authentic.Also See#music #Software
Did You Know
The Apple Watch lets you stream music even if you don't have the phone with you.
More in Android
Spotify Equalizer Mac
5 Best Gallery Apps With Hide Photos Option for Android
0 notes
Text
Why Kindergartners Must Learn Technology
Thank you so much to Norah Colvin for inviting me as a guest on her wonderful education blog, Norah Colvin. Norah covers so many great topics, I’ve been a long-time subscriber, always coming away a little smarter and up-to-date on teaching our youngest learners. A topic dear to me–and one I get lots of questions about–is teaching Kindergartners to Tech. I’m reposting this article for my readers.
Teachers: I’d love to hear your thoughts on this in the comments.
When I started teaching technology almost twenty years ago, I taught K-8, three classes in each grade every week. I was buried under lesson plans, grades, and parent meetings. I remember suggesting to my principal that he ease my schedule by eliminating tech for kindergartners. They wouldn’t miss anything if I started them in first or second grade would they?
And back then, that was true. Even a decade ago, technology was an extra class in student schedules where now, it is a life skill. Today, my teacher colleagues tell me kids arrive at school already comfortable in the use of iPads and smartphones, doing movements like swipe, squeeze, and flick better than most adults. Many teachers, even administrators, use that as the reason why technology training isn’t needed for them, arguing, “They’re digital natives.”
In fact, because they arrive at school thinking they know what they’re doing on a digital device is exactly why teaching them technology, starting in kindergarten, is critical.
I see a few of you shaking your heads. Does your school think kindergartners don’t need tech classes? Or, if you’re a remote learning school, do your youngers struggle with tech because they didn’t start to learn it early enough (like Kindergarten)? Let me give you four good reasons why Kindergartners need tech lessons–whether you teach remotely or in person. These will arm you the next time you have to defend a strategy you know works.
They arrive with bad habits
Parents love encouraging their kids to play with iPads and iPhones but it’s not their job to teach them how to do it right. And I’m fine with that. I’ll do it but I need to warn everyone: Bad tech habits are much (much) easier to break if I catch them in kindergarten than third grade. Here are a few that these digital natives arrive to my kindergarten classes with:
thumbing on the keyboard–Because kids use iPads and smartphones often prior to kindergarten, they end up thinking keyboards are operated with thumbs. I have to break the news to them that isn’t true. The longer I have to wait before telling them, the harder it is to convince them to use all fingers. Kindergarten is the perfect time to start (for the reasons listed below–they love it and learn fast). I can even show them how to break the virtual keyboard on their favorite mobile device into two, making it perfect for thumbing, and then remind them that’s an alternative, not the only way.
eating around devices–This is a horrible habit. Don’t let kids eat around any school equipment with a keyboard and explain why. Not only is it destructive to the equipment, it’s bad manners. If they eat a cookie over a friend’s keyboard and dribble crumbs into the spacebar and Delete key, they’re not going to be welcome in the future when those keys–and more–stop working. I teach them early and their parents thank me for it.
hunt-and-peck–I start kids keyboarding in kindergarten with hands on the keyboard. I don’t care if they use one finger or four but I do let them know, “In a few years, you’ll use all of your fingers.” That’s all I say. Then they can look forward to doing what the Big Kids do.
Kindergartners love technology
Because many pre-kindergarten kids play with digital devices at home, they think these devices are fun, which means what they learn with them is fun. So why not teach them where they’d like to learn–on these exquisite digital devices? Almost every kindergarten curriculum can be augmented, enriched, and energized with technology programs, apps, software, and more. If kids get to use devices they love, they’ll try harder to use them the right way, follow rules, and, well, learn.
Kindergartners learn technology fast
Truth is, kids learn whatever interests them quickly. You’ve seen it yourself when your own kids want to play a digital game, an app on a smartphone, or Xbox. In the case of school-based digital devices, they’ll want to use the available games, videos, music, apps, and more that support classroom inquiry because they associate them with good times. They’ll eagerly figure out how to push the video buttons, use YouTube in an age-appropriate manner, drag-and-drop with the mouse, type their name into posters about the rain forest, read digital books and stories, take a virtual field trip to the zoo, and more. This isn’t work to them. It’s fun and why they love school.
By third grade, they’re taking online tests.
Many schools have found that their third graders don’t know the basics required to take online tests. Here’s a list of missing tech skills that I got from teachers in my PLN as they struggled to make online tests about the subject matter, not tech skills:
Drag-drop
Drop-down menus
Fill in boxes on a table
Highlighting
Keyboarding
Mouse manipulation
Read and comprehend online
Saving
Scrolling
Unselecting
Use calculator
Use video player
Use multiple windows
Use online dictionaries, thesauruses
Watch a video
Start in kindergarten with the organic use of mouse skills, scroll, watch a video, and more. Build on these every year. By third grade, this knowledge is second nature. With a little focus on a basic technology curriculum, kindergartners will learn the basics, have fun, and not suffer the stress that comes with knowing the test material but being unable to communicate it.
***
The biggest reason why technology should be incorporated into kindergarten is that it is how kids live. We can’t put that toothpaste back in the tube so embrace it. You will be amazed at how fast, how eagerly kids learn when we meet them in their world, teaching in the ways that make sense to them.
More on Kindergarten technology:
21 Websites and 5 Posters to Teach Mouse Skills
Tech Ed Resources for your Class–K-8 Tech Curriculum
How to Teach Mouse Skills to Pre-Keyboarders
Jacqui Murray has been teaching K-18 technology for 30 years. She is the editor/author of over a hundred tech ed resources including a K-12 technology curriculum, K-8 keyboard curriculum, K-8 Digital Citizenship curriculum. She is an adjunct professor in tech ed, Master Teacher, webmaster for four blogs, an Amazon Vine Voice, CSTA presentation reviewer, freelance journalist on tech ed topics, contributor to NEA Today and author of the tech thrillers, To Hunt a Sub and Twenty-four Days. You can find her resources at Structured Learning.
Why Kindergartners Must Learn Technology published first on https://medium.com/@DigitalDLCourse
0 notes
Text
Last Fm Spotify Scrobbler Download

Last Fm Spotify Not Working
Last.fm Spotify
Last Fm Spotify
Last Fm Spotify Scrobbler Downloads
Dismiss
Get the official Last.fm Scrobbler App to keep track of what you're listening to on Apple Music. Check out your top artist, album and song charts from all-time to last week, view detailed artist information and watch videos of your favourite tracks. Note: only tracks stored locally in. Now you'll be running Last.fm's Scrobbler plug-in on your computer. To use it, simply listen to music in iTunes, and whatever you listen to will be sent to your profile (see Spotify section above.
Download Simple Last.fm Scrobbler app for Android. A scrobbler that submits information on what music you play. Spotify, Deezer & many more. Download Simple Last.fm Scrobbler (Libre.fm & ListenBrainz) APK 1.5.7 for Android. A scrobbler that submits information on what music you play. Spotify, Google. The Benefits of Scrobbling Spotify to Last.FM. If you decide to scrobble Spotify using the Last.FM scrobbler, you’ll have access to a few unique benefits beyond the main features that Last.FM already provides: Local Spotify Files: Spotify lets you add your locally saved files into the app. The feature isn’t as reliable nor as useful as the. Part 3: The Pros and Cons of Scrobbling Spotify with Last.fm. There are some benefits if you scrobble Spotify to Last.fm, and you can check it out below. The Pros of Scrobbling Spotify with Last.fm: 1. It supports to scrobble local files upload to Spotify, but only for the tracks which have valid ID3 tags including tittle and artist.
Internet Explorer is no longer supported on Last.fm. In order to have the best experience, please upgrade to a more modern browser.
A new version of Last.fm is available, to keep everything running smoothly, please reload the site.
Track the music you listen to by scrobbling via our desktop and mobile apps or by connecting to many of your favourite music services.
Last.fm Desktop Scrobbler
The Last.fm Desktop Scrobbler for Windows is a simple app that runs in the background and automatically updates your profile with what you’ve been playing on your computer via native media players such as Windows Media Player or iTunes.
Download now for Windows
Compatible with Windows 7, Windows 8, and Windows 10.
Not using Windows? Try the Mac version
Legacy Last.fm Desktop App
The Last.fm Desktop App for Windows automatically updates your profile with what you’ve been playing on your computer via native media players such as Windows Media Player.
NOTE: This app is no longer supported and some features such as scrobbling from certain media players and iPods may no longer work on newer systems.
Download now for Windows
Compatible with Windows XP, Vista, Windows 7, Windows 8 and Windows 10.
Not using Windows? Try the Mac version
Last.fm Android App
Track what you listen to on the move. The Last.fm Android App enables you to track what you listen to on a number of services including Google Play, SoundCloud, Spotify, Deezer and more.
It also displays your top charts for artists, albums and tracks filterable by tag and time.
Last.fm Scrobbler iOS App
Get the official Last.fm Scrobbler App to keep track of what you're listening to on Apple Music. Check out your top artist, album and song charts from all-time to last week, view detailed artist information and watch videos of your favourite tracks.
Note: only tracks stored locally in the Apple Music app can be scrobbled. Tracks which are streamed through Apple Music do not scrobble at this time.
Youtube
Track what you listen to on the YouTube website.
Spotify
Track what you listen to on Spotify with their desktop and mobile apps, web player and any Spotify connected device.
Google Play Music
Track what you listen to on Google Play Music with their web player and Android app.
Tidal
Track what you listen to on Tidal with their desktop app, mobile apps and web player.
Deezer
Track what you listen to on Deezer with their desktop app, mobile apps and web player.
SoundCloud
Track what you listen to on the SoundCloud website.
Mixcloud
Track what you listen to on the Mixcloud website.
Sonos
Track what you listen to with your Sonos device and Sonos controller app.
Hype Machine
Track what you listen to on the Hype Machine website and mobile apps.
8tracks
Track what you listen to on the 8tracks website.
Bandcamp
Track what you listen to on the Bandcamp website.
Pandora
Track what you listen to on the Pandora website.
Can't find the music player, app or service you use?
More ways to scrobble
API Calls
For those who like to listen to a lot of songs on multiple music services, have you ever wondered is it possible to easily explore your listening history, discover new music and find friends with the same music taste on one app or software?
If so, then you can't miss Last.fm which is compatible with Spotify, YouTube, Google Play Music and other services. That means with Last.fm, you can scrobble any songs you listen to on Spotify and other music services from any devices to Last.fm.
Spotify Download Spotify. Mac OS X (Current 10.5)Windows; iOS; Android (Google Play Amazon)Spotify for other platforms. SpotiFree 1.6 Free. Spotifree is an OS X app that automatically mutes ads on Spotify. Spotify Premium 0.8. Spotify Premium is an application that helps the users to listen music on Mac. Spotify Premium features: - Listen on all your devices. Download music &. Spotify on Mac OS X Spotify is one of the best music streaming service for most people, but if you changed your mind and device to give a try with YouTube Red, Pandora, Apple Music or Amazon Music? Here are some quick tips on how to uninstall Spotify on your Mac. Mac download - Spotify Click the install file to finish up. If your download didn't start, try again. Bring your music to mobile and tablet, too. Spotify on mac os x.
Next up, let's know more about Last.fm and walk through the step-by-step guide for scrobbling Spotify music to Last.fm.
You May Like:
How to Rip Music from Spotify as MP3 (320 Kbps)
How to Get Spotify Premium Free on iPhone/Android
Part 1. What Is Last.fm
As the largest online music service that learns what you love, Last.fm enables music fans to:
1. Create their own profiles which indicate their listening habit;

2. Track songs that they have listened to on their music services (which is referred to as scrobbling);
3. Get their own music charts and new music recommendations and meet their musical soulmates;
4. Discuss their favorite artists, albums, the latest obscure genre and so on.
Among the features of Last.fm, scrobbling is the greatest advantage. The scrobble function means to keep track of every songs you've played on music services like Spotify from any devices with Last.fm. Only by integrating Spotify account with Last.fm account, you can easily enjoy Spotify and Last.fm at the same time.
Part 2. How to Scrobble Spotify music to Last.fm
Step 1. Join or Log in Last.fm
If you don't have a Last.fm account, then you need to create a Last.fm account at first:
Click on 'Join' on the top right of Last.fm interface, then enter your 'Username', 'Email' and 'Password' and click on 'Create my account' button on the bottom.
After that, you are prompted to verify your email address by clicking on the link on an e-mail sent by Last.fm.
For those who have joined Last.fm before, you need to:
Click on 'Login' on the top right of Last.fm interface, then enter 'Username' and 'Password' and click on 'Let me in!' button to log in Last.fm.
Last Fm Spotify Not Working
Step 2. Allow Access to Spotify Account
Put your mouse on your profile image on the top right corner and then click on 'Settings' option from the pop-up list.
After that, go to 'Applications' on the top of the settings menu and click on 'Connect' button next to 'Spotify Scrobbling' option. Finally, click on 'Agree' button.
Alternatively, you can go to the bottom of the Last.fm page and click on 'Track My Music' under 'HELP' menu, then scroll down to find 'Spotify' logo and click on 'Connect' button under 'Spotify' logo.
When you see a pop-up window indicating that 'You're all set!', that means you connect Spotify to Last.fm successfully.
Now, you are free to explore your listening history and build your music collection on Last.fm. When you want to disconnect Spotify and Last.fm, go to 'Settings' page and click on 'Disconnect' next to 'Spotify Scrobbling' option.
Part 3. Pros and Cons of Scrobbling Spotify to Last.fm
Next up, let's analyze pros and cons of integration of Spotify with Last.fm, so that you can make a good decision whether to scrobble Spotify to Last.fm.
Last.fm Spotify
Pros: Except the above-mentioned main features that Last.fm already provides, Last.fm also in characterized by features as below.
Local Spotify tracks can be added to Last.fm, and all your tracks will be shown in a single interface. However, to be fair, this feature is not as reliable as the Google Play Music offering.
Last.fm enables you to download Spotify songs for offline listening and can scrobble the last 50 songs that you've played offline when you connect Wi-Fi network or cellular data again.
If you want to suspend Last.fm scrobbling function, then you can start a Private Session. The Private Session can help parents whose Last.fm data are full of kids' songs and podcasts.
Cons: Though Last.fm provides so many useful features, it does have some disadvantages.
If you put great attention to your privacy, then you should take good consideration before scrobbling Spotify to Last.fm, because Last.fm is owned by CBS Interactive, a big entertainment company, which means your entire listening history might be used for other purposes by CBS Interactive without your knowledge.
Last.fm might not be a necessary option for everyone, especially for those who usually find new music by a Spotify's music discovery tool. Moreover, some of you might not want to see the music you listened to a long time ago when you launch Last.fm.
The biggest disadvantage of Last.fm is security. You should be aware that a serious data breach of Last.fm occurs in 2012, wherein 45 million accounts were compromised.
Conclusion
Last Fm Spotify
In conclusion, Last.fm is a good option for scrobbling everything you listen to on Spotify though it should be more concern about the privacy and security of users. Except Last.fm, you can also choose Last.fm alternatives for scrobbling Spotify such as Universal Scrobbler, Open Scrobbler and Vinyl Scrobbler.
Last Fm Spotify Scrobbler Downloads
0 notes
Text
Hi End Player For Mac

Hi End Player For Mac Os
Hi End Player For Macbook
High End Audio Player For Mac
Hi End Player For Macbook Air
As one of the best media players that works on both Windows and Mac operating system, Leawo Blu-ray Player is the first choice for a lot of professional users to play FLAC files as well as more than 180+ other audio and video files because with the powerful decoding technology. The 100% free media player can play almost every digital video format. Playing high-res files Macs can natively support up to 24/96, played through iTunes or other software. However, without a couple settings tweaks, audio files with resolution higher than.
StackCommerce
The Details:
Get multiple services like Spotify, SoundCloud, Google Play Music, and more under one program
Install different themes
Play your music with keyboard shortcuts
Why You Want It:
There are so many different platforms out there for listening to music right now, it can be really hard to keep straight what albums you’ve bought and which sites you used to buy them. Harmony Music Player for Mac aims to make listening to music a more enjoyable process by allowing you to access the tracks you love from their individual apps all in one place.
The Deal:
Harmony Music Player for Mac normally costs $9.99, which is already a steal, but you can save an extra 50% off that price and get it today through the Inverse Shop for only $4.99.
Like this deal? Check out Vault — you’ll get four premium tools, including NordVPN and Dashlane, to supercharge your online security. Enter code VAULTONE to try it out for just $1!
DSD player software is designed to playback Direct Stream Digital audio files (.dsf, .dff, sacd iso, DoP). Look how to play DSD files via free software (Windows, Mac, Linux, Android, iOS for iPhone, iPad), about sound quality, comparison list, F.A.Q. at this page - explanation by audio software developer Yuri Korzunov.
HD audio file conversion
Watch and share: What is DSD audio? Video explanation
Watch and share: Hi Res Audio [How it works. Sound quality. 7 Myths]
DSD player list
WARNING: This table can contain errors. It is not an offer or advertising. We are not affiliated with listed products. We guarantee nothing. If you found wrong information, contact us, please. To get exact information, contact with the software developers and/or vendors.
DSD player audio software list [See FREE audio players for hi-res]
Audio playerOperation systemLicenseSupported file typesSample rateDAC interfaceDescriptionDSD players Windows, Mac, LinuxAmarra Luxe Windows, Mac Commercial DSFAudiogate Windows, Mac DSF, DFF up to DSD128 DAC limitation for the software activationAudirvana Mac Commercial DSF, DFF (including DST), SACD ISO DoP, DSD to PCMDaphile Run as firmware (Linux based) from flash stick memory Free DSF Music server. Stereo onlyFoobar2000(with sacd input plugin) Windows Free DSF, DFF (including DST), SACD ISO up to DSD512ASIO, DSD to PCMFostex Audio Player Windows, Mac Free DSF, DFF up to DSD128 ASIO, DoPJRiver Windows, Mac, Linux Commercial DSF, DFF (including DST), SACD ISO ASIO, DoP, DSD over DLNA, DSD to PCM, PCM to DSDHQ Player Windows, Mac, Linux Commercial DSF, DFF (non-compressed DSDIFF) up to DSD1024 DSD to PCM, PCM to DSD, ASIO, DoPHysolid Windows Free DSF up to DSD256 ASIO, DoP WASAPI To work on music server PC with smartphone app controlLogitech Media Server Windows, Mac, Linux DoP PCM files Bit-perfect PCM output of DoP Need additional hardware and pre-conversion DSD files to PCM DoP files. How to adjust and use the software.Media Player Classic Windows Free DSF, DFFmoOde audio player To run on Raspberry Pi Free Here information about DSD settingsPine Player Mac Free DSD to PCM (up to 768 kHz)Mac App StoreResonic Player Windows Free, Commercial DSF, DFF up to DSD512Roon Windows, Mac;
server on Windows, Mac, Linux Commercial Bit-perfect, DSD to PCM Server may be installed on network area storage (NAS)TEAC HR Audio Player Windows, Mac Free DSF, DFF up to DSD256 ASIO, DoPTechnics Audio Player Windows, Mac DSF, DFF up to DSD128 USB driver Read the software license agreement about using limitationsVolumio
Run as firmware from flash stick memory on PC, Raspberry Pi, other
UPNP DLNA, Airplay, DoP Music serverWtfplay Linux Free DSF up to DSD128; DSD256, DSD512 are experimental DoPDSD players Android and iOS (mobile applications)HibyMusicAndroid, iOS Free DSF, DFF (including DST), ISO up to DSD256 net driver (Dropbox / DLNA / LAN) native DSD, DoP, DSD to PCMHi-Res music player-NePLAYERiOS Commercial DSF, DFF up to DSD256 DSD to PCM, DoP Check DSD replay issues at online store pageHYSOLIDAndroid, iOS Free Music server control applicationNeutron Music PlayerAndroid, iOS Commercial UPnP / DLNA, USB DAC, DoP, DSD to PCM There is evaluation version 'Neutron Music Player (Eval)' on AndroidOnkyo HF PlayerAndroid, iOS Free, Commercial DSF, DFF up to DSD256 AOA 2.0, DoP, DSD to PCM Some limitations of free versionTEAC HR Audio PlayerAndroid, iOS DSF, DFF up to DSD256 DoP, DSD to PCM There are DSD limitations of free versionUSB Audio Player PROAndroid Commercial DoP, DSD to PCM, native DSD playback
HD audio file conversion
Download FREE DSD converters >
Check FREE DSD music downloads >
Read about DSD DACs >
Read more about mobile device connections to DSD playback here.
How to play DSD files
To play DSD files, audio player software should be configured properly. DAC may be either DSD or PCM.
There is no general rule, that is the best sound quality for every case.
When PCM DAC is used, the conversion of DSD to PCM format is used.
DSD DAC may get an audio stream natively ('native DSD' stream via ASIO driver) of DoP (DSD over PCM).
Check out How to play DSD with foobar2000 >
Read more details below.
How do I get the best sound quality on my computer?
You can get the best sound quality on your computer / laptop on Windows, Mac, Linux or mobile device on Android, iOS, when you reduce weak places of the audio-signal path and your DAC works in optimal resolution.
What is bit-perfect mode
DSD files may be played back in bit-perfect modes:
A Samba file server enables file sharing across different operating systems over a network. It lets you access your desktop files from a laptop and share files with Windows and macOS users. This guide covers the installation and configuration of Samba on Ubuntu. What you’ll learn. How to set up a Samba. Ubuntu 18.04 is the first Ubuntu LTS that compiled samba support for something called 'multicast dns registration'. When you install samba ( sudo apt install samba ) your Ubuntu box will announce itself to the rest of the local network using Avahi ( Bonjour in macOS ). Your machine will automatically show up in the side panel of Finder under. https://sweatycherryblossomnight.tumblr.com/post/640590772638482432/ubuntu-samba-for-mac.
DSD file (DSF, DFF, SACD ISO);
DoP (DSD over PCM) file (FLAC, WAV, AIFF, other lossless PCM files).
Bit-perfect means transmitting of audio file content to DAC without altering.
What is gapless playback
When uninterrupted albums (operas, concerts) listen, non-gapless playback can cause clicks at track borders.
Gapless playback means playback album as a solid (uninterrupted) stream without re-initialization of DAC.
If the album is converted from an audio format to another one with resampling, it can cause artifacts at track borders. To avoid the track-border artifacts, True Gapless conversion may be used.
Offline conversion mode
With bit-perfect mode, you can playback offline pre-converted audio files (including PCM to DSD). This mode doesn't consume additional computing resources for altering an audio file. Also, it saves electrical energy that is spent on the processing.
Many digital audio players (DAP) capable of playback at stereo headphones. But some of your records may be multichannel.
EaseFab Video Converter for Mac can read a wide range of 4K/1080p/HD videos regardless of formats from the Internet, digital camcorders, capture cards, etc. And then convert them to any popular video and audio formats like MP4, MOV, M4V, H.264, HEVC, MP3, WMA, WAV, AAC, AC, etc. For easier playback, sharing or editing anywhere you like. Crack any video converter for mac os.
When DAP play a multichannel record, it downmixes to 2.0. Downmixing is a lossy operation and its sound quality depends on implementation.

Also, extra channels consume free space on the hard disk of the DAP. Offline pre-downmixed to stereo files allow putting more songs at hard disk.
If file played back on a mobile device in bit-perfect mode or with minimal processing, it allows:
saving battery charge;
getting a longer time of autonomous work;
getting more computing resources for other (not audio player) applications.
Inline conversion mode
DSD and PCM files may be played back with inline (real-time, 'on-fly') altering of audio content:
QuickBooks Desktop for Mac helps you organize your business finances all in one place so you can be more productive. Simple to set up and use. Manage expenses, stay synchronized with your bank records, get reliable reports for tax time, and import data from a spreadsheet. Business finances for mac. Finances for Mac Effortless Bookkeeping. Finances provides everything you need for your personal and business accounting. Enter and organize your transactions, attach invoices, import data from your bank account and see where your money goes. For the Business Finance Lease, you have the option to return your equipment and refresh with new, in-stock equipment under a new lease, purchase your equipment from the leasing partner for the current fair market value, return your products to the leasing partner and end your lease, or continue to use your equipment by continuing with the lease agreement and making post-term payments.
with DSD resampling;
with room correction;
with conversion DSD to PCM on PCM DAC.
This mode allows saving time for pre-converting of various audio files to the best sounding mode of DAC. But each playback can consume big computing resources to resolution conversion and other processing.
Real-time playback conversion DSD to PCM on mobile devices consume additional battery charge and part of the device CPU performance. It can cause a lesser time of autonomous work and reduce the response of other (non-player) applications.
Inline (real-time) vs offline conversion
of audio files on mobile devices
Offline conversion of audio files gives a longer battery lifetime. Because a mobile device performs lesser calculation number.
Also pre-downmix, pre-conversion DSD to PCM, pre-downsampling save free space at the hard disk of the mobile device.
DAC interfaces
To DSD playback (including bit-perfect) under Windows, DAC may be connected to an audio player via ASIO driver or DoP protocol.
Also, WASAPI (with DoP) interface may be used to playback (including bit-perfect).
DoP is the special open protocol to coding DSD into PCM audio stream. The stream cannot be played back as PCM.
To DSD playback under Mac, DAC may be connected to an audio player via DoP protocol.
Read more about:
What is the best DSD player
In audiophile application, the players are compared by the sound quality.
If the player has bit-perfect mode and used DAC support played file resolution, sound quality is the same for such players.
But, if an audio resolution is altered or EQ is used, then applied processing quality is a matter.
Discover the only legal way to get Adobe Audition free. The thing is, when you’re using an Adobe Audition CS6 crack link, you risk installing a hidden virus. Once you’ve made your next purchase online, the virus is activated. It copies your credit card information, sends it to a preprogrammed service and self-destructs. Chose one serial + PILIH Salah satu WORKING 99% per 13 Januari 2013 1330-1971-4830-1762 1330-1912-2628-0850-0232-4869 1330-1148-0472-2735-6555-0617 1330-1544-4195-8131-3034-5634 1330-1886-0283-4688-9152-2034 1330-1118-3174-6558-8260-5378 OR 1330-1971-4830-5668-6067-1762 1330-1912-2628-0850-0 232-4869 1330-1148-0472-2735-6555-0617 1330-1544-4195-8131. It can be a nice free alternative to Adobe Illustrator CS6 Crack for mobile devices. The application contains lots of popular features and tools. You can draw sketches using 5 adjustable brushes, work with multiple images and layers, duplicate and merge layers, send files to Illustrator or Photoshop. Crack for mac adobe cs6. Adobe Premiere Pro CS6 Crack With Full Free Pc Latest Version Win/Mac: The Uninterrupted player mode permits the users to utilize filters or to switch video parameters throughout enjoying. All videos are often foreign to when effects. Adobe is a worldwide illustrious package in.
In general, the best DSD player with processing should cause minimal distortions.
Also kind of distortions may be matter.
Frequently Asked Questions
What is DSD player? How do I listen DSD files?
DSD player is a device or software, that capable to play audiophile format Direct Stream Digital. It may be suggested as SACD optical disks or computer files.
Tampermonkey for mac. Cloud storage support (OneDrive, Google Drive, Dropbox) For a full overview please take a look at the FAQ or just install TM. Thanks for using Tampermonkey. Tampermonkey is the world's most popular userscript manager. Functions including (GMregisterMenuCommand, GMgetResourceText, GMgetResourceURL,) - full unsafeWindow access - settings and script export and import functionality incl. Manage and edit all your userscripts - enable and disable your scripts with 2 clicks - all GM.
Is DSD better than FLAC?
It is matter of recording quality and playback tool implementation. Read about DSD and FLAC comparison..
Is DSD audio worth it?
DSD allow to simplify a playback system and solve some issues of analog filter, theoretically. But implementation of the system makes actual result. See more..
Where can I download FLAC songs for free? Where can I download high-quality music for free?
You can download high-quality (high-resolution) files from the download resources into list here..
Can VLC play DSF?
Looks like, VLC can't play DSF. Follow current state here..
Can iPhone play DSD files?
Yes. iOS player software can play DSD files. See here..
How do I play DSF files with foobar2000?
Yes, you can. Read foobar2000 DSD playback guide here..
Can Windows Media Player play DSD?
No. Windows Media Player can't play DSD. But, you can use other software..
What is DSD music file?
Hi End Player For Mac Os
DSD audio files are files, that capable to contains DSD audio content: DSF, DFF, SACD ISO and DoP FLAC, WAV, etc. Read details here..
What is DSF audio file?
Read DSF file quick guide here..
What is DFF audio file?
Hi End Player For Macbook
DFF file is one of DSD files. Its audio data content is identical to DSF by the sound quality. Read DFF file details here..
How do I open DFF file?
High End Audio Player For Mac
DFF file is supported by software..
How do I play DFF files?
DFF files are played back via auio player software..
How do I play SACD ISO file?
You can play SACD ISO at hardware and software players.
However, SACD ISO may contains stereo and multichannel album variant. And it consume additional place at hardware player.
You can extract SACD ISO to DSD or PCM files. You choice PCM vs DSD is matter of your music player and hardware ability.
Hi End Player For Macbook Air
See more:
How do I convert DSF to FLAC?
Read about conversion DSF to FLAC here..
How do I convert DSF to mp3?
Read about conversion DSF to mp3 here..
What is native DSD support?
DSD files may be played back 3 ways:
on-fly conversionDSD to PCM, and playback on PCM DAC (in PCM mode of the DAC);
offline conversion DSD to PCM with conversion software, and playback on PCM DAC (in PCM mode of the DAC);
transmit DSD audio stuff to DSD DAC to playback.
Option #3 is called 'native DSD support'. DSD may be transmitted via ASIO driver or as DoP.
September 15, 2020 updated | since May 01, 2018
Read articles about audio
0 notes
Text
How To Get Discovered With Beetv Download
What is Showbox & & Is Showbox Legal to Use in Android Gadget?
If you are not trying to find a details flick, you can normally locate some networks that submit and also host material. However, relying on the network, the upload depends on it commonly. Typically, preferred or new films obtain copyright strikes promptly; coz movie studio have actually established bots to automatically move content that matches their very own movies. this showbox application practically appears as well easy to see complimentary tv shows and films online.
Nevertheless, it's just not just as good as the others on this list, specifically if you compare it to Cinema APK and Titanium TELEVISION. The application has a huge media directory, which obtains upgraded timely. You will constantly find the most recent motion pictures and shows available for streaming.
GoStream [Not Functioning] MovieBox Vs ShowBox Distinction Explained-- Digital MovieBox.

You can additionally view Netflix films or shows on a computer system. The online solution 123gostream. tv is taken into consideration as one of the biggest databases of video clip movies online.
Exactly how to get Netflix Free Test without a bank card neither PayPal 2020.
So, it relies on which motion picture you're viewing, if it is in the free classification it will certainly be enabled to watch without signup. For a really fine and smooth motion picture streaming experience, this is the place. Besides the major feed going, in the sidebar, there is a lot more to discover. The listings are sorted by style, cast names, release year, rating and also Open up Tons's very own recommended watchlist. It is a fine platform when you have a particular flick in mind.
Movie theater APK.
Key movies classifications are the category, Top IMDB and nation. Unlike the majority of the various other flick sites, Crackle does not only index the links to the films and TV shows. Snap is a prominent and content-rich media streaming platform, which uses every sort of on the internet materials which you can think of. MegaBox HD is a flicks streaming app to view motion pictures and also TELEVISION programs with fast streaming. HitAnime can be claimed as aShowbox Counterpart for Anime Movies, Collection as well as Manga Reveals.
Ideal Ludo Games For Android & iphone
Although it may take some time as well as look impractical but it's totally free after all as well as you can enjoy premium material completely free. Initially, download a VPN from the web to make use of Netflix free of cost. VPN means Virtual Private Network to hide your IP Address so you can access content limited in your location.
You simply require to look for the content which you are trying to find. The application will provide you with the services which offer that material. With Yidio you can globally look the content and enjoy it online. Much of the movies and TV programs are available for free to see but some may need a registration as well as pay like Netflix as well as G-Movies Specifically.
How can I watch movies online for free on my phone?
Technically, yes, movie box is illegal. You are streaming a movie/tv show without the original owner's permission. MovieBox does not have beetvapk pro the rights to show owner's copyrighted material. As for getting caught, however, the chances are slim to none.
SolarMovie [Not Working] My Download Tube.
How can I download movies free?

ShowBox app and others are illegal to use As popular and safe to use as they may be, ShowBox and other similar apps are borderline illegal. They let you stream TV shows and movies or download them for offline viewing – all for free. They stream content through torrents and other direct sources – which is illegal.

This has actually been named as one of the most effective film streaming and downloading website on several events all thanks to features packed over it. The content is divided easily into the genre, native land, alphabetical order, rating as well as preference over the IMDb. All of us like viewing collection and movies online completely free over the convenience of both mobile and also displays in your home. The best thing about the present altering technical is the simple availability of the material online that satisfies the audiences and enhance the sales of production houses.
It has a variety of motion pictures split and curated based on old standards as well as brand-new hits. This has special access to flicks made by Netflix, prime and also Hulu.
It might not be one of the similar apps but it certain is a terrific Showbox substitute. In fact, it is sustained on a wide variety of gadgets including Android, Windows, Mac, iphone as well as a lot more. New on-demand streaming applications get released practically on a daily basis.
What is the best website to watch free movies without signing up?
Download Showbox For iPhone & iPad. Showbox wont work on iPhone as it's an Android app and only works on Android devices. However, another version of Showbox named as Moviebox can be downloaded on your Apple device. Moviebox is similar to Showbox and allows you to enjoy all the perks offered by Showbox for free.
Free, streamable motion pictures are a fantastic offering, after all, so you could aid on your own and your other collection clients by motivating the signup. You can get Vudu on your computer system, video game gaming consoles, streaming devices, smart TV, Blu-ray players, phones and also tablets. You simply have to enroll in a complimentary Vudu account to use the applications as well as site.
0 notes
Text
The 2020 Guide to Creating Quality Technical Screencasts, Presentations, and Remote Meetings
I've had a lot of people ask me to write up a guide to creating great technical screencasts. This is an update to my 2011 post on the same topic.
What are you doing? STOP and reassert your assumptions
Hang on. You're doing a screencast or sharing your screen in some way for a meeting, presentation, or YouTube. What does that mean and why did I suggest you stop.
This isn't a stage presentation or even a talk in a conference room. Screencasts and remote meetings have an intimacy to them. You're in someone's ear, in their headphones, you're 18 inches from their face. Consider how you want to be seen, how you want to be heard, and what is on your screen.
Try to apply a level of intentionality and deliberate practice. I'm not saying to micromanage, but I am saying don't just "share your screen." Put your empathy hat on and consider your audience and how it'll look and feel for them.
Initial setup and tools
You can use any number of tools for screen capture. They are largely the same. My preferred tool is Camtasia. Other valid tools are CamStudio (a free and open source tool) and Expression Encoder Screen Capture. You can also use OBS to record your screen and webcam.
When you're using Skype/Zoom/Teams to record live, you're already set as those tools will share for you as well as record.
Windows Look at Feel
At the risk of sounding uptight, how you setup Windows and your environment is the difference between a professional and an amateurish screencast. It's shocking how many folks will start recording a screencast without changing a thing, then wonder why their 1600x1200 screencast looks bad on YouTube at 360p or low bandwidth on a phone. If you find yourself doing screencasts a lot, considering making a custom user (maybe named Screencast?) on your machine with these settings already applied. That way you can login as Screencast and your settings will stick.
Resolution and Aspect
First, decide on your aspect ratio. Your laptop may have a ratio of width to height that is 3:2 or 4:3 but MOST people have a 16:9 Widescreen system? A VERY safe resolution in 2020 is 1280x720 (also known as 720p). That means that you'll be visible on everything from a low-end Android, any tablet, up to a desktop.
That said, statistics show that many folks now have 1920x1080 (1080p) capable systems. But again, consider your audience. If I was presenting to a rural school district, I'd use 720 or a lower resolution. It will be smoother and use less bandwidth and you'll never have issue with things being too small. If I was presenting in a professional environment I'd use 1080p. I don't present at 4k, especially if the audience is overseas from where I am. You're pushing millions of pixels that aren't needed, slowing your message and adding no additional value.
On Windows, consider your scale factor. At 1080p, 125% DPI is reasonable. At 720p (or 1366x768, using 100% scaling is reasonable).
Background Wallpaper and Icons
Choose a standard looking background photo. I prefer to use one from http://unsplash.com or the defaults that come with Windows 10 or your Mac. Avoid complex backgrounds as they don't compress well during encoding. Avoid using pictures of your kids or family unless it feeds your spirit and you don't mind mixing the professional and personal. Again - be intentional. I am neither for nor against - just be conscious and decide. Don't just accept the defaults.
Hide your desktop icons. Right click your desktop and hit View | Show Desktop Items. Also consider whether we need to see your desktop at all. If it doesn’t add value, don’t show it on the screencast.
Fonts
Try to use standard fonts and themes. While your preferred font and colors/themes offer personality, they can be distracting. Consider the message you want to present.
If you're using Visual Studio or Visual Studio Code, remember that your audience likely hasn't changed their defaults, and if you show them something fancy, they'll be thinking about how they get that fancy widget rather than your content. In Visual Studio proper, go to Tools | Options | Environment | Fonts and Colors and click "Use Defaults."
In all your text editors, consider change your fonts to Consolas Size 15. It may seem counter-intuitive to have such large fonts but in fact this will make your code viewable even on an iPhone or Tablet.
Remember, most video sites, including YouTube, restrict the embedded video player size to a maximum of around 560p height, unless you go full-screen or use a pop-out. Use the font size recommended here, and use Camtasia’s zoom and highlight features during editing to call out key bits of code.
Don’t highlight code in the editor by selecting it with the mouse UNLESS you've deliberately change the selection background color. Defaults are typically hard to read editor selections in video. Instead, zoom and highlight in post production, or use ZoomIt and practice zooming and emphasizing on screen elements.
Browser Setup
Unless your screencast is about using different browsers, pick a browser and stick to it. Hide your toolbars, clear your cache, history, and your autocomplete history. You'd be surprised how many inappropriate sites and autocomplete suggestions are published on the web forever and not noticed until it's too late. Don't view pr0n on your screencast machine. Be aware.
Toolbars
Your browser shouldn't show any, and this is a good time to uninstall or hide whatever coupon-offering nonsense or McAffee pixel waster that you've stopped being able to see after all these years. Remember, default is the word of the day. Disable any Browser Extensions that aren't adding value.
If you are using Visual Studio or an IDE (Eclipse, Photoshop, etc) be aware of your toolbars. If you have made extensive customizations to your toolbars and you use them in the screencast, you are doing a great disservice to your audience. Put things to the default. If you use hotkeys, tell the audience, and use them for a reason.
Toast
You've got mail! Yay. Yes, but not during your screencast. Turn off Outlook Gmail, GChat, Twitter, Messenger, Skype, and anything else that can "pop toast" during your screencast.
Clock and Notifications
Go to Start on Windows 10, and search for System Icons and turn off the Clock temporarily. Why? You can't easily edit a screencast if there's a convenient time code in the corner that jumps around during your edits. Also, no one needs to know you're doing your work at 3am.
Clean out your taskbar and notification area. Anything that visually distracts, or just hide the taskbar.
Audio and Voice
Use a decent microphone. I use a Samson C01U. You can also use a USB headset-style microphone but be aware that breathing and "cotton mouth" really shows up on these. Test it! Listen to yourself! Try moving the microphone above your nose so you aren't exhaling onto it directly. Use a pop filter to help eliminate 'plosives (p's and t's). You can get them cheap at a music store.
Be aware of your keyboard clicks. Some folks feel strongly about whether or not your keyboard can be heard during a screencast. Ultimately it's your choice, but you have to be aware of it first, then make a conscious decision. Don't just let whatever happens happen. Think about your keyboard sound, your typing style and your microphone, and listen to it a few times and see if you like how it comes together.
Avoid prolonged silence. There should be ebb and flow of "I'm saying this, I'm doing that" but not 10 seconds of "watch my mouse." Speak in an upbeat but authentic tone. Be real.
Also be calm and quiet. Remember you are a foot from them and you're their ear. It's a conversation with a friend, not a presentation to thousands (even if it is).
Don’t apologize or make excuses for mistakes – either work them in as something to learn from, or remove them completely.
If you are editing the presentation - If you make a mistake when speaking or demonstrating, clap your hands or cough loudly into the mic and wait a second before starting that portion over. When editing, the mistakes will show up as loud audio spikes, making it easy to find them.
Camtasia has decent automatic noise reduction. Use it. You’ll be surprised how much background noise your room has that you, but not your audience, will easily tune out.
If you must overdub a portion of the audio, sit in the same position you did while recording the original, and have the mic in the same spot. You want your voice to blend in seamlessly.
Preferred Video Output for Prerecords
Your screen capture tool should be produced at the highest reasonable quality as it will be compressed later when it's uploaded. Think of it like producing JPEGs. You can make a 5 megabyte JPG, but often a 500k one will do. You can make a 10 gig screen capture if you use uncompressed AVI encoding, but often a high bit rate MP4 will do.
The trick is to remember that your compressed screencast will be recompressed (copies of copies) when it is run through the encoding process.
Edit your screencast, if you do, in its recorded native resolution which hopefully is what you'll publish to as well. That means, record at 1080p, edit at 1080p, and publish at 1080p. Let YouTube or your final destination do the squishing to smaller resolutions.
Personally, I like to know what's going on in my production process so I always select things like "Custom production settings" in Camtasia rather than presets. Ultimately you'll need to try and find what works for you. Use an H.264 encoder with a high bitrate for the video and 44.1kHz/441000Hz 16 bit mono for the audio. Basically make a decently sized MP4 and it should work everywhere.
Do you have enough bandwidth?
In my opinion, if you are doing a live call with Video and Screensharing and you want it to be high definition, you'll need 4 Mbps upstream from your connection. You can check this at http://speedtest.net. If you have 5-6 Mbps you've got a little more headroom. However, if someone in the house decides to get on Netflix, you could have an issue. Know your bandwidth limitations ahead of time. If it's an important stream, can you dedicate your bandwidth to just your one machine? Check out QoS (quality of service) on your router, or better yet, take your kids' iPads away! ;)
Conclusion
Take some time. I put about an hour of work into a 15 min screencast. Your mileage may vary. Watch your video! Listen to it, and have your friends listen to it. Does it look smooth? Sound smooth? Is it viewable on a small device AND a big screen? Does it FEEL good?
Sponsor: Have you tried yet? This fast and feature-rich cross-platform IDE improves your code for .NET, ASP.NET, .NET Core, Xamarin, and Unity applications on Windows, Mac, and Linux.
© 2020 Scott Hanselman. All rights reserved.


The 2020 Guide to Creating Quality Technical Screencasts, Presentations, and Remote Meetings published first on https://deskbysnafu.tumblr.com/
0 notes
Text
The 2020 Guide to Creating Quality Technical Screencasts, Presentations, and Remote Meetings
I've had a lot of people ask me to write up a guide to creating great technical screencasts. This is an update to my 2011 post on the same topic.
What are you doing? STOP and reassert your assumptions
Hang on. You're doing a screencast or sharing your screen in some way for a meeting, presentation, or YouTube. What does that mean and why did I suggest you stop.
This isn't a stage presentation or even a talk in a conference room. Screencasts and remote meetings have an intimacy to them. You're in someone's ear, in their headphones, you're 18 inches from their face. Consider how you want to be seen, how you want to be heard, and what is on your screen.
Try to apply a level of intentionality and deliberate practice. I'm not saying to micromanage, but I am saying don't just "share your screen." Put your empathy hat on and consider your audience and how it'll look and feel for them.
Initial setup and tools
You can use any number of tools for screen capture. They are largely the same. My preferred tool is Camtasia. Other valid tools are CamStudio (a free and open source tool) and Expression Encoder Screen Capture. You can also use OBS to record your screen and webcam.
When you're using Skype/Zoom/Teams to record live, you're already set as those tools will share for you as well as record.
Windows Look at Feel
At the risk of sounding uptight, how you setup Windows and your environment is the difference between a professional and an amateurish screencast. It's shocking how many folks will start recording a screencast without changing a thing, then wonder why their 1600x1200 screencast looks bad on YouTube at 360p or low bandwidth on a phone. If you find yourself doing screencasts a lot, considering making a custom user (maybe named Screencast?) on your machine with these settings already applied. That way you can login as Screencast and your settings will stick.
Resolution and Aspect
First, decide on your aspect ratio. Your laptop may have a ratio of width to height that is 3:2 or 4:3 but MOST people have a 16:9 Widescreen system? A VERY safe resolution in 2020 is 1280x720 (also known as 720p). That means that you'll be visible on everything from a low-end Android, any tablet, up to a desktop.
That said, statistics show that many folks now have 1920x1080 (1080p) capable systems. But again, consider your audience. If I was presenting to a rural school district, I'd use 720 or a lower resolution. It will be smoother and use less bandwidth and you'll never have issue with things being too small. If I was presenting in a professional environment I'd use 1080p. I don't present at 4k, especially if the audience is overseas from where I am. You're pushing millions of pixels that aren't needed, slowing your message and adding no additional value.
On Windows, consider your scale factor. At 1080p, 125% DPI is reasonable. At 720p (or 1366x768, using 100% scaling is reasonable).
Background Wallpaper and Icons
Choose a standard looking background photo. I prefer to use one from http://unsplash.com or the defaults that come with Windows 10 or your Mac. Avoid complex backgrounds as they don't compress well during encoding. Avoid using pictures of your kids or family unless it feeds your spirit and you don't mind mixing the professional and personal. Again - be intentional. I am neither for nor against - just be conscious and decide. Don't just accept the defaults.
Hide your desktop icons. Right click your desktop and hit View | Show Desktop Items. Also consider whether we need to see your desktop at all. If it doesn’t add value, don’t show it on the screencast.
Fonts
Try to use standard fonts and themes. While your preferred font and colors/themes offer personality, they can be distracting. Consider the message you want to present.
If you're using Visual Studio or Visual Studio Code, remember that your audience likely hasn't changed their defaults, and if you show them something fancy, they'll be thinking about how they get that fancy widget rather than your content. In Visual Studio proper, go to Tools | Options | Environment | Fonts and Colors and click "Use Defaults."
In all your text editors, consider change your fonts to Consolas Size 15. It may seem counter-intuitive to have such large fonts but in fact this will make your code viewable even on an iPhone or Tablet.
Remember, most video sites, including YouTube, restrict the embedded video player size to a maximum of around 560p height, unless you go full-screen or use a pop-out. Use the font size recommended here, and use Camtasia’s zoom and highlight features during editing to call out key bits of code.
Don’t highlight code in the editor by selecting it with the mouse UNLESS you've deliberately change the selection background color. Defaults are typically hard to read editor selections in video. Instead, zoom and highlight in post production, or use ZoomIt and practice zooming and emphasizing on screen elements.
Browser Setup
Unless your screencast is about using different browsers, pick a browser and stick to it. Hide your toolbars, clear your cache, history, and your autocomplete history. You'd be surprised how many inappropriate sites and autocomplete suggestions are published on the web forever and not noticed until it's too late. Don't view pr0n on your screencast machine. Be aware.
Toolbars
Your browser shouldn't show any, and this is a good time to uninstall or hide whatever coupon-offering nonsense or McAffee pixel waster that you've stopped being able to see after all these years. Remember, default is the word of the day. Disable any Browser Extensions that aren't adding value.
If you are using Visual Studio or an IDE (Eclipse, Photoshop, etc) be aware of your toolbars. If you have made extensive customizations to your toolbars and you use them in the screencast, you are doing a great disservice to your audience. Put things to the default. If you use hotkeys, tell the audience, and use them for a reason.
Toast
You've got mail! Yay. Yes, but not during your screencast. Turn off Outlook Gmail, GChat, Twitter, Messenger, Skype, and anything else that can "pop toast" during your screencast.
Clock and Notifications
Go to Start on Windows 10, and search for System Icons and turn off the Clock temporarily. Why? You can't easily edit a screencast if there's a convenient time code in the corner that jumps around during your edits. Also, no one needs to know you're doing your work at 3am.
Clean out your taskbar and notification area. Anything that visually distracts, or just hide the taskbar.
Audio and Voice
Use a decent microphone. I use a Samson C01U. You can also use a USB headset-style microphone but be aware that breathing and "cotton mouth" really shows up on these. Test it! Listen to yourself! Try moving the microphone above your nose so you aren't exhaling onto it directly. Use a pop filter to help eliminate 'plosives (p's and t's). You can get them cheap at a music store.
Be aware of your keyboard clicks. Some folks feel strongly about whether or not your keyboard can be heard during a screencast. Ultimately it's your choice, but you have to be aware of it first, then make a conscious decision. Don't just let whatever happens happen. Think about your keyboard sound, your typing style and your microphone, and listen to it a few times and see if you like how it comes together.
Avoid prolonged silence. There should be ebb and flow of "I'm saying this, I'm doing that" but not 10 seconds of "watch my mouse." Speak in an upbeat but authentic tone. Be real.
Also be calm and quiet. Remember you are a foot from them and you're their ear. It's a conversation with a friend, not a presentation to thousands (even if it is).
Don’t apologize or make excuses for mistakes – either work them in as something to learn from, or remove them completely.
If you are editing the presentation - If you make a mistake when speaking or demonstrating, clap your hands or cough loudly into the mic and wait a second before starting that portion over. When editing, the mistakes will show up as loud audio spikes, making it easy to find them.
Camtasia has decent automatic noise reduction. Use it. You’ll be surprised how much background noise your room has that you, but not your audience, will easily tune out.
If you must overdub a portion of the audio, sit in the same position you did while recording the original, and have the mic in the same spot. You want your voice to blend in seamlessly.
Preferred Video Output for Prerecords
Your screen capture tool should be produced at the highest reasonable quality as it will be compressed later when it's uploaded. Think of it like producing JPEGs. You can make a 5 megabyte JPG, but often a 500k one will do. You can make a 10 gig screen capture if you use uncompressed AVI encoding, but often a high bit rate MP4 will do.
The trick is to remember that your compressed screencast will be recompressed (copies of copies) when it is run through the encoding process.
Edit your screencast, if you do, in its recorded native resolution which hopefully is what you'll publish to as well. That means, record at 1080p, edit at 1080p, and publish at 1080p. Let YouTube or your final destination do the squishing to smaller resolutions.
Personally, I like to know what's going on in my production process so I always select things like "Custom production settings" in Camtasia rather than presets. Ultimately you'll need to try and find what works for you. Use an H.264 encoder with a high bitrate for the video and 44.1kHz/441000Hz 16 bit mono for the audio. Basically make a decently sized MP4 and it should work everywhere.
Do you have enough bandwidth?
In my opinion, if you are doing a live call with Video and Screensharing and you want it to be high definition, you'll need 4 Mbps upstream from your connection. You can check this at http://speedtest.net. If you have 5-6 Mbps you've got a little more headroom. However, if someone in the house decides to get on Netflix, you could have an issue. Know your bandwidth limitations ahead of time. If it's an important stream, can you dedicate your bandwidth to just your one machine? Check out QoS (quality of service) on your router, or better yet, take your kids' iPads away! ;)
Conclusion
Take some time. I put about an hour of work into a 15 min screencast. Your mileage may vary. Watch your video! Listen to it, and have your friends listen to it. Does it look smooth? Sound smooth? Is it viewable on a small device AND a big screen? Does it FEEL good?
Sponsor: Have you tried yet? This fast and feature-rich cross-platform IDE improves your code for .NET, ASP.NET, .NET Core, Xamarin, and Unity applications on Windows, Mac, and Linux.
© 2020 Scott Hanselman. All rights reserved.


The 2020 Guide to Creating Quality Technical Screencasts, Presentations, and Remote Meetings published first on http://7elementswd.tumblr.com/
0 notes
Last Seen Blogs

kpopincandy
Kpop edits

kpophoe
A slut for kpop

bunnytriestoanimateyt
BUNNY|RONN

not-buggy
YOU BETTER VOTE 🫵

victoriaknow
baby boo