#style experiment inbetween assignments:3
Explore tagged Tumblr posts
Visit Tumblr Blog
Explore Tumblr blogs with no restrictions, modern design and the best experience.
Last Seen Tumblr Blogs


Fun Fact
70% of Tumblr users say the Dashboard is their favorite place to spend time online.
Photo
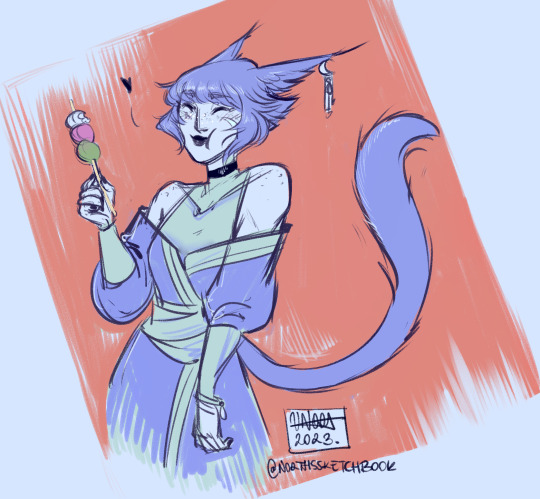
#ffixiv#warrior of light#miqo'te#artists on tumblr#illustration#character art#norarts#northssketchbook#ch: lunarae starseeker#style experiment inbetween assignments:3#insert witty queue tag here
6 notes
·
View notes
Text
YOUR FIRST TIME OPENEING ABELTON
Right, so you've got everything installed and ready to go. So you open up abelton, and see this :

WTF. Right? Yeah, I know. Lets break it down:
To start with Abelton has two viewing modes, arrangement view, and session view, you can toggle between the two by hitting tab. You'll work mainly in arrangement view, where you'll be able to view your project against time going left to right.
So, lets go by the circled areas in the photo above:
Browser Section: This is where you'll be able to search from, and drag and drop audio, instruments, audio effects, etc. Basically, anything and everything you'll need to drag and drop will be/can be from here. Underneath (far left of green box) is the help section, you can hover your mouse over anything and a brief explanation of its function will pop up here: good for a quick check/reminder.
Effects and Plugins Section: Here is where you'll be dragging and dropping to and will able to access and tweak/turn off all those things. Your effects, VSTs, plguins etc. can be opened by double-clicking on them from here, or directly but adjusting the knobs here( e.g the OTT effect i have dragged in here) .
QUICK TIP: The order in which effects are added in the chain of effects can make all the difference in the overall outcome of your sound, so experiment with this.
QUICK TIP: When installing 3rd party plugins, make sure to make a new folder on your PC for them. This will be where Abelton scans for all 3rd party plugins. You’ll need to set this on Abelton first. Options > preferences > File > VST plugins custom folder.
Groups and tracks: Here you will find all your tracks be it audio or midi ( more on the differences, pros and cons of these in another post) The highlighted section called BASS is a group (to group channels, select wanted channels, right click) and inside is a midi channel with an instance of Xfers Serum on it, and the other a blank audio channel. The number and 'S' underlined in pink to the right of the tracks can be use to turn the track on/off (number) or Solo it (S)
Navigation: Here you can move around your project, set locators at specific time-stamps by right-clicking ( e.g 'Chorus' here, or 'Drop' here). The unit used here in bars(although it can be changed). You can also loop a section of your track should you want to, using the loop button and length locator(underlined in purple.
Right, so I know when you open up Abelton for the first time it won't look exactly like above. Thats cause i've set a template, this makes my life easier and I don't have to do some of the things needed in a project each time I open up Abelton. Each persons template will be slightly different depending on style/workflow, so dont hesitate to change this template to what you feel works best for you, once you know that.I cannot stress how imporant being able to lay your creative ideas down easily and efficently without having to spend 2/3 minutes mucking about trying to find what you’re looking for.
Before we go into building your template, lets take some time to get into the audio effects in the template, understand a basic degree of what they do and why we might want them there.
EQ- An EQ allows you to boost/dampen the gain of a certain range of frequencies within a sound. The Q knob on an eq, allows you to wider or narrow the exact range of requenies being affected by the boost/reduction in gain you set. I actually have three of these in my template, one for high, mid and low frequencies.
Reverb- This gives the sense the sound is reflecting off walls, as if it were made in a large room with a lot of echo, this can add 'size' to sounds, making a listener preceive it as 'big'.
Utility tool- This is a stock abelton plugin that will allow you to adjust the gain of a channel as well as some other useful things you can do with it that will come later on.
Extra: Gain VS Volume- These two are very similar in idea, and some people will loosley use them interchangably. Volume is how loud the output of the channel is. It affects your loudness. Gain is how loud the input of the channel is.It controls tone.
In my template I have:
BPM set to 175 (this is completly up to you and can vary from project to project)
Inside Abelton, you can create custom Audio effect racks, these are essentially just a a grouping of effects in a particular order, that you can apply all at once with a single effects 'rack'.Certain parameters of effects can the be asigned to blank 'macro' knobs, this allows you to tweak them easily. I have an Audio Effects rack with a range of effects I will most commonly use. ( Note i have all the values set to 0 by default, such that they can be there but not be in use if i dont want them, but are there and easy to access if i do). I have this effects rack assigned by default to each new channel I add, both midi and audio.

Making your custom AER:
In your browser section >Audio effects >Audio effects rack (drag and drop this onto a blank channel)
This should be blank by default. We'll add all our effects first then map specific parameters to the macro knobs later. To start with, we'll add our three EQ Eights.(Eq Eight vs. EQ three, is simply the number of points on the EQ you can manipulate). Drag and drop these from your Audio Effects section in the browser. Each of these will control a different range of frequencies.
The values I use on the different EQs are:
Low: A low shelf filter, Q- 0.71, Freq- 200hz
Mid: A Bell filter, Q-0.56, 500Hz
High: A High shelf filter, Q-0.71, Freq-1.1kHz

Next we'll add some reverb and a utility tool.
Now we'll assign the specific parameters of the effects we'd like to tweak, each to their own macro knob.To do this, click the map button above your macros, this should take you into 'macro mapping mode' and highlight mappable parameters green, right click on the parameter you want to map, and then assign it to its macro. Macros can be renamed by rick clicking on them once out of 'mapping mode'. For each of my EQs, i have a macro assigned to their gain at 0dB. A macro knob for the dry/wet parameter on reverb at 0% (dry), and a macro for ther gain knob on the utility at 0dB.
Once you’re done, add one to a midi channel, right click on the channel > set as default midi channel, then do the same for audio and your sorted :)
Extra: Dry/Wet is j a term used to describe how much effects are being applied, with Dry being no effects, and wet with.
Thanks for reading :) My next bunch of posts will be a series on writing a track start to finish, with a couple random tips and tricks dotted inbetween :)
Big ups x
- P
0 notes
Note
❣️hoi, what was art school like? I'm planning to go myself (and my family is pretty passively aggressively turning me down), but I just want to know what skills do you learn? What is the experience? Thank u for your time! Ur blog and art are amazing btw
hI I think it really depends on the school but I can give like the idea of two of them since I went to another school for precollege to see if it was something I’d be interested in majoring in! C./C/A and I went to Ri/.ngli./.ng and my parents are actually letting me go back to school now so hopefully I’ll be back there in Fall c’: also thank you for liking my stuff!
this ask is gonna long because I know I’m gonna ramble so I’m gonna call the schools C and R so I don’t have to do the slashes all the time! C’s experience was a specific 1-2 month course so it’s nothing like actual college at R so feel free to skip down to it, I just thought it was important to add since it was my first experience at an art school
and after I talk about the schools I’ll say what stuff’s good to include in your portfolio, of course this is based on my experience but for the most part it helps in what you should try strengthening
I did animation at C, which was 2D in the morning and 3D in the afternoon. I did precollege the summer before my senior year cuz it’s like the college experience before college so you do get the feel of how it is being on your own, and I wanted to see if I was good enough to pursue something art related. At this point, my parents were on the fence about the idea, so it would help them too. And C’s in California, so I had a bunch of relatives who could show me around and who I could stay with during the weekends
experience wise, the teachers and TAs I had were really nice, so in 2D it was stuff like learning Principles of Animation and the first thing we did was a flipbook animation I think? and then it went to looking at scenes from movies for inbetweens and character sheets and we all worked together reanimating a quick scene from a movie. In the end, we all chose a really short scene from an animated movie to study and reanimate for our final
while in 3D, it was just learning around Maya and doing animation exercises each day with it, eventually working your way up to a mini film (nothing’s completely rendered though! just models), other than that it was pretty much the same as 2D
so basically, I learned the basics and they were really helpful, but to be honest I felt a bit lost with how free it was, you basically had to learn everything on your own with the teachers just checking your work. I was really good at 3D but it... wasn’t fun for me lol so I decided that after this I’d want to stay in the 2D realm of things
now for R! My parents were worried about the starving artist myth and all that, so they would absolutely not let me do Illustration even though that’s what I really wanted, so I chose Game Design and I was like hey I’ll deal with it or like maybe I’ll like it. If not, I could always try convincing my parents to let me switch my major.
the way things work at R is that all the majors are put into categories, so Computer Animation, Game Art, and Illustration are all the Media Arts majors. All Freshman take basically the same type of classes and things start breaking off around the second semester of freshman year. Eventually you like see no one outside your major lol
and lET ME TELL YOU........ R HAS A VERY HEAVY WORK LOAD, so you gotta be prepared for that. I think just about all art schools are like this, but R’s very strict on it. Manage your time wisely, there’s a lot of times I’ve seen people pull all nighters just to finish all their assignments. I was really bad at managing my time too, so when I go back I need to be more strict on myself. It’s better to do things early and relax than relax until last minute and have anxiety hell. Not many of the teachers are about how much homework you have in other classes. Also, it’s good to not do things last minute because then you can relax earlier and scanners and place you go to take photos aren’t crowded.
and trust me, your teachers will know if you did something last minute, and they can tell whether effort was put into something or not.
Now for classes, I’ll talk about just freshman year since that’s probably what’s most helpful to you right now and since I was made to drop out by my parents I’ll probably be repeating like the second semester of that rip.... anywAY
so, R starts you with foundation, so figures classes, 2D design, drawing (this one’s perspective! so important but rip everyone forgets everything after that semester so I should probably start studying perspective again)
the figure classes at R are sO GOOD............ you improve a lot with those, a few weeks into it I was thinking about the figures I had in my portfolio and was just like...... fuck these are so shitty how the hell did the school accept me.... of course the experience depends on the teacher, but I loved my figure drawing teacher he was really cool and good. He did demos at some point every class to where we would all just hover over his shoulder and watch him draw while he explained what he was doing. You i
2D design I hated because like...... abstract... it’s supposed to help you work with compositions and such but I really don’t understand abstract and execute it properly so that was a really difficult class for me
drawing class is just doing still life and perspective exercises, you don’t really get to the fun part till second semester, I forget the other exercises but I remember that towards the end there was one where you designed a car (like a fun spin on it like.... I think mine was a firefly styled car? yeAH)
other classes were Film & Narrative (so studying films, it was cool) and Writing Studio, which is just like a writing class, they don’t really apply to skills/experience in art so I’ll skip over those
second semester, you still have Figure Drawing, but there’s more of a focus on stuff and you get to draw animals too (sadly no, no real animals come into the classroom. You work off of projections and then there’s a field trip to a big cat sanctuary)
drawing II gets fun because you finally get to use photoshop for your still life and assignments, the assignments get more fun like the Tro/./.ja./n Ho//rs/e assignment. Like you could either do the actual one or draw a similar scenario, I’m totally blanking out on what I did but one of the examples was like a giant wooden mouse with cheese and in the back were cats watching the actual mice. Anyway, it had even more of a focus on compositions and colors.
Another assignment was designing a character’s room. It could be any character, but you couldn’t have anything that gave away their name. People had to be able to guess who the room belonged to just by looking at it. Sounds hard, but fun. If the character you chose had like a specific style from the concept art of where they’re from you’re free to use that too! I did Kida from Atlantis and one of my friends did Greg Universe’s room, so she got to imitate SU’s background style which was cool to see!
3/D desi/gn was............. super difficult to me, I almost failed that class >w>;;;; because it was woodshop type stuff and polymer clay depending on what you wanted. However, every assignment you did would lead up to the grunt assignment, which was like, you had three designs of things that would be possible grunt level monsters, and you essentially pitch a game idea to the class and they pick the best. SO again, modeling especially with actual clay is hard for me but it was a great experience when it came to designing and stuff. There’s more but I don’t want to get into all the assignments
3/.D design differs based on what major you’re in, and you only get it if you’re doing one of the Media Arts majors, but I’m pretty sure for the most part they’re the same?
if you major in Game Art or Animation, then you also take traditional animation, which was really fun but tbh...... I only knew how to do animation because of me being at precollege at C and then like learning stuff on my own, you were really left alone a lot, which is the same for some of the other classes. They’ll help you if you ask, but if you don’t then you can’t really get helpful feedback. Again, it depends on the teacher. The one I had was really nice and I frequently went to her for help.
so despite how some assignments/classes were hard for me, I really loved R and I’m excited at my parents giving me the option to go back, I just need to do a portfolio again >w>;;;; R’s a really good school with a lot of great resources. All of my issues came from problems with people (not teachers just other students) there and I’m not gonna get into those cuz personal lol
OKAY SO for portfolio tips
still life
figURES
ANIMALS, it makes you have a better understanding of anatomy and stuff
try to have a mix of media in there, like I mainly do digital but still have some traditional stuff to show that you know how to use those
I would keep figures realistic and not stylized so they can see that you have an understanding of them
depends on the school I think, but R strictly says in their guidelines to not do fantasy stuff like unicorns and dragons
NO FAN ART....... you can have it but you need to be really, really vague? if that makes sense, like people shouldn’t be able to tell it’s fan art
have what you’re applying for in your portfolio, so like depending on what you want I’d add concept art stylized stuff or character designs
you gotta have your best work in there, like some people like having okay/bad work to show how much they improved but that’s a bad idea, if you don’t think something’s good don’t put it in for colleges to see
12 notes
·
View notes
Text
“Weekly Summary, Week 4″ - 16.01.2017-20.01.2017
Animated Sketchbook Reel - Animated Sketchbook” - 19.01.2017
So begin with, I looked back at my sketchbook and the ‘Storyboard’ I made for my 'Sack of Flour’, observing the 'Keyframes’ that I’d drawn and if anything could be improved. Happy with what I’d already drawn, I decided to go ahead with these 'Keyframes’. First I studied how the animator’s draw fire in 'The Last Airbender’, from their fire down to their 'Poses’, the show has taken a lot of influence from 'Martial Arts’. As I’m basing my second animation off of ‘Element Bending’ from the show, I watched the ‘Animatic’ and evaluated on how I’m going to draw 'Fire Bending’. Additionally, the movements of the characters and their stances before ‘Bending Fire’ is relevant to me as well. Searching for resources, I found a video showing the ‘Final Pencil Sketch’ from the show before colouring. I wanted to view how these sort of propelled flames would act in real-life. So searched around, I found this video showing a flamethrower spraying flames in slow-motion. A great help with the process of making the effects and adding a touch of realism to my work. The next ‘Principle’ to be implemented is ‘Arc’, the reason I choose this one was to push the ‘Martial Arts’ theme of the animation. I drew the stances of my 'Sack of Flour’, plotting all the 'Keyframes’ my three main actions, constantly thinking about my 'Principles’, integrating the ones previously used but taking special care to implement 'Arcs’. The reason for this is so I can achieve an animated character with sweeping, dramatic movements. I drew the ‘Tie-downs’ and 'Inbetweens’ on the animation, even continuing on to the second set of actions to have the 'Sack of Flour’ cycle back to his original position. Ss far, I’m really pleased with the 'Dynamic’ animation style and think if it carries on to be this successful, it may even turn out better that the 'Kitchen Nightmares’ animation. But before that, I need to add the 'Secondary Action’, the flour bending.The use of the ‘Seconary Action’ really completes this animation, and from the beginning to here I’ve noticed how detrimental the planning of this animation has been to its success. The 'Dynamics’ of the arcing movement and the flashiness of the flour really make for an 'Appealing’ animation, but I do think that it needs to be tweaked, 'Easing In and Out’ certain movements in the animation due to the 'Sack of Flour’ being a bit to light on his feet. What needs to be included next is the ‘Staging’ of the animation to display the environment and complete the scene.
“Narrative Week 4″ - 17.01.2017
We learned about ‘The Shapes of Stories’, ‘The Hero’s Journey’, ‘Three act and five act structure’ and this units ‘essay questions’. To begin with, shapes of stories were cover. We learned about the similarities between the new testament and the fairy tale Cinderella, since they both purses a similar structure.
Beginning with a human receiving ‘incremental gifts from a deity’, but is ‘suddenly ousted from good standing’ in the middle, but then ‘receives off-the-chart bliss’ in the end. On the other hand, we learned about the ‘Old Testament’, which has ‘a human receive incremental gifts from a deity’, but is then ‘ousted from good standing in a fall of enormous proportion’. As well as this, we re-visited Vogler’s ‘The Hero’s Journey’.
Later, reasoning can to light. Why do we tell stories?
The Rehearsal Reason - the brain is like a muscle, and gets stronger by ‘practising’ for difficult scenarios (and how to avoid them).
The Healing Reason - Watching a character heal his flaws helps us heal (and recognise our own).
The Information Retrieval Reason - Stories make information easier to remember (by showing us cause and effect).
The Panacea Reason - Stories with happy endings give us hope: even history can be rewritten to suggest a sense of order and justice.
The Procreation Reason - A story ends in sexual union, or its ‘symbloc manifestation through marriage’; on a basic level these stories encourage the continuation of the species (fairy tales in particular).
The Psychological Reason - Stories separate the disparate parts of our own psyche into external characters: they play out a process of integration - helping us to achieve this: overcoming our own shadows, giving up on our shallow ego-driven wants in order to fulfil our needs.
What’s is an act? A part of a story (consisting of individual scenes, which may belong to a sequence of linked scenes). We learned the difference between ‘3-act’ and ‘5-act structure’, and how Shakespearean play had a 5 part story. We then analysed the 3-act structure. Continuing on and really fleshing out the process a three-act story may follow.
And comparing its differences with Freytag’s 5-stage pyramid that we saw in previous lessons.
Then breaking down the specific of the Three-Act structure:
Act I - The introduction to the story setting up the story, this act usually lasts from 20 to 30 minutes. “It’s all about our somebody and the wants something.” (Michael Lengsfield)
Act II - The second act usually last for half the movie (up to an hour), focusing on the “trouble getting” (MIchael Lengsfield) the want.
Act III - In this last half hour, the story begins to be resolved. The character who overcomes the obstacles in Act II is now changed from the encounters. They gather their strength for one last final confrontation that will answer the story questions and bring the story to a close.
Next, we looked at the Three-Act structure when following “The Hero’s Journey” (Vogler’s Version)
Act I (Separation)
Heroes are introudced in the ‘Ordinary World’.
They receive the ‘Call to Adventure’.
They’re ‘reluctant’ at first or ‘refuse the call’.
They are then encouraged by a ‘Meeting with a Mentor’.
‘Cross the First Threshold’ and enter the ‘Special World’.
Act II: Descent and Initiation
Along the way, they encounter ‘Tests, Allies, and Enemies’.
They ‘Approach the Inmost Cave’, crossing a ‘second threshold’.
They endure the ‘Ordeal’/Death and Rebirth’. The mid-point of the story, where the ‘new truth dawns’ for the protagonist, who “embraces for the first time the quality they will need to become complete and finish their story.” (Yorke, 2013)
They take possession of their ‘Reward’.
Act III
The protagonist is pursued on ‘The Road Back’ to the ordinary world, undergoing a spiritual death.
They cross the third threshold, experience a ‘Resurrection’ and are transformed by the experience.
They ‘Return with the Elixir’, the treasure to benefit the ‘Ordinary World’.
The Midpoint - usually ups the stakes and intensifies in action. Revealing the direction the 2nd half of the story will go. The moment when the protagonist turns from ‘reaction’ to ‘action’, dealing with their problems actively.
Yorke presents an adapted version for 2-D storytelling.
Lastly, we looked at the projects essay question, this is where we decide what kind of essay we want to write by choosing our questions, in turn influencing what kind of animation we write about.
Analyse your chosen narrative with reference to ‘The Hero’s Journey’, or another appropriate theory of three-act or five-act structure.
Make a ‘Proppian analysis’ of an animated fairy tale with reference to its literary source, if applicable. Discuss the particular suitability of the film’s animation style as a method of discourse for the telling of a fairy tale.
Walt Disney once remarked that, ‘We like to have a point to our stories, not an obvious moral but a worthwhile theme.’ Analyse your chosen narrative as an example of moral or ‘worthwhile’ storytelling.
‘Only available in animation.’ To what extent does this Paul Wells quote apply to your chosen film? Explain how the medium and materials enter, shape, and define the narrative. If your chosen film subverts or ignores conventional expectations of a ‘plotted’ narrative, identify the strategies employed in its place.
Animation is a uniquely visual medium. Analyse your chosen narrative as a successful example of visual storytelling.
Paul Wells has written of animation’s licence to be more radical than live action cinema, due to the ‘inherent innocence’ in the ‘language of animation’. How does this apply to your chosen narrative?
For our assignment, we were instructed to look at different narratives to narrow down what kind of essay we wanted to write in preparation for next weeks presentation.
Animated Sketchbook Reel - Animated Sketchbook” - 19.01.2017
For my third showreel animation, water reference was needed before beginning since this would be my first time animating water. So I found a few images depicting the process of water animation in 2-D, rippling outwards until it becomes less and less visible. I also looked at different styles of drawing water, observing how the ripples and splashes are drawn. Looking at different aspects and ways of drawing the liquid. I feel that this animation will be my hardest yet. So before tackling the third animation, I believe that I attempted a test first. With the test, I drew a fishbowl and attempted to have the water ripple inside. Immediately, I noticed the difficulty of having the rippling stay at a consistent, believable speed. Additionally, water behaves different to a character, so I’m finding it challenging applying such ‘Principle’ of 'Ease Out’ to the ripples. Nevertheless, I attempted to figure it out while animating my third animation. I drew the ‘Keyframes’ for the animation. Firstly, the character begins face down in the water until he suddenly emerges in a panic, breathing heavy and flailing about. He then begins to calm down and regains his composure. I added additional frames into the animation to really get an understanding of the 'Timing’, this way I could tweak appropriately until the animation flows. So I drew the additional ‘Tie-downs’ in basic ‘Semiotic’ shapes but added features to the character’s face, I viewed the 'Timing’ of the movement to gauge the speed so I could adjust any frames to improve the animation. From judging it, I feel that the animation goes way to fast, I also need to add small details in the character’s body to have him constantly moving, as if he’s distressed. So from here, I went back in and starting drawing the 'Inbetweens’. I continued on and animated the water for the animation, as well as adding more frames to the character’s movement and adjusting his ‘Posing’ in select frames. After evaluating the animation, it’s still too fast. Additionally, I found it to be really challenging trying to draw the water consistently due to it being liquid. You can’t 'Keyframe’ it, so I decided to draw it using 'Follow-Through’ which worked better than trying to 'Key’ it, but flows too fast, looking more like rapids rather than the calm beach shore I’m trying to go for.
Stop-Motion” - 19.01.2017
For this induction, the class was introduced to creating stop-motion animations using ‘Wire-mesh’ models and ‘Ball-and-socket’ models. For my group, we were assigned to the pinning station. The pinning station is where you’d use the ‘Wire-mesh’ puppets and pin them down to the wooden board to stabilise them before capturing the pose.
On the other hand, the other station uses magnets to magnetise the ‘Ball-and-socket’ puppets to the grid.
To begin with, me and my partner chose our puppets and then to animate using the ‘Straight-ahead’ technique in animation. This is used in ‘Stop-Motion’ due to it being difficult to animate ‘Keys’ in ‘Stop-Motion’. We finished the animation and from looking back, I feel that the character’s intentions are portrayed well, but everything happens too fast. The problem with the speed may cause the viewer to lose track of small details in the animation. Overall, I believe that this first attempt was good, however, another attempt is needed since I believe that the more control I have over the process, the smoother everything will sync together.
Conclusion
To start with, this has been an extremely busy week. Cramming so much work into my schedule. I was able to create to amazing 2-D animations for my 'Animated Showreel'. Additionally, being introduced to 'Stop-Motion' was a new and welcomed experience, allowing me to experiment with animating with a real object instead of drawing every frame. For next week, I plan to further my knowledge on 'Stop-Motion' and push myself in creating different animations.
0 notes
Text
"Weekly Summary - Week 3” - 09.01.2017-13.01.2017
Animated Sketchbook - 09.01.2017
For this animation, there was no storyboard, yet I was inspired when re-watching Disney's ‘Ratatouille’, when the scene follows Remy’s escape through the kitchen. The idea was to have a 'Sack of Flour’ running through a kitchen in fear, a contrast from my previous animation 'Sleeping Beauty’, mostly due to wanting to explore more interesting and dynamic animation techniques. Beginning with a run to then have the sack jump and land, a more ambitious and challenging task in comparison to 'Sleeping Beauty’. I decided to have the 'Sack of Flour’ trigger a rumble, causing knives to fall from above. Since I wanted my animation to contain a rumble in the kitchen, the 'Principles' I wanted to incorporate into ‘Kitchen Nightmares’ is 'Staging’, 'Solid Drawing’ and ’Exaggeration’, so I could flaunt the sack’s movements to sell to the audience the state of panic that the ‘Sack of Flour’ is in. Like I said previously, I wanted to work to challenge myself and push my limits, which I feel I did. It's my best animation so far in the 'Animated Sketchbook’, and I plan to one up this animation and keep attempting new and challenging ideas.
For the ‘Animated Sketchbook Reel’, I need to make 'Three Animations’, one of which needs to be a 'Self-Portrait’ of myself having a change in expression. I planned to base it off my 'Thinking Exercise Animation’, using techniques such as 'Secondary Action’ and 'Exaggeration’ to create a fun, exciting change of expression. I reviewed my sketchbook looking at different ideas I’ve had throughout the project. After reviewing, I came to the conclusion that I wanted 'The Flour Bender’ sketch to be my second animation. This sketch depicts a 'Sack of Flour’ bending flour, an homage to the series 'Avatar: The Last Airbender’. A fun, interesting animation idea due to the animated show having such excitingly 'Dynamic Animation’ and effects. And finally, for my third animation, I decided to have my very own character reacting to his situation. I wanted to reference is the one involving the seagull and water. This way I can create a 'Secondary Action’ using the liquid, which would be a new and exciting prospect for me. I plan to keep these animations rough. This way I can focus on motion rather than presentation, working fluidly to really portray the 'Dynamics’ of the character’s movement and really adhere to what a sketchbook truly is. “A safe place to play, to experiment, and to be unusually free” - Laura Heit
I reviewed the ‘Thinking Exercise’ animation, as well as viewing previous sketches of myself in my sketchbook. I tried a few styles to see what way I wanted to animate my face. In the end, I decided to go with a more stylised approach due to a detailed animation taking too much time. I wanted the hand to be the 'Secondary Action’ of the animation. So before attempting this, I studied reference on hands to simplify the process of drawing them for myself. Taking into account the 'Semiotics’ used in simplifying the design. I drew the basic shapes for the animation, filling in the 'Keyframes’, 'Tiedown’, and 'Inbetweens’. Reviewing the expression, it clearly shows the slow, sustained change in expression, exactly what I was going for. The hand is going to stay 'Rough’, however, I need to re-aligned it since it shakes quite a bit during the scene.
Narratology - 10.01.2017
We began learning about a particular type of ‘Narrative’ - the 'Fairy Tale’. Looking at tales like 'Bluebeard’ (1697) and 'Cinderella’, seeing how they'd changed over time, originally shared with adults, yet over time it has been adapted for the children of the time. Having their disturbing psychological messages changed to tales suitable for children, but still containing an important moral. We looked at 'The Company of Wolves’, written by Angela Carter (1940-1992), a dark subversion of 'Little Red Riding Hood’. After, the topic 'Is animation the ideal medium for a fairy tale’ came into play. Discussing how 'Metamorphosis’ and 'Shapeshifting’ is a dominant characteristic of fairy tales, and animation in turn. We looked at work from Caroline Leaf’s 'The Street’ animation to 'Fantasmagorie’ (1908). After watching the videos, we learned about the rules that come with writing a tale.
The Law of Threes - 'three is the maximum number of men and objects that occur in traditional narrative.’
The Law of Repetition - actions in folk tales are typically repeated 3 times
The Law of Contrast - other people should be antithetical to the hero; therefore if the hero is generous, other characters should be 'stingy’ to contradict him.
The Law of Twins - two people can appear together in the same role and should be similar in nature.
The Law of Patterning - situations and events are told and re-told in 'as a similar a manner as possible’.
Then we moved onto 'Propp’s dramatis personae' and the variety of character tropes and the roles they play:
The Villain - who appears twice. Firstly, a sudden appearance. Secondly, he would be sought out.
The Donar - is encountered accidentally. Orivudubg the hero with a magical object or helper. Not always a benevolent character.
The Helper - is the ally that aids the hero on his/her journey.
The Princess and her Father (who function as a single 'agent’) - tend to be sought after, and act as a reward later in the story.
The Dispatcher - sends the hero on his/her journey.
The Hero - is the protagonist, and the one to undertake the journey.
The False Hero - assumes the role of the hero but is unable to complete the hero’s task.
Additional, we looked at how these roles can differ within the story. Looking at examples, such as Snow White being a victim-hero, while 'Anna’ from 'Frozen’ acts as a seeker hero. We moved onto the last part, entailing details about the '31 functions’, organised into 6 stages:
Preparation
One of the members of a family absents himself from home.
An interdiction is addressed to the hero.
The interdiction is violated.
The villain makes an attempt at reconnaissance.
The villain receives information about the victim.
The villain attempts to deceive his victim.
The victim submits to deception.
Complication
The villain causes harm or injury to a member of a family.
or
One member of a family either lacks something or desires to have something.
Misfortune or lack is made known; the hero is approached with a request or command; he is allowed to go or he is dispatched.
The seeker agrees to or decides upon counteraction (Only appears in tales with a seeker-hero).
Transference or donation
The hero leaves home. (At this point the donor enters the tale).
The hero is tested, interrogated, attacked, etc, which prepares the way from his receiving either a magical agent (object/animal) or helper (magical person).
The hero reacts to the actions of the future donor (passes or fails a test, does or does not render a service, etc).
The hero acquires the use of a magical agent.
The hero is transferred, delivered or led to the whereabouts of an object of search (often located in another kingdom).
Struggle
The hero and the villain join in direct combat.
The hero is branded.
The villain is defeated.
The initial misfortune or lack is liquidated (The narrative is meant to peak at this point).
Return
The hero returns.
The hero is pursued.
Rescue of the hero from pursuit.
Recognition or difficult task.
The hero, unrecognised, arrives home or in another country.
A false hero presents unfounded claims.
A difficult task is proposed to the hero.
The task is resolved.
The hero is recognised.
The false hero or villain is exposed.
The hero is given a new appearance.
After learning about 'Proppian Analysis’, we joined into small groups in order to make our own. We’d been assigned to analyse an animated fairy tale and comment on how the animation enriches the experience.
Storyboard Introduction Masterclass - Animated Sketchbook - 12.01.2017
I imported the frames into 'Photoshop’ and organised them into chronological order. From here, I created an 'Animatic’. During the editing process, I experimented with a variety of different effects, observing and trialling to see what works best at creating the atmosphere needed for the scene. During the process, I also tweaking the 'Timing’ of the frames and effects, controlling when the flashes and fades are triggered. These effects really worked in sequences such as the flash of the camera, flashing to white when the bulb pops. Additionally, using solid black in some scenes to reveal the information slowly created suspense when watching the scene. Now finished, I can say I’m pleased greatly by the final result. Researching the different techniques to add me in the process of making the 'Animatic’ really paid off, as well as giving me the experience needed to undertake the project.
Conclusion
This week has shown the most progress so far. For the 'Animated Sketchbook' project:
I produced my best animation so far in the 'Animated Sketchbook' project.
Made a great start on the 'Animated Sketchbook Reel', making great development on the animation.
Created an 'Iron Giant Animatic' that covers the meeting between 'Hogarth' and 'The Giant', which is 'Timing' and editing in order to set the scene.
During 'Narratology', we covered 'Fairy Tales', 'Folk Tales', 'Propp’s dramatis personae' and the '31 functions'. A great lesson that really challenged my understanding of a story, even containing exercises to allow me to put my newly learned information into practice. For next week, I plan to continue as I have, working hard and challenging myself so I can put these newly learned techniques to use.
1 note
·
View note