#thank god i saved the hair cut psd eh..
Photo
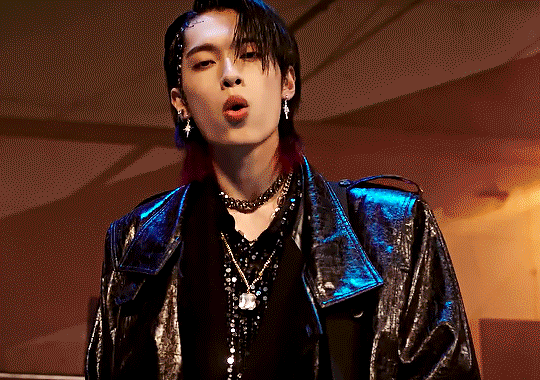
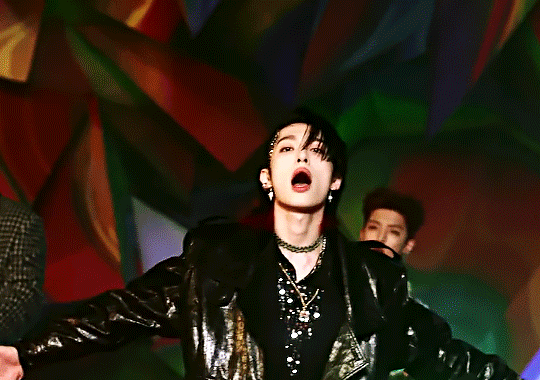
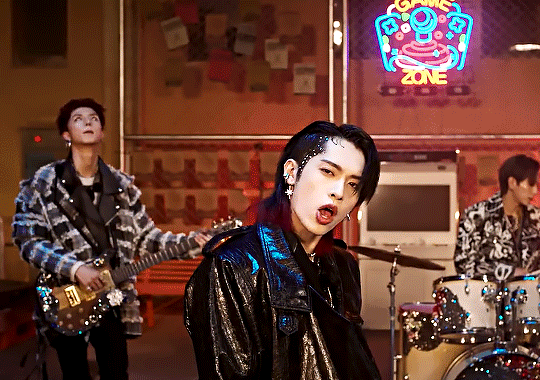
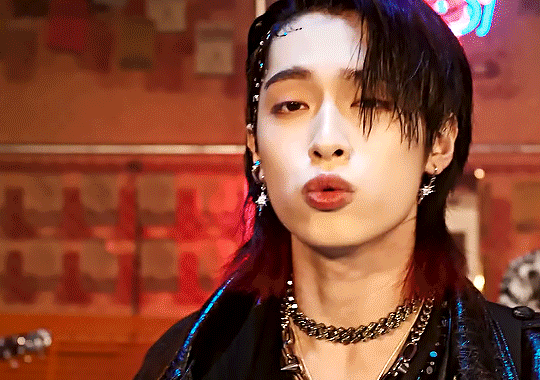

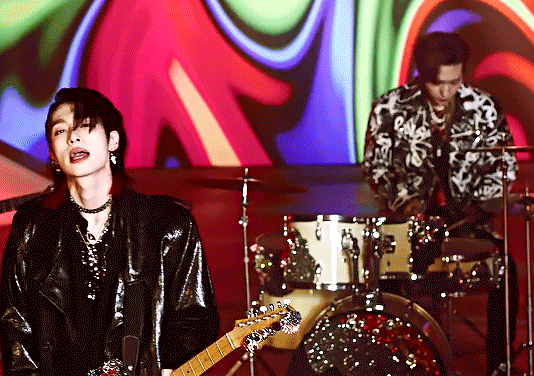
GAON
"X-MAS" Band Performance Video
#gaon#xdinary heroes#xdinarynet#jypartists#*m#*g#eyestrain tw#thank god i saved the hair cut psd eh..#this video was adressed to me specifically
114 notes
·
View notes
Text
Gif Tutorial~~~°˖✧◝(⁰▿⁰)◜✧˖°
Hi, guys~!
In lieu of all the greats sharing their wisdom and techniques, I thought I would make a tutorial, which is totally uncalled for, on my own methods and maybe inspire other makers!

If you wanna read the rantings, follow down in the cut below~
Let's establish some things: I am a Mac user, and although Mac’s are EXCELLENT computers, when it comes to awesome gifs, we don’t get to have that kind of benefit.
With those that have Windows, legit, y’all can use KmPlayer, PotPlayer, Avisynth
AVISYNTH MAN. If you want to know what that is, go to Brandinators tumblr, he’s considered God of Avisynth.
Here are some awesome tutorials that might be helpful made by great people:
✩ : This one is Ottokaji-VIXX, Agata is precious and this tutorial is hilarious
✩ : It’s fychasang, but technically this is CHA-NNNNN and it is a really great tutorial. Excellent tidbit on fonts as well.
ANYWAYS GOING ON TO THOSE LESS FORTUNANTE AND CAN’T USE THESE
So, what I use:
-ClipGrab (to download videos)
-Photoshop CS6 (if you don’t have any version, try to check out itsphotoshop blog!)
Okay let’s get rolling!
1. Download your video. I use Clipgrab and downloaded a Desperate performance from Youtube. This video will save on your desktop.
-ALWAYS TRY TO DOWNLOAD 720P OR 1080P. The higher the better. I also like .ts (or .tp) but those are like, if I get lucky.
2. The video will open up in Quicktime for me, but your video will open up in anyway you view it. From here, find a portion of the clip you want and trim:

Obviously I am a Hongbin stan, so I just want a Hongbin gif.
3. From here, open up photoshop and go to File > Video Frames to Layers

Select your video and make sure you don’t select the “Limit To Every 2 Frames��� despite what other tutorials tell you.
I mean, you can!
But I guess I’m someone who loves lots of frames, which is why I opt out of it.

*BUT BE CAREFUL! Sometimes you’ll get stuck with a CRAZY amount of frames for just a silly hair flip. Be selective!
3. Next, you’ll get a screen such as this one. Select ( or highlight) the bottom frames and change the timing as you would like.
*TIMING IS ACTUALLY A VERY VERY IMPORTANT PROCESS. People for some reason don’t mention it, but it guarantees the smoothness of your gifs.
I like 0.04-0.06, but don’t worry, you are gonna put this finished gif back in CS6 to adjust the timing again.

4. Next, go to the right hand-side and see a little button with 4 lines and a downward arrow. Press it and select “Convert to Video Timeline”

5. Afterwards, go to Filter > Convert to Smart Filters

6. This is the most fun step, the Coloring!
Now let me explain a few things.
-I don’t give out PSDs because they are my personal one. If you like a color of a gif you are making, I recommend you save it then as a .psd so that you can use it on future gifs.
-Be creative and make your own style of coloring
But here is something I CAN give as a tip, I love to use Levels and Selective Coloring first!
The Level’s function is like the Curves function, but eh, preference. I like to focus more on dark and less on light.
The Selective Color function is very important because I go in there to mess with skin color and background color. I absolutely adore blues so I try to emphasize it in background when I can. Or red...but that’s because these are my fav colors.
I like certain colors to stand out more than others. If anything, there are so many coloring functions on here, be creative! Like, I’ll use a Photo FIlter of blue to counteract yellow tint.
After Levels and Selective coloring, put your PSD of choice and adjust!

Here is the “PLEASE DON’T DO THIS” portion:
-Again, it is very important that you develop your own sense of coloring and style. It makes the world better trust me. Especially when people want to steal your gifs and you need to hunt someone down. It’s good to be able to distinguish them.
-But here are somethings to take note of:
+WHITE-WASHING
PLEASE DON’T DO THIS.
IT’S UGLY AND PASTY. HONGBIN IS A GHOST WTF.
Like, sue a girl for wanting her man to you know...look alive.
But also it shows how grainy it is

+OVERSATURATION
Someone get Wonka on the phone, he’s missing one of his Oompa Loompa’s
Like, I know I am someone that ADORES vibrancy and whatnot, I love using the function, but for heaven sake, have a limit children!
This gif looks like Hongbin sat in the tanning bed for too long.
Wait, I got one more!
Oompa Loompa dum bi dee doo We don’t want Hongbin to look like you~

Now i’m done. Moving on~
7. Yes NOW we do sharpening. I save this one for last because, when I color, I like to be able to move the cursor around and if the sharpen is already on there, it lags.
Go to Filter > Sharpen > Smart Sharpen.
I keep my settings on 0.03 radius...why is this at 100% amount? I thought it was on 500%? Oh well, do what you want and how you want to sharpen haha.

8. Okay so this is one of those secret techniques I have that isn’t timing and coloring.
Honestly, it’s just an extra step. You don’t need this if you don’t want it.
This is known as the Anisotropic function. It makes it blurry!
Filter > Stylize > Diffuse

Select Anisotropic and press OK.

Make sure you go back into the adjuster on the right hand side, where all the color functions and sharpen functions are, and adjust the intensity of the blur.
*THIS WAS AN OPTIONAL STEP.
Really this doesn’t do anything at all, It’s just an extra step.
Timing and Coloring and Frames are the most important.
9. Next, crop your gif and go to Image > Image Size. Adjust your gif size, this impacts the MB so be wise. I usually stay around 300 px unless I’m being adventurous.

10. File > Save for Web. Lower left-hand corner, it tells you your MB size.
For you lucky ducks, Tumblr put the cap at 3 MB recently, so your gif can work under that number.
BUT TRY BEING US WHO HAD TO DEAL WITH THE 1MB AND 2MB.

Adjust the way you want and save!
Next thing, you would take your created gif and open it up again into photoshop. We are doing this because it is too fast I bet you.
The gif will open up like Step. 3 did. Here, just select all the frames, adjust the time (I usually do 0.04-0.05) and then go to Save For Web again. Just save and replace the old.
Finished Product:
And now you are DONE!

I hope this was helpful in some way, I know I got lazy around some portions and this was long but I thank those that got here haha.
I hope this will be helpful for those that want to try it!
Important emphasise one last time:
-Timing is important
-Coloring is important
-Frames are important
-BE CREATIVE AND MAKE YOUR OWN STYLE
Have fun~!
Please credit me if you use anything here as inspiration!
77 notes
·
View notes
Last Seen Blogs

gabriellorca
Things are only impossible until they're not.


gear332-blog
CanonGear33

yuki-intex
Yuki_Intex

speakordienow
ON MY MIND