#typescript alias
Explore tagged Tumblr posts
Visit Tumblr Blog
Explore Tumblr blogs with no restrictions, modern design and the best experience.
Last Seen Tumblr Blogs


Fun Fact
28.6 is the average number of monthly visits per US mobile user.
Video
youtube
TypeScript Interface Alias Union Tutorial for JavaScript Developers Full Video Link - https://youtu.be/j7KzDovCqmU Check out this new video on the CodeOneDigest YouTube channel! Learn Interface, Alias & Union in typescript. Learn how to use Interface & Objects, how to use Alias & Union in typescript language. #video #typescript #interface #alias #union #nodejs #javascript #codeonedigest@java @awscloud @AWSCloudIndia @YouTube @codeonedigest #typescript #javascript #typescript #javascript #typescripttutorial #learntypescript #typescriptforbeginners #typescripttutorialforbeginners #typescriptinterface #typescriptinterfaceprops #typescriptinterfacejson #typescriptalias #typescriptunion #typescriptfullcourse #typescriptcrashcourse #typescriptexplained #typescriptproject #typescriptprojectsforbeginners #typescriptprojecttutorial #typescripttutorialforjavascriptdevelopers #typescriptguide #typescriptcompleteguide
#youtube#typecript#typescript interface#typescript alias#typescript union#typescript project#typescript language
1 note
·
View note
Text
TypeScript / Type Mapeado
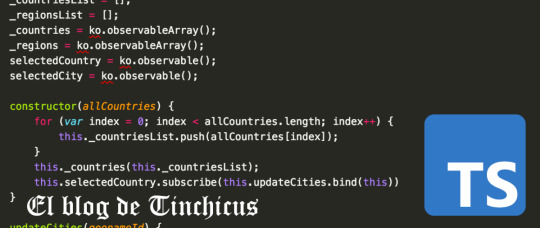
Hoy veremos una variante de type en conjunto con los genericos para lograr un alias muy interesante espero les sea de utilidad y buen finde!
Bienvenidos sean a este post, hoy veremos type nuevamente. En este post vimos como eran alias de tipos (type) y como nos permitian poder definir tipos especiales. Pero si esto lo combinamos con genericos podemos lograr una herramienta muy poderosa, la cual nos puede permitir crear tipos basados en otros tipos. Para entender el concepto vamos a analizar el siguiente codigo: interface IRequerido…

View On WordPress
0 notes
Text
Currently fighting with the TypeScript compiler API so I can pull out all of the types we’ve written into a form that I can use to output in other languages, and it’s hell. For some reason it’s deciding that sometimes a type alias is actually Itself and not what it was set to, but I know the info is there it just won’t give it to me >:(
#it is mostly working tho#most of the structs are resolved properly#making them useful already#just need to implement a resolution mechanism to handle generics#which I’ll do next because I want to rip my hair out
0 notes
Text
Chrome ExtensionをTypeScriptとReactで作る環境を構築する
Chrome拡張機能を作るときの環境をいい感じにしてみます。
最終的なディレクトリ構造はこんな感じになります。
env-extension ├── dist // 拡張機能として読み込むディレクトリはこれ ├── public │ ├── index.html │ └── manifest.json ├── src │ ├── background │ │ └── background.ts │ ├── content │ │ ├── content.scss │ │ └── content.tsx │ └── popup │ └── index.tsx ├── gulpfile.js ├── package-lock.json ├── package.json ├── tsconfig.json └── webpack.config.js
npmの環境を作る
ディレクトリを作ってnpmの初期化を行います。
$ mkdir env-extension && cd env-extension $ npm init -y
React + TypeScript環境を作る
必要なパッケージを落っことします。
$ npm install --save-dev webpack webpack-cli html-loader html-webpack-plugin file-loader ts-loader typescript @types/react @types/react-dom copy-webpack-plugin $ npm install react react-dom
パッケージを軽く整理してみる。
webpack
モジュールバンドラー。JavaScriptファイルをブラウザで動くようにするために必要。
webpack-cli
webpackのコマンドセット。
file-loader
importやrequireで読み込まれるファイルを��力先のディレクトリに配置する
html-loader
htmlをstringにして出力する
html-webpack-plugin
htmlファイルの作成を簡単にする。
copy-webpack-plugin
すでにあるファイルやディレクトリを、ビルドディレクトリにコピーする
ts-loader
webpackについてのTypeScriptLoader
typescript
TypeScriptへの対応に必要
@types/react, @types/react-dom
reactのための型定義が入ってるパッケージ
tsconfig.json、webpack.config.jsを作成します。 webpackの中身はあとで!
// tsconfig.json { "compilerOptions": { "outDir": "./dist/", "allowSyntheticDefaultImports": true, "sourceMap": true, "noImplicitAny": true, "module": "esnext", "moduleResolution": "node", "target": "es5", "lib": [ "es5", "es6", "dom" ], "jsx": "react" }, "include": [ "./src/**/*" ] }
ChromeExtension用のファイルを用意
popup
popupにはhtmlとjsファイル双方必要なので用意。
src/popup/index.tsxを作成します。
// src/popup/index.tsx import React from 'react'; import ReactDOM from 'react-dom'; const Popup = () => <h1>Hello world</h1>; ReactDOM.render(<popup></popup>, document.getElementById("root"));
// public/index.html <meta charset="utf-8"><title>env test</title><div id="root"></div>
background
とりあえず確認のためのスクリプトを挟み込んでおきます。
// src/background/background.ts console.log("background test");
content
スタイルシートなしで、確認できるようにボタンを配置しておきます。
// src/content/content.tsx import React from 'react'; import ReactDOM from 'react-dom'; const Button = () => <button>Hello</button>; const app = document.createElement('div'); app.id = 'extension-button'; document.body.appendChild(app); ReactDOM.render(<button></button>, app);
manifest
manifestを作成します。今回は確認のためだけの最小限に留めます。
// public/manifest.json { "manifest_version": 2, "version": "0.0.1", "name": "env-sample", "description": "sample", "browser_action": { "default_popup": "index.html" }, "background": { "scripts": [ "background.js" ] }, "content_scripts": [ { "matches": [ "http://*/*", "https://*/*" ], "js": [ "content.js" ] } ], "content_security_policy": "script-src 'self' 'unsafe-eval'; object-src 'self'" }
ビルドの設定を作成
webpackの設定を行います。
// webpack.config.js const webpack = require('webpack'); const HtmlWebPackPlugin = require('html-webpack-plugin'); const CopyPlugin = require('copy-webpack-plugin'); module.exports = { mode: "production", entry: { popup: './src/popup/index.tsx', background: './src/background/background.ts', content: './src/content/content.tsx', }, output: { path: __dirname + '/dist', }, module: { rules: [ { test: /\.tsx?$/, loader: 'ts-loader', }, { test: /\.html$/, use: [ { loader: 'html-loader', options: { minimize: true }, }, ], }, ], }, resolve: { extensions: [ '.ts', '.js', '.tsx', '.jsx' ] }, plugins: [ new HtmlWebPackPlugin({ template: './public/index.html', filename: './index.html', chunks: ['popup'] // ここはentryの値を入れる }), new CopyPlugin({ patterns: [ { from: './public/manifest.json', to: 'manifest.json' } ] }), ], }
ビルドの自動化
package.jsonに以下を追記。ファイルの変更を検知して自動でビルドしてもらいましょう。。。
// package.json // webpack modeのデフォルトはproducion, configはあれば読んでくれるので省略 { ... "scripts": { "build": "webpack --mode production --config webpack.config.js", "build-watch": "webpack --watch", ... }, ... }
$ npm run build-watchでファイルの変更を監視して、変更があり次第ビルドしてくれます。
ついでにlintと自動修正
ついでにESLintを導入してみます。
まずはパッケージのダウンロード。
$ npm install --save-dev eslint-config-airbnb eslint-plugin-import eslint-plugin-react eslint-plugin-jsx-a11y eslint $ npm install --save-dev gulp gulp-eslint
eslint
JavaScriptのコードからフォーマットの違いとかを発見して通知してくれる。
eslint-config-airbnb
airbnbの設定を適用するのに必要
eslint-plugin-import
eslintでimport/exportに対応する
eslint-plugin-react
eslintでreactに対応する
eslint-plugin-jsx-a11y
jsxの静的解析に対応する
gulp
gulpを使うのに必要
gulp-eslint
gulpでeslintを使うために必要
設定ファイルの追加。項目は適宜変更してください。
// .eslintrc.js module.exports = { "env": { "browser": true, "es6": true }, "extends": "airbnb", "parserOptions": { "sourceType": "module" }, "rules": { "indent": [ "error", 2 ], "linebreak-style": [ "error", "unix" ], "quotes": [ "error", "single" ], "semi": [ "error", "always" ] } };
gulpでタスクにして、自動化します。
// gulpfile.js const gulp = require("gulp"); const eslint = require("gulp-eslint"); const applyLintPaths = [ "src/**/*.{js,jsx,ts,tsx}", "gulpfile.js" ]; /** * lint */ gulp.task("lint", function () { return ( gulp.src(applyLintPaths) .pipe(eslint({ fix: true })) .pipe(eslint.format()) .pipe(gulp.dest((file) => file.base)) // overwrite fixed file .pipe(eslint.failAfterError()) ); }); gulp.task("lint-watch", function () { return ( gulp.watch(applyLintPaths, gulp.task("lint")) ); });
package.jsonの書き換え。
// package.json { ... "scripts": { ... "lint": "gulp lint", "lint-watch": "gulp lint-watch", ... }, }
$ npm run lint or $ npm run lint-watchでlintできます。
ついでにsass対応
ソース内で、import '**.scss'が使えるようにします。
まずはパッケージのダウンロード。
$ npm install --save-dev style-loader css-loader sass-loader sass
style-loader
DOMにCSSを注入するのに必要
css-loader
importやrequireで読み込まれるcssファイル解決に必要
sass
sassをJavaScriptで実装したもの
sass-loader
sass, scssファイルを読み込んで、cssにコンパイルするのに必要
ビルドの設定をいじる。
// webpack.config.js module.exports = { module: { rules: [ ... { test: /\.s[ac]ss$/i, use: [ // Creates `style` nodes from JS strings "style-loader", // Translates CSS into CommonJS "css-loader", // Compiles Sass to CSS "sass-loader", ], }, ], }, };
contentをいじったり、sass書��たり。
// src/content/content.tsx ... import './content.scss'; ...
// src/content/content.scss $bgcolor: black; $color: white; button { background-color: $bgcolor; color: $color; }
tsでのエイリアスの貼り方
tsconfig.jsonの変更
{ "compilerOptions": { ... "baseUrl": "./", "paths": { "@/*": ["src/*"] } }, ... }
webpack.config.jsの変更
const path = require('path'); module.exports = { ... resolve: { alias: { '@': path.resolve(__dirname, 'src/') }, extensions: [ '.ts', '.js', '.tsx', '.jsx' ] }, ... }
viteを使っている場合はvite.config.tsを変更
import { defineConfig } from 'vite' import react from '@vitejs/plugin-react' // https://vitejs.dev/config/ export default defineConfig({ ... plugins: [react()], resolve: { alias: { "@/": `${__dirname}/src/`, } } })
lintも設定
$ npm install --save-dev eslint-import-resolver-webpack
.eslintrc.jsの変更
module.exports= { ... "settings": { "react": { "version": "detect" }, "import/resolver": { "webpack": { "config": path.join(__dirname, "webpack.config.js") } } } }
参考
ReactでChrome Extensionを開発するために必要なwebpackのビルド設定
Eslint --fix supresses errors but doesn't actually change file
sass-loader
npm
React: import時のaliasを設定するときはWebpack、TypeScript、ESLintの3つを対応しなければならない件 -qiita
【TypeScript】パスのエイリアスの設定方法
<2022/02更新>vite+TypeScriptでalias pathを~に設定する
0 notes
Text
Never let the sun go down on your anger
- LADY CERAMIUM
- EDDIE MARIGOLD
- DORA ANASTOMOSIS ELLA CAP
- HANNAH
- ANNETTE
- CALEB JAVELIN
- GREGG AVOGADRO
- RACHEL VIVA
- GUY
- DEGREASE EVANS
- DOMINIC
- BENEDICT WITHSTOOD
- ORD
- EMERALD CHESHIRE
- VERNA EXPECTATION
- ARYL ANDERSON
- PAULINE
- EFFIE
- ALIA TRANSPORT
- BEE LESSON
- RAE TYPESCRIPT
- YOUR JOHNSON
- BETTY
- NORMAN PHOTO NORMA
- STEFAN ASHMAN
- ED
3 notes
·
View notes
Text
Create a custom work item control with Azure DevOps extension SDK
The Azure DevOps Web Extension SD or Azure DevOps Extension SDK is a client SDK for developing extensions for Azure DevOps. In this example I will show you how to make a custom work item control using this SDK.
Here is an example of a small project with a custom work item.
Prerequisites
We will need the following before we get started with building our extension:
NodeJS
Setting up the project
We start setting up the project by running the following NPM command in your project directory:
npm init
You can configure these settings as you wish. These can be found in package.json.
we need to install the following packages a dependencies:
npm i azure-devops-extension-api azure-devops-extension-sdk azure-devops-ui react react-dom
as well as the following dev dependencies:
npm i @types/react @types/react-dom copy-webpack-plugin cross-env css-loader loader-utils node-sass rimraf sass sass-loader style-loader tfx-cli ts-loader typescript webpack webpack-cli --save-dev
Now your package.json should look something like, the packager versions might be different:
{ "name": "testextension", "version": "1.0.0", "description": "", "main": "index.js", "scripts": { "test": "echo \"Error: no test specified\" && exit 1" }, "author": "", "license": "ISC", "dependencies": { "azure-devops-extension-api": "^1.158.0", "azure-devops-extension-sdk": "^2.0.11", "azure-devops-ui": "^2.167.49", "react": "^16.14.0", "react-dom": "^16.14.0" }, "devDependencies": { "@types/react": "^18.0.25", "@types/react-dom": "^18.0.8", "copy-webpack-plugin": "^11.0.0", "cross-env": "^7.0.3", "css-loader": "^6.7.1", "loader-utils": "^3.2.0", "node-sass": "^7.0.3", "rimraf": "^3.0.2", "sass": "^1.56.0", "sass-loader": "^13.1.0", "style-loader": "^3.3.1", "tfx-cli": "^0.12.0", "ts-loader": "^9.4.1", "typescript": "^4.8.4", "webpack": "^5.74.0", "webpack-cli": "^4.10.0" } }
Create two directories inside your root directory: src and static. in this example we won’t be adding anything to the static folder, but it is meant for, for example image files that your project uses. For now, you can add a file named .gitkeep instead.
Next up is configuring TypeScript. Create tsconfig.json in your root folder and put the following inside it:
{ "compilerOptions": { "charset": "utf8", "experimentalDecorators": true, "module": "amd", "moduleResolution": "node", "noImplicitAny": true, "noImplicitThis": true, "strict": true, "target": "es5", "rootDir": "src/", "outDir": "dist/", "jsx": "react", "lib": [ "es5", "es6", "dom", "es2015.promise", "es2019" ], "types": [ "react", "node" ], "esModuleInterop": true } }
Now we configure Webpack. Create webpack.config.js in your root folder and put the following inside it:
const path = require("path"); const fs = require("fs"); const CopyWebpackPlugin = require("copy-webpack-plugin");
const entries = {};
const ComponentsDir = path.join(__dirname, "src/Components"); fs.readdirSync(ComponentsDir).filter(dir => { if (fs.statSync(path.join(ComponentsDir, dir)).isDirectory()) { entries[dir] = "./" + path.relative(process.cwd(), path.join(ComponentsDir, dir, dir)); } });
module.exports = { entry: entries, output: { filename: "[name]/[name].js" }, resolve: { extensions: [".ts", ".tsx", ".js"], alias: { "azure-devops-extension-sdk": path.resolve("node_modules/azure-devops-extension-sdk") }, }, stats: { warnings: false }, module: { rules: [ { test: /\.tsx?$/, loader: "ts-loader" }, { test: /\.s[ac]ss?$/, use: ["style-loader", "css-loader", "azure-devops-ui/buildScripts/css-variables-loader", "sass-loader"] }, { test: /\.css?$/, use: ["style-loader", "css-loader"], }, { test: /\.woff?$/, type: 'asset/inline' }, { test: /\.html?$/, loader: "file-loader" } ] }, plugins: [ new CopyWebpackPlugin({ patterns: [ { from: "**/*.html", context: "src/Components" } ] }) ] };
The last configuration we need to make is specifically for Azure DevOps extensions. Again, in the root directory, create a new file, this time it’s called azure-devops-extension.json:
{ "manifestVersion": 1.0, "id": "textextension", "publisher": "your Visual Studio Marketplace publisher here", "version": "0.0.1", "public": false, "name": "testextension", "description": "custom control", "categories": [ "Azure Boards" ], "targets": [ { "id": "Microsoft.VisualStudio.Services" } ], "icons": { "default": "logo.png" }, "content": { "details": { "path": "README.md" } }, "scopes": [ "vso.work" ], "files": [ { "path": "static", "addressable": true }, { "path": "dist", "addressable": true } ] }
Now, you might notice how this configuration file needs two files: README.md and logo.png. You can add these files in your root folder.
Making the custom control
inside the src directory, create a new React component, let’s name the file Common.tsx.
import "azure-devops-ui/Core/override.css" import "es6-promise/auto" import * as React from "react" import * as ReactDOM from "react-dom" import "./Common.scss"
export function showRootComponent(component: React.ReactElement<any>) { ReactDOM.render(component, document.getElementById("root")) }
It is important we import "azure-devops-ui/Core/override.css", so that we can use standardized UI styling.
This component is more or less our root component, which renders our other components inside a HTML element with id “root��.
Also create a Common.scss file. All we’re going to add to this is:
body { margin: 0; padding: 0; }
Inside the src folder, let’s make another directory named Components and inside that folder create another one named TestExtensionComponent.
src │ Common.scss │ Common.tsx │ └───Components └───TestExtensionComponent
Inside the TestExtensionComponent folder, we’re going to add a few files. First off is TestExtensionComponent.html, this will be our html that will contain the component(s) of your custom control.
<!DOCTYPE html> <html xmlns="http://www.w3.org/1999/xhtml"> <body> <div id="root"></div> <script type="text/javascript" src="TestExtensionComponent.js" charset="utf-8"></script> </body> </html>
Next is TestExtensionComponent.scss.
@import "node_modules/azure-devops-ui/Core/_platformCommon.scss";
This will import the Azure DevOps styling.
Now add TestExtensionComponent.json, this is our component configuration file. Let’s add an input to the configuration, let’s call it SampleInput
{ "contributions": [ { "id": "TestExtensonComponent", "type": "ms.vss-work-web.work-item-form-control", "targets": [ "ms.vss-work-web.work-item-form" ], "properties": { "name": "cusom control", "uri": "dist/TestExtensonComponent/TestExtensonComponent.html", "inputs": [ { "id": "SampleInput", "name": "sample input", "description": "sample input", "validation": { "dataType": "String", "isRequired": true } } ] } } ], "scopes": [ "vso.work" ] }
Next is TestExtensionComponent.tsx
import React, { Component } from 'react' import * as SDK from "azure-devops-extension-sdk" import { IWorkItemFormService, WorkItemTrackingServiceIds, WorkItemOptions } from "azure-devops-extension-api/WorkItemTracking"
import "./TestExtensionComponent.scss"
import { showRootComponent } from "../../Common"
class TestExtensionComponent extends Component<{}, {}> {
constructor(props: {}) { super(props) }
public componentDidMount() { SDK.init({}) }
public render(): JSX.Element { return ( <></> ) } }
export default RESTRequestButton showRootComponent(<RESTRequestButton />)
The component doesn’t do much for now. What is important is the SDK.Init() inside the ComponentDidMount(). This makes sure we can use the Azure DevOps Extension SDK in our component.
So, what if we want to get input data? For example, our SampleInput we configured in the json. We can use the Azure DevOps Extension SDK for that.
To the constructor add:
this.state = { displayText: "default text", }
and to the Component after the extends keyword:
class TestExtensionComponent extends Component<{}, { displayText : string }>
SDK.Init() inside ComponentDidMount() is a Promise so, we can use then-chaining to set our state values there.
public componentDidMount() { SDK.init({}) .then( () => { this.setState({ displayText: SDK.getConfiguration().witInputs["SampleInput"] }) }) }
Now in our render() we can display the input data
public render(): JSX.Element { return ( <>{this.state.displayText}</> ) }
You might also want the data of the current Work Item, we can do this with the IWorkItemFormService interface.
const workItemFormService = await SDK.getService<IWorkItemFormService>( WorkItemTrackingServiceIds.WorkItemFormService )
Then we can use this to get specific fields
const fieldValues : Promise<{[fieldName: string]: Object}> = workItemFormService.getFieldValues(fields, options)
fields here is an array of strings containing key names of the work item, for example: System.Title, System.AssignedTo or Custom.HasPineapple
options is a class that implements WorkItemOptions, which can be done quite easily like
class Options implements WorkItemOptions { returnOriginalValue: boolean = true }
Now, the variablefieldValues is a Promise, so you can use then-chaining to get the data.
Say, we want to display the title of the work item instead on the SampleInput, we could modify our code to look like this:
public componentDidMount() { SDK.init({}) .then( () => { const workItemFormService = await SDK.getService<IWorkItemFormService>( WorkItemTrackingServiceIds.WorkItemFormService ) const fieldValues : Promise<{[fieldName: string]: Object}> = workItemFormService.getFieldValues(fields, options)
fieldValues.then( data =>
this.setState({ displayText: data["System.Title"] }) ) }) }
0 notes
Text
Download WebStorm crack (serial key) latest version EAYF№

💾 ►►► DOWNLOAD FILE 🔥🔥🔥 This software has targeted particular tools used for software developers and project managers. It has introduced Kotlin, a programming language that runs in Java virtual machine. Whats New? WebStorm Crack has launched various new tools that make your programming much easier. With Vue. It also adds more new features to the jest integration alike. Pull Member up refactoring is the new concept of moving class methods up the class hierarchy. Secondly, this version has introduced new extract type alias refactoring for Typescript. It automatically replaces all its usages with the new name. WebStorm Crack is the simplest, easiest and reliable way for software development. It can be used in programming as well. This software allows the user to easily understand various files and has computerized functionality. It tells the user on the travel when a code problem is detected. It can verify the codes from the version control system and synchronize with File transfer protocol server. With this, super amazing software user can increase developing experience while performing SQL editing. In case, you are the web developer then it has vast features that help the user to identify the bugs in web developing. Moreover, it is the final and last solution for you if you are curious to find all in one programming and development software program ever. It allows the user to detect coding problems. The user can verify the codes without any trouble. It is a comprehensive and user-friendly interface. If you are new to programming then it is the best choice for you. WebStorm Crack has impressive and simple tools that make developing much easier. It detects the bugs in coding and provides guideline on how to correct the coding according to the selected language. WebStorm Furthermore, it is a complete tool for working with Symphony, Word press and its various same web hosting sites to understand your code in a good manner. If you are the student and want to become a programmer in less than no time then WebStorm Crack is the best software for you. WebStorm Keygen is the only key to activate this particular software. There are two ways to get the premium features. First is to buy the product key from its official site. Secondly, if have not available sufficient dollars then you are here to get WebStorm for free. Just download the crack file from the link below and get premium version for free. It has the workstation to check your abilities and experiences. Key Features of WebStorm
1 note
·
View note
Text
Download WebStorm crack (license key) latest version IKXQ*

💾 ►►► DOWNLOAD FILE 🔥🔥🔥 This software has targeted particular tools used for software developers and project managers. It has introduced Kotlin, a programming language that runs in Java virtual machine. Whats New? WebStorm Crack has launched various new tools that make your programming much easier. With Vue. It also adds more new features to the jest integration alike. Pull Member up refactoring is the new concept of moving class methods up the class hierarchy. Secondly, this version has introduced new extract type alias refactoring for Typescript. It automatically replaces all its usages with the new name. WebStorm Crack is the simplest, easiest and reliable way for software development. It can be used in programming as well. This software allows the user to easily understand various files and has computerized functionality. It tells the user on the travel when a code problem is detected. It can verify the codes from the version control system and synchronize with File transfer protocol server. With this, super amazing software user can increase developing experience while performing SQL editing. In case, you are the web developer then it has vast features that help the user to identify the bugs in web developing. Moreover, it is the final and last solution for you if you are curious to find all in one programming and development software program ever. It allows the user to detect coding problems. The user can verify the codes without any trouble. It is a comprehensive and user-friendly interface. If you are new to programming then it is the best choice for you. WebStorm Crack has impressive and simple tools that make developing much easier. It detects the bugs in coding and provides guideline on how to correct the coding according to the selected language. WebStorm Furthermore, it is a complete tool for working with Symphony, Word press and its various same web hosting sites to understand your code in a good manner. If you are the student and want to become a programmer in less than no time then WebStorm Crack is the best software for you. WebStorm Keygen is the only key to activate this particular software. There are two ways to get the premium features. First is to buy the product key from its official site. Secondly, if have not available sufficient dollars then you are here to get WebStorm for free. Just download the crack file from the link below and get premium version for free. It has the workstation to check your abilities and experiences. Key Features of WebStorm
1 note
·
View note
Text
Download WebStorm crack (license key) latest version XB2!

💾 ►►► DOWNLOAD FILE 🔥🔥🔥 This software has targeted particular tools used for software developers and project managers. It has introduced Kotlin, a programming language that runs in Java virtual machine. Whats New? WebStorm Crack has launched various new tools that make your programming much easier. With Vue. It also adds more new features to the jest integration alike. Pull Member up refactoring is the new concept of moving class methods up the class hierarchy. Secondly, this version has introduced new extract type alias refactoring for Typescript. It automatically replaces all its usages with the new name. WebStorm Crack is the simplest, easiest and reliable way for software development. It can be used in programming as well. This software allows the user to easily understand various files and has computerized functionality. It tells the user on the travel when a code problem is detected. It can verify the codes from the version control system and synchronize with File transfer protocol server. With this, super amazing software user can increase developing experience while performing SQL editing. In case, you are the web developer then it has vast features that help the user to identify the bugs in web developing. Moreover, it is the final and last solution for you if you are curious to find all in one programming and development software program ever. It allows the user to detect coding problems. The user can verify the codes without any trouble. It is a comprehensive and user-friendly interface. If you are new to programming then it is the best choice for you. WebStorm Crack has impressive and simple tools that make developing much easier. It detects the bugs in coding and provides guideline on how to correct the coding according to the selected language. WebStorm Furthermore, it is a complete tool for working with Symphony, Word press and its various same web hosting sites to understand your code in a good manner. If you are the student and want to become a programmer in less than no time then WebStorm Crack is the best software for you. WebStorm Keygen is the only key to activate this particular software. There are two ways to get the premium features. First is to buy the product key from its official site. Secondly, if have not available sufficient dollars then you are here to get WebStorm for free. Just download the crack file from the link below and get premium version for free. It has the workstation to check your abilities and experiences. Key Features of WebStorm
1 note
·
View note
Text
Download WebStorm crack (license key) latest version 7UW2*

💾 ►►► DOWNLOAD FILE 🔥🔥🔥 This software has targeted particular tools used for software developers and project managers. It has introduced Kotlin, a programming language that runs in Java virtual machine. Whats New? WebStorm Crack has launched various new tools that make your programming much easier. With Vue. It also adds more new features to the jest integration alike. Pull Member up refactoring is the new concept of moving class methods up the class hierarchy. Secondly, this version has introduced new extract type alias refactoring for Typescript. It automatically replaces all its usages with the new name. WebStorm Crack is the simplest, easiest and reliable way for software development. It can be used in programming as well. This software allows the user to easily understand various files and has computerized functionality. It tells the user on the travel when a code problem is detected. It can verify the codes from the version control system and synchronize with File transfer protocol server. With this, super amazing software user can increase developing experience while performing SQL editing. In case, you are the web developer then it has vast features that help the user to identify the bugs in web developing. Moreover, it is the final and last solution for you if you are curious to find all in one programming and development software program ever. It allows the user to detect coding problems. The user can verify the codes without any trouble. It is a comprehensive and user-friendly interface. If you are new to programming then it is the best choice for you. WebStorm Crack has impressive and simple tools that make developing much easier. It detects the bugs in coding and provides guideline on how to correct the coding according to the selected language. WebStorm Furthermore, it is a complete tool for working with Symphony, Word press and its various same web hosting sites to understand your code in a good manner. If you are the student and want to become a programmer in less than no time then WebStorm Crack is the best software for you. WebStorm Keygen is the only key to activate this particular software. There are two ways to get the premium features. First is to buy the product key from its official site. Secondly, if have not available sufficient dollars then you are here to get WebStorm for free. Just download the crack file from the link below and get premium version for free. It has the workstation to check your abilities and experiences. Key Features of WebStorm
1 note
·
View note
Video
youtube
TypeScript Interface Alias Union Tutorial for JavaScript Developers
0 notes
Text
TypeScript / type
Hoy les traigo como generar un alias para los tipos de datos, espero les sea de utilidad!
Bienvenidos sean a este post, hoy veremos otra mecanica para aplicar a los tipos. En typescript se incorpora el concepto de alias para tipos,, si hacemos un paralelismo lo podemos comparar con typedef de C++ donde a tipos de datos lo podemos asignar a un alias, para resumirlo por citar un ejemplo, primero veamos como es su sintaxis: type nombre_alias = tipo_dato; Siempre va precedido por la…
View On WordPress
0 notes
Text
Download WebStorm crack (keygen) latest version 2UW4;

💾 ►►► DOWNLOAD FILE 🔥🔥🔥 This software has targeted particular tools used for software developers and project managers. It has introduced Kotlin, a programming language that runs in Java virtual machine. Whats New? WebStorm Crack has launched various new tools that make your programming much easier. With Vue. It also adds more new features to the jest integration alike. Pull Member up refactoring is the new concept of moving class methods up the class hierarchy. Secondly, this version has introduced new extract type alias refactoring for Typescript. It automatically replaces all its usages with the new name. WebStorm Crack is the simplest, easiest and reliable way for software development. It can be used in programming as well. This software allows the user to easily understand various files and has computerized functionality. It tells the user on the travel when a code problem is detected. It can verify the codes from the version control system and synchronize with File transfer protocol server. With this, super amazing software user can increase developing experience while performing SQL editing. In case, you are the web developer then it has vast features that help the user to identify the bugs in web developing. Moreover, it is the final and last solution for you if you are curious to find all in one programming and development software program ever. It allows the user to detect coding problems. The user can verify the codes without any trouble. It is a comprehensive and user-friendly interface. If you are new to programming then it is the best choice for you. WebStorm Crack has impressive and simple tools that make developing much easier. It detects the bugs in coding and provides guideline on how to correct the coding according to the selected language. WebStorm Furthermore, it is a complete tool for working with Symphony, Word press and its various same web hosting sites to understand your code in a good manner. If you are the student and want to become a programmer in less than no time then WebStorm Crack is the best software for you. WebStorm Keygen is the only key to activate this particular software. There are two ways to get the premium features. First is to buy the product key from its official site. Secondly, if have not available sufficient dollars then you are here to get WebStorm for free. Just download the crack file from the link below and get premium version for free. It has the workstation to check your abilities and experiences. Key Features of WebStorm
1 note
·
View note
Text
TOP 10 NEW FEATURES & UPDATES OF ANGULAR 12
Angular 12 is now added in the latest addition to Google's popular TypeScript. Released in May of 2021, the framework comes with many extras like bug fixes, performance improvement, and features. As a learner of the Angular framework, staying updated with all the latest additions is vital.
Srishti Campus is the best Angular training center.
Hop into the ten latest additions to Angular 12 to keep abreast of the add-ons
Towards Ivy
The Angular team had consistently worked on the objective of integrating the Angular ecosystem on Ivy. The current libraries will be working on the Ivy app by depreciating the old View Engine. The library authors will now be working on moving towards Ivy to keep up.
To have a comprehensive understanding, Srishti Campus is the best training center.
Uncertain Protractor
There are speculations about not involving Protractor in the upcoming projects by the team. Currently, the feedback is under trial in the RFC. However, the community is working on exploring popular third party solutions available in Angular CLI. At present, the community of developers are working with Cypress, TestCafe, and Webdrive for elective solutions.
Nullish Coelsing
For writing a cleaner code, the nullish coalescing operator has been in the league for some time. Updating the Angular applications now helps simplify the process of conditional statements.
Here's how the new update makes coding easier:
{{age !== null && age !== undefined ? age : calculateAge() }}
{{age ?? calculateAge() }}
TypeScript 4.2
Several updates have been made for Angular 12, including improvements in type alias, abstract classes, tuple types, and operators. No important variables or information will appear randomly by improving the in-operator. Infact, the improved version returns valid handles and suitable types, thereby lessening the errors and repetition.
New Styling
Along with the several changes made in the styling, the support for inline SaaS in the style field and component decorators is significant. Moreover, a brand new SaaS model has been adopted by Angular Material and CDK.
Tailwind CSS's support is also made by this version of Angular, given its development and popularity in the Tailwind community.
A Strict Module
Enabling the strict mode by default in CLI has added another feature. With this, catching bugs and better maintenance becomes more manageable. Application examinations are also made way quicker than before with the update.
New Dev Tools
Access to Angular Dev Tools was enabled after the release of Angular 12. After every preview, the embedded profiler can now capture the changed detection. It can be later monitored to figure out the delay detection cycle.
A New Learning Experience
With the aim of improving the learning experience of developers, Angular 12 has also brought some crucial changes for an improved learning experience. This can be noticed in the Angular 12 documentation with a content projection guide.
Along with it, the contributors guide will also aid the developers in elevating the basic understanding of a project documentation. A few useful tips and guides on debugging have also been shared.
A change from the i18n framework
The message-id designs were used in the i18n framework. However, this thought could be put on hold. Angular 12 has added a new and improved intuitive ID format that decreases the cost of invalidation and retranslation. The belated design is comparatively complex yet natural.
Inbuilt Production Build
Presently, the ng build command comes with improved results. However, in the new Angular 12, the production build will come by default
Srishti campus provides the best angular training in Trivandrum
0 notes
Text
Programmiersprache: TypeScript 4.2 führt Buch über Typ-Aliasse
Neben der Beibehaltung von Alias-Deklarationen erlaubt Microsofts Programmiersprache neuerdings für Tupel Rest-Elemente in der Mitte oder am Anfang. Read more www.heise.de/news/…-... www.digital-dynasty.net/de/teamblogs/…

http://www.digital-dynasty.net/de/teamblogs/programmiersprache-typescript-4-2-fuhrt-buch-uber-typ-aliasse
0 notes
Photo

Highlight.js 10, Node 14, and modern React in 20 minutes
#485 — April 24, 2020
Unsubscribe : Read on the Web
JavaScript Weekly
Introducing Crank.js: A New JSX-Driven Framework — A new framework for creating JSX-driven components with functions, promises and generators. If you haven’t got time to read the creator’s lengthy (but well worth reading!) rationale for creating another framework, check out the GitHub repo or jump straight into a CodeSandbox example. I hope to see a lot more about this in the near future.
Brian Kim
The Cost of JavaScript Frameworks — Using data from the HTTP Archive, Tim explores the performance cost of using various popular frameworks as a starting point. Some good analysis here.
Tim Kadlec
You Hacked the Gibson? Yeah, They Built Their Own Login — Don't let Crash Override pwn your app. FusionAuth adds secure login, registration and user management to your app in minutes not months. Download our community edition for free.
FusionAuth sponsor
Node.js 14 Released — v14 now becomes the current ‘release’ line with it becoming a LTS (Long Term Support) release in October. Diagnostic reports are now a stable feature, it now uses V8 8.1, there's an experimental Async Local Storage API, and more.
Michael Dawson and Bethany Griggs
Vidact: A Compiler to Convert React-like Apps to Vanilla JS — Compiles pure React-compatible JavaScript (JSX) to vanilla JavaScript with no virtual DOM.. think similar to Svelte, but without introducing a new syntax. A curious idea.
Mohamad Mohebifar
Highlight.js 10.0: The Web Syntax Highlighter Library — I always laugh when I see a big release of a popular library and saw we last linked it 5 years ago 😄 Nonetheless, this is a big release and Highlight.js continues to be a fantastic library for syntax highlighting code.
highlight.js
💻 Jobs
Senior Full-stack Developer (Malmö/Sweden) — Every day is different from the next. Join our upbeat Team and work on exciting, major projects using a modern JavaScript stack.
Ortelius AB
Find a Job Through Vettery — Vettery specializes in tech roles and is completely free for job seekers. Create a profile to get started.
Vettery
📚 Tutorials
▶ React: The Basics in 20 Minutes — A well presented, up to date (yep, it covers hooks) tutorial that doesn’t hang around, whether you’re new to React or just want a refresher.
Devistry
Creating Web Apps via TypeScript and webpack — The example app doesn’t use any front-end framework, just vanilla DOM APIs. Some knowledge of TypeScript, webpack, and npm are required, but this is a neat way to bring together a bunch of tools.
Axel Rauschmayer
What Is The toJSON() Function? — If an object has a toJSON function, JSON.stringify() calls toJSON() and serializes the return value from toJSON() instead.
Valeri Karpov
A Much Faster Way to Debug Code Than with Breakpoints or console.log — Move forward and backwards through your code to understand what led to a specific bug, view runtime values, edit-and-continue, and more.
Wallaby.js sponsor
How Does TypeScript Work? A Bird’s Eye View — Dr. Axel goes into depth on the structure of a typical TypeScript project, what gets compiled, and how can an IDE be used to write TypeScript. Aimed at people who haven’t yet picked TypeScript up.
Axel Rauschmayer
10 Lesser Known Angular Features You've Probably Never Used
W3Radar
You Might Not Need switch — Using an object of outcomes instead of switch suits many use cases, though take care over readability.
Valentino Gagliardi
🗓 Upcoming Online Events
Pick JS (May 8) — Aimed at intermediate to expert JS developers rather than beginners.
JavaScript Remote Conf 2020 (May 14-15) — Speakers lined up already include Douglas Crockford, Aimee Knight and Christian Heilmann.
ESNEXT CONF 2020 (May 18-22) — From the Pika folks (of Snowpack fame). 12 speakers over 5 days so it's a gradual pace.
ForwardJS (May 26-29) — A real world event (ForwardJS Ottawa) that has now become a virtual event.
CascadiaJS 2020 (September 1-2) — This upcoming online conference is set to take place in September, and the CFP is open now through May 15.
🔧 Code & Tools

Phelia: A Reactive Slack Application Framework — If you think Slack apps were all about text bots, think again.. you can now create apps complete with in-app UIs. Phelia brings the React approach to the task.
Max Chehab
Marked.js 1.0: A Fast Markdown Parser and Compiler — Got Markdown to render? Marked.js to the rescue. While the project is years old, 1.0 has dropped just this week. Here’s a live demo.
Christopher Jeffrey
Stream Chat API & JavaScript SDK for Custom Chat Apps — Build real-time chat in less time. Rapidly ship in-app messaging with our highly reliable chat infrastructure.
Stream sponsor
Alpine.js: A Minimal Framework for Composing JS Behavior in Your Markup — We only gave Alpine a brief link when it first dropped but with new versions coming out thick and fast, we think it’s well worth a look. Billed as “like Tailwind for JavaScript”, Alpine lets you keep the HTML you know and love and just pepper it with JavaScript as and where appropriate.
Alpine.js
enroute: A React Router with a Small Footprint for Modern Browsers
TJ Holowaychuk
Rosetta: A General Purpose Internationalization Library in 292 Bytes — Less than 300 bytes, but does have a few dependencies. Aims to be very simple and is targeted at basic string use cases.
Luke Edwards
NAB 2020 May Be Canceled, But The Full Bitmovin Experience Is Not
Bitmovin Inc. sponsor
Hotkey 1.4: Trigger an Action on an Element When a 'Hotkey' is Pressed — Use Hotkey, set the data-hotkey attribute on your elements, and you get keyboard shortcuts. GitHub built and uses it (look for the data-hotkey attributes on their pages).
GitHub
web-worker: Consistent Web Workers for the Browser and Node — In Node it works as a web-compatible Worker implementation atop worker_threads. In the browser it’s an alias for Worker.
Jason Miller
by via JavaScript Weekly https://ift.tt/2yIinEA
0 notes