#umber grove makes a neat model
Text
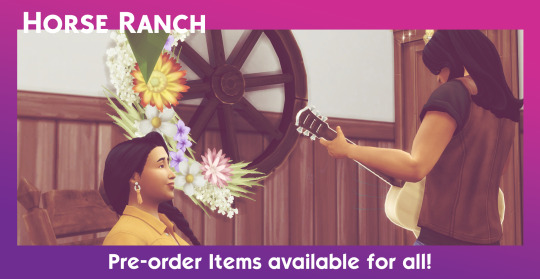
Horse Ranch Unlocks for All!
COME GET YALLS JUICE.

Google Drive Link here, and ONCE AGAIN IF YOU HAVE A SFS ACCOUNT PLEASE INVITE ME SO I CAN STOP LINKING TO GOOGLE DRIVE IT DOESN'T FEEL RIGHT.
Okay, these unlocks are actually pretty neat.
I'M SORRY, I FORGOT!
#the sims 4#the sims 4 unlocked#ts4#ts4 unlocks#ts4 horse ranch#umber grove#umber grove makes a neat model#well actually this has been burning at the back of my mind for a while#i didn't really forgot i just never got around to it#life exists around me and i must exist with it#things get awfully weird if i don't#i thrive in routine but every time i establish one things get shaken up#also my husband and i have a HUGE back catalog of games we're trying to catch up on so my attention is currently on baldur's gate 3#yes i love the pale white david bowie/tim curry fruitbasket lovechild vampire man#he's delightful#but NONE OF YOU warned me about gale and karlach and i demand financial compensation for that#big tall stronk yet soft is JUST my type in women#But Gale#LITERALLY BUT GALE#HE'S LITERALLY MY HUSBAND#THE HAIR#THE BEARD#THE CHEST TATTOO#THE TRAUMA#FROM A TOXIC FORMER RELATIONSHIP#LITERALLY GALE IS JUST A CIS VERSION OF MY HUSBAND#GALE DEKARIOS IS MY HUSBAND IN PIXELS AND POLYGONS#HOLY SHIT#anyway horsies
43 notes
·
View notes
Text
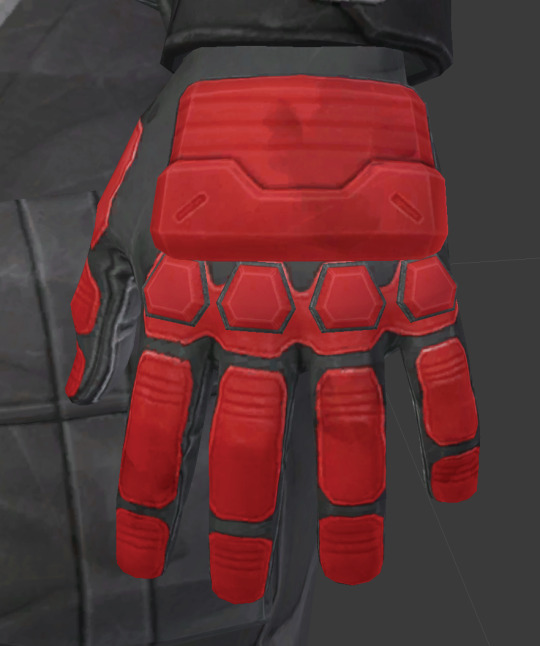
Making Soldier 76′s Gloves: A Tutorial

Yay gloves! This is a walk-through that shows how I made them. I did make several mistakes along the way, but hopefully there is still value to be found in the process. Enjoy!
Warning: Ridiculously image heavy!!
As usual, I started by hoarding references. The 3D model I downloaded was very helpful for this.

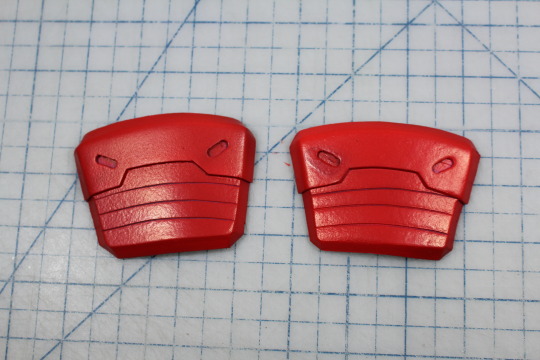
Several months ago at the beginning of this adventure, I sat down and planned how all the costume components would be built. At the time I intended to use spray adhesive to tack down some type of stretchy, plastic-y fabric--probably vinyl. Later I learned that my library’s makerspace had a die cutter, so “stretch vinyl” was replaced with heat transfer vinyl. I did choose to omit the grey palm, but otherwise these are accurate to the game model.

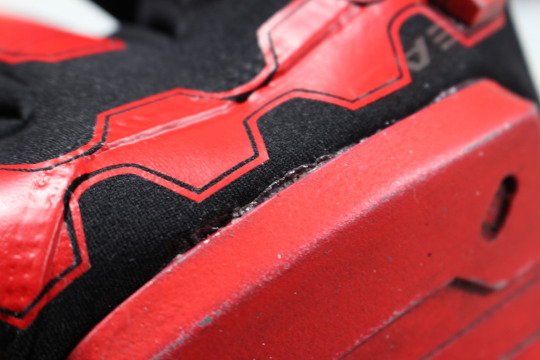
The pre-existing gloves were a pair of these from Costco. In hind sight, they weren’t 100% ideal; see that seam across the knuckles? It’s going to cause trouble later.

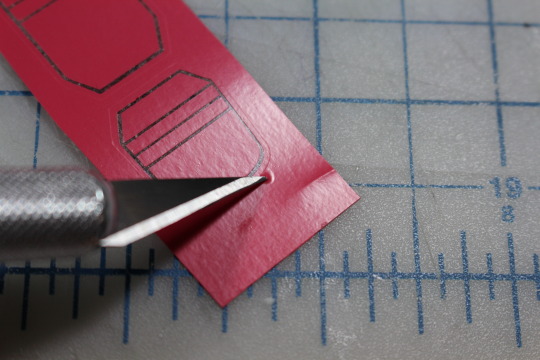
Next I needed to make a digital cut file for the Silhouette die cutter. Die cutters are basically digital cutting machines... sort of like printing with a knife. You give them a file with lines, and a knife (or other tool) traces them onto materials like paper, fabric, and vinyl. The software requires vectors to cut, so I used Adobe Illustrator. If you don’t have access to this software, the open source equivalent Inkscape would work just as well. I began by very carefully measuring the gloves to make a janky but correctly scaled pattern. The red armor was drawn over the top.
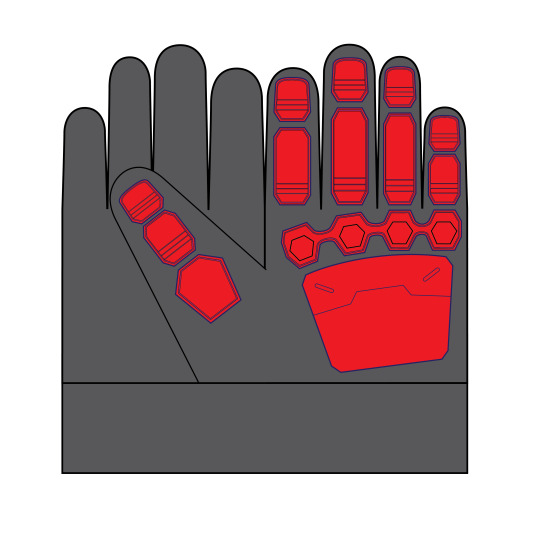
Next, the templates were printed and laid over the glove to check for scale. as you can see, the guard on top of the hand is much too large. I made a few adjustments to the paper templates, scanned them, and modified the vectors to fit.

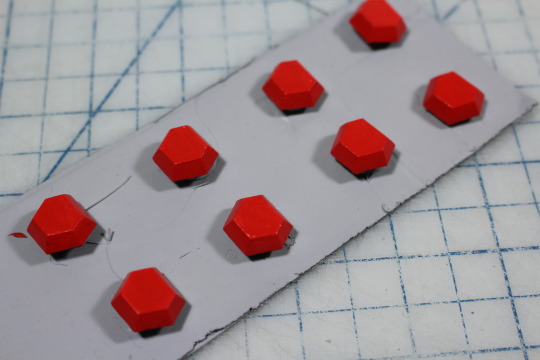
Then it was cutting time! Only the finger and knuckle guard bases were made from heat transfer vinyl. (If I didn’t have access to the die cutter, I would have traced the templates onto masking tape and used them as a mask for fabric paint.)

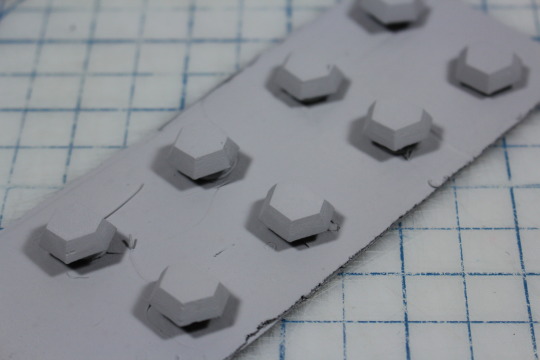
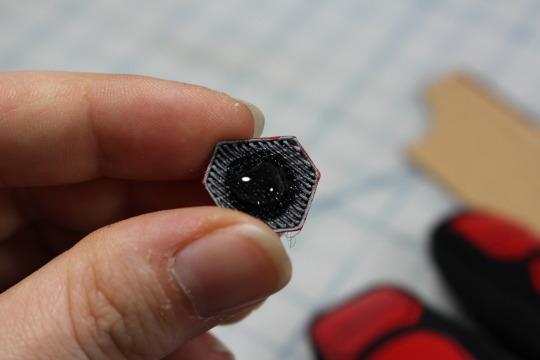
Next I wanted to make the knuckle guards. These could have easily been made with Sculpey, but I sit next to a 3D printer all day at work so I took the easy way out.
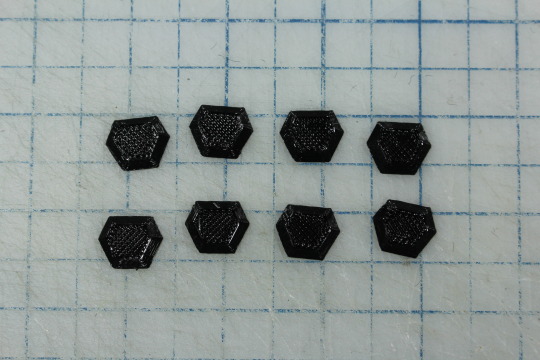
As normal with 3D prints, these had a distinct texture. I decided to take the opportunity and try out Automotive Filler Primer since it’s supposed to be the bee’s knees for smoothing 3D prints. Sanding PLA sucks, so I’ll jump on any possible opportunity to avoid it. In preparation for spray painting, the knuckle guards were stuck on a piece of cardboard with hot glue. A little clearance from the surface means their edges will be more clean, plus I don’t need to keep track of 8 tiny pieces of plastic. The hot glue will peel off cleanly later.
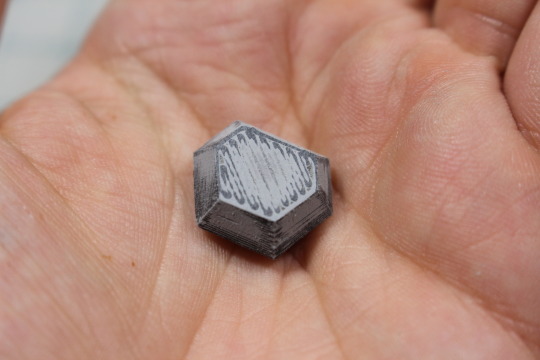
From what I had heard, you don’t need to sand filler primer because it self-levels. After one coat, I was not so sure.

Three coats in and the ridges were actually more pronounced, so I broke out the sandpaper.

Amazing!!! It looks awful but dang did it feel smooth and it sanded SO MUCH EASIER than PLA! 220 grit paper was plenty remove material.
After two more passes of spraying and sanding, the guards were looking pretty smooth. Here they are after their final spray:
Fun fact, that stuff will clog up your paper something fierce! Buy a lot of sandpaper if you have large things to surface.
Next up was painting. Normally I would spray paint or airbrush something like this, but the weather has not been cooperating lately so I hand-painted them instead.
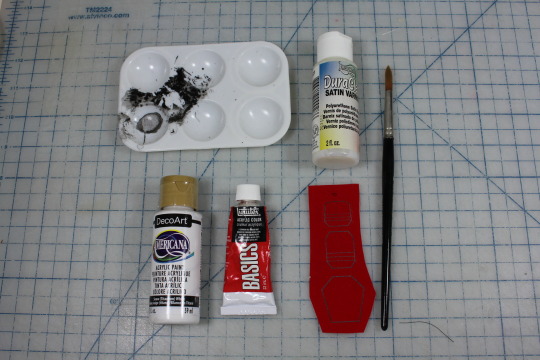
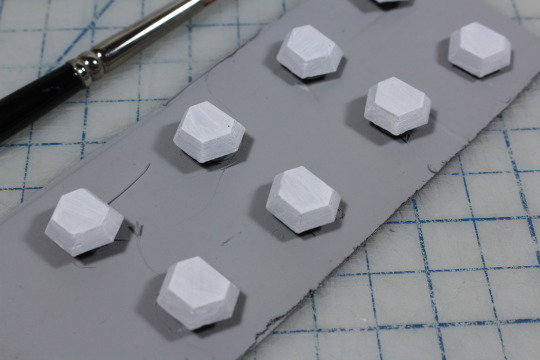
Since the red paint is somewhat translucent, I gave the parts a thin coating of white first. Then red was layered on until I achieved full coverage.
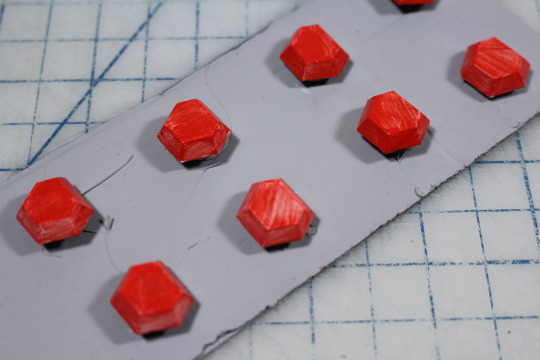
The final detail for the knuckle guards was a thin, black line running around their base. Any permanent marker will do.

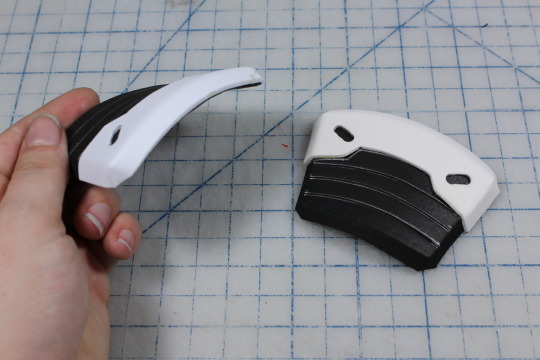
The knuckle guards still need weathering, but I prefer to weather everything at once so I moved on to building the hand guards. Using the paper template from Illustrator, I traced the main shape onto 6mm foam. You will notice some indents running along the flat surface:
Those were recreated by scoring the foam with an X-acto knife. When blasted with a heat gun, the foam will contract slightly to create a groove (pictures of this later).
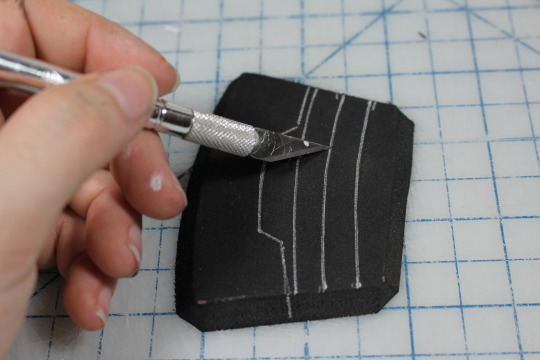
I added a second layer to the guards with 2mm craft foam.
In order to emphasize the angles, I carved a teeny grove with my pen knife and removed the excess material with a pair of tweezers.


This channel helps the foam bend a little sharper. It might seem subtle, but the effect was worth it.

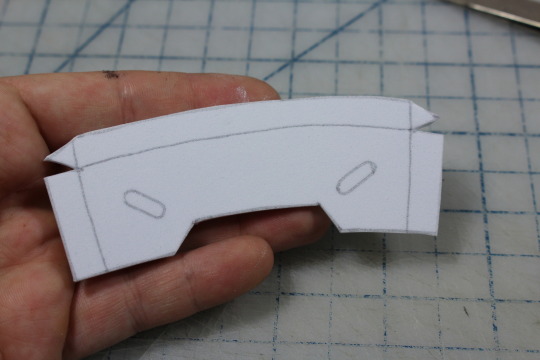
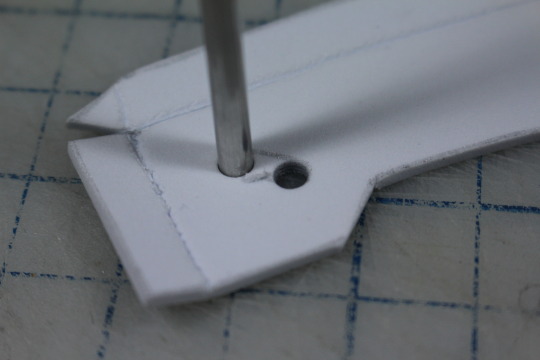
Next, I used a sharpened aluminum tube to punch perfect circles into the foam. You can find these at most hobby stores and sharpen them with a needle file--also to be found at most hobby stores. The holes were expanded into slots using my handy X-acto. This was surprisingly hard to do neatly; I wish EVA foam was a little more dense :/

The parts were adhered together with contact cement. I had to do this outside and it was dark, so I don’t have good pictures :( As a last step before painting, I used a heat gun to give them a gentle curve and emphasize those grooves. Unfortunately, I was a little liberal with the heat and you can see some low-key melting. Oops. Given the size of these parts, it was an interesting challenge to attempt without gloves.
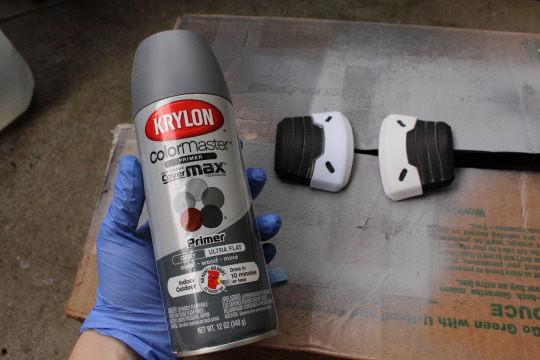
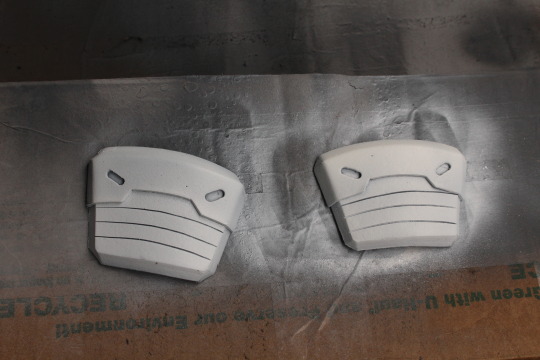
For painting, I decided to use my airbrush. I was gifted a setup yeeeeeeeears ago and I hardly ever use it. Time to change that! I primed the foam with this all-purpose primer which claimed to be slightly flexible. This is a lie. Don’t buy this brand of primer if you need something to be flexible!!
Like the knuckle guards, I gave the hand guards a light pass with white so it would take less red to reach full coverage. Full disclosure, I kind of suck with air-brushes. See that weirdo blob on the left corner of the left guard? That’s what happens when you spray too much paint with an air-brush. They also had a funky texture which I believe was a result of too much paint at once.

For weathering, I used 400 grit sandpaper to remove paint from corners and edges revealing the primer beneath. I think it gives a pretty neat effect! Grime was a mixture of Mars Black, Burnt Umber, and water. Finally, a coat of brush-on varnish sealed the paint job.


It was only after applying the varnish that I realized it was glossy, so I misted the parts with Matte Fixative meant for sealing drawings. This is not ideal and you should be smarter than me and buy the right varnish to begin with.
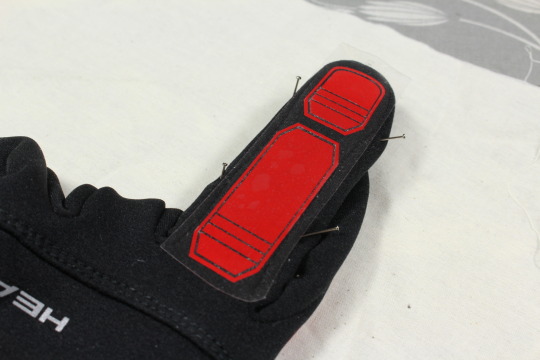
Finally, it was time to add the finger pieces and assemble the gloves! This was done with an ancient (circa 1970′s) iron, a scrap of muslin, some cardboard, and sewing pins.

Note about the vinyl: There is such a thing as stretchy heat transfer vinyl. I didn’t know this when purchasing, but stretchy would definitely have been preferable. The fingers of a glove are constantly flexing and moving, so over time my regular vinyl will break down. I did verify that my pattern would stretch, but you should still purchase the proper variety if you choose to do something like this. Thankfully the pattern I cut allowed the material to stretch somewhat.

Once cut, the vinyl needed weeding. Weeding is the process of removing everything you don’t need from the piece to be transferred. While there are specific tools available for this task, I like using an X-acto knife. After you get a piece started, tweezers can help remove the rest. Be very careful during this step; sometimes the machine doesn’t quite slice all the way through and you can pull off the wrong parts.
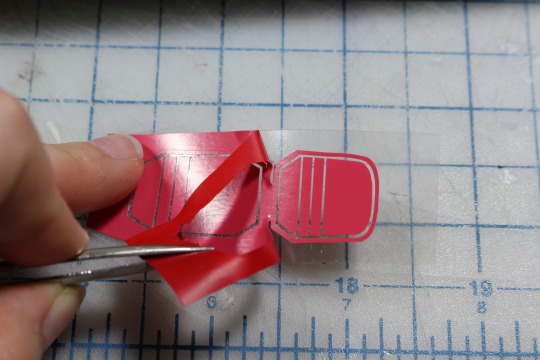
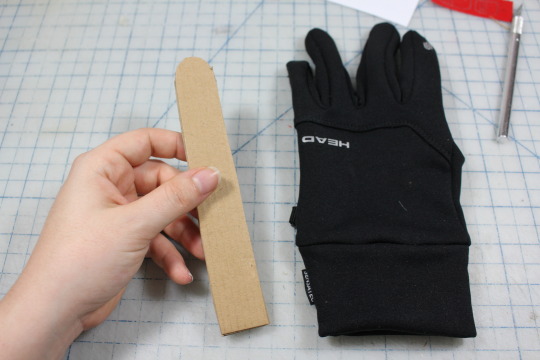
With the parts weeded, it was time to iron them in place. Heat transfer vinyl needs to be pressed while perfectly flat. The fingers of these gloves have gussets on each side which equals a lot of fabric and seams in a small area. Such construction makes them form-fitting and comfortable, but I couldn't get them to lay flat. To remedy this I made an insertable cardboard finger and pinned the fabric in place. It was important NOT to stretch the fabric while doing so or else the vinyl would crumple when un-pinned.


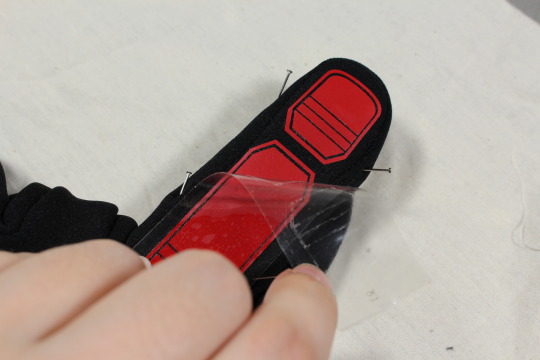
With the fabric secured, I attempted to stick the vinyl in place using the mildly adhesive cover plastic. Alas, it just wouldn’t stay, so I used a snugly pinned piece of muslin to hold it down. 15 seconds of pressing with the iron, and ta-dah! Red decals :)


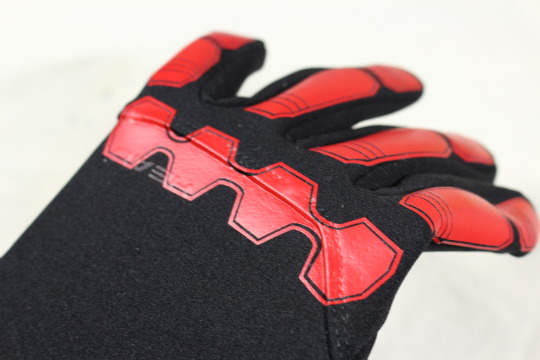
These gloves are two sizes too big for me in case you couldn’t tell :)
Remember how I mentioned that seam across the back causing trouble? Unfortunately it runs right through the middle of a decal. It was very tricky to iron without burning the vinyl and it’s kind of ugly. 10-foot rule will save me, but it could have been avoided by buying better gloves.
The last step was gluing the hand and knuckle guards in place. Because the fabric is stretchy but my parts are curved, I needed to put the gloves on Casey before gluing down anything rigid. Alas, I don’t have many images here because Casey didn’t feel like being a hand model and we were outside because of glue fumes. Each hand guard got a thorough application of E6000 in the center with hot glue around the edges. I wanted the strength of E6000 but needed the quick dry time of hot glue, so this worked fairly well. Overflowed hotglue was colored with a Sharpie and disappears from a distance.

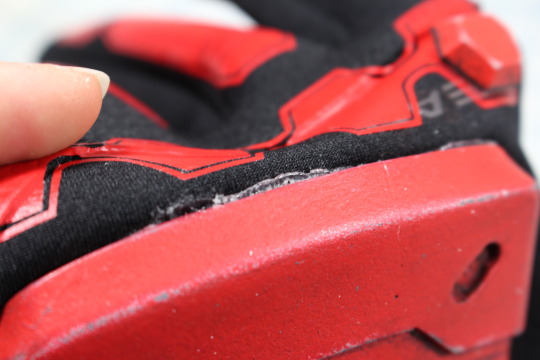
More E6000 was used to fix the knuckle guards. Then the gloves were tossed into the Bin of Shame ™ to cure without fumigating my room.

After two days of curing, everything was finished! I'm really happy with how they turned out :D

98 notes
·
View notes
Last Seen Blogs

xocdia88scom1
XOCDIA88 - Cổng Game Giải Trí Tặng CODE 88K Uy Tín 2024

beguri
tekervények

32stories1
32 Stories Dental Aesthetics

woodxbenoist
isa 🌻

digitaldoor
Untitled