#unwanted software uninstaller
Text
Ashampoo UnInstaller 14
Thorough Software Removal with Precision.
Bid farewell to unwanted programs, plugins, and Windows apps down to the last byte with Ashampoo UnInstaller 14. This advanced tool ensures a clean slate by employing five complementary deletion methods, guaranteeing the total removal of applications and their remnants.
https://find-your-software.com/ashampoo/uninstaller-14/

3 notes
·
View notes
Text
IObit Uninstaller 12 PRO License Key 2022
IObit Uninstaller PRO 12 [Giveaway]
IObit Uninstaller 12 Pro is designed to remove any unwanted software in one click, including the bundled programs. The new install monitor helps you completely uninstall any program by logging all the changes made during software installation so that they can be reverted in the future. It’s really one of the best uninstaller software for Windows users. Read More

3 notes
·
View notes
Text
IObit Uninstaller 13.6 Pro Key License [1Yr Free 2024]
What is IObit Uninstaller 13.6 Pro Key?
The IObit Uninstaller 13.6 Pro key is a license key that unlocks the full capabilities of IObit Uninstaller 13.6 Pro. This key grants access to advanced features and tools designed to help you efficiently manage and remove unwanted software from your computer. Unlike the free version, the Pro version offers enhanced functionalities for a more comprehensive cleaning experience.
What is IObit Uninstaller 13.5 Pro Key?
The IObit Uninstaller 13.5 Pro key serves a similar purpose for the previous version, IObit Uninstaller 13.5. It provides access to Pro features in that version, allowing for advanced uninstalling capabilities and better system optimization compared to the free version.
Features of IObit Uninstaller 13.6 Pro Key
Advanced Uninstallation: Completely removes unwanted software, including residual files and registry entries.
Browser Toolbar Removal: Easily eliminates unwanted browser toolbars and plugins.
Real-Time Monitoring: Monitors installations in real-time to ensure complete removal.
Powerful Scanning: Performs a deep scan to clean up leftover files and registry traces.
Batch Uninstall: Allows multiple programs to be uninstalled simultaneously.
How to Activate IObit Uninstaller 13.6 Pro Key with License Keys?
Download and Install: First, download and install IObit Uninstaller 13.6 from the official website.
Launch the Software: Open IObit Uninstaller 13.6 Pro on your computer.
Enter License Key: Navigate to the registration or activation section within the software.
Input Key: Enter your IObit Uninstaller 13.6 Pro key in the provided field.
Activate: Click the activation button to unlock Pro features.
How to Uninstall IObit Uninstaller?
Open IObit Uninstaller: Launch the application from your applications or start menu.
Select Program: Choose IObit Uninstaller from the list of installed programs.
Uninstall: Click the uninstall button and follow the prompts to remove it from your system.
Clean Residual Files: Use any built-in cleanup tools to ensure all associated files are deleted.
IObit Uninstall and Remove Administrator Issues on Windows 10
If you encounter administrator issues while uninstalling IObit Uninstaller on Windows 10:
Run as Administrator: Right-click the IObit Uninstaller icon and select “Run as administrator.”
Disable UAC: Temporarily disable User Account Control (UAC) if you continue to face issues.
Use Safe Mode: Boot your computer in Safe Mode and try uninstalling the program again.
Use an Uninstaller Tool: Consider using another uninstaller tool if the built-in method fails.
Why Choose IObit Uninstaller 13.6 Pro Key?
1. Comprehensive Removal: Provides thorough uninstallation to eliminate all traces of unwanted programs.
2. Enhanced Performance: Improves system performance by removing clutter and optimizing the registry.
3. User-Friendly: Offers an intuitive interface for easy navigation and operation.
4. Real-Time Monitoring: Ensures clean installations and removals with real-time monitoring.
IObit Uninstaller 13.6 Pro Key Free License 2024
6E25C-21F89–7F62B-D86BC for 13.6.0.5– Valid till — October 16, 2024.
Free License: 11242-C437D-DE013–6E6TC
New License: DB978–6E333-B12DC-7BDTC
Key: F6741-F743C-7CE93–3C8TC (Valid till June 20, 2024)
30C81–393A2–7DBAF-390TC — Valid till — November 8, 2024
6E25C-21F89–7F62B-D86BC — Valid till — October 16, 2024
F6741-F743C-7CE93–3C8TC — Expiry: June 20, 2024
11242-C437D-DE013–6E6TC — Expiry: May 30, 2024
DB978–6E333-B12DC-7BDTC
11242-C437D-DE013–6E6TC
BE75C-BD2C8–7E065–3FEBC (Valid till Apr 08, 2024)
5E635-B9223-D6779-BAEBC (Valid till Mar 22, 2024)
539C6-A60A4–62290–383TC (Valid till Mar 02, 2024)
6B95D-3EE8D-ED01B-2DDTC (Valid till Mar 02, 2024)
4AEC4-DAE7D-A0C86–765TC (Valid till Mar 02, 2024)
B894E-7ADF2–100F1-CC1TC (Valid till Mar 02, 2024)
539C6-A60A4–62290–383TC (Valid till Mar 02, 2024)
7B48B-01241–1EE02–3BETC (Valid till Feb 18, 2024)
7A54B-0A8ED-8F770–4ECTC (Valid till Feb 09, 2024)
2CBB7–715F7–9E5BE-991TC (Valid till Feb 09, 2024)
IObit Uninstaller 13 ProLicense Key (3 Device)
CDNJF-P6G3P-85BQV-58Y7E
4MM6R-R9332–4JKKJ-X3N46
Q9DHY-5367H-YYVLN-JGW5U
M3JFE-7MNWQ-MM59G-K5WXY
QKSUD-GEZRM-JVNER-K2EGP
Z3XSZ-6PVNJ-YNN8J-ZRPRX
IObit Uninstaller Pro Activation codes (6 Months)
B894E-7ADF2–100F1-CC1TC
81B57-E0F9E-14836–570BC
C7870-A6BBE-D9C12-A25TC
CE697–12E0B-46B82-AE4TC
FE17F-ADE45–6BED8–30DTC
879BF-5A984–8EEB0–86ETC
4BCDA-6B1CC-3AC6F-AD4TC
Conclusion
IObit Uninstaller 13.6 Pro Key is a powerful tool designed to help you manage and remove unwanted software effectively. With advanced features like real-time monitoring and deep scanning, it ensures a thorough cleaning process. To activate the Pro version, simply use the provided license key, and for any issues, follow the suggested solutions to uninstall or troubleshoot.
0 notes
Text
Comprehensive Approach: Removing Check-tl-ver-176-2.com Malware Made Easy
Imagine you're enjoying a peaceful day at home, and suddenly, a few uninvited critters start causing havoc. That's what dealing with Check-tl-ver-176-2.com malware can feel like on your devices. Fortunately, if you've found this malware guide, you’re already on the right path to securing your digital life and making your device critter-free once again.

Identifying Check-tl-ver-176-2.com Malware
This malware can be tricky to spot. It's like a chameleon, blending into your device's environment by mimicking normal processes. However, knowing what to look for is the first step in tackling the problem.
How Does the Malware Enter Your Device?
Like a thief finding a hidden key under the mat, this malware often sneaks in through bundled software installations, infected email attachments, or compromised websites. Always be wary of what you download and where you click.
Symptoms of Malware Infection
Are you seeing an avalanche of pop-ups? Maybe your browser has new toolbars you didn’t add, or your homepage has mysteriously changed. These are all telltale signs that your device might be compromised.
Why You Should Act Quickly
The longer malware lingers, the more it can spread and damage your files and personal information—like a water leak soaking into your home's foundation. Quick action is crucial.
Step 1: Isolate Your Device
Disconnect from the internet. This stops the malware from communicating with its controller and prevents further data leakage.
Step 2: Enter Safe Mode
Booting in Safe Mode is like putting your device into a protective bubble where only essential services run, making it easier to root out and remove the malware.
Step 3: Uninstall Unknown Programs
Look for any applications you don’t remember installing. Removing these can often clear the malware, as if you're weeding out uninvited plants from your garden.
Step 4: Clean Your Browser
Reset your browser settings to their original state. This removes any harmful changes made by the malware and clears out unwanted add-ons and extensions.
Step 5: Use Malware Removal Software
Run a comprehensive scan with reputable malware removal software. Think of it as a thorough cleaning service for your device, catching any remnants the manual clean might miss.
Step 6: Update Everything
Update your operating system, browsers, and any installed software. Updates are like fortifying your doors and windows to make it harder for intruders to get back in.
Preventive Measures for the Future
Adopting good habits can significantly reduce the risk of infection. Don’t open suspicious emails, use strong, unique passwords, and keep your antivirus software updated.
Common Questions About Malware Removal
What if the malware doesn’t go away?
How often should I scan my computer?
Can this malware steal my identity?
Conclusion
Removing Check-tl-ver-176-2.com malware might seem daunting, but with a systematic approach, it's entirely manageable. By following these steps, not only do you cleanse your device, but you also enhance its defenses against future attacks. Stay vigilant, stay informed, and keep your digital environment safe.
0 notes
Text
Easy Steps to Prevent MacBook Overheating
Do you know why your MacBook is getting overheating? Both software and hardware issues can cause a MacBook to overheat. Even the latest models can heat up when memory-intensive tasks overload the processor, or when internal fans malfunction. Some common reasons for MacBook overheating include having too many processes and applications running at once, unresponsive applications, too many browser tabs open, defective internal fans, blocked air vents, or viruses and malware.
Here are some steps to prevent your MacBook from overheating:
Check the CPU: Open Finder and locate the Activity Monitor tool within the Utilities folder of the Applications section. Launch Activity Monitor and click the CPU tab to see which applications are consuming the most processing resources, indicated in the % CPU column. Use the X button to shut down intensive processes and reduce the load on your CPU. While you’re in Activity Monitor, switch to the Memory tab to check your RAM consumption, as this may also be hampering performance. Consider uninstalling unwanted Mac software to prevent high-impact background processes.
Manage your graphics settings.
Reset the SMC.
Keep your MacBook updated.
Use official Mac chargers only.
Physically clean your Mac.
If you're still experiencing the same issue after following these steps, you can contact the Fix My Computer team, who will guide you on how to prevent overheating.
0 notes
Text
Micro Pc Tech - How virus can be removed
Removing a virus from a micro PC follows similar principles to removing malware from any other computer. Here’s a general guide by Micro Pc tech to help you remove viruses from your micro PC:
Disconnect from the Internet: The first step is to disconnect your micro PC from the internet to prevent the virus from spreading or communicating with its source.
Enter Safe Mode: Boot your micro PC into Safe Mode. This will prevent the virus from running automatically when the system starts up. To enter Safe Mode, restart your computer and repeatedly press the F8 key (or another key depending on your system) before the Windows logo appears. From the Advanced Boot Options menu, select Safe Mode with Networking.
Use Antivirus Software: If you have antivirus software installed on your micro PC, run a full system scan. Allow the antivirus program to quarantine or remove any detected threats. If you don’t have antivirus software installed, you can download and use reputable free antivirus tools like Malwarebytes, Avast, or AVG.
Manually Remove Suspicious Programs: Go to the Control Panel on your micro PC and uninstall any programs that you don’t recognize or that seem suspicious. Some viruses disguise themselves as legitimate software.
Check Browser Extensions and Plugins: Viruses often install malicious browser extensions or plugins. Open your web browser and remove any suspicious extensions or plugins from the settings or extensions menu.
Clear Temporary Files and Cache: Viruses can sometimes hide in temporary files and cache. Use the Disk Cleanup tool to remove temporary files and clear the cache on your micro PC.
Update Your Operating System and Software: Ensure that your micro PC’s operating system and all installed software are up to date with the latest security patches and updates. This helps protect your system from known vulnerabilities that malware may exploit.
Reset Browser Settings: Reset your web browser to its default settings to remove any changes made by the virus. This will also remove any unwanted toolbars, home page hijackers, and other browser modifications.
Perform a System Restore: If you’re still experiencing issues after following the above steps, you can perform a system restore to revert your micro PC to a previous state before the virus infection occurred. Be aware that this may result in the loss of recent files and changes made to your system settings.
Backup Important Data: Before proceeding with any drastic measures like system restores or reinstalling your operating system, make sure to back up any important data to an external storage device or cloud service.
Seek Professional Help: If you’re unable to remove the virus yourself, or if your micro PC continues to exhibit suspicious behavior even after removal attempts, seek assistance from a professional computer technician or IT support service.
Remember to regularly update your antivirus software and perform scans to prevent future virus infections on your micro PC. Additionally, practice safe browsing habits and avoid downloading or clicking on suspicious links and email attachments.
0 notes
Text
Say Goodbye to Bloatware: Uninstall System Apps without Root
Smartphones have become essential to our lives. These powerful devices enable us to stay connected, access information, and perform various tasks. However, many smartphone users often encounter bloatware, which can negatively impact their performance and user experience. Bloatware refers to preinstalled apps with the device, usually installed by the phone manufacturer or the operating system. These apps include default browsers, email clients, music apps, and more, which may only be helpful to some users.

Understanding Bloatware
Bloatware, or system apps, refers to the preinstalled apps that come with your Android device. These apps are installed by the phone manufacturer or the operating system and are often unnecessary for the average user. While some bloatware apps may be helpful to specific users, most are redundant and take up valuable storage space on your device. Bloatware apps can impact performance, consume system resources, and generate unwanted notifications. As a result, many users wish to uninstall bloatware to enhance their device's speed and increase storage space.

Defining Bloatware
Bloatware, or system apps, refers to the preinstalled software with your Android device. These apps are typically installed by the phone manufacturer or the operating system and are often unnecessary for the average user. Examples of bloatware apps include default browsers, email clients, music apps, and more. While some users may find these apps helpful, many consider them intrusive and unnecessary, as they take up valuable storage space and can impact the device's overall performance.
Impact of Bloatware on Device Performance
Bloatware can have a significant impact on the performance of your Android device. These preinstalled apps consume system resources, including processing power, RAM, and storage space, leading to lags, slow performance, and even crashes. Additionally, bloatware apps often run in the background, using up valuable system resources, which can reduce battery life and increase data usage. The presence of numerous bloatware apps can also make the device feel cluttered, impacting the overall user experience. Removing bloatware can significantly improve device performance, responsiveness, and efficiency.
The Need to Uninstall System Apps
With the negative impact of bloatware on device performance, it's essential to address the need to uninstall system apps. By uninstalling unnecessary system apps, users can enhance the speed and performance of their devices, improve battery life, and free up valuable storage space. Uninstalling system apps can also result in a cleaner and less cluttered device, making it easier to navigate and use. In the following sections, we will explore different methods to uninstall system apps without root access, allowing users to optimize their device's performance and customize their app lineup.
Enhancing Device Speed
One of the critical benefits of uninstalling bloatware is enhancing device speed. Bloatware apps consume system resources, including RAM, CPU power, and storage space, which can cause your device to slow down and become less responsive. By uninstalling unnecessary system apps, you can free up system resources, allowing your device's operating system to run smoother and faster. This, in turn, leads to faster app launching, multitasking, and overall device performance, providing a more seamless and enjoyable user experience.

Increasing Storage Space
Another significant advantage of uninstalling system apps is increasing storage space on your Android device. Bloatware apps, although preinstalled, still occupy valuable storage space, which could be better utilized for user-installed apps, photos, videos, and other files. By removing unnecessary system apps, you can reclaim storage space, providing you with a larger capacity for your favorite apps, media, and personal data. This ensures ample space for new installations, updates, and other content, offering your device more flexibility and freedom.
Uninstallation Methods for Bloatware
Now that we understand the importance of uninstalling system apps let's explore the different methods available for removing bloatware from your Android device. There are two primary options for uninstalling system apps: regular uninstall/turn off options and advanced uninstallation techniques. Regular uninstall options allow you to disable or uninstall some system apps directly from your device's settings app. In contrast, advanced uninstall techniques involve using developer options, ADB commands, and third-party tools to remove system apps that are otherwise difficult to uninstall.
Regular Uninstall/Disable Options
Regular uninstall options provide a straightforward way to disable or uninstall system apps on your Android device. Depending on the device manufacturer and operating system version, you can uninstall or disable certain system apps directly from the settings app. By tapping the uninstall or turn off button, you can remove the app from the user interface, preventing it from running in the background and consuming system resources. However, it's important to note that not all system apps can be uninstalled or disabled using this method, as some apps are deemed essential by the operating system.
Advanced Uninstall Techniques
Advanced uninstall techniques provide an alternative solution for system apps that cannot be uninstalled or disabled through regular options. Advanced uninstallation methods involve using developer options, ADB commands, and third-party software to remove bloatware apps from your device. By accessing hidden settings, enabling USB debugging, and connecting your device to a computer, you can use ADB commands to uninstall system apps directly from the device's command prompt. These advanced techniques offer greater control and flexibility, allowing users to remove unwanted system apps that would otherwise be challenging to uninstall.
Using adb for Bloatware Removal
One of the advanced uninstallation methods involves using the Android Debug Bridge (ADB) tool, which allows you to execute commands on your Android device using a computer. Using ADB, you can uninstall bloatware apps that cannot be removed through regular options, giving you more control over your device's app lineup. Let's explore the steps involved in using ADB for bloatware removal, including enabling USB debugging, connecting your phone with ADB, identifying packages to uninstall, and executing app uninstallation commands.
Enabling USB Debugging on your Phone
You need to enable USB debugging on your Android phone to use ADB for bloatware removal. USB debugging is a developer option that allows your phone to communicate with the ADB tool on your computer. To help with USB debugging, go to the developer options in your phone's settings app and toggle the USB debugging option. If developer options are not visible, go to the About phone section in settings and tap on the build number multiple times until the developer options are enabled.
Connecting your Phone with ADB
Once you have enabled USB debugging, you must connect your phone to the computer using a USB cable. Ensure the computer recognizes the phone before proceeding with ADB commands. Open the command prompt on your computer and navigate to the ADB directory. You can use ADB commands from the command prompt to interact with your phone and uninstall bloatware apps. Keep in mind that the commands may vary depending on your operating system, so it's essential to follow the specific instructions for your computer.
Identifying Packages to Uninstall
Before executing app uninstallation commands, you need to identify the package names of the system apps you want to uninstall. You can do this by using ADB commands to list the installed app packages and their package names. By obtaining the package names of the bloatware apps, you can ensure that you uninstall the correct apps without affecting the functionality of other apps or the operating system. Carefully identify the package name of the bloatware app you intend to uninstall for precise removal.
Executing App Uninstallation
With the package name of the bloatware app at hand, you can now execute the uninstallation command via ADB. You can access the package manager on your device using the ADB shell and uninstall the bloatware app directly. You can remove the app from your device by executing the uninstall command, freeing up storage space and system resources. It's essential to follow the precise syntax of the uninstall command to ensure the successful removal of the bloatware app.
Exploring Debloater Tool for System App Removal
Another method for uninstalling system apps without root access is the Debloater tool, which is designed to remove bloatware apps from Android devices. This ToolTool provides a user-friendly interface that allows users to turn off system apps, preventing them from running in the background and using system resources. The Debloater tool offers a convenient way to turn off bloatware apps without root access. It suits users who prefer a more user-friendly, software-based approach to uninstalling system apps.
Setting up the Debloater Tool
To get started with the Debloater tool, you need to download and install it on your desktop computer. Once installed, launch the Debloater tool, ensuring that it recognizes your connected Android device. The ToolTool establishes a connection with your phone via a USB cable, enabling you to manage and turn off system apps. Access the settings of the Debloater tool to configure the app removal options according to your preferences, allowing you to turn off bloatware system apps without root access.
Disabling System Apps using the ToolTool
With the Debloater tool set up, you can effortlessly turn off unwanted system apps on your Android device. Select the bloatware system apps you want to disable from the Tool'sTool's user interface, and the ToolTool will take care of the rest. Turning off the apps prevents them from consuming system resources, generating notifications, and running in the background, improving device performance and user experience. The Debloater tool offers a straightforward solution for disabling system apps without the complexities of ADB commands or root access.
How to Handle App Reinstallation
While uninstalling system apps is a great way to optimize your device, there may be cases where you need to reinstall an app that you previously uninstalled. Additionally, it's essential to understand how to handle the reinstallation of system apps should the need arise. In the following sections, we will explore the process of reinstalling uninstalled apps and restoring system apps that have been entirely removed from your device, ensuring that you can effectively manage your app lineup while maintaining the stability and functionality of your device.
Reinstalling an Uninstalled App
To reinstall an app you previously uninstalled, you can access the Google Play Store, search for the app, and tap the Install button. The app will be downloaded and installed on your device, allowing you to use it again. Remember that the app's data may not be preserved, so you may need to set up the app again upon reinstallation. The reinstallation process is simple and allows you to regain access to the app quickly and easily.
Restoring System Apps
Sometimes, you can restore system apps entirely removed from your device. If the absence of a particular system app affects the normal functioning of your device, you may need to reinstall the app to maintain stability. Restoring system apps can be done by downloading them from the Google Play Store or, in some cases, performing a factory reset on your device. Factory reset restores the device to its original state, reinstalling all system apps and settings. However, be cautious when performing a factory reset, as it will erase all user-installed apps, settings, and data.
Are There Any Risks Involved in Uninstalling System Apps?
While uninstalling system apps offers numerous benefits, it's essential to consider the potential risks involved. Removing critical system apps can lead to instability within the operating system and may result in malfunctions or errors. Identifying non-essential apps and avoiding uninstalling essential system apps integral to the device's functionality is vital. Carefully review the app's purpose and consult reliable sources before uninstalling, ensuring you minimize the potential risks associated with uninstalling system apps.
Can Uninstalling System Apps Cause Device Malfunction?
Uninstalling system apps has the potential to impact the device's performance and user experience. Removing critical system apps can disrupt the phone's native functionalities, leading to device instability and compatibility issues. It's crucial to understand the role of the app within the operating system before uninstalling it to avoid unintended consequences. Uninstalling system apps, especially without proper knowledge, can cause device malfunctions, which may require additional troubleshooting or even a factory reset.
Conclusion
In conclusion, getting rid of bloatware is essential for optimizing your device's performance. Uninstalling unnecessary system apps can enhance your device's speed and increase storage space. Various methods are available for removing bloatware, from regular uninstall/turn off options to advanced adb techniques. You can also use the Debloater tool to turn off system apps easily. It is important to note that while there may be risks involved in uninstalling system apps, such as potential device malfunction, taking proper precautions can minimize these risks. So, say goodbye to bloatware and enjoy a faster and more efficient device experience.
1 note
·
View note
Text
Top Uninstaller Software for Windows: Free & Paid Options to Streamline Your PC!
Say goodbye to unwanted programs cluttering your PC! Discover the top 10 Uninstaller Software for Windows, both free and paid options, to keep your system clean and efficient. From removing stubborn apps to optimizing space, these tools have you covered! Check them out now!
#WindowsSoftware #UninstallerTools
0 notes
Text
Why does my Chromebook keep freezing ? and How to Fix It
Why does my Chromebook keep freezing -Experiencing a freezing Chromebook can be incredibly frustrating, disrupting your workflow and causing unnecessary stress. However, freezes are a common occurrence and can stem from various issues. In this blog post, we'll explore the reasons behind your Chromebook's freezing episodes and offer practical solutions to help you regain control and a smooth user experience.

1. Not Enough System Resources:
Cause: Running several resource-intensive apps simultaneously can strain your Chromebook's memory and processor, resulting in freezing.
Solution:
- Avoid having too many applications and tabs open simultaneously.
- Utilize the "Task Manager" (Shift + Esc) to identify and close processes consuming excessive resources.
2. Using Outdated Software:
Cause: Employing outdated software, including the Chrome OS and apps, can lead to compatibility issues and freezing.
Solution:
- Keep your Chrome OS and apps updated with the latest versions.
- Enable automatic updates to ensure you're always running the most recent software.
3. Background Processes and Extensions:
Cause: Background processes and browser extensions can gobble up system resources, causing your Chromebook to freeze.
Solution:
- Restrict the number of active background apps and extensions.
- Regularly assess and disable or uninstall unnecessary extensions.
4. Dealing with Malware and Unwanted Software:
Cause: The presence of malware and unwanted software can introduce instability and result in freezing.
Solution:
- Equip your Chromebook with a trustworthy antivirus program and run periodic scans.
- Only download apps and software from reliable sources.
5. Hardware Constraints:
Cause: Older or less powerful Chromebook models might struggle with demanding tasks, leading to freezing.
Solution:
- Evaluate whether your hardware meets the demands of the tasks you're performing.
- Consider upgrading to a more capable Chromebook if necessary.
6. Preventing Overheating:
Cause: Prolonged intense usage without proper ventilation can cause overheating and freezing.
Solution:
- Use your Chromebook on a flat, solid surface to ensure proper air circulation.
- Keep the vents unblocked to allow for effective cooling.
7. Clearing Out Cached Data and Cookies:
Cause: Accumulated cached data and cookies can contribute to performance issues and freezing.
Solution:
- Routinely clean out browsing data, cache, and cookies.
- Make use of the "Clear browsing data" feature in Chrome settings.
8. Investigating Hardware Issues:
Cause: Defective hardware components, such as faulty RAM or a failing hard drive, can trigger freezing.
Solution:
- If you suspect hardware problems, consider reaching out to Chromebook support or consulting a professional technician.
Conclusion:
Addressing a freezing Chromebook involves identifying and tackling the underlying causes. By following the solutions offered in this post, you'll be well on your way to enjoying smoother and more reliable computing. If the freezing problem persists, it might be time to seek professional guidance or contemplate upgrading to a more robust Chromebook model.
FAQ
Why does my Chromebook keep freezing? Freezing can be caused by factors such as insufficient system resources, outdated software, background processes, malware, hardware limitations, overheating, cached data, or even hardware issues. Can having too many apps open cause my Chromebook to freeze? Yes, running multiple resource-intensive apps simultaneously can overload your Chromebook's memory and lead to freezing. Is it important to keep my Chrome OS and apps updated? Absolutely. Outdated software can lead to compatibility issues and freezing. Regular updates are crucial to maintaining optimal performance. How can I prevent background processes from causing freezes? : Limit the number of active background apps and extensions, and regularly review and disable unnecessary ones. Can malware really affect my Chromebook's performance and cause freezing? Yes, malware and unwanted software can introduce instability and lead to freezing. Regular scans with reputable antivirus software are recommended.
Read the full article
1 note
·
View note
Text
How to increase the speed of your PC

To increase the speed of your PC by three times, you can follow several steps and optimize different aspects of your computer. Here's a detailed guide on how to achieve that:
Upgrade your hardware:
- Add more RAM: Increasing your computer's random-access memory (RAM) can significantly improve its speed. More RAM allows your system to handle multiple tasks simultaneously without slowing down. Check your computer's specifications and upgrade to a higher RAM capacity if possible.
- Upgrade to a solid-state drive (SSD): Replacing your traditional hard disk drive (HDD) with an SSD can greatly enhance your PC's performance. SSDs have faster read and write speeds, resulting in quicker boot times, faster file transfers, and improved overall responsiveness.
- Consider a faster processor: Upgrading your CPU can provide a substantial performance boost. Look for a processor with a higher clock speed and more cores to handle demanding tasks more efficiently.
Perform regular maintenance:
- Keep your operating system updated: Install the latest updates for your operating system. These updates often include performance improvements, bug fixes, and security patches.
- Remove unnecessary programs: Uninstall any unused or unwanted software from your computer. These programs take up valuable system resources, which can slow down your PC.
- Clean up your hard drive: Regularly delete unnecessary files, such as temporary files, cache, and old downloads. You can use the built-in Disk Cleanup tool on Windows or third-party software like CCleaner to streamline this process.
- Defragment your hard drive: If you're still using a traditional HDD, defragmenting your hard drive can improve its performance. The process rearranges fragmented files, making them easier to access and reducing load times. On modern versions of Windows, the built-in defragmentation tool runs automatically, so manual intervention may not be necessary.
Optimize startup and background processes:
- Disable unnecessary startup programs: Many applications automatically launch at startup, consuming system resources. Disable or remove any startup programs that you don't need to load immediately. You can manage startup programs through the Task Manager on Windows or the System Preferences on macOS.
- Limit background processes: Some programs run in the background and consume system resources even when you're not actively using them. Use the Task Manager (Windows) or Activity Monitor (macOS) to identify resource-intensive processes and close them if they're not essential.
Adjust visual effects and settings:
- Disable visual effects: Windows and other operating systems offer various visual effects and animations that can impact performance. Disable or reduce these effects by adjusting your system's visual settings. On Windows, you can access these settings through the Performance Options in the Control Panel.
- Lower screen resolution: If you're not concerned about visual quality, reducing your screen resolution can improve performance. Lower resolutions require less processing power and can make your system more responsive.
Use performance optimization software:
- Antivirus and malware scans: Regularly scan your system for viruses, malware, and other malicious software. These can slow down your PC and compromise its security. Install a reputable antivirus program and keep it up to date.
- System optimization tools: Consider using reliable system optimization software that can clean up your system, optimize settings, and help identify and fix any performance issues automatically. Be cautious when choosing such software and ensure it comes from a trusted source.
Keep your system cool:
- Overheating can cause your PC to slow down. Ensure that your computer is properly ventilated and free from dust. Clean the fans and heat sinks regularly to prevent them from getting clogged, which can lead to overheating.
By following these steps, you can significantly increase the speed of your PC. However, it's important to note that the magnitude of the speed improvement may vary depending on your specific hardware, software, and usage patterns.
Read the full article
0 notes
Text
CCleaner – Phone Cleaner

Clean up your phone storage with CCleaner for Android!
Brought to you from the makers of the world’s most popular PC and Mac cleaning software, CCleaner for Android is the ultimate Android cleaner. Quickly and easily remove junk, reclaim space, monitor your system and more, and truly master your device.
Clean, Remove, and Master
• Remove unnecessary files and clean junk safely
• Clean files, download folders, browser history, clipboard content, leftover data and more
Reclaim Storage Space
• Analyze valuable storage space
• Quickly and easily uninstall multiple unwanted applications
• Clear junk, such as obsolete and residual files
Analyze Applications’ Impact
• Determine the impact of individual apps on your device
• Check which apps consume your data
• Find apps draining your battery
• Discover unused apps with App Manager
Clean your photo library
• Find and remove similar, old, and poor quality (too bright, dark, or unfocused) photos
• Reduce file sizes with Low, Moderate, High, and Aggressive file compression, and move originals into cloud storage
• Delete photos from private chats
Monitor your System
• Check the usage of your CPU
• Analyze your RAM and internal storage space
• Check out your battery levels and temperature
Easy to Use
• Clean your Android in just a few clicks
• Simple, intuitive user interface which is easy to navigate
• Choose the color theme you like most
Disclaimer: Certain automatic profiles are automatically triggered based on your device's location, which requires access to location data we'll be using in the background. We'll ask for permission to access this data before using it.
This app uses Accessibility permission to assist disabled and other users stop all background apps with just one tap.
Read the full article
0 notes
Text
Revo Uninstaller Pro Crack: Your Ultimate Solution for Complete Software Removal
Introducing Revo Uninstaller Pro Crack, the premium version of the renowned software removal tool that takes application uninstallation to a whole new level. If you're tired of dealing with residual files, registry entries, and stubborn leftovers after uninstalling software, Revo Uninstaller Pro Crack is here to transform your experience.
With Revo Uninstaller Pro Crack, you can bid farewell to the hassles of traditional uninstallers. This advanced software offers a comprehensive approach to removing unwanted programs from your computer, ensuring that no trace of the application remains behind. Say goodbye to clutter, and hello to a cleaner, faster, and more efficient system.
Key Features of Revo Uninstaller Pro Crack:
Complete Uninstallation: Revo Uninstaller Pro Crack meticulously scans your system for leftover files and registry entries associated with the uninstalled program. It ensures a thorough removal, leaving no digital debris behind.
Forced Uninstall: With the Forced Uninstall feature, you can uninstall even the most stubborn and difficult-to-remove applications. Revo Uninstaller Pro Crack employs advanced techniques to eradicate any remnants left by these programs.
Real-Time Monitoring: Enjoy the benefit of real-time monitoring that tracks changes made by newly installed software. This feature ensures that Revo Uninstaller Pro Crack can create a complete log of modifications, simplifying the removal process if necessary.
Browser Extensions Manager: Take control of your browser extensions with ease. Revo Uninstaller Pro Crack enables you to manage and remove browser add-ons, toolbars, and plugins effortlessly.
AutoRun Manager: Enhance your system's startup management with the AutoRun Manager. Easily control which programs launch at system startup, boosting your computer's boot time and overall performance.
Junk File Cleaner: Revo Uninstaller Pro Crack helps you free up valuable disk space by identifying and removing unnecessary files cluttering your system.
Windows Apps Uninstaller: Say goodbye to unwanted Windows Store apps that are challenging to remove through standard methods. Revo Uninstaller Pro Crack streamlines the process of uninstalling Windows Apps effectively.
Multi-Level Backup System: Rest assured knowing that Revo Uninstaller Pro Crack creates backup points before uninstalling any application. If needed, you can restore your system to a previous state.
Hunter Mode: Simplify the uninstallation process by using Hunter Mode. Simply drag the Hunter icon over a program's window or desktop shortcut to remove it effortlessly.
Revo Uninstaller Pro Crack provides you with a powerful set of tools that enable you to maintain a clutter-free and optimized computer system. Embrace a seamless software management experience and unlock the full potential of your PC with Revo Uninstaller Pro Crack.

#RevoUninstaller#SoftwareRemoval#PCOptimization#TechTips#UninstallSoftware#TechSolutions#CleanYourPC#SoftwareManagement#TechGeeks#TechHacks
0 notes
Text
Unnecessary apps take a lot of unwanted space on your Windows 10, therefore how to uninstall programs on windows 10 and its traces from Windows 10 PC?
0 notes
Text
youtube
Welcome to our YouTube channel! In this informative video titled "Quick and Easy Guide: Uninstalling Programs in Windows 10," we will provide you with step-by-step instructions on how to effectively uninstall programs on your Windows 10 operating system.
Uninstalling programs can be a hassle for many users, but with our simple tutorial, you'll learn the quickest and most efficient methods to remove unwanted software from your computer. We understand the importance of optimizing your computer's performance by eliminating unnecessary programs, and we're here to guide you through the process.
In this video, we'll cover various techniques to uninstall programs in Windows 10. We'll explore the traditional method using the Control Panel, as well as the modern approach through the Settings app. We'll also delve into additional tips and tricks to ensure a thorough removal, including tackling stubborn programs and dealing with leftovers.
By following our comprehensive guide, you'll save valuable disk space, enhance system speed, and maintain a clutter-free computer experience. Whether you're a beginner or a tech-savvy user, our instructions are designed to be easily understood and implemented.
Remember, regularly uninstalling programs that you no longer use is crucial for optimizing your Windows 10 experience and freeing up valuable resources. Keep your system clean and organized with our practical advice and recommendations.
So why wait? Join us now and become proficient in uninstalling programs in Windows 10. Don't let unnecessary software slow down your computer; take control with our expert guidance! Hit the play button and let's get started. If you find value in our video, don't forget to like, share, and subscribe to our channel for more helpful content.
#Windows10#UninstallingPrograms#QuickandEasyGuide#WindowsTips#ComputerTips#SoftwareRemoval#PCMaintenance#TechnologyGuide#WindowsTutorial#TechTips#WindowsHelp#WindowsSupport#HowToUninstall#WindowsUpdates#SoftwareUninstall#TechGuide#PCGuide#WindowsAdvice#WindowsTraining#ProgramRemoval#WindowsTutorials#Youtube
0 notes
Text
[ad_1]
Supercharging Your Laptop: Unleash Its Full Potential with Tips & Tricks for Optimal Speed and Performance
Introduction:
In this digital era, laptops have become an indispensable tool for both professional and personal use. However, nothing is more frustrating than a sluggish and underperforming laptop that slows down our work and hampers productivity. Fortunately, there are several tips and tricks to supercharge your laptop and enhance its speed and performance. In this comprehensive guide, we will delve into the world of laptop optimization, providing you with valuable insights and techniques to optimize your device for ultimate efficiency.
I. Understanding Perplexity and Burstiness in Writing:
Before we embark on our journey to supercharging your laptop, let's familiarize ourselves with two key factors in writing: perplexity and burstiness. Perplexity measures the complexity of text, while burstiness gauges the variation in sentence length and structure. Humans tend to write with greater burstiness, blending longer and complex sentences with shorter ones, which is more engaging and appealing to readers. However, AI-generated content often lacks this natural burstiness, making it crucial to infuse our writing with these elements for a more captivating reading experience.
II. Increasing Perplexity: Mastering Laptop Optimization:
1. Cleanse Your Laptop's Soul:
- Remove Unwanted Software: Uninstall unnecessary programs and applications to declutter your system and free up valuable resources.
- Sweep Away Digital Dust: Perform routine disk cleanup to eliminate temporary files, cookies, and caches that accumulate over time, optimizing your laptop's storage capacity.
- Defragment Your Hard Drive: Defragmentation rearranges fragmented data on your hard drive, resulting in faster access times and improved overall performance.
2. Reign in the Resource Hogs:
- Manage Startup Programs: Disable or remove unnecessary startup programs to reduce the burden on your laptop's resources during boot-up.
- Task Manager to the Rescue: Utilize the Task Manager to identify and terminate resource-intensive processes and applications that may be running in the background, negatively impacting performance.
3. A Breath of Fresh Air: Proper Ventilation and Cooling:
- Keep It Cool: Prevent overheating by ensuring adequate airflow and avoiding placing the laptop on soft surfaces that obstruct ventilation.
- Clean the Vents: Regularly clean the laptop's vents and fan to remove accumulated dust and debris, enabling proper heat dissipation and preventing performance throttling.
4. Optimizing Power Settings:
- Hit the Right Balance: Customize power settings to prioritize performance when plugged in and maximize battery life when on the go.
- Adjust Display Brightness: Lowering screen brightness conserves energy, reducing the strain on your laptop's resources.
III. Embracing Burstiness: Advanced Techniques for Boosting Laptop Performance:
1. Solidifying Your Hardware:
- Embrace SSD Magic: Upgrade your traditional hard drive to a Solid-State Drive (SSD) for lightning-fast performance, improved read/write speeds, and reduced boot times.
- Revitalize Aging RAM: Upgrade your laptop's Random Access Memory (RAM) to augment multitasking capabilities and boost overall system performance.
2. Keeping Software Up to Date:
- Patch It Up: Regularly update your operating system and software to ensure you have the latest security features, bug fixes, and performance enhancements.
- Driver Updates: Stay on top of driver updates for your hardware components to optimize compatibility and performance.
IV. HTML Headings and Subheadings for an Organized Read:
1. Understanding the Basics of HTML Headings:
- H1: The Title Header
- H2: Major Section Headers
- H3: Subsection Headers
- H4-H6: Sub-subsection Headers
2. Utilizing HTML Subheadings:
- Exploring Software Optimization Techniques
- Uplifting Hardware for Enhanced Performance
- Maximizing Power Efficiency through Advanced Settings
V. Frequently Asked Questions (FAQs):
Q1. How often should I clean my laptop's vents?
A1. It is recommended to clean the vents every 3-6 months, depending on usage and environmental factors.
Q2. Can I use an external cooling pad to enhance laptop performance?
A2. Yes, an external cooling pad can provide additional cooling mechanisms and aid in maintaining optimal operating temperatures.
Q3. Is it safe to upgrade my laptop's RAM and SSD on my own?
A3. While it is generally safe, it is advisable to consult the laptop manufacturer's guidelines or seek professional assistance if you are unsure about the process.
Q4. Should I update all my software, including less frequently used programs?
A4. It is generally recommended to keep all your software up to date to benefit from improved performance, security patches, and bug fixes.
Conclusion:
By implementing these tips and tricks, you can breathe new life into your laptop, transforming it into a high-speed productivity machine. Remember to embrace both perplexity and burstiness in your writing, ensuring your content is engaging and provides comprehensive insights. Supercharge your laptop and unlock its true potential for an optimized and seamless computing experience.
[ad_2]
#Supercharge #Laptop #Tips #Tricks #Speed #Performance
0 notes
Text
Explore the Key Features of CCXProcess on Mac
Welcome to our overview of CCXProcess's main Mac features! Powerful software called CCXProcess provides a variety of features and functionalities for Mac users.
CCXProcess on Mac offers a simple and effective solution to manage your files, improve system efficiency, and increase your overall productivity, whether you're a professional or a casual user.
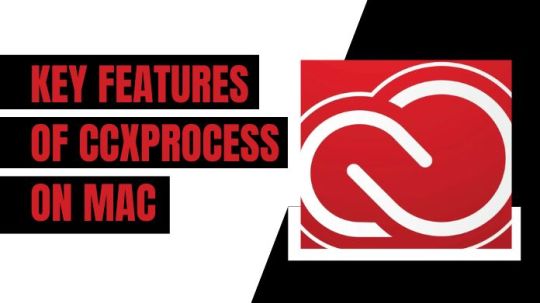
Everyone can benefit from CCXProcess, regardless of whether they are a business professional, student, or creative person.
Let just explore below article, we'll examine a few of CCXProcess Mac's most useful features in more detail and walk you through their practical application.
Main Key Features of CCXProcess on Mac
Join us as we explore CCXProcess's essential Mac features and learn how this potent program may revolutionise your productivity and streamline your workflow. Let's get started.
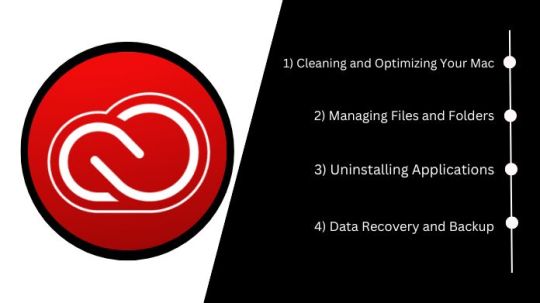
1) Cleaning and Optimizing Your Mac
For optimum performance and longevity, your Mac must be kept clean and optimised. You can accomplish this with the use of many tools provided by CCXProcess Mac.
Quick Scan
The CCXProcess Mac Smart Scan tool swiftly analyses your Mac's system and pinpoints any problems that might be impairing its performance.
It checks for unwanted files, viruses, dangers to users' privacy, and other potential issues.
After the scan is finished, you may analyse the findings and take the necessary steps to address any issues that were found.
Cleanup of Junk Files
Your Mac builds up superfluous files over time, including temporary files, logs, and cache, which can take up valuable disc space.
You may scan your Mac for these files and securely remove them using the junk file cleanup feature of CCXProcess Mac, which enhances system efficiency and frees up storage space.
Protection of Privacy
In the digital age, privacy protection is essential. CCXProcess Mac has privacy protection features that can assist you in protecting your sensitive data.
In order to prevent unauthorised access, it may safely remove any potential privacy hazards found on your Mac, including browsing history, chat logs, and passwords that have been saved.
2) Managing Files and Folders
You can manage your files and folders effectively with the aid of CCXProcess Mac's features, which also make it simpler to search and arrange your data.
Organisation of files
You can easily organise your files and folders using CCXProcess Mac. You can do things like rename files in bulk, move files between directories, and create custom folders.
By streamlining your file management procedure, this function helps you save time and effort.
Finder for duplicate files
Duplicate files can take up valuable disc space and clog up your Mac's storage.
The Duplicate File Finder in CCXProcess Mac examines your system for duplicate files and generates a thorough report that you can easily review and remove.
You may optimise your storage and boost system speed by getting rid of duplicate files.
File Shredder
When you delete files from your Mac, they are not truly gone; using specialised software, they can still be restored.
The File Shredder tool of CCXProcess Mac enables secure file deletion by overwriting deleted files with random data, effectively rendering them unrecoverable.
When you need to securely dispose of important files, this tool comes in handy.
3) Uninstalling Applications
There is more to completely uninstalling a programme from your Mac than simply moving it to the trash.
The removal of a programme is made simpler by CCXProcess Mac, which also makes sure that no preferences or leftover files are left behind.
Removal of the entire application
You can completely uninstall apps with the use of CCXProcess Mac's Application Uninstaller.
Associated files, preferences, and caches are also deleted in addition to the application itself.
This guarantees a clean removal, frees up disc space, and ensures that no leftover data is left behind.
Removing old files
Some files may still be present on your Mac after you uninstall a programme, using up valuable storage space.
The Leftover File Cleanup function in CCXProcess Mac searches your system for these leftover files and enables simple deletion.
You can save disc space and keep your system organised by deleting unnecessary files.
Applications Reset
CCXProcess Mac gives you the option to restore apps to their default state in addition to complete uninstallation. When an application is acting improperly, this can be helpful.
You can fix software conflicts or corruption issues by resetting an application, which returns it to its default settings.
4) Data Recovery and Backup
Unexpected data loss can occur as a result of either a system crash or an accidently deleted file.
To protect your crucial files and restore lost data, CCXProcess Mac provides data recovery and backup tools.
Data Restoration
The Data Recovery tool of CCXProcess Mac can assist you in recovering files that you unintentionally deleted or lost as a result of system crashes.
It looks through your storage devices for files that can be recovered and offers options for restoring them to either their original locations or a predetermined location.
File Restore
To avoid data loss, you must frequently back up your files. You may create backups of crucial files and folders using CCXProcess Mac's File Backup function.
Your files will be safeguarded against unforeseen events if you specify the backup location and set automatic backups.
Conclusion
A wide range of capabilities provided by CCXProcess Mac can greatly improve your Mac experience. CCXProcess Mac offers a simple and effective solution for managing files and folders, uninstalling programmes, cleaning and optimising your system, and protecting your data. You may harness the power of CCXProcess Mac and increase your productivity while assuring the smooth running of your Mac by following the step-by-step tutorial in this article.
1 note
·
View note
Last Seen Blogs

cprdefibs
CPR_PH

softweebqueen
Soft Weeb Queen

gajjarequipments
Gajjar Equipments Private Limited
cprdefibs
CPR_PH

animeherald
Anime Herald - Tumblr Edition