#upholsterous
Text

I'll put my 70s couch up against anybody else's 70s couch any day of the week. And yes, that is a painting of a "Spanish village" behind me and yes it is painted entirely in shades of avocado green, dirty brick and black.
#couch is still there but got reupholstered in trendy navy blue with tiny white dots in the 90s#but it has been covered in sheets since the day it got back from the upholsterers because my family covers their furniture to Keep It Nice
37 notes
·
View notes
Text
since we're just going all out on the morgan lore this month so far lemme say that a ridiculous number of my ancestors were farmers in either england or fucking nebraska
#blondiepost#very well may delete later but yr girl's family was roasted by [redacted] american author for farming reasons#sheep farmers in england. generalized farmers in nebraska#upholsterers on my maternal grandfathers side tho and my paternal grandfather may have. hm. actually story for another day
7 notes
·
View notes
Photo
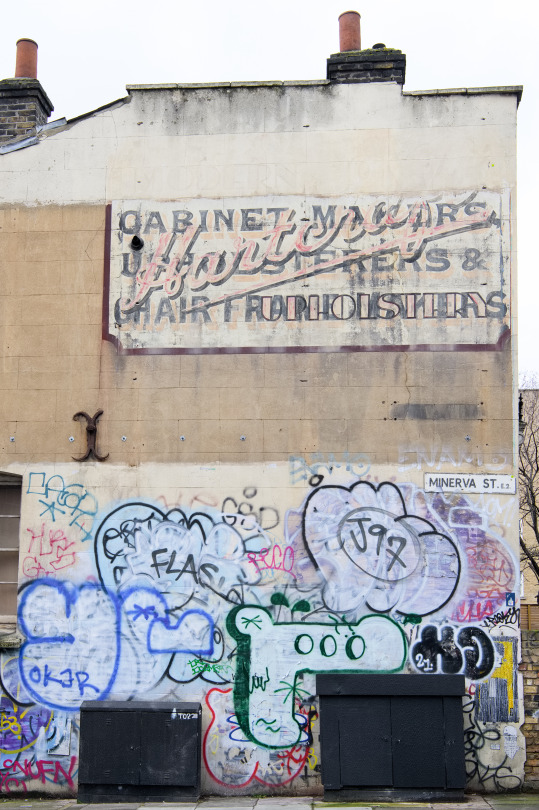
Contrasting times on the side of a building, Bethnal Green
The ghost sign for the old cabinet makers and upholsterers contrasts with the modern graffiti
#London#Bethnal Green#graffiti#ghost sign#contrast#urban#urban photography#cabinet makers#upholsterers#England#UK
27 notes
·
View notes
Text
today I have most of the day off and im letting myself work on my weird history game as a treat
#messages from the ouija board#its still all pen on paper. diagrams. brainstorming. flowcharts about puzzles#its the one thats theoretically about the boston tea party but its not. its verging on anti-game territory.#the grounding message im building it around is like. historic events are going to happen but u still have to buy groceries.#and i keep populating the game w real 1770s bostonians who are represented somewhat like the people they were#but somewhat like my friends from work who portray them. like theres going to be a puzzle involving beating upholsterer/militia cadet moses#grant at nine mens morris. and thats nothing to do w anything i know about that man and completely to do w the fact that hes portrayed#by my friend tim who is very very good at nine mens morris. so thats become a Fact About Moses Also to me
9 notes
·
View notes
Text


https://youtube.com/playlist?list=PL-6Ys7gca1JGyHpi71zatm0ImwbsyIEVd
The infinitely expanding playlist of jack white songs that have stuck in my head over the past 20 years (faintly chronological)
#jack white#meg white#the dead weather#the raconteurs#the white stripes#shirley manson#garbage#the flaming lips#third man records#the kills#perfect#the upholsterers
14 notes
·
View notes
Text
I have a lot of scrap materials. Scrap wood, foam, fabric, and god knows what else. Just, a lot of leftovers from previous projects.
So I figured I could try to MAKE something out of them, just to put those materials into use so they could become something instead of just sitting around uselessly, taking space and collecting dust.
I thought making a footstool could be a fun, easy-ish project for me to do this winter.
So here, come along with me on this journey of making a wonky, scrap footstool
So key thing here is that I very specifically wanted to avoid buying ANYTHING for this project. I did end up buying two things, a pullsaw (which is a general tool I can use in other projects, so I figured I could get away with it), and one itty bitty thing that ended up costing like, what, 2€?
But yes, my goal was to use things I already have and give them a purpose, not accumulate any MORE scrap materials. This is important because through out this project I ended up using many Unideal Methods For Doing Things, mainly because I didn't have enough material to do it The Ideal Way.
This is not a tutorial for efficiency, this is my journey to repurpose garbage. Just wanna be clear about that. There are better ways to build a footstool.
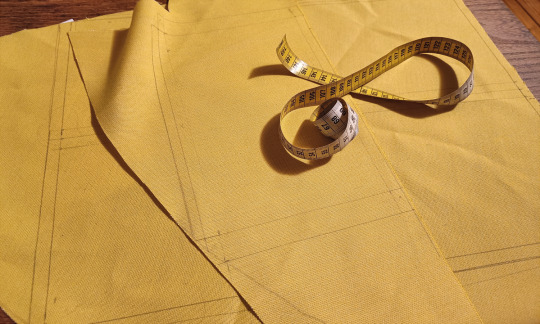
Anyway, I started the project from arguably the weirdest part; figuring out how much fabric I had from the chair project
The thing was that I wanted to make the footstool as big as I possibly could with the material I had, so I had to start this project by figuring out the maximum size I could do with the fabric I had.
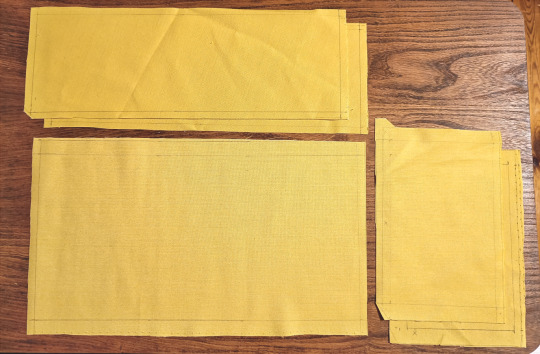
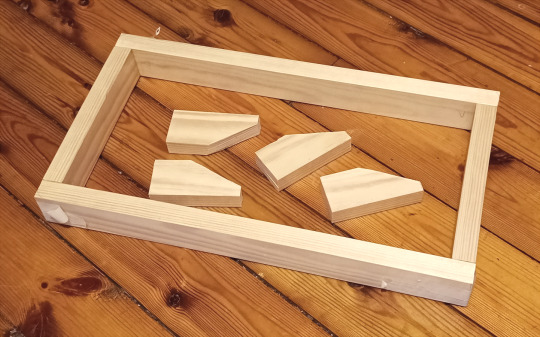
So I figured out the dimensions I could do (even cut the fabric pieces while I was at it), and then using those dimensions as a guide, I went off to figure out the wood pieces I would need for the frame of the stool, as well as the feet. Once I had things measured out, I cut the pieces and boom
Wood pieces obtained.
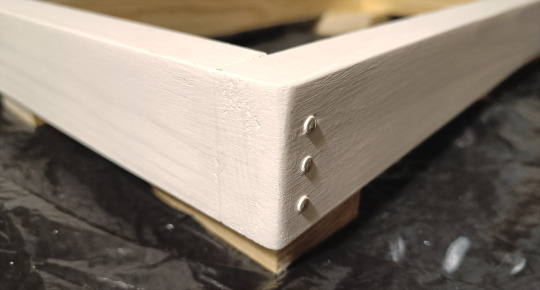
Sidenote, yes, a 90 degree angle on the corners would have looked much prettier than what I did, I just figured that this would be easier to cut (I cut those pieces before I bought my new pullsaw), also, I wasn't sure how I would perma-attach the pieces if the corners were done like that. Like, with these corners, I could fortify them with dowels or nails or whatever, but clean corners at an angle? I have no idea how to pull that off, and I don't have the energy to to try anything fancy, man, I wanted this to be semi-easy
(There was no way in hell I was gonna attempt somekinda dovetail joint here, I didn't have enough wood to work with (there was a point where I was actually worried I wouldn't have enough wood to build the frame at all) and god knows I'm nowhere near good enough at wood working to pull something like that off)
Anyway, I did originally intend to attach the wood pieces with dowels, since they'd be hidden and look neat (by not being visible at all), but when I drilled the first hole for the first dowel, I realized that 1) I didn't have a drill bit large enough for the dowel to fit in, and 2) I did not have it in me to actually do it. Like, to make sure the wood pieces would allign correct I would have to make sure I was drilling Very Straight into the wood, not once, not four times, but 16 times (since I was planning on using 2 dowels at each joint). If I didn't drill the dowel holes perfectly straight and perfectly aligned, the frame wouldn't come together, and I did not want to risk fucking that up, man, no
So I took the easy way out.
Nails.

I do kinda regret picking these nails, I should've used less obvious ones OR waited until the wood was painted before nailing them together because these are kinda pretty nails, so it ended up being kind of a waste to use them (since there was no way I was gonna AVOID these nails while painting the wood). IDK I was worried the glue alone wouldn't hold the wood strong enough while I was working with the frame or something and chose poorly here. But it is what it is. (On the plus side, we seemed to have exactly 12 of these nails, which was the exact perfect amount)
Anyways, yes, I chose to paint the frame because I have leftover paint (and primer) from the previous project so I figured I might as well use it up. Even though I hate this fucking paint so much
Two or three coats of primer, a gentle sanding after them, the wood was perfectly smooth and lovely
Then came the paint and it looks like shit, just like last time


I did like. What, four coats of paint. Sanding between the coats. Dilluting it so it wouldn't be so thick. And yet. And yet it looks like shit. Just like last time, with the chair I refinished. I mean I knew it was gonna turn out like ass but I'm still kind of shocked by how bad it turned out.
Anyway. Ideally you'd probably make a cushion onto some random piece of plywood (or something similar) that you would slot into the frame of the stool. I did not have any plywood pieces, nor did I have enough wood to make a small, thinner frame to slot into the main frame. So.

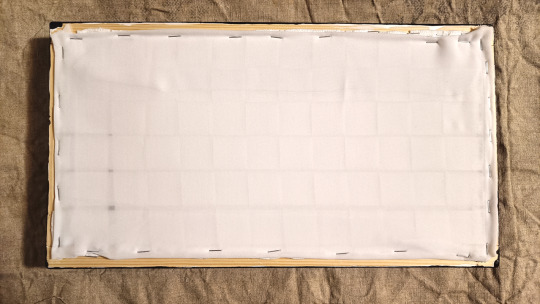
To create a bottom I used this ribbon that I have an entire fuckload of (since I bought it for that fucking lamp before realizing I couldn't use it and couldn't return either, literally have nothing better to do with it so here it goes) to weave a bottom onto the frame. And a bit later I attached a piece of fabric on top of the weaving (another leftover from the lamp project), as this would be what I'd glue the cushion onto.
But first, I had to make a cushion!
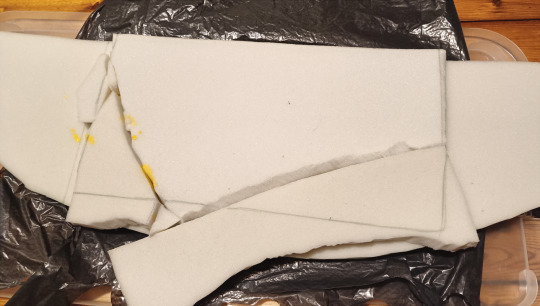
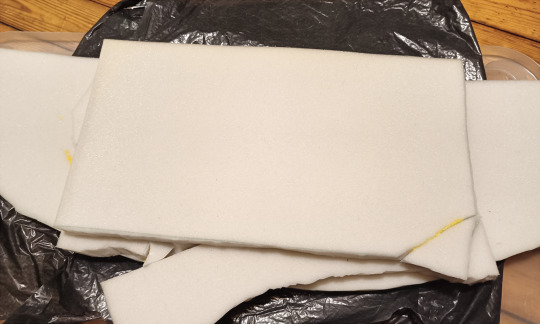
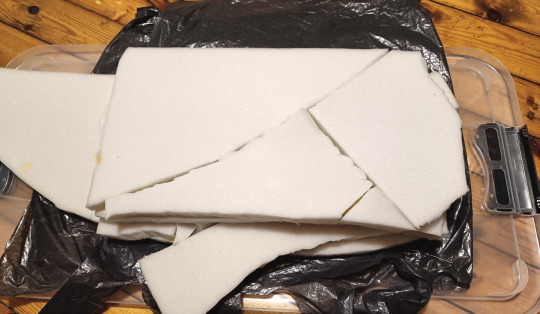
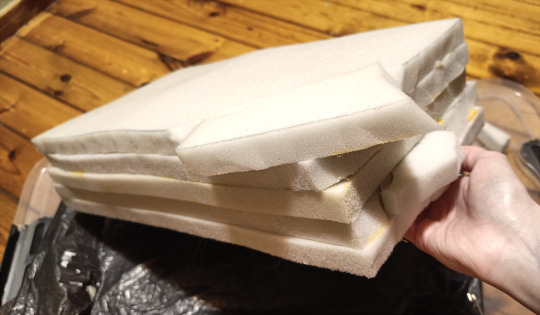
As you can see, I have a lot of scrap foam
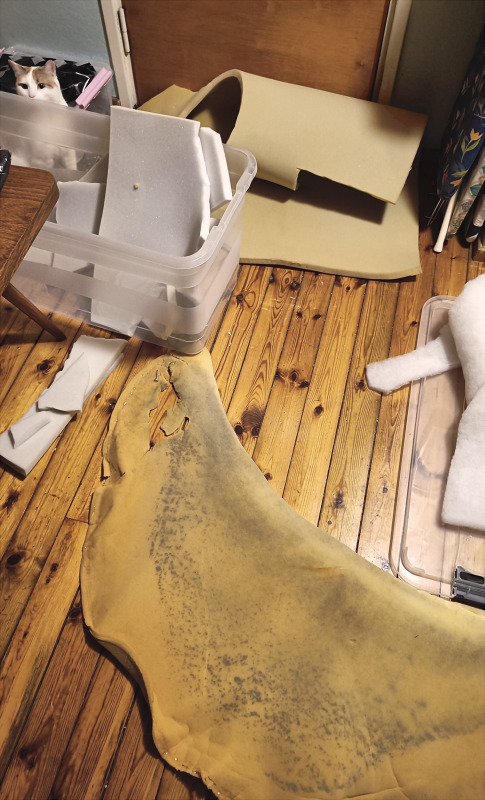
(Yes I've kept the original foam from the styrofoam chair, I did cut it down to get rid of the damaged edges (after taking this photo) but otherwise the foam is fine, shhhhhh) (Also the white foam is what I bought for the chair project, the yellow foam is something my mom had bought years ago that we've had laying around for ages)
I wanted the cushion of the stool to have some height to it, but I didn't have any thick pieces of foam, so I figured I could just make a thick foam piece from the scraps I had, with some help from the foam glue I have (the same stuff I bought for the styrofoam chair but wasn't able to use since it melted the styrofoam).

Started by figuring out the rough dimensions of the foam piece I'd need (from the biggest, cleanest piece I had)
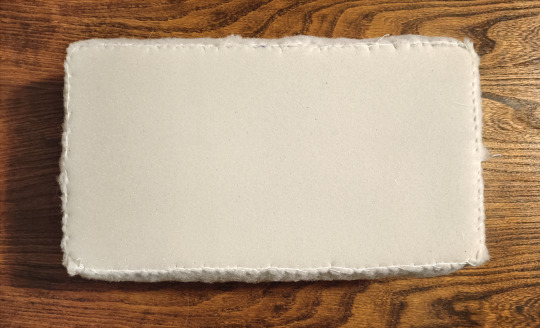
And I got started making a Foam Sandwich

Let me tell you my hands were an absolute mess during this whole process, I was essentially washing my hands with fucking nail polish remover (I just noticed the foam glue smelled like nail polish remover and realized it would probably get rid of the residue on my hands, which it did, thank fuck), it was nasty
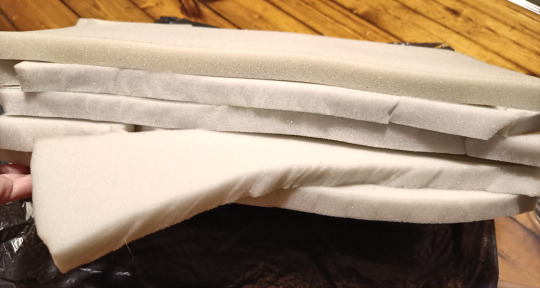
But yes, Big Foam Sammich. I did start lowkey cutting it WHILE I was building the cushion, since my goal here was to not waste materials so. Y'know. I tried to make sure I wouldn't waste materials.
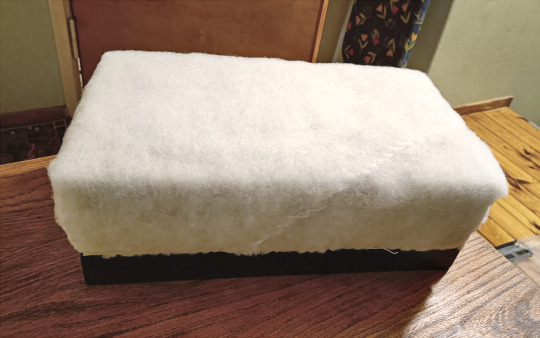
After the cushion was formed, I let it dry for a good while before I went in to shave the edges and cut it down. After that I used this floofier scrap foam to cover the sandwich. I could have glued it on, but I figured I had killed enough of my braincells while making the foam sandwich and breathing in the glue fumes that I decided that sewing would be good enough.
Two flooffy foam pieces were enough to cover the cushion, I just sewed them together on top and sewed them to the bottom of the cushion. It was quite easy indeed.

With that all done, I could attach the finished cushion onto the frame!

Brought the glue back out so I could just glue the foam onto the fabric that was stapled onto the frame, and I allowed it to dry (upside down, with some weights)
And yes, ideally you would staple the foam down onto a separate piece of wood, but since it was going directly on top of the frame and I didn't want to staple it onto the frame, I didn't. I wanted the wood (and my shitty paint job) to be visible, and the fabric would need to be stapled onto the frame anyways, so the glue just had to do the job here.
ANYWAY, UPHOLSTERY TIME
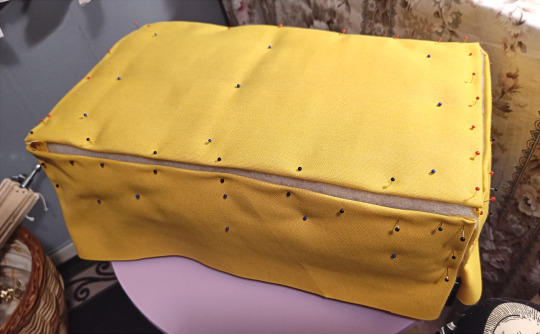
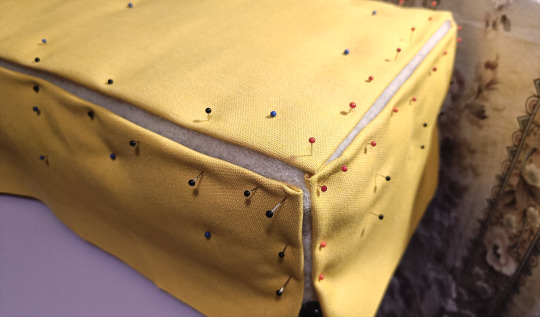
Since the fabric pieces were long done, I could just get straight into it. I pinned the fabric pieces down and handsewed the whole thing. I do admit I regret not ironing the fabric before I started though, I forgot and by the time I realized it was too late, and there was no way I was going to lift the fabric off the stool at this point. I learned my god damn lesson with the styrofoam chair, I know there would've been no way for me to put the fabric back down as neatly as it had been before, it was not worth it.

Anyway, I sewed the fabric and to finish things off I stapled the bottom of the fabric down, onto the frame. And yes I did a wonky ass job, shush
And here comes the one thing I ended up buying for this project, the thing that cost me like 2€

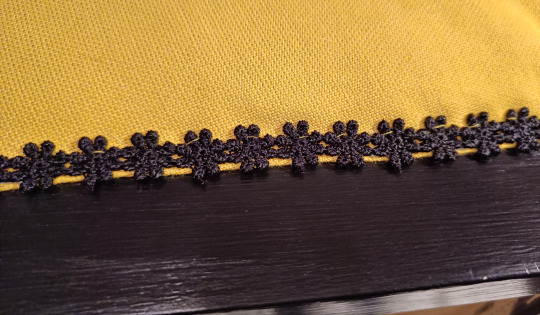
Decorative ribbon to hide the staples! Since I couldn't think of any other way to hide the staples.
And y'all, I understand now why people normally just glue this shit on, it took me like FIVE FUCKING HOURS to sew the ribbon onto the stool!! Mainly because my smallest upholstery needle was WAY too big for this job, and my thinner straight needless were too hard to use for this. My fingers were hurting so bad even the next day, like I understand what thimbles are for now, holy shit
Also. I did not have black sewing thread. So I ended up using yellow thread and then gently went over it with a black (waterproof) marker so the thread wouldn't be visible over the ribbon. (I didn't take photos of it so you'll just have to take my word for it)
So yeah. Shit took forever, I wish I had a hotglue gun but I don't, so it just had to be done the hard way. All things considdered though, it worked out alright, and the ribbon is nice and secure on the stool.
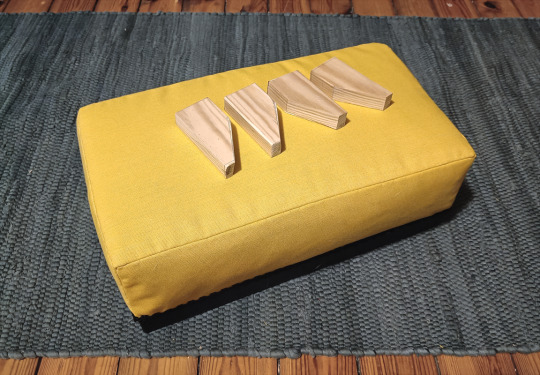
Now, you might've noticed that I haven't mentioned doing anything to the feet of the stool. That's because I haven't finished them.
It's the middle of winter. It's cold. I can't be bothered to go outside to stand the cold for hours to finish the feet of the stool. I need to shape them, I need to sand them, I need to make sure they're all the same lenght etc, all this before I can even prime and paint them and attach them to the frame. But since I can't access our patio, I can't use my orbital sander to speed things up. And I can't be bothered to do all that word by sanding the wood by hand. I am far too lazy for that man, nah
So I'm going to finish this project when the weather gets nicer and our patio isn't covered in a meter of snow.
I'll finish the feet of the footstool later.
So there will probably be a follow up to this post later
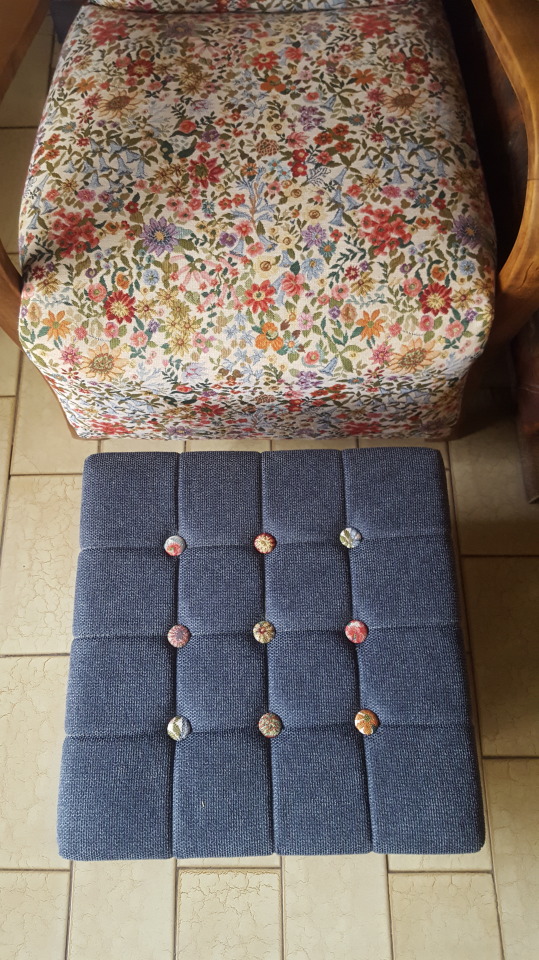
But yeah, here's my unideal, imperfect footstool, made almost entirely out of scrap materials.
It looks like ass, but hey I've never tried to build a piece of furniture before, give me a break, I'm a comic artist not a furniture maker
#Mine#Refinish Diary#DIY#Like I've had issues through out this project but all things considdered this has been quite enjoyable#Also yes my upholstery still looks like shit but. It's better than the chair okay#And hey the stool can now Match the chair not just in color and fabric but also the wrinkles!#You can't tell from the photos but the cushion I made is actually wonky like#One side of it is very straight while the other bulges out gently#But honestly the only way you'd notice is if you looked at it closely from a very specific angle#Which you'd normally never look at it from anyways#So it's fiiiine. But yeah I definitely understand why upholsterers tend to staple foam onto the wood directly#It would have made for a much cleaner end result. But hey I'm learning and that's the important part#'Cause I still have a fuck ton of foam left and fabric and other shit (but no wood) (Well. A little wood)#And I've been wanting to build my cat a tiny sofa for a long time now lmao#It'd be so fun#But I have a million other projects I should tackle first so that ain't happening any time soon
3 notes
·
View notes
Text
Corbin Custom Upholstery LLC

Auto upholsterer in Marysville WA
Address:
9113 State Ave suite B, Marysville, WA 98270
Telephone:
(425) 275-1912
Website:
https://www.corbincustomupholstery.com/
Email:
[email protected]
Located in Marysville, WA, Corbin Custom Upholstery LLC stands as a premier provider of specialized upholstery services, catering to a diverse range of vehicles and recreational crafts. With an unwavering commitment to quality and customer satisfaction, Corbin Custom Upholstery offers personalized solutions designed to meet the unique needs and preferences of each client. Whether you're looking to refurbish the interior of your boat, enhance the comfort of your RV, or restore the seats of your classic car, their team of skilled craftsmen is equipped to handle projects of all sizes and complexities.
Services: Boat Upholstery, Car and Truck Upholstery, Dirt Bike Upholstery, Hot Rod Upholstery, Motorcycle Upholstery, Rv Upholstery
1 note
·
View note
Text
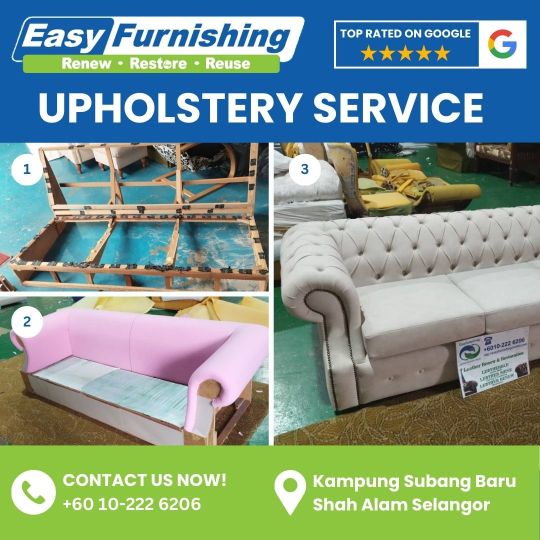
Turning dreams of luxury into reality! 💖 Our latest project: changing the design of a cushion sofa to a regal Chesterfield.
Your home deserves this treatment. Contact us for upholstery services.
https://wa.me/60102226206
#upholstery#upholsteryshop#upholsterer#upholsteredfurniture#sustainability#sustainable#sustainableliving#sustainablefuture#sustainabledevelopment#furniture#furnituremakeover#furniturerestoration#furnitureflip#furnishing#beforeandafter#restoration#transformation#chesterfield#luxury#luxuryliving#chesterfieldsofa#sofa
0 notes
Text

A properly working sleeper bed should be easy to use. Pull out, use it, and put it back in. Simple, unless yours is not functioning because of abuse or neglect. To restore a broken pullout sleeper with a new replacement sleeper mechanism is a relatively simple task: unscrew, pull the old unit out, and install the new unit. And you may want to consider replacing the old, limp mattress as well, because it's a good idea to get it firm again. Manufactured in the United States and supplied straight from our sleeper mechanism craftsmen, with a clear Lifetime Service Policy attached. We're excited to work with you to design a warm and inviting environment.
#sleep#putitback#diy#doityourself#pulloutbed#bedframe#sleeperbed#pulloutcouch#sleepersofa#sleeperbedmachanism#hospitality#life#useit#comfort#guests#upholstery#upholsterer#nowaste#environment#sxlife#pullout#PullOutBed#SofaBed#ConvertibleSofa#PullOutSofa#SofaSleeper#ConvertibleSleeper#SleeperCouch#PullOutSleeper#SofaBedSleeper
0 notes
Text
Qualified Upholsterer / Okleveles Kárpitos
View On WordPress
#armchair#art#certificate#design#door#florahartyandi#footrest#furniture#home#motorcycle#pouffe#qualified#rebuilt#recycling#school#upholsterer#upholstery
0 notes
Text
Website : https://www.starrynightny.com/
Address : 76 North Ave, New Rochelle, NY 10801
Phone : +1 929-357-9046
Starry Night New York is your one-stop shop for enhancing your vehicle's appearance and functionality. As an official Starlight Headliner Dealer, they specialize in transforming your car's interior into a mesmerizing starry sky. Their expertise extends to a wide range of automotive lighting and accessories, ensuring your vehicle stands out from the crowd.
Business mail : [email protected]


1 note
·
View note
Text
Inspiration for a formal, huge, concrete paver, full sun garden.

#custom upholsterered outdoor sofa#home dogwood bed end bench#concrete pavers#garden sculpture artwork#large outdoor sofa and sofa chairs
0 notes
Photo

New York Patio
Inspiration for a mid-sized modern courtyard concrete paver patio vertical garden remodel with no cover
#decor concrete pavers#stainless steel garden rod#natural stone floor tiles#custom outdoor textiles#outdoor table and chairs#custom upholsterered outdoor sofa
0 notes
Photo

New York Landscape
Ideas for a sizable formal concrete paver garden in the modern era that receives full sun.
#stainless steel garden rod#natural stone floor tiles#custom outdoor textiles#large outdoor sofa and sofa chairs#custom upholsterered outdoor sofa#decor concrete pavers#decorative side stands
0 notes
Photo

Landscape Concrete Pavers in New York
Design ideas for a large modern full sun concrete paver formal garden.
#custom upholsterered outdoor sofa#large outdoor sofa and sofa chairs#decorative exterior accents#garden sculpture artwork#custom outdoor textiles
1 note
·
View note
Photo
#upholstery #upholsterer #upholsteredfurniture #upholsteryfabric #upholsterycleaning #sofa #sofadesign #sofafabric #sofacleaning #sofacleaningservices #wdwesterndesignersfurnishings #westerndesign #customupholstery #wdfurnishings https://www.instagram.com/p/CoLy6dKL6lo/?igshid=NGJjMDIxMWI=
#upholstery#upholsterer#upholsteredfurniture#upholsteryfabric#upholsterycleaning#sofa#sofadesign#sofafabric#sofacleaning#sofacleaningservices#wdwesterndesignersfurnishings#westerndesign#customupholstery#wdfurnishings
0 notes
Last Seen Blogs

sokpuppet
Still a chicken

get-qrov
QROV

aipilosse
from dark beginnings to uncertain goals

briefgalaxytimetravel
Untitled

straightupedgy
Unbelievable