#userghouls tutorials
Explore tagged Tumblr posts
Visit Tumblr Blog
Explore Tumblr blogs with no restrictions, modern design and the best experience.
Last Seen Tumblr Blogs


Fun Fact
US Tumblr user growth rate is estimated to slow down to 4.1%.
Text

ANIMATED TEXT TUTORIAL: ★★✩✩✩ Difficulty: Beginner/Intermediate
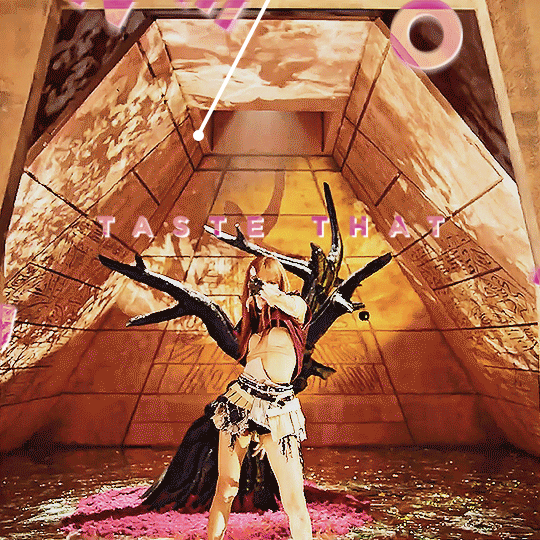
This is a step by step tutorial on how I did the text for my Pink Venom swinging text.
We are going to be making this text:
Before I start, you WILL need Adobe After Effects, but I will show you step by step how to achieve this.
Tutorial below the cut!
✔ Step One: Composition Open After Effects and create a new project, then a new composition making sure the composition matches your gif settings. (ex: 540 x 540, 2 seconds, 30 fps)


✔ Step Two: Creating Our Text Add a new text layer. It should be the same as Photoshop, you can just select the text tool and write what you want. Customize the text to say what you want and change the font and size to your liking.


We should have something like this:

✔ Step Three: Adding Our Animation There should be a box that says "Effects & Presets", in that box you can search for effects. Search for "Explosion". It will be under Text > Miscellaneous.

Select the first one and you can either drag it on top of your text layer or just double click it with your text layer selected. Sliding the time, we should have something that looks like this:

✔ Step Four: Adjusting the Animation With your text layer still selected, press "U" on your keyboard. This will open our key frames for the animation.

It's a lot to look at but don't worry, we will only be focused on Amount and Opacity, and I will make this as easy as possible for you. On the Opacity setting, click on the little time clock. This will remove the keyframes. Make sure your opacity is set to 100%.

Next we are going to adjust the amount so that it explodes INWARD instead of OUTWARD. Find a good spot where the letters are out and add a new keyframe the same way you would on Photoshop.
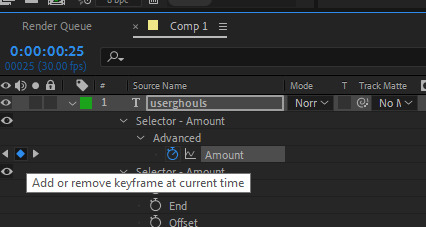
Now swap the two keyframes so the explosion animation is reversed. Next we are going to remove the scale keyframes. Click on the second stop watch for the second amount parameter, and make sure that one is set to zero.

We should be left with only ONE thing that is keyframed. And the keyframes should look like an hourglass.

You can stop now and leave it or we can make it a little smoother and more fun looking.
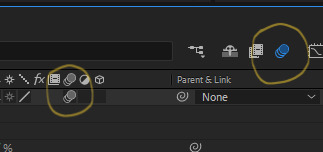
✔ Step Five: Editing the Graph & Adding Motion Blur To add a motion blur to our text, we just need to select the three little circle stack on our text layer. Also double check that the same symbol is highlighted blue up top.

Now we have motion blur. Next we are going to adjust the graph. To open the graph select the little graph icon and then select our keyframed buy clicking on the amount parameter.


Now our graph should look like this:
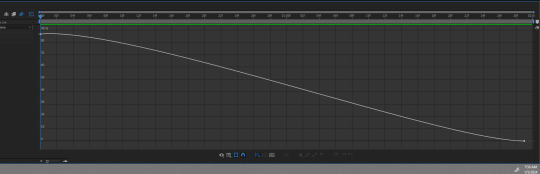
Select one of the dots and two little arms should pop up and we can drag those around to adjust the graph (the speed of our animation). Adjust to your liking, but to make it look like the text in the tutorial, my graph looks like this:
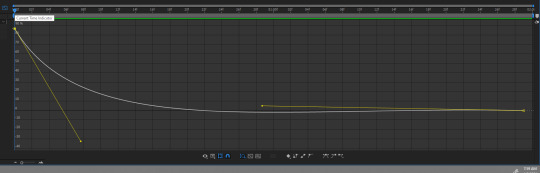
With my graph, the animation looks like this:

Now all the hard work is done!
✔ Step Six: Exporting Now to export our video so it can be turned into a gif: Go to File > Export > Add to Render Queue

We should be at a menu like this:
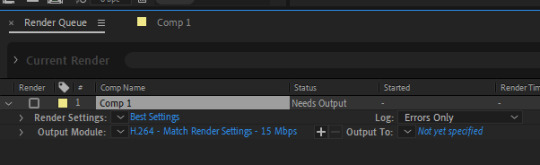
Click on the part that is blue next to "Output Module" and another box should pop up. For format: change to "Quicktime" For Video Output > Channels: select "RBG + Alpha" (this will ensure our background is transparent)
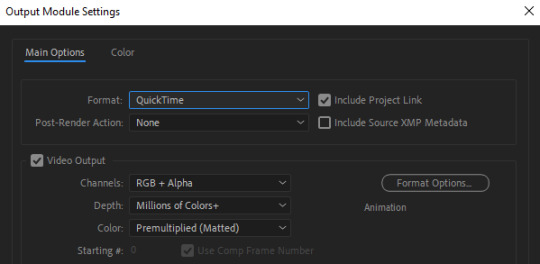
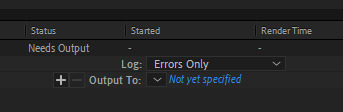
Select "OK" and then under "Output to" select where you want the video to save.
Now all you have to do is Render.
Once that finishes, YOU'RE ALL DONE!
Import video to frames as you usually would in Photoshop, just don't change the frame delay.
Treat it like a normal text layer/smart object.
As usual, you can play around with all the animation settings to get the look you want, this is just the basics for the main animation.
It looks like a lot but the difficulty is minor once you get the hang of the steps.
Any questions you have during the process just DM me! ★
159 notes
·
View notes
Note
Hi, again! I, Annon, am the one who asked about a tutorial for your GIF borders. I meant someting like this: /post/717445093384175616/nayeon-pop-studio-choom-lgbtqcreators I apologise for the miscommunication. Thank you taking the time to respond to my question, regardless of whether you decide to create a tutorial or not. Best wishes.
HI! I'd love to show how i make multiple types of borders!
I'll show you how to make the borders I used in both of these gifs:


It's super simple!
✔ Step One: Base gif make your gif the way you like with your coloring.

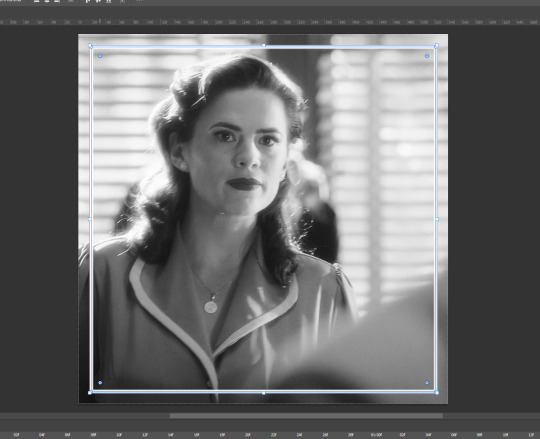
✔ Step Two: Making the border now just select the rectangular shape tool from your tool bar. since my gif is a square, i'm going to hold shift and drag to make the perfect square.


so now i just have a white square. this is where the settings come in:

i've changed the fill to blank and the stroke to a solid color. now i need to change the position.

making sure that the alignment is set to canvas, i'm going to center the square i made.
now this is the basic border, but if you want something extra, you can mess around with the settings.

here: i've added a dashed border, and 45 degree rounded edges.

you can play around with these as much as you want and add as many borders as you need to get the look you want. even change the blending style!!
HAVE FUN!
8 notes
·
View notes