#*resources
Explore tagged Tumblr posts
Visit Tumblr Blog
Explore Tumblr blogs with no restrictions, modern design and the best experience.
Last Seen Tumblr Blogs


Fun Fact
The most popular pages on Tumblr are about Minecraft, GIFs, and David J. Peterson.
Photo
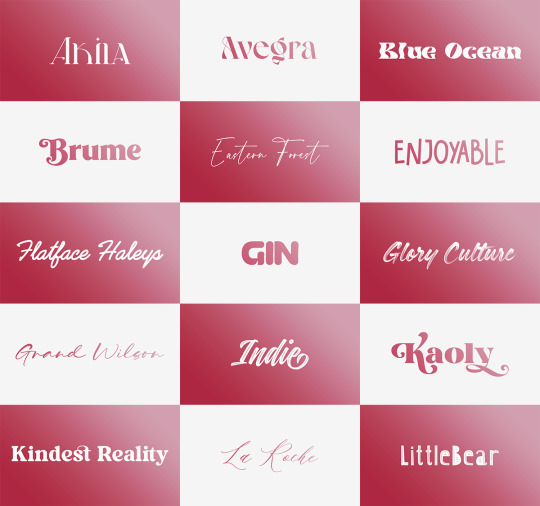


Font Pack 16 by liohnelmessi
Happy belated 2023! This is my long-delayed 16th font pack, which contains 30 high quality fonts that I have collected over the past calendar year. I hope you enjoy! {More fonts}
This pack contains 30 high quality fonts
Like / Reblog if you’re downloading
Download Links: {Dropbox} / {Mediafire}
#font#fonts#completeresources#resourcemarket#allresources#codingcabin#dearindies#tusermelissa#tuserheidi#usernik#folkloreresources#useryoshi#userrobin#userauden#tusercat#usercim#*#*resources
2K notes
·
View notes
Text
BBC GHOSTS S5 GDRIVE
Here is the link to my google drive, with Ghosts s5!
Only episodes 1 & 4 are up so far, but 2 is going up as we speak and then the rest will follow.
Feel free to share this around, but if you use it, a reblog would be much appreciated so that other people can also use this!
802 notes
·
View notes
Text
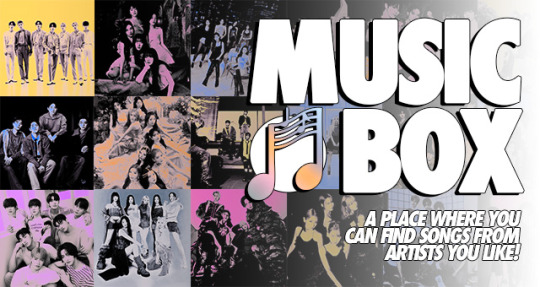
MUSIC BOX IS OPEN! this is a carrd that contains music from kpop groups that are mainly under the big 4 + starship and others that i can find! it also has concerts and mvs included as extra and it will be updated regularly once i find other drives for other groups that might be missing or when they have comebacks! hope you find it helpful ♡
#if there are wrong links or anything you want me to add feel free#to send me an ask or a dm about it!#other than that ENJOY <3#it took me a while to finish this but i think it came along well#you can share it around!!#big 4 boycott#hybe boycott#*posts#*resources
282 notes
·
View notes
Text
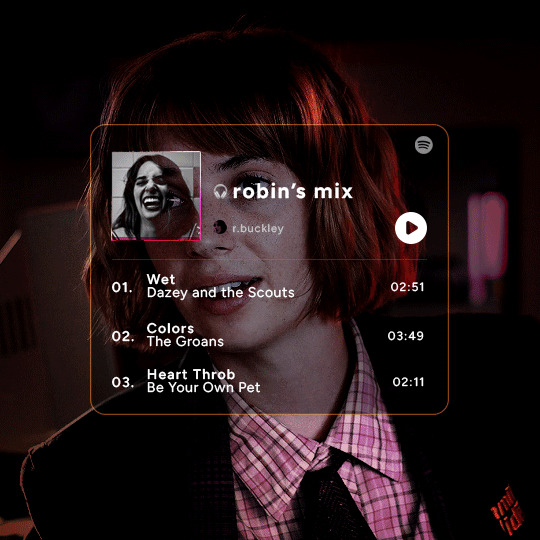
Playlist Template by @uservalerian
this is the template i used to create my robin playlist from this robin set. i've shared this with a few people, but i wanted to make it available for everyone that asked about it/was interested in using this template.
below is some basic info + download link.
the font used here is called figtree
all of the layers are labeled, some with basic info like blend modes
each song has it's own layer group
the headphones emoji is an image, not an emoji font
the playlist cover is 88px
the profile/user photo is 14px
i remade this template, so please let me know if anything is not working or gets confusing :)
all i ask is that you don’t claim as your own & you give proper credit if you end up using this template, as i made it myself.
the link to the template is here. [link update]
feel free to tag me in your edits! i would love to see them <3
#*#*resources#usersen#usermaguire#userallisyn#userkam#userridge#usernik#userraffa#alielook#tuserheidi#uservalentina#uservivaldi#userjesslynn
748 notes
·
View notes
Note
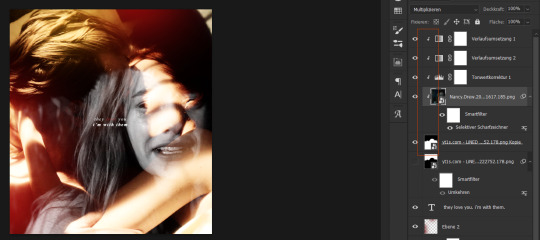
Please oh please share with us how you did the effect in your latest Nancy drew set, it is truly so gorgeous I cannot stop looking at it!
hi nonny, sorry this took a while. so you're looking for the effect from this post:
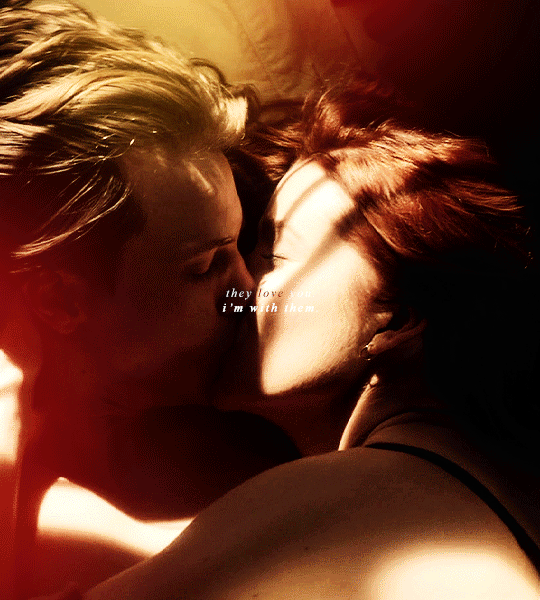
i made it fairly easy on myself for this one because i am lazy and impatient as hell, so hopefully this is a rather short tutorial.
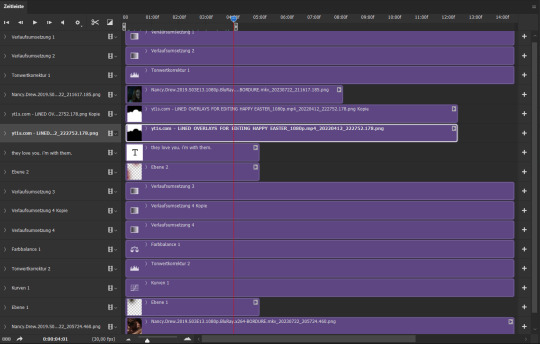
there's a neater and tidier way to do this that would require frames instead of timeline but for the effect i was aiming for, the slightly sloppier and faster way actually worked fine.
preparation: you'll need a gif with the overlay effect that you like and want to use. i'm giving you the one i used for all the gifs in this set (just slightly altered for each individual gif):

then, of course, you need two gifs — one that'll be your base gif (the coloured one in my example) and one that'll "bleed into" the other one (the black and white one here).
base gif: i just did my regular preparation and colouring, added some yellow and red brush strokes here and there to add some colour and that was it.
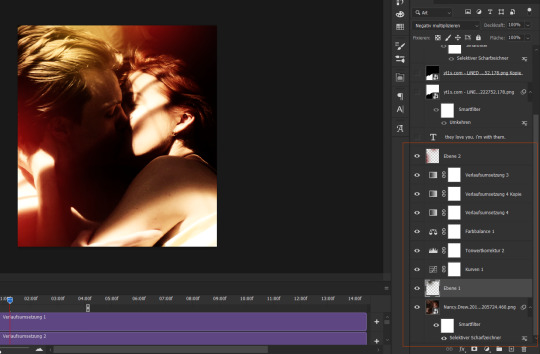
i also added some text at this point and i positioned it on top of my base gif but underneath the overlay layers (because i wanted the text to vanish with the overlay):
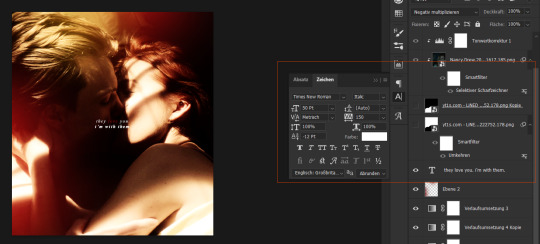
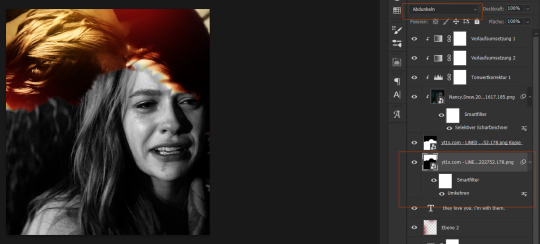
second gif: i did a quick and very basic black and white colouring for this one.
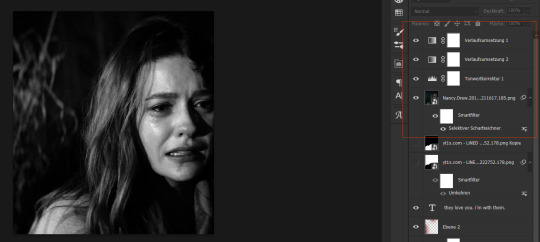
for the overlay effect to work properly, i set the blending mode of this gif to multiply.
overlay: now the fun part. i added my overlay effect gif and changed its size and position to my liking and so that the important parts of my base gif were visible long enough (aka the kiss).
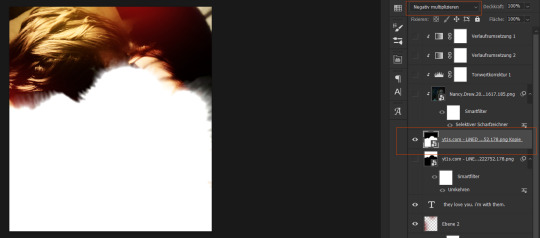
i set this layer to screen and clipped the b/w gif and the adjustment layers to it.
the thing is, as you can see, the overlay part is way too transparent to be efficient. you might get away with this if your base gif is dark enough but for the scene i wanted to use as a base it just didn't look right.
so i duplicated the overlay effect layer, dragged it underneath my original one, inverted it and set it to darken. et voilà, this worked wonders:
before saving, have a look at your timeline and whether everything lines up. you can change the starting point of your overlay effect (having it come in later or earlier) or your other gifs. whatever looks right to you and also fits into the size limitation.
and that's it. if something didn't make sense or you want to know anything else, just let me know. hope this helped, nonny. ♥️
280 notes
·
View notes
Text

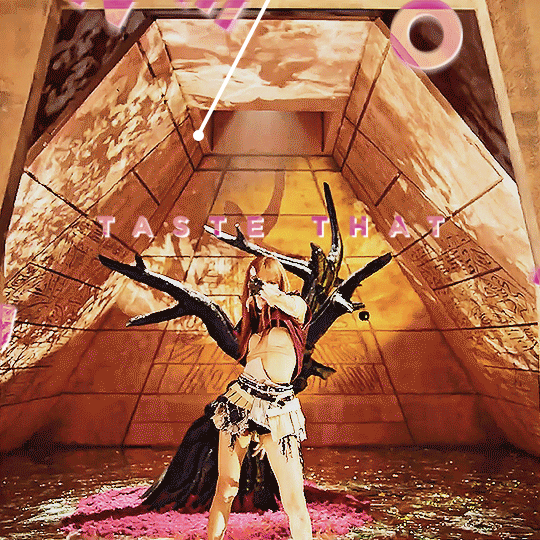
ANIMATED TEXT TUTORIAL: ★★✩✩✩ Difficulty: Beginner/Intermediate
This is a step by step tutorial on how I did the text for my Pink Venom swinging text.
We are going to be making this text:
Before I start, you WILL need Adobe After Effects, but I will show you step by step how to achieve this.
Tutorial below the cut!
✔ Step One: Composition Open After Effects and create a new project, then a new composition making sure the composition matches your gif settings. (ex: 540 x 540, 2 seconds, 30 fps)


✔ Step Two: Creating Our Text Add a new text layer. It should be the same as Photoshop, you can just select the text tool and write what you want. Customize the text to say what you want and change the font and size to your liking.


We should have something like this:

✔ Step Three: Adding Our Animation There should be a box that says "Effects & Presets", in that box you can search for effects. Search for "Explosion". It will be under Text > Miscellaneous.

Select the first one and you can either drag it on top of your text layer or just double click it with your text layer selected. Sliding the time, we should have something that looks like this:

✔ Step Four: Adjusting the Animation With your text layer still selected, press "U" on your keyboard. This will open our key frames for the animation.

It's a lot to look at but don't worry, we will only be focused on Amount and Opacity, and I will make this as easy as possible for you. On the Opacity setting, click on the little time clock. This will remove the keyframes. Make sure your opacity is set to 100%.

Next we are going to adjust the amount so that it explodes INWARD instead of OUTWARD. Find a good spot where the letters are out and add a new keyframe the same way you would on Photoshop.
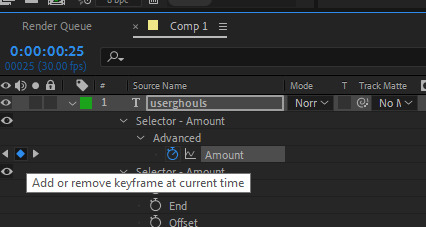
Now swap the two keyframes so the explosion animation is reversed. Next we are going to remove the scale keyframes. Click on the second stop watch for the second amount parameter, and make sure that one is set to zero.

We should be left with only ONE thing that is keyframed. And the keyframes should look like an hourglass.

You can stop now and leave it or we can make it a little smoother and more fun looking.
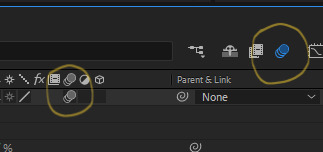
✔ Step Five: Editing the Graph & Adding Motion Blur To add a motion blur to our text, we just need to select the three little circle stack on our text layer. Also double check that the same symbol is highlighted blue up top.

Now we have motion blur. Next we are going to adjust the graph. To open the graph select the little graph icon and then select our keyframed buy clicking on the amount parameter.


Now our graph should look like this:
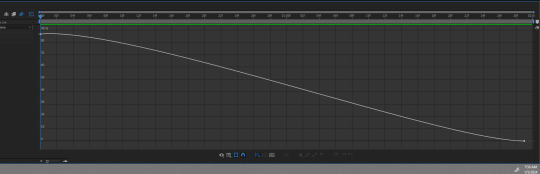
Select one of the dots and two little arms should pop up and we can drag those around to adjust the graph (the speed of our animation). Adjust to your liking, but to make it look like the text in the tutorial, my graph looks like this:
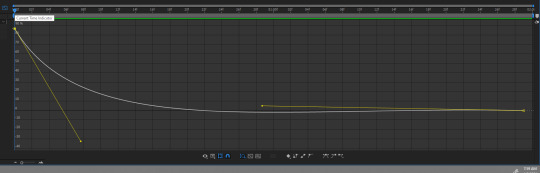
With my graph, the animation looks like this:

Now all the hard work is done!
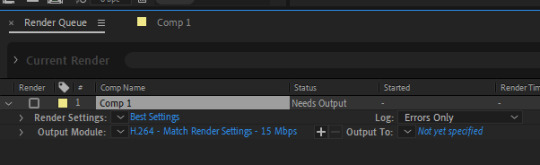
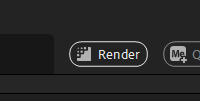
✔ Step Six: Exporting Now to export our video so it can be turned into a gif: Go to File > Export > Add to Render Queue

We should be at a menu like this:
Click on the part that is blue next to "Output Module" and another box should pop up. For format: change to "Quicktime" For Video Output > Channels: select "RBG + Alpha" (this will ensure our background is transparent)
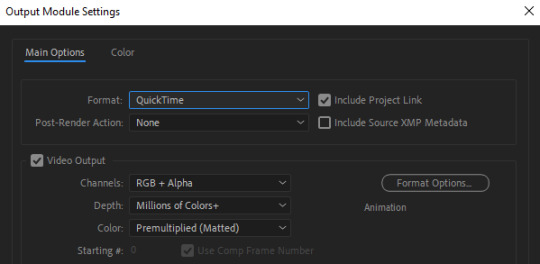
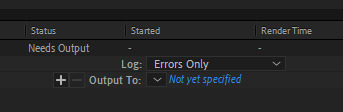
Select "OK" and then under "Output to" select where you want the video to save.
Now all you have to do is Render.
Once that finishes, YOU'RE ALL DONE!
Import video to frames as you usually would in Photoshop, just don't change the frame delay.
Treat it like a normal text layer/smart object.
As usual, you can play around with all the animation settings to get the look you want, this is just the basics for the main animation.
It looks like a lot but the difficulty is minor once you get the hang of the steps.
Any questions you have during the process just DM me! ★
155 notes
·
View notes
Note
how did you make the gif into that shape?
https://www.tumblr.com/bylrndgm/715951263258411008/i-wanna-be-more-than-a-friend-more-than-a?source=share
Hey anon, thank you very much for the ask. 💞 It's a very simple and quick technique, all you need for this tutorial is a basic photoshop knowledge.
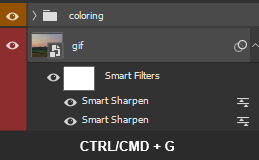
1: Make your gif as you always do
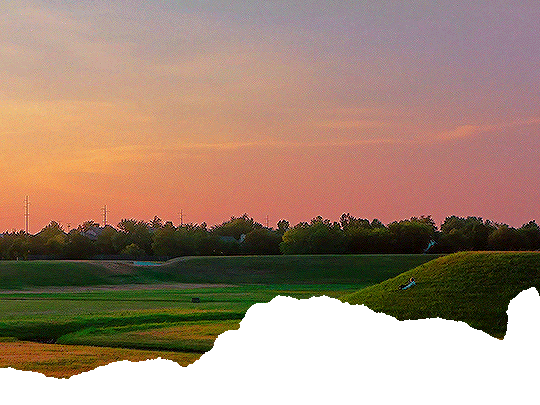
Make the gif, sharpen it, color it. (I'll be using a random scene as well as some basic coloring for this tutorial)

Once you have your finished product group all the layers (select all the layers and use the shortcut CTRL/CMD + G).
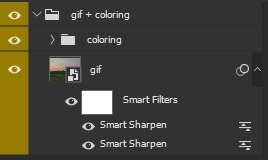
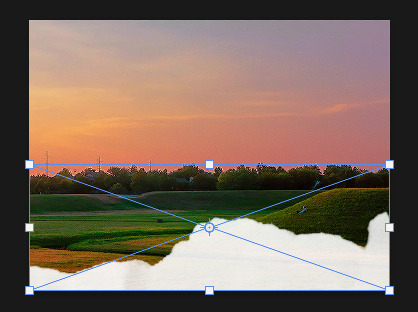
2: Find the shape
In that gifset I had used a ripped paper shape - but follow the same exact steps for every shape tou want! Tip: png shapes are easier to use, so try to find one that has a transparent background :)
Once you find your shape, place it over your gif and play with it until you like the result.
3: Sharpen the shape
I never skip this step because it allows you to hape "crisp" shapes.
Click on the png layer -> right click -> Convert to Smart Object
Go to Filter -> Sharpen -> Sharpen (repeat if necessary!)
4: Masking
Now, while holding your CTRL/CMD button, click on the shape layer's thumbnail
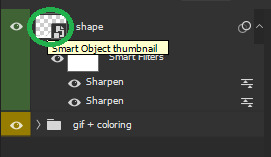
And the border of your shape should be all dashed, like this:

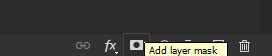
Now click on the group we made on step #1 (the yellow one) and on your Layers tab, click on Add Layer Mask:
Next to the group a new thingy should pop up (it's B&W). Select it by clicking on it and press CTRL/CMD+I to invert the mask (the black should become white and viceversa).

Now you can either delete the shape layer or make it invisible by clicking on the little eye on the left

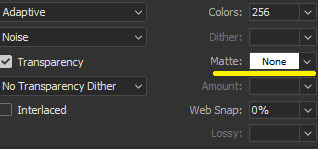
5: Saving
Choose your usual settings, but remeber to change the Matte option to None.
And... you're done!
You can do this with any shape or even text!

Hope it was useful <3 Have a nice day!
47 notes
·
View notes
Text


hi friends! i am so excited to share that i've reached 2k on this blog <3 there's a lot that i can say but truthfully my gratitude cannot be adequately put into words. what i will say is that i appreciate every last one of you; friends, mutuals, and followers and that you mean the world to me. thank you for always loving the silly little moving pictures i make lol <3 to show my appreciation i've decided to share some resources for dl; included are my sharpening actions, over 300 fonts and approximately 100 textures. download links under the cut! ♡
01 ✦ SHARPENING
sharpening action one: download link sharpening action two: download link

02 ✦ FONTS
download link preview of some of the fonts:

03 ✦ TEXTURES
download link texture preview:

also, obligatory shoutout to my follow forever <33 i won't bore you guys with a speech this time but i love and appreciate you very much. @karakorums @vampirebaeks @soonhoonsol @aceofvernons @jeonsupershy @jeonwon-wonwoo @vvstual @zombleeknow @facethesuns @bandzboy @wonboos @fairyhaos @kimsmingyu @woozification @ashmp3 @ajusnice @vcrnons @ishikawayukis @ikjun @renjunniez @wonwooridul @scouped and any, many more !! thank you for making this site a little less like hell and a little more like my second home. all my love ♡
*i do not claim credit for any fonts or textures, they're just things that i have accumulated!
29 notes
·
View notes
Text
resource list | updated march 22nd
this is egregiously long i'm sorry, i tried to keep it to the things i use the most 😭
reshade 5.9.?
vhs
tawhay
pluto
raices
cas
default skin
default eyes / facepaint eyes 1 / facepaint eyes 2
chubby cheeks / decades 1 & 2 / eyelides / facelights & pores by faaeish
cas tuning controlled position
kijiko lashes / dreamgirl lashes / all miiko lashes / all lashes by mmsims / obscurus lashes / obscurus lashes 2 / twistedcat lashes
stand still in cas
more traits
traits 1 / traits 2
more columns
no ea eyelashes
cas background
cas lighting v2
default feet
ring overrides 1 / 2 / 3
most maxis mix skin details by thisisthem / ddarkstonee / obscurus and sims3melancholic
cas unlocks
face and body details/overlays by miiko
nesurii little details
lip masks
face blush
all teeth by yooniesim
build buy
t.o.o.l
betterbuildbuy
gizmo overrides
paris world mod
san sequoia bridge override
hidden highlight
sunblind
cupcake machine replacement
out of the dark
no fade everything
misc
mccc
ground and terrain overrides
game font override (april)
loading screen
almost all of littlemssams mods
grannies cookbook
tianas recipes / grimoire
ui cheats
clickable worlds
invisible infant mat
thick apartment walls
headphones replacement
cellphone replacement
baby carrier overrides
couple selfie poses overrides
no zzz
no ask for advice
no sad holiday moodlet
no bike helmet
painting overrides
tram override
zodiac signs
20 sims cap remover
home regions
passionate gifts
kiss n grind
ghastly ghosts
preferences plus
many of kiarasims mods
realistic pregnancy overhaul
realistic childbirth
first impressions
all vampire mods
meaningful stories
many mods by sims4me
plantsim lives
talents & weaknesses
cute romance
remove sims from conversations
most of zerbus mods
most of adeepindigos mods
#*resources#im so sorry it took me this long to redo this!#i dont want to make this even longer afsasfdjal so i didnt list my presets poses and sliders#but if anyone wants to know i can make a separate post for those!#is this too long?? 😂 i didnt know what to include and what not too#i have so many i could make a whole other post
58 notes
·
View notes
Text
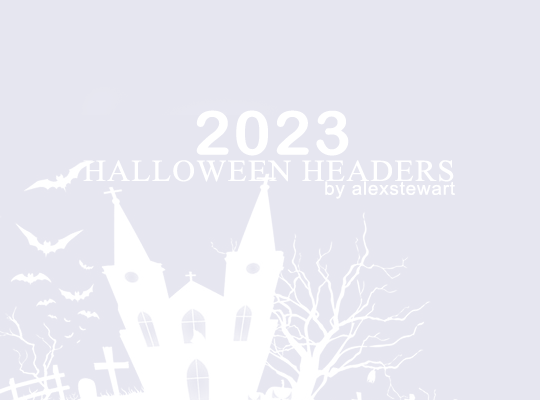
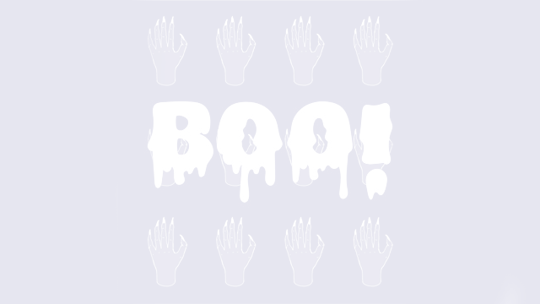
Hey guys, with Halloween coming soon I thought I'd make some pale headers for y'all. Please, don't forget to like or reblog if you download. I've spent a lot of time on them and it would be greatly appreciated! Hope you'll like them. Have fun and let's the spooky festivities begin.
You'll find the headers under the cut.


#Header#Headers#Halloween#Halloweenedit#Halloween Header#Halloween Headers#Completeresources#Chaoticresources#*headers#*resources#*
71 notes
·
View notes
Text

15 HQ textures
please do not steal/claim as your own or repost
a like or reblog is appreciated if you download or use them
download/view → (box)
#textures#texture pack#completeresources#chaoticresources#dailyresources#*textures#*resources#*thingamabobs
68 notes
·
View notes
Text
i've put a good girl's guide to murder on my gdrive in case you can't watch it on iplayer. if you can, please do and support the show! but if you can't or you want to make gifs/edits, here you go.
link here.
#i got so caught up in the insanity i forgot to share it on here oops#*resources#resources#mat baynton#mathew baynton#a good girl's guide to murder#agggtm#agggtmedit#just tagging things that might help the community find this
66 notes
·
View notes
Photo

a little while ago, i was asked when i would make another gifpack, aaaaaand here it is!!! this is the classic gifpack please like or reblog if you’re downloading ♥ this pack contains:
45 gifs in .psd format
268 x 268 px (unsharpened)
download here
#allresources#completeresources#paleresource#itsphotoshop#yeahps#palesource#paleedit#paletmblr#palenet#palemakers#mysticalpale#gifmakersource#gif pack#gifpack#*resources#resources
116 notes
·
View notes
Text

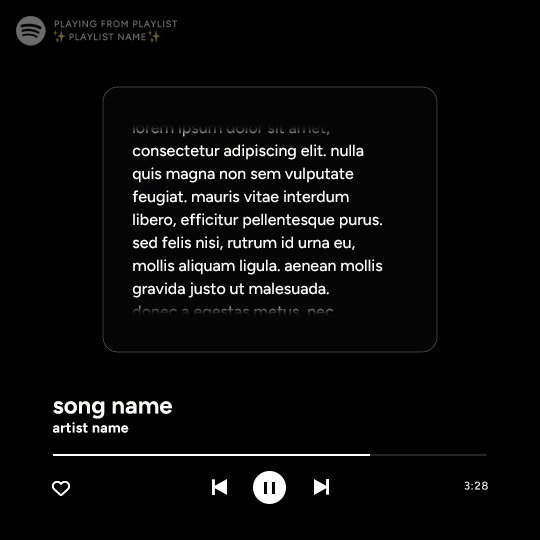
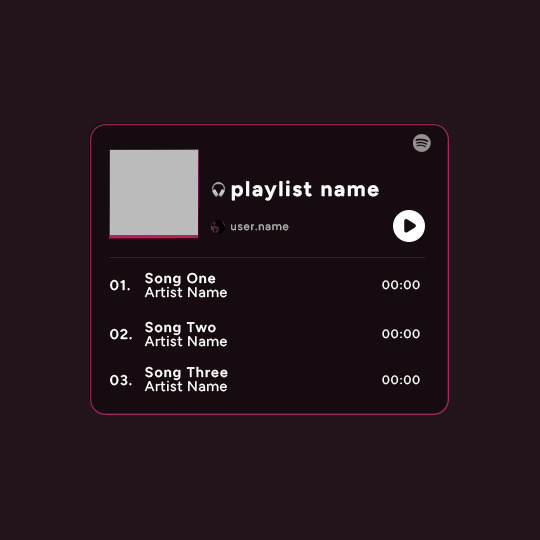
Spotify Template by @seaoftr
Hello! I received a few messages asking me to share the template that i made for my cal kestis playlist set, so I thought it was time to make a post for it!
Below is some basic info + download link.
the font used here is called figtree from google fonts
the layers are all labeled, some with basic info that tells you what to edit/adjust
the play/pause button layer-group uses a layer mask, but the pause button rectangles are included as well in case you run into any issues.
i made this template myself, so all i ask is that you don't claim as your own & you give proper credit if you end up using it!
the link to download the template is here. [link update]
feel free to tag me in your edits! i would love to see them <3
#usermaguire#userkam#usersen#usernik#useral#userriel#userabs#tuserheidi#userfern#alielook#userkosmos#usershreyu#userelio#userjanice#userbess#userlockescoles#useralison#uservivaldi#*#*resources
1K notes
·
View notes