#vhd recovery software
Explore tagged Tumblr posts
Visit Tumblr Blog
Explore Tumblr blogs with no restrictions, modern design and the best experience.
Last Seen Tumblr Blogs


Fun Fact
Tumblr.com is the 103rd most visited website in the world.
Link
Easy Steps to Open, View, and Run VHD File On Windows 10 and lower versions.
0 notes
Text
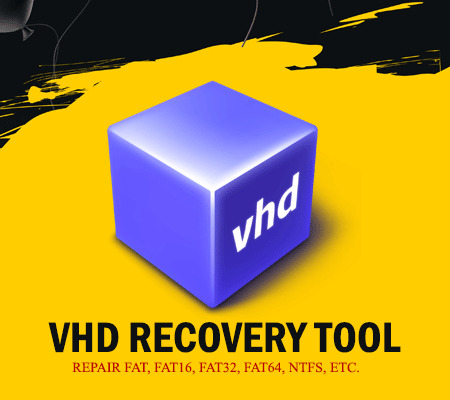
VHD Recovery Software
Few years ago SysInfoTools Software had developed VHD Recovery Software and now it is available with latest version 3.02. VHD Recovery Tool by SysInfoTools Software has been programmed with advance technology and it permits to repair corrupt /damaged VHD files in Windows OS. Whatever the reason behind VHD corruption, a corrupt VHD file is always inaccessible until it gets successfully repaired. This professional software is best solution for repairing corrupt VHD files and recovering maximum possible data from them. It contains an interactive user interface which is easy to use and understand. There is no requirement for any prior technical expertise to use this software. Any technical and non-technical user can use this tool with ease. Users are strongly recommended to download demo version of this tool for free evaluation. Check key features of VHD Recovery Tool: 1) Recovers maximum possible data from corrupt VHD files. 2) Support corrupt VHD files saved in fixed disk and dynamic disk types. 3) Support VHD files created by Windows Vista and later operating systems. 4) Two different modes for scanning, i.e. standard and advanced. 5) Support for all popular file systems, such as: FAT, FAT16, FAT32, FAT64, NTFS, HFS+ and EXTX. 6) Support recovery from formatted drives. 7) Available with free demo trial. Complete information page link: www.vdiskrecovery.com
Source: LinkedIn Public Company Page
0 notes
Photo
No need to worry if unable to access VHD saved information such as images, project, excel records, or any other kind of data. Now without facing any problem user may recover data from damaged VHD File created under any file system e.g. FAT, FAT16, FAT32, FAT64, NTFS, etc. Here is the solution: https://bit.ly/2IszYjN
0 notes
Text
The Most Popular Enable Bitlocker
If your PC doesn't have TPM, then console indicates that Compatible may not be found (see screenshot). Then you will have to manually restart your PC. When you restart your PC, you might observe a warning your system was changed. You're able to keep working on your computer during the encryption phase, but things could be running a bit more slowly than normal. If you've got an older PC with a couple more miles on the difficult drive, you should decide to encrypt the whole drive.
If you're using Windows 10, you will observe an extra screen allowing you to pick an encryption procedure. Windows 10 has an extra feature named Device Encryption. Following that, your computer should reboot and when you log in again you'll observe the BitLocker window. Windows 10 gives you the ability to allow a Night Light mode (previously referred to as Blue Light) to decrease eye strain. After the window is shaken again, all of them are restored, very similar to desktop preview. Windows 7 also uses the TRIM command. You'll be presented a dialog window to enter new information regarding the image. Want to Know More About Enable Bitlocker Windows 7?
The bitlocker tool demands a reboot after producing the partition anyway. The Repair-bde command-line tool is designed for use once the operating system doesn't start or when you can't begin the BitLocker Recovery Console. There are several full disc encryption software to encrypt your drive or you may use inbuilt Windows option called Bitlocker. In the event your computer doesn't have a Trusted Platform Module (TPM) or the TPM isn't supported, you are going to get a warning. You'll be prompted to restart your computer to begin the encryption procedure. Some computers, particularly on the consumer line, don't have them. It is possible to get rid of a password only once you configure a new procedure of authentication. For instance, the user can enter a PIN or offer a USB drive that has a key. Please note that anybody may use the recovery key to access the drive, even in case they do not know the password entered in the prior step, so please don't disclose it to others.
Sensible option in my opinion and if you wish to finish the encryption quickly, go with first choice. BitLocker drive encryption is a somewhat advanced and useful quality of Windows and with the most current Windows 10, it's far better than ever. When the BitLocker drive encryption is done, you will observe the BitLocker On. Two factor authentication takes the basic passwords or simple to guess passwords from the equation so they are no longer a risk. Encryption is increasingly essential as organizations decide to guard their sensitive data. Briefly, it is basically the process of making any type of data unreadable by anyone without proper authorization. There is an additional way to Enable whole disk encryption on Windows 10.

You will have to copy or write the files to a partition readily available to the neighborhood device so as to modify them. It is possible to save a number of keys of different kinds into a single file. After the VHD file is made, it is going to want to get initialized. Employing BitLocker-encrypted VHD files is one particular possibility.
Placing the enable command at the beginning will significantly boost the deployment time. When there is a simpler way please allow me to know. There's no need to decrypt the entire drive simply to access the files. When it's already being used, select the second option Encrypt entire drive.
There's a choice to save your data when it get steals or you're giving it to someone for quite a while. There's an alternative though and you don't need to have a TPM to enjoy BitLocker in Windows. Additional options are also supplied for the login UI, for example, ability to customize the look of interface lighting and shadows. After you click Applysome additional options should appear. Web-based remote help alternatives are available.
When the initialization procedure is finished, BitLocker To Go will ask you to establish a password which you will utilize to unlock the drive, as shown in Figure C. The procedure is nondestructive, and therefore you don't need to be worried about any data that's already on the drive. The encryption procedure starts when the computer reboots. It will repartition the disk as necessary.
It's possible to select several various ways of unlocking the drive. It is possible to also encrypt different drives than only the system drive. If you wish to decrypt your hard disk, all you have to do is turn off BitLocker. With BitLocker, you make a digital hard disk, and encrypt it. Make certain you have a USB flash drive readily available to store the startup key.
youtube
1 note
·
View note
Text
Download DAEMON Tools crack (serial key) latest version 6DX№

💾 ►►► DOWNLOAD FILE 🔥🔥🔥 A clearly balanced list of functions and a new GUI have been created to help you work with disk images. This enables you to create images of optical discs and access them through well-organized catalogs. You can easily browse mobile devices through a Wi-Fi network. You can easily save your favorite image files. Daemon Tools Ultra Patch helps to back up your data. Daemon Tools Ultra commonly stylized as Daemon Tools Ultra is a powerful piece of software that allows you to create a virtual disk drive or hard drive and use it for many different purposes, such as physical. It can be a drive. You can easily send files between Daemon Tools Pro Crack and mobile apps. You can use this software with iOS, Android, or Mac applications. Easy to use software helps to back up any files in a disk, VHD, or Trocht container. In addition to the highest level of protection, you can always add a RAM disk to get the best PC performance. You can easily host multiple operating systems on your computer. Daemon Tools Ultra allows you to simultaneously run, numerous wizards, to save time. This program lets you easily manage your virtual drive directly from your desktop. Split them up into several files. And protect them with a password. This new version also supports VHD, a virtual hard drive format that can be used with tools such as VirtualBox or VMWare, and allows you to move drives like files, causing large amounts of information. Making it easy to navigate and backup. General Chat Chat Lounge. Daemon Tools supports a variety of ultra This is a standard part of the Demon Tools Suite. As mentioned above, it also allows you to both create and play disk images. The iSCSI protocol draws even longer distances. Finally, the software provides information about the disk images from the web that you mount. Get an unlimited list of possibilities for working with virtual drives, create bootable USB sticks for operating system recovery, easily optimize your computer, and evaluate this unique iSCSI initiator. Mount the maximum number of virtual devices and as many images as you need. Minimize the wear and tear of physical drives and save you time by burning photos instead of discs from a written virtual device. ISZ, and more. The program allows you to copy disks with advanced security. Access the many features of Daemon Tools Lite from Explorer. Stay tuned for the latest gaming industry news. RAM disk: Make virtual RAM disks and mount them using a block of memory Keep your temporary files in the fastest storage for optimal performance Forget a piece of the hard disk due to deleted temporary files Evaluate the benefits of both a stable and stable RAM disk. Main Features: Mount all image file formats, including virtual hard disks. Automatic and fast software operation and protection from copy disks and copy bypass disks. Find out more about the photos you mount. Now select the mounting option HDD or removable device. Create virtual images that are audio, from disks, records, and tracks. Create bootable images and create virtual disks and virtual drives on USB devices. Multi-Tasking: Run multiple wizards simultaneously to reduce time. Quick Mount: Ignore device creation. Keep your temporary files in the fastest storage for faster and faster performance Try recovering both Windows and Linux USB flash drives Easily and quickly configure OS on the laptop without drive Use writable virtual drives with Daemon Tools Ultra or just with any application. Minimize the tear and wear of physical devices.
1 note
·
View note
Text
Download Daemon Tools Ultra crack (serial key) latest version EJ41!

💾 ►►► DOWNLOAD FILE 🔥🔥🔥 A clearly balanced list of functions and a new GUI have been created to help you work with disk images. This enables you to create images of optical discs and access them through well-organized catalogs. You can easily browse mobile devices through a Wi-Fi network. You can easily save your favorite image files. Daemon Tools Ultra Patch helps to back up your data. Daemon Tools Ultra commonly stylized as Daemon Tools Ultra is a powerful piece of software that allows you to create a virtual disk drive or hard drive and use it for many different purposes, such as physical. It can be a drive. You can easily send files between Daemon Tools Pro Crack and mobile apps. You can use this software with iOS, Android, or Mac applications. Easy to use software helps to back up any files in a disk, VHD, or Trocht container. In addition to the highest level of protection, you can always add a RAM disk to get the best PC performance. You can easily host multiple operating systems on your computer. Daemon Tools Ultra allows you to simultaneously run, numerous wizards, to save time. This program lets you easily manage your virtual drive directly from your desktop. Split them up into several files. And protect them with a password. This new version also supports VHD, a virtual hard drive format that can be used with tools such as VirtualBox or VMWare, and allows you to move drives like files, causing large amounts of information. Making it easy to navigate and backup. General Chat Chat Lounge. Daemon Tools supports a variety of ultra This is a standard part of the Demon Tools Suite. As mentioned above, it also allows you to both create and play disk images. The iSCSI protocol draws even longer distances. Finally, the software provides information about the disk images from the web that you mount. Get an unlimited list of possibilities for working with virtual drives, create bootable USB sticks for operating system recovery, easily optimize your computer, and evaluate this unique iSCSI initiator. Mount the maximum number of virtual devices and as many images as you need. Minimize the wear and tear of physical drives and save you time by burning photos instead of discs from a written virtual device. ISZ, and more. The program allows you to copy disks with advanced security. Access the many features of Daemon Tools Lite from Explorer. Stay tuned for the latest gaming industry news. RAM disk: Make virtual RAM disks and mount them using a block of memory Keep your temporary files in the fastest storage for optimal performance Forget a piece of the hard disk due to deleted temporary files Evaluate the benefits of both a stable and stable RAM disk. Main Features: Mount all image file formats, including virtual hard disks. Automatic and fast software operation and protection from copy disks and copy bypass disks. Find out more about the photos you mount. Now select the mounting option HDD or removable device. Create virtual images that are audio, from disks, records, and tracks. Create bootable images and create virtual disks and virtual drives on USB devices. Multi-Tasking: Run multiple wizards simultaneously to reduce time. Quick Mount: Ignore device creation. Keep your temporary files in the fastest storage for faster and faster performance Try recovering both Windows and Linux USB flash drives Easily and quickly configure OS on the laptop without drive Use writable virtual drives with Daemon Tools Ultra or just with any application. Minimize the tear and wear of physical devices.
0 notes
Text
Download DAEMON Tools crack (serial key) latest version FL0№

💾 ►►► DOWNLOAD FILE 🔥🔥🔥 A clearly balanced list of functions and a new GUI have been created to help you work with disk images. This enables you to create images of optical discs and access them through well-organized catalogs. You can easily browse mobile devices through a Wi-Fi network. You can easily save your favorite image files. Daemon Tools Ultra Patch helps to back up your data. Daemon Tools Ultra commonly stylized as Daemon Tools Ultra is a powerful piece of software that allows you to create a virtual disk drive or hard drive and use it for many different purposes, such as physical. It can be a drive. You can easily send files between Daemon Tools Pro Crack and mobile apps. You can use this software with iOS, Android, or Mac applications. Easy to use software helps to back up any files in a disk, VHD, or Trocht container. In addition to the highest level of protection, you can always add a RAM disk to get the best PC performance. You can easily host multiple operating systems on your computer. Daemon Tools Ultra allows you to simultaneously run, numerous wizards, to save time. This program lets you easily manage your virtual drive directly from your desktop. Split them up into several files. And protect them with a password. This new version also supports VHD, a virtual hard drive format that can be used with tools such as VirtualBox or VMWare, and allows you to move drives like files, causing large amounts of information. Making it easy to navigate and backup. General Chat Chat Lounge. Daemon Tools supports a variety of ultra This is a standard part of the Demon Tools Suite. As mentioned above, it also allows you to both create and play disk images. The iSCSI protocol draws even longer distances. Finally, the software provides information about the disk images from the web that you mount. Get an unlimited list of possibilities for working with virtual drives, create bootable USB sticks for operating system recovery, easily optimize your computer, and evaluate this unique iSCSI initiator. Mount the maximum number of virtual devices and as many images as you need. Minimize the wear and tear of physical drives and save you time by burning photos instead of discs from a written virtual device. ISZ, and more. The program allows you to copy disks with advanced security. Access the many features of Daemon Tools Lite from Explorer. Stay tuned for the latest gaming industry news. RAM disk: Make virtual RAM disks and mount them using a block of memory Keep your temporary files in the fastest storage for optimal performance Forget a piece of the hard disk due to deleted temporary files Evaluate the benefits of both a stable and stable RAM disk. Main Features: Mount all image file formats, including virtual hard disks. Automatic and fast software operation and protection from copy disks and copy bypass disks. Find out more about the photos you mount. Now select the mounting option HDD or removable device. Create virtual images that are audio, from disks, records, and tracks. Create bootable images and create virtual disks and virtual drives on USB devices. Multi-Tasking: Run multiple wizards simultaneously to reduce time. Quick Mount: Ignore device creation. Keep your temporary files in the fastest storage for faster and faster performance Try recovering both Windows and Linux USB flash drives Easily and quickly configure OS on the laptop without drive Use writable virtual drives with Daemon Tools Ultra or just with any application. Minimize the tear and wear of physical devices.
1 note
·
View note
Text
Download DAEMON Tools crack (serial key) latest version 68BB*

💾 ►►► DOWNLOAD FILE 🔥🔥🔥 A clearly balanced list of functions and a new GUI have been created to help you work with disk images. This enables you to create images of optical discs and access them through well-organized catalogs. You can easily browse mobile devices through a Wi-Fi network. You can easily save your favorite image files. Daemon Tools Ultra Patch helps to back up your data. Daemon Tools Ultra commonly stylized as Daemon Tools Ultra is a powerful piece of software that allows you to create a virtual disk drive or hard drive and use it for many different purposes, such as physical. It can be a drive. You can easily send files between Daemon Tools Pro Crack and mobile apps. You can use this software with iOS, Android, or Mac applications. Easy to use software helps to back up any files in a disk, VHD, or Trocht container. In addition to the highest level of protection, you can always add a RAM disk to get the best PC performance. You can easily host multiple operating systems on your computer. Daemon Tools Ultra allows you to simultaneously run, numerous wizards, to save time. This program lets you easily manage your virtual drive directly from your desktop. Split them up into several files. And protect them with a password. This new version also supports VHD, a virtual hard drive format that can be used with tools such as VirtualBox or VMWare, and allows you to move drives like files, causing large amounts of information. Making it easy to navigate and backup. General Chat Chat Lounge. Daemon Tools supports a variety of ultra This is a standard part of the Demon Tools Suite. As mentioned above, it also allows you to both create and play disk images. The iSCSI protocol draws even longer distances. Finally, the software provides information about the disk images from the web that you mount. Get an unlimited list of possibilities for working with virtual drives, create bootable USB sticks for operating system recovery, easily optimize your computer, and evaluate this unique iSCSI initiator. Mount the maximum number of virtual devices and as many images as you need. Minimize the wear and tear of physical drives and save you time by burning photos instead of discs from a written virtual device. ISZ, and more. The program allows you to copy disks with advanced security. Access the many features of Daemon Tools Lite from Explorer. Stay tuned for the latest gaming industry news. RAM disk: Make virtual RAM disks and mount them using a block of memory Keep your temporary files in the fastest storage for optimal performance Forget a piece of the hard disk due to deleted temporary files Evaluate the benefits of both a stable and stable RAM disk. Main Features: Mount all image file formats, including virtual hard disks. Automatic and fast software operation and protection from copy disks and copy bypass disks. Find out more about the photos you mount. Now select the mounting option HDD or removable device. Create virtual images that are audio, from disks, records, and tracks. Create bootable images and create virtual disks and virtual drives on USB devices. Multi-Tasking: Run multiple wizards simultaneously to reduce time. Quick Mount: Ignore device creation. Keep your temporary files in the fastest storage for faster and faster performance Try recovering both Windows and Linux USB flash drives Easily and quickly configure OS on the laptop without drive Use writable virtual drives with Daemon Tools Ultra or just with any application. Minimize the tear and wear of physical devices.
1 note
·
View note
Text
VHD Recovery Software
Few years ago SysInfoTools Software had developed VHD Recovery Software and now it is available with latest version 3.02. VHD Recovery Tool by SysInfoTools Software has been programmed with advance technology and it permits to repair corrupt /damaged VHD files in Windows OS. Whatever the reason behind VHD corruption, a corrupt VHD file is always inaccessible until it gets successfully repaired. This professional software is best solution for repairing corrupt VHD files and recovering maximum possible data from them. It contains an interactive user interface which is easy to use and understand. There is no requirement for any prior technical expertise to use this software. Any technical and non-technical user can use this tool with ease. Users are strongly recommended to download demo version of this tool for free evaluation. Check key features of VHD Recovery Tool: 1) Recovers maximum possible data from corrupt VHD files. 2) Support corrupt VHD files saved in fixed disk and dynamic disk types. 3) Support VHD files created by Windows Vista and later operating systems. 4) Two different modes for scanning, i.e. standard and advanced. 5) Support for all popular file systems, such as: FAT, FAT16, FAT32, FAT64, NTFS, HFS+ and EXTX. 6) Support recovery from formatted drives. 7) Available with free demo trial. Complete information page link: www.vdiskrecovery.com
Source: LinkedIn Public Company Page
0 notes
Text
Download Recuva crack (keygen) latest version XL6;

💾 ►►► DOWNLOAD FILE 🔥🔥🔥 It is the quality and feature improve generation. Recuva pro 1. One of the primary benefit of this software program using it you could without difficulty get better either big or small length deleted information. Recuva pro Keygen full model is certainly a free restorative tool, which will let you get better files deleted by way of mistake, or right now after a virus attack and machine crashes. It has a user pleasant interface which may be very clean and simple to use. The interface is progressive with attractive issues. Records from movable disks also can be recovered. Documents Recovered with the support of this software are loose from any malware. Without difficulty Restores the SD cards, secure virtual cards, and so forth. All you need to recover your files is to click on the experiment button. Brought Ext4 file machine support. Stepped forward accuracy of experiment statistics. Improved VHD image loading. Recuva expert best. Advanced localization and language support. Minor GUI enhancements. Accidently deleting or losing files after a computer crash that is! But Recuva professional crack is here to the rescue should you find yourself in a similar situation again. Recuva bills itself as a professional deleted file recovery tool that not only works miraculously on your hard drive, but also on your MP3 player, camera, SD cards and USB flash drives. It offers basic search options, where a simple wizard-based startup directs you to select the file type and also narrowing the scan down to possible locations where that specific file may be possibly saved. Initially, the utility begins with a quick scan, but you can always enable a deep scan right from the get go. The quick scan might take a few seconds to complete, while a deep scan is more comprehensive hence will take much longer. Whether deep or fixed scan, the entire process runs smoothly, and this recovery utility even offers you an advanced mode, which brings up an inspector file for each file to indicate a preview, information about the file and hex code in the file header. Piriform Recuva Pro crack One of the noteworthy features of this professional software is it also deletes files, and not just regular deletion, but securely enough to make it impossible for anyone or department to recover it including the FBI or CIA. The preview feature of this utility is it also helps you locate files that have lost their names, and lets you know if the files have been overwritten. Key Features of Recuva Portable Advanced file recovery with deep and comprehensive scan Virtual hard drive so you can rest assured all your files are backed up round the clock Premium support with an advanced knowledge database Software updates automatically Recovers files from virtually any disk including USB sticks and MP3 players Ability to recover videos, music, documents and even emails Intuitive user interface Installation is basic and self-explanatory No minimum memory or hard drive requirements Supported OS.
1 note
·
View note
Text
O&O DiskImage Professional Edition Portable is a powerful software for backing up all files and operating systems, recently released by O&O Software for Windows operating systems. In the software you can save your data to CD, DVD and USB. O&O DiskImage Professional Edition software provides full support for hard drive partitions. O&O DiskImage Professional Edition Portable supports SSD drives and the latest UEFI system. O&O DiskImage Professional Edition software gives you the ability to restore system files and copy or clone PC or entire hard drive. Characteristics: Backup all data on PC and operating system at the push of a button Ability to send activity notifications to your email Windows operating system support Command line control capability Monitor and alert if the hard drive is in danger Backup system and hard drives, cloning drives and full drives New file-based backup - Now twice as fast as ever - back up and restore individual files or folders Direct VHD creation Monitoring and warning of security risks. Incremental / differential backup Easily recover files, folders, drives and disks Multi-hardware system restore (MIR) Create a Windows boot system directly from the program by integrating the driver Supports Windows 10, Windows 8.1, Windows 7 and Vista Fast system and easy recovery even on dissimilar hardware Media Creator startup: Windows AIK / ADK Safe and simple backup to prevent loss of important personal files Boot directly from the application (USB or CD / DVD) Release year: 2020 Version: 15.5.219 System: Windows® XP / Vista / 7/8 / 8.1 / 10 Interface language: English File size: 73.93 MB Format: Rar Execute as an administrator: There's no need
0 notes
Text
Windows server 2012 r2 standard 32 bit download 無料ダウンロード.Windows Server 評価版ソフトウェア
Windows server 2012 r2 standard 32 bit download 無料ダウンロード.Windows Server 2012 R2:ダウンロード・インストールのやり方

Windows 11、10、8.1、8.0、7 で PowerShell を見つける.Windows Server R2:ダウンロード・インストールのやり方|epnote-備忘録-
Apr 09, · Windows Server R2のインストールを行う. Windows Server R2は評価版が用意されているいるので、マイクロソフトアカウントを取得し、サインインすることでダウンロードが可能となっています。. 試用期間は日となっていますが、とてもありがたいことです Feb 15, · Hi, Thanks for posting in Microsoft TechNet Forum. Windows Server R2 is only available in bit versions. Based on your description, please try to refer to the following link to change the display language ビジネス向け Microsoft Edge のダウンロード - Microsoft. 年 6 月 15 日に Internet Explorer (IE) 11 デスクトップ アプリのサポートを終了いたします。. IE モードを搭載した Microsoft Edge をご利用ください。. 詳細を見る >
Windows server 2012 r2 standard 32 bit download 無料ダウンロード.Free Download Windows Server R2 ISO File - Technig
前提条件. Windows Server R2 の システム要件 を確認する. 日間の評価を行うためにソフトウェア製品版のユーザー登録をしてからダウンロードおよびインストールを行う. 評価に役立つリソースを紹介するメールを受け取る. テクニカル リソース 無料ダウンロード & セキュリティ There is an update available for the WSUS role on Windows Server and Windows Server R2 and later. Edition (Bit x86), Windows Server R2 Enterprise x64 Edition, Windows Server R2 Standard Edition (bit x86), Windows Server R2 Standard x64 Edition, Windows Server Nov 08, · Windows Server Desktop エディション. すべての Desktop エディションで、左下隅にある Windows アイコンをクリックして、「PowerShell」と入力し始めます。 コンソールと ISE のオプションが両方表示されます。 上記のルールの例外は、Windows Server R2 SP1 の ISE のみです。
Azure ISO Virtual Lab VHD. Your download has started. This download has multiple files. If the download did not start automatically, click the button below. Windows Server R2 provides a wide range of new and enhanced features and capabilities spanning server virtualization, storage, software-defined networking, server management and automation, web and application platform, access and information protection, virtual desktop infrastructure, and more.
Need more information about Windows Server R2? See the product details page. Windows Server R2 is a proven, enterprise-class cloud and datacenter platform that can scale to run your largest workloads while enabling robust recovery options to protect against service outages. It helps accelerate time to value by simplifying your underlying infrastructure and allowing you to reduce cost by taking advantage of industry-standard hardware. Windows Server R2 helps you build, deploy and scale applications and web sites quickly, and gives you the flexibility to move workloads between on-premises environments and the cloud.
It enables you to provide flexible, remote access to corporate resources while managing identities across your datacenter and federated into the cloud, and it helps you protect critical business information.
Skip to main content. Evaluation Center. Windows 11 Enterprise Windows 11 and Office Deployment Lab Kit Windows 10 Enterprise Windows 10 and Office Deployment Lab Kit. Windows Server. Windows Server Windows Server Windows Server Essentials Hyper-V Server Windows Admin Center.
SQL Server. SQL Server SQL Server SQL Server SQL Server Azure SQL Edge. Microsoft Azure. Azure Migration and Modernization Program Try Azure for free. System Center. System Center System Center Endpoint Manager. Microsoft Endpoint Configuration Manager Current Branch Microsoft Endpoint Configuration Manager Technical Preview Microsoft Endpoint Manager Evaluation Lab Kit Microsoft Intune. Microsoft Viva. Microsoft Viva Topics. Microsoft Find the right Microsoft plan for your business SharePoint Syntex Project Visio.
Office Servers. SharePoint Server Project Server Skype for Business Server Microsoft Defender for Identity.
Identity Manager. Microsoft Identity Manager SP1. Integration Services. Host Integration Server BizTalk Server Power Platform. Power BI Pro Power Apps Power Automate Power Virtual Agents.
Dynamics Try Dynamics for free. Try Microsoft Cloud for Sustainability for free. Search All Products. Products Windows Windows 11 Enterprise Windows 11 and Office Deployment Lab Kit Windows 10 Enterprise Windows 10 and Office Deployment Lab Kit. Windows Server Windows Server Windows Server Windows Server Essentials Hyper-V Server Windows Admin Center. SQL Server SQL Server SQL Server SQL Server SQL Server Hybrid Azure SQL Edge.
Microsoft Azure Azure Migration and Modernization Program Try Azure for free. System Center System Center System Center Endpoint Manager Microsoft Endpoint Configuration Manager Current Branch Microsoft Endpoint Configuration Manager Technical Preview Microsoft Endpoint Manager Evaluation Lab Kit Microsoft Intune. Microsoft Viva Microsoft Viva Topics.
Microsoft Find the right Microsoft plan for your business SharePoint Syntex Project Visio. Office Servers SharePoint Server Project Server Skype for Business Server Microsoft Defender for Identity Microsoft Defender for Identity. Identity Manager Microsoft Identity Manager SP1. Integration Services Host Integration Server BizTalk Server Power Platform Power BI Pro Power Apps Power Automate Power Virtual Agents.
Dynamics Try Dynamics for free. Sustainability Try Microsoft Cloud for Sustainability for free. My Experiences My Actions My Profile.
My Evaluations. Evaluation Evaluations. Virtual LabVirtual Labs. Tech JourneyTech Journeys. Virtual Labs. Tech Journeys. Sign in to see your actions. My Actions. No Results Found. Sign in to see your profile.
My Profile. Postal Code:. Edit my profile. Sort: Most recent Alphabetically. Search within these products only:. Search within these action items:. Search within these resource types:. Sign in to track your Evaluations. Sign in to pin your Resources. Sign in to explore the Community. Sign in to track your Tech Journeys.
Sign in to explore more. Sign in to track your Virtual Labs. View all Evaluations. View All Virtual Labs. View All Tech Journeys.
Windows Server Evaluations days. Windows Admin Center. Evaluations Unlimited. Windows Server Essentials. Hyper-V Server Windows Server R2. Evaluations days 5 Last Visited:. Get started for free. Please select your experience: Azure ISO Virtual Lab VHD. Registration is required for this evaluation. Register to continue. Click continue to begin your evaluation. Outlying Islands U.
0 notes
Text
Acronis Boot Loader No Configuration File Present
Configure DHCP relay on the router/switch
Acronis Boot Loader No Configuration File Present Free
Acronis Boot Loader No Configuration File Present Full
PXE-No Configuration file present. In OS Deployer. 3 years ago. Then i get Acronis Loader: No configuration file present. I have uploaded the configuration components, created a PE boot environment and uploaded that as well. Option 66 and 67 have been configured. No other PXE exist on the network. Starting Acronis Loader. Jul 23, 2007 It is using Acronis in it and we are trying to make a bootable media with option ' Create Bootable Media'.It creates the bootable media in ISO format.I have used that ISO to make a CD and then i have tried to boot the PC with that CD.It boots but it gives this message ' Acronis Loader: No configuration file present'.
Acronis Boot Sequence Manager just adds virtual disks (vhd files) to the Windows boot loader’ list of disks available for booting to Windows 7. If you do not select from where to boot, then by default the computer boots from the first entry in the booting list after waiting for a time interval specified in the Boot Timeout field.
The bootwiz files will still be in the OS but it worked fine in this condition in my machine. Another possible fix is to run a recovery console repair (fixmbr, bootcfg /add, bootcfg /rebuild, or even chkdsk /r). Previously when I used OSS and the 'configuration file not present' was listed it booted into windows when I pressed the ENTER key.
I ran disk2vhd on a recently built Windows 8.1 x64 machine. The conversion completed successfully, but I'm having no luck finding the right recipe to booting it in Hyper-V on a Server 2012 R2 machine. I've tried both Gen 1 and Gen 2 (with and without Secure Boot enabled). In both cases it apparently fails to find a boot loader.
This article applies to:
Acronis Backup 11.5 (Acronis Backup & Recovery 11.5)
Symptoms
You install Acronis PXE Server.
You set up Agent machines located in another subnet for PXE boot.
PXE boot starts: Starting Acronis Loader… Downloading bootwiz.cfg…
And fails with: Acronis Loader: No configuration file present
Cause
Issue in the DHCP relay configuration of your router/switch.
Solution
Set up DHCP relay (forwarding DHCP packets beetwen machines residing in different subnets) on your router/switch.
E.g. on your Cisco router or switch add the IP address of Acronis PXE server to the ip-helper address of the router/switch. This allows dhcp brodacasts sent by the Agent machines to be forwarded to another network where the PXE server resides.
Tags:
Introduction
This article instructs how to use Acronis True Image to recover Windows from a boot failure.
Use the present article only if the system is damaged to a state when you can't get to the Desktop screen and launch Acronis True Image normally. If you are able to access Acronis True Image within running Windows, please follow instructions from that article instead.
Pre-requisites
1. Acronis Bootable Media - a bootable USB thumb drive, CD or DVD with Acronis software on it. Click here for instructions on how to get it.
If you already have the bootable media, you can use it, including media created on a different computer. There is no need to create a new bootable media.
2. A previously created backup.
If you do not have a backup, you cannot restore the system using Acronis True Image. In such a case try Windows built-in recovery options.
Solution
Insert Acronis Bootable Media
Reboot the computer
If at this point the computer boots into Acronis Bootable Media environment, then click here to skip to the part of configuring the recovery task.
Otherwise, if you observe the same Windows boot failure symptom, instead of seeing Acronis boot menu, it means that you need to configure BIOS/UEFI to boot from Acronis Bootable Media.
Configuring BIOS/UEFI to boot from Acronis Bootable Media
Reboot one more time and pay attention to the text displayed on the screen. One of the first screens after the beep sound should be telling you which key to press on the keyboard to access UEFI or BIOS settings. The button to press varies across computer makes and models. Usually, it is either of the following: Esc, Del, F2, F9, F10, F11, F12. Press the indicated key quickly, before the message disappears.
For example, one of the initial splash screens may say: 'Please press DEL or F2 to enter UEFI BIOS Setting'. In that case you should press either Delete (Del) key on the keyboard or F2 quickly, while the message stays on the screen.
Once you are in the BIOS / UEFI settings, navigate to Boot Options, or Boot Order, or Boot Priority list - the name of the section varies across computer makes and models. Look for the section with 'Boot' or 'Storage' in the name. Bvh files free download. Follow on-screen instructions to navigate through the menu and put the device with Acronis Bootable Media at the very top of the boot order/priority list.
Verify that the system disk is still above other hard disks in the boot priority list, but below the device with Acronis Bootable Media.
Save changes and exit BIOS/UEFI setup utility.
On Windows 8 or Windows 10 machine, if Secure Boot is enabled then bootable media may fail to load or may be absent in the list of boot devices. Disable Secure Boot temporarily to perform recovery.
Launching Acronis True Image application
The first Acronis Bootable Media screen looks different depending on whether the media was booted in 1) UEFI or 2) Legacy BIOS/CSM modes
If you see a black and white text menu (Acronis UEFI loader), press '1' on the keyboard to launch Acronis True Image application:
If you see a blue graphical menu (Acronis Legacy BIOS/CSM loader), move the mouse pointer over 'Acronis True Image (64-bit)' or 'Acronis True Image' and click it to launch the program:
Configuring recovery task
When the main program window appears, click 'My disks' just below 'Recover' in the center of the screen. The recovery wizard will walk you through the settings.
1. Browse to the backup location
Click the Browse button to locate the backup:
Case A. Backup is on a NAS
Use either of these three methods to browse to the backup location:
1) expand 'Computers Near Me' section on the left panel and browse to the folder with the backup
2) click in the 'File name' field and type two backward slashes, followed by the NAS' name or IP-address, followed by another backward slash, e.g. MyNAS, or 192.168.0.12. After you type the last backward slash, wait for the program to connect to the NAS, enter credentials if asked, and browse to the folder with the backup
3) NAS may or may not be discovered automatically as a 'NAS' device, depending on the NAS make, its settings and router configuration. If the automatic detection succeeded, you will see it under 'My NAS connections' section
Case B. Backup is on external USB disk or on internal disk
Select the disk where the backup is stored, and browse to the folder where the backup file is located
Case C. Backup is in Acronis Cloud
If you are restoring from Acronis Cloud, click 'Acronis Cloud', enter your Acronis account credentials and click Sign in:
Click on the backup name, then click OK:
If the backup is encrypted for extra protection, type in the encryption password and click OK:
Click Next:
2. Select backup version
Case A. Backup is on a NAS or on internal or external disk
Click on the backup file that you would like to restore. If there are several backup files (recovery points), look at the Date column to find the newest backup, click it, then click OK button:
Verify backup selection and click Next:
Click Next button to confirm that entire disks/partitions will be restored, not individual files and folders:
Case B. Backup is in Acronis Cloud
At 'Recovery point' step you will be offered to select the backup version to restore. Days when at least one backup version was created will be marked in green:

Click on the latest day marked in green:
Click on the backup creation time on the right side. Selected time is marked with a blue background. If there are several items in the list, choose the latest:
Click Next:
3. Mark the system disk for restoration
Disks and partitions in the selected backup version are listed at this step:
Locate the system disk and mark the checkbox next to it. To avoid unnecessary configuration steps further in the wizard, click on the checkbox next to the disk title, e.g. 'Disk 1', and not on the checkboxes next to partitions (EFI System Partition, C:, Recovery partition, etc):
Click Next:
4. Define recovery destination
Case A. Left panel offers steps 'Destination of Disk 1', 'Destination of Disk 2' etc
Click on the disk where the system currently resides, but fails to boot, and click Next:
Click OK to confirm that everything on the selected disk will be deleted and replaced with the previous state of the system disk from the backup:
Case B. Left panel offers steps 'Settings of Partition 1-1', 'Settings of Partition 1-2' etc
Before proceeding, try switching to Case A by following instructions here, section Solution - Bootable Media, to simplify the recovery process.
If it was not possible to change recovery mode from partitions mode to disks, there are two possible outcomes:
1) the 'Next' button is not grayed out:
When recovering to the original disk with unchanged internal disks order and partition structure, the program will be able to map partitions from the backup to existing partitions on the original disk automatically. In such case recovery settings for each partition are pre-filled, the 'Next button' is not grayed out and you can press it right away. Keep clicking 'Next' to move through the list of partitions on the left panel. Going through some partitions may make the program 'think' for 5-20 seconds to correctly match the disk - just wait till the interface responds and click the 'Next' button:
2) the 'Next' button is grayed outThe 'Next' button is grayed out, when either internal disks order or partition structure has changed and the software was unable to automatically find the original partition:
Click 'New location':
Locate the original disk on the list and click on its first partition:
Click Accept:
Click Next to move the second partition's settings:
Click New location, this time to set the destination for the second partition:
Select the second partition under the system disk:
Click Accept:
Click Next:
Repeat the process till reaching 'MBR recovery' point on the left panel. When working with big partitions, the program may require 5-20 seconds to respond - just wait till it finishes reading them and responds.
When asked about 'MBR recovery': click on the system disk:
Mark the checkbox 'Recover disk signature':
Click Next:
When the 'Finish' step is highlighted on the left panel, that is the last chance when you can safely cancel the recovery and undo any changes made on the configuration screens before the program starts applying them:
Performing the actual restoration
Click Proceed to start the actual process of replacing the current failing system state with a healthy system state from the backup:
When the recovery finishes, take out Acronis Bootable Media and close Acronis True Image window.
Computer will reboot.
Windows will boot in a state as it was exactly when the backup was taken.
Troubleshooting
If possible, take notes and photos of the actions you undertake during troubleshooting. If you will be contacting Acronis directly for assistance, step-by-step pictures would help to resolve the issue quicker.
Recovery fails with an error
Click on the Log tab, then click on the plus sign to see the log of the failed operation. To facilitate further issue investigation and troubleshooting, save the recovery log and a system report:
1) Open the Log tab, right-click anywhere in the log, select 'Save all' and save the log file.
2) Click on a small triangle next to the question mark in the upper top corner of the window, select 'Generate System Report'. When the report generating finishes, click 'Save as' and browse to the same folder where the recovery log was saved previously.
CRC, Write and Input/Output (I/O) errors in the log may indicate the need of system disk replacement. Take the system disk out of the computer box, connect it to another computer and run diagnostic checks against it:
Acronis Boot Loader No Configuration File Present Free
1) Free CrystalDiskInfo instantly reads the disk health status as reported by the disk itself and displays it as Good, Caution or Bad. It is the quickest way to identify a disk hardware failure.
2) Dedicated diagnostic utilities from the disk manufacturers take the longest time to complete the checks, but provide the most accurate methods of checking whether the disk is good or needs replacement:
- Western Digital drives: Data Lifeguard Diagnostic for Windows
- Seagate disks: SeaTools for Windows
- HGST disks: HGST Windows Drive Fitness Test (WinDFT)
- Intel SSDs: Intel Solid State Drive Toolbox
- Samsung drives: Samsung Magician
- ADATA drives: ADATA SSD ToolBox
- Kingston SSDs: Kingston SSD Toolbox, Kingston SSD Manager
- Transcend SSDs: Transcend SSD Scope
- Silicon Power disks: SP ToolBox
- Toshiba disks: Toshiba PC Diagnostic Tool Utility
If no issues were found with the disk, contact Acronis Customer Central for further help with system recovery as explained here.
Recovered system does not boot
Verify that the bootable media mode (UEFI/Legacy BIOS) corresponds to the system disk type (GPT/MBR)
Before you start the actual recovery, look at the pictures in the comparative table in this article to be able to determine whether Acronis Bootable Media starts in 1) UEFI mode or 2) Legacy BIOS/CSM mode.
While on the disks/partitions selection screen ('What to recover' tab of the recovery wizard), move the mouse pointer over the system disk title, e.g. 'Disk 1' or 'Disk 2'.
Right-click on the disk title, e.g. on 'Disk 1'. Do not click on the disk partitions on that screen.
Click on 'Properties':
Look at the value of 'Partition scheme' parameter. It could be either 1) GUID Partition Table (GPT):
or 2) Master Boot Record (MBR):
1. If it says 'GUID Partition Table (GPT)', then the bootable media should have started in UEFI mode (black and white text menu with keyboard-only navigation). If you observed the Legacy BIOS/CSM boot mode instead, please reboot the computer, enter UEFI/BIOS settings and enable UEFI boot for the device with Acronis Bootable Media. If you are unsure about how to do that, follow instructions here.
2. If it says 'Master Boot Record (MBR)', then the bootable media should have started in Legacy BIOS/CSM boot mode (colorful graphic boot menu with mouse and keyboard navigation).If you observed the UEFI boot mode instead, please reboot the computer, enter UEFI/BIOS settings and enable Legacy BIOS/CSM boot for the device with Acronis Bootable Media. If you are unsure about how to do that, follow instructions here, but choosing the opposite values from indicated there (e.g. choose 'Legacy Support On').
There may be situations when you see two entries, referencing the same Acronis Bootable Media device in the boot order list: one with 'UEFI' or 'EFI' prefix, and one without it. In such case you need to pick the one that matches the boot mode of the internal disk where the restored Windows will run. Boot options, such as 'UEFI first', 'Launch CSM: Disabled', suggest that Acronis Bootable Media entry with 'UEFI' or 'EFI' prefix should be used.
Acronis Boot Loader No Configuration File Present Full
Avoid resetting BIOS/UEFI settings to their default values. Otherwise the UEFI/Legacy BIOS switch for the internal disk may change, complicating the recovery.
Acronis Bootable Media fails to boot, freezes, closes or reboots unexpectedly
Create Acronis Bootable Media, based on WinPE, using Advanced mode, as explained in this article. Then reattempt the restoration.
Unable to select a destination partition in the recovery wizard
Click Cancel button to exit recovery wizard window, click on the Tools tab and use 'Add new disk' wizard to quickly clear disk contents. Be careful when selecting the disk for 'adding' as the tool completely deletes everything on the selected disk and that action cannot be undone.
The disk with backup file is shown as empty in the 'Browse' dialog
Make sure that the disk, storing the backup is not formatted in ExFAT format. Acronis Bootable Media(Linux-based) is not able to read from ExFAT-formatted disks. If this is your case, either create a WinPE/WinRE-based bootable media, or use another computer to move your backups from ExFAT disk to some other location, re-format the disk in NTFS format, move backup back onto the disk and reattempt the restoration.
Wrong number of physical disks are listed at 'Where to recover' step
If you do not see the original disk in the list or it appears as two separate disks, it may be set to run in RAID mode, unsupported by the standard bootable media (Linux-based). In such case you need to get to a second computer and create a special WinPE-based bootable media there, with drivers for the RAID controller. The fastest way to get it is use MVP WinPE builder (choose Advanced version).
Installed software/system behaves unusually after restoration
After the recovery is completed, installed programs and the system may seem to behave unusually slow, requesting reboots etc. These are required to complete the missed maintenance tasks, such as downloading and installing updates and running regular checkups. If that happens, just let the required operations complete and after one or several reboots the system should be back to normal.
Acronis True Image reports 'You've exceeded the maximum number of activations for this serial number' status under Account tab after system restoration
Click 'Resolve problem' button under Account tab, select 'I have changed hardware..' option, then 'Move license from another computer', click on the computer name and, finally, click 'Move license'. Click here for more information.
Third-party software programs/Microsoft Windows ask for license reactivation
If the system disk failed and you had to replace it with a new one, installed software and Windows may or may not ask for their licenses reactivation after the recovery. It they do, that is due to a significant hardware change detected and cannot be and should not be prevented or avoided by Acronis software. Contact the respective third-party software vendors or Microsoft for help with license reactivation.
Computer locks up at entering UEFI/BIOS settings
If the invitation to press a key to entier UEFI/BIOS stays on the screen forever after you press the key, it could indicate a failure of one of the computer components (hardware). Power off the computer, physically disconnect the power cord (if it is a desktop), open the case and unplug the system disk. Then connect the power cable back and start the computer, press the required key and see if you get to the BIOS / UEFI setup screen. If this does not help - keep disconnecting other devices (all USB devices, SD cards, network cable etc) one-by-one until you find the culprit. The failing device then may need repair or replacement. If you feel uncomfortable working with computer parts, bring the computer to a professional service center to diagnose and fix the issue with entering BIOS / UEFI settings.
More information
Contact Acronis Customer Central if you have any questions or need help:
1) Sign into your Acronis account at https://account.acronis.com/. If you do not have one yet, click Sign Up to create it.
2) (step for perpetual licenses owners) If you have not registered your license key yet, click 'Add keys' button in the upper top corner of the screen, copy and paste the serial number and click 'Add' to register it.
3) Click on the Support tab on the left panel.
4) For technical questions and issues click 'Technical issue'. For all other matters click 'Trial/Pre-sales/Licensing question'.
5) Enter Live Chat ('Instant Chat') or submit a ticket by email ('Submit a ticket'). Owners of subscription and PPI licenses also get support by phone for technical issues. Providing us recovery log, system report, step-by-step screen photos and the list of the undertaken steps would allow for quicker issue resolution.
See also:
Tags:
0 notes
Text
Easeus Data Recovery Mac Free
This article applies to: EaseUS TodoPhoto Recovery Introduction EaseUS TodoPhoto Recovery recovers photos and videos those are lost due to various reasons, such as deleting, formatting, partition loss, disk corruption, virus attack, and other data loss scenarios. You can use it to recover the valuable files with a few clicks. How to use 1. Select a location to scan The software will list all the drives connected to the computer, including external drives and internal drives. Please select a drive, volume or specific location from which you want to recover, then click Scan. Noted: If you are not sure which drive to scan, you may click Help in the left side. Under “Not sure which drive to scan”, please click Scan for the entire disk. 2. Scan the disk to find the lost files The software will automatically start a quick scan to find the deleted files, then an advanced scan to find more by searching the entire data area of your storage device. 3. Preview and Recover Lost Files EaseUS TodoPhoto Recovery allows you to preview the photos and videos following a scan. If you can preview, the files are recoverable. You may filter by file type, date or size. After file filtering, previewing, and selecting all of the important files that you wish to recover, press “Recover” button in the right corner to immediately get your data back. Note: Do NOT save the files back onto the same hard drive partition or external device which you recover from.
Easeus Data Recovery free. download full Version Crack Mac
Easeus For Mac

EaseUS Free Mac Photo Recovery Software, Data Recovery Wizard for Mac, is especially designed for Mac users to recover lost pictures on Mac OS X. It is the best freeware on the market to rescue all your precious photos lost due to deleting, formatting, improper.
EaseUS TodoPhoto Recovery recovers photos and videos those are lost due to various reasons, such as deleting, formatting, partition loss, disk corruption, virus attack, and other data loss scenarios. You can use it to recover the valuable files with a few clicks. EaseUS provides limited free recovery in the Data Recovery Wizard to help customers test its recovery quality before they make the purchase. This article explains how to obtain the free recovery in the Free version of EaseUS Data Recovery Wizard. EaseUS Data Recovery Wizard (Windows & Mac) EaseUS Data Recovery Wizard is not just another data recovery software, but also a user-friendly app, with a Windows Explorer type interface, and a three-step easy data recovery process. This app is free for recovering data up to 500MB (for the time being). It works on internal and external hard. Software Gratis EaseUS Mac Data Recovery dapat dengan cepat memulihkan file yang terhapus bahkan setelah Anda telah mengosongkan Isi trash. Benar-benar memulihkan data yang hilang akibat diformat, serangan virus, crash perangkat lunak, permasalahan OS, yang tidak benar atau alasan yang tidak diketahui lainnya.
Do you need specialized Manual Data Recovery Services? You may need further help for tough data loss situations like reformatting drive, RAW disk, partition loss, repartition failures, system boot error and virtual disk corruption. Consult with EaseUS Data Recovery Experts for cost-efficient one-on-one manual recovery service. They could offer the following services after FREE diagnosis: 1. Repair corrupted RAID structure 2. Unformat the drive which was formatted by mistake 3. Repair damaged RAW drive that needs to be reformatted (Bitlocker encrypted drive is also supported) 4. Repair unbootable Windows operating system 5. Recover/repair lost partition and reparitioned drive (the one that cannot be recovered by software) 6. Repair corrupted virtual disk file (.vmdk, .vhd, .vhdx, etc.) Activate Live Chat Call Us: 1-800-570-4634
Frequently Asked Questions

Easeus Data Recovery free. download full Version Crack Mac
Can I recover data if the drive shows as unmounted?
The drive cannot be accessed if it's not mounted. Please try to mount it in Disk Utility, then run EaseUS Data Recovery Wizard and scan the disk to recover lost data.
How can I find the lost data from the scan result?
EaseUS Data Recovery Wizard offers data filtering and search functions. You can filter the files by size and type, or search them by file/folder name or file extension.
Why cannot I recover 2GB data for free?
It is recommended to check the version installed is Free or Trial because they are different versions. The Trial has data preview function but cannot save any files, while the Free version enables to recover 2 GB files. The default free space is 500 MB and you may share the product on social media to get another 1.5GB.

Why cannot the recovered files be opened?
A file is saved as 2 parts on the storage device: directory information (which contains a file name, timestamp and size info, etc.) and data content. If the files with original file names and folder structures cannot be opened, one possible reason is the corrupted directory information. There is still a chance to recover the data content with the RAW Recovery method in our software.
Easeus For Mac
How long does it take to scan the drive?
It strongly depends on the capacity of your hard drive and the performance of your computer. As a reference, hard drive recoveries can be completed in around 10 to 12 hours for a 1-TB healthy hard drive in general conditions.
1 note
·
View note