
Statistics
We looked inside some of the posts by totenrand and here's what we found interesting.
Average Info
Notes Per Post
288
Likes Per Post
90
Reblog Per Post
183
Reply Per Post
0
Time Between Posts
1 year
Number of Posts By Type
Text
8
Photo
1
Last Seen Tumblr Blogs


Fun Fact
In February 2021, Tumblr had 518.6 million blog accounts.
Text
Some calm down Lego
Needing to chill out after a particularly stressful week, I settled in with some nice relaxing geometry nodes and made a fully procedural Lego System brick/plate.

There's certainly some improvements I could make, making a brick to be much bigger than the ones I've got here slows Blender right down when moving it. Also the material is a touch too sub-surfacey, and the scratches didn't randomise per object as much as I wanted.
But it was very satisfying, and calming to make.
The Geometry Nodes tree for the Lego brick is below the fold, should anyone want it.

The two linked objects are; the stud which is just a tiny cylnder with a bevelled top, because you can't easily bevel in GeoNodes yet; and the Lego stud logo, which is just the first SVG of it that came up on an image search, scaled down to about 3mm.
Edit: Whelp, that node tree wasn't as useful as I thought it would be... Edit the 2nd: Tiny pixelated node tree just can't stand, lets see if individual chunks are readable.


0 notes
Text
Blender Displacement Node Domesticated: the actually getting it right this time.
So I made a post a little while back being all triumphant and "I've cracked the code for displacement!", crowing that if you run the height map input through a divide node you can easily get a predictable displacement distance.
And it does, BUT only if your displacement node Midlevel is set to 0.0 (left image). However if it's set to anything else, like the default 0.5, the whole mesh gets turned inside out! (right image)


Buuuuuut it turns out I was very close, the whole "the height map is measured in Blender units" thing is right, but this is what the SCALE control is for! It's doing the whole "divide the height map" for me only not broken!
So if I unplug that [divide by 10] node and instead set the set the scale to 0.1, then we get the same 100cm deviation on the midlevel 0.0 image, and a 50cm deviation on the midlevel 0.5 image BUT Suzanne isn't turned inside out!


So yeah...
TLDR: Assuming you have a height map with values from zero to one, you can have millimetre precision on displacements by plugging a [divide by 1000] node into the displacement scale, then just entering how many total mm you want into that!
#blender#Shade Nodes#Displacement#I was so CLOSE the first time!#Why isn't this specified in the Blender Manual?#Finally getting it I think
0 notes
Text
Blender Displacement Node, Domesticated (very nearly)
[[NB. I was wrong, but very nearly right, this method only works if the mid point is zero, otherwise it turns the mesh inside out! I'll make a follow up post.]]
I feel like in every tutorial I've ever seen that used the Displacement Node in Blender's shader editor the person presenting the tutorial just fiddled about with the 'scale' setting until it things looked about right, and this is deeply unsatisfying to me because it feels terribly unpredictable.
Yesterday I had a thought out of nowhere, "What if the 'height' map was being interpreted as Blender's internal size units?"
So I set up an experiment, I made a 1m cube because by default Blender Units are set to 1 per metre, then I made the sides transparent, set up a quick scale with geometry nodes, and applied a Linear Gradient running through a displacement node to one face.

And it just WORKS! Right away the face slides diagonally from the one corner of the cube to the other, not clipping out the other side or anything!

So I wonder, why the hell can't I just divide the height input by 100 to get a 1 centimetre scale displacement?

And I works perfectly!
Why have we been fucking around with the scale setting all this time?
#blender#Shader Nodes#Displacement#Is this assumed knowledge?#Why isn't this specified in the Blender Manual?#I think the 'distance' setting in the Bump node work the same way#I was so close to being right!!
0 notes
Text
Distant City Windows
Like I mentioned in Gelatinous Cube in a Dungeon, the second ‘quick scene’ immediately got well out of hand, ballooning into some cyberpunkish shopping arcade that I made the mistake of making one wall a giant window, and having a giant window I needed a cityscape beyond it; so went my addled reasoning. Further over ambitious thoughts lead me to thinking “I can node my way out of this” and to an extent I can, randomly scattering some vaguely buildingish shape about the place isn’t too hard, and making materials for the buildings ends up resulting in something that I’m pretty happy with.
So I’ve broken it out and thrown together a quick scene to display it.

What I’m trying to replicate here is the look of a window into a lit room at night, where there’s some main lighting, and maybe some other lighting that’s a different colour temperature, and there’s indistinct patches of shadow suggesting occupants or maybe some furniture.
It basically some soft, distorted, noise driving a colour mix between a 2000k and 8000k blackbody colour node, that drive the Emission channel; with a couple of noise textures and a Musgrave texture being mathed together to drive the Emission Strength channel.
I’ve attached a shot of the whole node tree below the fold (now I know I can make a fold).
Some Time to Forget
Coming back to this project file after about six months to pull out the city windows material, I’ve found that whatever the image I had in my head for it at the time that overwhelmed me has died away to a dull roar, and I’ve actually managed to make some headway including a nifty geometry nodes system for generating the railings.
Where I stalled at is on the left, and my progress is on the right; now if only I knew what that vaguely church looking thing I’ve made at the end of the corridor is so I know how to detail it, but hey, one step at a time.


Shader Nodes for the city windows material below the fold.

#Blender#City#Procedural Shader#Procedural Material#City Windows at Night#Random cuboid city#Stalled project#WIP
1 note
·
View note
Text
Gelatinous Cube in a Dungeon
Another attempt at starting a quick project series where the second entry immediately got well out of hand, though it did produce an element that I’m quite happy with, so I’ll post that later.
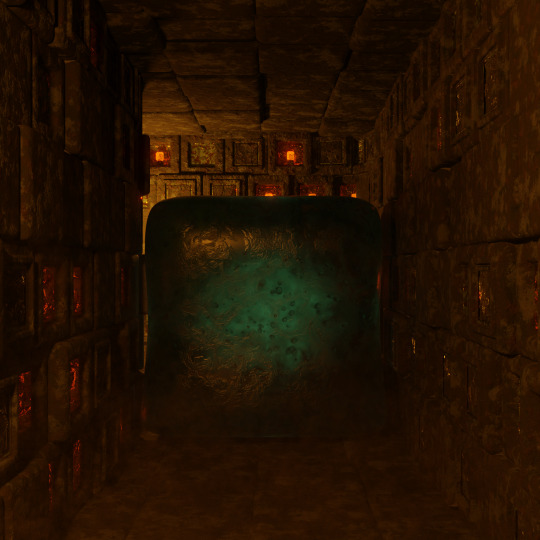
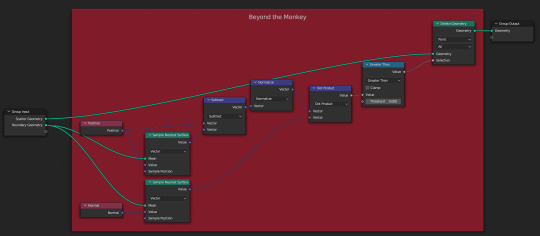
This first piece is an exercise to try and get my head around Blender’s Geometry Nodes system, at least a little bit. Here I’ve been following two main tutorials, one for distributing air bubbles inside a volume, and one for creating a brick wall on a curve; there was also another video that helped with erasing bubbles that escaped from cube, but for the life of me I can’t find that one again.
Edit -- Breakdown of Blender process and links to relevant tutorials now below the fold, now I know I can add a fold.
The Gelatinous Cube
The gelatinous cube’s mesh is just a cube primitive that’s been gently subdivided and rounded off, and then pinched in around the middle a little so it looks like it’s squishing down toward the floor.
Its surface shader is just a couple of noise textures, fed into a Voronoi texture, then fed into a Musgrave texture, which is then fed through a whole bunch of colour ramps into the Principled BSDF shader’s various inputs to make something glistening, organic, and unpleasant looking.
The same Musgrave is colour multiplied with a couple of different quadratic sphere gradients to feed into the density and emission strength channels of a Principled Volume shader, to give the impression of a thick, viscous, turbulent interior and a glow nucleus. (I know gelatinous cubes are supposed to be completely translucent, but that’s not as visually interesting.)
The main bubble distribution is adapted from this tutorial video by Via Crescendo,
youtube
but I’ve also used the newer than that tutorial “Distribute points in Volume” node to create some more randomly placed bubbles, using a node group from the third tutorial (the one that I can’t find again) that does some maths I don’t understand to erase any instances that leave the bounds of the geometry.
The Dungeon Walls and Floor
The dungeon floor (and ceiling) are by far the simplest things here, they’re just a single tile model that’s been distributed on a grid with the Z position set to randomly jiggle a bit so it looks old and tumbledown.
The walls are more complicated, I’m mostly following a tutorial for generating a brick wall along a curve by Joey Carlino,
youtube
that I’ve modified to instance from a collection of square bricks instead of a single rectangular brick and this random instancing is where the limits of my understanding are reached, as something this node system does means that points get instanced on in pairs which are sometimes adjacent, and sometimes not… This has led to my three ‘detail’ bricks being more clustered in their distribution that I’d like, but the effect this there at least.

Brick variants wise, going from right-to-left there is, the standard brick which has a heavily worn stone material, a brick with an inset corroded copper mirror, a brick with an inset panel of ‘hieroglyphs’ that have been worn away, and a hollow brick with a glowing gem surrounded by corroded copper mirrors (because the ‘unexplored dungeon lit by burning torches’ trope bothers me).
#Blender#Gelatinous Cube#D&D#Geometry Nodes#Dungeon#Dungeon Corridor#10’ corridor#10 foot corridor#Glowing jelly full of bubbles#Youtube
9 notes
·
View notes
Text
Sabre A
So I had the idea that making a series of lightsabers would be a good way to get a bunch of quick practice pieces under my belt, so of course I managed to complete exactly one before coming up with some over complicated concept that I couldn’t execute.
But here at least is Sabre A, intended as an artefact of a bygone age when lightsaber design was yet to be distilled into the pure utilitarian device we’ve seen on screen.

This sabre is loosely styled after European longswords from the 15th and 16th century, it has a longer grip than the screen sabres, which is made from a blue alien hardwood, that is cut with a slight barrel taper and a spiral pattern for grip.

The fittings are cast from a bronze-like metal, with the controls in a thumb cluster at the top of the primary grip. A cage-like waveguide protrudes from the top of the emitter, shaping the sabre’s energy field into a coherent beam.

4 notes
·
View notes
Text
Sideways
Sideways is my character is a Star Wars: Edge of The Empire TTRPG campaign, he’s an ageing Clone Trooper who went AWOL in the wake of Order 66, using his training as a “Tactical Battlefield Data-Warfare Specialist” to alter the records to fake his death in the chaos that followed Order 66, and abscond with a shuttle.

Sideways spent the next eighteen years roaming the fringes of the galaxy, trying to piece together the web of conspiracy that led to the Separatist Crisis and the downfall of the Galactic Republic. (The Clone Trooper specialist rapid training modules emphasised certain personality traits to enhance the clone’s abilities, the Data-Warfare package had the side effect of making troopers paranoid, data hoarding, conspiracy theorists; though none of these personality flaws were realised until long after the Clone army was in the field.)
As he travelled the galaxy, Sideways realised that it wasn’t just the original news reports of the Separatist Crisis that were being suppressed, edited, or erased; but historical and religious texts as well as part of what seemed to be an Imperial effort to suppress and discredit the very concepts of the Jedi in particular, and The Force in general.
Sideways began seeking out remote shrines, temples, libraries, and holy sites to work with their guardians to create electronic copies of their texts, forming what he started to refer to as The Sidereal Collection. Somewhere along the way he began to find solace in The Force, though through a piecemeal accumulation of concepts from a dozen religions and philosophies.
Along with copies squirrelled away in a variety of hidden data stores around the galactic rim, Sideways carries a copy of the Sidereal Collection with him in the form of a holobook.


The holobook exists as a diegetic reason for Sideways’ Lore skill to increase without him having to go on a quest for knowledge, he’s got a whole host of reference works with him, he’s just been having a hard time reading them because they’re all either written in the Star Wars equivalent of middle-English, or they’re describing direct experience of The Force for which he has no context.
The book being displayed in the renders is “Ye Principia of Ye Guardians of Ye Whills” a ‘modern’ translation of a core text for the kind of Force aware, but not Force sensitive monks like Chirrut from Rogue One. It’s an example of the ‘middle-English’ problem, in that it’s technically in the modern language of Aurebesh but the writing style is a few thousand years out of date.

Towards the end of the last adventure we played Sideways encountered his former commanding officer, a Jedi Agent who used to be codenamed Compass, who Sideways was convinced he had killed as a result of Order 66 by venting her into space. But she had been rescued by the soon to be Darth Vader, and turned to the Dark Side as a weapon for use by the Inquisitorius in the Jedi purge.
This shrine model that I had already been making to represent Sideways’ growing religious side, became rather poignant as he failed to get her to turn back from the Dark Side, and was forced to watch her die for a second time, only being able to recover her lightsaber as the team fled the exploding vessel where the confrontation had taken place.
The shrine is designed to look like Sideways has constructed it out of materials that could be found in the spares of a transport ship, so it’s made from galvanised metal taken from an old shipping container, industrial resin streaked with some gold paint, and metal that he’s cut and heat treated to make symbols representing the Force.
The symbol on the left is a cannon symbol of the Light side of the Force, and the symbol on the right is a cannon symbol for the Dark side. The central symbol is my take on a combined Force symbol that I’m calling The Harmonious Force, representing becoming greater through balance.
The lightsaber is an attempt at creating something a touch different, agent Compass was from a large species and used a strength based lightsaber style, so this is designed to be a great-sabre with a forward grip for power strikes like on a claymore. I also wrapped the grips in blue alien leather instead of the metal flanges that many of the film sabres favour. I also put the adjustment controls for blade length and intensity, that all lightsabers apparently have, somewhere more useful than the weird sticky out knobs the film one all have.
#Sideways#Clone Trooper#Tactical Battlefield Data-Warfare Specialist#Slicer#Force Neo-Pagan#Star Wars#Edge of The Empire#RPG Character#Blender#Holobook#Space Conspiracy Theorist#Force Shrine#Technically fan fiction#Lightsaber
1 note
·
View note
Text
Nerding as proof of life.
I thought that as I was going to be actually using this account, it would be a good idea to do some posts as a ‘proof of life’, to show that I’m not a bot, even if I’m probably not going to post very often.
So I thought I’d post some of the renders I’ve made for my RPG characters over the last couple of years as practice works to help in learning Blender.
1 note
·
View note
Photo
So the first use of this tumbler is a competition...

Judge Dredd IDW Comics Giveaway. For your chance to own a copy of IDW Judge Dredd vol.2,just reblog this post and the first six names we pull out of the hat,will wiin this fantastic giveaway. Good luck & start reblogging!
272 notes
·
View notes