A blog i made for my TS4 fandom town and any cc I end up making! ||CC reblog account> https://sims4sluts.tumblr.com/ || Main account here> https://trashcasket.tumblr.com/ || Please go to navigate (The plus symbol) and choose my cc to see the downloads!
Don't wanna be here? Send us removal request.
Statistics
We looked inside some of the posts by ts4fandomtown and here's what we found interesting.
Average Info
Notes Per Post
1K
Likes Per Post
985
Reblog Per Post
266
Reply Per Post
22
Time Between Posts
5 months
Number of Posts By Type
Text
9
Photo
3
Last Seen Tumblr Blogs


Fun Fact
The Tumblr app for Google Glass was released on May 16, 2013.
Text
How to Customize your Main Menu in The Sims 4
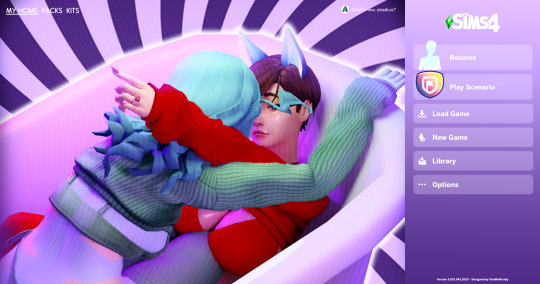
...Like this!
Special thanks to @sdmsims for pointing us in the right direction for figuring this out.
This tutorial will (hopefully) teach you how to make your own menu screen for TS4 using SimMattically's Refreshed Main Menu mod. If you've ever made a loading screen before, the process is very similar to that.
This is a 10 step process, and it's a bit lengthy. So make sure you have the time to kill before beginning.
Read on for the tutorial.
YOU WILL NEED:
SimMattically's Refreshed Main Menu mod
S4PE
JPEXS Free Flash Decompiler
Your choice in image editor
STEP 1: ACQUIRE MOD
This tutorial assumes you already know how to download, save, and load a mod into your TS4 game.
The mod will be downloaded to your computer as a .zip file. Extract the archive to somewhere you will find it.
Here is what is inside:
The base mod (SimMattically_RefreshedMainMenu_BASE.package)
The background files (They each begin with SimMattically_RefreshedMainMenu_BG_[...])
Optional files (One for an animated logo, one for the scenarios button. SimMattically_RefreshedMainMenu_AnimatedLogo.package and SimMattically_RefreshedMainMenu_ScenarioButton.package respectfully)
You will want the BASE, any optional file you'd like out of the two above, and a BG. For simplicity's sake, we will use BG_Arbour.
So, in your mods folder, you should at least have the BASE file and BG_Arbour.

STEP 2: BOOT GAME
This is to check and see if you've installed the mod correctly. If you have, you should see something like so;
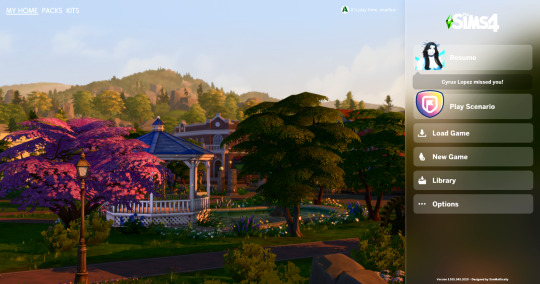
If you see something like this, congrats! Now close the game.
STEP 3: OPEN BASE FILE IN S4PE
Open up S4PE. It will look something like this;
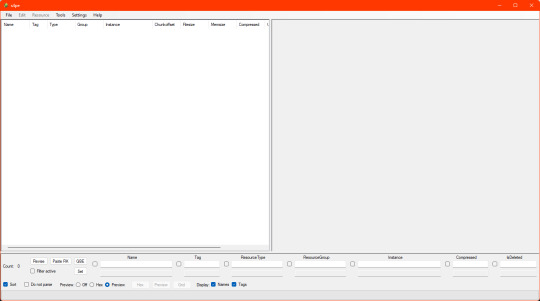
Navigate to File > Open...
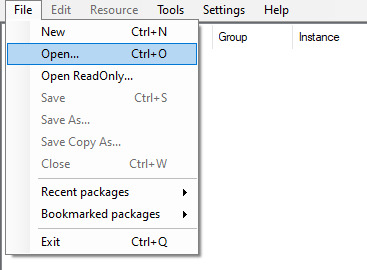
Navigate to your BASE file in your file explorer and open it. It should now look like this;
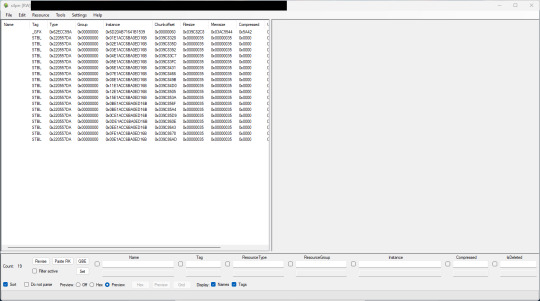
This looks like a lot here. However, we are in need of only one thing from this list.
STEP 4: EXTRACT .GFX
We want the thing at the very top of the list -- the _GFX.

Right click that line. Go to Export > To file...
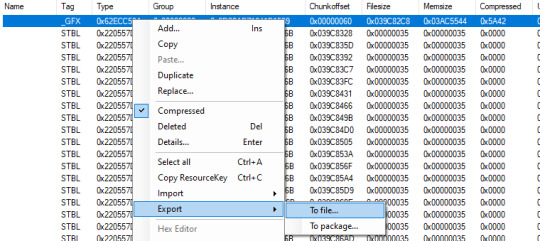
Export this file to somewhere you will find easily on your computer.
STEP 5: EXPORT IMAGES FROM .GFX IN JPEXS
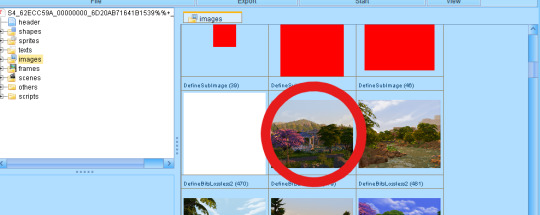
Open your .GFX file in JPEXS, and navigate to the panel on your left. Click images. It should look something like this;
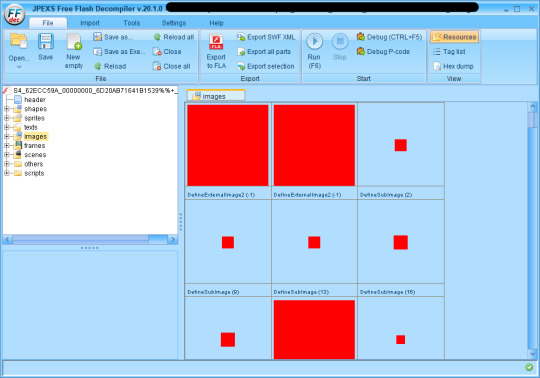
Scroll until you find the first box with an actual image in it. In this case, it's Arbour. It should be the first one to appear.
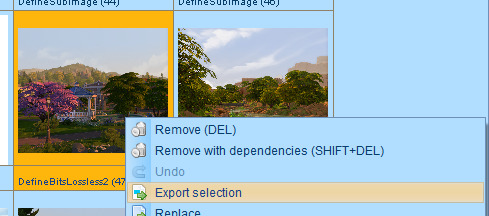
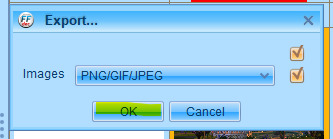
Right click it. Export selection > OK. Save it somewhere you will find it.
Now, scroll down some more, until you reach the first sidebar image.
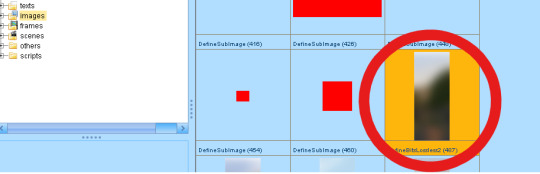
Again, this should correlate to the Arbour background. Repeat the same process as above for exporting.
Your images will save in a folder called images. Like so;
STEP 5: MODIFY IMAGES
NOW HERE IS THE FUN PART BABEY. This is where you let your imagination run wild! Open your images up in your favorite image editor and go nuts.
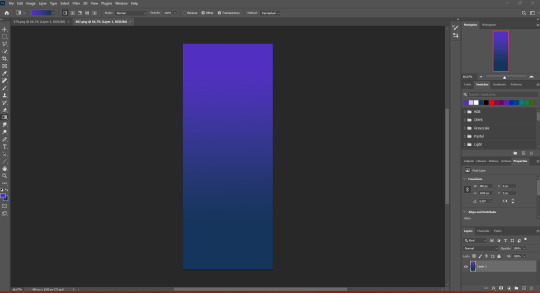
For the sake of this tutorial, I will be using a random image from my SSD.
And a gradient created by color picking this image.
Once you're satisfied with your work, go ahead and save these. I would just save them in that same images folder to save time.
STEP 6: REPLACE IMAGES IN .GFX IN JPEXS
Go back to JPEXS. Go back to the first background image in the list.
Right click it. Hit Replace...
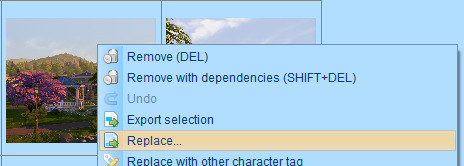
Navigate to that images folder.

And hit open! Congrats, you replaced your first image.
Scroll down to the first sidebar image. Rinse and repeat the steps above, but with your sidebar image (my gradient, for example).
And now you have your imported images! Save the .GFX file, and go back to S4PE.
STEP 7: LOAD NEW .GFX INTO PACKAGE FILE USING S4PE
Right click the _GFX line again. Then go to Import > From file...

Navigate to wherever you saved your GFX. Open it. You will be greeted by this window.
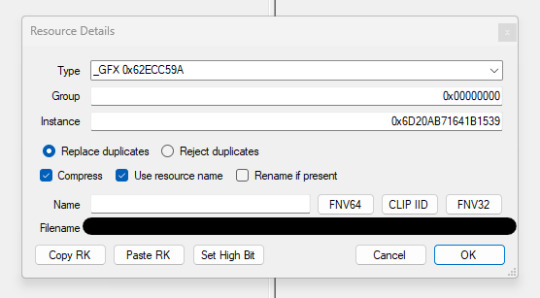
DO NOT TOUCH ANYTHING!!!!!!!!!!!!!!!!!!!!!!!!!!!!!!
Just hit OK.
Once it's in, your list should look like this;
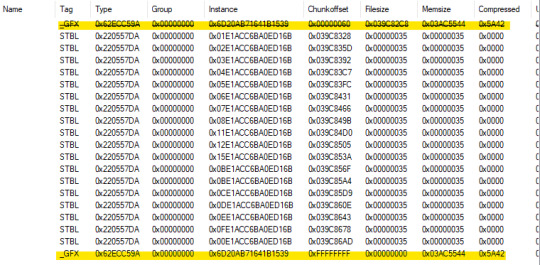
The old _GFX will be crossed out. This is good!
STEP 8: SAVE PACKAGE FILE
Navigate to File > Save. It may take a moment to save, be patient. Close S4PE, load the BASE mod into your mods folder, boot game.
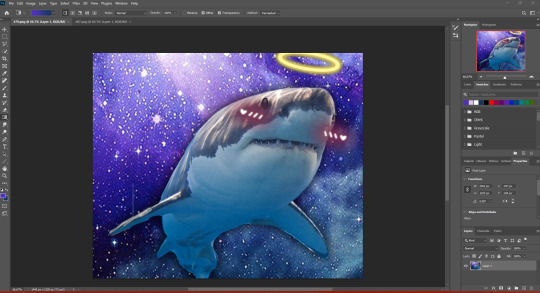
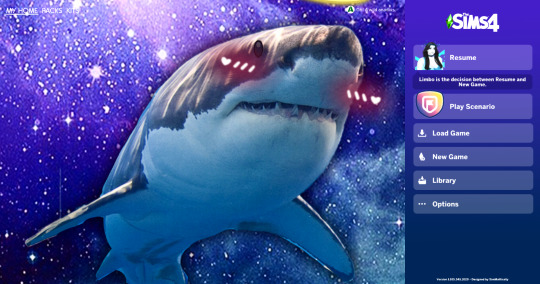
STEP 9: THE MOMENT OF TRUTH
If you did everything correctly, you should be greeted by your new Main Menu.
STEP 10: RELISH IN YOUR SUCCESS
YOU DID IT!!! You might find yourself wanting to forever stare at your new menu screen. This is normal and good. Congrats!!
SOME THINGS TO CONSIDER:
I couldn't find a TOS for SimMattically's mods, so I would recommend you use your new menu screen for personal use only.
I am thinking that similar steps are taken with different modded menu screens, so if you're a tinkerer type. Food for thought.
In the original images for the mod, the sidebar is a piece of the BG with some blur to give the sidebar a frosted glass look. We personally went with a gradient because it's easier, but really, you can do whatever you want.
If anyone has questions, feel free to send them our way! Thank you for reading.
322 notes
·
View notes
Text
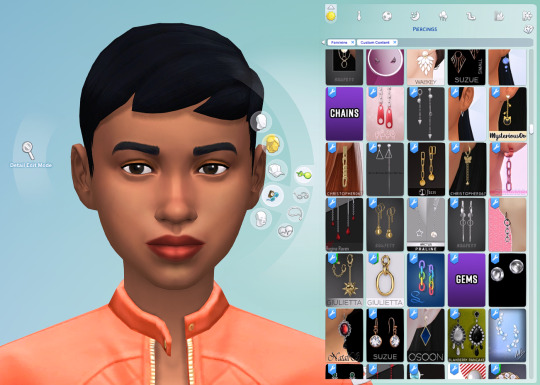
How to create visual "custom categories" with the new Sims 4 Studio Batch-Edit
As discovered by @vyxated Sims 4 Studio now supports batch-changing the Display Index number which allows you to easily sort your CC (see post here)
Using that, you can create visual "custom categories" for any existing category to sort your CC into smaller groups that share a thematic.
━━━━━━ ・❪ ☾ ❫ ・ ━━━━━━
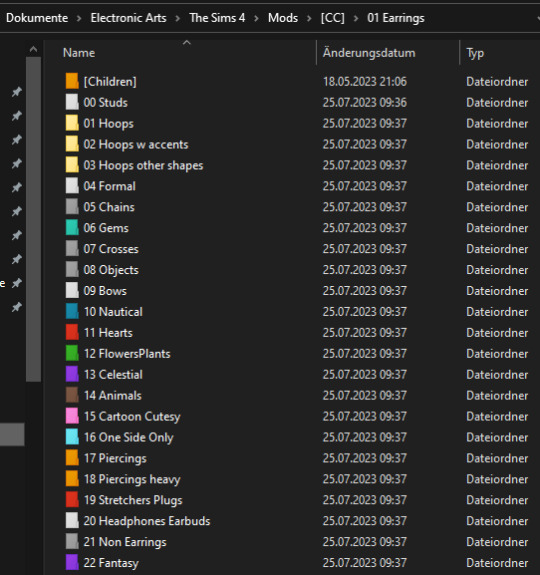
Step 1: Creating folders
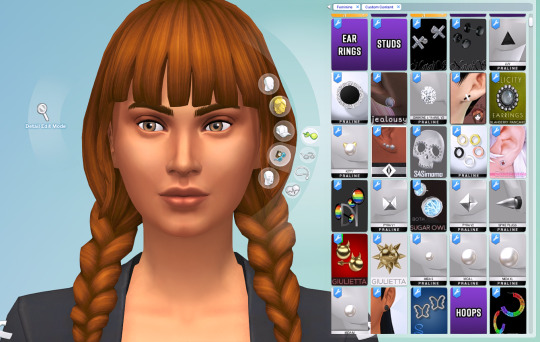
First you need to sort your CC into whatever categories you want. I am sorting my earrings.
( I use Folder Painter to get colored folders)
━━━━━━ ・❪ ☾ ❫ ・ ━━━━━━
Step 2 (Optional): Creating dividers
I highly recommend you to make some sort of divider for your categories (basically like my TidyCAS).
For that, in S4Studio start out by cloning any basegame CAS item.
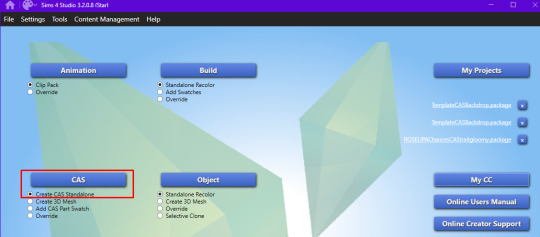
I usually always use the sunscreen facepaint, but it doesn't really matter, you shouldnt use smth with a mesh.
Or you can download this file and place it in Documents\Sims 4 Studio\Mods. It has no texture, is enabled for a lot of things and disabled for random.
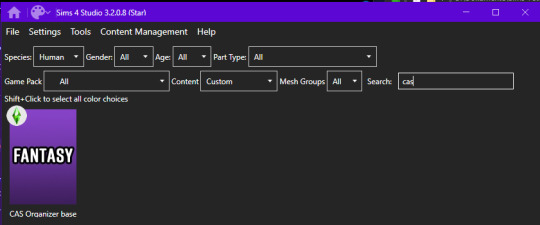
IMPORTANT: For every new divider you want to create, you have to clone the CAS item from S4Studio again. You cannot simply duplicate your divider CC and simply change it.
Save it as the number and name of your category. For me it would start with "00 Studs".
In that file, first import any type of custom thumbnail you want to use to display the category name.
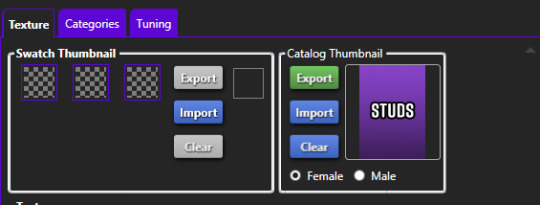
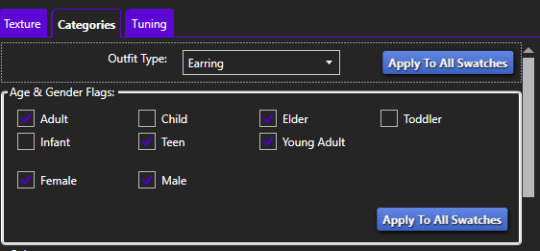
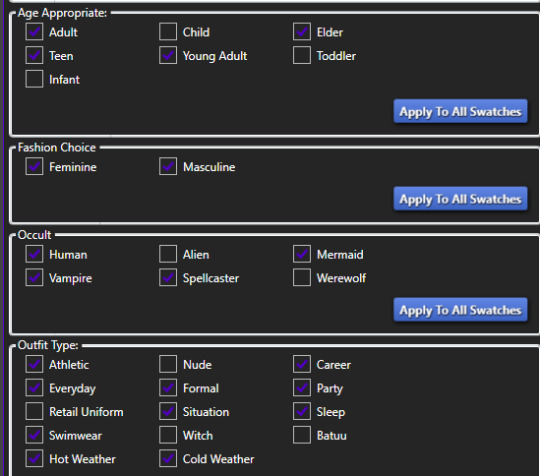
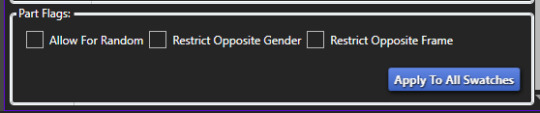
Then, change the category to whatever category you are working on and enable it for all ages, genders, fashion choices & outfit types you want and disable it for random.
Now if you want, import an empty texture to get rid off the sunscreen, but since you won't apply that CC, it won't matter.
Download the empty texture here
Make sure to place the dividers OUTSIDE your sorted folders.
━━━━━━ ・❪ ☾ ❫ ・ ━━━━━━
Step 3: Batch processing in S4Studio
Now you want to batch process your folders in S4Studio.
First click on "My CC" and let it load.

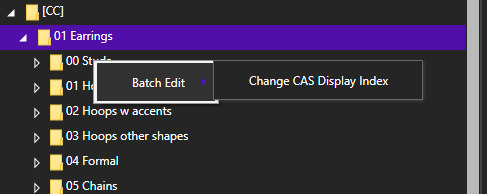
Now right click your first folder and select "Batch Edit - Change CAS Display Index"
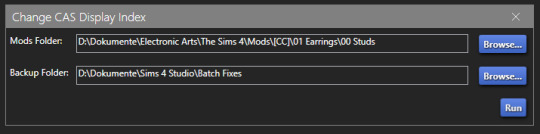
In the next window, press "Run".
Then, enter whatever number you want to start with. The smaller the number, the higher up the content is. You can go into negatives and the limit is a veeeeeeeeeery high number.
If you just want to sort some normal CC, I recommend starting with 0 simply.
For the next folder I then always go up by 10, so 0-10-20-30-etc.

Then press "OK".
You will then get a popup with all your changed files (I sorted mine before so it's non lol)
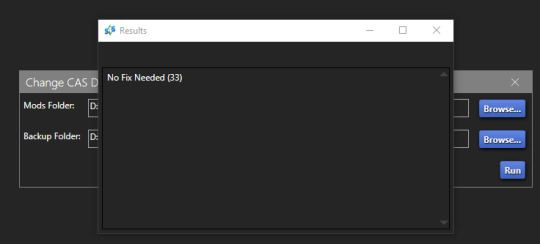
Note: Keep in mind that it does not sort your CC alphabetically. Apparently it's by last modified date.
━━━━━━ ・❪ ☾ ❫ ・ ━━━━━━
If you have done step 2:
Step 4: Sorting your dividers
Lastly you want to make sure that your dividers show up at the beginning of the custom categories.
Open up your divider in S4Studio again if you closed it.
Click on "Warehouse", select the "CAS Part" and on the right in the "Filter" field search for "display".
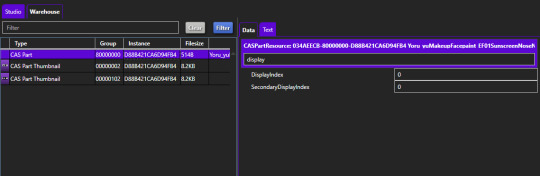
Under "DisplayIndex" you now want to input a number that's before your category.
My category starts at 0, so I will change it to -1. If the category starts with 10, I input 9 and so on.
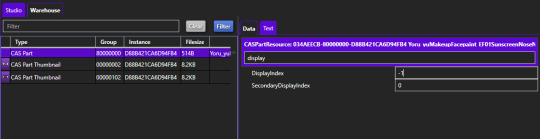
"SecondaryDisplayIndex" is swatch order, so it doesn't matter here.
Then just save it.
━━━━━━ ・❪ ☾ ❫ ・ ━━━━━━
And that's it!
@thefoxburyinstitute
371 notes
·
View notes
Text
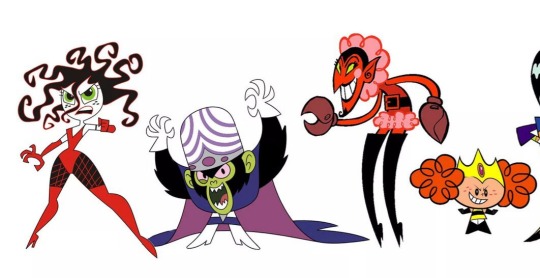
Sims 4 Villains from Powerpuff Girls
🐒👺👸👾
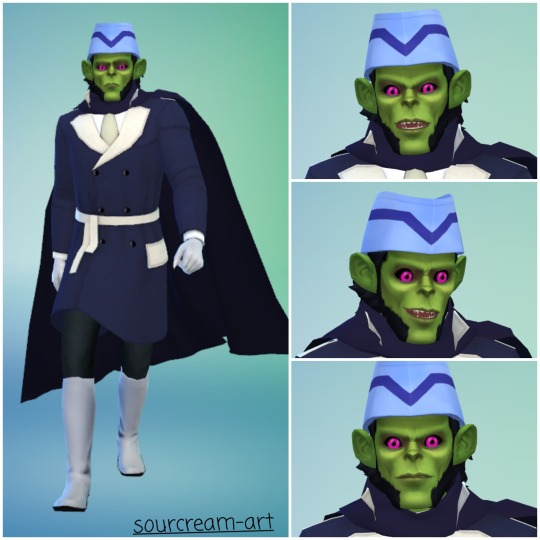
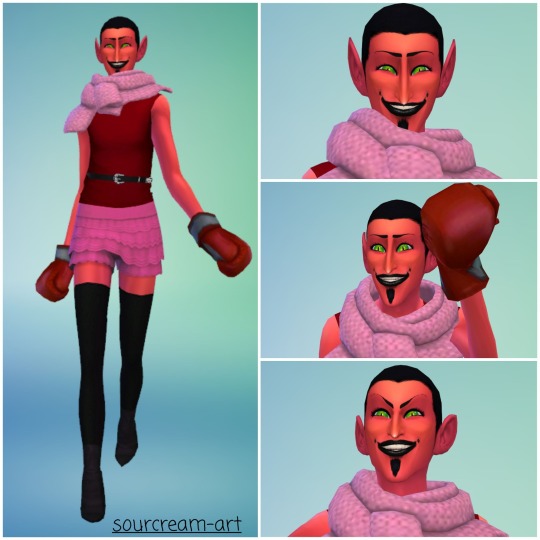

Mojo Jojo, HIM, Sedusa and Princess Morbucks from the Powerpuff Girls show
141 notes
·
View notes
Photo

I mean…what else was I supposed to do with these new dress swatches?
366 notes
·
View notes
Text
Homestuck Aspect Tank tops
Theres not very much homestuck cc out there(Or at least not as much as there could be) so i made this so i can make sylph outfits better.

The shirts are recolors of the basegame tank top so its fully BGC and the colors underneath are from a separate accessory, not a part of the shirt
{ ★ Download ★ }
18 notes
·
View notes
Text

A very A E S T H E T I C shot of my monster high Sims having a movie night
(Hopefully I can put together some more posts for this blog, might start with some full body shots of these sims)
32 notes
·
View notes
Photo


Some jojos cc i’ve made(most of it is pretty old)
The top two are my DIO posters that i made for DIO’s mansion there are two different package files (one requires cats & dogs and had a lot more swatches sorry): C&D’s posters & Basegame posters
the ones below that are the face marks i’ve made for the D’arby brothers(they look pretty bad ngl :/): D’arby face things
under those are the jjba style face marks the first two are 1-3 style and the other is a part 4 style(might do styles after that when i feel like putting the work in): Face marks
and last is Wamuu’s face tattoo, I’ll do Esidisi’s whenever i can get myself to._.: Tattoos
(Please forgive the not great looking sims, i made them all like 3 years ago and haven’t updated them much)
1 note
·
View note
Text
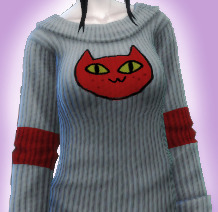
A few Adventure time shirts for the sims 4!
I could barely find any cc for adventure time(Which was pretty surprising to me)
so i made some myself
I made Marcies Cat sweater and no smoking shirt and Bubblegums sleeping shirt
the sweater needs the cats and dogs dlc to work and the no smoking shirt is a CC shirt made by @mlyssimblr who let me(And others) do recolors of their shirt! you need to download it because i am still new to this stuff and dumb and don’t know how to include a mesh ÓwÒ
anyways you should check their stuff out cause they make some nice cc and i hope you like these shirts.
Sweater
BG’s shirt

No smoking

3 notes
·
View notes
Photo


Homestuck mods for the sims 4! There is one dress(Ardata’s), one hoodie(Zebede) and a few random furniture things i’ve re textured
Furniture: http://www.mediafire.com/folder/5gsrcswagb7f1/Homestuck_ts4_cc
Hoodie: http://www.mediafire.com/file/v18pvyfffbs9vn0/Zebede.package/file
Dress: http://www.mediafire.com/file/4kgtsb7srk8l6if/Ardata.package/file
7 notes
·
View notes
Text
More Hiveswap cc!

Amisia’s shirt(Needs pets): Download
Vikare’s jacket(Needs seasons) : Download
Remele’s shirt(Base game) : Download
Ardata’s third eye as a skin detail(Needs this by @zaneida-and-sims4 big thanks to them for letting me use this!: Download
Remele’s eyes(Needs this by Toksik ): Left Right
Skylla’s Outfit(Needs strangerville for the shirt and get famous for the pants) : Shirt Pants
Please let me know if there are any issues with anything as i am still pretty new to making mods and i’d appreciate if you could spread this around to anyone you think might like it!
7 notes
·
View notes
Text
My magnum opus of ts4 cc
I’m a luxury, few can afford.

Keep reading
1 note
·
View note
Text
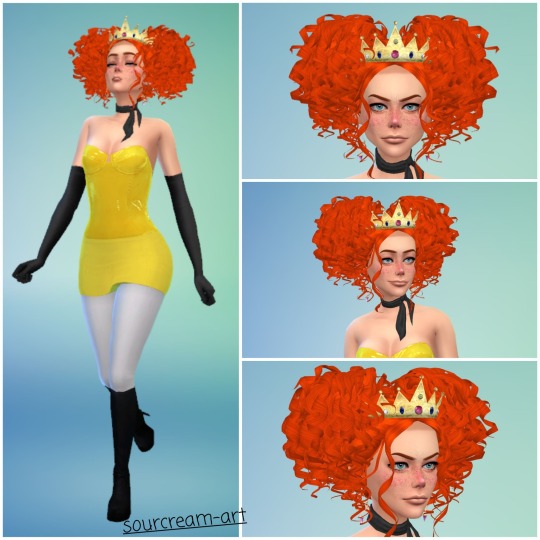
First TS4 hair CC!

This is the first hair me and my brother have tried to make, it was made for someone on the sims discord that we’re both in and it felt like a bit of a mess all together to make as an absolute novice at blender but it still got finished and could’ve look worse!(tho it does have a lot of glaring mistakes)
its got three different packages: one with plain EA textures and base game colors, one with a custom made texture(made by my brother not me!) and one with EA textures again but with random colors.
Download!
4 notes
·
View notes