
ttutorial
9 posts
Meiko⠀ eng/jp ⠀⠀જ⁀➴ ♡Minor⠀⠀☆⠀⠀tutorial blog
Don't wanna be here? Send us removal request.
Statistics
We looked inside some of the posts by ttutorial and here's what we found interesting.
Average Info
Notes Per Post
5K
Likes Per Post
3K
Reblog Per Post
2K
Reply Per Post
2
Time Between Posts
2 days
Number of Posts By Type
Note
2
Text
6
Photo
1
Last Seen Tumblr Blogs


Fun Fact
There are dozens of funny blogs to kill time on Tumblr.
Note
hello! Is it alright if you would show me a tutorial on how to recolor gifs and put them on a graphics? Thank you!
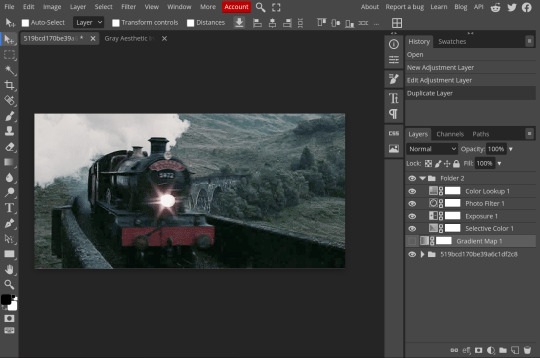
I. Recolouring GIFs
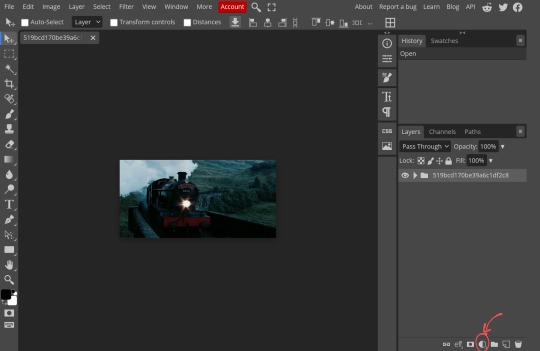
I use photopea to recolour and edit gifs. To recolour, I use two methods — gradient map and psds.
Method 1: Gradient Maps
This method is simple as its name. You import a gif, create a gradient map, and export. You can find gradient maps if you click the button that looks like a first quarter moon (🌓) on the bottom right corner.
Method 2: PSDs
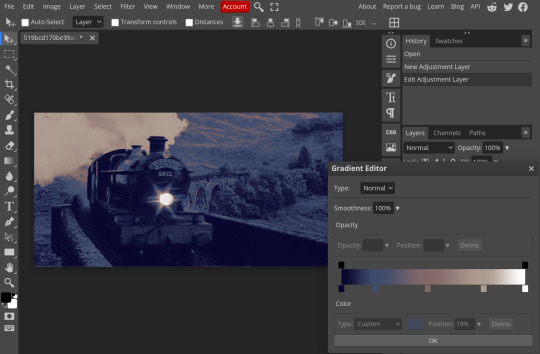
This method requires you to use a Photoshop document (PSD), one that consists of settings you'll need to colour or adjust images and GIFs. There are several PSDs online and on Tumblr which you could use, but I'm personally demonstrating an example using what I made.
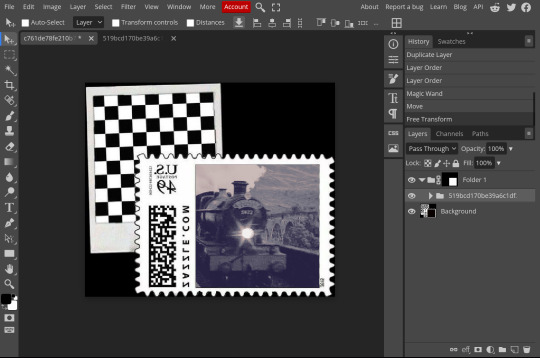
First, you load your gif. Then, you open your PSD in another document. After that, you duplicate the folder containing the settings into the other document.
Once you do, adjust the layers and make sure the folder is above your GIF. You should be able to export your GIF afterwards.
II. Adding GIFs into graphics.
Adding GIFs into graphics is pretty simple. I'll teach how to add transparent GIFS and how to add GIFs into masks.
Transparent GIFs
First, you load your picture. Then you open your transparent GIF in another document. After that, you duplicate it into the picture's document. Adjust to your liking and then export.
GIFs in Masks
To add GIFs into masks, first, you open the image you want to use as a mask. Then, you either select the pixels of the area you want to be a mask with the magic wand, or right-click (long press on mobile) to select the pixels of the layer.
Once selected, make a folder and then add a mask to the folder.


Open the GIF you want on another document and then duplicate it into the file just like in the previous text. Once you do, put the GIF's folder into the folder with the mask. Move and adjust the GIF as needed, and then export it once you're satisfied.
Unfortunately I've run out of images I can put here but I will reblog the finished product. I hope this tutorial helped! If you're still confused on some aspects or there's some things in the tutorial that you don't understand, don't be afraid to reach out for clarification.
:)
40 notes
·
View notes
Text


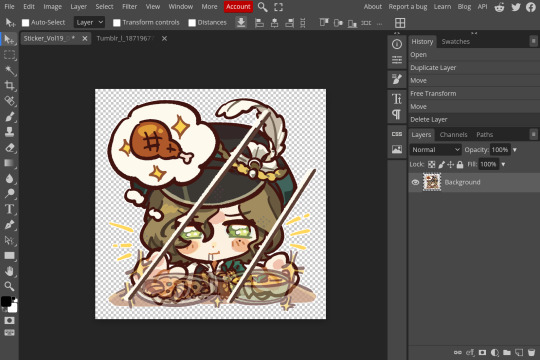
Hello dearests! ~ I am back with another tutorial, this one will be a tutorial on how to add a gif onto a pfp and/or icon mask! Click "read more" to continue!

Step one: import your frame/mask of choice and gif into photopea


Step two: click on the files tab and select the gifs file, hold and drag to your frame of choice. Here you can resize your gif by clicking "transform controls" when selecting the gif file.


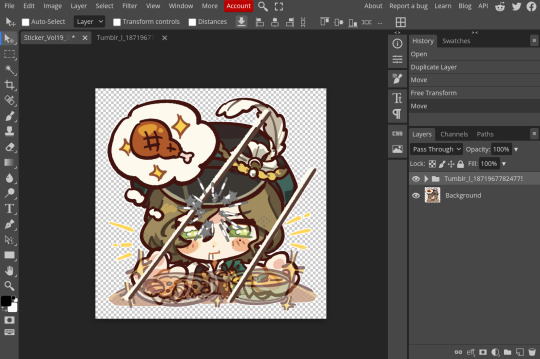
Step three: hide your gif file by selecting the eye icon beside it. Select the layer containing your frame (which should sit below the gif file) and select the magic wand button. Then you can select where you want the gif to mask.


Step four: Select the gif file once again and click on the eye icon once again. While you have the gif file selected, tap the "layer" tab.


Step five: Once you open it find the "raster mask" tab and select it, a couple of other tabs should appear below it. Select "reveal selection" and your gif file should look like this after


Step six: export as a gif and you're finished! You have successfully added a gif to your mask/frame! :)

#⌢⌢ @ttutorial tutorials ⟢#editblr#rentry#tutorial#rentry decor#rentry graphics#rentry resources#gifset#my gifs#anime gif#gif#pjsk
101 notes
·
View notes
Text


Today's tutorial will be dedicated to helping editors and non-editors find an original artist! Because crediting them is important ~

First method!
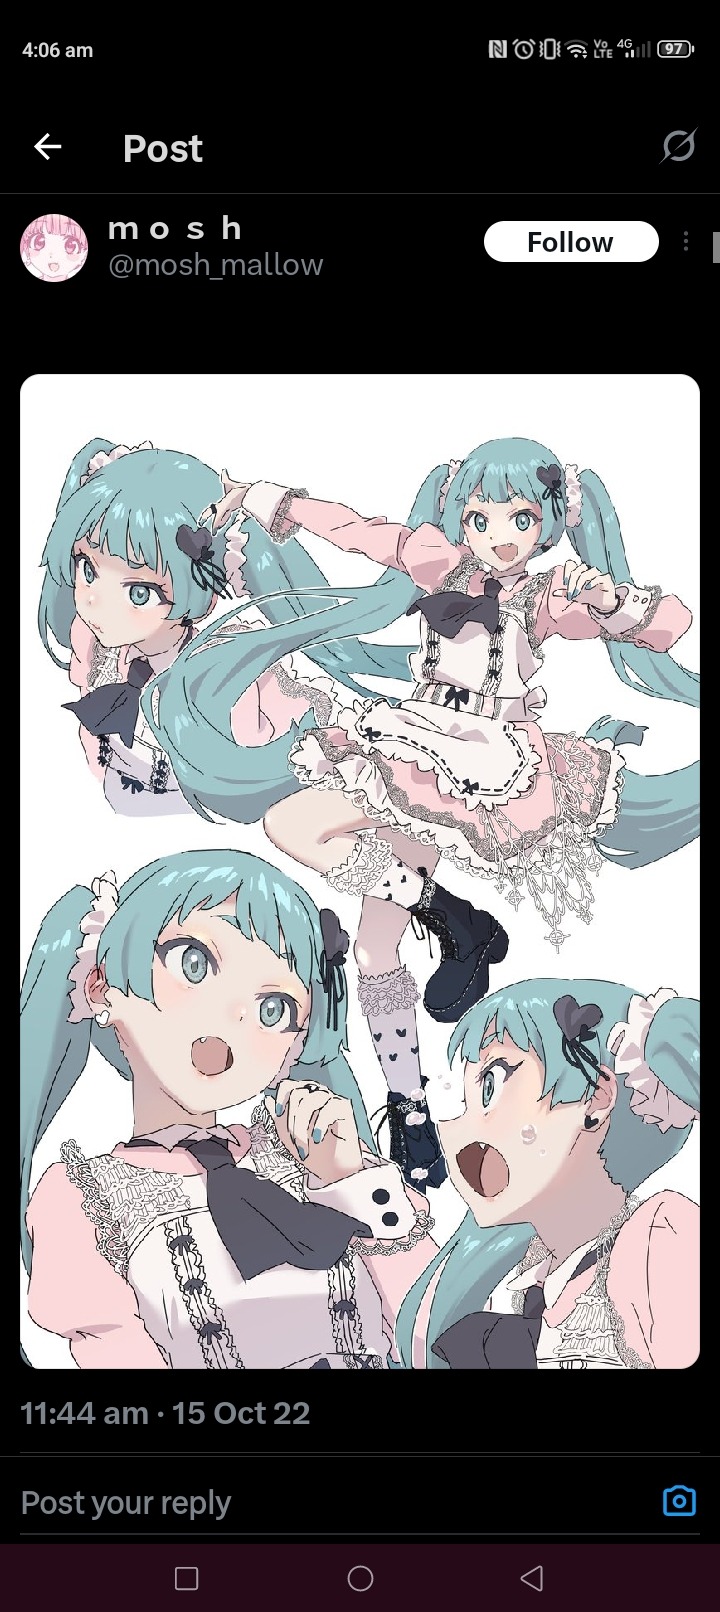
Step one: find your art! Usually Pinterest has a good amount of art you can use, but not everyone credits the artist! (I suggest using Danbooru/safebooru!) How can we find the artist? (The artist for this post is @mosh_mallow on Twitter/X)

Step two: open up Google and press on the camera looking button, this is called "reverse image search" or "google Lens"
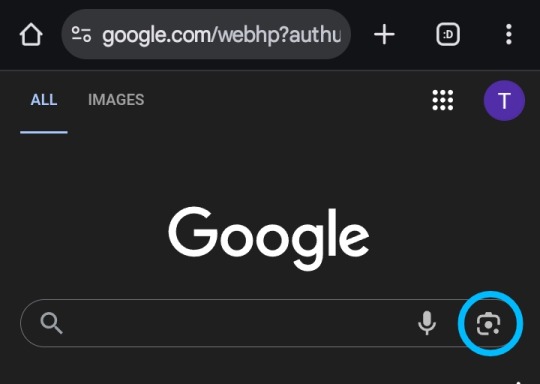
Step three: after you've clicked on the Google lens button, you will be able to upload any photo you need. After you've uploaded your photo, you'll be able to scroll down and look for "visual matches".


Step four: search "visual matches", usually you'll see a bunch or reposts from across the web, trusted websites that may be included are: Twitter, Reddit (credit will not always be provided) and Danbooru/safebooru.
For this tutorial I picked Danbooru, click on the icon and it should take you to the reupload, usually for this website the credits are always provided with a link to the original post/artist!

Second method!
If you cannot find the artist or original post, ask someone! Tumblr and discord are good places to ask. But if you can't do that, simply don't use it ~
130 notes
·
View notes
Text


Hello! Another tutorial today! This tutorial will teach editors and non editors how to put an outline on a transparent gif! ~

Step one:
Get your transparent gif and open photopea, select "open from computer" and import the gif


Step two:
Select the "files" button on the right and double tap/click on the highlighted gif file


Step three:
One you have double clicked the file, the "later style" tab will pop up. select the "stroke" box, once that's selected choose the size and color of choice! Feel free to click the "x" button on the top right corner to close the tab


Step four:
Select "file" in the top left corner. Select "export as" then "gif" and you should be able to download your gif!


Results! ૮(˶ᵔᵕᵔ˶)ა

#⌢⌢ @ttutorial tutorials ⟢#editblr#tutorial#rentry decor#rentry resources#rentry#rentry graphics#gif#editblr tutorial#photopea#photopea resources#photopeablr#photopea tutorial
166 notes
·
View notes
Text
Today's tutorial will be dedicated to helping editors and non-editors find an original artist! Because crediting them is important ~
First method!
Step one: find your art! Usually Pinterest has a good amount of art you can use, but not everyone credits the artist! (I suggest using Danbooru/safebooru!) How can we find the artist? (The artist for this post is @mosh_mallow on Twitter/X)
Step two: open up Google and press on the camera looking button, this is called "reverse image search" or "google Lens"
Step three: after you've clicked on the Google lens button, you will be able to upload any photo you need. After you've uploaded your photo, you'll be able to scroll down and look for "visual matches".
Step four: search "visual matches", usually you'll see a bunch or reposts from across the web, trusted websites that may be included are: Twitter, Reddit (credit will not always be provided) and Danbooru/safebooru.
For this tutorial I picked Danbooru, click on the icon and it should take you to the reupload, usually for this website the credits are always provided with a link to the original post/artist!
Second method!
If you cannot find the artist or original post, ask someone! Tumblr and discord are good places to ask. But if you can't do that, simply don't use it ~
#⌢⌢ @ttutorial tutorials ⟢#editblr#tutorial#rentry decor#rentry resources#rentry#rentry graphics#finding artist#credit artists#credit the artist#artist credit#hatsune miku
130 notes
·
View notes
Photo

hello everyone! under the cut you’ll find a tutorial explaining how to make pale and pastel gifs without turning the subject into casper the friendly ghost. please keep in mind that this is not strictly a step-by-step coloring tutorial - i won’t be teaching you how to recreate the exact look featured in the header. it will be more of a “foundational” guide that teaches you the basic techniques of anti-whitewashing, so that you can apply them to all sorts of different scenes. with that being said, let’s get right into it!
all you need for this tutorial is a version of photoshop with a timeline option, and a basic understanding of adjustment layers.
Keep reading
4K notes
·
View notes
Note
sorry if this has been answered, but how did you do the wavy text in your pinned?

just type ur text, click it to select, scroll to warp, n mess around! whisper uses flag at bend 50% or -50%


45 notes
·
View notes
Text

contrast - why it is important in editing
contrast is an element in any sort of design, from edits to artwork, and its importance doesn't waver regardless of what kind of design you are creating.
so why exactly is it important? it helps to not only organize the elements in your edit, but also to help distinguish the different parts. contrast helps draw your eyes to the more important aspects of the edit (typically the character). if everything blends together, then the edit stands out less.
its also important to note that contrast isn't *only* created using differing colors, however i will be explaining color contrast and how it can affect your edits in this post. contrast can also be created using size, texture, shape, etc.
the color contrast in different edits will differ depending on the theme you are going for, however no matter the theme of your edit you still want to be able to differ the focus point (your character) and your background. that tends to be harder in lower contrast edits because there is less of a difference in color values.
there is also issues when a lack of color contrast in an edit prevents visually impaired people from properly being able to see what you are creating.
so how can we go about implementing more contrast in lower contrast colorings? there are a few simple ways to do it. i'll be using kasumi as an example
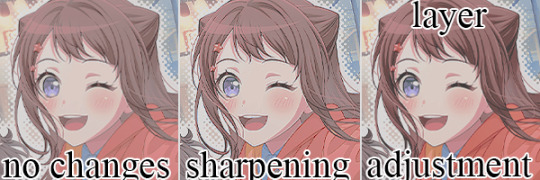
i've created a very low contrast psd and slapped it on kasumi. as you can see with the no changes version, the colors blend together very much because of the lack of color contrast.
the easiest way to fix this (and without changing the colors) would be to sharpen the image. this creates bolder lines on the character and helps kasumi stand out a bit more from the background.
another option would be to simply adjust the layers. on the third kasumi all i did was add two adjustment layers and i created a bit more contrast.
so whats the best solution to fixing the problem? well in my opinion, it'd be both sharpening *and* adjusting the layers.
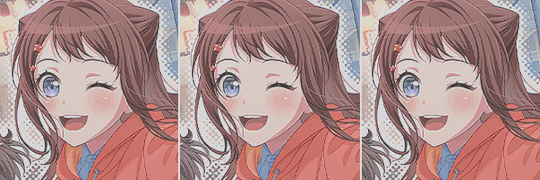
it maintains that low color contrast look, while also still making it so you can see kasumi.
there are multiple ways to add contrast using new adjustment layers, here's an example of three i could think of off the top of my head. curves, b/c (brightness/contrast), and levels.
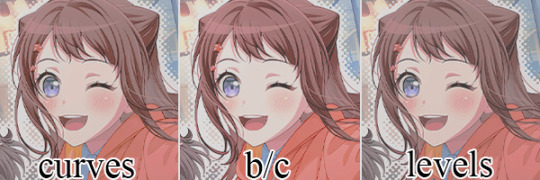
using curves can be either quite complicated or quite easy depending on your goal and understanding of it. for creating (or removing) contrast, its pretty easy!

by dragging the top pin to the left, you can easily create more contrast
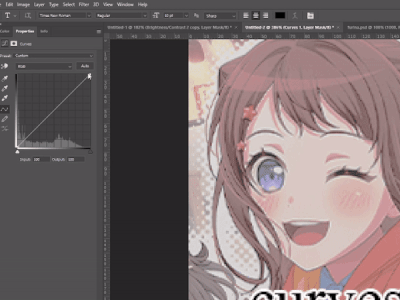
by dragging the top pin down, you can remove contrast

by doing it in the middle you can create a sort of mix of both.
brightness/contrast is pretty straightforward, just up the contrast value using the contrast bar. usually when i up the contrast i tend to turn the brightness down a little bit as well.
using levels is also relatively straightforward! by adjusting this bar you can easily add or remove color contrast.

you can use just one of these methods, a new method, or mix them! anything works! experimentation is a part of editing, it helps you to learn what works best for you. my guide is not an end-all fact book for how you *need* to do things, but rather advice and tips to help you get better and to make your designs look more appealing.
remember that it's all in good fun! if you have any questions or comments about my post, feel free to send me an ask or toss it in the reblogs and i will answer the best i can. happy creating!
63 notes
·
View notes
Text


This blog is dedicated towards editblr tutorials, want to know how to do something? Don't be afraid to ask! this blog is ran by @moechu ~ psd: huesick | art: official

8 notes
·
View notes