Axel | he/she/they | I’ll post art and random thoughts | feel free to request stuff
Last active 2 hours ago
Don't wanna be here? Send us removal request.
Statistics
We looked inside some of the posts by turtleunderyourhouse and here's what we found interesting.
Average Info
Notes Per Post
956K
Likes Per Post
516K
Reblog Per Post
439K
Reply Per Post
723
Time Between Posts
18 days
Number of Posts By Type
Text
15
Photo
2
Last Seen Tumblr Blogs


Fun Fact
The KCSC sent more than 20K requests to delete posts related to prostitution and porn to Tumblr from January to June 2017.
Text
youtube
My patreon
YouTube
TikTok
334 notes
·
View notes
Text

thats my fat old man!!
context: @sexyman-contest-2025
#new crack ship just dropped#idk how to feel about this one#but the art style is great#so it gets a reblog#orxa art#gravity falls#phineas and ferb#tumblr sexyman#tumblr sexymen poll
20K notes
·
View notes
Text
AHAHAHAHHAHHAHAHAA
#I don’t know whether to laugh or cry!#like this is one of the saddest scenes to me but that end clip caught me so off guard#”dad- dad no!” ”wanna be princess for a day?”#had me wheezing#tts#rapunzles tangled adventure#tangled the series#tangled#tts varian#tangled varian#rapunzels tangled adventure#disney tangled#rapunzel#rta varian
110 notes
·
View notes
Text

So... cub's recent tweet

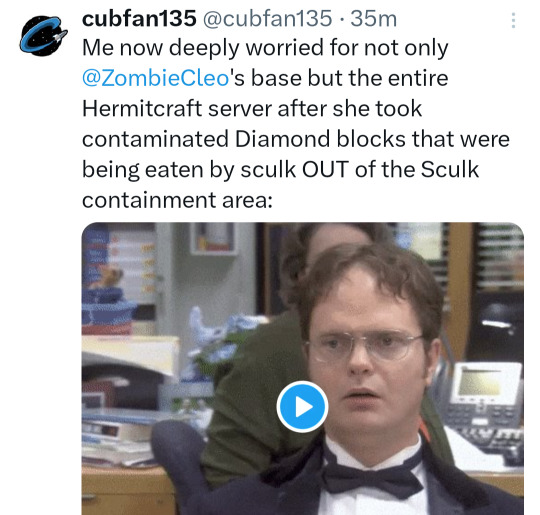
#cub will never leave his sculk phase#i love that for him#mcyt#hermitcraft#cubfan135#zombiecleo#artists on tumblr#hermitblr#hermitcraft season 10
4K notes
·
View notes
Text
why is ao3 is blocked on the hospital wifi????
149K notes
·
View notes
Photo
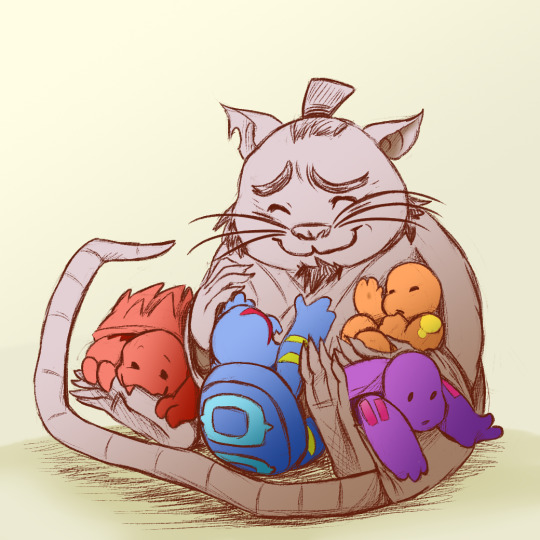
ROTTMNT Week Day 3 - Fav Side Character My heart can’t take how much I love ROTTMNT Splinter as a dad. They call him “Pops” and it’s just so friggin adorable and wholesome and I can’t even! So have a Rat Dad and some Turtle Tots.
Day 1 - Fav Turtle Day 2 - Fav Villain Day 4 - OC/ Other Iteration Characters Day 5 - Fav Looks/ Outfits Day 6 - Fav Scene/ Episode Day 7 - Why We Love ROTTMNT
ROTTMNT Week Info
#i love them so much#rottmnt#rise of the teenage mutant ninja turtles#rottmntweek#rise of the tmnt#splinter#splints#hamato yoshi#ratdad#turtletots#pops
2K notes
·
View notes
Text
I am not sure if this is legible, BUT just wanted to show a work in progress of one of the things I am working on! (imma not tell you from what fan comic this is from...) Where Donnie is kicking butt with a group fight. Plz enjoy!
2K notes
·
View notes
Text
I know tumblr is gonna make the quality SUPER crispy but I still want to share it on here!
852 notes
·
View notes
Text
IM BACK IN THE FUCKING BUILDING AGAIN OH MYYYY GODDD
A friend dragged me back to LMK so I offer you all a quick animatic.
Context: Wukong has been gone way to long and with no ruler over flower fruit mountain demons are getting impotent and want the territory for themselves Macaque can't single handedly fight every damn clan. So his compromise is if someone can lift wukongs staff and beat him in a fight. The the territory is there's and he will be their warrior . After Al who wouldn't want someone who can hear the future on their team?
4K notes
·
View notes
Text
i am an advocate for comet joel bc it lets me flex my animation degree lmaoo. but look- my fave guy won!!! MASSIVE win for joel enjoyers
(hi, do me a solid and hit reblog- it would rlly help an artist out, ty!)
3K notes
·
View notes
Text
things i’ll not call you a whore for:
sexual activity
how you dress
things i’ll call you a whore for:
stealing my food
stealing my lemons
my cat likes you more than me
173K notes
·
View notes
Text
Behold, Captain Kaesar

8 notes
·
View notes
Text
I’ve never been great at drawing super realistic art, and I think it’s because it never really held my interest. I just love stylized characters which is why I’ve been drawing them obsessively for over 20 years! Because of that, I’ve got a lot of ideas about how you can approach stylized anatomy - here’s a snippet of a longer video I made on this topic ✨
You can watch the full video here!
20K notes
·
View notes
Text
this is what i mean when i say "sniles so sneetly" btw

100K notes
·
View notes
Text

i think ya'll might like it ^^ my last submission for haikaveh week last week
#holy-this is so good#i’m gonna cry#poor kaveh#writing on the wall is such a good song#haikaveh#alhaitham#kaveh#genshin impact#digital art#fanart
102 notes
·
View notes
Text
the absolute best gif the MLP fandom ever produced is this one

80K notes
·
View notes