#Homemade Pears in Syrup
Explore tagged Tumblr posts
Visit Tumblr Blog
Explore Tumblr blogs with no restrictions, modern design and the best experience.
Last Seen Tumblr Blogs


Fun Fact
China blocked Tumblr because of pornography and censorship problems in 2013.
Note
hiii, do you have any good fall recipe recs? sweet or savoury I don’t mind I just regard you as a cooking god and am looking for inspiration
Yes! Here is my current To Make list.
Many I’ve made before and some are recipes I want to try.
I’m linking specific recipes just bc I’m copy pasting from my own list. Sorry for all the instagram reels, you can just google the name of the thing and find it.
I’m going apple picking with my friends sometime in early October so I’m already planning all the apple things I want to make 🤤🍎
And Friendsgiving… so many pies…
SWEET
- French Apple Cake/German Apple Cake
- Apple Tarte Tatin
- Apple Crunch Tart/“The Best Apple Tart in Paris”
- My auntie’s date pecan bread, one of my favorite quickbreads of all time. Yes you are reading that ingredient list correctly. This is for real fruit & nut enjoyers only. If you can’t play with the big boys go home.

- Pumpkin Bread
- Pumpkin Pie (I use the Libby’s recipe but double the cinnamon & ginger, brown sugar instead of white, 1 extra egg, and add 1 tsp vanilla, 1/2 tsp cardamom, 1/4 tsp nutmeg, a few cracks of black pepper, and lemon or orange zest. AND let the filling chill in the fridge overnight!!)
- Sweet Potato Pie (my own recipe, I’ll put under the cut)
- Pecan Pie (same)
- Cinnamon Roll Focaccia/Pumpkin Cinnamon Swirl Sourdough
- Orange Cardamom Olive Oil Cake
- Pear Almond Tart (Tarte Bourdaloue)
SAVORY
- Arayes (made already, so good)
- Crispy Pork Scallion Buns
- Coconut Curry Butternut Squash Sheet Pan Soup (+ Any Vegetable Sheet Pan Soup)
- Veggie Filo Crinkle Cake
- Peanut Noodle Soup
- Fall Squash Galette/Butternut Squash & Caramelized Onion Galette
- Crispy Parmesan Carrots
- Garam Masala Roasted Carrots
- Zucchini Cornbread
- Homemade (sourdough?) pizza with roasted butternut or kabocha squash, goat cheese, figs, caramelized onions
- My dad’s red beans and rice :)
- Spicy Korean Fried Chicken
- Potato Tart with Zucchini & Feta
- Thai Red Curry Dumpling Soup
- Channa Masala
MY RECIPES:
SWEET POTATO PIE
MAKES: 1 x 8-9” pie
INGREDIENTS
1 ½ lbs sweet potatoes (2-3 potatoes) (3 cups flesh), whole, to be roasted
1 x 12 oz can evaporated milk
1 cup (200g) dark brown sugar
2 eggs
5 Tbsp (70g) butter, melted
1 Tbsp lemon zest (zest of 1 lemon)
1 tsp lemon juice
1 Tbsp cinnamon
½ tsp kosher salt
½ tsp ginger
¼ tsp nutmeg
a few cracks (⅛ tsp) freshly ground black pepper
+
1 disc (½ recipe) All-Butter Pie Crust*
*I’ve posted my pie crust recipe on tumblr before tagged “recipes”
DIRECTIONS
1. Roast sweet potatoes: Preheat oven to 400°. Line a baking sheet with foil. Wash and scrub whole sweet potatoes. Pierce potatoes all over 3-5x with paring knife. Roast 45 minutes until fork tender. Let cool, then collect 3 cups flesh.
2. Prepare crust: Roll out pie dough (12-14” diameter circle, ¼” thick). Press into tin and crimp edges. Chill shaped shell in fridge or freezer until ready to use.
3. Preheat oven to 350°.
4. Make filling: Put all ingredients in food processor. Pulse 3-4x until smooth. (You can also use a blender, or simply beat ingredients until fully combined.)
5. Pour filling into pie shell.
6. Bake 45-60 minutes until puffed and firmly set (toothpick clean) everywhere except the very center, which should retain a very slight jiggle (but not look liquid). The center will set as it cools. Start checking at 45 minutes and continue baking at 5 minute intervals until set. (If crust gets too brown, shield edges with foil.)
7. Let cool completely before serving, at least 1 hour.
NOTES
Roast the potatoes whole, in the skins, so the sugars & starches properly caramelize. Do not steam or boil potatoes, even whole. They will take on water and make the filling soggy.
You can roast the potatoes up to 1 week in advance. Collect flesh day of.
PECAN PIE
MAKES: 1 x 8-9” pie
INGREDIENTS
2 cups (250g) chopped pecans
1 cup (200g) dark brown sugar
1 cup light or dark corn syrup
¼ cup (56g) butter
4 eggs
1 Tbsp vanilla
1 tsp kosher salt
1 tsp cinnamon
+
1 disc (½ recipe) All-Butter Pie Crust
DIRECTIONS
1. Prepare shell: Roll out pie dough (12-14” diameter circle, ¼” thick), press into tin, crimp edges. Chill shaped shell in fridge or freezer until ready to use.
2. Preheat oven to 350°.
3. Cook sugar syrup: In a saucepan, bring sugar, corn syrup, and butter to boil over medium heat for 1-2 minutes, whisking constantly, to cook sugar. Take off heat. Let cool slightly, 3 minutes.
4. Temper eggs: In a bowl, beat eggs until lightened and frothy. Slowly, while whisking, pour ½ cup of warm syrup into eggs. Whisk to combine. Then, while whisking, slowly pour egg mixture back into the remaining syrup mixture. Whisk until smooth.
5. Whisk in vanilla, salt, and cinnamon.
6. Pour chopped pecans into bottom of pie shell. Pour filling over pecans.
7. Bake 45-60 minutes until fully set everywhere except the very center, which should retain a very slight jiggle. The center will set as it cools. Start checking at 45 minutes and continue baking at 5 minute intervals until set.
8. Let cool completely before serving, at least 1 hour.
NOTES
Many recipes do not require you to cook the sugar before baking the pie. However, pre-cooking the sugar (and tempering the eggs) ensures the ideal gooey, silky, perfectly smooth texture.
Toast pecans if desired: Arrange pecans in a single layer on a baking sheet and toast in preheated oven 5-8 minutes.
#recipes#food#feyburner ask#always happy for recipe recs btw!! someone recced me a garam masala tart the other day that i forgot to put on here#but it’s on the list
119 notes
·
View notes
Text
so as long as ive wanted to be alive ive wanted to host a dinner party at my own place and it's FINALLY happening tonight im so excited. we're doing CHARCUTERIE. we're doing SPECIALIZED COCKTAILS WITH HOMEMADE BASIL SYRUP. we're doing EGGPLANT PARM WITH HOMEMADE NOODLES. we're doing A NOT HOMEMADE TUXEDO CAKE. i got my norah jones and laufey records on hold. i have a candle in both bathrooms. i have a flower centerpiece with a matching plate set. i bought a board game for after dinner. for fuck's sake, i even have a big bowl with fruit inside. FRUIT. it might just be pears, but still. FRUIT. i've never been more excited in my adult life.
15 notes
·
View notes
Text
Poached Pears
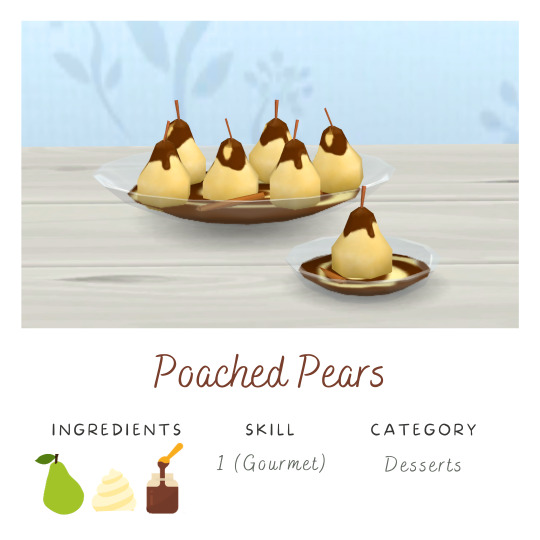
In the autumn months, Pip takes a basket with her to visit the orchard which sits at back of the farmhouse. Her basket laden with juicy pears, she hums to herself as she heads home and pops them in a saucepan on the stove. She pulls out some of her jars of precious homemade custard and chocolate syrup which sit bottled in her larder, and drizzles them over the delicious fragrant pears.
*REQUIRES the latest version of my TianaSims Cookbook to work* Download here (free): https://www.patreon.com/posts/tianasims-64612779
Category: Desserts
Ingredients: Pears, Custard (CL), Chocolate Syrup (CL)
Skill Level: 1 (Gourmet)
Available sizes: Single, Family, Party
Dietary: Vegetarian-Safe
DOWNLOAD (Patreon): https://www.patreon.com/posts/89330756?pr=true Milk and Cookies: Now! Sugar Cookies: 9th October Public: 16th October
#tianasimscookbook#ts4cc#customfood#ts4customfood#sims4customfood#custom food#thesims4#ts4 custom food#the sims 4#ts4 custom recipes#the sims 4 desserts#ts4 desserts#ts4 gourmet cooking#ts4 gourmet recipes#the sims 4 pears#the sims 4 farmhouse#cottagecore
129 notes
·
View notes
Text
9/15/24
Goal: 1,600
Breakfast: 897
6 chicken sausages (260)
3 blueberry pancakes (252)
4 tbsp maple syrup (208)
1 chocolate chip pancake (177)
Lunch: 0
Coke Zero (0)
Dinner: 669
2 tofu tacos (413)
Elote (256)
Snack: 525
2 mini pears (100)
2 tbsp caramel sauce (150)
1 serving homemade ice cream (275)
Total: 2091
Exercise:
1 hour incline treadmill (~400)
I went over my limit by like 400 cals, but it was cause I had such a huge breakfast I think. This week will probably be more consistent hopefully.
2 notes
·
View notes
Text
Crafting a cocktail with homemade absinthe, lime, pear liqueur, and honey syrup with a goat cheese wash.
2 notes
·
View notes
Text
Some pro-tips from someone in northeastern usa with food sensory issues AND cooks for both a small army of picky eaters & folks with different health risks:
Frozen onions are pre-diced and very, very easy to add into things. Unless someone has an allergy, I toss a handful of frozen onions (and garlic) into most of the dishes I cook. In thicker sauces & soups especially, they're very easy to sneak in.
Most squashes can be pureed and mixed into sauce! I like to use butternut squash especially (very popular donation to the food pantry so we always end up with a bunch) to mix into my stovetop mac'n'cheese sauce! Also another dish that you can freeze, though I will say that cubed squash (pumpkin especially~) is also really, really good when roasted with bacon, or when mixed into seasonal risotto.
Cauliflower! Cauliflower is a miracle veggie to me! You can dice it, rice it, mash it, use it as an alternative to pizza dough, and from personal experience it is absolutely delicious when breaded and deep fried.
Cucumbers! They go great with mint, watermelon, and are easy to sneak into sandwiches!
Kale & spinach are some greens that always are fairly popular with the crowd. For kale I like to either fry it up with some bacon, chicken, and pecans or dice it really fine to mix into soups. Spinach is very similar to that, but both are also good for salads. Kale has kind of a bitter- very mild!- taste to it and a bit more crunch; spinach is a little more bland & a bit softer (slightly longer to chew). Kale is also a good base for pesto. (I had so much kale from my garden last year; I had to get creative.)
Tomatoes are a hit-and-miss for me, so I've been getting more creative with them. I usually take canned tomatoes (homemade or store bought are both really good) and mix them into Hamburger Helpers (I'm poor and they're yummy), puree them for my own quick pasta sauce or salsa. I also love the smell of stewed tomatoes with mac'n'cheese but hated the texture; I found a recipe online that incorporates bell pepper slices and a slow simmer. I make them every time together.
Corn is very versatile. I personally love to make homemade cornbread (no idea how old our family recipe is), grill it, boil it, broil it, mix it into soups... I know there are more ideas out there, but I haven't tried them all yet.
Celery is one of those veggies I still can't quite get into, but it's always been good for soup: chunks into chicken pot pie, beef vegetable, pureed into a chilled celery soup on hot summer days, or even as a key ingredient in a veggie stock for meals later on.
Frozen berries! I know this thread is about veggies, but fruits & veggies kind of go hand-in-hand with this for me. Frozen berries can easily be added to ice cream, smoothies, cookies, or made into sauces & dressings for your rice, salads, & roasted meats. A few weeks back I used one bag of frozen blueberries to make a sauce that I put on chicken thighs, rice, and the rest went into a salad dressing. Plus they can be added to muffins, cereals, oatmeal, grits if you're willing to give it a go (maple syrup adds a little something-something too~)
Apples! I love apples; I can never stop thinking about how good apples are. They are very crunchy as they are and are very yummy raw, or drizzled with caramel, honey, baked into pies, grilled with brown sugar & cinnamon... Some of my personal favorites though are recipes where I slice them thin and incorporate them into my salads & sandwiches. Apple slices with cheddar cheese, apple butter, and cucumber slices on a cracker is divine for a midday snack, or apple slices with turkey, brie, and a little bit of honey toasted together (good place for some romaine lettuce too). My younger brother loves to grill up some slices of sausage with kale, apple, chive & onion cream cheese on toasted pieces of baguette.
Canned pears, peaches, and pineapple are always another option you can fall back on. I'm sure it's nowhere as good as the original, but I like to make sticky rice with pears as a dessert sometimes, and I've found the full sized canned pears are also good for making into a compote. Pineapple slices always add a little bit to a roast ham, and I love to heat up my peach slices in the microwave with a little cinnamon. They make easy snacks, too.
If you're like me and you have a phobia of produce going bad before you can finish it, I'd do a little digging into what you know you like to see if you could preserve it in some way.
Canned foods are usually fairly cheap (rinse several times before cooking to remove excess sodium!) and will stay good for several years.
Frozen fruits and veggies are often cut up in advance, which I can say from experience can save a LOT of time, and you don't need to use an entire bag in one go. I usually just do a handful or so at a time. Many also come with seasoning and can be cooked in the microwave!
If you, like me, rely on a food pantry, or even if you have to shop bulk, and tend to end up with a lot of fresh produce you don't think you can eat, it's worth the effort to set a day aside (if you can!) to figure out ways you can preserve it. I often spend my Saturday afternoons canning, dehydrating, and/or freezing what I know we can't use in the next week. I usually don't have a lot of spoons when I get home from work during the week, so any time I can save for myself cooking later is much better. (You can also freeze fresh herbs, cheeses, and meat!)
Getting into the habit of eating healthier can be a challenge, but it's worth trying to experiment and finding what sticks. In my case, it was eating mac'n'cheese baked inside a pumpkin & having my entire world view shift on me. Maybe it'll be something as simple as eating an apple slice drizzled with honey, or trying a different cheese on some leafy greens. You just have to find what works for you, and be patient with it.
i mean this in the gentlest way possible: you need to eat vegetables. you need to become comfortable with doing so. i do not care if you are a picky eater because of autism (hi, i used to be this person!), you need to find at least some vegetables you can eat. find a different way to prepare them. chances are you would like a vegetable you hate if you prepared it in a stew or roasted it with seasoning or included it as an ingredient in a recipe. just. please start eating better. potatoes and corn are not sufficient vegetables for a healthy diet.
#long post#food#veggies#fruits#reference#vegetables#cooking#meal prep#???#kinda#trust me i didn't eat like ANY vegetables till i was nearly 18- just potatoes and rarely some corn#i started just by putting some lettuce on sandwiches but when i finally tried that pumpkin mac-#core memory tbh#shut up ace
156K notes
·
View notes
Text
Kidney Care Through Nutrition: 7 Day Meal Plan for Kidney Disease
When managing chronic kidney disease (CKD), nutrition plays a vital role in supporting kidney function and maintaining overall health. For those living with kidney challenges, the right dietary approach can make a real difference in slowing disease progression and enhancing quality of life. That’s where a thoughtfully designed 7 day meal plan for kidney disease comes in—it acts as a roadmap for balanced nutrition tailored to kidney health.
Renalyfe, one of the most trusted dialysis centres in Bangalore, understands that kidney care doesn’t stop at treatment—it extends into everyday choices, especially what goes on your plate. That’s why we’re offering a practical, nutritionist-backed guide for kidney-friendly eating, with Renalyfe’s support and expert insights built in every step of the way.
Why Nutrition Matters for Kidney Health
The kidneys regulate waste, balance fluids, and control electrolytes in the body. When kidneys aren’t working properly, waste and fluid can build up, causing health complications. A personalized 7 day meal plan for kidney disease helps control sodium, potassium, phosphorus, and protein intake—all essential for people with CKD.
With the guidance of Renalyfe’s experts, patients are not only treated through advanced therapies at our leading dialysis centres in Bangalore, but also supported in adopting sustainable dietary habits that promote better outcomes.
7-Day Meal Plan for Kidney Disease (Low Sodium, Potassium, and Phosphorus)
Before following any new plan, always consult your doctor or a registered renal dietitian. The following 7 day meal plan for kidney disease is a general example designed for early-to-moderate stages of CKD.
Day 1
Breakfast: Oatmeal with blueberries and almond milk Lunch: Grilled chicken salad with lettuce, cucumber, and olive oil dressing Dinner: White rice with sautéed green beans and lemon herb tilapia Snack: Apple slices with unsalted peanut butter
Day 2
Breakfast: Rice cakes with scrambled egg whites and parsley Lunch: Pasta with garlic butter, steamed carrots, and grilled zucchini Dinner: Quinoa with sautéed bell peppers and lemon chicken Snack: Handful of grapes
Day 3
Breakfast: Low-sodium toast with boiled egg and fresh fruit Lunch: Baked fish with cabbage slaw and white rice Dinner: Couscous with green beans and tofu stir-fry Snack: Unsweetened applesauce
Day 4
Breakfast: Cornflakes with rice milk and chopped strawberries Lunch: Chicken wrap with lettuce and homemade vinaigrette Dinner: Basmati rice with sauteed eggplant and grilled turkey Snack: Air-popped popcorn (no salt)
Renalyfe ensures patients receive custom meal plans like this through our expert dietary counseling, available at our dialysis centres in bangalore—helping you eat right while undergoing treatment.
Day 5
Breakfast: Smoothie with pineapple, rice milk, and flaxseed Lunch: Chicken noodle soup (low sodium broth) and whole-grain bread Dinner: Brown rice with sautéed cabbage and baked tofu Snack: Sliced pear
Day 6
Breakfast: Rice porridge with cinnamon and apple Lunch: Turkey sandwich on white bread with cucumbers Dinner: Mashed cauliflower with herb chicken and green beans Snack: Rice crackers with hummus
Renalyfe’s mission goes beyond dialysis—we’re committed to holistic kidney care. That’s why our dialysis centres in Bangalore offer comprehensive dietary support, helping patients make safe food choices even when juggling complex health needs.
Day 7
Breakfast: French toast with maple syrup and fresh berries Lunch: Vegetable soup with pasta and a side salad Dinner: Grilled paneer with white rice and sautéed spinach (limited portion) Snack: Banana muffin (low potassium version)
By following a structured 7 day meal plan for kidney disease, patients gain consistency, reduce dietary stress, and lower risks associated with uncontrolled nutrient intake. Our Renalyfe nutritionists are available to personalize meal plans based on lab reports and individual preferences.
Tips to Enhance the Meal Plan
Watch portion sizes – Overeating healthy food can still burden the kidneys.
Cook fresh – Processed foods are often high in sodium and phosphorus additives.
Track fluid intake – Especially for those undergoing dialysis.
Use herbs for flavor – Basil, parsley, and rosemary can replace salt beautifully.
Renalyfe has built a reputation among the best dialysis centres in Bangalore by delivering not just high-quality treatment but total wellness support—including expert advice from renal dietitians and follow-ups to monitor nutritional progress.
Renalyfe: Nutrition-Backed Dialysis and Beyond
At Renalyfe, our vision is to make kidney care accessible, compassionate, and complete. We believe every patient should receive individualized attention—not just during dialysis sessions but in their everyday lifestyle.
Being among the most progressive dialysis centres in bangalore, we integrate nutritional counseling into each patient’s treatment plan. Our trained staff works closely with nephrologists and dietitians to align medical care with practical home routines like meal planning.
So, whether you’re managing CKD through lifestyle or undergoing regular dialysis, a thoughtfully crafted 7 day meal plan for kidney disease from Renalyfe can be your foundation for better health.
Final Thoughts
Kidney health doesn’t depend on medical treatment alone. It’s a holistic journey that combines therapies, lifestyle changes, and conscious nutrition. A reliable 7 day meal plan for kidney disease ensures that your body receives essential nutrients while minimizing stress on your kidneys.
With expert support from Renalyfe—one of the most patient-centric dialysis centres in bangalore—you’re never alone in this journey. Our team empowers you to eat smarter, live better, and take control of your kidney wellness with confidence.
Let Renalyfe guide you toward a healthier future, one meal and one day at a time.
0 notes
Text
Pear and Chocolate Yoghurt

A simple, yet more-ish dessert or mid-afternoon snack, this Pear and Chocolate Yoghurt only requires three ingredients and little to no effort, making it all the more delicious! Happy Friday!
Ingredients (serves 1):
2 beautiful halves Pears in Whisky Syrup
15 grams/1/2 ounce good dark chocolate (at least 62% cocoa)
1/2 cup Greek Yoghurt
Dice Pears in Whisky Syrup halves.
Roughly chop dark chocolate.
Stir diced Pears and chopped dark chocolate, saving a little of each for topping, into the Greek Yoghurt until well-combined.
Spoon into serving bowl, and top with reserved diced Pears and dark chocolate.
Enjoy Pear and Chocolate Yoghurt immediately!
#Recipe#Food#Pear and Chocolate Yoghurt#Pear and Chocolate Yoghurt recipe#Yoghurt#Yoghurt Bowl#Yoghurt Bowl recipe#Greek Yoghurt#Pears in Whisky Syrup#Pears in Syrup#Homemade Pears in Syrup#Pear Harvest#Chocolate#Dark Chocolate#Dessert#Dessert recipe#Fruity Treat#Fruity Treat recipe#Healthy Snack and Fruity Treat#Quick recipe#Easy recipe#5 Ingredients or Less
2 notes
·
View notes
Text
Be Healthy! Plant-Based Weekly Menu (UK Style) — Lunch, Dinner & Dessert Ideas
🌞 Monday
Lunch: Tofu and Roasted Veg Wraps Grilled tofu slices with roasted courgettes, red pepper, spinach, and hummus wrapped in a wholemeal tortilla.
Dinner: Lentil & Carrot Shepherd’s Pie Green lentils cooked in a tomato base with onions, garlic, carrots, topped with mashed sweet potato and baked until golden.
Dessert: Chia Seed Pudding with Berries Chia seeds soaked overnight in unsweetened soy milk with vanilla, topped with fresh strawberries and blueberries.
🌞 Tuesday
Lunch: Wild Rice Salad with Chickpeas and Avocado A refreshing salad of wild rice, chickpeas, cherry tomatoes, cucumber, parsley, lemon juice, and diced avocado.
Dinner: Mushroom & Tofu Stroganoff Tofu cubes and mushrooms in a creamy cashew sauce, served with whole wheat pasta and steamed broccoli.
Dessert: Baked Pears with Walnuts and Cinnamon Pears halved and baked with crushed walnuts, cinnamon, and a drizzle of maple syrup.
🌞 Wednesday
Lunch: Quinoa & Black Bean Stuffed Peppers Bell peppers filled with a mixture of quinoa, black beans, sweetcorn, and tomato sauce, baked until tender.
Dinner: Chickpea and Spinach Curry A mildly spiced coconut curry with chickpeas, baby spinach and diced tomatoes, served with brown basmati rice.
Dessert: Oat & Banana Cookies Mashed banana, oats, chopped dates, and a hint of cinnamon — baked into soft, chewy cookies.
🌞 Thursday
Lunch: Falafel Bowl with Tahini Dressing Homemade falafel served on a bed of couscous, lettuce, cucumber, cherry tomatoes, and tahini-lemon dressing.
Dinner: Aubergine & Lentil Moussaka Layers of grilled aubergine, lentil ragu, and cashew béchamel sauce baked until bubbling.
Dessert: Avocado Chocolate Mousse Blended avocado, cocoa powder, maple syrup, and a splash of plant milk — chilled and topped with raspberries.
🌞 Friday
Lunch: Sweet Potato & Black Bean Burrito Bowl Roasted sweet potato, black beans, brown rice, salsa, avocado, and lime — served in a bowl.
Dinner: Seitan Stir Fry with Ginger-Soy Sauce Seitan strips stir-fried with broccoli, bell peppers, carrots, and a ginger-soy glaze. Served with soba noodles.
Dessert: Coconut Yoghurt with Mango & Granola Dairy-free coconut yoghurt layered with sliced mango and homemade oat granola.
🌞 Saturday
Lunch: Grilled Veg & Pesto Pasta Salad Whole wheat pasta tossed with grilled courgette, cherry tomatoes, spinach, and a walnut-basil pesto.
Dinner: Stuffed Portobello Mushrooms Large mushrooms filled with a mix of lentils, walnuts, garlic, and breadcrumbs, baked and served with steamed greens.
Dessert: Apple Crumble (Vegan) Baked apples with a topping of oats, almond flour, coconut oil and cinnamon. Served warm.
🌞 Sunday
Lunch: Tempeh BLT Sandwich Crispy tempeh “bacon”, lettuce, tomato and avocado on whole grain bread with vegan mayo.
Dinner: Butternut Squash & Red Lentil Stew A hearty stew with red lentils, squash, carrot, and warming spices, served with rustic wholemeal bread.
Dessert: Berry & Oat Parfait Layered jar of oat porridge, mixed berries, and chopped almonds.
#PlantBasedRecipes#VeganMealIdeas#HealthyUKEats#MeatFreeMeals#WholeFoodsCooking#UKVeganRecipes#PlantBasedInspo#NutritiousAndDelicious#EcoFriendlyEating#VeganComfortFood#healthcare#healthylifestyle#menshealth#malehealth
0 notes
Text
Regional Breakfast Gift Baskets: Bringing Local Flavors to the Table
Nothing starts the day better than a delicious and hearty breakfast. Whether you're looking for the perfect gift for a loved one, a corporate client, or even yourself, breakfast gift baskets packed with regional delicacies offer a unique way to savor local flavors. These thoughtfully curated baskets showcase the best breakfast items from different regions, bringing an authentic culinary experience straight to your table.
Why Choose Regional Breakfast Gift Baskets?
Breakfast is often considered the most important meal of the day, and what better way to enjoy it than by experiencing a variety of flavors from different parts of the country—or even the world? Breakfast gift baskets provide a delightful mix of artisanal goods, homemade preserves, fresh-baked pastries, and locally sourced coffee or tea. They make excellent gifts for:
Family members who appreciate a good breakfast spread
Friends who love discovering new flavors
Business associates as a thoughtful corporate gift
Hosts who enjoy gourmet food items
Yourself—because you deserve a special treat!
Exploring Regional Breakfast Delicacies
Every region has its own unique breakfast traditions. Let's take a closer look at some popular breakfast gift baskets featuring local specialties from different areas.
1. New England Breakfast Gift Basket
New England is famous for its hearty and wholesome breakfast options. A typical New England breakfast gift basket might include:
Pure Vermont maple syrup
Blueberry pancake mix from Maine
Cranberry preserves
Freshly roasted coffee from a small-batch roastery in Massachusetts
Apple cider donuts from a local New Hampshire bakery
2. Southern Breakfast Gift Basket
The South is known for its comforting and flavorful breakfast staples. A Southern breakfast gift basket could feature:
Stone-ground grits from South Carolina
Buttermilk biscuit mix from Tennessee
Honey from Georgia
Pecan pralines from Louisiana
A tin of freshly ground chicory coffee from New Orleans
3. Midwest Breakfast Gift Basket
The Midwest takes pride in farm-fresh and homemade breakfast delights. A Midwest breakfast gift basket might include:
Amish-style apple butter
Sweet corn pancake mix from Iowa
Wisconsin cheddar cheese
Smoked bacon from Michigan
Locally sourced honey and granola
4. West Coast Breakfast Gift Basket
The West Coast emphasizes fresh, organic, and health-conscious breakfast items. A West Coast breakfast gift basket could contain:
Organic granola from California
Avocado honey from Southern California
Artisan sourdough bread from San Francisco
Freshly roasted espresso beans from Seattle
Seasonal dried fruits like figs and apricots
5. Southwestern Breakfast Gift Basket
The Southwest offers a bold and flavorful breakfast experience. A Southwestern breakfast gift basket might feature:
Hatch green chile jam from New Mexico
Blue corn pancake mix from Arizona
Prickly pear syrup from Texas
Southwest-style coffee blend with notes of cinnamon and cocoa
Spiced Mexican hot chocolate mix
6. International Breakfast Gift Basket
For those who love global flavors, an international breakfast gift basket can provide a gourmet experience with items such as:
French croissants or brioche
English breakfast tea
Italian espresso beans
Greek honey and nuts
Japanese matcha green tea
Where to Buy Regional Breakfast Gift Baskets
Many specialty food stores, local bakeries, and online gourmet retailers offer curated breakfast gift baskets featuring regional flavors. Some well-known brands and platforms include:
Harry & David
Williams Sonoma
Goldbelly (for small-batch regional goods)
Local farmers' markets and specialty shops
Etsy (for handmade and small-batch breakfast items)
Customizing Your Own Breakfast Gift Basket
If you want to make a truly personalized gift, consider assembling your own breakfast gift basket. Here’s how:
Step 1: Choose a Theme
Decide whether you want to focus on a specific region, a seasonal theme, or a mix of favorites.
Step 2: Select Key Breakfast Items
Include a mix of:
Breads (muffins, bagels, scones)
Spreads (jams, jellies, honey, butter)
Beverages (coffee, tea, hot chocolate)
Specialty foods (granola, cured meats, cheeses)
Step 3: Add a Personal Touch
Enhance the presentation with:
A handwritten note or recipe card
A beautiful wicker basket or decorative box
Festive ribbons or rustic twine
Conclusion
Breakfast gift baskets are a fantastic way to celebrate regional flavors and share a memorable dining experience with friends, family, or clients. Whether you’re indulging in rich New England maple syrup, savoring the bold flavors of the Southwest, or enjoying the freshness of a West Coast breakfast, these thoughtfully curated baskets bring joy to the morning table. Consider gifting or treating yourself to a regional breakfast gift basket today and start your day with a delicious adventure!
0 notes
Photo

Nothing compares to fresh, homemade applesauce. Can it, freeze it, leave it unsweetened, or add in some extras to sweeten things up. Enjoy it warm, right off the stove, or save it for later. Our recipe and tips give you everything you need to make this classic, homemade treat that everyone will love. For more apple goodness, try our delicious Apple Crumble and Homemade Apple Butter. Why Our Recipe Everything you need to know for making homemade applesauce, including slow cooker and instant pot options. We use a variety of apples for the perfect balance of tart and sweet. Optional add-ins if you want to make a flavored applesauce like cinnamon, or treat yourself to a dessert-style applesauce. This nostalgic recipe is the perfect sweet treat that your kids will love for an after school snack. While sweet and cinnamony applesauce makes us feel like a kid again, it’s also super versatile and can be used in many other recipes. This fresh, homemade applesauce pairs perfectly with your morning oatmeal or yogurt. You can even add it to cake batter or in homemade bread in lieu of oil or butter, making for a super moist and flavorful baked treat. Ingredient Notes Apples: For a balanced blend, use a variety. Also, this recipe is a great way to use up any bruised apples. Lemon Juice: Use freshly squeezed lemon juice for the best flavor. Bottled lemon juice can be used, but it doesn’t have as bright of a flavor. Brown Sugar: Light or dark brown sugar works, though dark brown sugar will give a deeper flavor. Vanilla Extract: Pure vanilla extract gives the best flavor, but imitation also works. Ground Cinnamon: Use a high-quality cinnamon for best results. Cinnamon Stick: Don’t skip this step! This infuses the apples with flavor while cooking. Best Apples to Use While you can always just use whatever apples you have on hand, The best applesauce comes from a mixture of multiple types of apples, rather than just relying on variety. The best apples to use for applesauce-making are McIntosh, Golden Delicious, Granny Smith, Fuji, and Jonathan apples. Sweet Apples: Fuji, Golden Delicious, Gala, Honeycrisp, McIntosh Tart Apples: Granny Smith, Braeburn, Jonathan, Pink Lady Balanced Mix: We recommend using a mix of both sweet and tart apples. If you prefer a naturally sweeter applesauce, lean toward Fuji or Gala. If you like a little tang, balance it with Granny Smith or Braeburn. McIntosh apples cook down very soft, making them perfect for a smooth applesauce, while Honeycrisp and Pink Lady hold a bit more texture for chunkier styles. Perfect Your Flavor When you make applesauce homemade, you get to make it exactly how you like it. Stick with our neutral base to keep it naturally sweet, or play around with some of our other options. We give you two within the recipe, but there’s more applesauce goodness to be had. Sweetened Applesauce: You have the option to add some brown sugar or you can use alternative sweeteners like honey, maple syrup, or coconut sugar. You can always start with 1-2 tablespoons and then increase based on your own personal sweet tooth. Rich and Desserty: We give you the option to add brown sugar, butter, more cinnamon, and a little vanilla extract for a dessert-like applesauce that is absolutely heavenly. Pear or Strawberry Blends: Can’t resist those fruity flavors at the grocery store? Make your own by adding some fruit. You can swap out up to half of the apples with ripe pears for apple-pear. For a strawberry blend, add 1 cup chopped strawberries during the last 10 minutes of cooking. The same concept works for other berries. Spiced Applesauce: Cinnamon is your classic spice addition to applesauce. We have you make the base with a whole stick of cinnamon for a subtle infusion of flavor. If you want to add more spice, you can add ground cinnamon. But wait, there’s more! You can go stronger spice with 1/2 teaspoon cinnamon, 1/4 teaspoon nutmeg, and a pinch of ground cloves. Or make it a total celebration of fall with up to 1 teaspoon of pumpkin spice mix. Smooth or Chunky Control your texture to make it as smooth or chunky as you like. It’s the beauty of homemade! For those who like things on the chunky side, use a potato masher to break up the apples and you’ll get super soft chunks throughout, or use a hand mixer to give it a slight blend. For a smooth applesauce, you’ll want to use an immersion blender to blend everything directly in the pot or transfer the cooked apples to a blender or food processor to blend until smooth. Slow Cooker and Instant Pot Instead of placing the apples into a saucepan on the stove, simply place the apples (along with the water, lemon juice, and cinnamon stick) into either a slow cooker or an Instant Pot. Cook for 10 minutes at high pressure. For the slow cooker, add all the ingredients to the slow cooker and cook on high for 3-4 hours. Then, puree as directed. Canning This applesauce can absolutely be canned following safe canning procedures. It’s all about the science. Apples are naturally acidic, but their exact pH varies by variety so to be safe, you’ve got to add an acid. Add an additional 1 tablespoon of bottled lemon juice or 1/2 teaspoon citric acid per quart of applesauce. Once your applesauce is hot and ready, ladle it into sterilized jars, leaving ½ inch of headspace. Wipe the rims clean, secure the lids, and process in a boiling water bath for 15 minutes for pint jars and 20 minutes for quart jars. After processing, let the jars cool at room temperature before storing them in a cool, dark place. Properly canned applesauce will last up to one year. Storage and Reheating Instructions Refrigerate leftovers in an airtight container for up to 2 weeks. To freeze, wait until cooled and then put into quart or gallon-sized freezer bags. Put the applesauce in the freezer and store it for up to 2 months. Do not refreeze the applesauce once you have thawed it. Reheat on the stove over medium-low heat until warmed through. Reheat in the microwave in 30-second increments, stirring in between each for even heating. More delicious Apple Recipes Source link
0 notes
Text
Quince Poached Pears
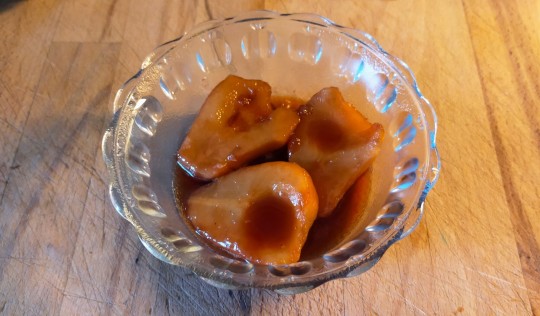
The ceaseless rain and strong winds of the past week means I’m am picking up heaps of fallen fruit in the garden. Some of the pears are just ripe, some are not even there yet, but if they’ve been bruised when they fell, one has to cook them rather quickly if one wants to eat them! These beautifully glazed Quince Poached Pears makes both an excellent dessert --the addition of ice cream can make it even more indulgent!-- or snack, or a side for your cheese board, especially if you have good blue cheeses, like Fourme d’Ambert or Stilton! Happy Saturday!
Ingredients (serves 2):
3 medium to large just ripe Williams Pears
1 cup Ginger and Lemon Quince Syrup
Thoroughly rinse Williams Pears under cold water.
Halve, core and peel pears, and place pear halves in a medium saucepan. Cover with Ginger and Lemon Quince Syrup, so all pear halves are submerged.
Bring to the boil over medium-high heat. Boil rapidly, for about 5 minutes; then, reduce heat to medium.
Simmer, for 15 to 20 minutes, occasionally flipping pear halves on their other side, until they are just tender, and Syrup has reduced slightly, glazing the pears beautifully.
Serve Quince Poached Pears with their Syrup warm, with a scoop or two of Ginger Ice Cream, onto thick yoghurt, or cooled, with good blue cheese...
#Recipe#Food#Quince Poached Pears#Quince Poached Pear recipe#Poached Pears#Poached Pear recipe#Pears#Williams Pears#Williams Pear#Williams Pear Tree#Pear Tree#Pear Harvest#Growing Fruit#Garden Fruit#Garden Orchard#Ginger and Lemon Quince Syrup#Quince Syrup#Homemade Quince Syrup#Quick recipe#Easy recipe#5 Ingredients or Less#Dessert#Dessert recipe#Fruity Treat#Fruity Treat recipe#Fruity Treat and Healthy Snack#Cheese Board
5 notes
·
View notes