#How to connect cricut to computer bluetooth wirelessly
Explore tagged Tumblr posts
Visit Tumblr Blog
Explore Tumblr blogs with no restrictions, modern design and the best experience.
Last Seen Tumblr Blogs


Fun Fact
Tumblr was the first site to host the blog for President Barack Obama in 2011.
Text
How to Connect Cricut to Computer Bluetooth: Ultimate Guide
Isn’t it fun to create something with a brand-new Cricut machine? Of course, it is. I like my Cricut machine, and I am really happy writing this blog for you all. If you’re a crazy crafter like me, you should know how to connect a Cricut machine to your computer to get started with the machine. I always use a Bluetooth connection to set up my Cricut machine. Let me teach you how to connect Cricut to computer Bluetooth.
Cricut machines are incredible when it comes to quality. It is enriched with many advanced features that all crafters need. Therefore, it can be a little complicated to set it up at first. In my crafting journey, I have helped many users create DIY projects, and I feel that I should also create related content for their connections. So, let’s continue with the blog.
How to Connect Cricut to Computer Bluetooth (Windows)?
If you want to connect your Cricut product to a computer’s Bluetooth on Windows, the steps are given below. Let’s check them.
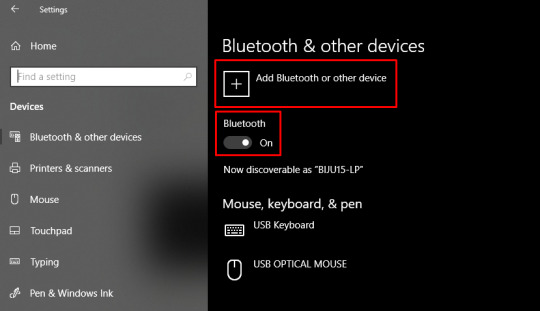
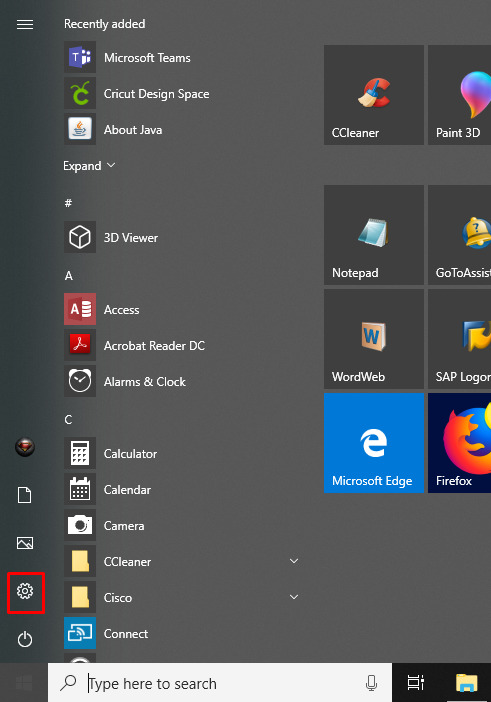
In the first step, go to the Start menu on your Windows PC and click on the Settings option.
Then, hit the Bluetooth option and turn it on.
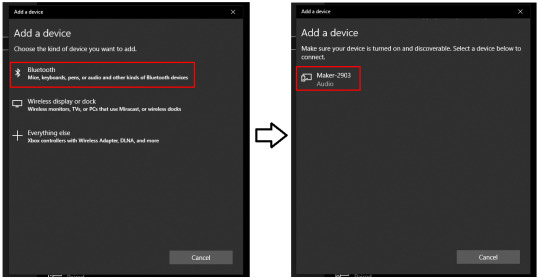
After that, select the Add Bluetooth or other device option.
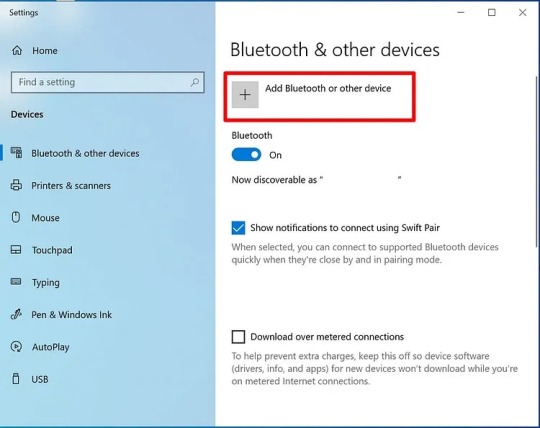
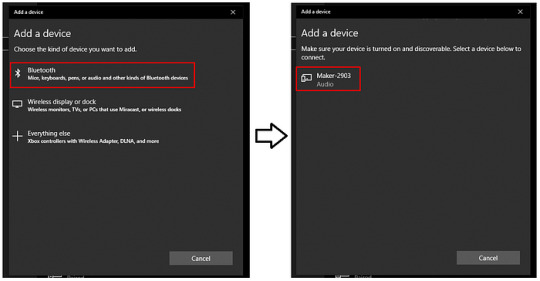
Now, select the Bluetooth option and allow your PC to find your machine.
Once you see your Cricut machine’s name on the screen, click on it.
In the last step, both devices are connected via Bluetooth connection.
Finally, you learned how to connect Cricut to computer Bluetooth wirelessly. Well, you can connect both of your devices via a USB connection. And I assume you know how to connect Cricut to computer with USB. Hence, using a USB connection would also be a good alternative.
How to Connect Cricut to Computer Bluetooth (Mac)?
As you already know, setting up a Cricut product via Bluetooth involves connecting it to a compatible device. Here, let’s discuss Cricut’s Bluetooth connection setup on a Mac.
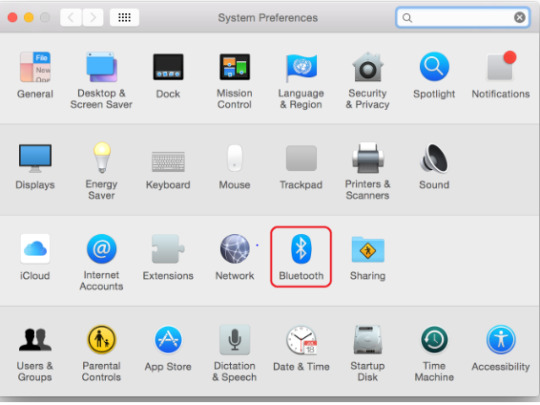
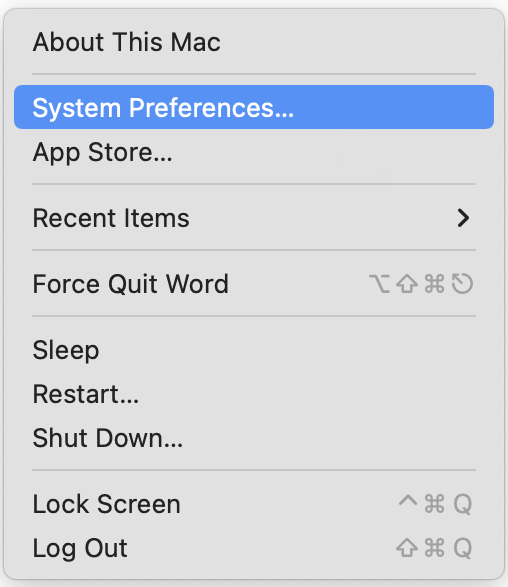
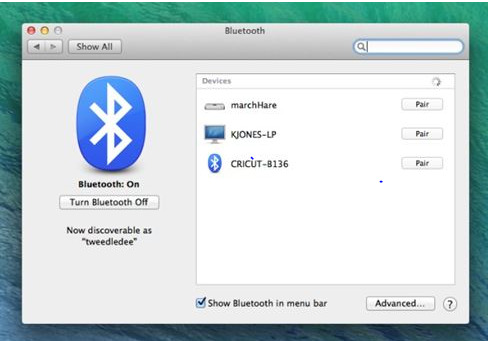
Initially, open the Apple menu and move to the System Preferences.
After that, select the Bluetooth option.
Also, ensure that the Bluetooth connection is ON and select your Cricut model from the list.
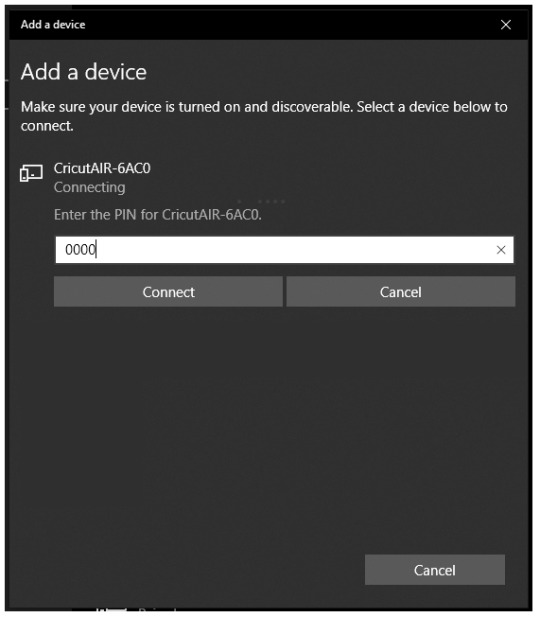
If you need to enter the password, put “0000” into the given box.
Finally, the Bluetooth connection process between Cricut and Mac computer is complete.
That’s all for Cricut Bluetooth connection on a Mac. Now, you can start using your Cricut machine with Cricut Design Space. Do you know how to get the Cricut software? If not, I’ll tell you all the steps to get it on your system.
How to Download Cricut Design Space on Desktop?
Once you have learned how to connect Cricut to computer Bluetooth, it’s time to cover the procedure to install Cricut’s software on your computer. Check out the steps below.
For Windows
As a Windows user, you can easily get the Cricut app on your computer. Let’s break down the steps for installing it on Windows.
First, navigate to Cricut’s website on your computer.
Then, search for the Cricut Design Space and hit the Download button to get this software.
After that, the download will start, and your browser will show it.

Now, jump to the Downloads location.
In the following screen, open the file by double-clicking on it.
And then allow the installation to finish.
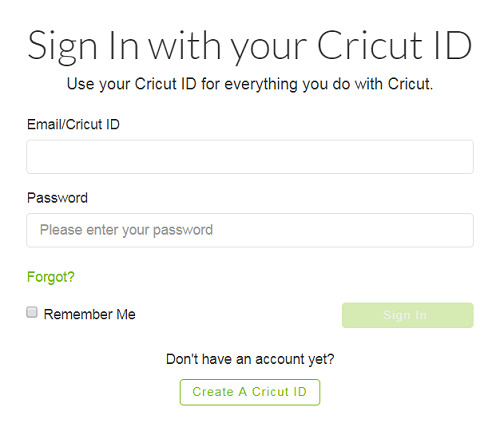
Next, hit the Cricut ID and password option.
Lastly, select the New Machine setup option to finish the connection process.
These are the final steps to get the Cricut software on a Windows PC. Now, you can use your software to create anything you want.
For Mac
When you’re a Mac user, the steps are slightly different than those for a Windows PC. Check the steps below to learn how to install the Cricut Design app.
To start, navigate to an internet browser and visit Cricut’s official website.
Then, locate the Cricut Design Space and hit the Download option next to it.

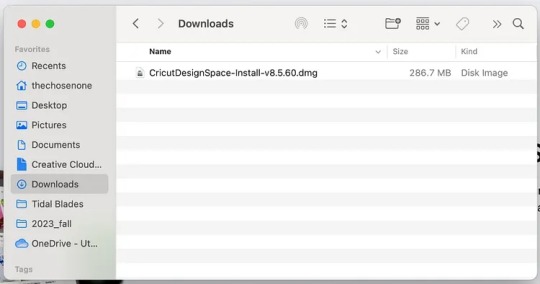
After that, allow the system to download your file.
Once the file is downloaded, open it under the Downloads location.
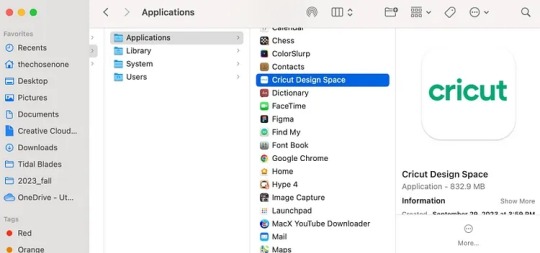
Next, slowly drag the Cricut icon to the Applications folder to start the installation of the Cricut software.
Also, open your Cricut Design app from the Applications folder.
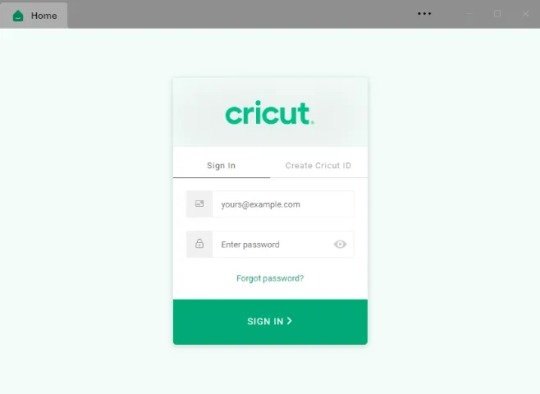
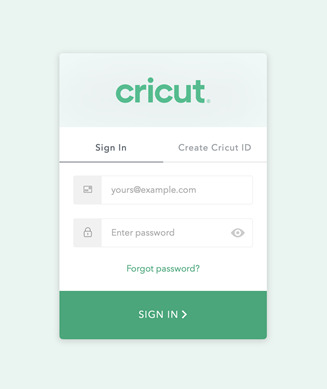
When your app opens, sign in to your Cricut Design Space account.
Finally, you can connect with your Cricut and start making beautiful designs and projects.
That’s it for downloading and installing the Cricut app on a Mac computer. Now, you’re good to go to use your software and machine to start crafting.
Conclusion
Finally, I showed you how to connect Cricut to computer Bluetooth and how to get Cricut Design Space on your system. Hopefully, you understand it, and you’ll also make an effort to connect your Cricut machine to your computer. A Bluetooth connection is excellent for wireless connections, and it helps you work at your convenience. Therefore, if you’re planning to set up your Cricut machine, this blog will be helpful.
#How to connect cricut to computer with usb#How to connect cricut to computer bluetooth wirelessly#How to connect Cricut to computer Bluetooth
0 notes
Text
How to Pair Cricut Machine via Bluetooth or USB? (Easy Tips)
Cricut machines are a must-have for DIY crafters, designers, and small business owners. Whether you’re working on vinyl decals, paper crafts, or fabric designs, pairing your Cricut machine correctly is the first step to getting started.
I still remember the day my Cricut machine arrived as if it were yesterday. But within minutes, my excitement faded as I struggled to connect the machine to my laptop. I couldn’t figure out how to connect it to my laptop. But you don’t have to worry about that. Pairing your Cricut isn’t as complicated as it seems once you know what to do.
In this blog, I’ll explain exactly how to pair Cricut machine with your Windows or Mac, whether you use Bluetooth or a USB cable. It’s a beginner-friendly guide designed to help you avoid the roadblocks I encountered.
Let’s get your machine up and running so you can start creating!
Step 1: Turn On Your Cricut Machine
Before you start pairing, make sure your machine is powered on. Follow these steps:
Plug in your machine: Make sure the power cable is connected to the machine and plugged into a power source.
Turn on the machine: Press the power button (usually located on the side or top) to turn it on. A blinking light indicates readiness.
Step 2: Connect via Bluetooth (Wireless Connection)
You can connect your machine wirelessly via Bluetooth. Here’s how to do it:
For Windows Users
Follow the steps given below to learn how to pair Cricut machine via Bluetooth on Windows:
Open Bluetooth settings: Click onthe Start menu, then select Settings, then Devices. After that, go to Bluetooth & other devices.
Turn on Bluetooth: Ensure Bluetooth is turned on in your computer’s settings.
Put your machine in pairing mode: Press and hold the Bluetooth button on the machine. The machine’s Bluetooth light will begin blinking, indicating that it’s ready to pair.
Select your machine in Bluetooth settings: On your computer, under the “Bluetooth & other devices” settings, click on Add Bluetooth or another device. Choose Bluetooth, then select your machine from the list of available devices.
Confirm the connection: Once paired, the Bluetooth light on your machine will stop blinking and become solid, indicating that it is connected to your computer.
TIP: Cricut Explore and Maker models include Bluetooth functionality by default. Older models may require a separate Bluetooth adapter.
For Mac Users
Follow the stepwise guide listed below to learn how to pair Cricut machine via Bluetooth on a Mac:
Open Bluetooth settings: Tap on the Apple menu > System Preferences > Bluetooth.
Enable Bluetooth: Make sure Bluetooth is turned on in your Mac’s settings.
Put your machine in pairing mode: Press and hold the Bluetooth button on your machine until the Bluetooth light blinks.
Select your machine name: On your Mac, you should see your machine model in the list of available Bluetooth devices. Click on Pair to connect.
Confirm the pairing: After pairing, the Bluetooth light on your machine will remain solid, confirming the connection.
Step 3: Connect Using a USB Cable (Wired Connection)
If you prefer a wired connection or your device doesn’t support Bluetooth, you can connect your crafting machine using a USB cable.
Locate the USB port on your machine: The USB port is on the left side of the machine, where you can connect the USB cable.
Plug in the USB cable: Now, connect one end of the USB cable to the machine and the other end to a USB port on your computer.
Open Design Space: Launch the software on your computer, and the machine should be automatically recognized.
If prompted, follow the on-screen prompt to complete the setup.
Step 4: Setup Cricut Design Space on Your Device
Now that your Cricut machine is paired with your device, you need to set up Design Space to start creating designs.
Download Design Space: If you haven’t already, download and install Design Space on your computer or mobile device.
Create or sign in to your account: Open the software and either sign in with your existing account or create a new account.
Select your machine name: Once logged in, the software will automatically detect your machine. If not, go to Settings and select your machine from the list.
Start designing: Once everything is set up, you can start creating your projects in Design Space and send them to the cutting machine for cutting.
Troubleshooting Cricut Pairing Issues
Sometimes, your machine may not pair correctly due to device settings or software glitches. Here are quick fixes.
Turn off both the machine and your computer or phone. Turn them back on and retry the pairing steps.
Remove any old Bluetooth devices that could be conflicting.
Ensure both your device’s operating system and the Design Space software are updated to their latest versions.
Clear the cache in the Cricut Design Space software.
Reopen the software and attempt to pair again.
Final Words
Pairing your machine doesn’t have to be difficult. Whether you use Bluetooth or a USB cable, the steps above will help you connect quickly and efficiently. Just keep your software up to date, follow the correct steps, and stay patient!
Once your Cricut machine is paired, the world of crafting will be at your fingertips!
Frequently Asked Questions (FAQs)
What to do if Design Space doesn’t recognize my Cricut machine?
If Design Space isn’t recognizing your machine, make sure of the following key points:
Ensure that the Bluetooth or USB connection is enabled and that the machine is discoverable.
Restart both your computer and machine.
Ensure your machine is within the recommended range of 15 feet from your device.
Make sure Cricut Design Space and your machine’s firmware are up to date.
If updates don’t resolve the issue, consider uninstalling and reinstalling Cricut Design Space.
Do all Cricut Machines have Bluetooth?
No, not all Cricut machines have Bluetooth connectivity out of the box. While newer models like the Cricut Joy, Joy Xtra, Maker, Maker 3, Explore Air 2, Explore 3, and Venture utilize Bluetooth, older models like the Explore One require a separate Bluetooth adapter to connect to devices.
Note: Cricut Explore and Explore One require a Bluetooth adapter.
Can I pair the same Cricut Machine with multiple devices?
Yes, you can connect extra devices to one Cricut machine, but only one device can actively control the machine at a time. This prevents conflicts and ensures that the machine receives clear instructions. You can install Cricut Design Space on multiple devices and access the same account and projects. You can connect to the machine via USB or Bluetooth, and the software will guide you through selecting the desired machine for your project.
SOURCE: How to Pair Cricut Machine via Bluetooth or USB
#how to pair Cricut machine#Cricut Setup#Cricut software app#cricut machine setup#cricut design space app#cricut design space software
0 notes
Text
How to Use Cricut Explore Air 2: Create DIY Projects at Home
Are you excited to express your creativity with the Cricut Explore Air 2 machine? This flexible cutting machine can make your crafting dreams come true. It cuts over 100+ various materials, like paper, cardboard, vinyl, and even leather.
Whether you’re a pro crafter or a beginner, this machine is perfect for bringing your ideas to life. This stepwise guide will walk you through ‘how to use Cricut Explore Air 2‘, download the Design Space app, and create your first project.
So, get ready to venture on a crafting adventure and discover the joy of DIY projects. Let’s dive in and explore the world of Cricut!
Downloading Cricut Design Space on Your Computer
The first thing to use the machine is to download the Cricut Design Space software. To download it, navigate to design.cricut.com from your Windows or Mac. If you already have a Cricut account, log in to the app after downloading it.
If you want to download the software on your mobile device, either Android or iPhone, go to their Play Store/App Store and look for the app in the search bar. It will be a square icon with Cricut written at the center.
NOTE: You must have an account beforehand to use the app. If you don’t have one, you should create one on the sign-up page. Also, you don’t need a Bluetooth adapter to use the machine, as it comes with built-in Bluetooth. The earlier Explore series, such as the Explore One, required a Bluetooth adapter.
Connecting Cricut Machine to Your Computer With USB
Although you can use your machine wirelessly, let’s examine how to use it through USB.
Step 1: First, place it on a clean and flat surface with 10-15 inches of space behind and front to let the cutting machine move freely.
Step 2: After that, you must plug in your Explore cutting machine.
Step 3: And then attach the USB cable and power adapter.
Step 4: Next, you need to turn on your Explore machine and your computer.
Step 5: Open the Cricut Design Space software discussed in the previous section and log in using your credentials.
Step 6: Within the app, select the Menu icon visible at the top and choose New Machine Setup. This will guide you through the installation, the first project you will make, and a greeting card.
Now, you are almost ready to use the machine. The next section will examine how to make a project on your machine. So, let’s get into that.
How to Use Cricut Explore Air 2: Creating Your First Project
Now, let us walk through a project that can be made with the materials that came with the box of your machine. If this is your first project, don’t worry—it will be easy!
Step 1: From the “Cricut New Machine Setup,” you will see a design on your screen. If you don’t find it, head over to cricut.com/setup. Then, find the Menu on the top side and click “New Machine Setup.”
Step 2: Prepare all the materials that came with the machine, such as cardstock, mat, paper, and pen. Remove the plastic film from your machine and keep it aside for future use.
Step 3: Afterward, you need to load the cardstock on the machine mat. The textured side should be facing up and lined up on the machine mat vertically. Make sure to line it up on the upper side, right below the Cricut logo.
Step 4: In the next step, you must insert your cutting mat into your Explore machine. Ensure that you load the machine mat as per the guidelines. You also need to take care that it is pressed against the roller while you press the “load/unload” buttons, which are located at the top of your cutting machine. The icon looks like a set of double arrows.
Step 5: Now, you need to insert the pen in clamp A. To do that, you need to remove the cap and place it tip-down until the arrow on the pen disappears. After you are done with this, you can close the clamp.
Step 6: Then, check the design on your screen and tap the Go button.
Step 7: Next, you need to set the dial to cardstock on the machine.
Step 8: As soon as you are ready to make the necessary changes in the design, the preview “C” button on the machine will start flashing.
Step 9: Also, you will have to unload the machine mat. Once you complete the project, click on the load/unload button to take off the pen.
Step 10: Afterward, remember to put the machine mat face down on a flat surface and then curl the edge up toward you. It will be removed from the cutting mat, and as you take it off, keep curling it up to make it easier.
Step 11: Fold your paper card over, and then crease it in half. Place the same on your plain blue paper inside the card. You can glue this in place if you like.
Hoorah, you have finished your first project. Pat yourself on the back and know that your journey in this crafting world has begun.
Summing Up
That concludes our guide on ‘how to use Cricut Explore Air 2‘ for beginners. Reading the above blog should make you feel fairly comfortable working on a new project. Now, you know how to download the Design Space app, set up the machine, and use it properly. Plus, you can always return here for a quick refresher!
FAQs
How do I enable the fast mode in my Cricut Explore Air 2?
To enable Fast Mode on your machine, load your material onto the cutting mat and place it in the machine. Choose the proper material setting in the Cricut Design Space software, such as vinyl or cardstock. Then, seek the option to enable Fast Mode. After selecting it, click the blinking “C” button to cut. This mode allows your machine to cut and write up to two times faster, making it appropriate for certain materials.
What can I make with a Cricut Explore Air 2?
It is an amazing and versatile cutting machine that allows users to make unique designs and projects. It has the ability to cut over 100 materials, like vinyl, cardstock, and iron-on, and even thicker materials, including wood. Its additional features, like writing and scoring capabilities, enable the creation of custom cards, labels, and stickers. This machine gives users access to thousands of designs through Cricut Design Space; users can easily make personalized items suited to their tastes.
Can I use Cricut Explore Air 2 without a computer?
Yes, one can use the machine without a desktop by pairing it to a smartphone via Bluetooth. The machine has built-in Bluetooth connectivity, which allows one to use the Cricut Design Space app on iOS or Android devices to design and send projects to the machine. However, some features may be limited compared to those of a computer.
Visit: install cricut design space app cricut.com setup mac
Source: https://explorenewmachine.com/how-to-use-cricut-explore-air-2-create-diy-projects-at-home/
#cricut.com/setup#cricut.com/setup mac#cricut.com/setup windows#cricut.com/setup login#install cricut design space app#install cricut explore air 2#install cricut design space#install cricut#www.cricut.com setup login#www.cricut.com/setup#www.cricut.com/setup login#cricut explore air 2#cricut setup#cricut design space download#cricut design space app#cricut design space software#cutfiles#cricut design space setup#cricutprojects#cutfilesforcricut
0 notes
Text
How to Download Cricut Design Space on Windows 11: Simple Guide
If you want to use a Cricut machine, you need Design Space software. A device is a must for using the app. Windows 11 is an excellent computer for working on your projects. You can easily get the design software from your Windows PC. If you don’t know the installation process, you should read this blog. It will help you learn how to download Cricut Design Space on Windows 11.
But you must remember that downloading the app on your computer or laptop is not enough to use a machine. You will also have to pair your machine with Bluetooth or USB to your Windows. This write-up will discuss all of these in detail. But before that, you have to check the compatibility of your operating system with the app. So, let’s dive deeper into it.
Minimum System Requirements for Using Cricut on Windows 11
Before you learn how to download Cricut Design Space on Windows 11, you should check your device’s compatibility with the app. If your computer or laptop does not have some features, you will find it difficult to work on Cricut. To work with the software smoothly, you need to make sure that your Windows 11 has these features:
How to Connect Cricut Machine to Windows 11?
Now that you have checked the specifications of the computer and make sure that it has all the features to use the Design Space software on it, you can continue with the connection. You have to connect your Windows computer to your machine. Here is how you can connect your Windows computer to your machine via Bluetooth.
How to Download Cricut Design Space on Windows 11?
Finally, you can effortlessly learn to get the software on your Windows computer. It is a must-have app for using your machine. The steps for getting the software are in the section below:
Conclusion
Hopefully, you have read this blog to the end. If you did, you have learned how to download Cricut Design Space on Windows 11. But as I told you before, installing the software on your PC is one of the things you have to do to set up your machine. You also have to pair your machine to your computer. Once you do all of that on your Windows computer, you can easily set up a machine.
FAQs
Does Cricut Design Space Work With Windows 11?
Yes, it does. Windows 11 is a great computer or laptop for working with your crafting machine. It has all the features that a machine needs. It has Wi-Fi, which you can use to connect your device to the internet. With Bluetooth, you can add your computer to the machine wirelessly. You can even use a USB to connect both devices. To use the machine and work on DIY projects, you need to get the Design Space app.
Can I Work With Cricut on Any Computer?
Not really. Design Space, which is essential for any Cricut machine, works with Windows and Mac computers. Also, the computer you are going to use with a machine needs to have the required specifications to work. When you check the features of your device and make sure that it meets all those requirements, then you can use it with Cricut. Also, the software does not work with Chromebook computers.
Why Is My Windows 11 Not Connecting to My Cricut?
When you try to connect your machine to your Windows 11 and cannot do so, your connection may have some problems. For example, maybe you have not turned on the machine. In that case, it will be impossible for the PC to detect the machine model. Ensure that you have turned it on properly. At the same time, you must turn on Bluetooth on your computer. Also, check the distance between the machine and your desktop, which should not exceed 10-15 feet.
Visit: cricut.com/setup www.cricut.com/setup login
Source: https://cricricutdesigncut.wordpress.com/2025/02/10/how-to-download-cricut-design-space-on-windows-11-simple-guide/
#design space setup#cricut.com/setup#www.cricut.com/setup login#www.cricut.com/setup#cricut setup#cricut design space setup#cricut design space#download cricut design space
0 notes
Text
How to Install Cricut Design Space on Windows [Beginners Tutorial]
We all know that you should have a device if you want to use a Cricut machine. It can be a phone or a computer. One such device is a computer with Windows 11 on it. It is an excellent choice for a Cricut machine. To use your crafting machine, you must learn how to install Cricut Design Space on Windows 11. For that, I would suggest you read this blog till the end. This guide will help you not only download the app on a computer but also connect the machine to your device wirelessly. You will also be able to check the computer’s system requirements.
You can download the Design Space software from the Internet for free. To download it on Windows 11, you have to visit the official site. This blog explains the process for downloading the app. So, let’s dive into it to start the crafting journey today.
Minimum System Requirements for Cricut App on Windows 11
If you want to use a Windows computer on your machine, you have to first make sure that it is capable of downloading and running Design Space. The computer will require certain features that are essential to run the app. The features that the computer requires for Design Space are mentioned below:
How to Connect Cricut Machine to Windows 11?
Once you make sure that your computer has the required system features in the process of learning how to install Cricut Design Space on Windows 11, you should connect it to the machine. Here, we will see the connection process of the Windows PC to a machine via Bluetooth:
How to Install Cricut Design Space on Windows 11?
By now, you have checked the features of your computer and have learned the Bluetooth connection process on the machine. Now, you have to download the app on a Windows 11 computer. But before downloading the software on your computer, you have to connect it to a stable Wi-Fi network. To download the app, you have to follow the steps written below:
Conclusion
To conclude, I would say this blog helped you learn how to install Cricut Design Space on Windows 11. Windows 11 is one of the newest operating systems and has the ability to run the app on it. But before you download the software on a computer, you must know about the minimum features any computer needs to run the app on it. Once you are sure of your computer’s compatibility, you can connect it to the machine. You read about the Bluetooth connection on the computer. Finally, you saw the Design Space installation process. Now, you can easily set up a machine on a Windows PC.
FAQs
Is Cricut Design Space Available for Windows?
Yes, it is! Design Space is an official app, and it is essential for Cricut machines. It works with multiple devices, including a Windows computer. If you want to use the machine on a Windows PC, you will have to download the software from the Internet. It is available on the official site. After installing the app, you can start crafting on your desktop.
Why Is Cricut Design Space Not Installing on My Computer?
If you are trying to install the app on your computer but are unable to do so, you should do a few things. First, you must ensure that your computer is connected to good internet broadband. After that, you will have to check the compatibility of your computer. If the computer lacks the required features, you might have trouble downloading the app. Also, you have to check the browser you are using to download the app. If it is an outdated browser, you must update it.
Is Windows 11 Compatible With Cricut Design Space?
Windows 11’s operating system is good enough to download the Design Space software on it. A Cricut machine requires Windows 10 or newer. But to make sure that it is actually compatible with the machine, you also have to check its features. The computer should have at least 2 GB free disk space and 4GB RAM. It needs to have a resolution of 1024 x 768 pixels and 2-3 Mbps of internet speed.
Visit: cricut com setup www.cicut.com setup login setting up my cricut maker install cicut design space app
Source: https://cricutspaces.blogspot.com/2024/09/how-to-install-cricut-design-space-on.html
#cricut.com/setup#cricut.com/setup login#cricut setup#install cricut explore air 2#cricut.com setup mac#www.cricut.com/setup login#www.cricut.com/setup#cricut install setup#install cricut design space app#cricut design space setup#cricut design#setting up new cricut maker#setting up your cricut maker#cricut design space app#cricut explore air 2
1 note
·
View note
Text
How to Connect Cricut Wirelessly: A Guide for Beginners
Are you a Cricut enthusiast planning to start your crafting journey? Well, you have come to the right place! I am going to walk you through all the essential info you need to learn in order to connect Cricut wirelessly.
Cricut crafting machines come with Bluetooth and USB connectivity to provide the utmost comfort in setting up the device. Crafters familiar with the machine can easily get started with the machine. On the other hand, some new users can find it difficult to complete the setup. In this case, it is best to have a thorough understanding of the process beforehand. So, get through the whole blog and grasp all the vital details and steps to wirelessly set up heat presses and cutting machines.
How to Setup Cricut Cutting Machines Wirelessly?
You can wirelessly connect your cutting machine to both computer and smartphone devices. So, here you will find a quick guide to completing the setup on both devices.
Method 1: Connect Cricut Wirelessly to Your Computer
Begin by unboxing the cutting machine and placing it near your computer device. (Make sure both devices are within the 10-15 feet range.)
(If you are using the Explore One machine, then you should insert the Bluetooth toggle to establish the connection.)
Next, attach the machine plug to a power socket and turn it on by pressing the power button.
From the Settings window on your PC, choose the Devices option.
After that, go to “Bluetooth and other devices,” turn on the Bluetooth toggle, and select “+Add Bluetooth or other device.”
On the next open page, select the Bluetooth option and move forward.
Henceforth, the printer will start looking for the available printers within its range.
Once you see your cutting machine model number on the screen, click on it.
If a prompt comes on the screen to type a PIN, you need to enter 0000 to move forward.
Afterward, the wireless connection process will be complete.
In order to use the cutting machine, you need to complete the setup process through the Design Space app. In the next step, you will learn about the setup process.
Begin by visiting the Cricut official website on your PC.
From the screen, click on the Apps option, which will take you to the Design Space download page.
In the open window, you will see that the Download button is greyed out.
To enable the download button, move to the terms and conditions checkbox and click on it.
After that, you will see that the Download button is now green; click on the button to initiate the download process.
Wait for the design app download process to complete, and then open it after that. (Or you can access the file from the Downloads folder on your device to install it.)
Before the app installation process begins, it will ask if you trust this app and want to open it; click on the correct option to start the installation.
Afterward, a box will show up on the screen to indicate installation progress.
Once the installation process is complete, launch the software/app and complete the login process. (Or create a new account if necessary)
Then, choose the Machine Setup option to search for the cutting machine you are using.
From the result, click on your machine’s name, and the setup process will be complete.
Method 2: Connect Cricut to a Smartphone Wirelessly
The following method will allow you to get complete knowledge of how to connect Cricut wirelessly to a smartphone device.
For the first step, power on your cutting machine and bring the mobile device within its 10-15 feet range.
On the smartphone, tap on the Settings icon and then go to Bluetooth.
Now, turn on the Bluetooth toggle and tap on your machine name based on the result.
Follow the instructions to complete the machine’s Bluetooth connection process.
After completing the Bluetooth connection, the same as the computer device, you need to download the app on your mobile phone. Follow the below guide to do that.
First and foremost, launch the Apple App Store or Google Play Store app on your mobile phone device.
Next, type cricut design space in the search section by tapping on the search bar.
After that, tap on the Search option.
From the list of open results, tap on the correct app icon and then tap on Get to start the downloading. (You might need to type your iTunes password if you are downloading the app on your iOS device.)
Once the downloading is finished, the app icon will appear on your system home screen.
You can open the app from the home screen or from the application downloader you are in.
After opening the app, you are required to complete the account sign-in process. (If you are using the machine for the first time, you need to create a new account.)
On the app, you can tap on the Machine Setup option to search for your cutting machine.
Afterward, follow the on-display instructions, and your machine setup process will be complete.
Here you go! Your machine is ready to create beautiful and stunning DIY projects.
How to Set up Cricut Heat Press Wirelessly?
If you are planning to connect Cricut wirelessly to a heat press machine, then you can do it easily without using any app except EasyPress 3. The following guide will help you complete the process without any issues.
First of all, connect your heat press machine’s plug to a power outlet.
Afterward, go to the Bluetooth page on your phone and establish a wireless connection between both devices.
On your smartphone device, download the Cricut Heat app from the App or Play Store.
Once that process is complete, launch the heat app on your device.
Also, you need to tap on the Sign Up option to initiate the machine setup process.
From the heat press names open on the screen, select your machine’s name, and select Connect.
Now, the app will verify the heat press with your registered email address.
Moreover, select the Activate option after reading the terms and conditions.
Once the machine setup process is complete, a notification will show up on the screen.
Finally, you can use your machine to apply icon-on designs on various products.
Final Words
This piece of content shares all the need-to-know info about the machine setup. You can effortlessly complete the setup process of your device without any issues. However, before downloading the Design Space app, make sure to check the device compatibility and system criteria to avoid any complications. If everything is as required, you are good to go to start using the crafting devices. I wish you a happy crafting journey!
Frequently Asked Questions
Does Cricut Require Bluetooth?
All the newer models of the Cricut machines come with both USB and Bluetooth connectivity technology. However, if you are using the first model of the Explore series, then you need to use the Bluetooth adaptor to establish the wireless connection. All other devices come with built-in Bluetooth to set up the device to a smartphone and computer.
Why Can’t I Connect Cricut Machine Wirelessly?
There could be various reasons if you are unable to make a wireless connection to your machine. Some common ones are given below.
The machine is not compatible with your PC or mobile phone.
The OS of your device has not been updated.
Using the outdated or incompatible Design Space app.
Either of your devices is facing a technical problem.
You are not following the correct connection process.
If you are having these types of problems, then ensure that everything is required or seek help if the problem seems too complex.
Does My Cricut Need to Be Connected to Wi-Fi?
There is no need to connect your machine to Wi-Fi in order to use it. These devices have Bluetooth and USB connectivity options. However, you might need to connect your computer or smartphone to Wi-Fi while downloading the Design Space app to complete the setup.
Source :- https://cricuthelpcenter.wordpress.com/2024/08/29/how-to-connect-cricut-wirelessly-a-guide-for-beginners/
0 notes
Text
How to Setup Cricut Maker: Getting Started for First Project!
If you wonder how to setup Cricut Maker, you need to follow this tutorial! In this guide, I will teach you the complete Cricut machine setup in 4 simplified steps. Although you can use this post to set up any model, I will use the Cricut Maker machine in this blog.
The Cricut setup can be daunting in the beginning, but you don’t have to worry. I have been crafting using Cricut for many years, and I am capable of teaching you how to do it. However, in this blog, I will only discuss the procedure of setting up Cricut Maker.
Let’s start with the basic steps to download Cricut, connect it to a Windows computer, and finally set up the machine. Let’s delve into it.
Step 1: Check System Requirements
Are you using a Windows PC? Well, you can’t use it without knowing the system requirements. This is a must before you learn how to set up Cricut Maker. Since the setup will be done on the Windows system, let’s see what we need to run the software on it.
Please take note of the following system requirements:
Operating System: Windows 10 or later (64-bit)
RAM: Minimum 4 GB
Disk Space: At least 2 GB free
CPU: Intel Dual Core or equivalent AMD processor
Display: Minimum screen resolution of 1024px x 768px
Connection: A USB port or Bluetooth connection is required.
Step 2: Download & Install Cricut Software
In order to learn how to set up Cricut Maker, you have to download Cricut Design Space software on your PC. Since all the setup steps are to be done on the app, you must download it beforehand.
On your PC, open your browser and enter this URL: cricut.com/setup.
After that, you will need to choose the product type: Cutting Machine.
Then, accept Cricut’s Terms of Use and click on the Download button. Now, your Cricut software will start downloading.

Once downloaded, you have to go to the Downloads folder and open it.
Just double-click on the downloaded file and begin the installation.

Finally, you will have your Cricut software downloaded to your PC.
Step 3: How to Set up Cricut Maker
Finally, I will walk you through the steps to set up a Cricut machine stepwise. Make sure you have downloaded the Cricut software on your PC and checked its compatibility.
Launch the Design Space app on a Windows PC and click on Product Setup.
Now, you should create your Cricut account.
Once done, you have to select a Smart Cutting Machine.
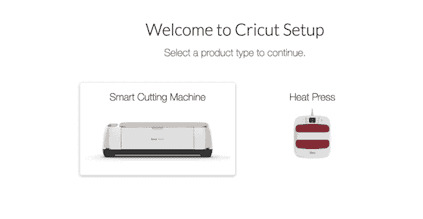
Next, click on the Cricut Maker machine.
After that, you need to follow the screen’s prompts for further setup.
Once you complete the above steps, you will need to connect your Cricut to your PC. I have explained this separately in the next step for your convenience. Please follow the steps carefully.
Step 4: Connect Cricut to PC Using Bluetooth
To complete the Cricut setup, you must connect it to your PC. Then, you will be able to use your machine.
Here’s how to connect Cricut cutting machine to a PC wirelessly:
Take your power cable out and plug it into your PC and machine.
After that, press the power button located on the top of the machine.
Once you have powered on your machine, go to your PC.
On your Windows desktop, press the Windows logo icon + I keys to enter Settings.
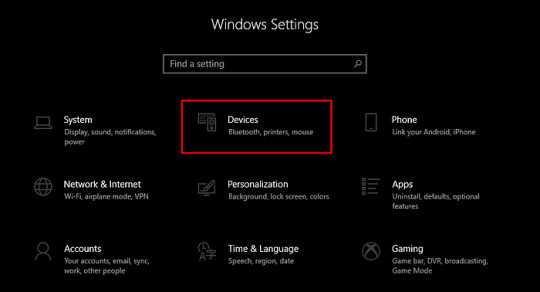
On the following screen, choose Devices.

Now, enable Bluetooth and select Add Bluetooth or other device.

Next, you will see a pop-up asking you to add a device. Choose the Bluetooth option.
Wait for a while and pair your machine with your PC.

Once it is found, select it and pair the machine with the PC.
Kudos to you😍! You have learned how to set up Cricut Maker on your Windows computer. From checking system requirements to connecting Cricut to a PC, it might not be as daunting as it seemed to be. Good luck with your first project; now you are all set to create your first project on Cricut.
FAQs
Question 1: Is it necessary to set up Cricut on PC?
Answer: No, it depends on whether you have any compatible device or not. According to Cricut, there are four compatible devices on which you can use Cricut software, and hence, you can use your Cricut hassle-free. These are Windows, MacBook, Android, and iOS devices. So, make sure you have one of the devices available.
Question 2: How is setting up Cricut Maker possible on Android?
Answer: To set up your Cricut on your Android phone, follow the steps below:
Plug the power cable into your Cricut and wall outlet.
Pair your machine with your Android phone using Bluetooth.
After that, you have to download the Cricut software.
Now, launch the app on your phone and create or sign in using Cricut ID.
Next, click on the menu and choose Machine Setup.
Then, choose the Cricut model.
Lastly, follow the rest of the steps displayed on the screen.
Question 3: How to connect Cricut Maker to a PC using a USB cord?
Answer: Follow the steps mentioned below and connect your machine to your Windows PC using the USB cable:
Make sure you have turned on your Cricut and PC.
After that, use one end of the cord and insert it into the back of the machine.
Then, take another end and insert it right into the PC.
Finally, your Cricut is connected to your PC with a USB cord.
Visit: www.cicut.co setup login
install cricut design space app
Source: https://cricutmakermachines.com/how-to-setup-cricut-maker-getting-started-for-first-project/
#cricut.com/setup#www.cricut.com setup login#www.cricut.com/setup login#www.cricut.com/setup#cricut design space app login#install cricut#install cricut explore air 2#install cricut design space#install cricut design space app#cricut install setup#cricut setup#cricut setup on computer#cricut setup maker#cricut setup explore air 2 setup#cricut setup for pc#cricut create connect to computre#cricut create connect to computer
0 notes
Text
How to Connect Cricut to Laptop: A Guide for Windows and Mac

If you have bought a new Cricut machine or are planning to buy one, then you sure have wondered how to connect Cricut to laptop. Connecting any of your Cricut machines is very easy and can be done in a few steps. By the time you finish reading this blog, you will be able to connect your laptop (Windows/Mac) to your Cricut easily via Bluetooth or using a USB cable.
Connect Cricut to Laptop/Computer (Windows)
There are 2 different methods in order to connect Cricut to your Windows laptop/computer. Either you can connect it via Bluetooth or a USB cable. I am writing down all the steps separately so you can connect your laptop to your machine easily.
Method 1: Via Bluetooth
Connecting Cricut machines via Bluetooth is very common among its users. The reason is that you can connect it wirelessly via Bluetooth. So, you don’t have the restriction of keeping your laptop near the machine. To connect your machine to Bluetooth, follow these steps:
First, plug in the Cricut product using the power adaptor and turn it on.
Next, you have to make sure that your machine and the laptop are within the 10–15 range.
After that, go to the Start menu on your laptop and open Bluetooth settings.

If your Bluetooth is off, then turn it on.
Then, go to Bluetooth and other devices and click Add Bluetooth or other device.

Select the Bluetooth option until your laptop detects your Cricut model.
When the machine appears, select the machine from the list of devices.
The procedure of pairing is complete. Now, you can start your crafting with Cricut.
Method 2: With a USB Cable
In case your Cricut or laptop does not have Bluetooth or has an error with Bluetooth connectivity, you can connect them using a USB cable. To connect with a USB, follow these steps:
When you unbox your machine, you will find a USB cable. You have to use that cable to connect your machine and laptop.
Afterward, make sure that you have plugged the machine in and that the power is on.
Next, connect one end of the cable to your machine and the other end to the laptop.
Then, go to the Design Space software and open New Product Setup.
Now, the Cricut machine will show as Connected.
Lastly, download the Cricut app and begin to make DIY projects with your Cricut.
Connect Cricut to Laptop/Computer (Mac)
Again, if you are using a Mac laptop/computer, connecting your machine through Bluetooth is pretty much the same process as with Windows. Although, it may have a few differences. Well, you don’t have to worry about them as I am writing them in the section below.
Method 1: Using Bluetooth
All the Mac computers come with Bluetooth connectivity. So you can easily connect them using Bluetooth. To connect your machine to a Mac laptop or computer, Use these steps:
Ensure that the Cricut product is on.
Keep the machine and your laptop within a 10–15 ft range.
Then, go to the Apple menu and select System Preferences.

After that, you have to open the Bluetooth section on your laptop.

Also, make sure that Bluetooth is on.
Check for the available Bluetooth devices and select your machine.

The Cricut machine is paired now. Start your crafting journey right away.
Method 1: Through a USB Cable
To connect your Mac laptop/computer to the Cricut machine, you have to follow these steps:
Make sure that your machine is connected to electricity.
Next, connect the cable to the machine and your laptop at both ends.
After that, navigate to the Cricut Design Space app.
Then, open the New Product Setup. The machine will be connected.
Note: When your machine is connected to a laptop or computer (Mac or Windows), you will need to download the Cricut Design Space software. You can download it from cricut.com/setup. When you see it is downloaded, you have to log in with your Cricut ID and start crafting. If you do not already have a Cricut account, you can create one.
Wrap Up
In short, you learned how you can connect Cricut to laptop. It is necessary to connect your Cricut machine to the computer, and only then you can use the Cricut Design Space app. You can connect any of your computers (Windows and Mac) using a USB cable or Bluetooth. Once your laptop is connected, you can download the Cricut software and log in with your Cricut username and password. In case you are new to Cricut and don’t have an account, you can create one from cricut.com/setup.
FAQs
Why would my Cricut machine not connect to my laptop?
A couple of problems may prevent your laptop from being connected to your Cricut. First, you should check whether or not your machine is powered on. If the power is on, make sure the laptop is within the range of 10–15 feet. If you are using a USB cable for the connection, make sure it is not strained. In that case, you will need a new cable.
How can I connect my phone to Cricut?
Connecting your phone to a Cricut machine is a pretty simple process. You can do it using either a USB cable or Bluetooth. To connect your phone via Bluetooth, plug in the machine and power it on. Make sure it is within 10–15 feet of your phone. After that, go to your phone’s Bluetooth settings and search for your machine. When it appears, click on it, and it will be connected. To connect via a USB cable, connect both ends of the cable to the computer and your Cricut.
What are the laptop system requirements for Cricut Design Space?
Your laptop should have a few basic requirements to be able to use the Design Space app. For example, it should have at least 4GB RAM and 2GB free disk space. It should have an available USB port or Bluetooth connectivity. The minimum resolution should be 1024x768 pixels. It should have a minimum of 2–3 Mbps download and 1–2 Mbps uploading capacity.
Read more: Cricut New Machine Setup
install cricut design space app
cricut.com/setup mac
Cricut Design Space
Source: connect cricut to laptop
#connect cricut to laptop#Cricut Design Space#cricut.com/setup mac#Cricut New Machine Setup#install cricut design space app
0 notes
Text
Cricut Set up: A Complete Guide for Easy Installation
If you have multiple questions about Cricut set up on a computer, then this is the perfect guide for you. Are you a non-tech person who just bought a Cricut machine? Then, you need to set it up first. Last month, my daughter told me that I was going to be a grandmother soon, and I was on cloud nine. For her baby shower, I am planning to make all the decor items by myself, and my Cricut is going to help me out with that.
Apart from cutting materials into any shape or size, I can easily connect my Cricut model to PCs and smartphones. I need to connect both devices to start my machine and create it myself. Other than setting up, I need to download the Cricut Design Space and connect the Cricut machine to a device.
If you are a quick learner, take advantage of this opportunity to learn the details about getting the Cricut app, connecting it, and setting it up on the Windows system.
Download Cricut Design Space on a Windows PC
The first step of the Cricut set up method includes downloading the Cricut software on a Windows computer. Take a look at the following steps to learn about how you can get this software on your computer:
First, switch on your computer and open the search engine you are using.
Second, navigate to design.cricut.com and read the Terms & Conditions.
Third, tick the checkboxes and then tap the Download option.

Following this, open the downloaded Cricut Design Space file from the browser or Downloads folder.

In case a small-up window asks you to trust the app, then click the Trust the application option.
After a few seconds, you will see the installation display status window in front of you.
Now, close the web browser and open the installed Cricut Design Space app.
At this point, sign in or create your account via Cricut ID & password.
Conclude the process by starting drawing new designs by using tools & other features.
After downloading and installing the Cricut app, get going by connecting the Cricut machine to your Windows computer.
Connect Cricut Machine to Windows via Bluetooth
You are around the corner to come across with the Cricut set up process. After downloading the Cricut software on your computer, let's discuss wirelessly connecting both devices. Below are the steps you need to follow to finish up the connection process without making any serious mistakes:
Kick start the method by confirming that your cut-die machine is on.
After checking that, ensure that it is placed within the range of 10-15 ft. under your computer.
Next, open the Start menu > click the Settings > and hit the Devices option.

Now, check that Bluetooth is on and then select Add Bluetooth or other device option.

At this point, an Add a Device window will appear on your desktop screen.
Following this, select Bluetooth and then hit your model name from the shared list.
Afterward, open the Cricut New Product Setup page.
Now, your cut-die machine will be shown as connected during the setup process.
Once you are done wirelessly connecting your craft plotter to the computer, let's focus on the method of setting up both devices.
Cricut set up on Your Windows Computer
Are you ready to go on a journey where you will learn how to set up Cricut on your Windows system? If yes, then brace yourself as this section has covered all the steps of the process:
Start the process by unboxing your machine and other supplies.
Now, plug your machine into the nearby wall socket and turn it on.
Afterward, connect your Cricut to your Windows via a USB cable or Bluetooth.
Next, download & install Cricut Design Space from design.cricut.com/setup.
At this time, go through the instructions, sign in, or create your Cricut ID & connect your machine.
Lastly, you will be called for a test cut to check whether the setup has been done successfully or not.
As a result of this blog, you must understand that it's compulsory for Cricut set up on your Windows system. Without the proper setup, you won't be able to design DIY projects or use the Design Space app.
Frequently Asked Questions
Question: Do I Need a Computer to Use My Cricut Machine?
Answer: No, you don't need a computer to use the Cricut machine. Since Cricut is a multi-tasking craft plotter, you won't face any issues if you don't connect it to the computer. But it would help if you had a smartphone to communicate with the Cricut machine and make customized projects.
Question: How Do I Set up My Cricut Machine on Smartphones?
Answer: Follow these steps for Cricut set up on your smartphone:
Start the process by plugging your machine cable into the socket and switching it on.
After doing that, pair your device to your smartphone via Bluetooth.
Next, download the Cricut Design app on your device and launch it.
Now, open the Menu tab and choose the Machine Setup option.
Following this, choose your Cricut model and go through the setup instructions.
Finally, you will be informed to do a test cut on the material.
Question: Can I Start a Business With My Cricut?
Answer: Yes, you can start your own business after buying a Cricut machine. Before everything, download and install the Cricut Design Space software and then set up the machine. After the successful Cricut set up, connect it to a computer and smartphone, and you're all ready to start creating new DIY projects and making money by selling them.
0 notes
Text
How to Connect Cricut Bluetooth to Computer: Full Guide
Hey, Cricut folks, I’m going to show you the easiest way to connect Cricut Bluetooth. I know how hard it can be when we get a new Cricut machine. From setup up to performing a test cut, it seems like climbing a mountain. But wait, this is not as difficult as you think!
I recently finished setting up a friend’s machine, in which I briefly taught him how to connect Cricut to computer. Honestly speaking, I didn’t even touch a thing; I was just instructing him to do this and that. Following my instructions, he completed his setup in a matter of minutes. Do you also want me to instruct you on how to set up your Cricut machine? If so, join me on a board to connect your Cricut to your computer using Bluetooth. Let’s start!
Step 1: Unpacking the Cricut Product
In the first step, you must open your new Cricut machine. Be careful while unboxing the box because many accessories are included. You have to ensure that nothing breaks while taking things out. As you can see below, I have unboxed my Cricut Maker 3 machine, and the items inside the box are as follows:
Similarly, when you unbox other Cricut models, such as Cricut Explore or Joy, you will get a few similar items. Now that we have done the unboxing let's proceed with the second step, which is to connect Cricut Bluetooth.
Step 2: Place Your Cricut Machine
Now, you have to find a place where you can locate your machine properly. Ensure the surface is completely flat so that it will be easier to work for you in the future. If you have a table, you can keep it. Otherwise, the floor is also a good idea if you have none.
Now you have chosen the right place, let’s move on to plug the machine. To do this, you have to find a nearby power socket and connect your machine to it.
Once connected, you have to turn on the machine by pressing its power button.
Step 3: Connect Cricut Bluetooth to Your Device
Finally, we are heading to learn how to connect Cricut to a computer via Bluetooth. But here, one question that might arise in your mind is what computer will we connect to? Is this a Mac or Windows or others?
Don’t worry! I have got your back for both the computers. I will show you how to individually connect your Cricut machine via Bluetooth on a Mac or Windows computer. Let’s start with Windows first:
For Windows
For Mac
FAQs
Question 1: Can I connect my Cricut to my laptop?
Answer: As mentioned on its official site, Cricut works with iOS, Windows, Mac, and Android. However, it is not compatible with Chromebook or Unix/Linux. Hence, if you use the operating system mentioned above, you can use any brand’s laptop, such as HP, Acer, Dell, Asus, Lenovo, MSI, and Apple.
Question 2: Is the Internet compulsory for using Cricut Design Space?
Answer: No, it is not necessary to connect the Cricut software to the internet all the time. The internet is only needed when you want to access a certain feature in the app. Otherwise, there is no need to connect it to the internet. The offline option is available for the Cricut app on all devices except Android devices.
Question 3: Can I connect my Cricut machine without Bluetooth?
Answer: Absolutely, yes! You can also connect your Cricut machine and computer via a USB cable. To do this, insert one cable end into the machine’s USB port and the other end into the computer’s USB port. Once connected, you are ready to use the machine for cutting, scoring, and other operations.
Final Words
In conclusion, I discussed how you can connect Cricut Bluetooth to Mac and Windows computers. I explained everything stepwise so that every beginner Cricut user can connect their Cricut wirelessly and hassle-free. The connection is important if you want to set up your Cricut. Hence, connect it and set it up to get started with your Cricut cutting machine. Start setting up your Cricut machine in one go with this simple guide.
Source: https://desincricut.wordpress.com/2024/04/23/how-to-connect-cricut-bluetooth-to-computer-full-guide/
#cricut setup#install cricut design space app#install cricut printer#install cricut explore air 2#www.cricut.com setup login#cricut.com/setup#cricut.com setup download#cricut.com setup#cricut.com setup windows#cricut.com setup mac#cricut.com/create#cricut.com sign in#cricut.com/register#cricut.com design space#cricut#cricut com setup#cricut new#cricut new product device#cricut new machine setup#cricut new product setup#cricut create#cricut create connect to computer
0 notes
Text
How to Connect Cricut Explore Air 2 to Computer: 2 Best Ways
Being a Cricut user, I know how to connect Cricut Explore Air 2 to computer. If you want to learn it, then stick to this blog till the end and follow each step. Let me introduce you—I’m a professional crafter and a passionate Cricut user for the last six years. I have tried almost every Cricut machine for my regular crafts. And I love teaching people about different things. So, this blog post is all I have to connect with my followers and readers.
Today’s post is simple. However, all my users will learn something new like always. I know you might be eager to learn the process. But, wait, are you aware of Cricut Design Space? I hope you’re. But, even if you don’t, I will explain it to you through this blog. Let’s get into it!
A Brief About Cricut Design Space
Before getting started with how to connect Cricut Explore Air 2 to computer, you must know this. If you’re a novice and recently took your step into the Cricut world, you should know that it’s a Cricut specialized software application that you’ll need to download and install in order to use your Cricut machine.
This software offers you with many intriguing features to start designing and set yourself apart from the competition. So, are you ready to stand out from the crowd? Yeah, it’s possible when you know the complete process to set up your Explore Air 2 machine or any Cricut product you have.
How to Connect Cricut Explore Air 2 to Computer?
Computers are the best devices with which to connect your Cricut. Do you know why? These devices are fast in speed and give a better user experience with a wider screen. I also use a computer for all my connection work. Let’s check the methods here.
Method 1: Using a USB Cable
A USB connection is a primary method for connecting Cricut machines to your computer device. So, learn how to connect Cricut Explore Air 2 to computer via USB from the steps below.
To start, get the USB cable that you’ve got with your Cricut machine.
Before that, unbox your machine completely and take off the coverings as well.
After that, take the USB cable and connect one end to the machine and another end to the computer’s USB port.
Now, turn on your devices and check if your computer shows the machine’s connection status.
Then, you can continue installing the Cricut Design Space from cricut.com/setup .
Finally, you’ll start making crafts using your Cricut. That’s how to connect Cricut Explore Air 2 to computer with USB. Now, look at another method. You can use the same procedure with your Mac computer as well.
Method 2: Via a Bluetooth Connection
You know the connection process with a USB cable, which is a basic connection process. However, you must ensure that your PC has USB drivers. Well, moving forward, let’s learn how to connect Cricut Explore Air 2 to computer wirelessly with a Bluetooth connection. Look at the steps below.
In the beginning, make sure that your Explore Air 2 machine is at least 10-15 feet apart from your computer and is ON.
Then, check if your PC has Bluetooth from the Device Manager.
Now, head to the Control Panel and click on the Devices and Printers option.
Thereafter, hit the “Add a device” option.
Next, let your PC identify your Cricut cutting machine.
Choose your Bluetooth device name or Cricut’s name from the list of devices.
You may need to enter the code when you’re asked. (Note: If you don’t know the code, type “0000”).
And then, hit the Next button to finish pairing between your Cricut and computer.
In the last step, hit the Close button to exit from the window.
That’s how to connect Cricut Explore Air 2 to computer. Now, you can utilize your Cricut machine to create fun crafts.
Conclusion
Finally, you know the connection process for a Cricut Explore Air 2 machine on a computer. The connection process is simple and straightforward. Beginners, as well as pro users, can perform this setup quite easily and hassle-free. Also, the USB and Bluetooth setup are great for connecting your Cricut to the computer. Once you connect your Cricut to a computer, you can start making anything you want.
FAQs
Why Is My Cricut Explore Air 2 Not Connecting to My Laptop?
If your Cricut Explore Air 2 is not connecting to a laptop, it may be due to the distance between your devices being more than 10-15 feet in case of a Bluetooth connection. Also, you need to check if your devices have Bluetooth connectivity or not. If you are using a USB connection, make sure that your PC has USB drivers.
How to Connect Cricut Explore Air 2 to Mac via Bluetooth?
These are the steps to connect your Explore Air 2 machine to your Mac via Bluetooth:
Initially, check if your Cricut machine is at least 10-15 feet away from Mac.
Now, check if your Bluetooth option is ON on Mac.
Then, move to the System Preferences and find the Bluetooth option.
After that, select your Cricut model from the list of Bluetooth devices.
If your screen asks you for a code, type “0000.”
Lastly, your devices will connect via Bluetooth.
How Do I Connect My Cricut Explore Air 2 to iOS?
To connect your Cricut to iOS, follow these steps:
First, ensure that your Cricut and iOS devices are at least 10-15 feet apart.
Now, open the Settings app.
Then, check if the Bluetooth option is ON.
After that, select the Bluetooth module from the list of devices.
Next, allow your iOS device to pair with Cricut.
Type “0000” when your screen asks you for a PIN code.
Also, get the Cricut Design Space.
Finally, your devices are connected together.
Source :- https://m2setupdotcouk.wordpress.com/2024/04/05/how-to-connect-cricut-explore-air-2-to-computer-2-best-ways/
0 notes
Text
How to Connect Cricut to Computer via Bluetooth or USB?
I still remember the day I bought my first Cricut Maker and Explore machine. You won’t believe me, but I was unsure of the proper machine setup. I didn’t want to make any mistakes that would lead to an error. Anyway, I learned how to connect Cricut to computer from the guidebook that comes with Cricut.
Although every user can use this easy guide to connect their machine, there are people who need an in-depth tutorial on Cricut setup. However, it’s been more than 3 years since I have been using these cutting machines for creating DIY projects. The best part about this machine is that it can connect via both Bluetooth and a USB cable.
By the end of this blog, you will learn how to set up your Cricut Maker or Explore machine using a USB or Bluetooth connection. So, are you ready to complete your Cricut setup? Let’s delve into it!
How to Setup Cricut Machine With Design Space?
Before learning how to connect Cricut to computer, the complete Cricut machine setup is essential.With this setup, you will connect your Cricut cutting machine to the Design Space that helps you create design, and it works as a medium to transfer your design to the cutting machine that cuts your final projects. Here’s how to set up your Cricut Maker or Explore on a Windows computer:
First, you need to power on the machine and computer.
Next, you have to connect the machine to your computer using a USB cable or pair it via Bluetooth. (I have explained how to connect Cricut to computer via USB or Bluetooth in the next section).
Then, download and install the Design Space app by simply visiting cricut.com/setup.

Afterward, you have to follow the on-screen instructions to sign in or create a Cricut ID and Password.
Finally, your Cricut setup is done; now you can move to the next section, where I have explained the way of connecting your Cricut to your computer.
How to Connect Cricut to Computer via Bluetooth?
So, are you ready to connect your Cricut to your computer wirelessly? The process is simple, and this is only for Windows users.
First of all, you have to maintain at least 10 to 15 feet of distance between your computer and the machine. For Cricut Explore or Explore One, you need to insert the Wireless Bluetooth Adapter.
Now, you have to go to the Start menu and choose the Settings.
On Windows Settings, you have to select Devices.
Next, turn on the Bluetooth and hit the Add Bluetooth or other device option.

After that, you have to select Bluetooth and then wait for a while until it detects your cutting machine. Once detected, you can select it to proceed ahead.
When prompted, you should enter four digits of PIN: 0000.

Finally, you have paired your Cricut Maker or Explore with your Windows computer.
That is it! This is the complete process of connecting your Cricut machine to a computer with the help of wireless Bluetooth. If you want to connect the machine using USB, then proceed with the following step.
How to Connect Cricut to Computer Using a USB Cable?
Another way to connect your Cricut to a computer is a USB cable. Below, I have given step-by-step instructions to establish the connection between the computer and Cricut:
Take a USB cable and connect it to the back of the Cricut machine.
Next, use the other end of the USB cable to connect it to a computer.
Then, you have to follow the instructions on your computer screen to install the USB driver.
If you find it difficult to connect it via USB, then you should check whether your computer meets the minimum system requirements for Design Space.
FAQs
Question 1: Why is the Cricut machine not connecting to a computer?
Answer: Below are 2 fixes that you can try if your Cricut machine isn’t connecting to your computer:
Inspect the Cricut: here, you need to check whether your machine is turned on and kept within a distance of 10–15 feet from the computer. For Explore or Explore One, make sure you have inserted the Wireless Bluetooth Adapter.
Check the computer: your computer must meet the minimum system requirements so that it can connect to Bluetooth. If everything seems okay, then try restarting the computer and machine.
Question 2: What is the PIN for connecting my Cricut to my Bluetooth?
Answer: It is 0000. This code is entered when you are prompted while pairing up your Cricut machine with your computer. The steps go as follows:
Open the Bluetooth on your computer.
Then, turn on the Bluetooth.
Go to the Add Bluetooth or other device option.
Next, you need to select the Bluetooth option, and it will start looking for your machine.
When it finds the machine, you need to click on it and then enter the code 0000.
Then, hit the Connect tab to connect the devices.
Question 3: Why can’t I connect my Cricut via USB?
Answer: Many people face a similar issue while connecting their Cricut via a USB cable. There are various reasons that stop you from connecting it via cable. To fix this problem, you need to check whether the cable is inserted properly into its port or not. If everything seems perfect, then you should try to replace the USB or try a different port on your computer. There are chances that these fixes will help you reconnect your cutting machine to your compatible device.
Conclusion
In this blog, I have explained two methods to connect your Cricut to a computer. This guide will be useful for connecting your Cricut Maker or Explore series machines to your Windows computer. Before talking about the connection between the computer and the machine, I have started with the Cricut setup, which is a must before connecting it to the cable or wirelessly. Both methods are suitable and depend on your choice of what suits you best.
Read more: install cricut design space app
cricut.com/setup
cricut.com/setup mac
Cricut machine setup
Source: how to connect Cricut to computer
#how to connect Cricut to computer#Cricut machine setup#cricut.com/setup mac#cricut.com/setup#cricut design space#cricut.com sign in#cricut setup#cricut new machine setup#cricut.com/create#install cricut design space app#Cricut machine not connecting
0 notes
Text
How to Use Cricut Machine? [A Comprehensive Guide]
Along with the craft plotter, the users also need to buy supplies & accessories to finish the project as per their choice. However, one thing that is common among them is the Design Space app. It is digital software that permits the DIYer to draw something creative and out of the box. Continue reading this blog to learn in detail about the Cricut cutting machine.
How to Setup Cricut Machine on a Computer?
Every crafter will agree that before starting the crafting process, it’s compulsory to set up the craft plotter. They can set up their cut-die machines with PCs as well as mobile devices very easily. However, it will be the user’s call to decide via which device they will be setting up their machine. Read the following steps to learn about setting up a Cricut craft machine with a Desktop.
First, start plug in your cut-die machine & power it on.
Next, connect both devices with each other via a USB cable or pair it up with Bluetooth.
Now, open the search engine and go to the Design Space setup page.
Following this, download and install the Cricut software on your system.
Next, sign in, create your Cricut ID, and start setting up your cutting machine.
Lastly, you will get to know about the setup that has come to an end when called for the test cut.
Further finishing up the Cricut cutter machine setup process with PCs, the crafter needs to connect their Cricut cut die machine with PCs using Bluetooth.
How to Connect Cricut Machine to a PC Wirelessly?
The user got the authority to cut the materials wirelessly with their electronic cutting machine. Have a look at the following steps and learn about connecting a Cricut machine with the Windows/Mac operating system:
For Windows
Ensure that your Cricut cut die machine is on and within 10–15 ft of your PC.
After that, press the Start menu and tick the Settings option (gear icon).

Now, click the Devices and then enable your device’s Bluetooth.

Next, press the Add Bluetooth or other devices and select Bluetooth.
Following this, choose your machine and start typing the PIN number.
After entering the PIN, select the Connect button given on the left side of the screen.
Finally, the connection process of your craft plotter with a Windows computer will come to an end.
Apart from Windows OS, the crafter can also connect their Cricut craft machine with Mac systems. For that, they need to read the section given below.
For Mac
First, cross-check that your Cricut machine is on and within 10–15 ft of your PC.
Next, choose the System Preferences given under the Apple tab.
Now, press the Bluetooth icon visible on the System Preferences page.

Afterward, a Bluetooth window will open and turn on the Bluetooth (if it isn’t on).
Next, select your Cricut model name from the list appearing and tick the Pair button.
Following this, fill in the PIN code and tick the Pair option appearing on the right side of the screen.
At last, both the devices will successfully get connected with each other.
With the wireless connection completion of the Cricut machine with PCs, the DIYer can now start by creating custom projects.
What Projects Can You Craft Out of Cricut Machine?
After learning so much about the Cricut cutting machine, the crafters become capable enough to craft different custom projects. You can create projects for personal as well as professional purposes. The DIYer can also use a Cricut craft machine and start their own business. Have a look at the list of popular projects that you can prepare out of the machine:
Greeting Cards
Custom T-Shirts, Mugs & Hats
Paper Lanterns
Personal Coasters
Cake Toppers
Custom Tumblers & Water Bottles
DIY Window Decal
Tote Bag.
Wood Sings
Doormats
Car Labels
Bookmarks
Earrings
Banner
Monograms
In brief to the post, we really hope that you were able to come across all the details regarding the Cricut machine.
Frequently Asked Question
Question: How Can I Connect My Cricut Machine to My iOS via Bluetooth?
Answer: Go through the following steps and learn about the wireless connection process:
First, enable your Cricut cut die machine & be within 10–15 ft of the smartphone.
Now, go to Settings and turn on your device’s Bluetooth.
After turning on the Bluetooth, select your machine name from the list.
Next, fill in the blank with PIN, i.e., 0000, and click the Pair option.
Finally, your wireless pairing process will come to an end.
Question: How Do I Setup My Cricut Machine on My Mobile Device?
Answer: Read the below steps to learn about the steps about cutting machine setup process:
Start the process by plugging in the machine and switching it on.
Next, pair up your mobile device with a Cricut machine with Bluetooth.
Now, install the Cricut Design Space app, launch it & create your Cricut ID.
After that, click the Menu tab and select the Machine Setup.
Choose your machine model and follow the on-screen.
You will know the setup is complete when called for a test cut.
Question: What Kind of Projects Can I Make With Cricut Machine?
Answer: There are tons of custom projects that the crafter can create out of their respective cutting machine. Read the following projects that can be crafted out of the cut-die machine:
Jar Labels
Bookmarks
DIY Mugs
Custom T-Shirts
Party Signs
Invitation Cards
Cupcake Toppers
Personal Banner
Bachelorette Party Props
Table Number Sign
Etch Glass
Custom Stickers
DIY Hats
Personal Wine Bag
Source: Cricut Machine
#Cricut Machine#CRICUT DESIGN SPACE LOGIN#HOW TO CONNECT CRICUT MACHINE TO LAPTOP#SETUP CRICUT DESIGN SPACE SETUP
1 note
·
View note
Text
How to Connect Cricut Explore Air 2 Bluetooth to Computer?
In this post, I will explain how to connect Cricut Explore Air 2 Bluetooth. Whether you are a Windows or Mac user, this blog will help you connect your machine and device easily.
When I got my crafting machine for the first time, I was a little overwhelmed, as I didn’t know how to connect it to my computer. But one of my friends, John, who is a professional crafter, helped me with this. Since then, I have been setting up my machine without anyone’s support. Now, I want to help you in the same way, as this is a beginner-friendly blog specially curated for novice crafters.
In this blog, I will explain how to connect your machine to the computer of your choice. Before that, I will also explain the system requirements for both Windows and Mac. Let’s start!
System Requirements for Connecting Cricut to Your Computer
Before you learn how to connect Cricut Explore Air 2 Bluetooth, you must review the system specs. This is very important before you set up your machine.
For Windows
For macOS
How to Connect Cricut Explore Air 2 Bluetooth to Windows?
I will show you how to establish a connection between your machine and Windows PC. Although the following steps can be used for another Cricut model, here I am specifically explaining it for the Explore model. Let’s take a look at the below steps:
How to Connect Cricut Explore Air 2 Bluetooth to MacBook?
On a MacBook, you can connect the machine using Bluetooth wirelessly. After this connection, you can set up your machine with your Mac and start using it. Let’s have a look at the following steps to connect:
Final Words
In this blog, I have explained how to connect Cricut Explore Air 2 Bluetooth on Windows PC and Mac. Following the above methods will help you connect your machine easily to your system via Bluetooth. Although I could connect my machine via a USB cable, I prefer a wireless connection. With a wireless connection, you don’t need to manage those tedious wires or cords.
FAQs
Question 1: Why is Cricut Explore Air 2 not connecting to Bluetooth?
Answer: There could be multiple reasons why your machine is not connecting to your Bluetooth. Below, I’ve mentioned the reasons:
Question 2: Why is my Cricut Explore Air 2 not working?
Answer: If your machine is not working properly, then the reasons could be as follows:
Question 3: How can I reset my Cricut Bluetooth?
Answer: In order to reset the machine’s Bluetooth, you will need to walk through the following steps:
Visit: install cricut design space app
Source: https://cricutcreate.blogspot.com/2024/09/how-to-connect-cricut-explore-air-2.html
#cricut design space app#cricut explore air 2#cricut setup#cricut new machine setup#cricut design space#cricut venture#cricut joy xtra#cricutprojects#cricut setup for pc#cricut design space software#install cricut design space#install cricut design space app#install cricut explore air 2#cricut.com/setup#www.cricut.com setup login#www.cricut.com/setup#www.cricut.com/setup login#install cricut
0 notes
Text
How to Connect Cricut to Computer Bluetooth (Effective Points)
When you want to use a Cricut machine, you need a computer or phone to connect it to your crafting machine. To connect both devices, you can either use Bluetooth or a USB cable. If you want to learn how to add your machine to a desktop, you should read this blog. Here, I will write about how to connect Cricut to computer Bluetooth. After reading the post, you will be able to perform the connection process yourself.
When it comes to computers, you can use either a Windows or a Mac, as both of them are compatible with Cricut. Here, you will learn about the full connection procedure for both computers and whichever of the two is your device, you can connect it to your machine.
How to Connect Cricut to Windows With Bluetooth?
If you want to use a machine on a computer, then a Windows PC can be a good choice for that. Cricut works great with Windows and has all the required features to connect it to the machine and download the Design Space app on it. For connecting Windows to a machine, the process is written below:
How to Connect Cricut to Computer Bluetooth (Mac)?
You can also use a Mac system instead of a Windows PC. Both computers are equally good for using your crafting machine. You can connect it to your operating device and download the software. The process for the connection is as follows:
How to Download Cricut Design Space on Desktop?
Once you have learned how to connect Cricut to computer Bluetooth, you have to download the Design Space app. This software is necessary because it creates designs for projects and helps the machine cut them. The easy steps for downloading and installing the software are as follows:
Conclusion
This blog has guided you through learning how to connect Cricut to computer Bluetooth. As I mentioned in the above section, you can use either Windows or Mac, and you can connect both of them to your machine by following the steps in the blog. Here, you also saw the downloading and installing procedure for the Design Space software on your computer because it is equally important to use a crafting machine. Now, you can easily set up your machine and work on it.
FAQs
Can I Connect Any Cricut Machine to a Computer via Bluetooth?
Yes, you can! Almost all the Cricut machines, especially the newer tools, have built-in Bluetooth features. You can add a machine to your device using Bluetooth. However, there are some older models that do not have built-in Bluetooth. You can still connect them wirelessly, but for that, you will need an external Bluetooth adapter. You can buy an adapter and install it on the machine. After that, you can connect your machine to a desktop.
Is There an Alternative Way to Connect Cricut to Computer?
Yes, there is! If you do not want to connect your machine to a computer with Bluetooth, you can use a USB cable. However, a USB cable is a wired connection, and it will not give you as much freedom as Bluetooth while working on a craft project. To connect your devices with a wired connection, you need to connect a USB cable and then insert it into the machine and your computer.
Do I Need a Computer for a Cricut Machine?
You can use a computer to work with a machine. But if you don’t have it, you don’t necessarily need it. You can use your crafting machine without a computer as well. Instead of a computer, you can use a smartphone. A mobile device works equally well with the Design Space app. Just like on a desktop, you can get the software and connect a phone to the machine.
Visit: cricut.com/setup www.cricut.com/setup login
Source: https://cricricutdesigncut.wordpress.com/2024/09/19/how-to-connect-cricut-to-computer-bluetooth-effective-points/
#design space setup#digital design#cricut design space#cricut.com/setup#www.cricut.com setup login#www.cricut.com/setup\cricut explore air 2 setup#www.cricut.com setup#www.cricut.com/setup login#cricut.com/setup explore air 2 setup#cricut.com/setup mac#cricut.com/setup windows#cricut design space setup#install cricut explore air 2#cricut setup#www.cricut.com/setup#cricut.com setup#mac#cricut design space app#cricut design space login#cricut design space download#cricut design space software
0 notes
Text
A Complete Guide for Cricut Explore Air 2 Bluetooth Setup
With the Cricut Explore Air 2 Bluetooth setup completion, the DIYer can make all their crafting dreams come true. Designed with simplicity, this cutting machine can cut anything covering from delicate to thickest material for various personal or professional uses. Explore Air 2 makes it easy for the crafters to go from idea to ‘I Did It.’ Apart from that, this model works properly with the Design Space app, which shares designs with the machine for cutting & printing purposes.
Also, it comes with an in-built Bluetooth wireless technology, making it easier for the DIYer to transfer designs without any technical errors. Inside this blog, you will learn about setting up Explore Air 2 wirelessly with Desktop/ mobile devices.
How to Setup Cricut Explore Air 2 on Windows via Bluetooth?
Explore Air 2 can wirelessly cut down the loaded materials into various shapes & sizes via its Bluetooth feature. Follow the steps written below to learn about the process:
First, you need to ensure that the cutting machine is on and within 10-15 ft range of your PC.
Now, tick the Start menu and press the Settings symbol.

Next, click the Devices and check that your system Bluetooth is on.

In case Bluetooth isn’t on, then move the dongle to the right side.
After enabling Bluetooth, tap the Add Bluetooth or other device.

At the new pop-up window, choose Bluetooth and let your computer scan your Cricut machine.

After finding your machine model, click on it and enter the PIN number (0000).
Now, you need to press the Connect option appearing on the left side of the screen.

Lastly, your Cricut machine pairing process with Windows OS will come to an end successfully.
Below, you will come across the Cricut Explore Air 2 Bluetooth setup process with Mac OS.
How to Setup Cricut Explore Air 2 on Mac via Bluetooth?
Follow these steps to learn about setting up Explore Air 2 with Mac wirelessly for crafting projects.
Commence the process by ensuring that your cutting machine is on and within the 10-15 ft range of Mac.
Now, press the Apple icon and choose the System Preferences option.
After opening the System Preferences window, click the Bluetooth icon.

Next, open the Bluetooth window and enable the device Bluetooth if it isn’t on.
From the list, choose your Cricut machine model from the list visible on your screen.
Following this, tick the Pair button and submit the PIN code inside the field.
Now, again tap the Pair, and your device pairing process will come to an end.
Apart from PCs, the DIYer can also setup their Explore Air 2 model with iOS devices. For that, they have to read the section given below.
How to Setup Cricut Explore Air 2 on iOS via Bluetooth?
Cricut Explore Air 2 Bluetooth setup process with iOS devices can take place by following these steps:
Initiate the process by checking that your iOS device is on and within 10-15 feet of your PC.
Now, open your smartphone and go to the Settings app.
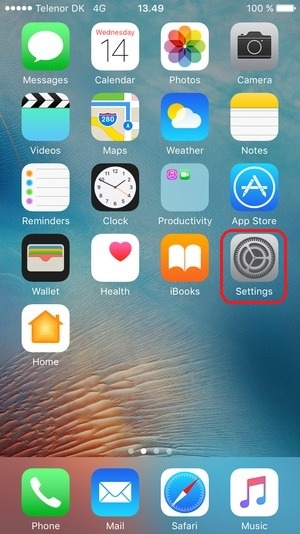
At the Settings, enable Bluetooth by tapping on it.

Afterward, wait till your phone’s Bluetooth is searching your cutting machine.
Next, you’ve to click on your machine name given under the Devices section.
Enter the PIN Number and tick the Pair option available under the top right side of the screen.

After a few minutes, the wireless connection between both devices will come to an end.
Summing up the post, you all must have understood various Cricut Explore Air 2 Bluetooth setup methods.
Frequently Asked Questions
Question: How Can I Setup Explore Air 2 With Bluetooth on My Android Device?
Answer: Follow the given below steps to learn about the wireless setup process:
Check that your cutting machine is on and within the 10-15 ft mobile phone range.
Go to Settings and enable your device Bluetooth.
Wait till your device is scanning your Explore Air 2 & then enter the PIN number.
After entering the PIN, tick the OK button, and both your devices will be paired with each other.
Question: Why is My Cricut Explore Air 2 Not Connecting to My PC Bluetooth?
Answer: There are several reasons why your cutting machine might be facing errors during the wireless connection process. Have a look at the reasons below:
Check that both of your devices are connected to a stable Wi-Fi network.
Sometimes, Cricut Design Space might be facing servers or experiencing issues.
Clear your browser cache and cookies if you are experiencing issues.
Question: How Do I Setup Explore Air 2 With My iOS Device via Bluetooth?
Answer: Read the steps to learn about the Cricut Explore Air 2 Bluetooth setup process with iOS devices. Place your iOS devices within 10-15 ft of your PC & switch on your smartphone.
Go to the Settings tab and enable your device Bluetooth.
After the Bluetooth is enabled, it will instantly start scanning your cutting machine.
After finding the machine, select it & enter the PIN (0000).
Your cutting machine & devices will get connected.
#Cricut explore air 2 Bluetooth setup#cricut design space login#cricut.com/setup windows#cricut.com/setup#cricut setup#cricut explore air 2#cricut
0 notes