#graphic design tutorials for beginners
Explore tagged Tumblr posts
Visit Tumblr Blog
Explore Tumblr blogs with no restrictions, modern design and the best experience.
Last Seen Tumblr Blogs


Fun Fact
Tumblr Inc. is funded by 13 investors.
Text
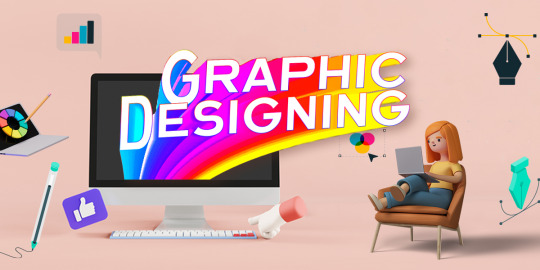
#graphic design full course#graphic design#graphic design course#graphic designer#how to become a graphic designer#graphic designing course#complete graphic design course#graphic design courses#graphic design tutorials for beginners#graphic design for beginners#graphic design principles#graphic design tutorial#learn graphic design#graphic designing#full graphic design course#free graphic design course#graphic design free course#how to be a graphic designer
0 notes
Text
youtube
Just uploaded a new YouTube tutorial about how to design this CD (+ in a case) using Canva!! It's my first Canva tutorial! Make this for your friend, partner, or another loved one
#graphic design#virtual assistant#aesthetic#cd#album#diy#how to#portfolio#design#web graphics#digital art#easy tutorial#beginner friendly#pink#y2k#frutiger aero#frutiger aesthetic#frutiger aqua#video editing#thumbnails#png#gift ideas#relationship#partner#love#Youtube
2 notes
·
View notes
Text
Look at the first design, and you immediately think: "Oh, it's simple, I know how to design it too."
And do you know what? 95% of people who think it's simple couldn't do it, or at least they did it wrong.
I just uploaded a tutorial video on Illustrator tips will blow your mind and change the way you design. I hope it proves helpful to you. If you like it, please give me a thumbs up. Thank you!
Video:👉 These Illustrator Tips will Blow Your Mind (Part 1)
#logo#logo design#logotype#logo inspiration#graphic design#logo designer#design#illustrator tips#illustrator tutorial#illustrator tips and tricks#adobe illustrator#design tips#illustrator for beginner#advanced illustrator tutorial#dainogo#tutorial#logo tutorial
29 notes
·
View notes
Video
youtube
how to add dynamic Page numbers in Canva
#youtube#canva#canva design#canva tutorial#canva update#canva new feature#page numbers#dynamic page numbers#graphic design tips#design tips#tutorial#learn design#design tutorial#book design#book pages#book page numbers#canva tutorial for beginners
2 notes
·
View notes
Text
#marketing#artificial intelligence#ecommerce#interiors#commercial#graphic design#illustrator tutorial#illustrator#graphic designer#adobe illustrator#logo design illustrator#illustrator logo design#graphic design tutorial#graphic design basics#adobe illustrator tutorial#learn graphic design#logo design#how to learn graphic design at home#adobe illustrator tutorials for beginners#design#illustrator tutorials#graphic design tips#logo design tutorial#adobe illustrator tutorials#how to design logo#artcam#artcam pro#artcam 3d design#artcam 2008#artcam beginner tutorial
2 notes
·
View notes
Video
youtube
What is flat logo design?
#youtube#Design a flat logo on Fiverr Flat logo design Fiverr logo design Flat logo tutorial Logo design for beginners Graphic design Logo design tip
1 note
·
View note
Text
Web Designing in Coimbatore
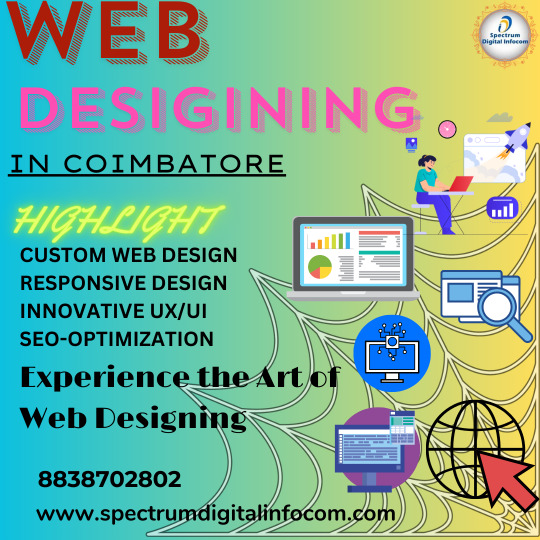
#web design#web design freelance#web design freelancer#freelance web designer#web designer career#web design 2024#web design business#web design business 2024#web design school#web designer#become a web designer 2024#website design#ui design#web design tutorial for beginners#web design trends#web design layouts#web design trends 2024#web design agency 2024#graphic designer job
2 notes
·
View notes
Photo

New to photoshop . Made this- (u/Electrical_Battle319)
#Berserk#fan art#anime fanart#Photoshop#Digital Art#Fan Art#Art#Graphic Design#Creative#Illustration#Digital Painting#Beginner Art#Photoshop Tutorial
0 notes
Text
10 Essential Photoshop Tips for Beginners in 2025
Introduction
Adobe Photoshop is a must-have tool for graphic designers, photographers, and digital artists. If you’re just starting out, learning the basics can seem daunting. However, with the right guidance, you can unlock new creative possibilities. Here are 10 essential Photoshop tips for beginners in 2025 to help you get started on your design journey.
1. Get Comfortable with Layers
Layers form the backbone of Photoshop. They let you edit different parts of your image separately without affecting the rest. Understanding layers is a key skill whether you’re learning at a graphic designing training institute in Yamuna Vihar or practicing on your own. READ MORE..
Learn Graphic Designing Now:-
#graphic design tutorials#graphic design tips#graphic art#fashion designing#graphic designers#graphic design#Graphic Designing tips#Graphic Designing tips for beginners#graphic designing institute#graphic designing course#graphic Designing course in yamuna vihar#Graphic Designing course in uttam nagar
0 notes
Text
#motion graphics#motion graphics tutorial#after effects motion graphics#motion graphics for beginners#after effects tutorial#learn motion graphics#motion graphics tutorial for beginners#tutorial#after effects tutorial motion graphics#motion graphics tutorials#motion design for beginners#after effects motion graphics tutorial#motion design tutorial#motion graphics for starters#motion graphics full tutorial for beginners#motion graphics after effects
1 note
·
View note
Text
Advanced Photoshop Techniques: Elevate Your Design Skills
Introduction
Once you've mastered the basics of Photoshop, diving into advanced techniques can significantly enhance your creative projects and workflow. These advanced skills will allow you to push the boundaries of your creativity, creating professional-grade designs that stand out. In this guide, we'll explore a variety of advanced Photoshop techniques to help you elevate your work.
1. Mastering Layer Styles and Blending Modes
Understanding and utilizing advanced layer styles and blending modes can create stunning effects and bring your designs to the next level. Layer styles like Bevel & Emboss, Drop Shadow, and Gradient Overlay can add depth and dimension to your designs. Experiment with blending modes such as Multiply, Screen, Overlay, and Soft Light to blend layers creatively and achieve unique visual effects.
2. Advanced Masking Techniques
Mastering advanced masking techniques allows for precise control over image adjustments and compositions. Using layer masks, you can seamlessly blend multiple images or selectively apply adjustments to specific areas. Refine Edge and Select and Mask tools help create intricate selections for complex subjects like hair or transparent objects, ensuring smooth and realistic composites.
3. Non-Destructive Editing with Smart Objects
Smart Objects offer a powerful way to apply transformations and filters non-destructively, preserving the quality of your original images. Convert layers to Smart Objects before resizing, warping, or applying filters. This way, you can make changes without degrading the image quality, and you can always revert to the original state if needed.
4. Creative Use of Filters and Effects
Applying creative filters and effects can transform your images and add unique artistic touches. Use the Liquify filter for surreal distortions, the Oil Paint filter for a painterly look, or the Tilt-Shift filter for miniaturization effects. Combine multiple filters and effects to develop your own signature style, and use the Filter Gallery to preview combinations.
5. Advanced Retouching and Healing Techniques
Advanced retouching and healing techniques can help you achieve professional-quality results in portrait and product photography. The Healing Brush and Clone Stamp tools are excellent for removing blemishes, imperfections, and unwanted elements. Frequency Separation is a technique that separates texture and color, allowing for precise and natural-looking skin retouching.
6. Using Actions and Scripts to Automate Workflow
Automating repetitive tasks with actions and scripts can streamline your workflow and save valuable time. Photoshop Actions record a sequence of steps that you can apply to multiple images with a single click. Scripts, written in JavaScript, offer even more advanced automation possibilities, such as batch processing and complex adjustments.
7. Creating Complex Selections with Channels
Channels provide a powerful method for creating complex selections, especially when dealing with intricate details like hair or fur. By isolating the color information in different channels, you can create precise masks. Use the Alpha channel to store and refine selections, combining them with layer masks for detailed compositing work.
8. Advanced Typography and Text Effects
Elevate your text designs with advanced typography techniques and text effects that stand out. Use Layer Styles to add shadows, glows, and textures to your text. Explore the capabilities of the 3D Text tool to create dynamic and realistic text effects. Combine text with clipping masks and layer blending modes for creative and impactful typography.
9. 3D Effects and Compositing
Explore the world of 3D in Photoshop to create immersive effects and complex composites. Use the 3D workspace to build, texture, and light 3D objects. Integrate 3D elements with 2D images to create realistic scenes. Experiment with depth maps, extrusions, and 3D layers to add an extra dimension to your designs.
10. Leveraging the Power of Camera Raw
The Camera Raw filter offers advanced tools for photo editing, providing greater control over exposure, color, and detail. Use Camera Raw to make global adjustments, such as correcting white balance, enhancing contrast, and sharpening details. The local adjustment tools, like Graduated Filter and Adjustment Brush, allow for precise, targeted edits to specific areas of your image.
Conclusion
By incorporating these advanced Photoshop techniques into your skill set, you can push the boundaries of your creativity and produce professional-grade designs. Mastering layer styles, blending modes, and advanced masking techniques will refine your compositing skills, while non-destructive editing and automation will streamline your workflow. Embrace the power of Photoshop's advanced features, and watch your design capabilities soar.
#photoshop#onlineducation#hrishionlinebuddhi#onlinelearing#career#course#graphic design#Photoshop#graphic design tutorials#Photoshop tutorials#learn graphic design online#best graphic design software#free Photoshop course#graphic design courses#advanced Photoshop techniques#graphic design certification online#Photoshop for beginners#graphic design inspiration#Photoshop tips and tricks#online graphic design degree#how to use Photoshop#graphic design portfolio examples#free graphic design resources#graphic design trends 2024#Photoshop editing techniques#graphic design jobs
0 notes
Text
Restaurant Banner design in coreldraw|metafreefile
youtube
#Smart AI #Advanced AI #Innovative AI #Cutting-edge AI #Efficient AI #Powerful AI #Adaptive AI #Insightful aI#RestaurantBannerDesign #CorelDrawTutorial #GraphicDesign #BannerDesign #CorelDrawTips #DesignTutorial #RestaurantMarketing #VisualDesign #CreativeDesign #DesignTips
#Intelligent#Smart#Advanced#Innovative#Cutting-edge#Efficient#Powerful#Adaptive#Insightful#metafreefile#comment#Restaurant Banner Design#CorelDraw Tutorial#Banner Design Tips#Restaurant Marketing#Graphic Design#CorelDraw for Beginners#How to Design Banners#Visual Design#Design Tips#Marketing Banners#Create Banners in CorelDraw#Pro Design Tips#Step-by-Step CorelDraw#CorelDraw Basics#Restaurant Banner Ideas#CorelDraw Projects#Beginner CorelDr#Youtube
0 notes
Video
youtube
How to edit freepik template in canva | Canva tutorial for Freepik lovers
#youtube#Canva#Canva design#canva tutorial#Canva designer#Canva tips and tricks#Freepik#Freepik template#Canva design tips#tutorial#graphic design#Canva freepik#Canva templates#How to#Canva tutorial for beginner
1 note
·
View note
Text
Check out my newest tutorial - How to Fill A Shape With An Image in Microsoft Word. It will guide you through the process of inserting an image into a shape in Microsoft Word and aid in improving your graphic design skills. #imagefill #insertimage #microsoftwordtutorial #godservdesigns #shapefill #fillashape #graphicdesigner
BUY THE BLUE SKY FUNERAL PROGRAM TEMPLATE
https://etsy.me/3NSVLFn
#shapefill#wordtutorial#godservdesigns#diywordhack#insertimageintoword#funeralprogram#bluefuneralprogramtemplate#wordtemplate#Microsoft Word#image insertion#Graphic Design#Microsoft Office#Microsoft Word Tips#Tutorial for Beginners#DIY Design#Graphic Design in Word#Image Editing#Step-by-Step Guide#designtutorial#Document Editing
0 notes
Video
youtube
Adobe Illustrator Tutorial for Beginners
#youtube#adobe illustrator tutorial for beginners#graphic design#free education#adobe illustrator tutorial#adobe illustrator#graphic design course#illustrator
0 notes
Video
youtube
Inkscape Tutorial - Working with Outlines and Outlined Shapes, Strokes, Power and Taper Stroke Path Effects In this video tutorial from 2Dgameartguru.com, I try to show some of the many ways of working with outlined objects in Inkscape This video was requested to understand how different outlined objects react, work, and can be edited in Inkscape. I start with a traced bitmap of an outlined island shape and turn it into a more manageable filled shape with a single stroke for an outline. I adjust the shape and the stroke to be centre on the shape's edge. I use Power Stroke, Taper Stroke Path Effects as well as a dashed stroke. It's a brief introduction and I am sure I forgot about a zillion other ways to use strokes but that's for future videos. The beginner videos for the Inkscape - hands-on Facebook group also focus on strokes and lines: https://youtu.be/W4ATvIO5zJs https://youtu.be/SXKJMXwKfIE https://youtu.be/apf7NbtHM20 My epic fight with the taper stroke is recorded in this video: https://youtu.be/Y40HbNPD9cM While I am having a lot of fun with Power Stroke in these: https://youtu.be/LarlNUhLI8M https://youtu.be/a2Iopv6YSzY
#youtube#inkscape#tutorial#vector#illustration#graphic design#stroke#outlines#powerstroke#taperstroke#beginner#basics
0 notes