#grid method on top
Explore tagged Tumblr posts
Visit Tumblr Blog
Explore Tumblr blogs with no restrictions, modern design and the best experience.
Last Seen Tumblr Blogs


Fun Fact
There were a total of 171.5 billion posts on Tumblr in 2019.
Text
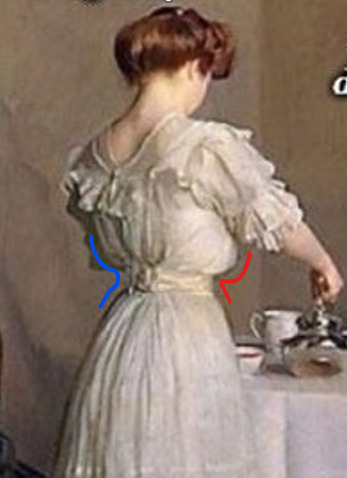
I think I genuinely did peak at art when I was 14 like what is that shading why was I so good at traditional
Maybe digital art isn't for me /hj
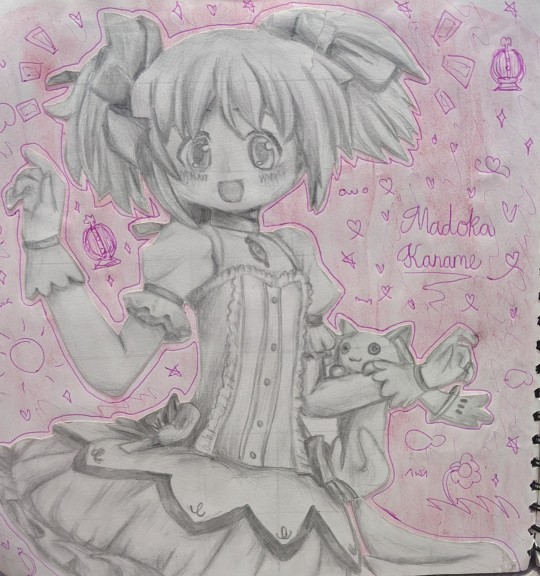
#used the grid method as seen by the poorly erased lines rip#so many art teachers have said they don't recommend the grid method but bro i drew stuff like this when i used it#grid method on top#art gcse#puella magi madoka magica#madoka magica#madoka kaname#fanart
74 notes
·
View notes
Text
its the way all my drawing ability immediately goes out the window as soon as it ACTUALLY MATTERS lol
#its also the way i keep thinking like waaa grid method is for losers who want the easy way out etc#when it would work rlly well for what i want to do w this painting bc i need an accurate recreation of my reference to work on top of#but ughhh it just feels like i should be better than thatttt#even tho that mindset is pretty dumb like who gives a gaf#sigh
0 notes
Text
Kote’s House
Kote’s first house is a pathetic thing, and he is incurably proud of it. The twi’lek he purchased it from very evidently could not make up his mind what to do with a man that grinned while he haggled, but it was the first time Kote had haggled over a purchase of his very own. He had thoroughly enjoyed it.
The house is built for one being, and a compact being at that, but Kote doesn’t have much. Moving in is quick, and most of his efforts during the next few days after go into attempting ambitious repairs for things he doesn’t know the first thing about.
His plumbing is an issue, he knows. Something is getting blocked up. Somehow while trying to fix the kitchen tumbler, his fresher spout explodes.
He hadn’t kept his new house a secret from anyone by any means, but it is still surprising when Fox barges in through his jamming front door. He finds Kote on the floor in his cramped kitchen while the fresher rains water in the adjacent room, laughing so hard and so crippled with delight that he can’t get up.
He tries to explain how wonderful it is —
“I-I have to fix my plumbing on my own, vod—”
—but judging by Fox’s single raised eyebrow he knows it doesn’t translate.
Fox, it turns out, is moving into the neighborhood. Kote doesn’t ask about the house Fox already has — the house he has visited, which is very nice and fancy — or point out that Fox’s contract there cannot possibly be up, which begs the question of why he’s here in Kote’s neighborhood — except that Kote already knows the answer to that question. So he doesn’t ask.
Fox doesn’t show him any grace or forbearance, though.
“Don’t even know how to fix a damn pipe, front lining show-off—” His brother snarls, but it is muffled; his top half had to go down beneath the floor they’d pried up to get at the plumbing issue.
“So that’s what they had you doing all these years.” Kote says, because he really is in a criminally good mood. He barely ducks the foot-long pipe Fox throws at his head, feeling giddy.
He makes dinner that night in thanks. Fox stays, ostensibly because now that he’s fixed the fresher he intends to use it, because his new house isn’t hooked up properly yet to all the supply lines and power grids.
They choke on homemade tiingilar (vode-style; Kote can’t pretend at the real thing yet) so heavily spiced it’s got grit to it that sticks between the teeth. It’s disgusting, but Cody had bought fifteen different spices and while usually he likes to keep his approach to the unknown more cautious, more methodical, he couldn’t think of anything he wanted to do more than use them all at once for the first time.
Wolffe joins them not long after; brings a few others along by recommending the apartment he picks out, so that soon most of the complex is taken up by vode, Kote hears, but he doesn’t visit yet. Everyone’s too busy coming over to his house, it seems; filling up his kitchen and asking why he hasn’t fixed the trash disposal yet, why he doesn’t have a couch, doesn’t he know they’re all the rage among civilized folk?
Kote fixes the trash disposal with Rex, who is better at it than he is but says it’s only due to Skywalker’s influence on managing all things mechanical.
“How is Skywalker?” Kote asks, and gets more than he bargained for over the next hour. At first he’s a bit off-put, because he’s trying to get dinner sorted again and he’s not been very fond of Skywalker at the best of times, but Rex is snorting out a story and laughing and it’s contagious, so Kote just resigns himself and settles in to enjoy.
Skywalker has little ones, now. Obi-Wan is the only one that can get them to sleep. Ahsoka is distressed; she knows better, but every instinct in her is apparently in agony over the little ones’ inability to eat meat yet. She obsesses over nutrients in their diet — which, given what tiny natborn humans primarily ingest in the early stages, makes for some slightly awkward conversations.
Rex helps with dinner afterward, and they take turns being incredulous over natborn baby facts, shoving around one another in the tiny, uncomfortable kitchen.
“What’s your next project?” Rex asks at one point, glancing sidelong with a cheeky look, and Kote levels his vegetable knife at him (he’s got a vegetable knife. Specifically for vegetables. It’s a very new concept).
“I make everyone’s dinner on Tuangsdays.” He says. “I’m productive.”
Rex’s sharp-toothed grin turns thoughtful. “Yeah” He says. “Everyone loves coming here, you know. You could be the new 79’s.”
Kote knows. He plans and plots, and puts more work into researching recipes than he’s put into any research whatsoever in months. It feels a bit like coming out of a shore leave; his thoughts quicken and his excitement grows. He hunts down a market. He brings a bag. He shops, bargains, and returns victorious.
He sends out a few comms., and can’t help but shake his head and grin at how different the responses are.
What a marvelous idea, Cody. His general — ex-general — says.
Yus pls, Ahsoka sends back, with some sort of strange tooka vidclip that dances with wiggly gyrations Kote can only assume indicate excitement.
Where is your house, Anakin says, blunt and to the point, and Kote can appreciate that.
He sends the address. He cooks all day. The sun sets, and Fox and Wolffe arrive, already bickering, Rex trailing behind with a long-suffering look sent to Kote, begging commiseration.
“Ugh, don’t you ever stop smiling, now?” He gripes when Kote just grins at him.
“Nope,” Kote says, unrepentantly.
He leaves the soup on the stove, simmering, and takes his cup of caf to the window. He leans on it, breathing in cool air, and just listens — listens to the squabbling as Wolffe gets on Fox’s case for not washing Kote’s dishes correctly the last time they visited. Hears the soft thumps of Rex sneaking into the cramped room Kote has set aside for plants and the sole pet he has; a pastel goullian, fins swaying ever so gently, permanent scowl in place. Thinks he catches, distantly, the sound of his remaining three guests (Padme couldn’t attend, and had made him feel very awkward by how thoughtfully she apologized for it) plodding up the hill.
“Cody!” Ahsoka cries, coming into view and waving.
Kote’s cheeks have stopped aching from all the smiling he’s gotten used to, so it’s easy to let another through.
#fan art#artists on tumblr#star wars fanart#star wars: the clone wars#fix it au#captain rex#commander cody#commander fox#commander wolffe#obi wan kenobi#anakin skywalker#ahsoka#After The War Fluff#Get you some vod that can do plumbing and make fun of your trash disposal unit#OmPu Writes: Snippet#just-typed-this-out-and-it-shows#Kote was grinning like a shark while haggling#It was terrifying#This man waged wars and he cannot wait to utilize every tactical skill he learned in that endeavor on one (1) twi’lek to negotiate the sale#-of a fix-er-upper he was going to buy anyway#First time trying this art style#Star Wars fanfic
2K notes
·
View notes
Text


Fanbinding(ish): Alice's Adventures in Wonderland, by Lewis Carroll
You've heard of the quarto-legal. Now get ready for the...
Quatro Legal
(ramen for scale.)
Okay. So. Context. For understandable reasons, people regularly say "quatro" when they mean "quarto," when talking about page size. (It's what it sounds like: a quarto is a quarter of a page.) @mourningmountainsbindery @zhalfirin-binds @ficcinghell and I were wondering what a "quatro legal" would actually look like, and decided it would have to be four legal sheets in a 2x2 grid.
So this book is 28" tall, and 17" wide.
I printed it on a large format printer a friend of mine was kindly willing to give me access to, and it's folded accordion style--looks like this when it's fully extended:

and the covers are chip board, though if I did it again I'd shell out for proper davey board, because I ended up spending way more time on the cover than I'd planned.
Here it is at the @renegadeguild retreat, with @mourningmountainsbindery's quarto legal, for scale:

Process pictures and videos under the cut.
So the first question was, how to get the cover on. Because PVA dries fast. I didn't want to use paste, because I was afraid the water would fuck up the boards, but in the time it would take to get glue on the whole board, the first glue would have already started to dry.
The answer:
dumping some glue onto the board, and slowly unrolling the fabric while my girlfriend frantically went ahead with a silicone scraper. So basically, curling.

For decoration, the first thing I knew I wanted to do was make a glow-in-the dark cheshire cat, so I started off by putting lines of masking tape up next to each other, drawing the design on with a sharpie, and then cutting on said lines to make a stencil. I then thought the cover looked a little empty, so I added the title. (Intermittently adding additional layers of glow in the dark paint.)


Then I peeled the tape off and the edges were a little wonkier in places than I'd hoped for. So, obviously, I had to do an outline. And I had all this imitation gold that I'd failed to make work on the page edges of my Good Omens bind, so obviously....


This also ended up requiring a ton of touch-ups: I just did the gilding adhesive directly onto the book cloth, which isn't the recommended method but I didn't trust my ability to keep my hand steady enough for primer. I did have to do two layers. (Pictured above is a bit of gilding adhesive waiting to be dry enough to put more gold on. It takes half an hour or so, and then the sealant that goes on top takes 4 hours to fully cure. So I did not do this on every single letter, though I considered it for one insane second.)

The endpapers are butcher paper a teacher friend kindly stole obtained for me. Getting them on required another frantic glue fest, with the assistance of @eebeesee, who was very nice about it.
Obviously, it was too big for the press. So here it is under a piece of chipboard, the glass top of the coffee table (surprisingly heavy,) 50lbs of dumbells, and then, for good measure, my actual book press plonked on top. Also required the assistance of eebee because keeping all of that aligned was kind of a four-arm operation.
The chipboard still warped a bit because, again, it's chipboard.
Eventually I'm going to make an actual quarto legal with the same cover so it can be compared to its mini-me.
#fanbinding#eratta#alice in wonderland#alice's adventures in wonderland#let nobody EVER say i don't fully commit to the bit#bookbinding#accordion binding#handbinding#idk what to tell you guys#op
136 notes
·
View notes
Text
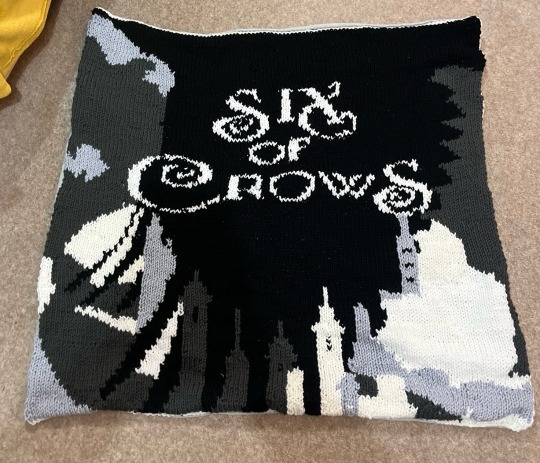
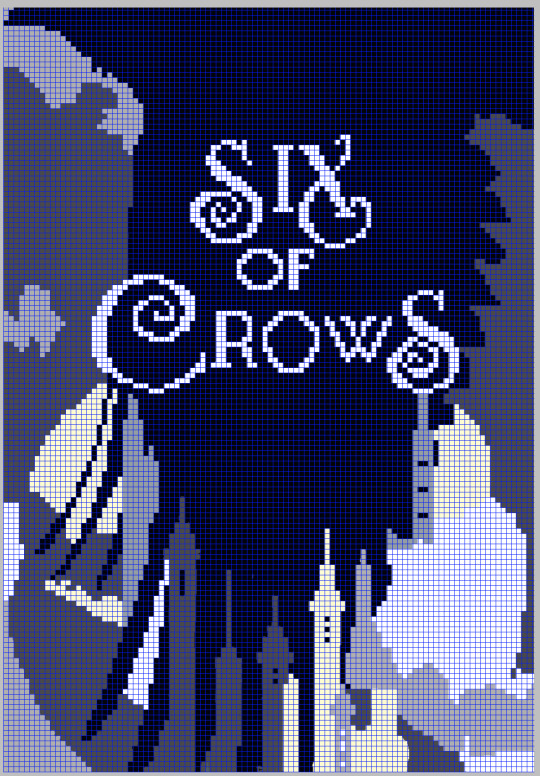
How to knit a Six of Crows blanket!
Hi my darlings, after posting quite a bit about my Grishaverse knitting projects I’ve had a few people ask if I have any kind of pattern or instructions for the Six of Crows blanket I made. I completely drew it myself and (as someone who has never designed a real pattern) figured it out as I went but I thought I’d do my best to put together a step-by-step guide of what I did for my one so you can try it if you’d like to! If you do this and share it anywhere then if you could please credit me for the design that would awesome <3
My finished blanket is approximately 117x120 cm, or 46x47 inches, and it looks like this:
Yarn I used: so sorry I can’t remember and I don’t have the information right now but if anyone wants me to I can update this when I find it; I know that it was bulky weight though
Needle size I used: 9mm
Stitches you need to know how to do: Knit and Purl
Other techniques you’ll need to know: the fair isle method for colourwork, and possibly how to back a blanket but I will explain that in more detail because I had to learn how to do it for this project
Tags: @marielaure @spike-is-not-a-dogs-name @scenemime @worth-this-and-more @wisegirl29 @atac-agent @uttermywish @feralipadkid @fairytalesofforever
Guide below the cut!!
Step 1: the first thing you need is a chart, because this is knit in fair isle. I’m sure there are proper softwares for designing fair isle charts but I uploaded a photo of the six of crows book cover onto a free drawing app called Ibis Paint X, went over it in flat colours to create a more 2D design, superimposed a grid over the top, and then went round every individual square of that grid and edited the image so that there was one colour in each square (ie, pixelated it). The fun thing about doing it like this is that you can easily change it to be whatever size you want by changing the size of your grid (each square represents one stitch). As I mentioned before, if you use the same yarn as I did and the exact same chart as I did it comes out to be around 117x120 cm or 46x47 inches; it’s pretty square and smaller than your average blanket, which is perfect for what I wanted but might not be perfect for what you want so you might want to adapt that if you’d rather a different size. This is what my chart looked like:
Step 2: casting on and knitting! This is the most fun bit, in my opinion. My grid is 103 stitches wide so and I wanted to have a border all around the edges so the first thing I did was cast on a full row in the cream yarn that I wanted to make that border from, with two more stitches
1) Cast on 105 of cream yarn. This should be the number of stitches across the x-axis of your pattern plus 2, to create a border either side. This cast on row will then create a one row border at the bottom of your work.
2) K1 in cream, knit first row of pattern, K1 in cream
3) P1 in cream, purl second row of pattern, P1 in cream
4) repeat steps 2) and 3) until the pattern is complete
5) complete an entire row in cream yarn
6) cast off - this is always so exciting!!! This is when you get the first real sense of accomplishment, in my opinion
I don’t have loads of progress photos, I’m afraid, but this is what mine looked like when I first cast off:
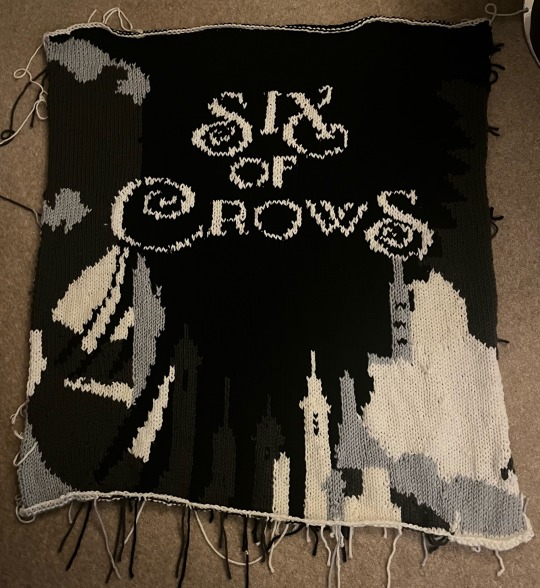
(The edges are curled here so you can’t see the border on the sides, but it is there, also the lighting is rubbish sorry)
Step 3: Weave in all the ends. Gonna be super honest this step is deeply boring but incredibly important; there are a lot of ends to deal with here. Sorry I don’t have a photo of the wrong side of my work but if you imagine at least one loose end for every section of colour change you can gather that it’s a lot haha
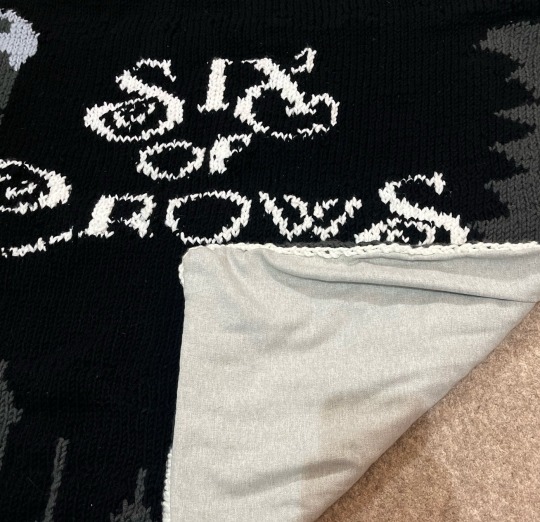
Step 4: Backing!! Now there can be different methods of backing depending on what kind of fabric you choose, I can’t actually tell you what kind of fabric I used other than that the colour was called ‘luna grey’ because the label didn’t actually say what it was so I just decided to go for it. I could only buy it in metres or half metres so I had to get 150cm and then trim the excess. Remember to cut your backing fabric larger than your knitting!! - you need lenience to sew it in. I chose a soft fabric that wasn’t very stretchy. If you get a stretchier fabric you might want to use something to band the knitting first so that you avoid pulling it out of shape.
Lay the right sides of your two pieces (fabric & knitting) together and securely pin three sides.
Once your right sides are pinned together you can go all around your three pinned edges and sew together. Sewing is not my forte so if it isn’t yours either don’t worry, what’s good about this is that your stitches won’t actually be seen once the project’s done so don’t worry too much if they aren’t super neat. I used a running stitch and caught the underside of the knitting without going all the way through so that I knew my stitches wouldn’t be visible. If you want to add extra security, you can go round this sewing section twice. I personally hand sewed this, I think you could use a machine if you wanted to but be careful that the knitting doesn’t catch.
This is an exciting bit because you can really start to see the finished project
Once you’ve sewn your first three sides what you essentially have is a giant inside out pocket, and you can turn it right side out so it looks something like this:
Sorry it’s not a great photo.
After this I trimmed off the excess fabric and just sat and stretched everything out to make sure it was sitting properly and I was happy with it. If you’re also trimming off excess fabric, remember to leave the same amount of lenience (I did about five centimetres/two inches) as you did for the original edges!!
Then fold your lenience fabric inside the pocket and pin it nice and securely. I used a YouTube video to learn an invisible stitch to close this edge and it worked really well once I’d gotten the trick of it, I was really pleased. I practiced it on the excess fabric is cut off first and I definitely recommend that, it was really helpful
And then that’s it!!!
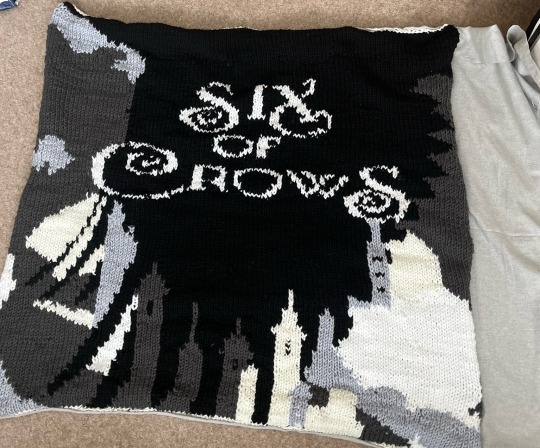
Here is my finished project again:
I am so overjoyed with how this came out!
I hope that this guide was somewhat helpful, though I realise it’s clear that I don’t write patterns and am probably not very good at describing what I did so I’m sorry if anything was unclear. If you try this let me know, and if you share it anywhere please credit me! 🖤🖤
#six of crows#crooked kingdom#grishaverse#leigh bardugo#kaz brekker#inej ghafa#wylan van eck#jesper fahey#nina zenik#matthias helvar#kanej#helnik#wesper#fandom knitting#fair isle knitting#hand knitted#knitting#knitblr#knitters of tumblr#knit blanket
128 notes
·
View notes
Text
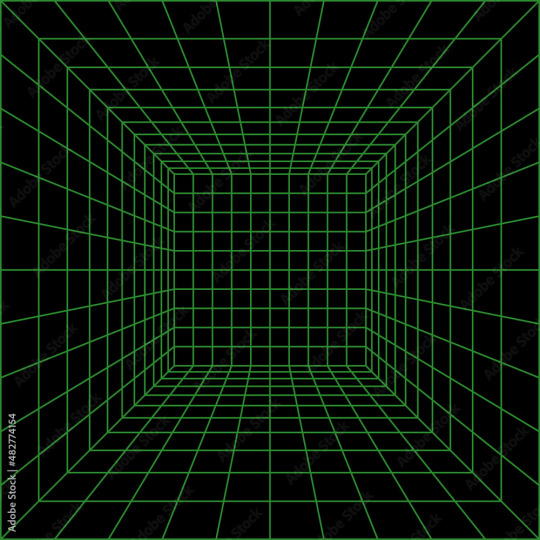
Nanami Kento's Domain Expansion

I have some thoughts on this. I've been ruminating over what I think his DE would be for a while.
So I view his 7:3 ratio critical hit method as a sort of two-dimensional (2D) method. He can only create one line at a time, and usually "flat" against what's in front of him.
I think his DE would thrust his opponent into a 3D grid, whereby Kento could make lines of critical weakness through his opponent in at least 3 different directions (front to back, top to bottom, and side to side), in one hit.
By making the points of critical weakness on these lines intersect each other, meeting up at a singular point, the power behind Kento's strike would be increased to the power of the amount of lines intersecting (if two intersect, the power is squared; if three intersect, the power is cubed).
Bonus info: I think this Black Flash King can BF into, out of and within his own domain, making it insanely fast for Kento to be able to step himself and opponents in and out of his domain, and strengthening the critical hits within even further.
I've been mathematic today. Sorry.
Thank you for coming to my TED talk.
-- Haitch xxx
#thank you for coming to my ted talk#domain expansion#kento nanami#jjk#jjk nanami#jujustu kaisen#nanami kento#jujutsu nanami#nanami headcanons
367 notes
·
View notes
Text
more darkbull charles! 1.2k words, with a little feature from pierre and esteban!
again: this is the darkbull verse, nobody here is healthy or well adjusted. mature/implied mature content below the line.
Charles frowns as he peers inside the pantry. He knows things haven't been great for Pierre and Esteban- but to have such a terrible fresh fish selection in the fridge and the worst available pasta brand in their pantry- ugh.
He makes a mental note to get money wired to their account as he steps back out. Really, he should be checking in on them more anyways, he's just been so busy.
Busy with Ferrari, busy with the business, busy trying to get Max's motorhome tapped without anyone noticing. It's a lot of moving pieces.
It would be much easier if he could actually talk to Max, get invited back to his room for a chat, but-
He curls his lip in disgust. Max is never alone.
It's impossible to catch him without a fucking watchdog nearby, a team member or otherwise. It's starting to drive Charles a little bit crazy, but it's not their worst offense.
Charles has a list of grievances with Redbull, but the very top, the one that makes his blood boil-
They're greedy.
They always have their hands on Max somewhere, fingers wrapped around his wrists, arms slung around his waist, palms over his thighs, hands wrapped around his neck-
He forces himself to uncurl his fingers. He'll fix it. Max only needs all that contact because his soul is alone, missing its other half. Once he's with Charles, he'll realize he doesn't need all the extra, doesn't need a whole crews worth of people manhandling him like they own him.
Charles will be enough.
He'll have to be careful about Daniel and Carlos though. As much as he'd like to send both of them to the bottom of the harbor, Max is attached to them. Charles knows why- the whole grid knows why. It's a joke made quietly in the security of team headquarters, where no one will hear it. It's a perk of being a Redbull driver-
If you make the team, you get a fast car. You get good upgrades, a whip smart engineering team, mechanics that work day in and day out to function as a seamless team. You get guidance and coaching.
If you make the team, you get to fuck Max.
It's not explicitly stated, but they all know it's true. Max meshes so well with Daniel and Carlos, and it's no secret that the team has struggled to maintain a fourth driver.
There's something about the way Max will settle between the two of them at a bar, loopy and tipsy, blush on his cheeks, metal glinting on his wrists and around his neck.
They make room so easily for him, lay their hands on him like he belongs to them-
Charles is grinding his teeth. He takes a few slow breaths to steady himself. Keeping his composure is vital. It's one of the things he's been chided on recently, something he needs to work on.
He stretches, feels the sting along his spine of the most recent star, added between his shoulder blades.
They're coming in fast, inked into his skin forever, a permanent link to Ferrari.
It's all Charles has ever wanted.
Well- Ferrari and Max. He's well on his way to one, which means it's time to start moving on the other, which is exactly why he's sitting here in Pierre and Esteban's apartment, waiting for them to get home.
He sighs, making his way into their bedroom. Pierre is his friend, and he certainly doesn't want to have to leverage Esteban- it's because of Charles that he's in Formula 1 at all. His family is well taken care of in Italy.
Pierre is smart, and Charles really does want to keep their friendship. At least, as close to a friendship as Charles has.
He settles into the middle of their bed, back leaned against the headboard, and starts methodically disassembling and cleaning his gun.
------
Pierre narrows his eyes when they get to the door, pushing Esteban behind him.
"Did you lock the door behind you?"
Esteban leans his head over his shoulder.
"Yes? I did not grow up very well off, I understand the importance of locking the door, you know this."
Pierre feels his boyfriend's hand tighten around his waist.
"Why? Pierre, it's not unlocked- is it?"
"Just- stay behind me."
Pierre carefully pushes the door open. Their kitchen light is on, and there's soft classical music playing from their bedroom.
On the one hand- it's not a stranger that's broken into their home.
On the other hand- it's Charles, which might actually be worse, considering the contract Pierre just signed.
He takes a slow breath, turning to kiss Esteban.
"I love you, you know that?"
Esteban's eyes are wide where he's looking at him, hand gently brushing over the side of his face.
"I know. Forever."
Pierre leans their heads together.
"Forever."
Esteban nods at him as he interlaces their fingers, and then they're walking towards the bedroom. Charles on his own is not exactly a death sentence-
But normally he calls ahead.
To be here, in their home, in their bedroom-
He's sending a message. He's reminding them that he owns their building, owns their city, owns the homes their families live in.
Charles has told Pierre they're friends. Pierre doesn't think a man like Charles knows how to have a friend. Maybe when they were younger, sure.
Now though? Charles operates in a different world from the rest of them.
Pierre lifts his chin high as he steps into his own bedroom, tries not to flinch at the way Charles is lounging on their bed, smoothly reassembling his gun.
Charles grins up at him, dimples flashing. It's meant to put Pierre at ease, but all it does is the exact opposite.
"Calamar! Please, come sit."
Charles pats the edge of Pierre's bed, and he tries to ignore the cold slide of sweat down the back of his neck as he settles.
Esteban quietly lowers himself down as well, keeping Pierre between him and Charles.
Charles slides the last pieces of his gun together with a smooth snick, but it might as well be a gunshot with the way it echos in Pierre's ears.
"Pierre. You have signed with Toro Rosso, yes?"
Pierre swallows.
Nods.
Charles is still smiling.
"Good, good. I know they have..."
Charles wobbles his hand in a back and forth motion, lights glinting off the rings on his fingers.
"A thing. About their drivers and Max."
Pierre feels Esteban squeeze his fingers tighter on his left side, where Charles can't see.
"I had heard that, yes."
Charles leans forward, gun resting in his lap.
"I trust our friendship means more to you than fitting in."
Pierre's throat is dry. He needs to mesh well with the team, and being a Redbull driver could set him up for years.
But this isn't about him, not really. It's only tangentially about Redbull.
At its core, this is about Max.
Redbull's Max.
Charles' Max.
Part of him wonders if Redbull has any idea about Charles. If they have even a single warning sign.
Charles always gets what he wants, in the end.
"Of course, Calamar. I wouldn't dream of ruining our friendship over a seat like that."
The lie is thick on his tongue.
#darkbull verse#charles being the biggest hypocrite on the planet here lowkey#charles subtly threatening them and their family while also mentally making them a grocery order#the duality of man#ficlet
70 notes
·
View notes
Text
cleansing & charging items ✨️
many of the methods used to cleanse items can also be used to charge them depending on your intentions.
cleansing & charging ideas:
visualization - imagine a ball of energy forming around the item to either cleanse it or give it power (the color of the ball could correspond to your intent, i.e. white or blue for cleansing, red for power, etc.)
earth - bury the object in soil or sand - a potted plant will also work
water - submerge the item in running water
salt water - anoint or submerge the item in a salt water solution
gem water - anoint or submerge the item in a corresponding crystal elixir
herbal & floral water - anoint or submerge the item in a solution of corresponding herbs or flowers
sea salt - sprinkle sea salt over/around the item or submerge it in a container of sea salt
essential & infused oils - anoint item with corresponding oil
smoke - pass the item through incense smoke
fire - pass the item through an open flame or burn it (you could see the act of burning as either cleansing or charging)
storms -leave item outside during a thunderstorm; anoint with storm water
wind -leave item outside when it’s windy; make use of windchimes
crystals/crystal grid - surround the item with crystals of corresponding intent (can be arranged in a pattern to form a crystal grid and enhance energy)
dried/fresh herbs & flowers - sprinkle mixture over/around item or submerge the item in a mixture of herbs and/or flower petals
sound - use a bell, whistle, or something similar to clear the space and associated items of negativity
sigils - craft and use sigils that correspond with your intent (you can set the item on top of the sigil, draw the sigil on the item, etc.)
moonlight & starlight - leave item in the path of these natural lights, either outside or in a windowsill overnight
sunlight - leave item in the path of sunlight for a few hours during the day (before sunset, of course), either outside or in a windowsill
divination - pair the item with a rune or tarot/oracle card that matches your intent in a small container
incantations - create an incantation that states your intent and speak it aloud while holding the item
physical energy - engage in physical activity of some sort (exercise, dancing, etc.) and direct that energy into the item
actual cleaning - physically and literally clean any items with an appropriate solution (soap, alcohol, etc.); the energy put into cleaning can also be used to charge the item
caution: some items, especially crystals, are not suitable for exposure to sunlight, water, or salt.
© 2025 bunny-claws
#witchblr#witchy#witch#witchcraft#witches of tumblr#cleansing#charging#magic#witchcraft community#energy work#beginner witch#beginner witchcraft#bunny-claws
34 notes
·
View notes
Text
What is championship building? 🏆🥇🍾🎉
During the Chinese Grand Prix Lando received a radio message from his engineer roughly saying - we talked about this, this may be one race you accept the 2nd place for the good of the championship.
My F1 veteran brain, went oh the plan is championship building, good move, like it. And I’ve been using the phrase “championship building” ever since. I’m now beginning to realise a lot of people misinterpret or don’t understand it. So let me try to explain.
In its simplest form championship building is ensuring your bad days are better than your rivals bad days. It’s the long game approach.
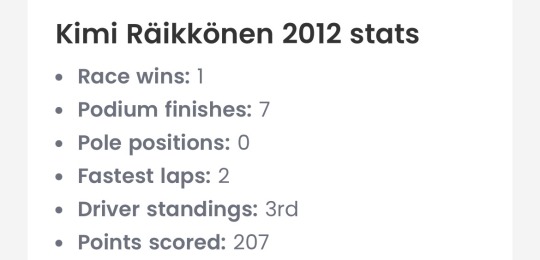
Now, I appreciate in the last decade of Mercedes and Red Bull dominance with their clear number 1 drivers we haven’t seen the championship building method, some of you maybe have never seen it. So I’m going to explain using the master of the art, Kimi Raikkonen.
In 2012, Kimi signed with Lotus (now Alpine). A lot of us felt it was a huge comedown for a former World Champion, but given Ferrari had gone through a phase of paying him not to race in F1 (yes really, Kimi was one of the highest paid sportsmen under 30 in the world at the time to NOT drive for Ferrari), this was a way to have him back on the grid. And Ferrari didn’t see Lotus as a threat so relented and allowed him to drive in F1 as technically it wasn’t for a “rival team”.
Now Kimi’s 2012 season has gone down in history, (I will explain more on that later), but I want to look at his results.
Lotus was a distinctly back of the grid team in 2012. The year prior they hadn’t scored a single point.
Enter Kimi. He strung together an insane run of point scoring finishes. No one was paying any attention to him, he was in a Lotus on a grid that had Seb Vettel at Red Bull and Lewis and Jenson at McLaren, Alonso was competitive in the Ferrari and Mercedes and Michael Schumacher were back in F1. Lotus, who cares.
By the halfway point of the season Kimi was in the top 5 of the Championship and people suddenly stopped and went, wait, how?
These are his results from 2012.
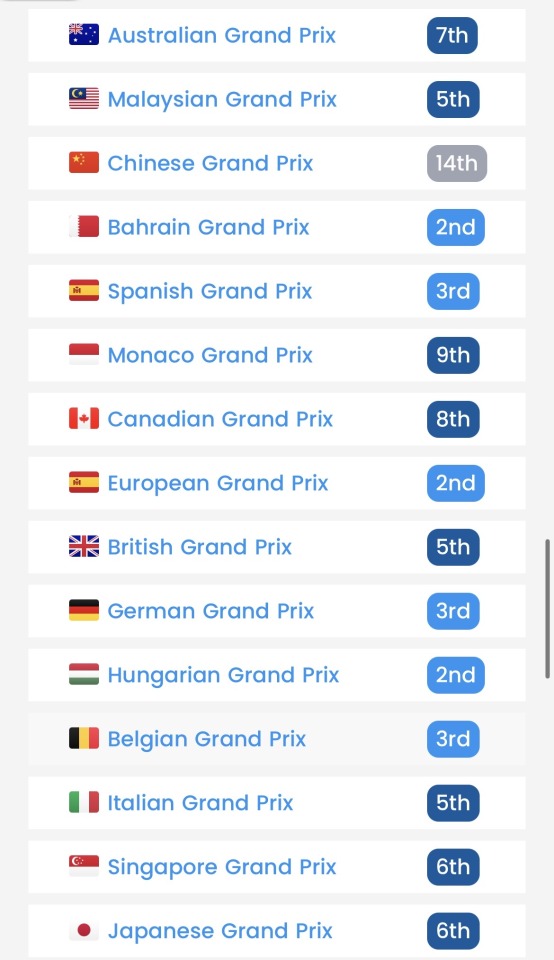
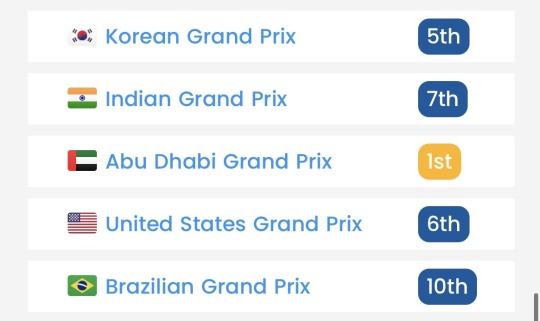
Now compare that to Lewis’s stats
In theory Lewis has the better season, more wins, poles, same amount of podiums. But his season had 5 DNF’s. And the game here is for your bad days to be better than your rivals. Kimi finished every race, and finished 19 out of 20 races in the points!
Yes the win in Abu Dhabi is effectively what meant he beat Lewis in the championship that year as Kimi won and Lewis DNF’d BUT by that point, we were all sold on the Kimi fairytale.
So back to Lando. His worst Grand Prix result this season so far has been 4th. Oscar’s has been 9th, Max 6th, George 5th and Charles 8th and a DSQ. With no points for pole or fastest lap any more, those results matter.
And we know he’s not fully comfortable with the car yet, so taking as many points as he can at this point, gives him ammunition to fight back with most the season still to come. Seb said it himself this weekend, this year’s Champion may not be winning every race.
It’s what you do on the days you don’t win. Championship building.
And finally back to why Kimi’s 2012 season was legendary. In 2012, Kimi’s contract entitled him to a €50,000 bonus for every point he scored. This must have seemed good business to a team who hadn’t scored a single point the season before. Kimi scored 207 of them in 2012. He scored another 183 in 2013.
His bonus entitlement, including race win bonus was €19.5 million! It effectively bankrupted the team and to this day Kimi has never received it all. It’s believed he agreed a settlement of 60% with around €6 million euros outstanding.
Oh and that “not a rival team” theory Ferrari had? Kimi beat Massa in the second Ferrari both years. Ferrari “logic” has always been there folks.
So this season, unless you plan on winning 15 out of 24 races, and let’s be fair, no one looks capable of that at this point, making sure your bad days aren’t that bad is the way forward.
That’s why despite a brake by wire failure, a track you can’t pass, a 10 second penalty for a grid position infringement and crashing out of Q3, Lando has only just lost the championship lead and is only 10 points behind. That should be classed as a disastrous start to the season, but the championship table doesn’t say that. It’s because his bad days have still meant big points and more points than his rivals.
47 notes
·
View notes
Note
I remember back in school that they taught us how to write stories like a picture that looked like steps or a triangle where it would show the conflict, rising action, falling action, climax, etc. etc. So I wondered if you have found those methods to be effective or is there another way about it that you'd recommend?
Basic Story Structure
What you're talking about is very basic story structure, like this:
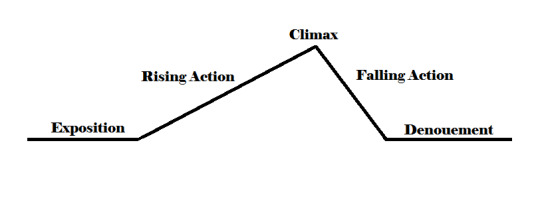
While this is certainly an effective way to understand how stories work at the simplest level, it's not great for showing all the plot points that happen in each of those sections.
If you're interested in a more in-depth story structure method or template, you can Google ones like Save the Cat Writes a Novel! to Larry Brooks Story Structure, Three-Act Story Structure, the Snowflake Method, The Hero's Journey, Blake Snyder's Beat Sheet, Derek Murphy's 24 Chapter Outline, Gwen Hayes' Romancing the Beat, Shawn Coyne's Story Grid, The Seven Point Plot Structure, Dan Harmon's Story Circle, The Five-Act Structure, James Scott Bell's A Disturbance and Two Doorways, Kishōtenketsu Structure, Story Spine.
The key with any story structure method or template is to know you don't have to follow them exactly. They're just a suggestion... like a suggested travel itinerary. You can follow it or you can augment it and work in some of your own stops along the way.
For more, head over to my Plot & Story Structure master list. :)
•••••••••••••••••••••••••••••••••
I’ve been writing seriously for over 30 years and love to share what I’ve learned. Have a writing question? My inbox is always open!
♦ Questions that violate my ask policies will be deleted! ♦ Please see my master list of top posts before asking ♦ Learn more about WQA here
122 notes
·
View notes
Text

Skysometric Design Retrospective, Part 2
Taking Shape (continued from part 1)
how does anyone decide on a personal logo? serious question, i have no idea. my old look as WillWare was a hexagon because i like hexagons, and it had a W because the name was alliterative. anything that has a deeper meaning than that is frankly beyond my creative scope.
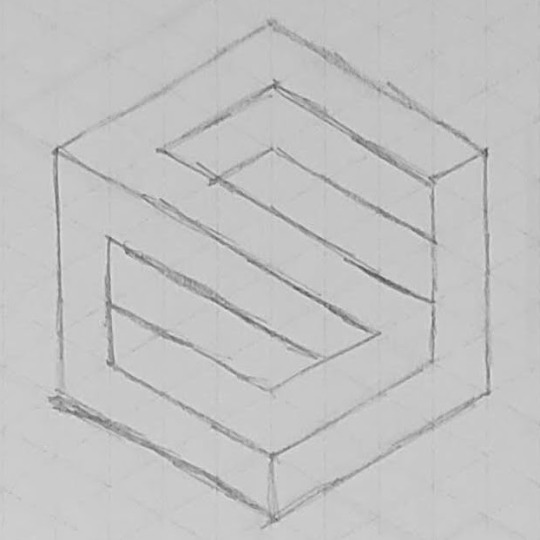
so i'm Sky now, and i need an S in a hexagon, to continue the precedent set by my old self. well, duh, that sounds like a hole in one! i probably got the shape right on my first try, didn't i?
...of course not! do you know how many freaking ways there are to draw an S on an isometric grid??


now guess how many different ways i've drawn the letter W.
most of these initial attempts were to solve a simple logistics question: how do i inscribe the letter S without leaving any gaps in the hexagon shape? i'm sure i could've used some math to figure it out, but i much preferred treating it like a puzzle and fitting the pieces together.
on the left you can see this quite literally, "weaving" individual rectangles together to create the S shape. but even after a couple of attempts, i couldn't figure out how to close the gaps on the outside of the hexagon. the bottom shape is a fun experiment with taking this weaving concept to its extreme, at which point the S shape is no longer visible. (but it's more obvious if you remove the ↙↗ minor diagonal in the middle!)
on the right i decided to step back and try other methods, like a simple block outline – which i ultimately discarded because it looks a little too much like the Superman logo, or maybe the "cool S" everyone could draw back in school. but the two at the top are worth going into more detail!

wha? Gamecube logo? nah, i have no idea what you're talking about.
the first was an attempt to make an S in the style of the "New WillWare" logo, using isometric blocks. but it really did not pan out, and any other variations i could think of were too simplistic. this was the turning point that made me realize, yeah, there's no going back to my old look. it won't fit me anymore.

huh? Dropbox logo? nah, you're just seeing things.
even though i couldn't fit this one in a "regular" hexagon (where all six sides are the same length), i still really like the idea – a tight knit shape that shows its direction with a color ramp! the S is visible by following the colors from cyan to purple, a much more subtle look than the other in-your-face attempts.
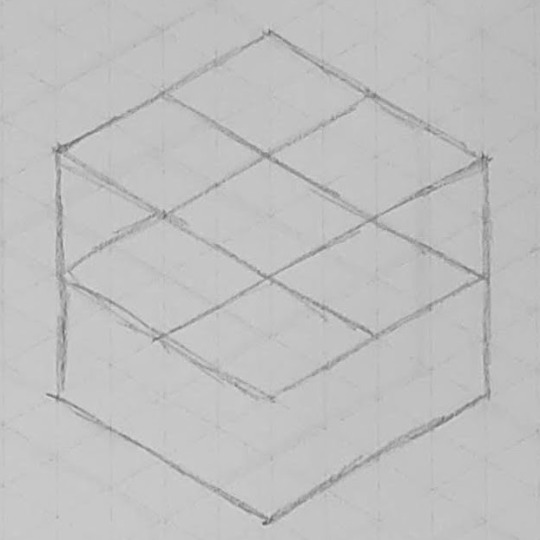
all this experimentation was fun, but my heart was set on something closer to the "weaving" attempts i started with, fitting block shapes together into a larger hexagon. i could practically see the outline in my head! why won't the shapes fit together??
so i drew the outline, and the shapes naturally followed:

the moment of clarity.
i drew out the new shape several times to help me choose which order to layer the crossbar – should it go over or under the top and bottom? i chose to put it under the top and over the bottom so that the shapes "flow" downward, just like writing an S with a pencil.
and that just leaves one question regarding the shape: how does it look digitally?

"really fast mockup of... an idea" – November 17th, 2020 via Twitter, just twelve days after coming out.
it looks great! so now i have a stable base to work with and build a logo out of.
you may notice it's in different colors than the finished product – in fact, this uses my old color palette, just to make it quick to test the shape with. but now i have a difficult problem... i need colors, and those are historically my biggest struggle with graphic design.
(continued in part 3...)
10 notes
·
View notes
Note
Hi I just started embroidering two weeks ago but I’m also interested in cross stitching. Can you explain the difference between the two (if there is any)?
I can try! Bear in mind that I'm self-taught in a "keep stabbing it til it looks right and turn to books/YouTube only if I'm really stuck" way, so people who were actually trained could probably do this better, and I'm open to being corrected.
Cross stitch is a type of embroidery where each stitch forms an X. It's often, but not always, done on Aida cloth, which looks like this:
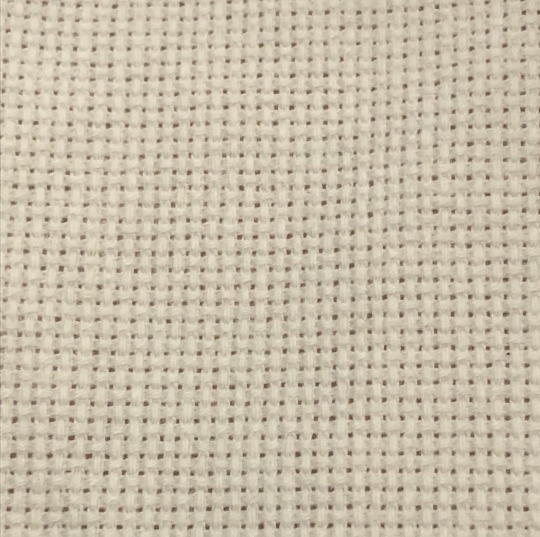
Each X covers a square of the cloth, so the result is a bit like pixel art:

If you have a line of stitches of the same colour, a lot of people will do a line of half-stitches, then work their way back (called the Danish method):

That's really down to preference. Personally I switch between Danish and English (where you complete each X before moving on to the next one) depending on the geometry of the pattern I'm working on. The main thing is that the top arm of each X should be facing the same way to keep the piece looking tidy.
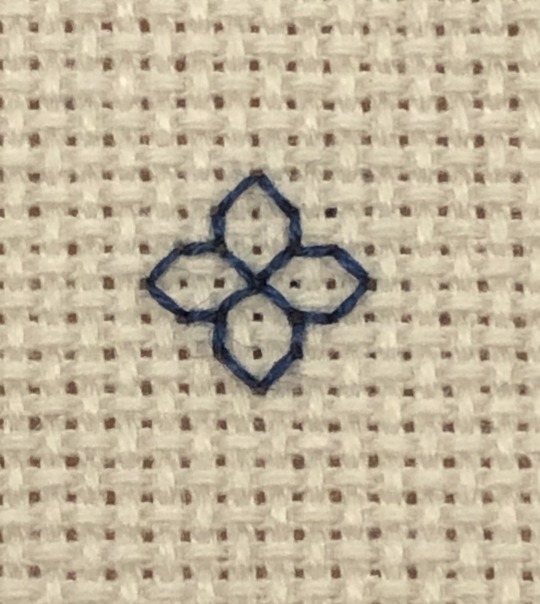
That's the basic idea, and there are plenty of patterns out there that only use cross stitches. Some patterns will also use back-stitching for outlines or details. Generally you do the cross stitching first, then back-stitch over top.
The majority of what I do is actually blackwork, which is related to cross stitch in that it's a type of counted work (each stitch covers a set number of threads of the fabric). I mostly use Aida cloth, but any evenweave fabric would work. There are a number of different styles of blackwork, but the one I do most often involves back-stitching geometric motifs to fill a section of a larger design. The pattern will show lines on a grid corresponding to the grid of the cloth:

A few things that might help if you're getting into cross stitch:
Aida cloth comes in different sizes. You'll see it labeled as 11-count, 14-count, 18-count, etc. That tells you how many squares/stitches there are per inch, so your stitches on 18-count will be much smaller than on 11-count.
If you buy 6-strand embroidery floss, you'll want to separate it into individual strands. If you're cross stitching, then usually the lower the count of your fabric, the more strands you'll need to make each X form a solid square and avoid having fabric show between your stitches. I use fewer strands with blackwork, because it keeps the lines sharp and makes the motifs stand out better. The pictures above are on 18-count. I used 2 strands for the cross stitch, and 1 strand for the blackwork (note that varying the number of strands can also be a method of shading in blackwork, but I haven't really used that technique before).
Some stitchers will tell you that the back of your work should look as neat as the front. If you want to aim for that, go for it. I'm really only careful about the back of my work if I know it's going to be visible in the finished piece; other than that, my backs are chaos and I'm fine with that.
This was at best a really basic overview of cross stitch. Some patterns use things like half-stitches and three-quarter-stitches to get different effects or smoother shapes. Some patterns will call for higher count cloth (like 28-count or more) and have each stitch cover two threads instead of one (called working "over 2"). There are all sorts of YouTube videos and tutorials that cover these things better than I can, but feel free to ask any questions you have, and I'll do my best.
Above all, have fun with it, and I hope it becomes something you enjoy!
270 notes
·
View notes
Text
X Stitch Quick Start Guide
Fabric
You can stitch on anything you like, but for x stitch it’s going to be a lot easier if you use some kind of evenweave fabric. Evenweave is fabric where, stay with me here, the weave is even.
You want to be able to see a little, evenly spaces holes between the fibres that go up and down, and the ones that go across.
This is aida, it’s what x stitch is usually done on

Here’s some examples of other evenweave fabrics that you could also use


If it’s got evenly spaced holes, then you can x stitch on it!
Thread
The thread that you typically use for x stitch is called floss. The key feature of floss is that it can be separated out into six individual strands.

This is not floss for x stitch.

Neither is this

Cut a length of thread to start stitching with. About 40-50cm is good. Not so long that it gets tangled, not so short that you’re constantly threading needles. Now you want to separate that cut length, but grabbing three of the individual strands and separating them from the other three. This can get messy. Everyone develops their own ‘never fail’ method of separating their strands. You’ll find what works for you, but only after many tangled threads and swear words.
These three separated strands are what you will stitch with. NOTE: you will not double these over (then you would be stitching with six strands).
You can also stitch with two strands, whichever you choose, just stick with that choice for the whole project.
Needle
You can use whatever kind of needle you want or have to hand. You will find it easier if you use the right kind, but we don’t always have the choice. The most important thing for x stitch is that the needle has an eye large enough to accommodate three strands of thread.
A tapestry needle is the best kind. It has a large eye and a blunter end.

The blunt end helps us go through the holes of the fabric more easily without catching surrounding threads.
This needle has a very small eye and a very pointy point. You can x stitch with it if it’s all you have, it will just be more difficult.

How to read the pattern
X stitch patterns, or charts, are a grid that align with your fabric. Each intersection of a horizontal and vertical line on the pattern corresponds to a hole in the weave of your fabric.

Most patterns will either be coloured blocks

Or symbols

For each coloured block or symbol on your pattern, you are going to stitch and X on your fabric
Deciding where to start can be tricky.
The centre is always a good choice. Find the centre of your fabric by folding it over and noting where the middle is. Most patterns have numbers on the top and sides to help you keep track of where you are. Use the numbers to find the middle of the pattern, or just eyeball it.
Starting in the top left is also a good choice. Make sure you leave a couple of centimetres of space, don’t start your first stitch right in the corner. The fabric will fray with handling, plus you might need some excess to work with for framing or finishing, depending on what your plans are for the final piece.
Starting
Tie a knot in the end of your thread.
Don’t listen to the gatekeepers who tell you knots are bad.
Knots aren’t great, but for now, to get us going, we’re just going to use a knot. Later we learn some better ways to start.
Stitching the X
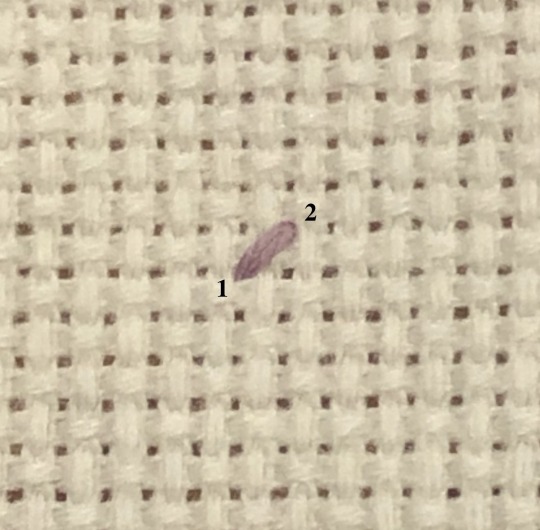
Bring your needle up through the top left corner of the square you are going to stitch

Bring your needle down though the bottom right corner or the square you are stitching

That's your first 'leg'!

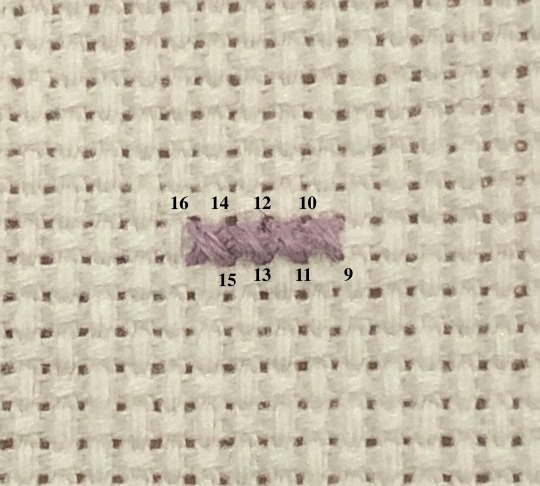
Bring your needle up though the top right corner of the square you are going to stitch

Bring your needle down through the bottom left corner of the square you are stitching

Congratulations! You’ve made your first x stitch!
Find the next square and repeat.


Where it can get tricky is when you finish your X and the hole you have just brought your needle down through, is also the same place you need to bring your needle up to start the next X
When this happens you may have to change the order of how you stitch your X. Instead of starting at the top left, start at the bottom right.
The most important thing to remember is to keep your X’s going the same way. Always have the first ‘leg’ slanting \ and the second ‘leg’ slanting /. It doesn’t matter if you stitch them top to bottom or bottom to top. As long as your X’s all look the same when you’re finished it doesn’t matter how you stitch them.
Finish your thread
When your thread gets too short, finish it by flipping to the back of your fabric and sliding the needle under a few of the stitches and cutting the thread off.


Keep going until you have finished your pattern. Now you can display your finished x stitch however you like! Frame it and hang it on a wall. Stitch it onto a bag or a jacket
You're now a x stitcher!!

(You may have noticed that my heart is a little different to the one in the pattern. You are about to learn that you do not know how to count. Yes, you learned how when you were very young, but when you count while doing x stitch, suddenly you numbers no longer make sense.)
I know that buying materials for arts and crafts can get expensive, so I'd recommend checking your local thrift stores. You can usually find different kinds of even weave and floss, even if it's not the right size or colours that you want, it's great for practice and you never know what might inspire your next project.
This ended up being a lot longer than I thought, and I feel like I’ve barely scratched the surface! If anything is unclear or you need help please let me know, I’d love to help.
I really enjoyed writing this guide so if you want more there’s also a whole lot more I could go into. If this has helped you at all and you’re interested in any of the below, let me know. More suggestions are welcome!
Advanced topics
Cloth count
Stitching on high count fabric
2 over 2, 1 over 1 etc
Stitching with things other than floss
Number of strands, when to use more or less
Patterns with lots of colours
X directions
Full X’s or \\\\ then /////
How to have a neat back
Loop start
Stitch in hand vs stitch in a hoop
Framing
Edging for a patch
Backstitch
Other counted embroidery types
#cross stitch#fibre arts#x stitch#how to guide#how to cross stitch#how to x stitch#learn with me#tutorial
9 notes
·
View notes
Text
Creating and using sigils
feat. My Sigils Using a Sigil Wheel and Ogham Alphabet


Here are my favorite sigils that I’ve made. I make my sigils using a sigil wheel with the Ogham alphabet, but there are many ways to make sigils.
What is a sigil?
A sigil is a symbol with a mystical or magical meaning. The term sigil derives from the Latin sigillum, meaning "seal”.
A sigil has no spirit, but can hold and store energy much like crystals can. They also each have their own signature energy that they give off, just like crystals.
How can I make a sigil?
There are a few standard methods, but really you can use any method you’d like to.
The standard methods are with a sigil wheel, a number grid, a deconstructed letter, or just artistic.
I personally use the sigil wheel
See below for all of these methods
Using my sigils
Draw, carve, or otherwise inscribe your symbol or sigil spell onto an object. This could be used in conjunction with other spell types like petition spells and candle spells.
There are active sigils and passive sigils.
Passive Sigils
In passive sigil activation, the energy is usually released overtime through a very moderate, and controlled fashion. This method is done through the act of keeping your sigil around, so that it can continue to work, and releases energy when it is needed. You will have to recharge your sigils if you are using this method every once in awhile after they get low on energy, unless they have a source to draw energy from.
Ways to activate Passive Sigils
Putting the sigil on a piece of paper.
Drawing the sigil on your body.
Getting a tattoo of the sigil on your body.
Making a sigil amulet.
Writing, or carved the sigils upon wood, or stones.
Having a piece of clothing with the sigil on it, or sewn into it.
Active Sigils
In active sigil activation, the energy is usually released all at once, or in a very immediate fashion. This type of activation is usually going to be done through the act of destruction of the sigil, so that all the energy that has been charged into it can be released and fired into the universe. This type of method should be used on things that you want done that are pretty direct, and will only need to be impacted once.
Ways to activate active sigils
Putting the sigil on a piece of paper, and burning it in fire.
Putting the sigil on a piece of paper, and submerging it in water until it dissolves.
Place the sigil on a piece of paper, and rip it up.
Charging Sigils
Pushing energy into the sigil by using energy work.
Meditating intently on the sigil.
Focus on the sigil intensely.
Burning candles around, or on the sigil.
Putting the sigil in the sunlight, or moonlight.
Having the sigil on your person while going through your day, keeping it with you so that it can feed off your energy.
Placing crystals on top of the sigil.
Placing the sigil at a ley-marker.
26 notes
·
View notes
Text
Driver Profiles: Oscar Piastri
Updated December 2024

Name: Oscar Jack Piastri
Age: 23
Nationality: Australian
Years in F1: 2 (Mclaren 2023-Present)
Number: 81
WDCs: N/A
Driving Style: Piastri is most well known for his calm demeanor, and it is incredibly rare to see him ruffled. This also translates to his driving, which is composed, methodical, and precise. He is one of the cleanest drivers on the grid right now (rare for a rookie) and since the Mclaren car started having more boost this year, he has shown to be ambitious. As he spends more time in F1, he is beginning to gain recognition for his overtakes. Many have noted that he overtakes when people least expect him to, essentially meaning he is not really following the typical overtake playbook. We saw this happen against Leclerc in Baku 2024 and Norris in Monza 2024. While he is still new to the grid, he has shown he can adapt very quickly to high levels of competition. My only criticism is that he tends to not qualify particularly well. If he could fix this one aspect, he would be on the podium (at least) every race with that speedy Mclaren car.
History:
Son of a wealthy businessman, Piastri started his karting career in 2011. By 2014 he had gone professional, and competed in various Australian races and championships. 2015 he began competing in European and other CIK-FIA karting championships . In 2016 he moved to the UK in order to further his career.

(young Piastri in karting)
In 2016 Piastri landed his first big sponsor, which allowed him to enter into single seater racing for the first time. Later in 2016, Piastri made his single-seater debut in selected rounds of the Formula 4 UAE Championship and claimed two podiums, taking sixth in the championship. He would go on to take part in F3, GP3, and F2. When he took part in British F4 championship he took 2nd place home. For the next few years he would make appearances in various different series and championships, but never gain himself a title.
(Piastri, right, on European debut)
In 2020, PREMA Racing, the reigning F3 champions, signed Piastri for the upcoming season. It was during this season that his potential really came out, as he regularly found himself on podiums and on the top step. This led to him clinching the F3 World Championship for 2020 with a tight three-way battle. At the end of this season, Piastri announced he would be graduating up to F2 with PREMA Racing. He would go on to win 6 GP's for the 2021 season, and joined Charles Leclerc on the short list of drivers who won the F2 championship in their rookie year.
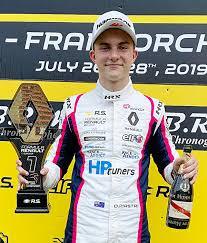
(Piastri, 2019)
In 2020 Piastri joined Renault Sports Academy, and was the reserve drive for Alpine (Renault) in 2022. After Fernando Alonso left Alpine for Aston Martin, it was assumed by most (including Alpine) that Piastri would be part of their driver lineup in 2023. This, however, was proven to be false as Piastri had already signed a contract with Mclaren for the 2023 season, replacing Daniel Riccardo.

(Piastri as Alpine's reserve driver)
The 2023 season at Mclaren was his first official year as an F1 driver. He had a rather impressive rookie year, getting up to 11th in the championship by the end. He acheived his first podium at the 2023 Japanese GP, taking third behind his teamate. Shortly after he received his highest finish in Qatar, taking 2nd place. While he did not match his teammate Lando Norris points wise, he was universally praised. Halfway through the season he reupped his contract with Mclaren, extending to 2026.

(Piastri in the 2023 Mclaren)
The 2024 season saw Piastri get his maiden win. Unfortunately for the driver, his win at the 2024 Hungarian GP was doused in controversy, as a very public mess with team orders led fans to say the win was given to him by his teammate. He went on to get his 2nd win at the 2024 Azerbaijan GP (Baku) where he held off Charles Leclerc for 1st after a much admired overtake. This win was his first one without the cloud of controversy hanging over it. All in all, the 2024 season has shown that Piastri is a competitive driver. He finished 4th in the championship, and helped his team achieve their first WCC win since teh 90s.
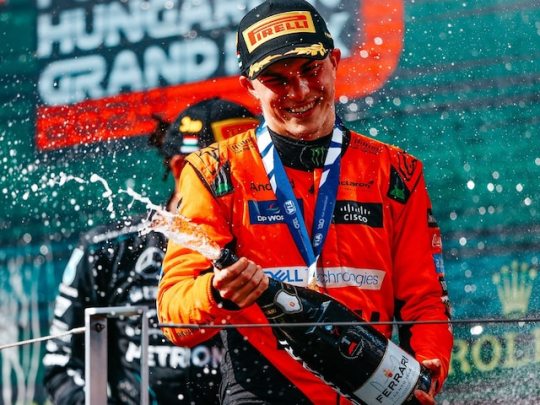
(Piastri on the podium in Baku)
Major Races:
2023 Japanese GP - Piastri's first podium displayed that he could battle with the top drivers. His consistency and control throughout the race are what helped him get up on the steps.
2023 Qatar GP - Piastri's second podium and highest finish in 2023. His composure was noted as a huge boon in this stressful race, and he only benefitted from the previous days sprint win. Wins always give drivers more confidence.
2024 Hungarian GP - A controversial win to be sure, but Piastri excelled in this race. He overtook his teammate early on in the race and held tight to the lead, only losing it after a Mclaren strat failure. His teammate was then ordered to give the position back, which led to Piastri's win, but nonetheless it was an excellent race by Piastri
2024 Azerbaijan GP - By far Piastri's most impressive race. Baku is an intimidating circuit, but Piastri took to it with ease. His overtake on Charles Leclerc mid race (which in itself was impressive) allowed him to stay ahead of the Ferrari. He then went on for a majority of the race with Leclerc less than a second behind him and putting pressure on. It was Piastri's calm head that won the race, as well as the minimal mistakes he made, not giving Leclerc a single chance to get by.
Cheers,
-B
31 notes
·
View notes
Note
do you have a pattern for that black edwardian-esque shirtdress you made?
Hey all. So one of my sewing posts has gotten a lot of unexpected traffic in the past day. Whenever this happens, it's usually because the tumblr algorithm is pushing the post onto the dash of anyone who follows the sewing tag. So for everyone who is sick of the dress in question assaulting your dash for absolutely no reason, I am so sorry.
@curiouscalembour
Short answer: yes, scroll down to the photos below
Longer answer: kind of, not really, I mean I have a pattern but it comes with no instructions and you're going to enjoy it about as much as most people enjoy scaling up Patterns of Fashion patterns, maybe even less. Also, this is not a tutorial, just an approximate recounting of what I did. So, uh, good luck.
So here's the thing. I don't use commercial patterns because they often have me finishing seams with a serger which I don't own, or constructing garments with the modern bag-lining method which just breaks my brain. I'm also not a professional pattern maker and have no idea how to digitize patterns, so I do all my drafting with good old-fashioned pen and Christmas wrapping paper. I'm also entirely self-taught and learned everything I know about pattern alterations through osmosis from TheClosetHistorian's videos, so I don't know if anything I'm doing here is industry-standard.
I got the original base pattern by tracing a modern button-down shirt that already fits me, and then converting it to be back-closing, then slashing and spreading the pattern pieces to get the desired style lines and amount of pintuck/floof I wanted, and then adjusting the fit over a series of wearable mockups. (5, to be exact. I now have 5 of these things in my wardrobe, and only 1.5 of them are successful.)

So here's^ the yoke piece. Wait, why are there 3 of them? Why do 2 of the pieces have a weird diagonal line running through them with the grid lines all messed up? Because I suck at this, that's why. I frankensteined this pattern from a previous mockup pattern that had a narrower V-shaped yoke and needed to widen it. If you want to digitize this for yourself and clean it up, you'll have to take one of the faint blue squares (they're 1"x1") and make a grid and then overlay that on top of the photo of the pattern shape. The back yoke piece has 2 different grainlines marked because the fashion fabric has a bias pintucked yoke, so its grainline is going to be different from the lining. The fashion fabric is meant to be pintucked beforehand, and then the pattern pieces traced on top of the pintucked panel and then cut out. Oh, and all of these pieces are drawn net, so you'll need to add seam allowance all around. Except at the center back, apparently, where past-Me already added allowance for a bound edge.

The bodice front and back pieces^ are a little more straightforward. No pintucks needed here. The upper edges ease into the bottom edge of the yoke, and the bottom edges gather/tuck down into the waistband. The center front tucks you'll have to drape on a dress form (or on yourself - I pinned a strip of twill tape which was my skirt waistband around my waist and then pinned the excess front bodice fabric onto the twill tape, then covered the raw edges with a dip-waist belt). The center back is a lot shorter than the rest of the bodice because I have a swayback. I learned from a previous mockup that if I leave the back of the bodice longer, I have to constantly tug my shirttails back down into my skirt because it gradually gets untucked throughout the day. These pieces also need seam allowances added. I assembled my bodice by sandwiching the bodice front and back pieces between the fashion and lining layers of my yoke pieces, but it was a bit bulky dealing with the folded back pintucked parts of the yoke seam allowances, so you can finish your seams however you want.
I'm fairly short-waisted, so if you have a longer torso than mine, then you'll want to lengthen the pieces vertically. You want these pieces to be longer than your torso, so that they poof out a little like a subtle muffin top, to get that Edwardian silhouette where the waist looks tiny under the poof:

Here's^ part of the sleeve pattern. Again, sorry it's a chaotic mess. I had to use bits of scrap paper and cobble the pattern together. The pattern above is just the upper arm part of the sleeve and ends at the elbow. You'll have to extend about 10" all along the bottom edge to make the smocked part that covers the forearms. I only sewed the sleeve seams closed down to the elbow, then left the seam open from the elbow down to the wrist, so that it closed with rows and rows of buttons and loops. The smocking will give the lower sleeves a bit of stretch, so you might still be able to get your hand through even without the button closure.
This is also a net pattern so you should add seam allowances, but the sleeve is ridiculously puffy already, so forgetting the seam allowances here isn't a big deal.
(I call it my Elphaba shirtdress but it's not an actual replica of anything she wears in the movie. If you want your sleeve to look more like Elphaba's, which is puffy at the shoulders and elbows and fitted around her biceps and forearms, you can change where you add your rows of gathering/shirring.)

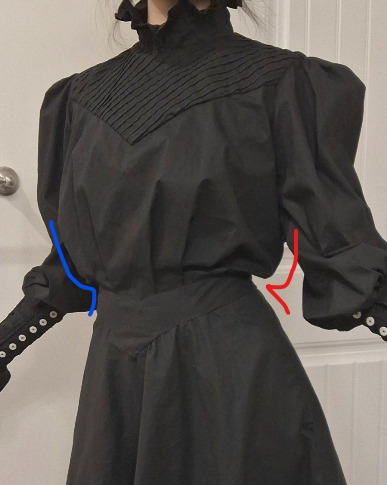
And finally, the collar piece. I'm not completely satisfied with how mine gapes at the center front (I think I need to contour/curve it a bit so that the top edge is narrower than the bottom edge), and I think the whole thing could be another inch taller all around, but this is the pattern piece I used to get my finished product. Notice that the back half of the collar slowly curves downward so that the center back is about 1/2" longer than the center front. That's on purpose. If you leave this little detail out, your collar will tilt backwards and make you feel like the front is trying to strangle you.
And because I'm nothing if not inconsistent, this piece features hem allowance already added to the top edge, but no seam allowance pre-added to the bottom edge where it attaches to my bodice yoke, and no allowance for overlap for the center back closure. So be very careful when making and marking your own copy and maybe be a little more consistent than I am?
Speaking of inconsistencies, remember how I drafted my yoke pieces to be cut from an already pre-pintucked panel of fashion fabric? Well, I didn't do that here for the collar. Instead, this collar piece is meant to be cut (on the fold) directly from flat fabric, and THEN pintucked (with lines of vertical pintucking perpendicular to the collar) after cutting. The pintucks are 1/4" deep, spaced 1/4" apart. So the pattern piece you cut out will pleat down to half its original length.
So this:

Becomes this:

Also, note on the pattern piece that I drew a horizontal line across the entire length, running parallel to and about 1.25" below the top edge? That's the point at which your pintucks stop. This gives the collar that ruffle you see at the top.
#sewing#sewing patterns#long post#idk what to tag this as#tricia sews (kind of)#asks#answered#curiouscalembour
13 notes
·
View notes