#how to disable copy paste in remote desktop
Explore tagged Tumblr posts
Visit Tumblr Blog
Explore Tumblr blogs with no restrictions, modern design and the best experience.
Last Seen Tumblr Blogs


Fun Fact
Tumblr has been providing a Korean-language service since 2013.
Text
How To Disable Copy Paste And Right Click In Hindi
How To Disable Copy Paste क्या होगा अगर कोई आपकी सामग्री की प्रतिलिपि बनाता है? सामग्री को एक-क्लिक कॉपी-पेस्ट से बचाने के लिए, आप राइट-क्लिक अक्षम कर सकते हैं और वेबसाइट डेटा की सुरक्षा कर सकते हैं। विस्तार पूर्वक पढ़े..
How To Disable Copy Paste And Right Click In Hindi ।मुख पृष्ठ।।पोस्ट।।Disable Copy And Paste। How To Disable Copy Paste कॉपी पेस्ट और राइट क्लिक को डिसेबल कैसे करें आप इस लेख मे पढ़ेंगे: How To Disable Copy Pasteकॉपी पेस्ट और राइट क्लिक को डिसेबल कैसे करेंप्लगइन का उपयोग किए बिना कॉपी, पेस्ट और राइट क्लिक अक्षम (बंद) करें।वेबसाइट के फुटर सेक्शन में निम्न कोड जोड़ेप्लगइन की मदद से कॉपी, पेस्ट…

View On WordPress
#Daily Prompt#dailyprompt#disable copy and paste in excel without macros#disable copy paste#Disable Copy Paste And Right Click In Hindi#disable cut copy paste in windows#how to disable copy and paste in website#How To Disable Copy Paste And Right Click In Hindi#how to disable copy paste in remote desktop#Wordpress#Wordpress Tricks
0 notes
Text
Creating a Thematic Online-Map using uMap
The goal of this blog post is to show how one can create a thematic online map using uMap with thematic data coming either from OpenStreetMap directly or from a layer added “by hand”.
This instruction can be read in a row, but typically one follows the instructions and then jumps directly to another chapter where the instruction continues based on given requirements and eventually existing data.
Figure 1 shows a decision tree which has to be read from the root top. Depending on the questions the tree finally points to chapters.

Figure 1: Decision tree (see larger image) containing the chapter numbers with instructions on how to include (own) geodata in uMap (from OpenStreetMap).
1. Integrate geodata in uMap
To begin with, search in OpenStreetMap (OSM) for the geodata you want to integrate in uMap. What we actually are looking for is the tags, the key-value-pairs, like “tourism=zoo” for zoo. Consider these web tools to look for these OSM tags: taginfo, OpenStreetMap Wiki and tagfinder.
If you can’t find the tags (meaning the geodata) you need in OpenStreetMap, take a look at the next chapter 2. Otherwise, skip chapters 2 and 3 and continue with chapter 4.
2. Data not available in OpenStreetMap
If the data you want to use - in our case for uMap - is not available in OpenStreetMap, you have the following choices:
Goto chapter 2.1 “Capture data manually in uMap“ if the amount of data is not too big.
Goto chapter 2.2 “Capture data in another tool“ if you want to gather your data in text format.
Goto chapter 2.3 “Capture data in OpenStreetMap“ if the data is suitable for OpenStreetMap and you want to include them.
Goto chapter 3 “Data available as external data / data source“ if the data already exists in a geodata-format that is supported by uMap.
2.1 Capture data manually in uMap
You can capture data manually in uMap. While doing so, it does matter how much geodata you want to record: if it’s too much the browser can slow down quickly or even stop working because of lack of memory. If there are only a few records - i.e. less than 5000 - take a look e.g. at OpenSchoolMaps and the topic “Create a situation plan with uMap” (”Mit uMap einen Lageplan erstellen”) there. If the data you’re going to enter in uMap fits to OpenStreetMap, consider capturing sharing it there, since this is the most sustainable way: see chapter 2.3.
2.2 Capture data in another tool
Instead of capturing the data in uMap you can also use another tool, like the website geojson.io or QGIS desktop.
If you’d like to do it with QGIS, look at “Management and capturing of Geodata“ (”Verwaltung und Erfassung von Geodaten”) in the QGIS section on OpenSchoolMaps. Geojson.io is a simple online geodata editor which allows you to edit points, lines, and polygons, manage attributes and exchange this with GeoJSON or other well-known formats.
After you’ve captured your geodata, either copy the data to the clipboard and insert it in uMap (by clicking 'import data), or save and export it as a GeoJSON file.
For importing geodata into uMap goto to chapter 3.
Note
Make sure your data has one of the following file extensions: GeoJSON, CSV, GPX, KML, OSM (XML), GeoRSS, uMap. We recommend to import data using GeoJSON. GeoJSON is a human-readable format which e.g. supports attribute name lengths greater than 10 as opposite to Shapefiles. If you decide to go for CSV make sure you have a column for lat and lon. All other columns are imported as attributes. Under ‘Choose the format of the data to import’ (figure 2) you have to choose the format of your file. Click the button ‘Import’ and all your data will be imported in uMap.

Figure 2: Example on how to paste and import a GeoJSON data in uMap.
2.3 Capture data in OpenStreetMap
Another possibility is that you capture the data directly in OpenStreetMap e.g. using the built-in editor (called “iD”) which is the default when you click on ‘Edit’ on the website. The advantage of curating the data in OpenStreetMap is, that the data can be used in different services and is accessible for everyone. Note that - once entered - the data is not available right away, because it must be distributed and processed first among the OpenStreetMap infrastructure.
The worksheet “Edit OpenStreetMap” (”OpenStreetMap bearbeiten”) on OpenSchoolMaps explains how to record the data in OpenStreetMap. If the data were successfully added to OpenStreetMap you can jump to chapter 4.
Note
Make sure the data is suitable for OpenStreetMap. That means only objective/verifiable facts are captured, no subjective nor personal data, and all data must be compliant to the OBbL licence.
3. Data available as external data / data source
If the required data is available as an external file or data source, you can it import into uMap. In uMap just navigate to ‘Import Data‘ and click on the ‘Browse…’-button. Choose your local file and confirm with ‘Open’.
Under ‘Choose the format of the data to import’ you have to choose the format of your file.
Click the button ‘Import‘ and all your data will be imported in uMap.
Note
As mentioned before, prefer the GeoJSON format if possible. Make sure that the data complies with the OBbL licence.
4. Data available in OpenStreetMap
4.1 A snapshot from the OSM data
To import the current status of the data into uMap you can conventiently use the webservice Overpass-Turbo (or Overpass-Turbo swiss edition). With the wizard tool there you can search for certain tags in OpenStreetMap. If you’re happy with the results you can export the data as GeoJSON by clicking the button ‘Export’.
4.2 Keeping data up to date
If you want to keep your data in uMap up to date, it’s very similar to the process described in the preceding section. Just open Overpass-Turbo as instructed before, and do some searching with the wizard, for example „tourism=zoo“. Now choose menu ‘Export’, open ‘Query’ section, then click on ‘placeholders/copy’ below ‘convert to OverpassQL’ (see figure 3).

Figure 3: Export Query from Overpass-Turbo.
By clicking on ‘copy’ you now have an URL in your clipboard. Go to the uMap view, edit the actual layer (or create a new one) by clicking on the pen symbol under ‘Manage layers’ (figure 4).

Figure 4: Editing a Layer in uMap.
Open ‘Remote Data’ from the ‘Edit’ menu and insert the copied URL into the text field URL (figure 5). As format select ‘osm’ and activate the button ‘Dynamic’ (see ‘ON’ in figure 5).

Figure 5: Entering a remote data in uMap.
Now your map contents will always be up to date when a change is made in the OpenStreetMap data, since it will request the data using the Overpass service. On the other hand, using an external service like this involves a dependency and the response time won’t be as fast compared to data coming directly from uMap.
Under ‘From zoom‘ (figure 5) you can define the minimum zoom if you like. This is the zoom level where the map data is being displayed. But that’s only necessary if uMap has a lot of data to display.
If the data clutters the map visually, one can cluster a layer by configuring uMap with another dialog (’point cluster’).
5. Conclusion
With a click on the blue ‘Save’ button above right an d the disable editing button the map is finished.
Now, you can share your map with others and/or integrate it to your website as iframe.
APPENDIX: Online Resources
uMap Webapp: https://umap.openstreetmap.fr/
uMap Guide: https://wiki.openstreetmap.org/wiki/UMap/Guide
Overpass: https://wiki.openstreetmap.org/wiki/Overpass_API
OpenSchoolMaps - e-learning material: OpenSchoolMaps.org
2 notes
·
View notes
Text
Testimonial of our client Exam Launch organization

What is Exam Launch?
laying the foundation for the creation of a desktop and web application that can offer online testing for students. Learn everything there is to know about online exam proctoring, including the key aspects of remote online proctoring. Exam Launch offers the resources necessary for a company to carry out the assessment in the authorised test venues or even remotely at home while maintaining the security and integrity of the test.
Vision
Our goal, assisting schools in determining and achieving their objectives for development, expansion, and student exam results. maintaining a strong affiliation culture while maintaining an institute-focused students' exams organisation.
Mission
If you choose to accept it, our goal is to help you succeed in your exams as a student. We want to establish exemplary organisations that support students' contribution to the community, exam growth, and academic performance. Make educational tests available so that all kids can succeed in their study.
youtube
Functionality of Institute Admin
Different access levels and students are easily configured List
The administrative personnel will receive training.
Payment Administration
Students who are involved and not
a straightforward and user-friendly interface
Strong features and reasonable prices
Exams are administered efficiently.
Bank of questions
Student Authentication - Exam Launch
secure access to their data, test, and question bank.
It offers a tool for developing questions in various formats.
It enables instructors to bulk upload questions, easing the burden of adding the reference chart to which test takers must refer.
It might be time-consuming and frustrating to answer specific inquiries.
Authentication of Students Using multi-factor authentication, the risk of student impersonation is eliminated. Online Exam Launch is a remote proctoring technology package used to remotely monitor an online exam from any location in order to identify and catch instances of cheating.
Student Authentication
Using multi-factor authentication, the risk of student impersonation is eliminated. Online Exam Launch is a remote proctoring technology package used to remotely monitor an online exam from any location in order to identify and catch instances of cheating.
Before the Exam
Email verification
Exam ID and StudentID authentication.
Select Join Exam from the Available Exam List.
Verify whether the video and mic are working.
Exam attendance requires admin panel approval for the student.
Students will send emails to notify. when an exam is made.
Once the computer has been locked out by the institute admin, the student should be able to see the list of available tests.
Key Features of Lockdown Device
offers a secure and obnoxious application to load the exam.
all but one key necessary for navigating the test taker screen is disabled.
disables copy and paste, as well as right-click, functionality.
The test window fills the full screen and is impossible for test-takers to shrink or close.
The test application establishes a secure connection with the video and audio platform and the proctor.
Unless they submit the exam or the proctor suspends and ends the exam, test takers cannot leave the application.
Features of Exam Launch
Exam Launch Test-taker Application
offers a secure and obnoxious application to load the exam.
all but one key necessary for navigating the test taker screen is disabled.
disables copy and paste, as well as right-click, functionality.
The test window fills the full screen and is impossible for test-takers to shrink or close.
The test application establishes a secure connection with the video and audio platform and the proctor.
Unless they submit the exam or the proctor suspends and ends the exam, test takers cannot leave the application.
We go through the most crucial aspects of how a website or e-commerce site may be beneficial to a business's ability to soar with its online presence. To receive more updates, connect with us. I appreciate you reading.
Visit to explore more on Testimonial of our client Exam Launch organization
Get in touch with us for more!
Contact us on:- +91 987 979 9459 | +1 919 400 9200
Email us at:- [email protected]
0 notes
Text
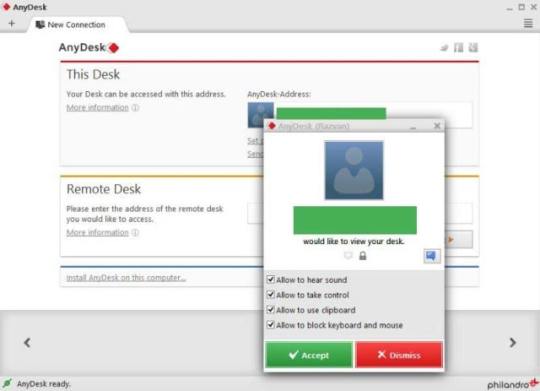
Download AnyDesk keygen (license key) latest version R0E#

💾 ►►► DOWNLOAD FILE 🔥🔥🔥 AnyDesk 7. No possibility of institutional setup is required. It may also be convenient for many remote desktop computers on the planet. Find all your records, services, and knowledge from all over the world, and you must never trust your data anymore. Use this app from everywhere without limitations to your private computer. Just use it anywhere you want. You also have complete access to the PC in a second. MobaXterm Crack AnyDesk License Key can exchange and move data because of the confidentiality of the individual from a remote location to receive the device. You will distribute the content of the clipboard on two platforms. You said you would use a pure paste copy from system to system. The user should set the password so that no one can also enter your computer without your assistance. A collection of addresses can also be disabled or stimulated. The consumer should tailor show choices to their situation. You have also found it easy to connect to other machines. Anyone can easily and securely connect with their time or Participant with the AnyDesk Premium license key. Finally, this application will allow you to activate your computer from a remote computer as you want to access it. Anywhere it belongs. Also, the knowledge stays. On the hard disk, there is no different location. The operating system furthermore, no desktop tracks can exchange and move data because of the confidentiality of the individual from a remote location to receive the device. There is also an integral startup feature where many machines are activated remotely collectively. The license key for AnyDesk is a very lightweight, much faster program than most software. Consumers can also even seize a screen from the workstation without problems. AnyDesk Keygen is also a reputable app for device access from one other PC remotely without a problem. A person can also be admitted to objective factors without many transmissions to the cloud entity without much effort. You may also obtain approval for the number of your files and papers. Moreover, the item program never again needs a structure arrangement for its base method. You can also view your movies and see documents and stacks of numerous reports with the aid of AnyDesk-ID. Besides, singular guarantees remain in effect throughout the use of this object. You can access all your programs, documents, and files anywhere without entrusting your data to a cloud server. As a result, the programs, data, and settings on your home or office PC are always available without time-consuming network configuration. Your files, meanwhile, remain on your computer. The application was created to be revolutionary from the start. DeskRT, a revolutionary video codec designed exclusively for graphical user interfaces, is at its heart. In addition, the connection is cryptographically validated on both sides. That is why AnyDesk is a step ahead of the competition. AnyDesk Torrent for Windows PC is a comprehensive software solution designed to give you a different way of remotely accessing a computer and working with various files and documents from afar. AnyDesk allows you to work from anywhere in the world. You can use AnyDesk whenever you need to access a remote screen, whether across the office floor or on the other side of the world. Likewise, this tool can connect to a computer remotely, whether on the other side of the office or halfway around the world. AnyDesk provides IT professionals and on-the-go users with secure and dependable remote desktop connectivity. AnyDesk understands how important low latency, rapid data transports, and frame rates of 60 frames per second are when working on a remote desktop. You can also download K7 Total Security Crack. It is one of the best apps that offers computer connectivity everywhere. Program of lightweight. In this app, there are no boundaries. It also introduced additional protection features to allow users to use them for security purposes without problems. It is one of the excellent applications which gives the machine everywhere. Get new features in the most recent edition. There are no limitations to this program. It adds new protection functionality so that the customer can access it quickly. Compared to other services, it is much easier. The program is excellent, which gives the processor total power. The boundary can be conveniently used. Printing from afar: Select the printer, and the print job will be transmitted to your local PC. So all you have to do now is choose your local printer. Unattended Entry: Allowing unattended access allows you to start a remote session from home. Transferring Files: You may use the clipboard to send text, screenshots, and other files between your remote and local devices. Alternatively, you can use File Manager to handle your files locally. Teamwork: While collaborating over a distant connection, use the Whiteboard to write simple instructions and the chat feature to say even more. In addition, you can record a session for future reference with Session Recording. AnyDesk Serial Key
0 notes
Text
Download AnyDesk keygen (license key) latest version LCPB,

💾 ►►► DOWNLOAD FILE 🔥🔥🔥 AnyDesk 7. No possibility of institutional setup is required. It may also be convenient for many remote desktop computers on the planet. Find all your records, services, and knowledge from all over the world, and you must never trust your data anymore. Use this app from everywhere without limitations to your private computer. Just use it anywhere you want. You also have complete access to the PC in a second. MobaXterm Crack AnyDesk License Key can exchange and move data because of the confidentiality of the individual from a remote location to receive the device. You will distribute the content of the clipboard on two platforms. You said you would use a pure paste copy from system to system. The user should set the password so that no one can also enter your computer without your assistance. A collection of addresses can also be disabled or stimulated. The consumer should tailor show choices to their situation. You have also found it easy to connect to other machines. Anyone can easily and securely connect with their time or Participant with the AnyDesk Premium license key. Finally, this application will allow you to activate your computer from a remote computer as you want to access it. Anywhere it belongs. Also, the knowledge stays. On the hard disk, there is no different location. The operating system furthermore, no desktop tracks can exchange and move data because of the confidentiality of the individual from a remote location to receive the device. There is also an integral startup feature where many machines are activated remotely collectively. The license key for AnyDesk is a very lightweight, much faster program than most software. Consumers can also even seize a screen from the workstation without problems. AnyDesk Keygen is also a reputable app for device access from one other PC remotely without a problem. A person can also be admitted to objective factors without many transmissions to the cloud entity without much effort. You may also obtain approval for the number of your files and papers. Moreover, the item program never again needs a structure arrangement for its base method. You can also view your movies and see documents and stacks of numerous reports with the aid of AnyDesk-ID. Besides, singular guarantees remain in effect throughout the use of this object. You can access all your programs, documents, and files anywhere without entrusting your data to a cloud server. As a result, the programs, data, and settings on your home or office PC are always available without time-consuming network configuration. Your files, meanwhile, remain on your computer. The application was created to be revolutionary from the start. DeskRT, a revolutionary video codec designed exclusively for graphical user interfaces, is at its heart. In addition, the connection is cryptographically validated on both sides. That is why AnyDesk is a step ahead of the competition. AnyDesk Torrent for Windows PC is a comprehensive software solution designed to give you a different way of remotely accessing a computer and working with various files and documents from afar. AnyDesk allows you to work from anywhere in the world. You can use AnyDesk whenever you need to access a remote screen, whether across the office floor or on the other side of the world. Likewise, this tool can connect to a computer remotely, whether on the other side of the office or halfway around the world. AnyDesk provides IT professionals and on-the-go users with secure and dependable remote desktop connectivity. AnyDesk understands how important low latency, rapid data transports, and frame rates of 60 frames per second are when working on a remote desktop. You can also download K7 Total Security Crack. It is one of the best apps that offers computer connectivity everywhere. Program of lightweight. In this app, there are no boundaries. It also introduced additional protection features to allow users to use them for security purposes without problems. It is one of the excellent applications which gives the machine everywhere. Get new features in the most recent edition. There are no limitations to this program. It adds new protection functionality so that the customer can access it quickly. Compared to other services, it is much easier. The program is excellent, which gives the processor total power. The boundary can be conveniently used. Printing from afar: Select the printer, and the print job will be transmitted to your local PC. So all you have to do now is choose your local printer. Unattended Entry: Allowing unattended access allows you to start a remote session from home. Transferring Files: You may use the clipboard to send text, screenshots, and other files between your remote and local devices. Alternatively, you can use File Manager to handle your files locally. Teamwork: While collaborating over a distant connection, use the Whiteboard to write simple instructions and the chat feature to say even more. In addition, you can record a session for future reference with Session Recording. AnyDesk Serial Key
1 note
·
View note
Text
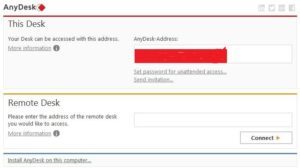
Anydesk Personal Use

Not every use case requires a paid AnyDesk license. That’s why we provide a free version of our remote access software so people can help friends and work on personal projects.
Swap your AnyDesk number for a personalized username, formatted like an email address e.g. This brings your AnyDesk account in line with your brand identity and gives your customers a more consistent brand experience – especially when you add your logo to the interface too. Session Logging.
AnyDesk will have elevated privileges when installed. Connecting to a client with AnyDesk installed won't run into trouble controlling Admin (UAC) required applications. However you can request elevation remotely to clients that run AnyDesk portable.
AnyDesk was founded in Germany in 2014, and its unique remote desktop access software has been downloaded by more than 300 million users worldwide, adding another 5 million every month. Chrome Remote Desktop. 8 Pros 7 Cons 1 Top Pro. Impressively fast. Faster than most similar.
Looking for Free Remote Access Software?
There are many reasons you might want a free remote desktop option:
A family member needs tech support, but you are halfway around the world.
To take advantage of the high-performance tools on your desktop PC from a less powerful laptop.
You want to have your data with you at all times, no matter where you are.
Anydesk Free Personal Use
Sometimes you just need remote desktop software that is reliable and fast. Thankfully, the free version of AnyDesk comes with many helpful features and high security standards for your personal use. Find out for yourself what AnyDesk's free remote access software has to offer.
Remote Support for Your Loved Ones
If your family and friends need help with their computers, free remote desktop software is a true lifesaver. Gone are the days of tedious explanations over the phone and piles of screenshots to sort through.
Simply have them download the 3 MB file. There’s no installation or registration needed. You can access their device and provide remote support as if you’re sitting in front of their PC.
Flexibility for Your Personal Projects
You likely use multiple devices when working on personal projects. You might have high-performance graphic design software on your desktop PC but prefer to send emails from your laptop. Your phone is mainly for calls, messaging and social media. What if you could always have everything with you?
Thanks to our free remote access software, you can! Your phone can become a remote control for your other devices, you can access powerful software from a small tablet and your files are with you at all times with cross-platform, high-speed access.
Trusted Security Standards
Security is our priority. That means our security features aren’t limited to the paid licenses. All of them are also available for the free version. TLS 1.2 technology protects every connection from unauthorized access.
RSA 2048 key exchange further encrypts your remote desktop session. We also employ Perfect Forward Secrecy and Salted Password Hashing to prevent third parties from decrypting your data.
Additionally, we make an effort to inform our users about cybercriminals and how to avoid getting scammed.
Access the Best Tools for Free
We offer the best tools for personal use that ensure a smooth workflow. Even if you’re on the go, working on your personal projects from your laptop, it’s as if you’re right in front of your remote device.
Need to print out a document from your remote device? Use our Remote Printing feature. The AnyDesk printer sends a print job to your local printer. This ensures a more efficient and immersive experience. Or transfer the file to your local device using our File Manager or the copy-and-paste function.
Need More Functionality Than Our Free Version Offers?
Do you need a high-performance remote desktop tool for your company, because you need to manage many devices at once? AnyDesk offers licenses for every need—from freelancers to large enterprises.
Commercial Use
Address Book
REST-Interface
Customization Options
More Simultaneous Sessions and Active Devices
DeskRT is our proprietary video codec that ensures image transmission at low latency and high framerates, even at low bandwidths of only 100kB/s. Our innovative codec is at the core of AnyDesk and is also available for our free users.
AnyDesk doesn’t need to be installed. Simply download the small 3MB file and immediately get started without registration. Your AnyDesk-ID will be generated by simply opening the file. The perfect remote desktop software for less tech-savvy users.
We wanted to make sure everyone can use AnyDesk to its full extent, whether you’re a Linux or a Windows user, whether you prefer Android or iOS. Even cross-platform use is seamless. Find your platform and download AnyDesk for free.
The FAQ addresses common questions in terms of features, usage, as well as support related topics. All sections link to corresponding articles. For detailed documentation use the search bar or write a ticket to [email protected].
Do I need to install AnyDesk?
AnyDesk will have elevated privileges when installed. Connecting to a client with AnyDesk installed won't run into trouble controlling Admin (UAC) required applications.However you can request elevation remotely to clients that run AnyDesk portable. The login credentials can be entered remotely, the following UAC prompt must be confirmed manually from the remote side. Each installation has its unique ID and is bound to a specific license.
How to reset 2FA / Two Factor Authentication
Do I need to be present at the remote side to start a session? (Unattended Access)
No, you can set a 'password for unattended access' to gain access remotely. See Unattended Access
I lost my password (my.anydesk.com)
To recover your password go to MyAnyDesk.com and hit 'Forgot your password? ', this will send a reset mail to the address stored in your account.
Can I use AnyDesk with other Remote Tools simultaneously?
Yes, it's possible to run instances of different solutions and AnyDesk at the same time with no restraints. AnyDesk can also run several instances at the same time.
Can I use my own namespace?
Yes, you may choose your own namespace for registered clients in on my.anydesk.com if you're using a Professional or Enterprise licence. See MyAnyDesk_Portal
Register or remove the AnyDesk license to a device
See Registration to register the client to a license.
Are updates included with AnyDesk licenses?
Yes, updates are always included with AnyDesk.Expired contracts of AnyDesk Lite and AnyDesk Professional will limit AnyDesk to the latest version of AnyDesk Free, which is not allowed for commercial purposes.

Where do I find my invoices?
Your invoices can be found in the MyAnyDeskPortal.
Do my customers need a licensed version?
End users always get a free license of AnyDesk automatically.
How to make multiple connections?
AnyDesk can run an unlimited amount of sessions from a device as long as resources allow. AnyDesk also can run several instances on a device. Based on your license, your AnyDesk client can have multiple sessions simultaneously. The Free and Lite license will only allow one simultaneous session. The Professional license allows for as many sessions as ordered and Power license enables unlimited sessions for the number of active devices ordered.
Can I transfer files with AnyDesk?
How to connect automatically
The speed dial (background icons under the 'Connect'-button) displays recent connections. Click on the client you want to connect to. There is no need to type the ID each time. The entered password for unattended acces can be saved IF the option has been enabled at the remote client side below the 'set password' option. You can even create a shortcut on the home screen by clicking/touching the overflow menu (downward arrow) next to the machines address, then 'Drop to desktop'.
Can I offer AnyDesk for downloading on my website?
Yes, customers can offer AnyDesk for download on their website. The best way would be to
create a direct link to anydesk.com/download. In this way, your customers will always have access to the latest
version.
Can I keep or move the AnyDesk ID/alias when reinstalling or moving to a new/clone system or hard drive?
Yes, your identity can be moved. If you have several machines with the same ID: See AnyDesk_ID_and_Alias
Does AnyDesk support Windows server?
Which ports does AnyDesk use?
To connect to the AnyDesk network port 80, 443 or 6568 is used. For standard listening port direct line connection is 7070 (TCP).
AnyDesk is slow despite LAN connection
AnyDesk might not recognize a direct connection and the session will be established via AnyDesk network. Direct connections display a play symbol in the status bar. If disabled, end
the session and reconnect. In case the direct connection cannot be established, send the trace files fromboth LAN clients to [email protected].
Please note that installing AnyDesk generally helps to better recognize connections in a LAN.
Why is there an orange question mark next to my cursor?
If AnyDesk can't fetch a cursor from the remote device, e.g., if you're connecting to a Windows Server without a mouse cursor connected, AnyDesk will display this static cursor as default.
Can another user connect to me via Browser or my website?
Can I lock the remote screen?
Yes, AnyDesk allows to lock the remote screen if permissions are set. See Permissions
How to work with dual monitors / multiple displays?
Remote displays are indicated by separate tabs in the session window. Switch between the monitors by clicking on a corresponding tab. To get separate windows for each monitor, (available only if your license supports simultaneous sessions), establish two sessions with a remote device and set each to another display. To get multiple sessions in fullscreen mode, switch from D3D-Rendering to OpenGL or DirectDraw.
Anydesk Personal Use Limitation
Unexpected session ends, disconnects, session interrupts after a certain time
Sessions may end unexpectedly for various reasons. If you encounter interruptions after a specific amount of time into the session, go to Settings and switch to the Connections tab. Disable direct connections.You may also setup a listening port in your firewall for AnyDesk in the Security Settings.
Anydesk Personal Use Limitations
Why do I have to type the unattended password/login information/authorization manually for a specific client?
The remote client must allow the option to save his login information. See Unattended Access
I cannot connect, because the request was 'blocked/rejected by the AnyDesk settings'.
If a client has an ACL-List (Whitelist) active that your ID/alias doesn't match, or if your interative access settings are set to disabled or don't allow connections in the background, then you'll get a message, telling that your request has been rejected. See Security Settings and adjust the settings on the remote client.
I cannot use AnyDesk for controlling Security/AntiVirus Software
Some applications are protected from external modification. Disable this feature locally in the settings, in order to get access from remote.
Can't get a session window, AnyDesk says: Waiting for Image
On Android: Make sure to give AnyDesk permission to record the screen. The first session request spawns the permission window. If not properly addressed, open Android settings - Apps - Choose AnyDesk - grant permissions.
If this doesn't fix the issue, a headless display adapter will help, this will force your system to render the image.
Synchronization of the clipboard is not working
Check permissions. AnyDesk might have to be installed on the remote side.
Denied mouse cursor/no input on window
Permissions missing: Is displayed when AnyDesk does not have permission to control a selected application. In this case, install
AnyDesk or launch it as an administrator on the remote client. Professional license users
can create a custom client that automatically requests administrator privileges upon startup. See also Customize AnyDesk and Administrator_Privileges_and_Elevation_(UAC)
AnyDesk shows 0 as ID
This means you can´t connect to our servers, please check if you have whitelisted AnyDesk in your firewall: Firewall
Transmission is too slow. What can I do?
Latency and rendering performance depend on hardware and driver. See Render Performance for more information.
Compatibility in Windows Vista Home Edition
In certain cases, AnyDesk may sometimes crash or experience startup problems in the Home Edition of Windows
Vista. If this happens, open the properties of the AnyDesk shortcut and select 'Compatibility mode for Windows
XP'.
Scrolling on Android
For connections from Android to Android, there are several options. Use Direct-Touch Mode for 1-finger scrolling(default for new connections) and 3-finger scrolling when in Touchpad or Touch(Mouse) Mode. See AnyDesk on Android
Keyboard input opens up automatically on Android
Per default, focused text input fields will open the soft keyboard on Android. This can be switched off in the settings. See »» settings » input » automatic keyboard.The soft keyboard can be opened manually via the pie menu. See Android App
How can I close sessions from other devices to free sessions?
Go to the Portal and close the session in the 'Session' section. See MyAnyDesk Portal
How To Use Anydesk Without Permission
I can't control the mouse and keyboard anymore on macOS
With macOS Mojave/Catalina, it is required to allow AnyDesk explicitly to control your device, you'll be prompted to do so automatically when running AnyDesk, it is however rather easy to miss this.
If this happened to you, please go to 'System Preferences', 'Security&Privacy', 'Privacy', 'Accessibility' and add 'Anydesk' to your list of trusted apps. More information can be found in AnyDesk on macOS.
I get the message 'Waiting for Image' or 'desk_rt_ipc_error' on macOS
With macOS Catalina, it is required to allow AnyDesk to record your screen.
AnyDesk shows a message, to configure your system in the 'System Preferences' to add AnyDesk to the trusted apps list in 'Accessibility' and 'Screen Recording'. More information can be found in AnyDesk on macOS.
0 notes
Text
Microsoft Office 2016 Crack For Mac

Microsoft Office For Mac 2016
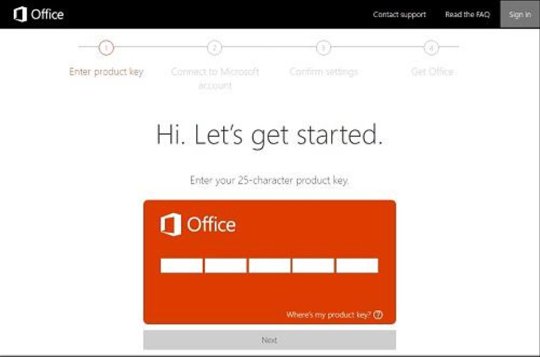
Activate MS Office 2019/2016 for macOS - MicrosoftOffice2019VLSerializer Office 2019 above. Note that Office2019 DO NOT support activate via simple copy/paste plist license file which is the simplest way to activate Office 2016. Fortunately, you can also use the VL Serializer tool, just install Office 2019 and Serializer, then run Serializer to activate. Download Microsoft Office 2016 Full Version Activator. Microsoft Office 2016 Full Version Free Download Terbaru Windows 7 32 Bit – Tentunya semua orang sudah familiar dengan aplikasi desktop pc yang super powerful untuk mengolah segala urusan data dan angka.Ya, aplikasi satu ini banyak digunkan diberbagai bidang seperti perkantoran, akademi, bisnis dan masih banyak lagi lainnya. Download Crack + Setup Keys Microsoft Office 2016 Crack & Serial Keys updated Free Download For Activation. Microsoft Office 2016 Crack Transactions are the most popular word processors, spreadsheets, and other software tools. As everyone knows, this is expensive for the average consumer.
Microsoft Office 2016 for Mac free. download full version is a must-have productivity and business suite with its complete set of applications. It’s used by most company and education institution throughout the world. Even though there are many alternatives, this software used by more than 1 billion PC computers in the world. Recently, Microsoft unveiled Office for iOS, which runs on iPhones and iPads and also Microsoft office to the mac device such as MacBook Pro and iMac. Anyone with one of these devices can open, edit and save any MS Office documents (Word), spreadsheets (Excel), and PowerPoint presentations within windows and mac freely. Amazing right?
Spectrasonics keyscape for mac. Spectrasonics Keyscape mac Although every keyboardist dreams of having the best instruments immediately available everywhere, Keyscape for Mac is useful in the studio for producers and composers. As these instruments can be easily transformed into amazing “unreal” sounds with the powerful STEAM engine under the hood, Keyscape Crack easily. KEYSCAPE ® is an extraordinary virtual instrument featuring the largest selection of collector keyboards in the world. From “holy grail” pianos to stunning keyboards you didn’t even know existed, this is a keyboardist’s dream come true. Ten years in the making, each of these sought-after keyboards was carefully restored and then deeply multisampled by the renowned Spectrasonics Sound. Keyscape is available as a download as an installation option through our Techshop.Once you download Keyscape via the Download Manager, follow this set of instructions to install it on your Mac system.
Video compression and streaming are made simple with the MacBook’s 10-bit HEVC hardware acceleration. The machine is equipped with enough intelligence to tone down energy usage when it does lighter tasks, such as word processing and email monitoring. What Kind of Processor Does This Style of Mac Use?Seventh generation Intel core makes the MacBook Pro fast even when it is rendering three dimensional models or encoding video clips. Sony vegas pro 13 for mac crack.
It has all of the features and tools, exactly the same as the windows version. Yet there are changes with the design and features interface, although it doesn’t really of much difference. Do you want to try this software before buying it officially? Download microsoft office 2016 for mac free down below for MacOS Mojave.

Microsoft Office for Mac 2016 Features
Additional Ribbon Buttons
Enhanced Collaboration between application
New Outlook Mentions
New and Improved Connection Options for Excel
You can now publish your file directly to docs.com
There’s even another publishing online features to Power BI
All new ms word researcher toolbar
There’s a new “suggest a feature” button on the file > feedback
All new text highlighter
Powerpoint now can zoom with a new toolbar
Skype new integration
Support MacOSS Mojave
Office 2016 Mac System Requirements :
Mac computer with an Intel processor
Mac OS X version 10.10
Recommended 1 GB of RAM
5,62 GB of free hard disk space
Hard disk formatting such as HFS + (also known as Mac OS Extended or HFS Plus)
A monitor with 1280×800 resolution or higher
Recommended Safari 7
How to Install Microsoft Office 2016 For Mac v16.17 Full Crack
Download microsoft office 2016 mac full crack
Unzip the file to any folder
Mac users must Disable SIP and Allow Apps From Anywhere
Run the DMG file to start the installation
Download Crack Fix, run Microsoft_Office_2016_VL_Serializer.pkg
Apply the crack and start any program
Enjoy!
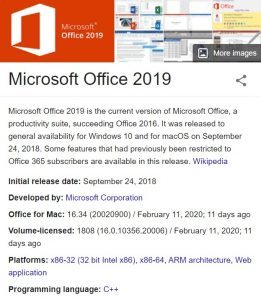
Best remote app for iphone. Also Download :Microsoft Office 2019 Mac
Download Microsoft Office 2016 Mac Full Crack (Mojave)
Installer Only | MegaNZ | Google Drive
Crack Fix VL 16.17 | ZippyShare | FileUpload
Microsoft Office For Mac 2016
Filesize : 1.7 GB | Password : www.yasir252.com
0 notes
Text
Windows 10 Professional Product Key 64Bit/32Bit And Crack Full Free Download
Windows 10 Professional Crack, If your device is lost or stolen, BitLocker and BitLocker to Go put everything locked, so no one else can access your systems or data. Office files like Excel, Word, and PowerPoint are automatically stored in the cloud, which works as a virtual drive over the Internet, so you can share documents and work on them in real-time. Log in with Remote Desktop to use a Windows 10 Pro computer while you are at home, on the road, or wherever there is an Internet connection. Create your own app section in the Windows Store to easily access the apps you need most.
Windows 10 Product Key 2021 Crack With Serial Number:
Windows 10 provides the product key for every user. The key to a product is a user’s centenary code for the authenticity of the product being created for each user. Sometimes, when updating or reinstalling Windows, they may ask you to enter your product key. If your product is not available, you’ll need to break Windows 10 to activate it. There are multiple Windows 10 hacks through which you can easily break your windows to activate it.
Windows 10 Crack Product Key 64/32 Bit Free Download:
Windows 10 Crack is one of the most used operating systems due to its advanced capabilities and the constant replacement of the OTA system. Her popularity increased publicly after seeing her on the market. It is the most manageable and easy to use work system. Therefore, it is used in many computer systems all over the world. If you want to create an OS for the first time, we can offer you a way to enjoy Windows 10 Crack today.
Microsoft continued with its winning formula, revealing Windows 10. You can buy the Windows 10 product key from the Internet or your reseller, or choose the free Windows 10 activation keys. If you want to take advantage of Windows 10 features, this article will help you obtain Windows 10 Generic Product Keys. These Windows 10 keys work for all versions and are free to use.
Windows 10 Product Key 64/32 Bit Crack:
Windows 10 Crack received excellent applause for its flexible features and excellent options. Windows 10 unexpectedly hit the market on the first launch day. Users were downloading a million copies from the start. Windows show satisfactory improvements in its running structures because of its inception. In this article, the smart and advanced features of Windows 10 are explained. Refer to the article to understand the preview and utilities for Windows.
What makes Windows 10 Crack so unique?
It uses Windows 10 and brings together some interesting features in Windows 7 and Windows 8 that make it proud of other Microsoft operating systems. The high-quality Windows machine provides you with the most innovative effects and security skills. In the way not to do it, the simplest thing is to make the tool comfortable, but it also allows you to perform your daily tasks in the most creative and effective way.
In quite a while, Windows 10 was able to capture the attention of many people, IT experts, businessmen, and employees who were referring to specific areas. Prior to the launch of the reputable Windows operating system, Microsoft 10 also released a technology preview of Windows 10 Crack to attract technology and IT professionals.
A full version of Windows 10 Crack:
Windows 10 is well known and highly recommended in the Windows Marketplace. It has advanced features that make it different from other versions. Windows 10 developers release several new releases every year. Each new edition has its own characteristics and functions. With the increase in releases, usability also improved, just like the Windows 10 Product Key is the latest and updated version of Windows. It has an easy-to-use interface and contains many features that can be useful and useful to users.
Why is it necessary to Activate Windows 10?
If you think it is necessary to activate your windows, we will also clear this idea. The reason why Windows is activated is that many premium features are locked in the free version of any window. If you want to use all of its features and features, you need to make them premium, which can only be possible by purchasing windows or entering product keys. And the keys are special too, you can’t get them at any cost, but here we give you all the keys for free.
You also have the option to use Windows 10 Product Key Generator for free, but you will miss many of the features in the free version. If you are looking for product keys to activate your windows, then you are in the right place, and here we offer updated and working product keys. Not only can you activate the Windows 10 Home edition, but you can also activate others, including business, professional, etc. All keys are given at the bottom of the page, copy any of the basic elements you want and your windows will be activated.
Windows 10 Features:
Multitasking has been improved in Windows 10.
The Start menu, which was missing in the previous version, was reverted; this feature improved the usability of Windows 10.
Spartan browser project.
This window is safer and more effective compared to earlier versions of Windows.
Cortana is available in Windows 10 to help you.
What’s New in Windows 10 Crack?
The drivers are up to date.
Now in Windows 10, you have full access to themes.
New versions released in Windows 10.
Speed is improved.
You can use it without errors.
There is a new Windows Store available in Windows 10.
Windows 10 Home Product Key is free.
An update to Windows 10 Crack?
If you want to upgrade your existing tires to Windows 10, it won’t be difficult at all. You can purchase updates from Microsoft Windows Ten, or the computer must have the hardware requirements it requires, including more memory, faster processor, software compatibility, and so on. You can also download the installation file or install it via USB.
You can buy the product key on the Microsoft official website or copy it here for free.
Use Activator to activate Windows 10:About KMSpico:
KMSpico is the trigger to activate windows without using any product key. It is free to install this on your computer, all you have to do is disable your antivirus software for a moment and then install it. After installing this activator, you can enable antivirus again. This program will activate your Windows automatically throughout life. You do not have to enter any password later to activate.
About Removewat:
Like KMSpico, removewat is also an activator that helps activate your windows. After installing the software, simply run your configuration and leave the rest of the activation in the hands of this activator. In a few minutes, your window will activate. Restart the computer now and start using it physically.
How to install and use Windows 10 crack?
Download it by clicking on the button below.
Extract the file and start the installation.
Copy the crack file. exe after extraction.
When the log message appears, paste the keys or the crack file that you copied into the installed directory.
There you will see an option to “Activate Windows”, click on it.
Then click Next and it’s fine.
That’s it, start with Windows 10 Crack.
Also Download
WinRAR Crack 32/64-bit License Key Full [Latest 2021]
IDM Crack 6.38 Build 16 Keygen With Torrent Download (2021)
Ant Download Manager Pro Crack + Registration Key [Latest]
IOBIT Uninstaller Pro Crack + Serial Key Full (Updated 2021)
0 notes
Text
Mac Os Stands For

Need a little help figuring out your new iMac or MacBook? You’ve come to the right place.
Mac Os X Stands For
Mac Os Stands For Computers
Mac Address Stands For Computer
Check out our updated survival guide for the basics on Mac OS X, including details on the latest “Mavericks” features, illustrated guides for updating and backing up your Mac, must-know tips, and more.
Within the Open Systems Interconnection (OSI) network model, MAC addresses are used in the medium access control protocol sublayer of the data link layer. As typically represented, MAC addresses are recognizable as six groups of two hexadecimal digits, separated. And now, with just a USB cable, unlock your phone's possibilities on PC and Mac through Samsung DeX. Click to download Samsung DeX app for use on PC and Mac. FOR WINDOWS 7 AND 10 FOR MAC OS. DeX for PC is available on selected devices, and on Windows 7, 10 and versions of Mac OS higher than 10.13. Visit the FAQ page for a full list of device.
The basics
What is Mac OS X?
It’s the software that powers all the day-to-day features on your iMac or MacBook. Every time you click a menu at the top of the screen, open a folder on your desktop, or search for a document on your hard drive, you have the Mac operating system (or “Mac OS”) to thank.
OK, so what does the “X” in “Mac OS X” stand for?
It stands for “10,” as in the Roman numeral—and specifically, it means we’re currently using the tenth major version of the Mac OS. Mac OS X first arrived for desktop Macs way back in 2001, and had been preceded by—you guessed it—Mac OS 9.
“Mavericks” is the latest version of Mac OS X, the software that powers your iMac or MacBook.
What is “Mavericks”?
Over the past dozen years, there have been a series of big updates to Mac OS X, and the latest update, 10.9, is nicknamed “Mavericks.” Previous updates to Mac OS X have been named “Panther,” “Leopard,” “Snow Leopard,” and plain-old “Lion.” Yes, it’s safe to say that Apple has a thing for felines—or had, until OS X Mavericks came around.
Anyway, Mac OS X “Mavericks” (which came out in October 2013) adds more than 200 new features to the Mac operating system, including all-new Maps and iBooks apps that mirror those on the iPhone and iPad; major overhauls for Calendar and the Safari web browser; revamped folder windows that now boast tabs, similar to Safari; and enhanced desktop notifications, including alerts from Mavericks-friendly websites like the New York Times and CNN.
Check out Apple’s rundown of the 200-plus new features in Mavericks right here.
Where to get Mavericks
Mavericks is available for download from the Mac App Store—and yes, it’s free.
The “About This Mac” window will tell you is your Mac is new enough for Mavericks.
Can your Mac handle Mavericks?
Generally speaking, you’ll need an iMac or MacBook Pro that was manufactured no earlier than 2007, or a MacBook circa 2008 or later.
Specific iMac and MacBook models have different requirements, however; click here for more details.
How to install Mavericks
The Mavericks installation process is fairly straightforward, but it will require at least an hour of your time.
Once you grab Mavericks from the Mac App Store, your system will download the update and alert you when it’s ready to begin the installation process. Just follow the prompts (there are only a few), sit back and wait. After a restart or two, your Mac should be all set.
How to back up your Mac
Don’t even thing of updating your Mac’s operating system without backing up your hard drive first. Luckily, backing up your hard drive is easy thanks for a Mac OS X utility called Time Machine; here’s how to use it.
40 must-know Mac tips and tricks
1. 5 gotta-try folder tricks for “Mavericks”
Apple’s just-released (and free) software update for the Mac comes with a series of nifty folder tricks up its sleeves, including the ability to open a folder as a tab in an existing folder window—yes, kinda like you can in a browser.
Want to map a street address directly from Safari? Easy.
2. Map a street address within Safari
Ever stumble across a street address on the web—yes, an actual street address—and wish you could quickly pinpoint it on a map? Usually, you’d just copy and paste the address into Google Maps, but the latest version of the Safari for “Mavericks” saves you a step.
3. Take a screenshot
So, you know how to snap an image of your iPhone’s screen—but what if you want to take a screenshot of your Mac’s desktop? Well, there are actually four ways to snap a screenshot on your Mac, and they’re all just a few keystrokes away.
4. Customize and create keyboard shortcuts
Wish you could snap a screenshot on your Mac by tapping just the F5 key rather than tangling with the SHIFT + COMMAND + 3 keyboard combo? Well, you can.
You can create time-saving “macros” for your street address, job title, phone number, or practically any string of text.
5. Create time-saving, text-replacing “macros”
Mac Os X Stands For
You can create custom, text-replacing “macros” (or shortcuts) on your Mac for your home address, job title, phone number, or other oft-used strings of text.
6. Pick a new alert sound, or install your own
Getting tired of the little “blurp” (or “ding,” or “beep”) sound your Mac makes when it needs your attention? As it turns out, your Mac comes with more than a dozen built-in alert sounds, and you can change the sound whenever you want.
7. Set “Do Not Disturb” mode to turn on (and off) automatically
One my of favorite new features in iOS 7 is the ability to automatically silence iPhone or iPad alerts during the wee hours—and now, thanks to Apple’s recent “Mavericks” update, you can set your Mac to muzzle notifications on a daily (or nightly) basis, too.
Got a DVD-less Mac? You can wireless share the optical drive of any nearby iMac or MacBook.
8. Share a DVD drive over Wi-Fi with Remote Disc
The MacBook Air, the Mac Mini, the new “retina” MacBooks, and other optical drive-less Macs come with a feature called “Remote Disc,” which lets you wirelessly borrow the optical drive of almost any nearby Mac or PC.
9. Get the hang of desktop “spaces” in Mission Control
The Mac’s handy Mission Control feature lets you manage multiple desktop “spaces” at once, each filled with its own assortment of open documents and applications. Sounds confusing, I know. But once you get the hang of it, these additional, virtual desktops can become addicting—and even essential.
10. Why “natural” scrolling feels backwards—and how to turn it off
Does scrolling on your Mac feel backwards to you? Blame Apple’s new “natural” scrolling feature. Luckily, turning it off is a cinch.
Wish you could get your scroll bars back? All you have to do is tweak the right setting.
11. Get your missing scroll bars back
Hey, what happened to the scroll bars on your windows? Don’t worry—you can get them back in a few clicks.
12. 12 handy trackpad gestures you need to try
Want to zoom in on a web page, twirl a snapshot in iPhoto, sneak a peek at the desktop, or look up the definition of a head-scratching word? You can do all that and more with a simple swipe, “pinch,” or tap on your Mac’s trackpad.
13. Turn on your Mac’s speaking clock
Your Mac has a built-in speaking clock that will read you the time every hour, on the hour—or the half hour, or even quarter hour. Here’s how to turn it on.
You can add a new Mission Control desktop with a little help from your mouse.
14. Create a new desktop in Mission Control
Making a new “space” in Mission Control, the essential Mac feature that gives you a bird’s eye view of all your virtual desktops, is easy—if you know where to look.
15. Pin an app to a specific Mission Control desktop
There’s a way to assign an app to a specific desktop in Mission Control, perfect for keeping your programs in their proper “spaces.”
16. Paste your signature into a PDF, no scanner or printer required
Got a contract or some other document that you need to sign and return via email? Just snap a photo of your John Hancock with your Mac’s iSight camera (just about any recent iMac or MacBook should have one), then paste it into the document you need to sign.

17. Make the most of the Mac desktop dock
Thanks to the handy Dock at the bottom of your Mac desktop, your favorite programs, files, and folders are never more than a click away—and if you know where to look, you can make the Dock behave practically any way you want.
“Sticky Keys” make for a clever alternative to playing “Twister” with your fingers.
18. Enable “sticky keys”
Having a tough time maneuvering your fingertips around multi-key combos like SHIFT + ALT + DELETE? The “sticky keys” feature in Mac OS X can help.
19. Take a “Quick Look” at almost any file
Meet “Quick Look,” a handy, built-in Mac tool that lets you take a quick glance at almost any file or folder without committing to firing up a program.
20. 12 Mac keyboard shortcuts you need to know
Switch applications, take a “quick look” at a file, get help, and more, all without touching your Mac’s mouse or trackpad.
21. Give your Mac desktop icons a makeover

Got a jumble of icons cluttering your Mac’s desktop? Are you desktop icons too big—or too small? Wish they would just arrange themselves? Help is here!
22. 5 ways to make the most of the sidebar
Looking to add your own folders to the Mac sidebar? Or perhaps you’d rather make the sidebar bigger, smaller, or just plain gone. Help is here!
Just dip into your Mac’s system settings to make the mouse pointer bigger.
23. Boost the size of the mouse pointer
Want to save both your eyesight and your sanity? Here’s an easy way: by dipping into your system settings and boosting the size of the mouse pointer.
24. Control your desktop with “Hot Corners”
Turn on the Mac’s hot-corner feature to jump to Mission Control, clear your desktop, and more, all with a simple flick of your fingertip.
25. Disable the Caps Lock key
Sick of striking the Caps Lock key by mistake? The good news is that turning off Caps Lock for good on a Mac is easy.
26. Stop programs from launching automatically
How long does it take for your Mac to start up? Too long? Maybe your Mac is trying to launch too many apps when it’s first starting up.
You can zoom your Mac’s display with a few keyboard combinations.
27. Zoom the display
Squinting at your computer screen? You can zoom the entire display on your PC or Mac, a handy trick for anyone with iffy eyesight. Here’s how.
Mac Os Stands For Computers
28. Choose your default web browser
Sick of having Safari pop up when you really wanted another browser, like Chrome or Firefox? There’s single, centralized place on your Mac where you can set your default web browser once and for all.
29. Create a “recent files” folder on your desktop
It’s easy to create a folder on your desktop that’ll display only the files you’ve created or worked with in the past day, week, month … you name it.
30. Set your Mac to automatically start up (or shut down) each day
Want to wake up each morning to a freshly brewed pot of coffee and a fully powered-on Mac? It’s easier than you might think.
31. 16 Mac keyboard shortcuts you need to know
Want to switch applications, empty the trash, search your hard drive, or put your Mac to sleep, all without touching your mouse? Read on for 16 keyboard shortcuts that’ll let you zip around your Mac like a pro.
By tweaking a single setting, you can use your Mac’s function keys without having to press and hold the “Fn” key.
32. Use the function keys without pressing “Fn”
On most Mac keyboards, the function keys—you know, those keys along the top of the keyboard marked “F1,” “F2,” “F3,” and so on—don’t get the luxury of having an entire key to themselves. Want to switch things around so you don’t need to press and hold “fn” to use a function key? No problem.
33. Set multiple “home” or “start” pages for your web browser
Want more than just a single home page to appear when you fire up your web browser in the morning? No problem.
Mac Address Stands For Computer
34. Cram a bunch of files into a single “zip” archive
Got a bunch of little files that you want to send to a friend? Well, you could always drag them all into an email and send them as attachments, but talk about messy. A cleaner, tidier alternative is to take all those little (or not-so-little) files and compress them into an archive—or, to be more specific, a “zip” archive.
Tapping to click takes getting used to, but it’s surprisingly addicting, not to mention easier on your fingers.
35. “Click” the trackpad with a tap
Having a hard time clicking the MacBook’s squishy trackpad? If so, here’s an alternative: setting the Mac trackpad to “click” with a simple tap rather than an actual click.
36. Share files between nearby Macs with AirDrop
Got a file on one Mac that you’d like to send to another Mac just a few feet away? A built-in Mac feature called AirDrop lets you…well, “drop” a file from one Mac onto another.
37. Change the default programs for your files
Annoyed that the Mac’s Preview app, and not Adobe Reader, always gets to open your PDF files? There’s a way to permanently change the “default” program that opens a given type of document.
38. Customize the buttons in program toolbars
Ever wish there were a Print button next to the Reply and Forward buttons in the Mac’s Mail app, or a pair of Zoom buttons on the top of every Safari browser window? Well, here’s the thing: you can add, remove, and rearrange the buttons in the “toolbar” of several familiar Mac programs.
You can set your wallpaper to change at any interval you choose, from once a day to once every 5 seconds.
39. Put your desktop wallpaper on shuffle
Getting tired of the same old wallpaper on your Mac desktop? If so, try this: just set your Mac to shuffle some or all of your favorite desktop wallpaper (or “background”) photos, at any interval you choose.
40. 4 ways to right-click on a Mac trackpad
There are actually several different ways to right-click on the MacBook’s trackpad, which (nowadays, at least) is essentially one big button.
Get more help
Have more questions about Mac OS X, or Mavericks in particular? Click here to ask me directly—and remember, there are no dumb questions.
Related posts:
0 notes
Text
AirDroid Review: How to Sync Android Notification with Mac
New Post has been published on https://www.news47ell.com/reviews/airdroid-review-how-to-sync-android-notification-with-mac/
AirDroid Review: How to Sync Android Notification with Mac
Sometimes my Android phone is a bit far from my reach and I have received an “important” SMS that I need to access in 30 seconds1. Instead of having to go grab my phone from the other room, unlock it, open the SMS app, read the code, memories and then type it on my MacBook. I have found another, much easier way to do all of this right from my MacBook using an app called AirDroid that allows me to Sync Android Notification with Mac as well as having full access to my Android device.
Meaning that as soon as that SMS is received on my Android phone, I will get a notification on my MacBook. I can copy part of it like the TFA code or reply to it if it’s a person I’m talking with.
AirDroid Review
Table of Contents
AirDroid Features
Account Tiers
How to Sync Android Notification with Mac
Support
Pricing
Conclusion
We’ve all had one of those days where you’re working on your MacBook in the living room and you need to access that SMS on your Android phone but you left it in the bedroom. What do you do?
Well, with AirDroid, you can access it right from your Mac. It’s super easy and cost you nothing.
AirDroid doesn’t stop here, it goes even beyond notifications. You can get full access to your phone from your Mac if you use their app or the web client which is really powerful and you can do almost anything with it.
AirDroid Features
Mirroring Notifications
Like we’ve been discussing, this is the feature which allows you to Sync Android Notification with Mac so you won’t miss a thing. It works with every notification you receive on your phone and you can see a list of all received notifications using the AirDroid desktop client.
Send Messages
AirDroid allows you to send messages from apps like the default SMS app, Telegram, WhatsApp, Kik, Line and even emails.
Receive phone calls
You can answer and reject phone calls through your Mac or PC but the talking has to be done on your Android device. You can also send pre-made or custom SMS messages telling the caller that you will call them later.
Notifications actions support
Sometimes you just want to archive or delete an email right away without opening. This is the feature for you, allowing you to take actions on your phone right from your desktop.
File Transfer
Remember the full access to your phone that I mentioned above? Well, this is it. You can get full access to every file and folder inside your phone’s built-in memory, as well as the memory card if you have one inserted. Allowing you to transfer all kinds of files and folders to and from your phone to your desktop.
AirMirror
Mirror everything you see on your Android phone to your desktops. Take screenshots or record video of everything you see. This helps you make video tutorials about apps or broadcast your gameplay.
AirIME
Type on your Android phone using your desktop’s keyboard. Not sure why, but you do have this feature.
Remote Camera
You can use your phone camera to monitor things or as a security camera. Record what you see through it or take screenshots.
Web app
All the features we talked about above can be accessed through the AirDroid desktop app. But there is the possibility of needing to access them on a computer that doesn’t belong to you, using a user account with no privileges that allow you to install an app. The daunting question, what do you do?
The AirDroid web app comes to the rescue. By simply visiting AirDroid web app using any browser, on any system, you will get access to all the features we mentioned above, including a clipboard feature that allows you to paste the text you copied on your phone to your computer and vice versa. Plus, you don’t have to reveal your password, you can easily just scan a QR Code and you will have granted that browser, for that session only (until the browser is closed) a full access to your phone.
There is some limitation to this feature which you need to be aware of:
The web app doesn’t support mirroring notifications.
AirMirror feature through the web app requires you to download a Google Chrome extension and to connect your Android phone to the desktop using a USB cable.
If you use AirDroid web app with an iOS device, the site is forced to redirect itself to an HTTP version instead of the HTTPS version used when you access an Android device.
.@AirDroid Review: How to Sync #Android Notification with #MacClick To Tweet
Account Tiers
There are three types of account: Personal Basic, Personal Pro & Business. Below, I will explain the features that each account type has:
Personal Basic
For a regular user who wants to manage up to 2 devices and get access to features like:
File Transfer
AirMirror
AirIME
SMS
AirDroid web client
Remote data quota: 200MB/month
Individual file size limit: 30MB
Personal Pro
The Personal Pro plan gives you everything in the Personal plan as well as:
Remote Camera
Folder Transfer
Remove Ads
Disable connection alerts on the phone
Find Phone
Remote data quota: Unlimited
Individual file size limit: 100MB(Web) – 1GB(PC)
Business
The business account is used to manage a large number of devices at the same time. These devices are not limited to phone, but pretty much any device that runs Android. This account contains all the features you will get in the Personal Pro plan along with:
Multiple Groups: Organize and manage devices based on groups like Region and Type of devices used
Multiple Roles: Assign a role to each device- Admin, Team Member, and Viewer
Manage more than 500 concurrent connections
How to Sync Android Notification with Mac
Now we will discuss How to Sync Android Notification with Mac in order to receive notifications from an SMS or chatting app like WhatsApp.
The process is really easy and simple to follow:
Step 1
Download the app on Android
Step 2
Download the desktop client on Mac or Windows
Step 3
Sign up for a free account
Step 4
Log in to your account on your Android phone and desktop client
Step 5
On a desktop, there’s nothing that you need to configure, but on your Android device, go to Tools > Desktop Notif and make sure that it’s enabled and the settings suit your needs.
And that’s pretty much it. You just learned How to Sync Android Notification with Mac using AirDroid and now, whenever you get a notification on your Android device, you will also receive it on your Mac.
How to Sync #Android Notification with #Mac using @AirDroidClick To Tweet
Support
While using the app, I had a tiny issue that triggered Little Snitch. The issue was that AirDroid Mac app has two different signatures. I had one saved in LS and when I downloaded a newer version of the app, LS triggered a warning. It stated that the signature was different from the one already used in the AirDroid version currently installed on my Mac.
I contacted AirDroid to make sure this new signature belonged to them. It sure did. I got my answer quickly and professionally.
I contacted them through DMs on Twitter. It’s good to know they are active on there and ready to help you with any issue you might be facing.
Pricing
As we discussed before, AirDroid offers three types of accounts, each has a price:
Personal Basic is free for everyone and it’s limited to 2 devices, 200MB/month and file size of 30MB.
Personal Pro cost $1.99/month or $1.67/month billed annually $19.99.
Business plan: you will need to contact them.
Conclusion
Having AirDroid is like having a virtual replica of your Android phone that lives on your desktop. A real, fully functioning replica which you can interact with.
Kinda like Continuity, a feature that Apple developed for its iPhone users, but much better.
Hopefully, my AirDroid Review gives you a good idea about all the cool features that AirDroid will allow you to perform. Now, go ahead and give it a try, it’s going to be really useful.
I am talking about TFA SMS :P ↩
0 notes
Text
Download Dropbox Onto Mac

4/5(1 vote )
Download Dropbox Onto Laptop
Dropbox For Mac Os
Download Dropbox Onto Computer
Dropbox Download Mac Os X
Installing and using Dropbox for Mac is as simple as downloading and installing the app. From there, your Dropbox acts like a folder on your computer—except that it resides in the cloud. Here's how to add it to your Mac. That’s it, you’ve just copied the file from a shared Dropbox folder onto your own MacBook Air or other Mac system. In fact, since it’s a video, my demo can now be opened and viewed: With a name like “Crash Landing” you can probably guess how the video ends. Anyway, that’s it. Dropbox on the Mac. Super easy to work with. I spoke my book to an audio producer and he put it on Dropbox. To e-transfer it to disc I need to download my dropbox file onto my MacBook Air and the file is only available in a link from Dropbox.
The importance and utility of Cloud storage in our life are certainly of great help to provide security against data loss threats. Its role has been of significant assistance in making our lives much easier and convenient. The small businesses and even regular computer users use embedded security features of cloud storage for file sharing rather than using expensive server systems.
The cloud-based platforms including Dropbox and Google Drive are even better alternatives that use such programs so that you can get access the cloud files from your desktop.
Mac users: Click on the Dropbox icon in your menu bar, select the gear icon at the bottom left, and click on Preferences. Click on the Account tab, and then click on Change Settings.
What is Dropbox and how to uninstall it on Mac.
Contents
How to remove Dropbox from Mac
How to manually remove Dropbox from Mac
An alternate method to remove Dropbox from Mac:
Dropbox is a personal cloud-based storage service that allows you to file sharing and collaboration. It also allows quicker sharing of files across multiple devices and lets you even stream files online. It further allows you to back up your files onto a database in the cloud for safekeeping. Here, in this article, we are providing you with a complete guide for how to remove dropbox from Mac with ease.
All those users who change their mind and wish to switch from Dropbox to another platform have faced difficulty and are generally unsure of how to uninstall dropbox on Macbook. The users may wish to delete the dropbox because of the limited 2GB free storage that it provides or because of security concerns about dropbox use.
There also may be several other reasons why you want to remove the dropbox from your computer, that’s why this article seeks to explain everything to you in relation to understand about How to remove dropbox from Mac system, keeping your data safe.
Things to remember before uninstalling dropbox
There are a few things that you must remember before you uninstall dropbox. The concept of cloud storage is that your files are not actually on your system; instead, they are being stored on a cloud server so that you can access them remotely. If we follow this concept, the process of removing dropbox from your Mac is not actually deleting the files stored in it.
The only thing happening is that the dropbox program is being removed from your desktop. And to note, you will only able to access your dropbox account and files in that folder via the Dropbox website.
The users who have their file synchronization can no longer avail of this luxury. So, if you really want to delete your Dropbox files or account, then deleting it is not the right approach. To understand in detail, this article will explain to you how to remove dropbox files from Mac system.
How to remove Dropbox from Mac
There are two methods to remove dropbox from Mac. The first method is by removing the dropbox manually and the second method says to remove dropbox from Mac by using utility or applications. Also, in another way, you can remove your dropbox account or delete it. Lets’ discuss the two methods in detail:
How to manually remove Dropbox from Mac
The first method to remove dropbox from Mac can be done by removing it manually. If your dropbox is open, then quit the dropbox by following the methods:
Step 1: Unlink your Dropbox account
Launch Dropbox on your Mac > Click on the dropbox icon from the menu bar > Go to the settings > Select ‘Preferences’ > Dropbox command line tool.
A new menu appears where you click on ‘Account’ tab > Now, click on the ‘Unlink this dropbox’
settings to remove your account > Once done,
click on the ‘Dropbox icon’ at the top of the screen >
Now dropbox Account is unlink quit the dropbox icon from so that it stop working.
Step 2: Move the Dropbox Application the trash folder
When done, go to the application folder and remove the dropbox application to the trash folder.
You can also trash the folder which contains all the remaining files.
But the thing is, this manual removal of the dropbox method sometimes doesn’t work because the system shows that the removal of the application is impossible as the app is bound to the application account. Still even after unbinding the application account and then try to remove the dropbox folder with all the files.
Further, if you also wish to remove the files in the dropbox folder from hard drive, then drag the dropbox folder to the trash. Applying this way, it will deflect your dropbox folder which is present in a local folder.
How to delete Dropbox account on Mac completely

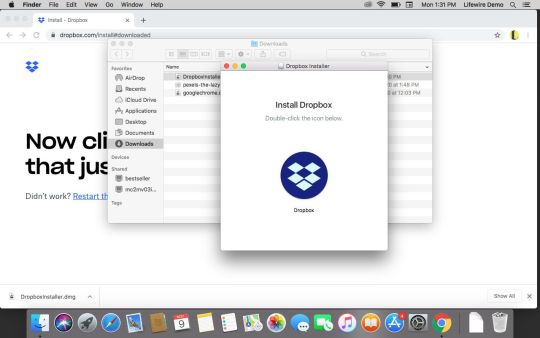
Uninstalling the dropbox program from Mac won’t delete your dropbox account. But if you still wish to delete your Dropbox account as well from the Mac device, then you follow the below-listed steps. However, it is to be noted that performing these steps will delete your dropbox files too, so ensure that you have a copy of your files to prevent any important data loss.
Step 1: Open a browser app and type Dropbox.com into the address bar.
Step 2: Sign-in to dropbox using your email id and password.
Step 3: Once there, go to the top-right, click your name and select the ‘Settings’ from the drop-down menu.
Step 4: Below the ‘General’ header, locate and click on ‘Delete My Account’
Step 5: An optional step with a window asking the reason for your decision will appear. If you want to give a reason then enter your password, write so, and click ‘Delete my account.’ Now you are done.
An alternate method to remove Dropbox from Mac:
The other alternate method to remove the dropbox from your Mac device is by the usage of tools or utilities. To carry out this secondary method, there is particular software available for the same. The name of the software goes by “App Cleaner and Uninstaller” which enables you to remove the dropbox folder from your device. This software also lets you manage the different extensions. With the help of just one click, the software app cleaner will disable the unwanted Mac start-ups programs. You just need to follow these easy steps:
Step 1: First thing, you need to quit your dropbox application. Once done, you need to launch the app cleaner and then search out for the dropbox on it.
Step 2: When you find the application on the app cleaner, click on the app > select the delete option and press ok to delete it.
The above methods will completely delete the data of an application from your device.
Mac free memory cleaner. Nonetheless, it is to be noted that the services of the App cleaner software are basically cloud-based so in case, you are afraid of losing any other important file and wish to reinstall the dropbox on your Mac system, then you can restore all of your data or lost files.
In case you are facing trouble issue while removing dropbox from Mac, then you follow these 4 steps as given below:
Step 1: Go to utilities and go to applications available on the dropbox folder.
Step 2: Open the activity monitor and scroll to find the lines that say dropbox.
Step 3: Once there, click on X to force to quit an application.
Step 4: You need to repeat this method for each line which is saying dropbox, and then try to uninstall the dropbox again.
Delete Dropbox using Third party app:
There are plenty of third party app which uninstall dropbox in single click. few of them are list below.
CleanMyMac X
CleanMyMac X is all-in-one package to awesome your Mac. It cleans megatons of junk and makes your computer run faster. Just like it did on day one.
Download and launch CleanMyMac X
Click on the Uninstaller tool in the sidebar.
Locate Dropbox in the list of apps and check the box next to it.
Press Uninstall.
Check for any leftover files by clicking on Leftovers in the Uninstall utility. If there are any listed, check the box next to them and press Uninstall.
AppCleaner
AppCleaner is a small application which allows you to thoroughly uninstall unwanted apps.
Simply drop an Dropbox application onto the AppCleaner window. It will find for the related files and you can delete them by clicking the delete button.
Optional Method for removal of the dropbox from Mac
Additionally, there is another optional method to remove the dropbox from your Mac system can be done by following these simple steps as listed below:
Step 1: Open the finder > Select ‘go to a folder’ > Press shift + command + G.
Step 2: Or you can simply go to the ‘menu’ and click on it to open the dialog box. Now, copy and paste the ~/. Dropbox into the box > and press the ‘Return key’.
Once it is done, you can remove the Dropbox app from the system settings and select all files in that dropbox folder and drag and drop them into the trash.
How Do I Remove Dropbox from my Mac without Deleting Files?
There are a lot of queries from users to know how to remove Dropbox from Mac without deleting files. Well, there are two effective solutions to save your important data, while uninstalling Dropbox application from your Mac device.
The first and easiest way to ensure no data is lost while removing the dropbox app is to check for the green mark which is available next to the File’s icon. The green mark indicates that the data from your files is still available on your hard drive so you can now safely uninstall dropbox from the device.
Another way that is a more thorough alternative to make sure about the safety of your data is to move the files out of your Dropbox account. This can be done by creating a copy of the files or moving the original files out of the dropbox folder. Now that the files are no longer in your Dropbox account, they are not available for download from elsewhere but are still stored safely on your Mac device.
If You Can’t delete dropbox from my Mac?
It is possible that sometimes you are not able to delete dropbox from your Mac device. The reason may be the background processes of the dropbox application that are not shutting down properly. You can close these manually by following steps:
Step 1: Click on the ‘Activity Monitor’ located inside the utilities folder within your applications. But the problem is they may restart if you open Dropbox again.
Step 2: In the Activity Monitor, look for lines that say ‘dropbox.’ Select the process and click ‘X’ located in the top-left corner to force it to quit.
Select 3: Repeat the same step 2 for each process and then try to uninstall dropbox again by deleting the app from within the finder.
Concluding Remarks on How to delete Dropbox from Mac

Following the above-mentioned full guide for removal of dropbox from the Mac device, it is evidently clear that it is not a difficult task to remove dropbox from the system. Certainly, the difficult part is to ensure that all traces of the application are deleted. The steps for removal of dropbox become pertinent to follow when you are selling your Mac laptop and want to scrub off any personal important data left unintentionally on the system.
Well, it is no wonder, that some users think that uninstalling and manual deletion of the dropbox folder is not sufficient to remove the dropbox from Mac. For that, the answer is App Cleaner and Uninstaller tool that can be used by the users to remove Dropbox from Mac. Now, you can conveniently uninstall dropbox from Mac device, following the above complete guide.
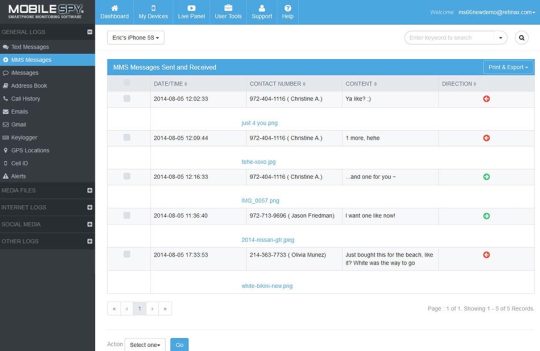
Moreover, it is also possible that while on the go on removal process you may accidentally delete some important files. But we have got you covered, with steps explaining how to uninstall Dropbox from Mac without deleting files. I hope, you have found the article useful and helpful. Thank-you!
Also Read:
Expand cloud storage on Mac
CloudMounter connects unlimited storage to Finder.
A number one cloud-based storage system today, Dropbox essentially made storing data online mainstream. This app simplifies syncing files across different devices and offers an easy way to share photos, folders, or send large files (i.e. too large for emails) to others. Although Dropbox isn’t the only cloud-based storage and syncing service for Mac, it remains extremely popular.
Even though, as a Mac user, you do already have iCloud storage and syncing service right at your fingertips, integrated with your Mac and other iOS devices, there are still reasons for you to download Dropbox for Mac.
Get Setapp for seamless storage control
No matter where you keep your precious files, Setapp apps will help you make storage management easy. A single toolkit for everything.
Dropbox makes it easy to share whatever it contains, by offering advanced features such as shared folders or the ability to copy a Dropbox link to allow someone to download a file from your folder. Besides, Dropbox is one of the more common cloud services used by third-party productivity apps that could offer you great additional features.
Despite iCloud and Dropbox both having basic cloud storage functionality, there are quite a few differences in what you can expect from each. You can’t easily share with iCloud, as its associated solely with a given Apple ID, while Dropbox lets you share folder contents with others, constantly syncing among those connected to the folder. On the other hand, don’t expect Dropbox to automatically sync your data like photos or contacts like iCloud does. You only get quick access to what you put inside your Dropbox folder.
How To Sync Dropbox On Mac Easily
While you can always access your data from the Dropbox website, in the long run, it's easier to install the Dropbox desktop app. Using the Dropbox desktop app means you won't have to manually upload or download files in your Dropbox folder and any time you make a change to a file and are connected to the internet that change will sync everywhere you have Dropbox installed. Dropbox app for Mac works even when you're offline — just like an ordinary folder.
How to install the Dropbox app for Mac?
To download Dropbox for Mac, look for the Dropbox installer on dropbox.com. Once the download of the Dropbox installer is complete, you should be able to find it (DropboxInstaller.dmg) in your Mac’s Downloads folder. Open the file to start your Dropbox download app:
Double-click on the Dropbox icon in the installer window
A warning sign will appear cautioning that Dropbox is an application you downloaded from the internet ➙ click Open to start the installation process
Once the basic installation is complete, Dropbox will ask you to sign in. If you don’t already have an existing Dropbox account, use the sign-up link near the bottom-right corner of the window and follow the online instructions to set up your Dropbox account.
If all done right, after you sign in to your Dropbox on Mac, you’ll see a congratulations message for successfully completing the installation. Well done!
Now on to your Dropbox folder. To set it up:
Click Open My Dropbox Folder button in the final installer window
Enter your Dropbox password ➙ then click OK
Dropbox will add itself to your Finder’s sidebar and deposit a Dropbox for Mac tutorial into your Dropbox folder (a Get Started with Dropbox .pdf file). Take a few moments to read through the guide — it provides a good outline for working with Dropbox.
Tips for using Dropbox on Mac
Understanding how does Dropbox work is easy. Once you install the Dropbox desktop app and set up your Dropbox account, it’ll appear on your computer as a special Dropbox folder, which will become the heart of how does Dropbox work. Anything you place inside that folder is automatically copied to the cloud and synced with your other devices that run Dropbox. Note that Dropbox might not automatically copy all the files on your computer (e.g. when you don’t have enough space) — you might have to pick and choose which ones you want to save.
Transferring files to the Dropbox folder is a matter of seconds. First Dropbox will show a blue icon with circling arrows in the lower left — this means copying the file and uploading it to the cloud. Once it’s done, the icon will turn green and display a check mark. If you wish to transfer multiple files at once:
Hold ⌘ and click on each file you want to move
Drag one of the files to move all selected ones into the Dropbox folder
What you don’t have to worry about is how to sync Dropbox. Dropbox for Mac automatically saves all data placed inside the folder across all devices. As long as you can access your account, you can download any file stored in your Dropbox folder on your local machine. For example, you can move pictures you took on your phone to Dropbox and look at them on your Mac in seconds.
One of Dropbox’s strongest features you should definitely benefit from is sharing files with colleagues and family members. To designate files for sharing:
Right-click on the item you wish to share in your Dropbox
Select the option that says “Share…” with a Dropbox icon next to it
In the text field below the question “Who do you want to share with?”, type the email addresses of the people with whom you want to share the file
Grant the permission you want, either view only or with the ability to edit the file
Once done, you’ll be able to write a message for the recipient(s) if you want to do so. You can also create a link to send to people yourself if you don’t want Dropbox to send the link by email.
Using Dropbox on Mac as pure cloud storage is popular too, as it helps you keep backup copies of important files safe and ready to restore should need be.
What is Dropbox pricing?
Dropbox is available in four pricing plans: the first three let you expand the amount of storage you have by referring others to the service. For example, the basic free version of Dropbox will give you 500 MB per referral, expanding the initial 2 GB to a possible maximum of 18 GB of free storage. A Plus plan for $9.99 per month will give you 1 TB of storage space.
More than just Dropbox app for Mac
Having been one of the best choices for cloud file storage for a long time, more and more often Dropbox isn’t the only one in the cloud services portfolio for many people. For personal and professional data storage needs, more than one service is frequently used.
Why? A combination of cloud-based storages increases your Mac’s disk space to virtually unlimited, as long as you have an active internet connection. Unfortunately, it also turns managing different cloud accounts into quite a hustle.
Use CloudMounter to keep every storage in one place
Forget the trouble of switching across your cloud storage accounts. CloudMounter enables you to access it all from one app.
Luckily, there are apps like CloudMounter that allow you to use all your storage solutions in one place. CloudMounter connects your cloud storage providers to your Mac as if they were your external drives. This lets you treat cloud data just like local files and even move documents between the different clouds.
Download Dropbox Onto Laptop
Another benefit of using CloudMounter is its latest encryption algorithm that guarantees the security of your cloud files. Plus it allows encrypting sensitive data on the cloud and doesn’t share your login info with third parties. The app works perfectly with all major cloud services and could become your ultimate cloud manager if you’re constantly dealing with several cloud services or feel there’s not enough free space on your Mac’s SSD.
Even better, you could match amazing cloud-storage opportunities with clever productivity apps. One such example that uses Dropbox to sync your work files across all devices is Unclutter.
Unclutter does wonders for those of us with busy clipboard lives: when you often have to copy several things at once and be able to paste each of them multiple times. Instead of creating temporary work folders and flood your desktop with files, opt for Unclutter’s drag-and-drop area that keeps your desktop clean and all your files, links, and notes at your fingertips.
Even more, Unclutter keeps track of everything you copy to your Mac’s clipboard even after the system was rebooted, lets you create separate lists to save particular clips for future use, has a memo assistant to remind you of things you don’t want to miss, and can have all the different files ready for you every time you open your Mac. And you’ve guessed it right, all the content is auto-synced across all your Dropbox-connected devices!
Best of all, you can find CloudMounter and Unclutter mentioned above on a free trial through Setapp, a platform of more than 150 useful Mac apps and tools that will completely overhaul the way you interact with your computer. So you decided how to use Dropbox on Mac yet?
Dropbox For Mac Os
Setapp lives on Mac and iOS. Please come back from another device.
Meantime, prepare for all the awesome things you can do with Setapp. https://loadingcharter936.tumblr.com/post/653308890228850688/aiseesoft-pdf-to-text-converter-for-mac.
Download Dropbox Onto Computer
Read on
Dropbox Download Mac Os X
Sign Up
Setapp uses cookies to personalize your experience on our website. By continuing to use this site, you agree to our cookie policy.
0 notes
Text
Windows - Disable file copy through RDP with Group Policy

In this post we'll see how we can configure the Windows Server Group Policy Management Console (GPMC) to globally disable some useful - yet potentially harmful - features that natively come with the Remote Desktop protocol, such as: Clipboard redirection, which can be used to cut/paste text and files from the remote PC to the local PC and vice-versa (thus allowing file copy/download). Drive mapping/redirection, which allows the remote user to access their local drive(s) through the remote PC (thus allowing file copy/download). COM port redirection, which can be used to make some local COM devices available to the remote PC. LPT port redirection, which can be used to make some local Line Printer Terminal devices available to the remote PC (thus allowing local printing of remote files). As we can easily see those functions can be quite powerful, since they allow the remote user to easily access remote files: this can be great when they (and/or the company they work for) have full ownership and rights to handle them in any way, yet it can also pose severe risks of unauthorized data breaches if they don't. As a matter of fact, the remote workers rarely have full ownership rights over company documents: they are often allowed to access them only from corporate-owned devices, without being authorized to copy or print them somewhere else. When such limitations are in force, preventing those users from being able to copy, download and/or print those files to their local PC could be very useful to comply with the company policies. Luckily enough, the Windows Server Group Policy Management Console (GPMC) can be configured to disallow those features for all RDP users with the following steps: Access a computer upon which the Active Directory Domain Services server role is installed. Launch Server Manager, click Tools, and then click Group Policy Management. In the Group Policy Management console, expand the following path: Forest > example.com > Domains > example.com > Group Policy Objects, where example.com is the name of the domain where the RDP client computer policies that you want to configure are located. Right click the Default Domain Policy node and select Modify to open the Group Policy Management Console (GPMC). Use the GPMC user interface to navigate through the following path: Windows Configuration > Administrative Templates > Windows Components > Remote Desktop Services > Remote Desktop Session Host > Device and Resource Redirection Access the following group policy settings and enable/disable them accordingly with your needs: Do not allow Clipboard redirection Do not allow COM port redirection Do not allow drive redirection Do not allow LPT port redirection As you can see, in order to prevent the users from using each feature you need to enable the group policy that actively blocks it, thus overriding the default value that allows it for all users.
Conclusions
That's it, at least for now: I hope that this post will help those System Administrators that are looking for a way to prevent their users from using RDP connections to copy, download and/or print company-owned documents from their local device. Read the full article
0 notes
Text
Original Post from FireEye Author: Brendan McKeague
Summary
Recently, FireEye Managed Defense detected and responded to a FIN6 intrusion at a customer within the engineering industry, which seemed out of character due to FIN6’s historical targeting of payment card data. The intent of the intrusion was initially unclear because the customer did not have or process payment card data. Fortunately, every investigation conducted by Managed Defense or Mandiant includes analysts from our FireEye Advanced Practices team who help correlate activity observed in our hundreds of investigations and voluminous threat intelligence holdings. Our team quickly linked this activity with some recent Mandiant investigations and enabled us to determine that FIN6 has expanded their criminal enterprise to deploy ransomware in an attempt to further monetize their access to compromised entities.
This blog post details the latest FIN6 tactics, techniques, and procedures (TTPs), including ties to the use of LockerGoga and Ryuk ransomware families. It also highlights how early detection and response combined with threat intelligence gives Managed Defense customers a decisive advantage in stopping intruders before their goals manifest. In this instance, Managed Defense thwarted a potentially destructive attack that could have cost our customer millions of dollars due to business disruption.
Detection and Response
Managed Defense worked in tandem with the customer’s security team to acquire relevant log data, share findings from system analysis, and answer critical investigative questions. The customer was also undergoing a penetration test, so additional scrutiny was required in order to delineate between authorized testing activity and unauthorized activity attributed to FIN6. Our customer provided valuable insight into the role and importance of affected systems in preparation for entering Rapid Response. Rapid Response is a service offering that delivers incident response support to Managed Defense customers. As with any incident response service, the primary goal is to scope of the nature of the identified malicious activity and to assist our customers with a successful eradication event to eliminate the presence of adversaries.
Managed Defense, utilizing FireEye Endpoint Security technology, detected and responded to the threat activity identified within the customer’s environment. The subsequent investigation revealed FIN6 was in the initial phase of an intrusion using stolen credentials, Cobalt Strike, Metasploit, and publicly available tools such as Adfind and 7-Zip to conduct internal reconnaissance, compress data, and aid their overall mission.
Managed Defense investigated activity on two systems initially detected as compromised by FireEye Endpoint Security, the industry leading endpoint security solution that was ranked as the most effective endpoint detection and response (EDR) solution. The activity was detected by comprehensive real time methodology signatures designed to identify the most evasive adversary techniques. Pivoting from these initial leads, analysts identified suspicious SMB connections and Windows Registry artifacts that indicated the attacker had installed malicious Windows services to execute PowerShell commands on remote systems. Windows Event Log entries revealed the user account details responsible for the service installation and provided additional IOCs (Indicators of Compromise) to assist Managed Defense in scoping the compromise and identifying other systems accessed by FIN6. Managed Defense utilized Windows Registry Shellbag entries to reconstruct FIN6’s actions on compromised systems that were consistent with lateral movement.
Attack Lifecycle
Initial Compromise, Establish Foothold, and Escalate Privileges
To initially gain access to the environment, Managed Defense analysts identified that FIN6 compromised an internet facing system. Following the compromise of this system, analysts identified FIN6 leveraged stolen credentials to move laterally within the environment using the Windows’ Remote Desktop Protocol (RDP).
Following the RDP connection to systems, FIN6 used two different techniques to establish a foothold:
First technique: FIN6 used PowerShell to execute an encoded command. The command consisted of a byte array containing a base64 encoded payload shown in Figure 1.
Figure 1: Base64 encoded command
The encoded payload was a Cobalt Strike httpsstager that was injected into the PowerShell process that ran the command. The Cobalt Strike httpsstager was configured to download a second payload from hxxps://176.126.85[.]207:443/7sJh. FireEye retrieved this resource and determined it was a shellcode payload configured to download a third payload from hxxps://176.126.85[.]207/ca. FireEye was unable to determine the final payload due to it no longer being hosted at the time of analysis.
Second technique: FIN6 also leveraged the creation of Windows services (named with a random 16-character string such as IXiCDtPbtGWnrAGQ) to execute encoded PowerShell commands. The randomly named service is a by-product of using Metasploit, which creates the 16-character service by default. The encoded command contained a Metasploit reverse HTTP shellcode payload stored in a byte-array like the first technique. The Metasploit reverse HTTP payload was configured to communicate with the command and control (C2) IP address 176.126.85[.]207 with a randomly named resource such as “/ilX9zObq6LleAF8BBdsdHwRjapd8_1Tl4Y-9Rc6hMbPXHPgVTWTtb0xfb7BpIyC1Lia31F5gCN_btvkad7aR2JF5ySRLZmTtY” over TCP port 443. This C2 URL contained shellcode that would make an HTTPS request for an additional download.
To achieve privilege escalation within the environment, FIN6 utilized a named pipe impersonation technique included within the Metasploit framework that allows for SYSTEM-level privilege escalation.
Internal Reconnaissance and Lateral Movement
FIN6 conducted internal reconnaissance with a Windows batch file leveraging Adfind to query Active Directory, then 7-zip to compress the results for exfiltration:
adfind.exe -f (objectcategory=person) > ad_users.txt adfind.exe -f objectcategory=computer > ad_computers.txt adfind.exe -f (objectcategory=organizationalUnit) > ad_ous.txt adfind.exe -subnets -f (objectCategory=subnet) > ad_subnets.txt adfind.exe -f “(objectcategory=group)” > ad_group.txt adfind.exe -gcb -sc trustdmp > ad_trustdmp.txt 7.exe a -mx3 ad.7z ad_*
The outputs of the batch file included Active Directory users, computers, organizational units, subnets, groups, and trusts. With these outputs, FIN6 was able to identify user accounts that could access additional hosts in the domain. For lateral movement, FIN6 used another set of compromised credentials with membership to additional groups in the domain to RDP to other hosts.
Maintain Presence
Within two hours of the initial detection, the systems were contained using FireEye Endpoint Security. Through containment, attacker access to the systems was denied while valuable forensic evidence remained intact for remote analysis. Due to Managed Defense’s Rapid Response and containment, FIN6 was unable to maintain presence or achieve their objective.
Through separate Mandiant Incident Response investigations, FireEye has observed FIN6 conducting intrusions to deploy either Ryuk or LockerGoga ransomware. The investigations observed FIN6 using similar tools, tactics, and procedures that were observed by FireEye Managed Defense during the earlier phases of the attack lifecycle. Mandiant observed additional indicators from the later attack lifecycle phases.
Lateral Movement
FIN6 used encoded PowerShell commands to install Cobalt Strike on compromised systems. The attacker made use of Cobalt Strike’s “psexec” lateral movement command to create a Windows service named with a random 16-character string on the target system and execute encoded PowerShell. In some cases, the encoded PowerShell commands were used to download and execute content hosted on the paste site hxxps://pastebin[.]com.
Complete Mission
FIN6 also moved laterally to servers in the environment using RDP and configured them as malware “distribution” servers. The distribution servers were used to stage the LockerGoga ransomware, additional utilities, and deployment scripts to automate installation of the ransomware. Mandiant identified a utility script named kill.bat that was run on systems in the environment. This script contained a series of anti-forensics and other commands intended to disable antivirus and destabilize the operating system. FIN6 automated the deployment of kill.bat and the LockerGoga ransomware using batch script files. FIN6 created a number of BAT files on the malware distribution servers with the naming convention xaa.bat, xab.bat, xac.bat, etc. These BAT files contained psexec commands to connect to remote systems and deploy kill.bat along with LockerGoga. FIN6 renamed the psexec service name to “mstdc” in order to masquerade as the legitimate Windows executable “msdtc.” Example strings from the deployment BAT files are shown in Figure 2. To ensure a high success rate, the attacker used compromised domain administrator credentials. Domain administrators have complete control over Windows systems in an Active Directory environment.
start copy svchost.exe \10.1.1.1c$windowstemp start psexec.exe \10.1.1.1 -u domaindomainadmin -p “password” -d -h -r mstdc -s -accepteula -nobanner c:windowstempsvchost.exe
Figure 2: Strings from deployment BAT files
Ransomware
Ryuk is a ransomware that uses a combination of public and symmetric-key cryptography to encrypt files on the host computer. LockerGoga is ransomware that uses 1024-bit RSA and 128-bit AES encryption to encrypt files and leaves ransom notes in the root directory and shared desktop directory. Additional information about Ryuk and LockerGoga is available on the FireEye Intelligence portal: 18-00015730 and 19-00002005
Attribution
FIN6 has traditionally conducted intrusions targeting payment card data from Point-of-Sale (POS) or eCommerce systems. This incident’s targeting of the engineering industry would be inconsistent with that objective. However, we have recently identified multiple targeted Ryuk and LockerGoga ransomware incidents showing ties to FIN6, through both Mandiant incident response investigations and FireEye Intelligence research into threats impacting other organizations. We have traced these intrusions back to July 2018, and they have reportedly cost victims tens of millions of dollars. As the frequency of these intrusions deploying ransomware have increased, the cadence of activity traditionally attributed to FIN6—intrusions targeting point-of-sale (POS) environments, deploying TRINITY malware and sharing other key characteristics—has declined. Given that, FIN6 may have evolved as a whole to focus on these extortive intrusions. However, based on tactical differences between these ransomware incidents and historical FIN6 activity, it is also possible that some FIN6 operators have been carrying out ransomware deployment intrusions independently of the group’s payment card breaches. Which of those scenarios is happening would influence how pressing a threat the group’s card data breach tactics continue to be. Criminal operations and relationships are highly adaptable, so we commonly encounter such attribution challenges in regards to criminal activity. Given that these intrusions have been sustained for almost a year, we expect that continued research into further intrusion attempts may enable us to more fully answer these questions regarding FIN6’s current status.
Indicators
Type
Indicator
Network
31.220.45[.]151 46.166.173[.]109 62.210.136[.]65 89.105.194[.]236 93.115.26[.]171 103.73.65[.]116 176.126.85[.]207 185.202.174[.]31 185.202.174[.]41 185.202.174[.]44 185.202.174[.]80 185.202.174[.]84 185.202.174[.]91 185.222.211[.]98
hxxps://176.126.85[.]207:443/7sJh hxxps://176.126.85[.]207/ca hxxps://176.126.85[.]207:443/ilX9zObq6LleAF8BBdsdHwRjapd8_1Tl4Y-9Rc6hMbPXHPgVTWTtb0xfb7BpIyC1Lia31F5gCN_btvkad7aR2JF5ySRLZmTtY hxxps://pastebin[.]com/raw/0v6RiYEY hxxps://pastebin[.]com/raw/YAm4QnE7 hxxps://pastebin[.]com/raw/p5U9siCD hxxps://pastebin[.]com/raw/BKVLHWa0 hxxps://pastebin[.]com/raw/HPpvY00Q hxxps://pastebin[.]com/raw/L4LQQfXE hxxps://pastebin[.]com/raw/YAm4QnE7 hxxps://pastebin[.]com/raw/p5U9siCD hxxps://pastebin[.]com/raw/tDAbbY52 hxxps://pastebin[.]com/raw/u9yYjTr7 hxxps://pastebin[.]com/raw/wrehJuGp hxxps://pastebin[.]com/raw/tDAbbY52 hxxps://pastebin[.]com/raw/wrehJuGp hxxps://pastebin[.]com/raw/Bber9jae
Host
031dd207c8276bcc5b41825f0a3e31b0 0f9931210bde86753d0f4a9abc5611fd 12597de0e709e44442418e89721b9140 32ea267296c8694c0b5f5baeacf34b0e 395d52f738eb75852fe501df13231c8d 39b7c130f1a02665fd72d65f4f9cb634 3c5575ce80e0847360cd2306c64b51a0 46d781620afc536afa25381504059612 4ec86a35f6982e6545b771376a6f65bb 73e7ddd6b49cdaa982ea8cb578f3af15 8452d52034d3b2cb612dbc59ed609163 8c099a15a19b6e5b29a3794abf8a5878 9d3fdb1e370c0ee6315b4625ecf2ac55 d2f9335a305440d91702c803b6d046b6 34187a34d0a3c5d63016c26346371b54
ad_users.txt ad_trustdmp.txt ad_subnets.txt ad_ous.txt ad_group.txt ad_computers.txt
7.exe Kill.bat Svchost.exe Mstdc.exe
Detecting the Techniques
The following table contains several specific detection names, including methodology detections for several tools and techniques that applied to the initial infection activity as well as additional detection names for the ransomware used by FIN6.
Platform
Signature Name
Endpoint Security
METASPLOIT A (METHODOLOGY) SUSPICIOUS POWERSHELL USAGE (METHODOLOGY) BEACON A (FAMILY) SYSNATIVE ALIAS RUNDLL32.EXE (METHODOLOGY)
FE_Ransomware_Win64_Ryuk_1 FE_Ransomware_Win_LOCKERGOGA_1 FE_Ransomware_Win_LOCKERGOGA_2 FE_Ransomware_Win32_LOCKERGOGA_1 FE_Ransomware_Win32_LOCKERGOGA_2 FE_Ransomware_Win64_LOCKERGOGA_1
#gallery-0-5 { margin: auto; } #gallery-0-5 .gallery-item { float: left; margin-top: 10px; text-align: center; width: 33%; } #gallery-0-5 img { border: 2px solid #cfcfcf; } #gallery-0-5 .gallery-caption { margin-left: 0; } /* see gallery_shortcode() in wp-includes/media.php */
Go to Source Author: Brendan McKeague Pick-Six: Intercepting a FIN6 Intrusion, an Actor Recently Tied to Ryuk and LockerGoga Ransomware Original Post from FireEye Author: Brendan McKeague Summary Recently, FireEye Managed Defense detected and responded to a FIN6…
0 notes
Text
Router Security
Eraser has an excellent post up about router security. While this is one of those pieces of hardware most home-users set and forget, it’s important to note that this is usually the largest, most glaringly bad hole in your home internet defense.
There is no anti-virus software for routers. No matter how secure your mobile devices, desktop computers or other electronic devices might be, having an unsecured router still makes you susceptible to malicious attacks.
A router is an interface between the internet and all your computing devices. It can hence be thought of as an interpreter. If the interpreter itself is malicious, then one can only imagine the things that can go wrong.
Router Security is a less-talked-about topic but is as important as installing anti-virus software on your computer. A hacked router can let a malicious person:
• Hijack your DNS, • Cause a denial of service attack, • Download malicious copies of software, • Spy on your activities, • Slow down your internet connection, • Hack files that are being transferred, and • Ultimately access the computers connected via the LAN of the router.
There are many side effects of neglecting router security. It is hence crucial for every internet user to do the right thing by making router security an important concern and by applying whatever methods possible, to ensure privacy and online security.
Since it is now established that router security is essential for every internet user, let us go into the details of how you can ensure it.
Step 1: Picking the right Router
You cannot secure a router if it is not appropriately chosen. Picking the right kind of router is the first step you can take towards router security.
Most people tend to use the router provided by their Internet Service Provider (ISP). The only advantage of doing this is the fact that you can call your ISP for any issue that arises in your internet connection. The downsides to using it, however, are many:
• Devices shipped by ISPs are incompetent in their initial configuration and maintenance. A device installed with a default password is certainly not the right option for you • Some ISPs can spy on your data for their own use or by co-operating with spy agencies and governments. • Some ISPs do not allow you to update the firmware or change DNS servers of the router • ISPs generally provide a single router; hence you will have no emergency backup in case of failures • A common type of router, provided by an ISP to millions of customers is an easy target for malicious users
A consumer router is a better alternative to ISP provided routers but is still not the best option. The most secure option to choose is hence a commercial router meant for small businesses.
When choosing a router, think of the long-term benefits that you obtain by using it. While the upfront cost of the router might seem like a huge investment, it is still a better option than compromising your security.
A router can only get as secure as the features it offers. It is not recommended to buy used routers as the software might have been modified maliciously. When choosing the correct router, consider the inclusion of these security features:
WPS
WPS (Wi-Fi Protected Setup) is not as good as it sounds. It is easy to use and easy to bypass feature that allows malicious users to enter an eight-digit PIN to access the router. The PIN is printed on the router itself. Once someone gets access to your PIN, you can change the network password or network name, but the validity of the PIN still remains intact.
Therefore, anyone who gets access to the PIN printed at the base of your router can access your router forever.
If a router uses WPS, it is not good enough. Check if WPS can be turned off. Proceed only if WPS is absent or can be disabled in your router.
WPA2
WPA2 encryption is good. However, one must consider some other points when looking for a secure router. Keep the following points in mind:
• Verify if your router offers WPA2 exclusively and not the combination of WPA2 and WPA • A router that uses AES or CCMP is also as secure as the one that uses WPA2 encryption • Ensure that your router does not use TKIP • Look out for routers that offer WPA2 Enterprise support. This usually means that the router allows every Wi-Fi user to set their own user id and password. A RADIUS server is required to handle these user ids/passwords. This option might be a high bar for most people, but it is the best encryption mechanism possible
Local administrative access
Another aspect of determining the security of a router is its local administrative access mechanisms. A secure router must:
• Limit access based on LAN IP address or by Mac Addresses • Limit the number of logons and allow only a single computer to log into it at once • Lockout after repeated failed login attempts • Create audit logs for every login attempt • Timeout and allow you to set a timeout period • Restrict access based on the SSID • Allow you to log out
Remote administrative access
Remote administrative access in your router should be off by default. A secure router must:
• Limit remote administrative access to HTTPS • Allow you to change the port number • Allow you to restrict access on the basis of the source IP address or source network • Timeout the running session after a certain timeout time
Default passwords
Be wary of routers that employ default passwords. Default passwords can look random, but follow a specific formula to be created. Once someone understands this formula, the rest is easy.
Check if the router forces you to provide a new non-default password for logging into the router. Additionally, check if the router forces you to provide non-default passwords for each new Wi-Fi network. Choose the router only if the two conditions are met.
Wi-Fi
A secure router must allow the options to:
• Schedule turning off the Wi-Fi at night and turning it back on in the morning • Use the Wi-Fi ON/OFF button
The bottom line is that the router should make it easier to disable a Wi-Fi connection when it is not required.
Monitoring Attached Devices
Another feature of a good router is the ability to monitor the devices connected to it. A good router:
• Lists all the attached devices • Allows you to list both DHCP assigned devices and devices with static IPs • Allows you to list devices by grouping it on the basis of the Wi-Fi network • Allows you to monitor the bandwidth usage of each device
Firewall
A good router’s firewall should:
• Close all ports on the WAN/Internet side • Allow you to create outgoing firewall rules
Listed below are other good to have features which can help you make the right choice.
• Factory Reset Look out for a router that allows you to factory reset it and erase all personal data from it. • Logging A good router logs unsolicited incoming connections, failed login attempts, internet accesses and changes made to the configuration. • Firmware Another parameter that can help you determine the right router for you is its ability to make firmware updates. • HNAP (Home Network Administration Protocol) The HNAP has been the baseline for many router flaws. A secure router does not support HNAP. • Port Forwarding Make sure that your router limits port forwarding by IP address. It is better if your router allows you to schedule port forwarding. • Router Admin Password The router admin password should not be too short and must allow the maximum password length to be at least 17 characters. A router should also defend itself against brute force password guessing.
Step 2: Configuring the router securely
Once you select the right router of your choice, it is time to configure the router as securely as possible. The below mentioned short list of configuration tricks can do wonders for the security of your router:
Change the default password of your router. Make sure that you do not use a dictionary word. Incorporate some numbers and special characters in your password. Also make sure that the password is not something as menial as the name of something you love, or the name of your hometown.
Ensure that the encryption mechanism used is WPA2 with AES. The password of your Wi-Fi network should be at least 16 characters long. Again, make sure to set a password that is not easy to guess.
Turn off UPnP (Universal Plug and Play). While UPnP was initially designed to be used on a LAN, some routers implement it on the Internet too. There have been security issues with routers in the past because of UPnP, hence turning it off is the best way to ensure that your router is secure.
Choose a sensible SSID (Service Set Identifier). Using a default SSID makes it easier for malicious users to crack the WPA2 encryption. Choose a network name that does not give away your personal information.
Turn off WPS. It is actually better to choose a router that does not support WPS at all. If it does have WPS encryption, make sure to run it off.
Turn off Remote administration.
Check for new firmware occasionally. If your router does not release new versions of firmware, it might be the right time to switch to a new router.
Use a Guest Network. Use a password protected Guest Network for guests and also for IoT devices.
Test your router. Use available online testers to test the port information of your router.
The steps mentioned above are just the basic things you can do to ensure that nobody accesses your router or installs malicious software in it. If you are actually a freak for security, there are a number of other methods that you can employ to make your home router a fortress that can guard the electronic devices that connect to the web through it. Choose and implement anything from the list below:
Change the user id of the router. That is if your router lets you.
Change the default DNS servers that your router provides you. ISP-assigned DNS servers are usually the worst when it comes to security. It is better to use the DNS of a company that specializes in it.
Turn off unused features. This is a good way to reduce the attack surface. The features that are better turned off are remote administration, web access from WAN, Telnet, SNMP, NAT-PMP and Remote GUI.
Change the router’s LAN IP address. It is better to change the subset of the LAN side as a whole. Doing this prevents router attacks.
Lock down the access to the router from the LAN side.
Turn off Ping reply. Test this implementation by having someone outside your network ping your public IP address.
Block the ports used by Windows file sharing. It is also a good idea to prevent network printers from making outbound connections.
Disable the analytics on your router. You would not want your router company spying on you, so it is better to turn off the analytics feature in your router’s firmware releases.
Use a clean web browser session to administer routers with a web interface. Start the browser, work on the web interface of the router, and shut down the browser after you are done with the administrative activities. The better option would be to use a private browsing mode.
Always backup your configurations. If you have to reset the router at some time, you can restore the last backed up state of the router.
Step 3: Ongoing care for the router
After initially configuring the router, it is also essential to monitor for your router configurations regularly. There are a number of methods that can be adopted to ensure that your router’s security has not been compromised.
Updating the router Check if your router self-updates regularly or not. Check for the availability of new firmware updates every month. If your router has the self-updating feature, make sure that the system is actually working as expected and if the new updates are actually worth using. There can be major security loopholes in some security updates. It might be a good option to revert the updates in such cases.
Rebooting the router When a router gets infected with malware, the infection is sometimes very difficult to get rid of. However, most infections are temporary and simply rebooting the router can help you get rid of the infection. Make sure that you reboot your router every week or every month, in order to remove such kind of malware on a regular basis.
Checking the list of attached devices Every router has the functionality of displaying the attached devices. Make sure that you check this list now and then and validate the list against the number of devices that your network actually uses. Some routers also offer the capability of assigning names to these devices.
Checking the status of DNS servers A common attack against routers is maliciously changing the DNS servers. It is hence important to continuously check and ensure that your DNS servers have not changed. You can configure a DNS server on your own computer. Doing this ignores the DNS configuration present in the router. This is especially useful when you use public Wi-Fi networks. However, some routers override the DNS configuration of the computer and force the computer/laptop to use its own configuration. Hence, it is important to know the kind of router you possess and periodically check the DNS server configuration of your devices.
Checking the logs of the router If your router offers logging facilities, it is recommended that you continuously check the logs for unsolicited incoming connections, failed login attempts, internet accesses and changes made to the configuration.
All in all, router security is not limited to buying a good router and configuring it one-time. New router threats are emerging every day and are posing serious threats to personal privacy and security. It is essential to keep yourself updated with router flaws, and periodically check your router security parameters to avoid compromising your personal information.
#Eraser#Router#Router security#IoT#Home Internet Security#Gateway#Home Internet#Internet#Cyber security#Cybersecurity
0 notes
Photo
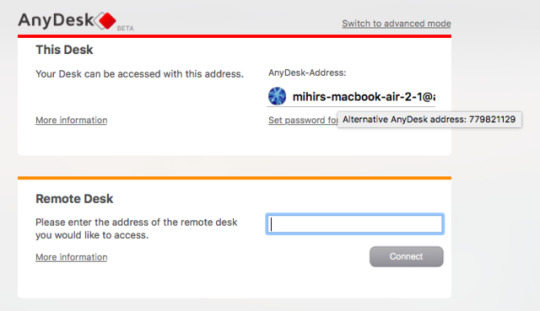
https://jpkee.com/pc-mobile/12-excellent-free-screen-sharing-remote-access-tools-you-havent-heard-of-yet/
12 Excellent, Free Screen Sharing & Remote Access Tools You Haven’t Heard Of Yet
Advertisement
Are you constantly being asked for computer help? Or perhaps you’re the one doing the asking. Either way, seeing and controlling screens remotely can save time and confusion on both ends.
Remote access programs aren’t just for helping someone or being helped with a computer problem, they can also be very beneficial in assisting in holding meetings over the computer without actually meeting in person.
We at MakeUseOf have covered article after article about remote access and screen sharing applications, but I’m going to consolidate some of the potentially less common ones that you may not have heard of. We have all likely heard of the popular programs in the game: TeamViewer Provide Remote Assistance And Host Meetings Using TeamViewer 7 Provide Remote Assistance And Host Meetings Using TeamViewer 7 As the internet becomes more evolved, more tools pop up to help each other out and spread information. There are quite a few products out there that make long distance presentations easy, while others can… Read More and LogMeIn Join.me: The Simplest Way to Have a Web Conference Call Between Computers & Mobile Devices Join.me: The Simplest Way to Have a Web Conference Call Between Computers & Mobile Devices Your friend has called. They have a problem with their computer and are asking for your expertise. You want to help, but everything would be so much easier if you could see what’s on the… Read More . But perhaps it’s time to consider some equally solid contenders.
AnyDesk is perhaps the easiest remote desktop access tool 4 Effortless Screen Sharing Tools You Can Use Anytime 4 Effortless Screen Sharing Tools You Can Use Anytime Sharing your screen with your family or colleague can be painless. Use these four free screen-sharing tools to share your screen as quickly as possible without complicated installations. Read More for anyone in the world. It supports all of the major platforms, i.e. Windows, Mac, Linux, FreeBSD, Android, and iOS. And it’s the closest thing you will get to plug-and-play simplicity.
Features Within AnyDesk
The free version of AnyDesk offers all the goodies that any average joe would want. Obviously, you can remotely access the other person’s computer and see their screen. The address or namespace is usually confusing gibberish though. Here’s a pro tip: Hover the mouse cursor over your address to see an alternative 9-digit AnyDesk address number.
Positives
Connecting two devices via AnyDesk is dead easy. It supports audio and video transmission too, so you can talk as you help. The free version also lets you transfer files between the two devices, making it easy to access anything, anywhere.
Negatives
The free account supports only a 1:1 connection, which means only two devices at a time. The AnyDesk premium paid plans let you increase this capacity.
LiteManager is the most powerful of these free remote access tools. At the same time, it’s not a simple and easy interface. But when you get to control 30 PCs at any time, that’s a good enough compromise.
Features Within LiteManager
LiteManager has two different programs to install, on the server side and the viewer side. The viewer can access up to 30 PCs in the free version, and even more with the paid version. This makes LiteManager ideal for IT managers of small teams.
It supports Windows, macOS, Android, and iOS. Linux users can run the program with Wine How to Run Windows Apps & Games with Linux Wine How to Run Windows Apps & Games with Linux Wine Is there any way to get Windows software working on Linux? One answer is to use Wine, but while it can be very useful, it probably should only be your last resort. Here’s why. Read More . LiteManager also has a QuickSupport mode for no-installation connections. This mode is ideal for anyone who needs help and doesn’t have LiteManager already installed. The main program is better for system administrators.
Positives
No other free remote desktop tool supports so many PCs at a time. This makes LiteManager unique and a fantastic tool for a system administrator. Plus, it has almost every feature you can think of, like file transfers, drag-and-drop simplicity, event logs, and more.
Negatives
For admins, the only thing lacking in the free version is ticketing and a screen recorder. Those features are available with the paid version of LiteManager, but then again, there are better apps if you’re willing to pay.
Remote Utilities is a popular tool for remote access and screen sharing 7 Easy Screen-Sharing and Remote-Access Tools 7 Easy Screen-Sharing and Remote-Access Tools We show you 7 free tools that let you share a screen over the internet or gain remote access to a computer to troubleshoot technical issues. Read More . It’s quite powerful, bypassing firewalls and NAT devices. And it connects to many computers simultaneously. But it supports only Windows computers, while mobile apps only let you act as viewer.
Features Within Remote Utilities
Install the Remote Utilities “Host” program on the computers you want to access. Install the “Viewer” program on your PC. Connect the two via the IP address and you’re done. It couldn’t be simpler.
You can multi-task and control up to 10 PCs with the free version, and more if you’re willing to pay. In fact, that’s the only difference between free and paid versions of Remote Utilities—how many PCs you can control at a time. So if 10 is enough for you, you get all the features of a premium program for free.
Quick note, you’ll need to register and get a free license to run the program.
Positives
There are some excellent features in the free version of Remote Utilities that other programs offer in their paid versions only. For example, you get Address Book syncing, which is invaluable in a small office.
And it features unattended access, which means you can remotely manage a PC even when the owner isn’t at the workstation.
Negatives
How I wish Remote Utilities was available across more platforms, but it’s Windows only. That is really the only negative of this program.
vimeo
Mikogo is another application which does both remote access and screen sharing. It supports Windows, Mac and Linux and is an excellent program for working in teams.
Features
Not only does it do the basics such as chat and file transfer, but it also allows you to decide which applications are seen by the viewers when you’re presenting. There’s a whiteboard to create drawings and text, the interface is very intuitive and there’s an option to record.
Another thing I liked are the speech bubbles (which can be easily disabled) to help remind you of what all the features can do – they’re just nice to fall back on while still learning the program. I also like that while you are using the program, you can see in a small screen in the window what is being displayed on the other person’s screen.
Positives
Lots of great helpful features and multi-person connection makes it great for teams. No time restriction.
Negatives
Code in program cannot be copied and pasted, nor can the window be resized. Also note that each time the icon for the program is clicked a new window is created. I had to manually close out each one in the system tray.
Bottom Line
Like previously stated, Mikogo is great for groups of people, but it also can be used as a one-on-one tool. Although, it may be a little overkill to use to just help someone with their computer.
ShowMyPC is focused on screen sharing. With a fairly simple user interface and Windows, Mac and Linux compatibility, it makes a solid choice if all you’re looking for is to share your screen.
Features
In the free version the features include the ability to take and share screenshots, Android phone support, limited chat room whiteboard, limited application sharing, file transfer (no folder transfer), schedule meetings, one-hour password length, one-hour session duration and limited participants per meeting, which varies based on network traffic.
Positives
No installation – simply launch the application and run it.
Negatives
Be prepared for a popup window promoting premium services once the session is ended.
Bottom Line
ShowMyPC is certainly not my favorite. Its website isn’t the easiest to navigate around and it took me a while to find the “free” link – you can tell it’s not heavily promoted. That said, the interface of the program isn’t all that bad and makes it fairly easy to use and understand. Out of 5 stars I would give ShowMyPC a 3.5 star rating.
MingleView is a Windows based screen sharing program which is completely free and has no premium package upgrade. This means you won’t be bothered by popups when ending the session. It also has no installation process and can simply be downloaded and ran by clicking “Share” and then allowing it to download to your computer.
Feature-wise MingleView stands out quite nicely. As you can see in the list above, it allows unlimited participants and meeting hosting. Plus, you don’t need to register or sign up like many of the services here.
It claims to have the highest screen quality offered. The user interface is simple – a little too simple actually – and it is easy to figure out what to do, with only a few buttons. The peer to peer connection is secure and built over SSL. In addition, there’s no port forwarding or special firewall configuration that is required.
Positives
MingleView is fast, easy to use and any platform can view another desktop through the web-based platform.
Negatives
The downloadable file is Windows only.
Bottom Line
MingleView isn’t a bad alternative to some of the others, but I wouldn’t say it’s the best. I know some may say it’s not about interface, it’s about the features. But in my mind, the interface is a feature and MingleView just doesn’t seem to offer a very intuitive or clean-looking interface.
That said, the fact that it has the features that it has and is free is impressive and is certainly the one to go with if you are planning to host a large viewing party, just make sure you have Windows. Out of 5 stars I would give MingleView a 3 star rating.
ScreenLeap is completely web-based too and also only does screen sharing. However, I would have to say that out of all the web-based interfaces, ScreenLeap looks and works the nicest. It’s also easy to use – simply click the big large button that says “Share your screen now” and you’re good to go.
Features
Although, there aren’t many real features with ScreenLeap, its simplicity and excellent functionality should not be disregarded. But the main feature that it has is its ability to share the session several ways. There’s a link to copy and paste into any form of communication from IM to email to Facebook message. Or there is a code which you can copy or read off to the people you’re connecting with. You can also type in the email address or phone number that you wish to send the code to.
Positive
Very simple and straightforward. There are many ways to share the session invite depending on the person’s comfort level with different forms of technology. You also have the option to share different windows or the entire screen.
Also, no account or registration is needed, at all.
Negative
There really isn’t much negative with ScreenLeap when you consider that it isn’t a mainstream application, but a simple website. Although it’s, low featured, you can’t compare it to the Mikogo’s of the group.
Bottom Line
You might be thinking right now, that ScreenLeap blows MingleView out of the water, and you’re right. It does. It’s simple, it’s quick and it’s useful at what it does. I highly recommend it for simply sharing your screen and would give it a 4.5 out of 5 star rating.
SkyFex is an online remote access service. That means it too doesn’t require a download since it’s entirely browser-based. This also means that it’s accessible on all platforms, making it a nice choice for those who are looking for a easy tool to use to help clients or even just friends.
That said, SkyFex has a great commercial presence as it allows companies to customize the interface with their logo, color style and custom links, as well as being able to display a link to remote sessions right on the company’s website. This builds customer loyalty and just looks more professional – of course this isn’t free though.
Features
Aside for the non-free customization features, the web application itself is quite nice. First though, let’s start with the appearance of the account from the “Expert’s” point of view. The page is clean and simple. There is the option to add additional computers to be associated with the account. There are also several ways to connect with the client, either by ID, sending the link directly to the client or by email invitation.
While the session is running you have access to several tools such as system information, remote control, sending files, remote reboot, sharing your desktop, chat, and full screen mode. It’s also neat that when your right click, a message bubble will show where you are pointing to.
Positives
SkyFex has some great features within its free model. From remote control to seeing system info, you are surely to be satisfied with it.
Negatives
I didn’t think I would have said this at first, but there are some negatives with SkyFex. For one, you are only given a 30 minute window of time per session. To my knowledge though, you can start a new session with that same user after that and there shouldn’t be any issues.
Also, I found it puzzling that it required a browser plugin to be installed on the client’s end when the link was clicked. This might throw some users off if they aren’t aware of what a plugin is and even though it states that it’s adware/spyware free, they might still be a little suspicious. I know the person whom I tested this with was caught off guard by it, as many websites may claim to be malware free, but that doesn’t mean they are. Hopefully they trust your better judgment.
Bottom Line
Overall, SkyFex seems like an excellent tool. It has all the features you need, and hopefully it doesn’t take you more than 30 minutes to solve the issue, but it’s not a problem if it does (because we all know that rarely happens). One great advantage that SkyFex has over a local program is that you can access this anywhere simply by signing in. There’s no need to spend time downloading and installing a program if you are at a public computer trying to help someone. I give SkyFex a 4.5 out of 5 star rating.
Yugma SE For Skype is a screen sharing and conferencing application. It is especially great for teams and business professionals who want to have a meeting, but don’t have the time or luxury to do it in person. And because Skype is so common for most people to have, why not integrate with it and make everyone’s job easier?
Features
The Skype integration allows you as the presenter to import the contacts, allowing you to easily invite people right from the list.
There is a vast amount of features from being able to switch presenters, have a telephone conference via Skype, schedule meetings and use annotation and whiteboard tools. But that’s just the tip of the iceberg so check out the list below for the rest of the features.
It is important to note that Yugma SE For Skype only works for Windows and Mac, although Linux users can still participate in the meeting, they just can’t host it with the downloaded program.
Lastly, an amazing feature is that you can have up to 20 participants in one meeting at a time.
Positives
Well so far, I’ve listed all the positives of Yugma, so there really isn’t much more to share. The annotation is an excellent feature, and one of the highlights. It is a solid program with an easy to use interface that is not only intuitive, but productive as well and that is very important in a professional setting. The entire website as a whole is easy to navigate.
Negatives
Unfortunately, there are some. And not being fully compatible with Linux is the biggest one. The other negative is that the meeting has a time limit of 30 minutes and that is when the program is started. So hopefully everyone joins fairly quickly to get things taken care of.
Bottom Line
Yugma SE For Skype is a great addition to Skype and since most people already have the program, it makes coordinating with them a breeze. However, they do not need to have Skype open to participate in the meeting, but simply need to add their Skype email to the Email ID field. I give Yugma SE For Skype a 4 out of 5 star rating.
Three Other ToolsWorth Mentioning
There is a lot on MakeUseOf about Virtual Network Computing (VNC) and I’m going to contribute even more to it. TightVNC Is TightVNC Really More Tight Than Other VNC Clients? Is TightVNC Really More Tight Than Other VNC Clients? When it comes to remotely connecting to a desktop PC or a server, most people quickly opt for installing a VNC server. It’s fast, easy to configure, and best of all it’s absolutely free. Once… Read More and UltraVNC, both of which have been mentioned on MakeUseOf are excellent free options for remote access via VNC. Both of these programs allow you to log into a computer, including yours at home while you’re away, and completely control the desktop.
The Google Chrome browser now comes with its own free extension for remote desktop access. It works on Windows, Mac, and Linux, and there are mobile apps for iOS and Android. It’s easy to set up and use from anywhere, and works nicely even on mobile data. Check out our full guide to control your PC with Chrome Remote Desktop Control Your PC From Anywhere Using Chrome Remote Desktop Control Your PC From Anywhere Using Chrome Remote Desktop Need to remotely control your PC from another device? Struggling with RDP, or services like LogMeIn? Well, we have the solution: Google Chrome! Let’s find out how to remote control a PC with Chrome. Read More .
What About Linux?
It seems like several programs don’t completely work with Linux (although UltraVNC does), so I’ve provided a few links from past MakeUseOf articles on this topic:
Which One Would You Pick?
There are certainly pros and cons of each service, but I feel that overall ScreenLeap, SkyFlex, Mikogo and CrossLoop are the best and shouldn’t be ignored.
What are your favorites in the list? Do you use them for remote support or face to face meetings?
Signal Desktop Brings Secure Messaging to Your PC3 Email Pranks for Messing With Your Friends
!function(f,b,e,v,n,t,s)if(f.fbq)return;n=f.fbq=function()n.callMethod? n.callMethod.apply(n,arguments):n.queue.push(arguments);if(!f._fbq)f._fbq=n; n.push=n;n.loaded=!0;n.version='2.0';n.queue=[];t=b.createElement(e);t.async=!0; t.src=v;s=b.getElementsByTagName(e)[0];s.parentNode.insertBefore(t,s)(window, document,'script','https://connect.facebook.net/en_US/fbevents.js');
fbq('init', '1039155796172671'); fbq('track', "PageView");
Source link
0 notes