#how to make stickers with Cricut
Explore tagged Tumblr posts
Visit Tumblr Blog
Explore Tumblr blogs with no restrictions, modern design and the best experience.
Last Seen Tumblr Blogs


Fun Fact
69% of Tumblr users are millennials.
Text
How to Make Stickers With Cricut? (Complete Guide)
Cricut is a brand that offers versatile crafting machines, enabling professionals and hobbyists to create stunning DIY projects. Creating with Cricut has become a passionate pursuit for many. Therefore, beginners are also starting to craft their own projects using the Cricut machine. In this blog, we’ll guide you through the learning process of operating the crafting machine, starting with one of the most demanding requests for beginners: how to make stickers with Cricut. So, without further ado, let’s dive into this and start crafting!
Essential Tools and Materials for Making Cricut Stickers
Before you start making stickers with your machine, gather the following tools and accessories to ensure a smooth crafting process and get high-quality results.
Cricut Machine
Printer
Cutting Mat
Printable Sticker Paper
Printable Clear Sticker Paper
A4 Printable Vinyl Sheets
Cricut Design Space (Windows, Mac, Android, or iOS)
How to Make Stickers With Cricut? [6 Simple Steps]
Here are the basic steps for creating custom stickers with your crafting machine, which cover everything from setting up your design to printing, cutting, and peeling your stickers for use on different surfaces.
Step 1: Setup Your Design in Cricut Design Space
First, open the Cricut Design Space app on your device and create a new canvas. (Uploading a design can simplify the process for beginners.)
Second, create your sticker designs and flatten any multi-layered elements. This ensures your machine treats them as a single printable image. Then, you’re ready to print and cut.
Third, create a template and put a 6.75 x 9.25-inch square from the shapes library onto that template.
Once you arrange this much, remove the square from the canvas.
Next, select all the images on the sheet and group them. This step ensures their positions are locked, preparing them for printing and cutting.
Step 2: Prepare Your Design for Print Then Cut
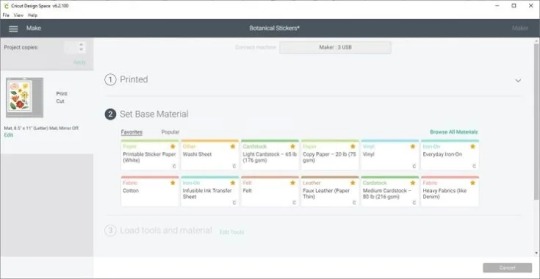
Click on “Make It.” Your designs will appear inside a lined box, which acts as a guide for the Cricut’s cutting sensors. (Note: the sensors on your machine will print and read this black box, helping it know precisely where to make those important cuts.)
Next, select “usual” as your machine cutting type, then click “Print.”
On the next print screen, you’ll see the option to add or remove bleed. (Choosing this will create a margin around your sticker designs.)
Also, you can adjust the print settings for optimal quality by selecting the “Use System Dialogue” option.
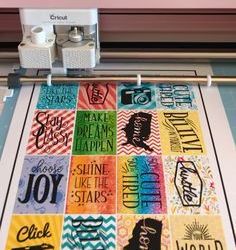
Step 3: Print Your Sticker Sheet
Load your printer with the correct printable material, ensuring it is positioned face up or face down as per your printer’s specifications for optimal print quality and accurate design alignment.
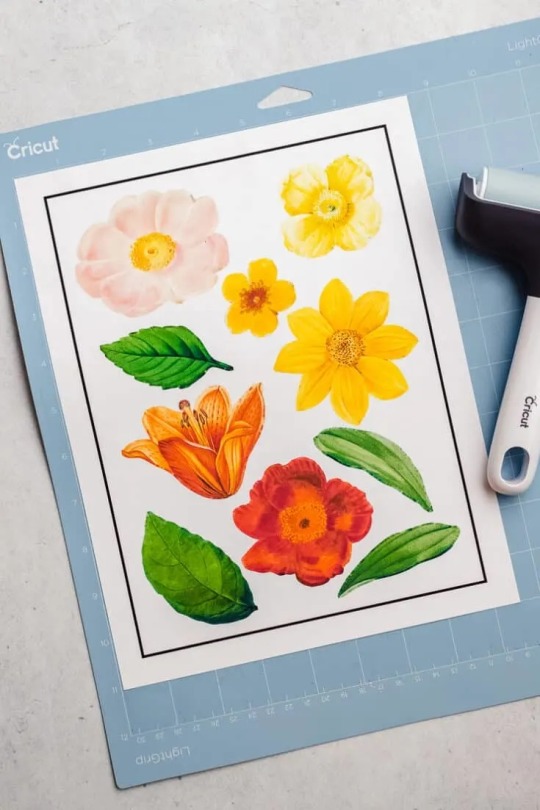
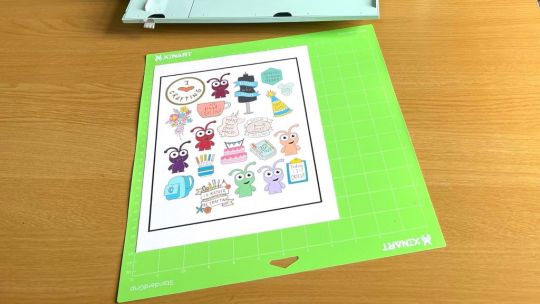
Step 4: Place the Printed Sheet on Mat
After the sheet is printed, place it onto a LightGrip cutting mat, aligning it with the top-left corner.
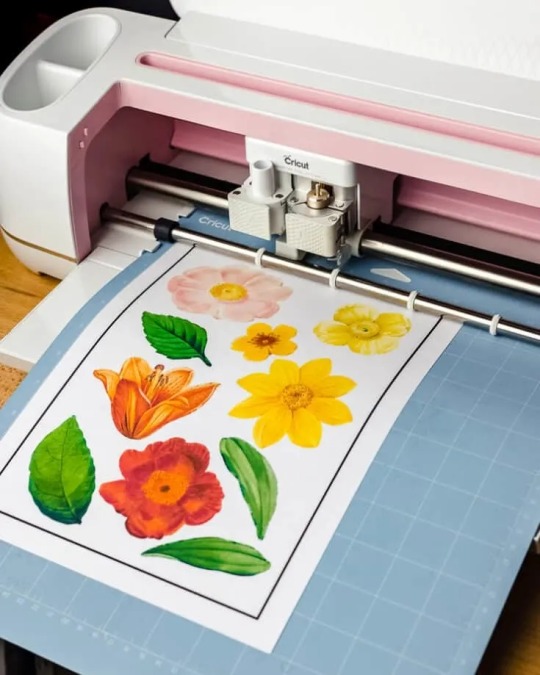
Step 5: Cut Your Stickers With Cricut
Now, select the material you want to cut. In this step, you’ll set your machine to cut for a sticker, not always cutting all the way through.
Pro Tip: If the machine fails to detect the lines, try placing it in a darker area or shining a flashlight on the sensor lines while it reads them.
Once the machine successfully reads the sensor lines, it will automatically start cutting the stickers with precision, which ensures your designs are perfectly shaped and ready for use.
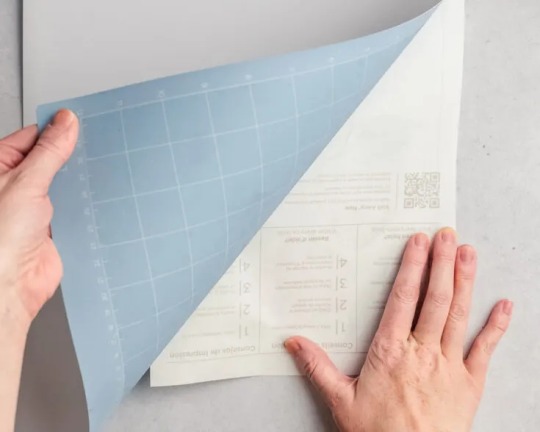
Step 6: Peel and Use Your Custom Stickers

Once the sticker is cut, the only thing left to do is carefully peel it off from the backing and stick it onto your desired surface, adding a personal touch to your projects or belongings.
Conclusion
The Cricut machine is a versatile device that enables you to create impressive crafts like stickers. This guide provided a step-by-step method on how to create stickers with Cricut. In the end, we hope you find this guide helpful and informative on how to make stickers with Cricut. However, if you encounter any trouble while creating a sticker, you are welcome to contact us for expert assistance with your issue.
Frequently Asked Questions (FAQs)
What Cricut Machines are Compatible with Create Sticker feature?
Making stickers is slightly more advanced than regular cutting because it uses the ‘Print Then Cut‘ feature. This means you’ll need a Cricut machine that supports print-then-cut, such as the Joy Xtra, Explore series, Maker series, and Venture. However, Cricut Joy is not compatible with sticker creation.
Is a Cricut Access plan necessary to use the Create Sticker feature?
You can preview the feature on Canvas and Mat Preview. However, a Cricut Access subscription is always required for cutting. If you lack Cricut Access, you can begin the free trial today and explore all the Cricut machine features.
Is Cricut Machine Good for making Stickers?
Yes, Cricut machines are great for creating custom stickers. They give precise cuts and handle different materials, including vinyl, printable paper, and sticker sheets. The Design Space app allows you to make designs and cut stickers accurately.
Source: How to Make Stickers With Cricut
#how to make stickers with Cricut#cricut design space app#cricut design space software#Cricut Setup#Cricut machine setup
0 notes
Text
How to Make Stickers With Cricut? (Easy Guide)
Everyone likes stickers, and it does not matter if you are a child or a grown-up. You do not need a printer to make stickers. Making stickers with Cricut is easy, but you need a basic understanding of the designs, supplies, and ‘how to make stickers with Cricut‘.
Stickers may seem like a normal sheet of paper, but they’re a great way to personalize and decorate your gifts. Whether you are a Cricut user, run a small business, or work on your planner or any other DIY project, you can tap into the fun and creative side of Cricut. Whether you are a craft expert or a beginner, with a machine and Cricut Design Space, you can make any kind of sticker in any shape, color, and size you can imagine.
There are three general types of stickers you can create with Cricut: vinyl decals, Print Then Cut stickers, and written labels. In this blog, you will learn how to make Print Then Cutstickers.
Materials You Need for Print Then Cut Stickers
These are the main tools and supplies you need to create custom stickers with your crafting machine.
Cricut Explore 3, Explore Air 2, and Maker or Maker 3
Cricut Design Space
LightGrip cutting mat
Inkjet printer
Finally, you know the basic materials for creating stickers. Now, let’s start learning the complete procedure to make stickers using the Print Then Cut feature.
How to Make Stickers With Cricut: Simple Steps
Here are some quick and easy steps to make unique and beautiful stickers with your crafting machine:
If you have never printed anything with your machine, you should first calibrate it. It is necessary; otherwise, your stickers will not be properly cut.
In Design Space, choose the Calibrate option from the main menu. Then, it will show you three options. Choose the Print Then Cut option.
After that, you can design your sticker using the Cricut Design Space software or choose a pre-design sticker that Cricut members upload. Or you can upload your SVG file.
Now, select the Offset feature once you have uploaded or chosen your sticker design from the app library. You can change the offset width and color. By default, it shows dark gray, which you can change to white.
Next, group your offset and flatten it together. In the software, the Flatten button is on the right-hand side, down towards the bottom. Flattering items makes them into one layer. You can also unflatten the image. You can select attach to keep your sticker intact and in one layer.
Afterward, select Basic from the Operation dropdown menu tool and change it from Basic to Print Then Cut.
Once you are done designing your stickers, click on “Make It.”
After that, you will be prompted to print your design. Now, a preview box will appear, and you can check your print settings. For Print Then Cut, the crafting machine can print a maximum image size of 9.25 in x 6.75 in.
Your design is ready to send to the printer, so load your printer with the sticker/printable paper. When your stickers are printed, put them on the machine mat, and they will be ready to be cut.
The final process is to cut the stickers using a machine. Remember to change your Custom settings to Sticker paper. They have white and clear options, so choose accordingly. When the stickers are done cutting, remove them from the mat, and they’re ready to use.
Finally, we create custom stickers with the help of a crafting machine and the Cricut Design Space software. Now, you make a variety of projects at home using this machine.
Conclusion
The Cricut Design Space app and your cutting machine allow you to design and cut personalized stickers in various colors, shapes, and sizes. You can create stickers for your journal, notebook, or customized gifts. Not just from an artistic perspective, but it is also a great way to add a unique touch to your belongings.
This blog explored the Print Then Cut feature and how to make stickers with Cricut. Now, you can choose which type of stickers you want to create.
FAQS
Which printer is compatible with Cricut Print Then Cut feature?
The printer needs to be an inkjet printer, not a laser printer. Using a laser printer can cause damage to the materials and stickers. The material you are planning to print on should be printable paper, sticker paper, vinyl, or clear sticker paper. Cricut recommends the whiter material, but you can use light to medium colors.
What is the process for making stickers?
First, calibrate your printer. After that, design your sticker using the Cricut Design Space app or upload your printable images. Offset the sticker, flatten it, and attach it. Then, choose the Print Then Cut feature and load the mat with stickers that need to be printed. The machine is ready to cut the stickers.
What is the offset feature in Cricut app?
You must use an offset feature while designing your stickers because it adds an outline and a decorative shadow. It works best with closed paths images. You can change the color of the offset, and you can use it for print cut design as well as regular cut design.
Source: How to Make Stickers With Cricut
#how to make stickers with Cricut#cricut design space app#cricut design space software#Cricut.com/setup
1 note
·
View note
Text
How to Make Cricut Stickers: No Printer Needed!
Hey, want to learn how to make Cricut stickers? If so, you are in the right place. I received an order for stickers from one of my clients. But alas! My printer got damaged🥴! Now, what should I do? Well, fear not — the Cricut machine can be used to create stickers without printers. Yes, you heard that right! You can make custom stickers on Cricut without a printer, too.
Using my Cricut machine, I created many sheets of stickers and delivered them on time to all my customers. If you want a fun and creative sticker design, try this guide. In this post, I will teach you how to make stickers with Cricut. First, we will gather the basic supplies or materials and then move on to the stepwise tutorial. Let’s get started without any further ado!
What Will You Need to Create a Custom Sticker?
After getting the order from the client, I started focusing on the things that I needed to make stickers. First, I started gathering the items that I already had and then bought some others that I didn’t have. Hence, in order to learn how to make Cricut stickers, you have to gather some materials or tools required to complete this project. Make sure you have all the important materials that I have enlisted below.
Materials that you will need to gather:
Cricut machine
Cricut Design Space software
PC or laptop
Black vinyl
Cricut cutting mat
Weeding tool or Cricut basic tool
How to Make Cricut Stickers for the First Time?
Now, you have all the basic materials or supplies to get started with the Cricut sticker project. So, what are you waiting for? Once you are ready and have collected all the items mentioned above, let’s start creating the stickers in no time.
Step 1: Choose or Create a Design in the Cricut Software
Sticker designs are usually very simple. But the stickers I am making today are also a cakewalk. So, you can choose a sticker design from Cricut Design Space or the internet or create your own.

Step 2: Adding an Image to Canvas
Once you have chosen your design, you need to add it to your Canvas. If you are creating stickers yourself, you don’t need to do so because Canvas is a platform you need to create a design from scratch. In simpler terms, you are already on Canvas, so you don’t need to add anything to it.

Step 3: Turn Single and Multiple Images Into Stickers


Step 4: Fix Overlapping

Step 5: Cutting Your Stickers
Finally, we have come to the most exciting part — CUTTING! So, it’s time to fire up your Cricut and make something out of it!
First, you will need two pieces of vinyl that are in contrasting colors. But why? You will need one for your backing layer and the rest for your images. Thus, I am using sparkly silver for the backing and black for the image, SIMPLE!

Step 6: Weed the Sheet of Vinyl


That’s all in it! You might have learned how to make Cricut stickers quickly using a Cricut machine.
FAQs
Question 1: Which Cricut is the best for stickers?
Answer: The two ideal machines I know and have used for making stickers are Cricut Explore Air 2 and Cricut Maker. These two machines work really well for creating all sorts of stickers quickly. Both machines come with new features that are sufficient for crafters who want to make stickers.
Question 2: Are Cricut machines good for making stickers?
Answer: Yes! If you want to make cute stickers that are fun and easy to create, you need to try a Cricut machine. It can easily create all sorts of stickers in one go! It will bring out your artistic and fun activity and give you a fantastic result you can always remember.
Question 3: Is Cricut sticker paper made permanent?
Answer: Yes, the adhesive on all the sticker papers you use to create stickers is permanent. Paper and your Cricut printable vinyl are permanent, and they are a great option for making stickers for fun and more. So, whether you want to make a sticker or smaller decals, you can try Cricut paper or vinyl, as they are permanent.
Final Words
Through this blog, I explained how to make Cricut stickers. Now, you can easily learn and follow this tutorial to create stickers using the best possible method. I made all these stickers when I received a bunch of orders from my clients. I made all these stickers using Cricut vinyl in black and silver colors as per the client’s demands.
Read more: install cricut design space app
cricut.com/setup mac
Cricut Design Space
Cricut.com setup windows
Source: how to make stickers with Cricut
#install cricut design space app#cricut.com setup mac#cricut.com/setup#how to make stickers with Cricut#Cricut.com setup windows#Cricut Design Space
0 notes
Text
How to Make Stickers with Cricut for New Year 2024?
Hey crafters! Do you want to learn how to make stickers with Cricut for New Year’s Eve? If yes, don’t worry! I am here to help you with that. The new year is arriving soon, and I have already created many stickers to decorate my personal journal or books. So, in this blog, I will be talking about the fun and unique stickers that you can easily make with the machine, which offers thePrint Then Cut feature.
While making stickers with Cricut, I used some essential supplies required to make these stickers. You must ensure these supplies first then; we will move to learn the step-by-step procedure to make professional stickers.
So, are you excited to delve into this journey with me? If yes, then set up your cutting machine with your Design Space, and let’s jump into it!
What Supplies Do I Need to Make Stickers?
Anyone who is here to learn how to make stickers with Cricut also needs to have essential supplies. However, when I made the stickers for the new year, I used the following supplies or items:
Cricut Maker or Explore Air 2
In this guide, I am using Maker 3. However, you can use any latest version of the cutting machine.
Note: Cricut Joy doesn’t feature the Print Then Cut feature, but the Explore and Maker series are greatly compatible with this feature.
Design Space
Design Space is a must-have app without which you won’t be able to make a single cut, so if you have just bought a machine and haven’t set it up yet, first try finishing the setup.
Sticker Sheet Image File
A sticker sheet image file is the most important supply if you want to create a sticker. However, you can get such files from well-known websites such as Etsy, Creative Market, and Creative Fabrice.
Inkjet printer
Since I have used the Print Then Cut feature for making a sticker, I will recommend you get a Canon PIXMA TS9521C. It works well for paper as it comes with a unique feature, i.e., 12” x 12” borderless printing.
Sticker paper
When I am making my own stickers with a cutting machine, I try to shop for a matte white, printable sticker paper that is compatible with my inkjet printers. In addition, I found the printable sticker paper, which offers great quality.
Also, the thickness is more than other brands of sticker paper. Thus, Cricut brand sticker paper is always a good option.
How to Make Stickers with Cricut?
So, are you ready to make your own stickers with the Print Then Cut feature? Let’s start and follow the below instructions carefully.
Step1: Creating an Image File
Here, you have two options: create your own sticker sheet image or download the ready-made sticker sheet. If you want to create your image, then you can use tools such as Procreate, Illustrator, or Design Space.
Step 2: Uploading the Sticker File
First of all, launch a Design Space on your computer and start creating a new project.
After that, hit the Upload button given on the main canvas.
Then, select the main file and click the Upload Image to import the sticker design.
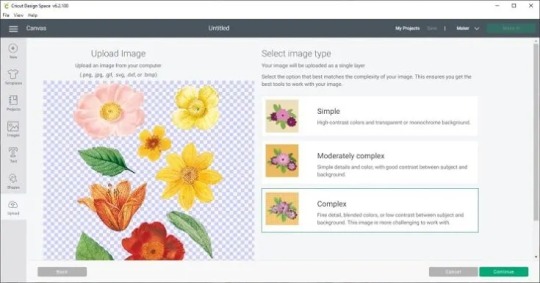
If prompted to select an image type, choose Complex image.
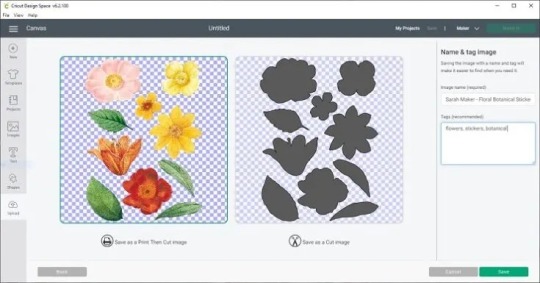
On the next screen, hit the Save as a Print Then Cut Image option.
Lastly, press the Insert Image tab to get the image on your canvas.
Step 3: Printing the Picture
Once you have imported the image on Canvas, you can edit the size as per your requirements.
In case the image is too large, resize it up to the maximum size that easily fits the printable area, which measures 6.75″ by 9.25″. Afterward, follow the steps below:
Next, load your sticker paper into the inkjet printer. However, I have loaded the sticker paper facing up. So double-check, as your printer might be different.
Now, click on the Make It tab on the Cricut Design Space app.
Then, tap on Continue, and finally, Send to Printer.
Finally, print to get the printed sticker design.
Step 4: Material Settings
Now, return to your Design Space and choose your materials.Go to the material settings and select “Sticker Paper.”
Note: if you are using an Explore machine, then you should set the dial to Custom to find this option.
Step 5: Loading the Cutting Mat
Now, please take out your Light Grip blue mat and place your printed sticker paper onto it. Make sure your sticker paper is aligned to the upper left corner. You can also smoothen the paper using a brayer tool or your hand. Finally, you need to press the flashing arrow button on the Cricut machine to load the mat.
Step 6: Cutting the Stickers
After loading the mat along with sticker paper, you will notice the Cricut icon button is flashing. It means your machine is ready to cut, so press the C button to start the cut. After some scanning, your machine will finally start cutting out the stickers.
Finally, I have explained to you how to make stickers with Cricut. Now, enjoy your New Year’s with these beautiful stickers that you can use to personalize your laptop or other stuff.
Conclusion
Finally, I have explained to you how to make stickers with Cricut, along with the important supplies. In addition, I have used the Print-Then-Cut feature, which requires you to print your design first and then cut it on a cutting machine. In addition to the feature, the printer is a must for printing the design. Despite this, you can download the sticker from the internet or create your own using tools like Canva, illustrator, Design Space, etc. Thus, this blog will help you create your personalized stickers for New Year’s Eve.
FAQs
Question 1: What do I need to make stickers with Cricut on New Year 2024?
Answer: It depends on the project you are making. Let’s take an example of stickers. If you want to make stickers for the new year, then you will need the following items:
Cutting machine
Design Space
Inkjet printer
Fine point blade
Cutting mat
Sticker paper
Question 2: Which Cricut machines are best for New Year stickers?
Answer: I suggest you use Explore 3 and Maker 3 if you want to make stickers for the new year 2024. Both Explore 3 and Maker 3 machines come with the Print then Cut feature, which is an incredible feature for printing images using the printer. Afterward, you can cut the printed images using your cutting machine. In addition, this feature is popular and is widely used for making stickers. Thus, the Explore and Maker series are compatible with your stickers.
Question 3: Is making stickers with Cricut machine easy for the New Year?
Answer: The best thing about cutting machines is that they cut the material precisely. The result comes after cutting with Cricut looks seamless and professional. Hence, this machine is the best tool for making stickers. Also, if you are a beginner, then you will not need much assistance to make anything since the cutting machine is designed in a way that is easy to use for everyone.
#Making stickers with Cricut#How to Make Stickers with Cricut#Cricut.com/setup#cricut.com/setup mac#cricut design space#cricut new machine setup#cricut.com/create#cricut.com sign in#cricut setup
0 notes
Text
I think I would do better when tabling at artist alleys if I could get into and make art for something popular at the time of it coming out instead of exclusively liking things that are either a) several years old or b) severely niche
#for example rn I’m having a fe3h moment. a game that came out in 2019#idk what’s even popular rn. deltarune which I haven’t played#kpop demon hunters which I thought was fun but didn’t like enough to want to make fanart about it#uhhh idk what else#i figured out how to use my cricut so I’m making last minute new stickers for a con this weekend#I have some dunmeshi ones but my dunmeshi stuff hasn’t been selling very well recently#show didn’t come out recently enough and market is oversaturated#and I’m gonna make some stickers of my cat#and then I’ve got some madoka charm designs I never finished maybe I’ll turn those into stickers#beyond that?? idk#everything I’m into is either too niche or too not recent#maybe murderbot stickers? but I don’t have a good idea in my head of what I think murderbot looks like#maybe alien stage???? there was a shit ton of alien stage at animazement in May
19 notes
·
View notes
Text

Going a little insane preparing for LvL Up….
#helluva boss#I learned how to use a cricut and now I’ve got too much power#this is just an excuse to draw Stolas in a little dress and hat#yall don’t understand this sticker making thing is so addictive#lvl up expo
13 notes
·
View notes
Text
How to Make Stickers on Cricut? 2025
learn ‘how to make stickers on Cricut‘, then you have come to the right place. Stickers are loved by everyone, whether you’re a child or an adult. You do not need a printer to make custom stickers. You can create stickers at home using the crafting machine and some supplies and tools.
Stickers may look like ordinary sheets of paper, but they are a great way to personalize journals or gifts. Whether you are a Cricut user or a beginner, if you have a crafting machine and Cricut Design Space app downloaded to your device, you can make stickers in any shape, color, or size you can imagine.
There are three general types of stickers you can create with your Cricut cutting machine: written labels, vinyl decals, and Print Then Cut stickers. In this blog, you will learn about Print Then Cut stickers.
What Materials Do You Need for Your Project?
Before starting the process of how to make stickers on Cricut the first step is gathering all of the supplies and equipment needed for sticker making.
Cricut Explore, Explore Air 2, and Maker 3
Design Space
LightGrip cutting mat
Inkjet printer
StandardGrip mat
Sticker paper, printable vinyl sticker paper
Making Print Then Cut stickers is a great way to personalize gifts, decorate water bottles, or add stickers to scrapbooks and journals. Creating stickers is fun and easy, but to get started, you need to gather the materials mentioned above and then follow the steps below to proceed with the sticker-making.
How to Make Stickers on Cricut: 6 Simple Steps
Here are the steps you will need to follow for creating stickers on your crafting machine. So, let’s get started right away.
Step 1: Calibrate Your Machine for Print Then Cut
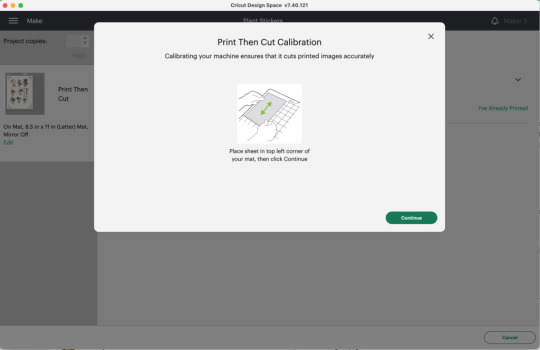
Calibrating your machine can sound optional, but this is the important part of making stickers with Cricut. In the Cricut Design Space app, choose Calibration from the menu, and then choose Print Then Cut. The software will prompt you to print a test sheet and load it into your machine. Tip: If possible, try to use a lightGrip machine mat.
Step 2: Add a Printable Image to Your Canvas
Now, within the Cricut Design Space Software, you can add multiple images to your canvas to make custom stickers. Or you can upload your SVG file. Once you have placed the images on your canvas, select Print Then Cut under the Operation menu and change the design from a Basic cut to a printable design.
Step 3: Format Images With Offset Feature
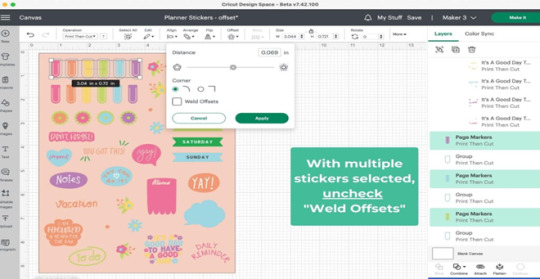
When you are done creating your stickers, you can add a finishing touch. To do this, you need to create a white border around your images. This creates a decorative outline called an offset, adding dimension to your sticker. Choose the design/ image that you want to offset, and then click the Offset option in the toolbar. When you are done selecting the offset feature by default, it can show you dark gray, which you may need to change to white.
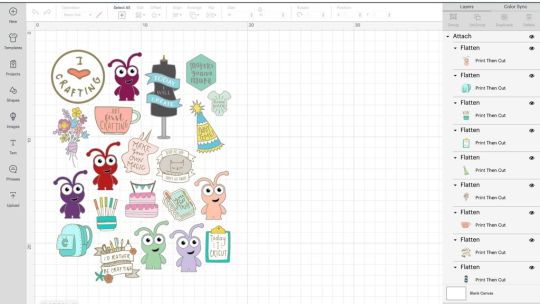
Step 4: Attach the Images

Once you are done formatting your stickers, select each with its layers in the layers panel and click Flatten. When you flatten the images, make them into one layer, and to keep your project in order, select all photos and click on the Attach option.
After flattening the design, you cannot change the colors. But you can always Unflatten the images and make changes later.
Step 5: Print Sticker Sheet
Now, you’ve reached the best part of sticker making. Once you click the Make It button, you are ready to print your design. Click on Use System Dialog, and a preview box will appear where you can fix your print settings. Printer settings vary depending on your model, but select the highest-quality print setting if possible. Make sure the sticker paper is compatible with the printer and the paper you have chosen.
Step 6: Cut the Image Using Your Machine
This is the last step of ‘how to make stickers on Cricut‘. Firstly, when your stickers are printed, put them on the Cricut mat, then choose your material settings. After that, load your cutting mat and press start to cut using the standard fine-point blade. Remember to change your custom settings to Sticker paper. They have clear white options, so choose accordingly. When the stickers are done cutting, remove them from the mat, and it is ready to use.
Summary
Making stickers with Cricut is a very fun and creative process. Using your machine, you can make different kinds of stickers in different colors for your journals, scrapbooks, or for your gift hampers. It is a great way to get kids involved in a fun and creative activity. You can create stickers for your journal, notebook, or customized gifts. Not only is it a creative process, but it is also a great way to add a unique touch to your belongings.
In this blog, you explore ‘how to make stickers on Cricut’, and now you can decide which kind of stickers you want to make.
Source: How to Make Stickers on Cricut
#how to make stickers on Cricut#cricut stickers#cricut design space app#cricut design space software#cricut maker setup
1 note
·
View note
Text
How to Make Stickers on Cricut (Full Guide)
Stickers are fun to create, right? There are so many fun things that you can create in the form of stickers. These products are decorative, and you can use them for your home decor, festivals, special occasions, or phone covers. Sticker making can never be boring with the ultimate Cricut machine. With the help of this blog, I’ll share ‘how to make stickers on Cricut‘.
I’ll tell you each step included in making a good sticker using your crafting machine. Moreover, you’ll also need a printer to print stickers through your machine. Use an inkjet printer to create stickers. Discover all the steps included in making a perfect sticker.
Step 1: Launch Cricut Design Space on Your Device
In this method, I usually use the Print Then Cut feature with a size of 6.75 x 9.25 inches. You can also resize your sticker by choosing a square shape from the library and resizing it according to you. Let’s move to learn how to make stickers on Cricut.
Step 2: Prepare Your Printer
Now that you’ve completed the design and adjusted the print size, you need to create a customized sticker. In the next step, choose your machine from the menu and hit the Make It button.
After that, you’ll see a black line around your design. Then, your crafting machine will scan your image and cut it into the exact size. Now, click on the Continue option to continue, and send the image to your inkjet printer.
Once you hit the Print option, choose the Add Bleed option. After selecting this option, the white margin will be removed from your image’s border. Next, you should hit the System Dialog option to confirm your printer’s settings and keep them adjusted to get premium-quality prints.
Step 3: Print Your Design, and Add an Image to Mat
When everything is optimum, just add the material into your printer to the printer and click the Print button.
Once your sticker design is printed, you can add the print to the mat. Make sure that your sheet perfectly aligns with the mat and doesn’t cover the Cricut logo. Using a machine mat is necessary even if you’re using smart materials.
Step 4: Select Your Material and Start Scanning
Once you’ve followed all the steps carefully, you should select the material you’re using. For instance, if you’re using sticker paper or vinyl, select it. If you create stickers quite often, you can click the Start button next to your material, and your material will be added to the favorites.

After that, let your machine use its sensors to scan the black lines and cut the images. In the next step, your machine will cut the stickers, and now you can use them anywhere you want.
Tips and Tricks to Troubleshoot Sticker-Related Problems
No matter how well you create your design or follow the steps, you may end up with some issues. Sticker-making with Cricut can be a little complicated. Here are some tips and tricks you can use to fix the issues you create while creating your stickers.
Ensure that your machine is On and lit to scan the registration marks.
Then, confirm if the mat is perfectly aligned inside the machine.
You can also increase the white border around your sticker’s design to fix the issue. Sometimes, low margins may also cause issues in cutting.
Power cycle your machine. Turn it off, and disconnect its power cord.
Update the firmware and check it by performing the Print Then Cut feature.
Hence, these are some tricks you can follow to create a well-designed sticker with your crafting machine. That’s it for how to make stickers on Cricut.
FAQs
Is a Printer Necessary for Making Stickers With Cricut?
Not at all! You don’t necessarily need a printer; however, you can use it by choice. You can create a fun sticker with your Cricut and vinyl. There are more fun ways to create the best stickers with your machine without using a printer.
What Materials Do I Need to Create a Sticker With My Cricut?
If you want to create your own stickers with the machine, you need certain materials to get started; check the list here:
A brand new Cricut machine
A design software (Cricut Design Space)
Printable vinyl
LightGrip cutting mat
A scraper tool
Can I Use Something Else Instead of Cricut Design Space?
Yes, there are some alternatives to Design Space, like Canva. It’s one of the best tools for creating fun sticker designs. You can use this tool to print your stickers, and then you can cut them using your machine.
Source: how to make stickers on Cricut
#how to make stickers on Cricut#cricut design space download#cricut machine setup#Cricut.com/setup#cricut design space app#cricut design space software
0 notes
Photo
If you want to learn how to make stickers with your Cricut this is the best tutorial you’ll ever find!! There are tons of tips and ideas for you to make the most beautiful stickers in the Cricut World! #cricut #cricutmade #cricutexplore #crafts #stickers #cricutdesignspace #cricuttutorials
0 notes
Text
How to Make Stickers With Cricut Machine?

Nothing can replace beautiful stickers to decorate your journal and diary. These are the best things to make for beginners and experienced crafters. Making stickers is easy and simple. So, this guide will explore how to make stickers with Cricut. In other words, you will learn what it takes to create professional-looking stickers, design stickers using the Cricut Design Space app, and finally make the perfect sticker. With these stickers you can make gifts and other small things beautiful.
Moreover, we will use the Print-Then-Cut feature to make stickers. During the process, you will need to use an inkjet printer, which we will discuss later in this post. Let us first learn about the items required to make stickers.
What Items are Required to Make Custom Stickers?
Before we move to how to make stickers with Cricut devices, we will first need to know the things needed for making stickers.
1. Paper for Making Stickers
While shopping for the paper, you must choose a matte white and full sheet printable sticker paper, which is especially designed for inkjet printers. You can also go for Cricut sticker paper as it is thicker than other brands’ paper.
2. Inkjet Printer
After designing the stickers on the Design Space app, print them using the inkjet printer. Further, when printing is done, cut the stickers with Cricut machines. However, we will recommend you go with Canon PIXMA TS9521C for printing your stickers.
3. Cricut Explore Air 2 or Maker
These two machines are perfect for cutting the stickers. Both of them come with the Print-Then-Cut feature. Besides, if you want to cut the designs without any Cricut machine, then you can cut using scissors or an X-Acto knife.
4. Sticker Sheet Image File
Lastly, you must use the image file to print and cut. Either you create your sticker design or find a sticker sheet file to download.
How to Make Stickers With Cricut Design Space?
Sticker designs can be made on Cricut Design Space easily. You can also use pre-made designs and give them your creative touch. However, the maximum size you can cut with the Print-Then-Cut feature is 9.25 inches x 6.75 inches. Therefore, we suggest you add a 9.25-inch x 6.75-inch rectangle template to my Design Space canvas. It will help you plan your designs.
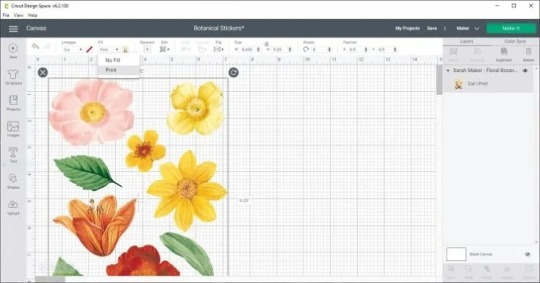
Once you have finished your design, select everything and, with the help of the Flatten tool, combine the shapes and text in one printable layer. Furthermore, you can convert the design into a printable image. Finally, print the design.
Here are the steps to make stickers with Cricut using the Print-Then-Cut feature.
Step 1: Creating a Sticker Image File
Firstly, download the readymade sticker sheet image file. Also, you can design the sticker sheet image using an app such as Illustrator, Design Space, and Procreate.
Step 2: Uploading the Sticker Image to Design Space
Launch the Cricut Design Space, then create a new project.
Afterward, tap the Upload button from the main canvas.
Then, look for the image file and hit the Upload Image to import it.
Further, you will be prompted to choose the image type.
Then, on the screen, select Save as a Print, then Cut image.
After that, you can tag and name the image you chose. Hit the Save button.
Finally, select the Insert Image option to insert the image into the Canvas.
Step 3: Printing the Sticker Image
On the canvas, you have to resize the image. Make sure the image size doesn’t exceed more than 6.75 inches by 9.25 inches. Further, load the sticker paper into the printer. From the Design Space app, you have to hit the Make it and then Continue tab. Finally, press the Send to Printer option. After that, Print the sticker design you made.
Step 4: Setting the Materials
After printing, you need to select the suitable materials on the Design Space app. From the material settings, choose Sticker Paper if you are using Cricut sticker paper. If you are not using Cricut paper, then you can choose the washi option.
Step 5: Loading a Mat into the Cricut Machine
Take a LightGrip blue mat and load it into the machine. To load the Cricut mat into the machine, you have to press the flashing arrow button.
Step 6: Cutting Stickers
After loading the mat, the Cricut icon button will start flashing. Flashing indicates that your machine is ready to cut the designs. To begin the cutting, you will need to press the C button.
Step 7: Unloading the Cricut Mat
After finishing the cutting, unload the mat by pressing the flashing arrow button. Then, remove the mat, and now you have your beautiful stickers to decorate the things you want.
Conclusion
In short, the Print-Then-Cut feature is available in both Cricut Explore Air 2 and Maker. The feature is very helpful when you make stickers. For this, we need an inkjet printer, which we have already talked about in this blog post. After that, the Cricut Design Space app can make designs, and then you can print them using the printer. Finally, you cut the stickers using any of the Cricut machines, such as Explore Air 2 and Maker.
FAQs
How to make stickers with Cricut?
To create the stickers, you need a Cricut machine (Explore Air 2 & Maker), an inkjet printer, and a Cricut software. Firstly, you will make designs on Cricut Design Space and then print the design using an inkjet printer. Further, you can cut the stickers using a Cricut machine. Then, unload the mat and remove the stickers.
What items do I need to make stickers with Cricut?
These are the items you will need to make stickers on the Cricut machine.
Any Cricut machine but Joy doesn’t support the Print-Then-Cut feature
Permanent or removable Cricut Vinyl
Transfer tape & scissors
Cricut mat
Weeding tool
Inkjet printer
Sticker paper
Cricut Design Space
Sticker sheet image file
What type of materials do I need to make stickers?
The type of sticker you can use is opaque & clear glossy sticker paper for making professional-looking labels and stickers. If you want water-resistant or waterproof stickers, you can use a Vinyl sticker, which is suitable for any environment. Besides, you have a Matte sticker, which is easily affordable.
For more information visit: cricut.com login Cricut Machine Set up cricut design space for mac design.cricut.com
Source: How to Make Stickers With Cricut
#how to make stickers with Cricut#cricut design space login#design.cricut.com#cricut.com login#Cricut Machine Set up#cricut design space for mac
0 notes
Text
How to Make Cricut Stickers: Full Guide for Beginners
Only a crafter can understand the fun of creating stickers with Cricut. In this process, learning how to make Cricut stickers becomes even more important because it gives us more freedom to create unique and perfect stickers instantly. Cricut machines are advanced enough to make anything you want in a few minutes. However, you need proper guidance to create a proper custom sticker using a Cricut machine. In this guide, I will help you through the entire process.
In this tutorial, I’ll show what you’ll need to create a sticker with your favorite font, design, or image in less than 10 minutes. Once you learn the process of making stickers with Cricut, you will have endless opportunities. All you have to do is implement the points mentioned further in the guide.
Supplies Required for Creating Cricut Stickers
Before we begin the guide, gather the supplies outlined below. With all of these items, you will be able to create the best-looking sticker.
Sticker paper or Cricut printable sticker paper
Cricut machine (Preferred that supports Print-Then-Cut )
A computer with the Design Space software installed
Transfer tape
Weeding tool
Scraper
Inkjet printer
Complete guide
Light Grip cutting mat
Step 1: Download the SVG File of the Stickers
I mostly download premade stickers and customize them in the Cricut software. I suggest you download a free SVG file of stickers from somewhere online. Download the file always in .svg format and unzip it.
Step 2: Upload SVG on the Cricut App
To learn how to make Cricut stickers, open the Cricut app and start a New Project.
Next, click the Upload icon in the bottom left toolbar.
Now, browse the downloaded sticker sheet to upload.
After that, select the image type as a Complex from the list.

Also, if the file is absolutely clear, then there is no need to erase click on Next.
Finally, select “Print Then Cut Image,” add the image name and any tags, and then click “Upload.”

Note: Instead of uploading a sticker file, you can access the Cricut Design Space library or create stickers.
Step 3: Customize Your Sticker Design
When the design is uploaded, it is on the canvas of the Cricut app, where it can be modified.
We won’t be making any specific modifications, so simply drag the design and get “Print Then Cut” the maximum size, which is 9.25″ x 6.75″.
Next, double-check the design and click on “Make It.“

Step 4: Select the Printer

From the drop-down menu, choose the printer and then turn on the “System Dialogue,” this will allow you to access your printer.
Step 5: Take a Printout and Place on the Mat

Step 6: Cut Out Your Design
Go back to Design Space and choose the base material as a printable vinyl and pressure default.

Next, load the mat by pressing the Load button on your machine and Design Space. Press Continue and push the flashing Go button on the Cricut machine. Now, the machine will run and cut around each sticker.

Step 7: Unload the Mat and Weed Out Excess Particles
This is the last step in learning how to make Cricut stickers. Once the cut is complete, take the mat off from the Cricut machine and flip the sticker sheet.
If there are any negative particles, then use the weeding tool and remove them.
Now, peel the stickers from the paper and add them to your project and surface.

Step 8: Apply Your Sticker

Final Thought
Most beginner crafters wonder how to make Cricut stickers. In this blog, I have explained the complete process. First of all, we have to upload or create the sticker design on Cricut Design Space. After that, print your sticker design using the Print then Cut function if it is colorful. And you can cut it out with the Cricut machine and start using it for the weeding procedure. Keep making stickers like this to achieve more quality.
Source: how to make Cricut stickers
Visit here for more Information: cricut.com/setup
Cricut explore 3
download Cricut design space
#how to make Cricut stickers#cricut.com/setup#cricut explore 3#download cricut design space#design space cricut#Cricut DesignSpace
0 notes
Text
How to Make Stickers on Cricut Like a Pro: Full Tutorial
Do you know how to make stickers on Cricut without using your printer? Recently, I created Cricut vinyl stickers, and I didn’t use the printer as it was not working. Yes, you heard that right! You can make stickers without a printer. And the overall process is also simple. For me, creating stickers is always fun, and I often personalize items such as laptops, water bottles, gift tags, journal diaries, and much more.
So, you can also make it, and you don’t need to use any type of inkjet or laser printer. Earlier, it was not as easy as today because Cricut has made it possible to create a sticker within a couple of minutes. Everything has become advanced, so you should also make stickers in a smart way.
With this blog, I will help you with the essential supplies required for creating this project. Despite this, I will guide you to make beautiful sticker designs on Cricut Design Space. Let’s jump into it!
Step 1: Necessary Supplies for Your Project
Below, I am providing you with some essential supplies that will be useful in this project. So, before we talk about how to make stickers on Cricut, you should gather the following supplies first:
Cricut machine (Prefer Cricut Explore 3 or Cricut Maker)
Design Space app
Cricut mat
Adhesive vinyl sheets (choose your desired colors)
Paper trimmer or Scissors
Transfer tape
Weeding tools
Laminate sheets for added durability (optional)
Now, we have found the essential things to make our stickers. Now, let’s create a sticker design.
Step 2: Add a Sticker Design
Now, the question is how to make stickers on Cricut Design Space? Or is there any other way to add the design to our Canvas without creating it from scratch? The answer to both the questions is yes! If you want to create your own design, you can simply create it, or you can import images from another source.

Note: I am using Cricut Design Space on Mac with Explore 3. So, you may notice a slight difference in your screen if you are not using the Mac. However, the steps will be the same.
Step 3: Preparation Before Cutting


After this, you will notice that your stickers are overlapping each other. In this case, rearrange and resize if required.
Next, you will need to place the vinyl sheet on the cutting mat. Then, load the mat into the cutting machine and move to your Design Space. Here, you need to select the material Adhesive Vinyl and hit the Cut or Make It button. Once you are done, move to the exciting part, i.e., Cutting — one of my favorite tasks!
Step 4: Cut and Weed Out Stickers
After loading the mat and material into Cricut, you have to press the flashing Go button on the cutting machine to begin cutting. Here, you need to follow the instructions displayed on your screen. Follow them and proceed to cut.

Step 5: Use Transfer Tape

Below, I am showing you how to use the transfer tape to transfer the stickers:
You need first to cut the piece of transfer tape. Ensure the piece is larger than the size of your sticker.
Now, peel off the backing layer of the transfer tape to reveal the sticky side.
After that, you have to place the sticky side on the sticker design.
Then, apply the pressure firmly to adhere the transfer tape to your vinyl sheet.
Next, peel the transfer tape and stickers off the cutting mat. Here, your stickers should be attached to the tape.

Step 6: Apply Your Stickers
By now, you have all your stickers on your transfer tape. You can use them anytime, wherever you want. To apply these stickers to the desired surfaces, follow the instructions below:
Place the sticker on the desired surface.
Apply gentle pressure to remove the air bubble.
Now, remove the transfer tape slowly and make sure your stickers are adhered to the surface properly.

Final Words
In this blog, we learned how to make stickers on Cricut without using a printer. Anyone can make it with simple guides and tutorials. But yes, you need to be a little creative if you are going to create your own sticker design. Despite these, you can follow this guide to make a sticker on the Cricut machine. All the essential supplies are mentioned above, so ensure you have all these supplies before you start. Good Luck!
FAQs
Question 1: Can you make stickers with a Cricut?
Answer: Yes, Cricut can be one of the best tools for creating eye-catching stickers with or without a printer. The features of Cricut machines are just incredible, and you can easily master the skills of making stickers in the first go. Be it cutting or designing, Cricut got your back! Also, Cricut machines are capable of cutting a variety of materials with accuracy and precision. Due to this, the project looks professional and grabs people’s attention. In short, Cricut is the right tool for creating all types of custom stickers.
Question 2: Which Cricut machines should I use to make custom stickers?
Answer: All Cricut cutting machines are compatible with making custom stickers except the Cricut Joy. Cricut Joy doesn’t support if you are making stickers with the Print Then Cut feature. Since Joy is not capable of printing then cutting, you can’t use Joy but can use all machines. Despite this, there are two machines that are considered ideal for making stickers: the Cricut Maker and Explore series.
Question 3: Does Cricut provide a waterproof Cricut sticker paper?
Answer: Yes, you can get printable waterproof stickers that come with a laminating sheet to protect the stickers from water. But this sticker paper set is only compatible with inkjet printers. Using a laser printer may damage your materials, including your printer. Apart from these, you can also use permanent premium vinyl and printable matte vinyl.
Read more: install cricut design space app
cricut.com/setup mac
cricut.com/setup
Source: how to make stickers on Cricut
#how to make stickers on Cricut#cricut.com/setup#cricut software app#cricut new machine setup#cricut design space#cricut explore air 2#cricut.com sign in#install cricut design space app#www.cricut.com/setup login#can you make stickers with a Cricut#Cricut vinyl stickers
0 notes
Text
How to Make Stickers with Cricut Explore Air 2?
Are you searching for how to make stickers with Cricut Explore Air 2 process? With god’s grace, one of the best cutting machines completes this process within a few minutes. Among the rest of the Cricut’s, this DIY cutting machine is suitable for creating various projects for personal or professional purposes. Moreover, this version also offers a wide range of tools & accessories for users.

With just a few clicks, this craft plotter connects wirelessly with Desktop & mobile phones. You can also create different kinds of designs & projects by accessing Design Space software. You can create the sticker as your wish, depending on the color, size & pattern. In the following paragraph, you will learn about the steps around the sticker-making process.
STEP 1: CREATE A DESIGN ON THE CRICUT APP
First, you have to open Cricut software and press the New Projects option.
Insert the Template, Shape or Printable Image from the available library and modify its size.
Now, with the item chosen, change the fill to Print & choose the color or pattern as per your preference.

Once the designing process ends, ensure that each element has its fill set to Print.
After that, choose the complete design and tap the Flatten box. Keep repeating the process till you get the final design.

Other than that, you can also upload the images from the Upload Image page.

Followed by pasting the image back to the app; you can add text by using the Text tool.
You are advised not to flatten each design uploaded on the canvas.

STEP 2: DECIDE QUANTITIES
You can duplicate the design or change the number of copies depending on the design size & shape.
Moreover, you can also change the material sizes and enable the mirror toggle.
Besides finishing the above two steps, press Continue, visible on the right side of the screen.

STEP 3: DESIGN PRINT OUT
Following the modification of designs & sizes, it’s time to proceed to the next step.
Now, you will be reconnected to the Canvas and tick the Make It box.
Furthermore, load the selected material into the available printer.
Tap the Send to Printer, and a pop-up box will open on your screen.

Inside the pop-up box, enter the asked details and tick the Print button.

Choose your printer, toggle Use System Dialog on and tick the Print option.
After doing so, the print settings will be visible on your screen.

STEP 4: SET TO CUT
Furthermore, set your material and pressure. Then place the Light Grip mat on the Explore Air 2 machine.
The machine will flash the orange light notifying that the cutter is ready to go.
Press the button and wait till the cutting & printing process is going on.
Take a new sheet (at least 3-5) and repeat the same process.

STEP 5: CRAFT LABELLING
On the contrary, start weeding out the printed design from the sheet with the basic tools set.
Ensure that you weed out each sticker separately and with gentle hands.
Place the label and use the scraper tool to cover the entire area of the object.
Here you go! Your DIY craft is completed, and you are prepared to carry it with you.

With the assistance of all the above-mentioned steps, it has become quite clear that the method of designing a custom sticker is quite easy. The crafter just needs to complete by going through each step without skipping any of them.
CONCLUSION
In brief, to this post blog, all the DIYers must have the essential supplies with them during the printing process. The supplies include: Explore Air 2, Tool Set, Design Space, Inkjet Printer, and Sticker sheet. It is important for all users to know how to use those supplies and the correct method to use them. Other than how to make stickers with Cricut Explore Air 2, the cutting machine model can also design stunning projects such as:
Watercolor Decal.
DIY Throw Pillow.
Wood Serving Tray.
Reusable Stencils.
FREQUENTLY ASKED QUESTIONS
QUESTION: DO I NEED INK FOR CRICUT EXPLORE AIR 2?
Answer: With the help of computer-based software and digital content, users don’t need cartridges while using the machine. Although, if you still have a cartridge and want to make it usable, then link it with a Design Space account. You can simply link it by signing in to the account, choosing Link Cartridges, and inserting the respective into the machine slot. The cutting machine will immediately start operating.
QUESTION: WHAT IS THE DIFFERENCE BETWEEN CRICUT STICKERS & VINYL?
Answer: Sticker papers are paper-based materials that typically come matte & glossy. However, printable vinyl is a polymer-based material displaying a more plasticky feel while viewing or touching it. Another difference between these two materials is that Cricut stickers are not waterproof. On the other hand, printable vinyl is water-resistant. Sticker paper is better suited for indoor use, and vinyl material is best for outdoor purposes.
QUESTION: IS CRICUT A GOOD OPTION FOR CRAFTS?
Answer: As compared to other cutting machines, Cricut can be considered the best choice for every crafter. One of the best parts of owning a cutting machine is that it can cut most of the materials by itself. However, one needs to take some extra precautions while creating stickers as it requires much more attention and extra effort to get the desired result.
#Cricut.com/setup#How to make stickers with Cricut Explore Air 2#design.cricut.com#design.cricut.com/setup#cricut explore air 2#cricut design space login#cricut design space#cricut setup
0 notes
Note
Hello! I was wondering what company you use for your sticker sheets? I bough one from your Ko-Fi shop and really like the quality, and the pricing you were able to sell at is waaaaaay more reasonable compared to any of the companies I've seen and used myself. Is it a POD company, or a mass purchase of them to sell on your own?
Thank you for your time if you're able to respond!
I'm really glad you like the quality, because I actually make them by hand at home! (Please forgive the lighting, my bedroom is my office lmao.)
I don't use a company (and Idk what a POD company is sorry!) but making them at home gives a lot more freedom of stock, just be wary it can be very time consuming depending on how many you need to make.
I've had other people ask before, so here's a rundown of how I make my stickers at home: At most you'll need:
Printer
Sticker paper (this is the type that I use)
Laminator and lamination paper (the lamination paper that I use.) You can also use adhesive non-heat lamination paper if you don't have a laminator, gives you the same result, just be careful of bubbles. You will get double your worth out of a pack because we are splitting the pouches to cover two sticker sheets.
Your choice of a sticker cutting machine or just using scissors.
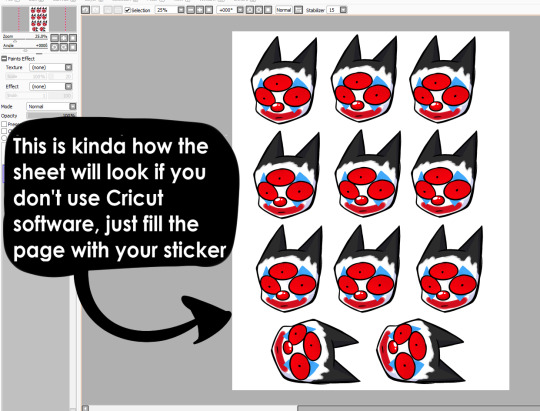
First, I use Cricut's software to print out the sticker sheet with the guidelines around the corners so the machine can read it. If you do NOT have a Cricut machine, open up your art program, make a canvas of 2550x3300 and fill it up with your sticker design with some cutting space between them. This the 8.5x11 size for the sticker page.
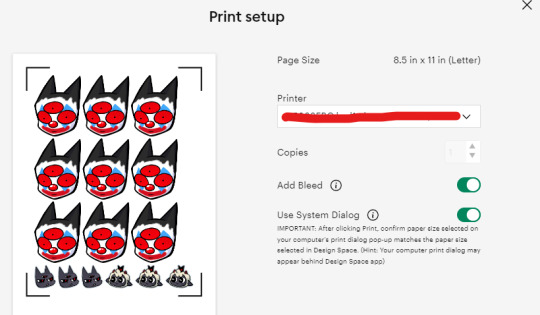
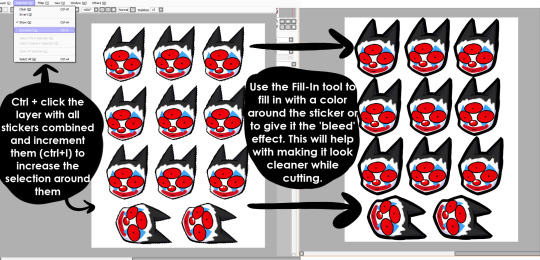
I usually have bleed selected so the cut comes out cleaner. Tip for non-Cricut users below: Increase the border around your sticker design to fake the 'bleed' effect for a cleaner cut.
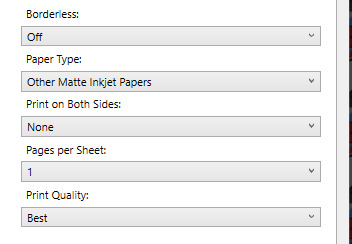
These are the print settings I use for my printer. I use the 'use system dialogue' to make sure I can adjust the settings otherwise it prints out low quality by default. Make sure if you're using the above paper that you have 'matte' selected, and 'best quality' selected, these aren't usually selected by default.
So you have your sticker sheet printed! Next is the lamination part. I use a hot laminator that was gifted to me, but there is no-heat types of lamination you can peel and stick on yourself if that's not an option.
(This is for protection and makes the colors pop, but if you prefer your stickers matte, you can skip to the cutting process.)
Important for Cricut users or those planning to get a Cricut: You're going to cut the lamination page to cover the stickers while also not covering the guidelines in the corners. First, take your lamination page and lay it over the sheet, take marker/pen and mark were the edges of your stickers are, and cut off the excess:
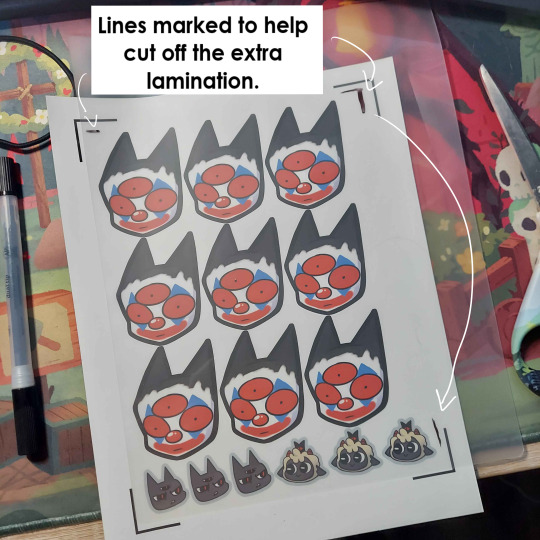
(I save the scrap to use for smaller stickers or bonuses later on)
After you've cut out your lamination rectangle, separate the two layers and lay one down on your sticker sheet over your stickers with matte side down, shiny side up. (Save the other sheet for another sticker page)
The gloss of the lamination will prevent the machine from reading the guidelines, so be careful not to lay it over them. It also helps to cut the corners afterwards to prevent accidentally interfering with the guidelines.

Now put that bad boy in the laminator! (Or self seal if you are using non-heat adhesive lamination)
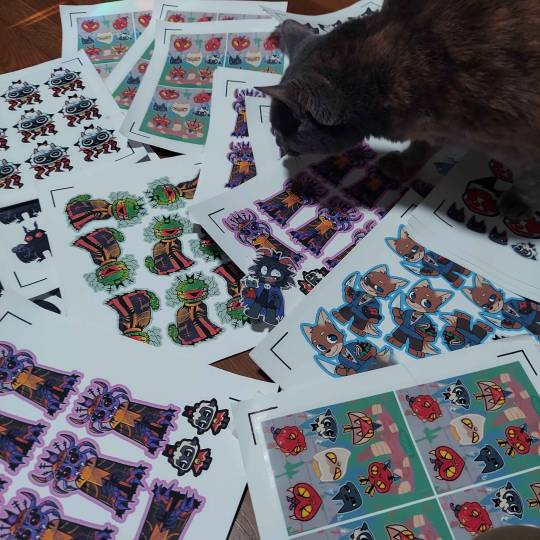
Congrats! You now have a laminated page full of stickers.
For non-cricut/folks cutting them out by hand: this is the part where you start going ham on the page with scisscors. Have fun~
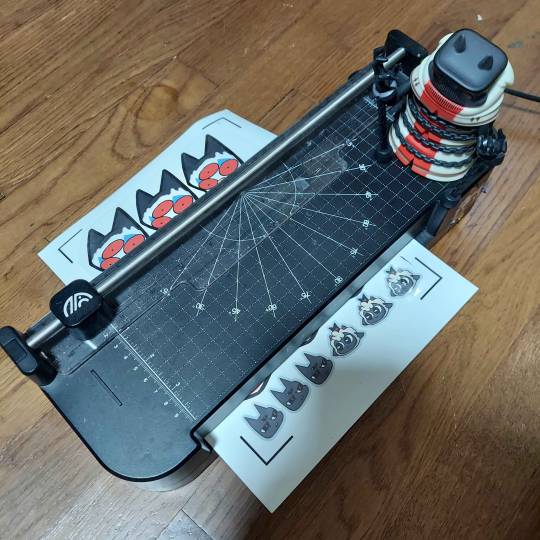
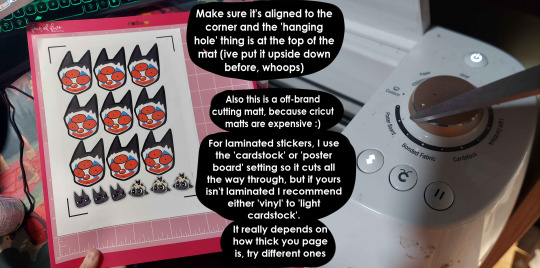
Cutting machine: I put the page on a cutting mat and keep it aligned in the corner, and feed it into the machine. For laminated pages I go between 'cardstock' and 'poster board' so that it cuts all the way through without any issues, but for non-laminated pages or thinner pages, I stick for 'vinyl' and 'light card stock'. Kinda test around.
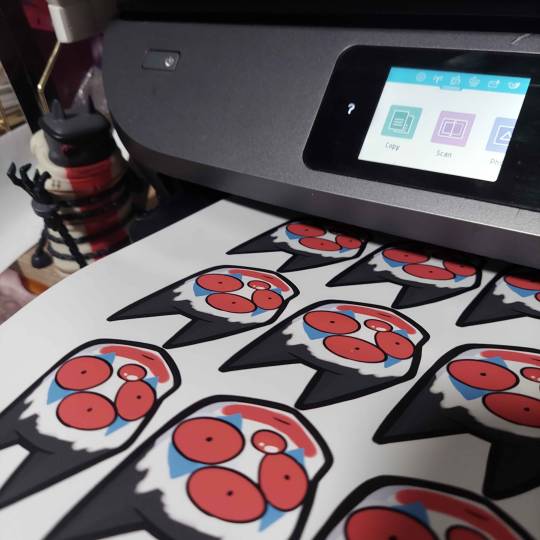
Now I smash that go button:

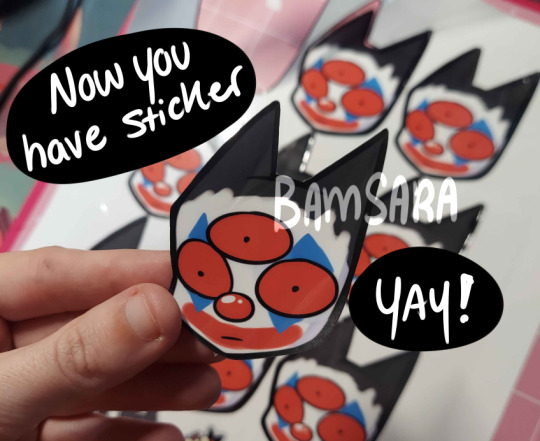
You have a sticker now!
The pros of making stickers at home is that you save some cost, and you have more control of your stock and how soon you can make new designs. (I can't really afford to factory produce my stickers anyway)
However, this can be a very time consuming, tedious process especially if you have to make a lot of them. There is also a LOT chance for some errors (misprints, miscuts, lamination bubbles, ect) that will leave you with B-grade or otherwise not-so-perfect or damaged stickers. (Little note, if you have page mess up in printing and can't be fed into the cricut machine, you can still laminate it and cut it out by hand too.)
I have to do a lot of sticker cutting by hand, so if you don't have a cricut don't stress too much about it. I have an entire drawer filled to the top of miscuts/misprints. I keep them because I don't want to be wasteful, so maybe one day they'll find another home. Sucks for my hand though.
But yeah! This is how I make my stickers at home! Hope this is helpful to anyone curious
1K notes
·
View notes
Text


might make this fella into a sticker if i figure out how the fuck my cricut works
#faith fanart#faith airdorf#faith the unholy trinity#john ward#faith game#running from his demons#and other not-mental-health-related demons
215 notes
·
View notes
Text
Artsy Update :)
Hi everyone, it has been a while since I posted. I've been incredibly busy with a few high-demand projects for which deadlines are approaching swiftly.... *send help please* However! I did continue the Valentine's Day couple series. Here are the final three sketches I did:
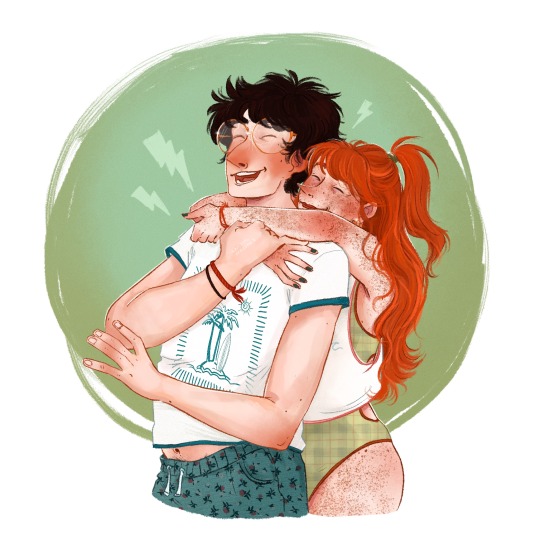


Hinny, Jegulily and Jegulus <3 I have to say that while I enjoyed doing these sketches, this style is not exactly my thing :) I love doing character line-ups and story illustrations more, but trying different poses and practising new colour combinations was a lot of fun. I had a blast :) I'm sorry if your favourite ship hasn't been drawn. I could only do a few in the time I had. But there's always next year! <3<3<3 As for the other things taking up my time at the moment... I have a big deadline for a picture book I'm working on. Only five more weeks to finish. When April comes, I'll (hopefully) be done with it and then I'm taking a teeny tiny holiday to rest and gather energy for new projects! I might actually leave the house for that... :)
The other big thing was my first art market of the year! I had a stand at Fantasy Fest in the Netherlands last weekend. I prepared a lot for it, making new prints and stickers and even creating some brand-new artwork :) The result was a booth filled with colourful goodies! I sold a little less than I had hoped for during the weekend, but I did have a lot of great conversations and managed to put a smile on people's faces with my art. And that is the most special thing in the world <3

I loved my little booth. The lighting was great and I had some lovely neighbors with whom I chatted all weekend. My mum also came to help for a day and she stood in front of the booth to play the very convincing 'interested customer', drawing in some more curious onlookers :) I love her, she is my number 1 supporter <3
Now, these are some of the new (and older) products I designed for this fair:


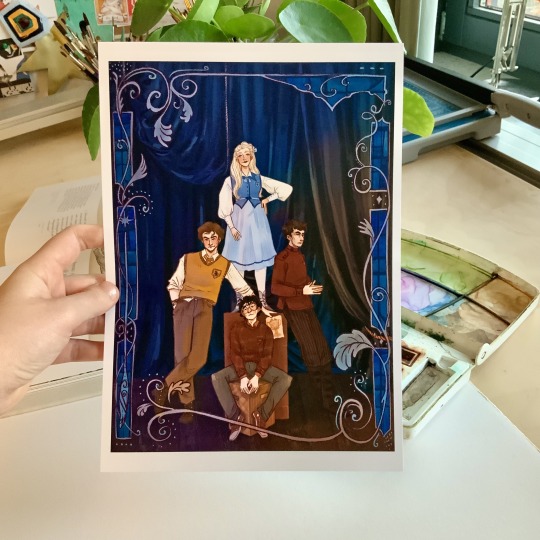
This is the Fantasy Characters collection: a series of 12 fantasy characters in a cool set! I made these specially for the fair and had so much fun with them. I picked out a nice paper, got to design a cool border to tie the whole thing together and even wrapping the sets in a colourful label was so so fun to do! I will definitely do more projects like this in the future. It's the best!


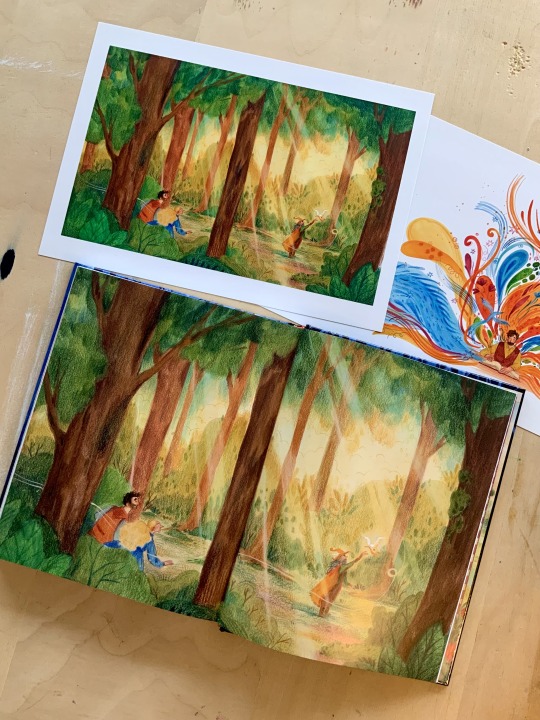


I created a bunch of prints from some of my traditional artworks. Most of them come from the book of fairytales I illustrated last year. They were a hit! Especially the map. That one was my bestseller :)
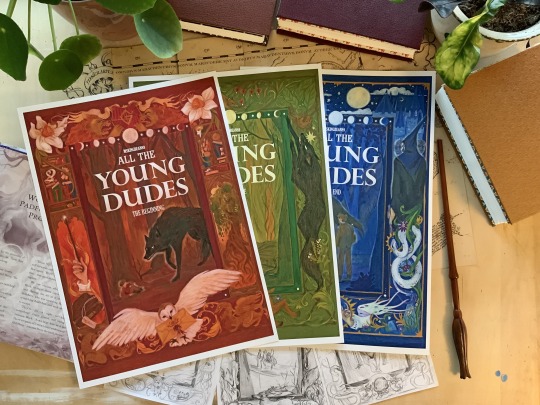


And of course, I had to add fanart, too. I sold a couple of Marauders band posters. That made my day. It was so cool to meet fellow fans :) (All of these are available in my shop, by the way, in case you're interested :)) Last, but not least: I made STICKERS! In January, I bought a Cricut machine for the first time and after postponing for a month to learn how to make it work, I managed to create these sticker packs:


They are my favourite new creation. It's so cool to be able to make my own stickers! I have four sets: Toads and Toadstools, Owls, Ollivander's Wand Shop and the Stars and Moons doodle sheet.


The little stickers are super fun to fill in empty spaces in your journal and the big ones are a showstopper for any surface. I already stuck a bunch of them on my planner, phone and sketchbooks... I have no shame. This is the best thing I ever made :)
I had a lot of fun!
I am looking forward to more cool art in the near future. I have one more project to finish. A picture book that has been a rollercoaster and not in a good way... I'll be happy when I've got my work done on that. It's still going to be a lovely book, it was just the publishing house that I had some trouble with. I will share something on the book whenever I can :) Right, I'm going to stop yapping! If you made it all the way to the end, thank you! You're amazing! Hugs, Fleur
#update#lifeupdate#artsy#artsystuff#illustrator#illustrators on tumblr#harrypotterart#characterdesign#illustration#jegulus#jegulily#harrypotteruniverse#hinny#valentine'sday
59 notes
·
View notes