#install mysql 8 centos 7
Explore tagged Tumblr posts
Visit Tumblr Blog
Explore Tumblr blogs with no restrictions, modern design and the best experience.
Last Seen Tumblr Blogs


Fun Fact
Tumblr was the first site to host the blog for President Barack Obama in 2011.
Text
How to Optimize Your Offshore SSD VPS for Maximum Efficiency
Having a well-optimized Offshore SSD VPS Hosting Solution is crucial for maintaining high performance, security, and cost-effectiveness. By implementing the right strategies, you can maximize the efficiency of your SSD VPS Servers while ensuring a seamless experience for your users. Here’s a step-by-step guide to help you achieve optimal performance.

1. Select the Right Operating System
Choosing an efficient OS like Linux (Ubuntu, CentOS, or Debian) can reduce resource consumption and improve server stability. Opt for minimal installations to avoid unnecessary processes that slow down your Offshore VPS Hosting Services.
2. Keep Software and System Updated
Regular updates enhance security and efficiency. Ensure your Offshore VPS Hosting Solutions receive the latest OS patches, security fixes, and software upgrades to maintain peak performance.
3. Optimize SSD Performance
Since SSDs provide high-speed storage, enabling TRIM support and reducing unnecessary write operations will extend their lifespan and enhance server performance. Using a lightweight file system like ext4 or XFS can further optimize storage efficiency.
4. Implement Caching Mechanisms
Caching reduces server load and speeds up content delivery. Tools like Memcached, Redis, or Varnish can significantly improve the responsiveness of your SSD VPS Servers by storing frequently accessed data.
5. Use a Lightweight Web Server
Switching to a high-performance web server like Nginx or LiteSpeed can enhance efficiency by handling more simultaneous connections with fewer resources. This optimization is essential for Offshore VPS Hosting Services that deal with heavy traffic.
6. Optimize Database Queries
Inefficient database queries can slow down your server. Use indexing, query caching, and database optimization tools to ensure fast and efficient data retrieval. MySQL tuning with InnoDB adjustments can also improve performance.
7. Strengthen Security Measures
Securing your Offshore SSD VPS Hosting Solutions is critical. Use firewalls (like UFW or CSF), SSH key authentication, and regular malware scans to prevent vulnerabilities and unauthorized access.
8. Leverage a Content Delivery Network (CDN)
A CDN reduces latency and speeds up global content delivery by caching and distributing resources across multiple locations. This reduces the direct load on your Offshore VPS Hosting Solutions.
9. Monitor Resource Usage
Tracking CPU, memory, and disk space usage is essential for identifying bottlenecks. Use monitoring tools like Nagios, Zabbix, or htop to ensure your SSD VPS Servers operate efficiently.
10. Optimize Bandwidth Usage
Reduce data transfer costs and improve performance by enabling Gzip or Brotli compression, minimizing HTTP requests, and optimizing website images. This ensures efficient bandwidth usage for your Off shore SSD VPS Hosting Solutions.
Conclusion
By applying these optimization techniques, you can enhance the efficiency, security, and performance of your Offshore SSD VPS Hosting Solutions. A well-maintained VPS ensures smooth operation, better user experience, and cost savings. Start implementing these strategies today to get the most out of your hosting solution!
0 notes
Text
How to Install MySQL 8 on CentOS 7 Linux
How to Install MySQL 8 on CentOS 7 Linux
Hi Friends! We will learn about “How to install MySQL 8 on CentOS 7 Linux”, we will look at the installation for MySQL 8 step by step in CentOS 7 . MySQL is the Relation Database, which is used to store the data. It Is open-source and widely used in the industries. MySQL written in C and C++. It has also been tested to be a “fast, stable and true multi-user, multi-threaded SQL database…

View On WordPress
#install mysql 8#install mysql 8 centos 7#install mysql 8 centos 7 digitalocean#install mysql 8 in centos 7#Install MySQL 8 in Rocky Linux#install mysql 8 on amazon linux#install mysql 8 on rhel 7#Install MySQL 8 on Ubuntu 20.04#Install mySQL in linux#install mysql on ubuntu 18.04#mysql community download#mysql community edition#mysql community server download
0 notes
Text
This guide has been written to help you ... https://www.computingpost.com/how-to-install-mariadb-10-9-on-centos-7-rhel-7/?feed_id=20490&_unique_id=637b18342c74c
0 notes
Text
How to install gdb on centos

#HOW TO INSTALL GDB ON CENTOS HOW TO#
#HOW TO INSTALL GDB ON CENTOS INSTALL#
#HOW TO INSTALL GDB ON CENTOS SOFTWARE#
#HOW TO INSTALL GDB ON CENTOS FREE#
> Processing Dependency: devtoolset-7-runtime for package: devtoolset-7-gcc-7.3.1-5.4.el7.x86_64
#HOW TO INSTALL GDB ON CENTOS INSTALL#
Here is the output in our ~]# yum install devtoolset-7-gcc* STEP 2) Install the development tools and GNU GCC 7, which is part of the “devtools” package > Package centos-release-scl-rh.noarch 0: will be installedĬentos-release-scl noarch extras 12 kĬentos-release-scl-rh noarch extras 12 k > Processing Dependency: centos-release-scl-rh for package: > Package centos-release-scl.noarch 0: will be installed Loading mirror speeds from cached hostfile Here is the output in our ~]# yum -y install centos-release-scl
#HOW TO INSTALL GDB ON CENTOS HOW TO#
So here is how to install GNU GCC 7: STEP 1) Install the repository in your system This article is to install GNU GCC 7 on CentOS 7 and we have a new one to install GNU GCC 8 – How to install GNU GCC 8 on CentOS 7. To have a newer version of the same components, you can have multiple version of GNU GCC – you can install with no worries of breaking your system GNU GCC 6 and 7.Not only GNU GCC, but you can also have PHP, Ruby, Python, famous databases like Mysql, MongoDB, PostgreSQL and many more Multiple version installed of the same components, you can have multiple GNU GCC installed without breaking your system or compiling manually.We can say these packages are officially maintained by CentOS 7 team and as a whole Red Hat/CentOS officials and community developers! The collection aims at
#HOW TO INSTALL GDB ON CENTOS SOFTWARE#
There are repositories, which would surely break your system at one point even they do not break it at first installing a newer version of GNU GCC! There is a really easy and “official” way to have newer development software in CentOS 7 by using the Software Collection –
#HOW TO INSTALL GDB ON CENTOS FREE#
It offers us free enterprise-class operating system, which is compatible with Red Hat, but in many situations, we need a newer (not even a bleeding edge) tools from a trusted source not from an unknown third repository! Let’s say you are a developer and you need newer than GCC 4.8 (which is more than 5 years old and at present, we have stable GCC 8.x stable branch). In order to close this display screen, you need to use the following combination: CTRL + A + D.CentOS 7 is a very stable and conservative operating system. In order for it to be available for the entire system, we will need to run the following command: make install Configuring CPULimit Using the Applicationīy entering the special top command it is possible to view the list of processes. When this process completes, a binary file will appear in the cpulimit-2.5 directory. The next step is to run make to start compiling CPULimit: make The next step is to run make to start compiling CPULimit: cd cpulimit-2.5 Then you need to install and, therefore, unpack the archive: cd ~ To quickly and successfully install this utility, you need make, screen, and wget. Some applications that may be limited include Nginx, PHP, Java. It is worth noting here that most applications will run normally. Essentially, applications will turn on or off quickly enough to limit the program to the desired number of cycles. It works as follows: CPULimit is not designed to work with applications that use job control, for example as they can be destroyed when CPULimit sends the SIGSTOP stop signal. One of the important differences is that cpulimit does not manage system boot, unlike cputool. Cpulimit is used to limit the CPU usage of a process in the same way as CPUTool, however it offers more use cases than its counterpart. CPULimit is a utility designed to work with Linux servers to limit the use of resources by an application.
0 notes
Text
Mattermost system requirements

MATTERMOST SYSTEM REQUIREMENTS INSTALL
MATTERMOST SYSTEM REQUIREMENTS FULL
MATTERMOST SYSTEM REQUIREMENTS ANDROID
MATTERMOST SYSTEM REQUIREMENTS SOFTWARE
Other S3-compatible systems may work, but are not officially supported. Mattermost is compatible with object storage systems which implement the S3 API. Elasticsearch 5.0 and later is supported. Elasticsearch to support highly efficient database searches in a cluster environment.Grafana to visualize the system health metrics collected by Prometheus with the performance monitoring feature.Prometheus to track system health of your Mattermost deployment, through performance monitoring feature available in Enterprise Edition E20.System Requirementsįor Enterprise Edition deployments with a multi-server setup, we highly recommend the following systems to support your Mattermost deployment: Mattermost’s performance monitoring tools can be used for detailed performance measurements and to inspect the running system to ensure sizing and installation is correct. You can use the Mattermost open source load testing framework to simulate usage of your system.
MATTERMOST SYSTEM REQUIREMENTS FULL
It is highly recommended that pilots are run before enterprise-wide deployments in order to estimate full scale usage based on your specific organizational needs. Hardware Requirements for Enterprise Deployments (Multi-Server) Scale Requirementsįor Enterprise Edition deployments with a multi-server setup, see our scaling guide.
1 - 1,000 users - 1 vCPU/cores, 2 GB RAM.
Most small to medium Mattermost team deployments can be supported on a single server with the following specifications based on registered users: Hardware Requirements for Team Deployments Changing this number may change memory requirements.įor deployments larger than 2,000 users, it is recommended to use the Mattermost open source load testing framework to simulate usage of your system at full scale. Recommendation is based on default 50 MB maximum file size, which can be adjusted from the System Console. Moreover, memory requirements can be driven by peak file sharing activity. These hardware recommendations are based on traditional deployments and may grow or shrink depending on how active your users are. Usage of CPU, RAM, and storage space can vary significantly based on user behavior. If you are using MySQL 8.0.4+, you will need to enable mysql_native_password by adding the following entry in your MySQL configuration file:`` ĭefault-authentication-plugin=mysql_native_password In MySQL 8.0.4, the default authentication plugin was changed from mysql_native_password to caching_sha2_password ( ).
Hashtags or recent mentions of usernames containing a dot do not return search results.
MATTERMOST SYSTEM REQUIREMENTS INSTALL
If any of the above is an issue, you can either enable the Elasticsearch (E20) feature or install MySQL instead.
Terms containing a dash return incorrect results as dashes are ignored in the search query.
Hashtags or recent mentions of usernames containing a dash do not return search results.
For searching two characters, you will also need to set ft_min_word_len and innodb_ft_min_token_size to 2 and restart MySQL.
MySQL 5.6, 5.7, 8 (see note below on MySQL 8 support)ĭeployments requiring searching in Chinese, Japanese, and Korean languages require MySQL 5.7.6+ and the configuration of ngram Full-Text parser.
While community support exists for Fedora, FreeBSD, and Arch Linux, Mattermost does not currently include production support for these platforms.
Using the Mattermost Docker image on a Docker-compatible operating system (Linux-based OS) is still recommended.
Ubuntu 18.04, Debian Buster, CentOS 6+, CentOS 7+, RedHat Enterprise Linux 7+, Oracle Linux 6+, Oracle Linux 7+.
MATTERMOST SYSTEM REQUIREMENTS SOFTWARE
Server Software Mattermost Server Operating System Mobile clients: iOS Mail App (iOS 7+), Gmail Mobile App (Android, iOS).Web based clients: Office 365, Outlook, Gmail, Yahoo, AOL.Desktop clients: Outlook 2010+, Apple Mail version 7+, Thunderbird 38.2+.iOS: iOS 11+ with Safari 12+ or Chrome 77+.
MATTERMOST SYSTEM REQUIREMENTS ANDROID
Android: Android devices with Android 7+.
iOS: iPhone 5s devices and later with iOS 11+.
Though not officially supported, the Linux desktop app also runs on RHEL/CentOS 7+.
Linux: Ubuntu LTS releases 18.04 or later.
Requirements Software Client Software Desktop Apps
0 notes
Text
How to Install MySQL on CentOS (7, 8)
How to Install MySQL on CentOS (7, 8)
In this tutorial, we’re going to show you how to install MySQL on CentOS. Step-by-step instructions on how to configure and install MySQL. (more…)

View On WordPress
0 notes
Text
Best Free App Cleaner Mac

Clean Junk Files, Private Data & More from iOS Devices
We all know that cleaning isn't an interesting for any iDevice user but there are so many junk files such as app caches, cookies, temp files and more laying around the iPad, iPhone and iPod memory that slow down the iOS device's performance. Coolmuster iOS Cleaner is right here to help you clean junk files and private data from all types of iOS devices. What can be erased from the iOS Cleaner?
DaisyDisk, chosen by Apple as a Mac App Store ‘essential’, provides a cleaner and more interactive circular interface for visualizing Mac’s hard drive. 9to5mac For only ten bucks, DaisyDisk is a simple, convenient utility for every Mac owner, and it gets the job done well for less technically-inclined users. We would like to show you a description here but the site won’t allow us.
Junk Files includes app caches, app cookies, app temp files, app crash logs, downloaded temp files, photo caches, user storage files, iTunes radio history, etc.
Private Data includes call history, browsing history, Safari cookies, Safari history, Safari caches, iOS notifications, app orphaned files, etc. https://blogeastern186.tumblr.com/post/657941750623731712/mysql-macos-install.

Turn Your iPad/iPhone/iPod into Totally New
What Is The Best Free Mac Cleaning Software
We know that after using electronic products for a long time, the performance and running speed of it will keep getting worse. That's the way Coolmuster iOS Cleaner comes in. With a set of powerful features, this reliable software will be able to improve your iPad, iPhone and iPod's performance and make them run like new.
You can enjoy all-around and risk-free iOS data cleaning ability by using this iOS Cleaner. With the help of it, you can delete 30+ types of junk files and private data from iPhone, iPad and iPod with just 1 click. Efficiently protect your privacy from prying eyes.
Start docker daemon centos. The following CentOS docker container will start as a daemonized container using -d option, while at the same time executing ping 8.8.8.8 using an endless bash while loop. # docker run -name centos-linux -d centos /bin/sh -c 'while true; do ping 8.8.8.8; done' Using docker's ps command we see the that our centos-linux container is running. Configure and troubleshoot the Docker daemon. Estimated reading time: 11 minutes. After successfully installing and starting Docker, the dockerd daemon runs with its default configuration. This topic shows how to customize the configuration, start the daemon manually, and troubleshoot and debug the daemon if you run into issues.
Free Up Space & Optimize iOS Devices
The main reason that cause your iOS devices run slowly is that there are increasing cache and temp files stored on your iOS device. Since iOS Cleaner is produced to clean your iPad, iPhone and iPod's memory and erase all these junk and useless files permanently, it will keep your iDevices always run fast.
Whenever you found your iOS device is running out of space, you can depend on this iOS cleaning software to reclaim up almost 40% storage space of your iPad, iPhone and iPod so that you can get more new files imported to your device.
Flexible Toolbox Guarantees Worry-free Clean
Have a bunch of useless messages, duplicated contacts, private information, long-forgotten notes and Safari bookmarks on your iDevice? Just let iOS Cleaner get rid of them with simple 1 click. It will scan deeply on your iPad, iPhone and iPod, and display all scanned out files clearly for your choice. Just set off your device with a fresh start.
Best Free Cleaner App For Mac
As the most marvelous and innovative iOS cleaning tool, all iOS devices can be supported by it, including iPhone X/8/8 Plus/7/7 Plus/6/6 Plus/5S/5C/5/4S/4/3GS, iPad Pro/Air/mini/4/3/2/1 and iPod touch/Shuffle/Nano/Classic.
More Features
Easy to Use
Concise user interface and step by step wizard make even computer novice can handle this software without any trouble.
All Windows Platforms Supported
Work well on all Windows platforms, including Windows 8/7/XP/Vista/ 2003/2000/NT.
Standalone
Do NOT need any other third-party program while you're running this program.
0 notes
Text
The Ultimate InterServer WordPress VPS Hosting Review

In this article, I’m going to show you how to make a WordPress Website on InterServer WordPress VPS Hosting (Virtual Private Server).
At the same time, I will share with you my honest and unbiased review of this service.
Unlike other reviews, this is going to be a spontaneous report of an ongoing experience that summarizes the impressions and opinions I have before, during, and afterthe purchase and the use of the service.
Why InterServer?
In the ultimate guide of How to Make a Website, I strongly recommended established companies that have good experience with hosting and InterServer was one of them.
InterServer is an American hosting company and a domain registrar that has been in the industry for more than 21 years.
Although a lot has changed since then, these long years must have enriched its experience.
Today, the company provides varied services ranging from simple hosting plans intended for small businesses to advanced plans for giant companies.
I liked this because it is a great indicator that this is the hosting that one can grow and stay with for a long time.
1. My First Impressions: Before Selecting a Package
The website of InterServer looks professional: The combination of the main colors, white and blue, plus the organization of the information makes the understanding of the website structure and main services they provide easy.
At this time, I see that they are offering a 65% OFF discount ($2.50 / month), plus a special coupon (PENNYDEAL) that allows you to get their shared hosting for $0.01 the first month. The offer is made to encourage new visitors to buy and try their services.
I already got their shared hosting plan, and now I want to try their WordPress VPS Hosting.
I’m choosing this option to benefit from the power and the speed it provides.
My choice of a VPS over a shared hosting will result in a faster and stronger website: And after all, VPS to Shared Hosting is like a private car to a public bus.
Promises & Guarantees
On the purchase page, InterServer promises that my WordPress Website will be ready in 20 minutes and says that the price starts from $6 per month.

InterServer also promises high performances and speed: It states that their VPS is optimized for WordPress, making it more powerful to WP than an ordinary VPS.
Furthermore, they guarantee:
1. Free Migration Service (Migrate your website from a place to another)
2. High-performance storage. (Optimized for WP, fast and responsive)
3. Instant Provisioning (Activates in a few seconds)
4. 99,99% Uptime Guarantee (Website available everywhere in the world, all the time)
5. Easy Control Panel
6. Multiple Language Servers (PHP, MySQL, Perl, Python, Ruby…etc.)
7. Flexible Software Options (full root access to install any software.)
My Choice
There's a bar in the middle of the page to customize the VPS: If you want more power, you can move it to the right. But, the more you do, the more the price rises.

As a starter, 1 core, 2048MB, 30GB SSD, and 2TB transfer are more than enough for my project.
At a later time, If I ever need more resources for my website, I will always have the option to upgrade them.
Now, with this configuration and at this price, it’s worth it. Yet I think it would have been more appealing if it was a little bit cheaper than this.

2. Ordering the VPS
By clicking on BUY NOW, the configuration page shows up.
On the left side, there’s a table that can be used to customize the VPS before ordering it.

The table allows you to choose:
1. The platform of the VPS (Virtuozzo, KVM, or HyperV),
2. The location of the VPS (New Jersy, Los Angeles, or Equinix NY4),
3. How many slices you need (1 or more, and up to 16),
4. The operating system (CentOS, Debian, Fedora, OpenSUSE, Ubuntu, VzLinux, and Windows),
5. The version of the operating system,
6. The control panel (None, DirectAdmin, or cPanel),
7. The Hostname and Root Password,
8. The Coupon Code
And it indicates the overall price.
I will not change a lot here; I will only enter the Hostname (Domain Name) and a Root Password.
To get a price reduction of $0.01 for the first month like me, you can use the coupon code PENNYDEAL before you proceed.
On the right side of the screen, there’s a table titled VPS availability.
As you can see in the picture below, VPSs are not available in Los Angeles right now. I will stick with New Jersey.

Below it, there’s a table that indicates the current VPS information:

When you click on proceed, you will be directed to the confirmation page, where you will be able to review your order.
You will also be asked to read and accept the Terms and conditions as well as the Privacy Policy.
After that, you will be able to pay for the service.

3. After Purchase: Let’s Test the Promises
VPS Activation
Once I placed the order, I saw a progress bar telling me to hold on while building the server.
I noted the starting time to see how many minutes it will take.
Surprisingly, in about 60 seconds I had my server up and running.

Linking the VPS to the Domain Name
Now that I have a unique VPS IP, I need to link it to my domain name to be able to access my website through the URL.

Image 1: IPV4 ADDRESS
To do that, I just have to add an A record in the DNS configuration page of my domain name (image 2) and set the hostname to the hostname I chose (vps.clevious.com), and the IPV4 ADDRESS (image 1) to the unique IP address I got.
Read the Full Review on Medium >
#hosting#wordpress#webhosting#web development#webdesign#web design#make website#website#linux vps server#vps hosting#review#hosting reviews
0 notes
Text
This guide is to help you with the insta... https://www.computingpost.com/how-to-install-mysql-8-0-on-centos-7-rhel-7/?feed_id=20473&_unique_id=637b17efa2985
0 notes
Text
Rhel Desktop Iso

Red Hat Enterprise Linux (RHEL) is a Linux distribution developed by Red Hat and targeted toward the commercial market. Red Hat Enterprise Linux is released in server editions for x86, x8664, Itanium, PowerPC and IBM System z architectures, and desktop editions for x86 and x8664 processors. Red Hat Enterprise Linux, or RHEL, is the go-to enterprise-level Linux distribution for those customers who want support from a vendor.
Redhat Linux is one of the many Linux distributions and one of few open-source OS with enterprise class of technical support. Indeed, it’s well backup by many big boys such as IBM, Dell, HP-Compaq, Oracle, etc. Apart from that, a scale-down version of Fedora Core is also selected for well-known

One-Laptop-Per-Child project (OLPC)

! OLPC is a nice and caring idea of developing $100 laptop (XO-1 or Children’s Machine) for children around the world, especially to those in developing countries, to provide them with access to modern form of knowledge and education! Unlike Windows Vista or its predecessor, you neither need to really pay for a genuine Redhat Linux CD nor you’ll see high-tech hologram printed. Redhat Linux is free-of-charge OS, unless you need to access their technical support or using Redhat Enterprise Linux. Having say that, you can easily and freely download Redhat Linux CD ISO image from its FTP server. Although, development of the free version Redhat Linux has been discontinued after the release of Redhat Linux 9. Then, it’s Fedora Core – a merger between the Redhat Linux and old Fedora Linux projects in September 2003! Anyway, Redhat Inc (NYSE:RHT) sponsorship is ensuring that Fedora Core will continue available for free download and installation.

Centos 6 Minimal Iso
As a home user, there might be little or not problem at all by using the most up-to-date Linux distribution, such as Fedora Core 7. However, upgrade is not always an easy job for Linux administrators, who are maintaining legacy application servers running on old Redhat Linux distribution! So, one of the Linux administrator responsibilities is to ensure all the Linux installation CDs or ISO images are securely maintained and regularly backup. If you have lost track of them, you’ll appreciated if someone or somewhere still have a copy for download!

Here are the last resources – the official archive of Redhat Linux CD ISO images available for download from Redhat file servers. Also included are Redhat Linux LiveCD for OLPC project and the latest Fedora Core 7 download links:
Centos 5 Iso
Rhel Desktop Version Iso Download
Download official Redhat OLPC Linux CD ISO image
Download latest Fedora Core Linux CD ISO image
FTP direct download Redhat Linux 6.2 CD ISO image
FTP direct download Redhat Linux 7.0 CD ISO image
FTP direct download Redhat Linux 7.1 CD ISO image
FTP direct download Redhat Linux 7.2 CD ISO image
FTP direct download Redhat Linux 7.3 CD ISO image
FTP direct download Redhat Linux 8.0 CD ISO image
FTP direct download Redhat Linux 9 CD ISO image
Rhel 8 Desktop Iso
How To Setup TinyDNS Server In 3 Minutes – Walker News 29-06-07@15:59
[…] Last weekend was my first time to setup and configure DNS server for a small office network with hundred units of networked computers. As usual, due to cost factor, the management decides to run an open-source DNS daemon on an aging Intel-based PC with Red Hat Linux 9. […]
Create Linux Loopback File System On Disk File – Walker News 01-07-07@00:19
[…] you create a Linux file system without using partition DIRECTLY – sort of file system within file system […]
How To Install Wordpress Blog In 3 Minutes – Walker News 18-07-07@16:16
[…] (Linux, Apache, MySQL, and PHP), I’m writing this 3-minutes WordPress setup guide for Red Hat Linux (my another 3-minutes setup guide […]
How To Mount And Read CD ISO Image In Linux – Walker News 19-08-07@23:29
[…] may heard about disk image, particularly CD ISO image. Literally, an ISO disk image is a single binary file that encapsulates the contents of hard disk, […]
Using Linux od Command To View File In Bit – Walker News 21-09-07@00:14
[…] shown in the diagram, a Bash shell script called simple.sh that was scp from Windows Vista to Red Hat Linux failed to execute properly, with an error message “bad interpreter no such file or […]
How To Fix Weird Character In Linux Man Page – Walker News 26-09-07@00:20
[…] confirmed that this groff formatting trick works in Red Hat Linux 8 Professional and Red Hat Linux Enterprise Linux […]
want red hat 9
i really very happy to get this site .since 3 days i have been searching for this kind of sites.today only i got this site.it should have a familiar access.thanks to concern teams
Regards ,Maniskearan Loganathan
i have download the red hat linux 9 cd iso image.i have copied the en folder from linux 9 folder.how to write in the cd and how to install the linux os from that.pls give tips
hi there
can anyone provide me the ftp login and password for downloading the iso images archieve please do the needfulll
pls…. send me login and password for downloading REDHAT 7.2 . AND ALSO SEND THE LINK WHERE I’M DOWNLOAD THE FILE.
The link to download Red Hat 7.2 is already in the article.
If you’re prompted to login, use the anonymous login method:
thx a lot , excelent job
thanks If you’re prompted to login, use the anonymous login method:
i want redhat 7.3
Thank you for the access to these ISO files for Redhat 7.2. I am making an effort to use Kylix 3 and it was certified on this version. All the best in your walkings!
This site is great for redhat iso’s and even legacy redhat iso’s here lately I have been searching for a really really old copy of redhat linux 2.5, does anyone know where I can get it?
The links that you have gave will no longer work for now.
i download En linux 9 it’s Red Hat Server include that’s file ..?
thx
Dears, Am downloading Redhat 7.2 , thanks for that , but i want to know which specific files that should i download and how to mount it ?
If you’re looking for English version, then browse to “en”, “iso”, “i386” folder.
Depends on how you want to use the ISO files, e.g. if install on physical machine, then you should burn the ISO file to disc. To read the ISO file on Linux, you can try this.
Hi, thanks for the iso files!!
thanks man! been looking for a site like this one, glad i found it. More power!
I want redhat 6.3 64bit
THANKS
Hi there, I have downloaded and tried installing several different iso’s of redhat, versions 8 and 9. Unfortunately, my computer will not boot from the CD; other CD’s will boot however, so I know the drive is good. I have a disc one iso for version that I downloaded a few years back and it runs but I can’t find disc two to continue the installation. If it helps, my computer is a Compaq desktop with a i845 chipset. It does meet the requirements for the system but for some reason, I can’t get any of the iso’s I’ve downloaded to work! Please help!!!!!
Thank you!
First of all, did you verify the MD5 file checksum of the ISO images you’ve downloaded?
If the file checksum is valid, then I suspect you didn’t “burn” the ISO image correctly onto the CD/DVD-ROM.
Otherwise, the images hosted by the official site might have corrupted.
0 notes
Text
Install Specific Version of MySQL 8 using YUM
We have many ways to install MySQL on linux machines such as source, binary and so on. But most of the Engineers always prefer default package managers (yum for RPM-Based distributions and apt for DPKG-Based distributions) for its ease of use and it can resolve all dependencies on its own. And of course, it is not possible to use package managers in environments where the internet is not allowed, but this is a different case. At some point, we need to install exactly specific version of MySQL for the following cases To create Production Replicas To simulate an Production Issue on similar kind of environment To configure Disaster Recovery(DR)/UAT Setup Compatibility with opensource tools ( Eg , Xtrabackup compatibility ) But following the instructions from MySQL Documentation for installation using yum always leads to the installation of the latest version released. At the time of writing this blog, the latest release is MySQL 8.0.22. Following the documentation steps resulted in installation of the same. Definitely, we can install other versions of MySQL using RPM files. But it is quite tough at times because of its dependencies or conflicts with any other older version packages. So, in this blog post, we will look at how to install a specific version of MySQL using yum. All the following steps are tested in CentOS 7 and it requires sudo privileges. Setting up Yum Repository The below command will enable the yum repository required for the installation of MySQL rpm -Uvh https://repo.mysql.com/mysql80-community-release-el7-3.noarch.rpm Disabling all repos in MySQL It is to disable repos for all versions of MySQL. sed -i 's/enabled=1/enabled=0/' /etc/yum.repos.d/mysql-community.repo To install MySQL 8 of particular minor version, let’s say 8.0.20 , we can execute the following command yum --enablerepo=mysql80-community install mysql*8.0.20* So, the general command will be like yum --enablerepo=mysql80-community install mysql*8.0.X* Where X is the minor version that you want Or else if you want to install the latest version, just go with the below command. It will install the latest version available at that time. yum --enablerepo=mysql80-community install mysql-community-server That’s it if the above command succeeds. We will get the required version successfully installed on the server. 4. Start the MySQL service Use the below service command to start up the MySQL service service mysqld start 5. Get the temporary password in the error log By default, MySQL will generate a temporary password for root user and it will be in the error log. So, to get the temporary password from error log use the below command. grep "temporary password" /var/log/mysqld.log The sample output would be like: [root@ha mydbopslabs]# grep "temporary password" /var/log/mysqld.log 2020-12-10T14:12:49.940127Z 6 [Note] [MY-010454] [Server] A temporary password is generated for root@localhost: 7y:ztnVKwh7q [root@ha mydbopslabs]# 6) Login the MySQL using root user with the temporary password mysql -p'$temporary password' 7) On successful login, we should reset the root user password as the first thing. Otherwise, we cannot execute any commands until we reset the password. we will get the warning like below mysql> show schemas;ERROR 1820 (HY000): You must reset your password using ALTER USER statement before executing this statement.mysql> To reset the root user password, execute the below query on mysql prompt. alter user 'root'@'localhost' identified by 'strong password'; Sample query be like mysql>mysql> alter user 'root'@'localhost' identified by '[BX.D"7s!c';Query OK, 0 rows affected (0.22 sec)mysql> Once it is done, our MySQL setup is ready to use. For fine tuning of MySQL to handle production work load, refer our presentation Fine Tuning of MySQL 8.0 which was taken at Mydbops Database Meetup. Also, look our other blogs that explores the coolest features of MySQL 8.0 which greatly helps for Database Administrators and Developers. https://mydbops.wordpress.com/2020/12/12/install-specific-version-mysql-8-using-yum/
0 notes
Link
こんにちは。GMOリサーチでインフラを担当しているオカモトです。 コロナの影響で引きこもり生活が続く中、皆様いかがお過ごしでしょうか。 今回、Googleが先日公開した「Tsunami」というオープンソースのセキュリティスキャナーを試してみたのでその内容をご紹介します。 1.Tsunamiって何? Tsunamiは、2020年6月18日木曜日(現地時間)にGoogleがオープンソースのプロジェクトとして公開したセキュリティスキャナーです。 GoogleではGKE(Google Kubernetes Engine)を使ってインターネットからアクセスを受けているシステムの脆弱性診断にTsunamiを使っているそうです。 ・Tsunamiのリリースに関する記事は以下のURLから確認できます。 Google Open Source Blog https://opensource.googleblog.com/2020/06/tsunami-extensible-network-scanning.html Tsunamiは以下の目標・理念を掲げて開発を進めているそうで、超大規模なシステムを高速にスキャンするような用途でも使いやすいソフトウェアを目指しているようです。 Tsunami supports small manually curated set of vulnerabilities(手動でリストアップされた少数の脆弱性に対してのスキャンをサポート)Tsunami detects high severity, RCE-like vulnerabilities, which often actively exploited in the wild(遠隔からのコード実行のような緊急度の高い脆弱性を検知する)Tsunami generates scan results with high confidence and minimal false-positive rate(誤検出率を最小限に抑えた信頼性の高いスキャン結果を生成する)Tsunami detectors are easy to implement.(脆弱性の検知器は簡単に実装できる)Tsunami is easy to scale, executes fast and scans non-intrusively.(簡単にスケールできる。高速に実行��れ、対象システムに侵入せずにスキャンする)2.Tsunamiの仕組み 公式の資料によるとTsunamiの脆弱性診断の流れは以下のような感じで進むそうです。 出典: Tsunami Scan Orchestration https://github.com/google/tsunami-security-scanner/blob/master/docs/orchestration.md 大きく分けて、Reconnaisance(調査/偵察)とVulnerability Verification(脆弱性の検証)の2つのステップで実行されるそうで、各ステップの役割は以下の通りになります。 Reconnaisance(調査/偵察) Reconnaisance(調査/偵察)のステップでは、ポートスキャンとフィンガープリントの2つのフェーズで対象システムに関する情報を可能な限り収集します。 <ポートスキャン> 対象システムの開いているポート、使われているプロトコル、ネットワークサービスなどを検出するフェーズ。 車輪の再発明をしないために、nmapやmasscanなどの既存のソフトウェアを内部で利用したプラグインを使うことを想定しているようです。 デフォルトではnmapのプラグインが使えます。 <フィンガープリント> 検知したポートで動いているサービスやウェブアプリケーションを検出するフェーズ。 1つのポートで複数のウェブアプリケーションが動いているような場合でも、それぞれのウェブアプリケーションを識別することを目指しているようです。 (例、TCPポートの443でリバースプロキシとしてnginxが動いている状態で、/blogではWordPress、/forumではphpBBが動いているというような構成)。 残念ながら今はまだ実装されてないみたいです。 Vulnerability Verification(脆弱性の検証) Vulnerability Verification(脆弱性の検証)のステップでは、前のステップで収集した情報に基づいて、脆弱性検知のプラグインを並列に実行して対象に脆弱性がないか検証します。 脆弱性検知のプラグインは、基本的には1つの脆弱性に対して1つのプラグインとして実装されることを想定しているようです。 また将来的な構想として、脆弱性検知のプラグインをJavaで実装するほかにPythonやGoなど別の言語でも実装できるようにしたいそうです。 ※現在公開されているTsunamiは開発者に試してもらうことを目的としたPre-Alpha版なので、将来的に仕様に大きな変更が入る可能性があります。 3.Tsunamiを実際にインストールしてみた 今回は以下の環境のサーバーを使って試してみました。 CentOS Linux release 7.7.1908 (Core) 3.10.0-1062.4.1.el7.x86_64 ① 必要なパッケージのインストール 以下のバージョン以降のnmapとncrackが必要となるので、それぞれ公式サイトよりバイナリ及びソースコードをダウンロードしてインストールします。 nmap = 7.80 ncrack = 0.7 nmapとncrackの最新安定版はこちらからダウンロードできます。 ● nmap(binary/source) https://nmap.org/download.html ● ncrack(source) https://nmap.org/ncrack/ また、今回のテスト環境ではncrackのコンパイルのためopensslのバージョンを上げる必要があったので以下のバージョンのopensslもインストールしています。 お使いの環境によってはその他にも必要なものがあるかもしれません。 # 必要なバイナリ及びソースコードのダウンロード $ sudo su - # cd /usr/local/src/ # wget https://nmap.org/dist/nmap-7.80-1.x86_64.rpm # wget https://nmap.org/ncrack/dist/ncrack-0.7.tar.gz # wget https://www.openssl.org/source/openssl-1.1.1g.tar.gz # nmapのインストール # rpm -vhU nmap-7.80-1.x86_64.rpm # nmap --version Nmap version 7.80 ( https://nmap.org ) Platform: x86_64-redhat-linux-gnu Compiled with: nmap-liblua-5.3.5 openssl-1.0.2s nmap-libssh2-1.8.2 nmap-libz-1.2.11 nmap-libpcre-7.6 nmap-libpcap-1.9.0 nmap-libdnet-1.12 ipv6 Compiled without: Available nsock engines: epoll poll select # # openssl-1.1.1gのインストール # tar xvzf openssl-1.1.1g.tar.gz # cd openssl-1.1.1g/ # ./config --prefix=/usr/local/openssl-1.1.1g shared zlib # make depend # make # make test # make install # cd /etc/ld.so.conf.d/ # vi openssl-1.1.1g.conf # cat openssl-1.1.1g.conf /usr/local/openssl-1.1.1g/lib # # ncrackのインストール # cd /usr/local/src # mv ncrack-0.7 /usr/local/ # cd /usr/local/ncrack-0.7/ # ./configure --with-openssl=/usr/local/openssl-1.1.1g/ # make # make install # ncrack --version Ncrack version 0.7 ( http://ncrack.org ) Modules: SSH, RDP, FTP, Telnet, HTTP(S), Wordpress, POP3(S), IMAP, CVS, SMB, VNC, SIP, Redis, PostgreSQL, MQTT, MySQL, MSSQL, MongoDB, Cassandra, WinRM, OWA, DICOM # ② Tsunamiのインストール 公式に用意されているquick_start.shというスクリプトを使ってTsunamiをインストールします。 このquick_start.shを実行すると、以下の処理を実行してくれます。 ※gitでcloneするのでgitがインストールされている必要があります。 google/tsunami-security-scanner と google/tsunami-security-scanner-plugins の2つのリポジトリを $HOME/tsunami/repos ディレクトリ以下にgit cloneする全ての Google Tsunami plugins をコンパイル、できたjarファイルをすべて $HOME/tsunami/plugins ディレクトリへ移動するTsunami scannerをコンパイル、できたJarファイルを $HOME/tsunami ディレクトリへ移動するサンプルの設定ファイルのtsunami.yaml を $HOME/tsunami ディレクトリへ移動するサンプルとして127.0.0.1に対してスキャンを実行するコマンドを表示する ● Tsunamiのインストール $ bash -c "$(curl -sfL https://raw.githubusercontent.com/google/tsunami-security-scanner/master/quick_start.sh)" 実行すると必要なファイルやプログラムのダウンロードやインストール、jarファイルのビルドをしてくれます。すべてのjarファイルのビルドが正常に完了すると最後に以下のようなメッセージが表示されます。 BUILD SUCCESSFUL in 1m 40s 14 actionable tasks: 14 executed Build successful, execute the following command to scan 127.0.0.1: cd /home/okamoto/tsunami && \ java -cp "tsunami-main-0.0.2-SNAPSHOT-cli.jar:/home/okamoto/tsunami/plugins/*" \ -Dtsunami-config.location=/home/okamoto/tsunami/tsunami.yaml \ com.google.tsunami.main.cli.TsunamiCli \ --ip-v4-target=127.0.0.1 \ --scan-results-local-output-format=JSON \ --scan-results-local-output-filename=/tmp/tsunami-output.json Tsunamiのファイル群は$HOME/tsunami/以下にインストールされています。 $ ls -l tsunami/ total 16112 drwxr-xr-x 2 okamoto r_admin 316 Jun 25 17:23 plugins drwxr-xr-x 4 okamoto r_admin 78 Jun 25 17:22 repos -rw-r--r-- 1 okamoto r_admin 16492741 Jun 25 17:25 tsunami-main-0.0.2-SNAPSHOT-cli.jar -rw-r--r-- 1 okamoto r_admin 130 Jun 25 17:25 tsunami.yaml $ プラグインは$HOME/tsunami/pluginsのディレクトリに格納されています。 デフォルトだとポートスキャナーのプラグインが1つ、脆弱性検知のためのプラグインが5つ用意されています。 $ ls -l plugins/ total 148 -rw-r--r-- 1 okamoto r_admin 7156 Jun 25 19:03 exposed_hadoop_yarn_api-0.0.1-SNAPSHOT.jar -rw-r--r-- 1 okamoto r_admin 6194 Jun 25 19:03 exposed_jenkins_ui-0.0.1-SNAPSHOT.jar -rw-r--r-- 1 okamoto r_admin 5899 Jun 25 19:03 exposed_jupyter_notebook-0.0.1-SNAPSHOT.jar -rw-r--r-- 1 okamoto r_admin 39515 Jun 25 19:03 ncrack_weak_credential_detector-0.0.1-SNAPSHOT.jar -rw-r--r-- 1 okamoto r_admin 76185 Jun 25 19:03 nmap_port_scanner-0.0.1-SNAPSHOT.jar -rw-r--r-- 1 okamoto r_admin 6249 Jun 25 19:03 wordpress_exposed_installation_page-0.0.1-SNAPSHOT.jar $ 4.Tsunamiの設定を書いてみる Tsunamiはyaml形式のファイルで設定を読み込むことができます。 初めから用意されているyamlファイルが$HOME/tsunami/tsunami.yamlにあるので、これを編集して設定を記述します。 今回はデフォルトで用意されているnmapを使ったポートスキャナーのプラグインの設定を1-1024番のウェルノウンポートのみスキャンするよう設定してみます。 $ cd tsunami/ $ vi tsunami.yaml $ cat tsunami.yaml plugins: google: port_scanner: nmap: port_targets: "1-1024" $ 5.セキュリティスキャンをやってみよう Tsunamiのビルドが成功した際のメッセージの最後の部分で、以下のようなローカルホスト(127.0.0.1)をスキャンするためのコマンドが表示されます。 cd /home/okamoto/tsunami && \ java -cp "tsunami-main-0.0.2-SNAPSHOT-cli.jar:/home/okamoto/tsunami/plugins/*" \ -Dtsunami-config.location=/home/okamoto/tsunami/tsunami.yaml \ com.google.tsunami.main.cli.TsunamiCli \ --ip-v4-target=127.0.0.1 \ --scan-results-local-output-format=JSON \ --scan-results-local-output-filename=/tmp/tsunami-output.json 今回はこのコマンドを使って試しにローカルホストに対してセキュリティスキャンをしてみます。 1 2 3 4 5 6 7 8 9 10 11 12 13 14 15 16 17 18 19 20 21 22 23 24 25 26 27 28 29 30 $ cd /home/okamoto/tsunami && java -cp "tsunami-main-0.0.2-SNAPSHOT-cli.jar:/home/okamoto/tsunami/plugins/*" -Dtsunami-config.location=/home/okamoto/tsunami/tsunami.yaml com.google.tsunami.main.cli.TsunamiCli --ip-v4-target=127.0.0.1 --scan-results-local-output-format=JSON --scan-results-local-output-filename=/tmp/tsunami-output.json (省略) INFO: Tsunami scanning workflow traces: Port scanning phase (16.74 s) with 1 plugin(s): /Tsunami Dev ([email protected])/PORT_SCAN/NmapPortScanner/0.1 Service fingerprinting phase (296.7 ms) with 0 plugin(s): Vuln detection phase (22.06 ms) with 5 plugin(s): /Tsunami Team ([email protected])/VULN_DETECTION/NcrackWeakCredentialDetectorPlugin/0.1 was selected for the following services: ssh (TCP, port 22), smtp (TCP, port 25), rpcbind (TCP, port 111) /Tsunami Team ([email protected])/VULN_DETECTION/YarnExposedManagerApiDetector/0.1 was selected for the following services: ssh (TCP, port 22), smtp (TCP, port 25), rpcbind (TCP, port 111) /Tsunami Team ([email protected])/VULN_DETECTION/JenkinsExposedUiDetector/0.1 was selected for the following services: ssh (TCP, port 22), smtp (TCP, port 25), rpcbind (TCP, port 111) /Tsunami Team ([email protected])/VULN_DETECTION/JupyterExposedUiDetector/0.1 was selected for the following services: ssh (TCP, port 22), smtp (TCP, port 25), rpcbind (TCP, port 111) /Tsunami Team ([email protected])/VULN_DETECTION/WordPressInstallPageDetector/0.1 was selected for the following services: ssh (TCP, port 22), smtp (TCP, port 25), rpcbind (TCP, port 111) # of detected vulnerability: 0. Jun 25, 2020 7:53:15 PM com.google.tsunami.main.cli.TsunamiCli run INFO: Tsunami scan finished, saving results. Jun 25, 2020 7:53:15 PM com.google.tsunami.common.io.archiving.RawFileArchiver archive INFO: Archiving data to file system with filename '/tmp/tsunami-output.json'. Jun 25, 2020 7:53:15 PM com.google.tsunami.main.cli.TsunamiCli run INFO: TsunamiCli finished... Jun 25, 2020 7:53:15 PM com.google.tsunami.main.cli.TsunamiCli main INFO: Full Tsunami scan took 19.54 s. $ ずらずらと実行時のログが表示された後、最後に上記のようなスキャン結果が表示されます。 ポートスキャンに約17秒、脆弱性の検証に約22マイクロ秒の時間がかかったというような各ステップの実行時間や、ポートスキャンで見つかったサービスに対して各Detectorを実行した結果などを確認できます。 6.まとめ Pre-Alpha版ということでドキュメントもほとんどなく機能的にもまだまだ足りない状態で、全体的にまだまだこれからという印象を受けました。 ですが、Reconnaisanceの結果として見つかったサービスに対して脆弱性検知のプラグインを適用していくというTsunamiの基本的な動作の流れは確認することができました。 新たな脆弱性が見つかったらサクッと脆弱性検知のプラグインを書いて流す、そんな使い方になりそうです。 超大規模環境を迅速に脆弱性診断することを目指しているTsunami、ご興味ある方はGithubなど覗いてみてはいかがでしょうか。 自分も時間があればまた自作のプラグインを組み込んでの脆弱性診断などにチャレンジしてみたいと思います。 最後まで読んでいただきありがとうございました!
0 notes
Text
The Good, the Bad and the Unknown — Bluehost Review In 2019
BlueHost is one of the oldest and most reputable web hosting providers accessible as my review in 2019. This Bluehost evaluation depends strongly on information, as well as on the general experience with their hosting characteristics and customer support.
In short, all Bluehost plans give their clients 24/7 live chat, unlimited bandwidth, and at least 5 email accounts. Similarly to many other web hosting companies, they too offer their users a free domain for the first year. Their plans start from $2.75/mo and include improved security, backups, and SSL certificate. These help keep your website secure and protect.
Overall, their performance was great. Bluehost is obviously at the top with its uptime (99.99 percent) and a quick load time of 0.41ms. Read all of the “Advantage” and “Disadvantage” below:
First of all, we should know about the history of Bluehost.
History of Bluehost?

Most of the individuals who heard about any hosting business probably learned about Bluehost.
Podcasters and internet marketing leaders love to encourage it, but is it a nice thing?
Founded in 2003, Bluehost is a private hosting company owned by Endurance International Group. With its sister hosting HostMonster, FastDomain, and iPage, the group owns almost two million domains. The service specialties are based in Provo, Utah, Bluehost VPS and specialized server hosting plans.
How Good is Bluehost Hosting?
The biggest selling point of Bluehost is, well, their selling point.
Bluehost pricing (beginning at around $2.95) is one of the lowest on the market and comes standard with all the fundamental characteristics that a shared hosting supplier might want.
They are worth comparing against other similar budget hosts as they offer a wide variety of plans with certain niche advantages. You may want to keep an eye out for a few things that our researchers found, however. Uptime and speed are considerably smaller than most rivals (particularly higher-priced competitors) and Bluehost’s customer service is not as helpful as one would have hoped.
General Info & Hosting Overview of Bluehost Review
Let’s see Bluehost Review In 2019
OVERALL RANK: Rated #1 out of 32 web host
speed: 406ms (Average from December 2017 to March 2019)
UPTIME:99.99% (Average from December 2017 to March 2019)
SUPPORT:24/7 Live ChatAPPS: WordPress, Joomla, Drupal, and some website builders
FEATURES: Unmetered bandwidth and storage, email accounts, free domain 1st year hosting
PLANS: Shared, Cloud, VPS, and Dedicated Servers
SITE TRANSFER: Not free pricing:
Starting at $2.75/mo (renews at $7.95/mo)
Why Choose Bluehost?
• Bluehost is awarded #1 for WordPress by WordPress.org since 2005 • Heavy focus on WordPress with WordPress installed by default on all new accounts • Custom-branded cPanel with all of the industry-standard features • Affordable cloud hosting with solid performance/reliability • Optimized plans specifically for WordPress and WooCommerce • Free & paid integrated SSL certificates for eCommerce websites • Personal & direct customer phone support based in the US • Numerous add-ons available, such as G Suite, Spam Experts, SiteLock, etc.
Key Features We Like On Bluehost Hosting
• Default support for PHP, Perl, Python, Ruby/Rails, & MySQL on Apache with the ability to install any other web server extensions required by developers or programming teams. • Fast hardware with SSD storage and real-time analytics that monitor website user traffic. • Immediate provisioning with no need to spend hours installing the OS and setting up the server. • Inclusion of Dedicated IP addresses and cPanel/CentOS license saves money over other companies. • Easily organize, edit, and manage databases directly on the server with Bluehost’s custom-designed database manager.
WHAT WE DON’T LIKE:
• VPS plans max-out at 4 CPU cores & 8 GB RAM, forcing an upgrade to dedicated servers.• Cloud Hosting plans are cheaper and more feature-packed, with higher capacity to support traffic spikes on a scale, while offering comparable hardware allocations, developer instruments, and third-party add-ons. • Configuration settings for sophisticated web page caching & HTML / JavaScript compression may be complicated for inexperienced users and involve live testing on manufacturing locations to be optimized.
What Are The Disadvantage of Bluehost
• Monetizes your site by injecting ads onto the 404 pages (although this can be disabled) • Basic hosting plan only allows you to host 1 website • Weebly site builder is pointless • Average speed & reliability scores from our performance testing on shared hosting plans • Uses MOJO Marketplace which includes a lot of bloatware/upsells • Charges $149 for migrating your existing website over to them • The cost of additional dedicated IP addresses can be expensive • Customer support via email tickets was discontinued • No prorated refund after 30 days
Do We Recommend Bluehost Hosting
yes, we do
Bluehost ranked at or near the top for both uptime and load times for more than a year.
They also provide strong safety help, money-back guarantee, and a lot of user-friendly apps, all for one of the lowest rates in the industry ($2.75/month).
They’re not perfect, however. Renewal prices will occur following the closing of the introductory price. And they pay extra for site migrations, which other hosts throw free of charge.
But overall, for a good value, Bluehost delivers a strong performance.
Also, you should read this Best Web Hosting Services 2019 | For An old website?
P.S. If you want to see hosting providers that are cheap & best, check our Blog Visitor Answer
0 notes
Text
OneinStack: How to install it on Ubuntu and CentOS
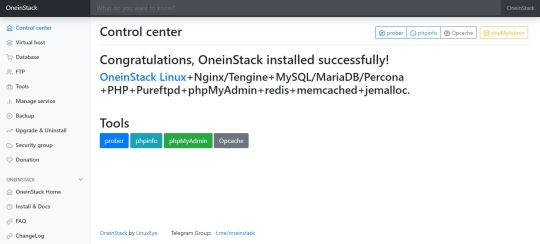
What is OneinStack? It is an active project that uses to set up an environment for the development of PHP/JAVA applications in just one-click on Linux operating systems such as CentOS (including Redhat), Debian, Ubuntu, Fedora, Deepin, Amazon Linux and other same family Distros. Just like WAMP or XAMPP server for Windows, OneinStack allows creating different Linux web server environment such as: Lnmp(Linux + Nginx+ MySQL/MongoDB+ PHP) Lamp(Linux + Apache+ MySQL/MongoDB+ PHP) Lnmpa (Linux + Nginx+ MySQL/MongoDB+ PHP+ Apache): Nginx handles static, Apache handles dynamic PHP Lnmt (Linux + Nginx+ MySQL/MongoDB+ Tomcat): Nginx handles static, Tomcat (JDK) handles JAVA Lnpp(Linux + Nginx+ PostgreSQL+ PHP) Lapp(Linux + Apache+ PostgreSQL+ PHP) Lnmh(Linux + Nginx+ MySQL+ HHVM) All the above-mentioned web servers combination can be installed using pre-given OneinStack script. OneinStack updates are timely which makes it very reliable to use. The script of OneinStack provides a wide range of features such as: All the command and auto installation will be done in Terminal only using the command line. Good for server usage. Most of the time up to date. Some security optimization Wide range of database versions (MySQL-8.0, 5.7, 5.6, 5.5; MariaDB-10.4, 10.3, 10.2, 5.5, Percona-8.0, 5.7, 5.6, 5.5, AliSQL-5.6, PostgreSQL, MongoDB) Multiple PHP versions (PHP-7.3, 7.2, 7.1, 7.0, 5.6, 5.5, 5.4, 5.3) Provide Nginx, Tengine, OpenResty and ngx_lua_waf Tomcat version (Tomcat-9, Tomcat-8, Tomcat-7, Tomcat-6) JDK version (JDK-11.0, JDK-1.8, JDK-1.7, JDK-1.6) Apache version (Apache-2.4, Apache-2.2) OneinStack provides option to install PHP Cache Accelerator provides ZendOPcache, xcache, apcu, eAccelerator. And php extensions, include ZendGuardLoader, ionCube and more... can be installed with one click. Installation of Pureftpd, phpMyAdmin, memcached, redis Provide upgrade script for above-mentioned tools Virtual host script Support local, remote(rsync between servers), Aliyun OSS, Qcloud COS, UPYUN, QINIU, Amazon S3, Google Drive and Dropbox backup script And more... It also comes with the Let's Encrypt certificate that means those want to use the SSL certificate for their project; just only need to enter the domain name with you want to use SSL. After that, it automatically configures the SSL certificate for the domain name. Moreover, OneinStack will also set the auto-renewal of Let's Encrypt certificate. The OneinStack project is available on GitHub and free to download, install and use.
Read the full article
0 notes
Text
Instalar Grafana en CentOS 8
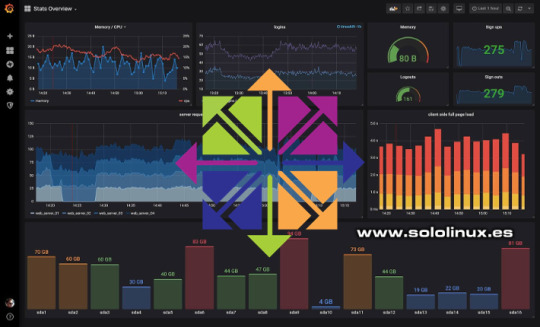
Instalar Grafana en CentOS 8 y CentOS 7. Grafana, es una de las mejores herramientas para monitorizar servidores que puedes encontrar, tiene unas propiedades únicas para ser de código abierto. No pienses que estamos ante una herramienta común, no no, de eso nada. Solo te digo que gigantes como eBay, Paypal o el mismo RedHat, utilizan Grafana para monitorear sus servidores. Es una herramienta imprescindible si quieres controlar tus servidores de manera robusta y escalable. Como ya comentamos en un articulo anterior, el nuevo panel de control web, Plesk Obsidian, lo integra de serie en sus instalaciones. Es muy, muy bueno. Grafana tiene otra interesante particularidad, nos permite optar por vincularlo con bases de datos de series temporales como InfluxDB o Prometheus, o con bases de datos relacionales como MySQL, MariaDB o PostgreSQL. En este articulo vemos como instalar Grafana en tu servidor o VPS.
Instalar Grafana en CentOS 8 o CentOS 7
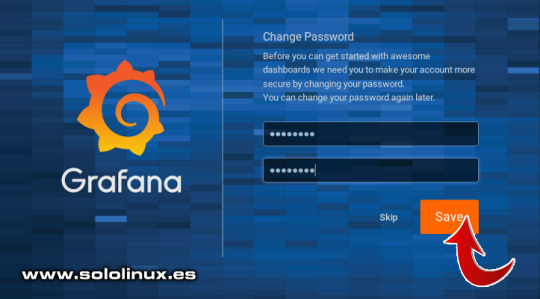
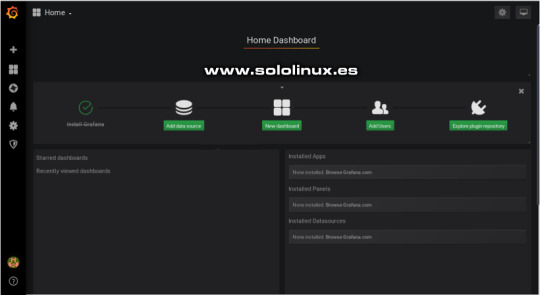
Comenzamos actualizando el servidor. sudo yum update Agregamos el repositorio de Grafana. nano /etc/yum.repos.d/grafana.repo Copia y pega lo siguiente: name=grafana baseurl=https://packages.grafana.com/oss/rpm repo_gpgcheck=1 enabled=1 gpgcheck=1 gpgkey=https://packages.grafana.com/gpg.key sslverify=1 sslcacert=/etc/pki/tls/certs/ca-bundle.crt Guarda el archivo, cierra el editor, y actualiza el sistema. sudo yum update Instalamos Grafana. sudo yum install grafana Una vez concluya la instalación, puedes comprobar el servicio con sus rutas. cat /usr/lib/systemd/system/grafana-server.service ejemplo... Description=Grafana instance Documentation=http://docs.grafana.org Wants=network-online.target After=network-online.target After=postgresql.service mariadb.service mysqld.service EnvironmentFile=/etc/sysconfig/grafana-server User=grafana Group=grafana Type=notify Restart=on-failure WorkingDirectory=/usr/share/grafana RuntimeDirectory=grafana RuntimeDirectoryMode=0750 ExecStart=/usr/sbin/grafana-server \ --config=${CONF_FILE} \ --pidfile=${PID_FILE_DIR}/grafana-server.pid \ --packaging=rpm \ cfg:default.paths.logs=${LOG_DIR} \ cfg:default.paths.data=${DATA_DIR} \ cfg:default.paths.plugins=${PLUGINS_DIR} \ cfg:default.paths.provisioning=${PROVISIONING_CFG_DIR} LimitNOFILE=10000 TimeoutStopSec=20 WantedBy=multi-user.target Según nos indica el ejemplo anterior... Los binarios de Grafana están en /usr/sbin/grafana-server. El archivo que define las variables de entorno las podemos encontrar en /etc/sysconfig/grafana-server. El archivo de configuración es a través de la variable CONF_FILE. El PID del archivo lo determina la variable PID_FILE_DIR. Las rutas del registro, datos, complementos, y más... también están indicadas por las variables. Puedes ver las variables en: etc/sysconfig/grafana-server ejemplo... GRAFANA_USER=grafana GRAFANA_GROUP=grafana GRAFANA_HOME=/usr/share/grafana LOG_DIR=/var/log/grafana DATA_DIR=/var/lib/grafana MAX_OPEN_FILES=10000 CONF_DIR=/etc/grafana CONF_FILE=/etc/grafana/grafana.ini RESTART_ON_UPGRADE=true PLUGINS_DIR=/var/lib/grafana/plugins PROVISIONING_CFG_DIR=/etc/grafana/provisioning # Only used on systemd systems PID_FILE_DIR=/var/run/grafana Puedes ver en el ejemplo anterior, que al instalar Grafana ya se creo un usuario (grafana). Vale, continuamos... Iniciamos Grafana y verificamos el servicio. sudo systemctl start grafana-server sudo systemctl status grafana-server Felicidades, ya tiene a Grafana corriendo en tu sistema. No te olvides de abrir el puerto correspondiente. sudo firewall-cmd --add-port=3000/tcp --permanent sudo firewall-cmd --reload Interfaz de usuario de Grafana El puerto por defecto de Grafana es el "3000", por tanto desde tu navegador web favorito puedes acceder así... http://ip-del-servidor:3000/ http://localhost:3000/ Nos aparece la pantalla de inicio de sesión, por defecto el usuario y la contraseña es "admin".
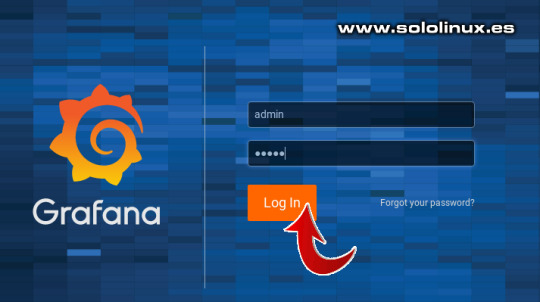
Iniciar sesión en Grafana La aplicación te pide que modifiques la contraseña por defecto.
Modificar el password en Grafana Accedemos a la pantalla predeterminada por defecto de Grafana.
Pantalla principal de Grafama La url de inicio de sesión en Grafana es la siguiente: http://ip-del-servidor:3000/signup http://localhost:3000/signup Si tu eres el sysadmin, y no quieres que nadie más tenga acceso, algo recomendable (ni intentar registrarse), sigue los pasos que te indico a continuación. Editamos el archivo "grafana.ini". sudo nano /etc/grafana/grafana.ini Busca la siguiente linea... # disable user signup / registration ;allow_sign_up = true La modificas a false. # disable user signup / registration ;allow_sign_up = false Guarda el archivo y cierras el editor. Para concluir reiniciamos Grafana. sudo systemctl restart grafana-server En un próximo articulo aprenderemos a crear nuestro primer tablero, síguenos. Espero que este mini articulo te sea útil, puedes ayudarnos a mantener el servidor con una donación (paypal), o también colaborar con el simple gesto de compartir nuestros artículos en tu sitio web, blog, foro o redes sociales. Read the full article
#centos7#CentOS8#codigoabierto#eBay#etc/sysconfig/grafana-server#grafana#grafana.ini#InstalarGrafana#interfazdeusuario#monitorizar#PayPal#PleskObsidian#redhat#servidor#sysadmin#vps
0 notes