#Install MySQL 8 on Ubuntu 20.04
Explore tagged Tumblr posts
Visit Tumblr Blog
Explore Tumblr blogs with no restrictions, modern design and the best experience.
Last Seen Tumblr Blogs


Fun Fact
Tumblr was attacked by a cross-site scripting worm deployed by the Internet troll group GNAA on Dec 3, 2012.
Text
Ghost nedir ve nasıl kurulur?

Wordpress ve Joomla gibi açık kaynak cms sistemlerine alternatif olarak kullanabileceğiniz bir yazılımdır.Kurulumu Wordpress kadar kolay değildir. Ghost bir açık kaynak bloglama platform yazılı JavaScript ve altında dağıtılmış MIT Lisansı, bireysel blogcular ve çevrimiçi yayınlar için çevrimiçi yayıncılık sürecini basitleştirmek için tasarlanmıştır. Ghost platformu konsepti ilk olarak Kasım 2012'de proje kurucusu John O'Nolan tarafından bir blog yazısında halka açıldı,ortak çalışan Hannah Wolfe ile bir prototip sürümünü kodlamayı haklı çıkarmak için yeterli yanıt üretti. Ghost kod yapısı Node.js, sunucu tarafı JavaScript yürütme motoru, ve Ember.js yönetici istemcisi. Sürüm 2.0'dan bu yana, yayınlar WYSIWYG editör; önceki sürümlerde, yalnızca Markdown desteklendi. Ghost CMS (İçerik Yönetim Sistemi) CMS olarak kullanılabilir.
Genel Bakış
Bu, önerilen Ubuntu 20.04 veya 22.04 yığınımızı kullanarak Ghost'u kendi kendine barındırma için resmi rehber. Kendi yazılımınızı yüklemek, bakımını yapmak ve güncellemek konusunda rahatsanız, burası tam size göre. Bu kılavuzun sonunda MySQL kullanarak üretimde çalışan tamamen yapılandırılmış bir Ghost kurulumuna sahip olacaksınız.
Önkoşullar
Resmi olarak önerilen üretim kurulumu aşağıdaki yığını gerektirir: Ubuntu 20.04 veya Ubuntu 22.04 NGINX (SSL için minimum 1.9.5) A desteklenen sürüm nın Node.js MySQL 8 Systemd En az 1 GB belleğe sahip bir sunucu Kayıtlı bir alan adı Başlamadan önce çalışan bir DNS kurmalısınız A-Kayıt alan adınızdan sunucunun IP adresini gösterir. SSL'nin kurulum sırasında yapılandırılabilmesi için bu önceden yapılmalıdır. Kurulum için resmi sayfadaki adımları dikkatlice takip edip sırası ile yapmalısınız. Resmi kurulum : https://ghost.org/docs/install/ubuntu/ Read the full article
0 notes
Text
How to Install MySQL 8 on CentOS 7 Linux
How to Install MySQL 8 on CentOS 7 Linux
Hi Friends! We will learn about “How to install MySQL 8 on CentOS 7 Linux”, we will look at the installation for MySQL 8 step by step in CentOS 7 . MySQL is the Relation Database, which is used to store the data. It Is open-source and widely used in the industries. MySQL written in C and C++. It has also been tested to be a “fast, stable and true multi-user, multi-threaded SQL database…

View On WordPress
#install mysql 8#install mysql 8 centos 7#install mysql 8 centos 7 digitalocean#install mysql 8 in centos 7#Install MySQL 8 in Rocky Linux#install mysql 8 on amazon linux#install mysql 8 on rhel 7#Install MySQL 8 on Ubuntu 20.04#Install mySQL in linux#install mysql on ubuntu 18.04#mysql community download#mysql community edition#mysql community server download
0 notes
Text
12 notes
·
View notes
Text
LibreNMS is a community-based GPL-licensed auto-discovering network monitoring tool based on PHP, MySQL, and SNMP. LibreNMS includes support for a wide range of network hardware and operating systems including Juniper, Cisco, Linux, Foundry, FreeBSD, Brocade, HP, Windows and many more. It is a fork of “Observium” monitoring tool. In this guide, we will cover the installation and configuration of LibreNMS on Ubuntu 20.04/18.04 LTS server, codenamed Bionic Beaver. We have other monitoring tutorials around Cacti, Zabbix, Grafana, Prometheus, and InfluxDB. Below are the top features of LibreNMS networking monitoring tool Has Automatic discovery – It will automatically discover your entire network using CDP, FDP, LLDP, OSPF, BGP, SNMP, and ARP API Access – LibreNMS provides a full API to manage, graph and retrieve data from your install. Automatic Updates – With LibreNMS you get to stay upto date automatically with new features and bug fixes. Customisable alerting – Highly flexible alerting system, notify via email, irc, slack and more. Support for Distributed Polling through horizontal scaling which grows with your network Billing system – Easily generate bandwidth bills for ports on your network based on usage or transfer. Android and iOS application – There is a native iPhone/Android App is available which provides core functionality. Multiple authentication methods: MySQL, HTTP, LDAP, Radius, Active Directory Integration support for NfSen, collectd, SmokePing, RANCID, Oxidized Below are requirements for running LibreNMS on Ubuntu Database Server – We will use MariaDB PHP Web Server – We will use Nginx Step 1: Install PHP and required modules Ubuntu 18.04+ has PHP 7.x in its repositories. Install it by running the commands below on your terminal: sudo apt update sudo apt -y install wget php php-pear,cgi,common,curl,mbstring,gd,mysql,bcmath,imap,json,xml,snmp,fpm,zip To confirm the php version installed, use the command php -v: # Ubuntu 22.04 $ php -v PHP 8.1.2 (cli) (built: Aug 8 2022 07:28:23) (NTS) Copyright (c) The PHP Group Zend Engine v4.1.2, Copyright (c) Zend Technologies with Zend OPcache v8.1.2, Copyright (c), by Zend Technologies # Ubuntu 20.04 $ php -v PHP 7.4.3 (cli) (built: Oct 6 2020 15:47:56) ( NTS ) Copyright (c) The PHP Group Zend Engine v3.4.0, Copyright (c) Zend Technologies with Zend OPcache v7.4.3, Copyright (c), by Zend Technologies # Ubuntu 18.04 $ php -v PHP 7.2.8 (cli) (built: Jul 17 2018 09:50:46) ( NTS ) Copyright (c) 1997-2018 The PHP Group Zend Engine v3.2.0, Copyright (c) 1998-2018 Zend Technologies Configure and Start PHP-FPM Ensure date.timezone is set in php.ini to your preferred time zone: Edit both files: sudo vim /etc/php/*/fpm/php.ini sudo vim /etc/php/*/cli/php.ini Change date.timezone under [Date] section: [Date] ; Defines the default timezone used by the date functions ; http://php.net/date.timezone date.timezone = Africa/Nairobi Restart php fpm: sudo systemctl restart php*-fpm.service Step 2: Install Nginx Web Server For this setup, we will use Nginx as a web server for LibreNMS, install it by running: sudo apt remove apache2 -y sudo apt -y install nginx Ensure it is enabled to start on boot: sudo systemctl enable nginx Step 3: Install and configure MariaDB Install MariaDB Server: sudo apt install mariadb-server LibreNMS is not fully compatible with MySQL strict mode, for now, please disable this after mysql is installed. sudo vim /etc/mysql/mariadb.conf.d/50-server.cnf Within the [mysqld] section please add: [mysqld] innodb_file_per_table=1 sql-mode="" lower_case_table_names=0 Then restart mysql sudo systemctl restart mariadb Once database server has been installed and configured, you need to create a database for LibreNMS. $ sudo mysql -u root CREATE DATABASE librenms CHARACTER SET utf8mb4 COLLATE utf8mb4_unicode_ci; CREATE USER 'librenms'@'localhost' IDENTIFIED BY 'StrongPassword';
GRANT ALL PRIVILEGES ON librenms.* TO 'librenms'@'localhost'; FLUSH PRIVILEGES; exit Step 4: Download and Install LibreNMS We will download and install LibreNMS in this step. If you don’t have git, first install it: sudo apt install git -y LibreNMS will run under its own user called librenms which we need to add: sudo useradd -r -M -d /opt/librenms librenms getent passwd librenms Add this user to web user group www-data sudo usermod -a -G librenms www-data When done. proceed to install packages required by LibreNMS sudo apt update sudo apt install rrdtool whois fping imagemagick graphviz mtr-tiny nmap python3 python3-pip python3-mysqldb snmp snmpd python3-memcache mtr-tiny composer acl unzip python3-pymysql python3-dotenv python3-redis python3-setuptools python3-systemd -y Clone LibreNMS source code from github: $ git clone https://github.com/librenms/librenms.git librenms Cloning into 'librenms'... remote: Counting objects: 130428, done. remote: Compressing objects: 100% (27/27), done. remote: Total 130428 (delta 10), reused 10 (delta 4), pack-reused 130396 Receiving objects: 100% (130428/130428), 128.54 MiB | 19.52 MiB/s, done. Resolving deltas: 100% (88754/88754), done. Checking out files: 100% (8476/8476), done. Move the folder librenms to /opt sudo mv librenms/ /opt/ Configure snmpd Copy configuration template: sudo cp /opt/librenms/snmpd.conf.example /etc/snmp/snmpd.conf sudo vim /etc/snmp/snmpd.conf Edit the text which says RANDOMSTRINGGOESHERE and set your own community string. $ sudo vim /etc/snmp/snmpd.conf com2sec readonly default LibreStr0ngSecret Next download distro: curl -o distro https://raw.githubusercontent.com/librenms/librenms-agent/master/snmp/distro chmod +x distro sudo mv distro /usr/bin/distro Restart snmpd sudo systemctl restart snmpd Step 5: Configure PHP-FPM and Cron job Copy default PHP-FPM www.conf file cd /etc/php/*/fpm/pool.d sudo cp www.conf librenms.conf cd ~/ Open the file for editing: sudo vim /etc/php/*/fpm/pool.d/librenms.conf Change [www] to [librenms]: [librenms] Change user and group to “librenms”: user = librenms group = librenms Change listen to a unique name: listen = /run/php-fpm-librenms.sock Create LibreNMS Cron job Run the command below to set cron job: sudo cp /opt/librenms/librenms.nonroot.cron /etc/cron.d/librenms Step 6: Configure Log rotation and Permissions LibreNMS keeps logs in /opt/librenms/logs. Over time these can become large and be rotated out. To rotate out the old logs you can use the provided logrotate config file: sudo cp /opt/librenms/misc/librenms.logrotate /etc/logrotate.d/librenms Finally, fix all permissions sudo chown -R librenms:librenms /opt/librenms sudo setfacl -d -m g::rwx /opt/librenms/rrd /opt/librenms/logs /opt/librenms/bootstrap/cache/ /opt/librenms/storage/ sudo setfacl -R -m g::rwx /opt/librenms/rrd /opt/librenms/logs /opt/librenms/bootstrap/cache/ /opt/librenms/storage/ Run composer install: sudo su - librenms ./scripts/composer_wrapper.php install --no-dev exit Enable lnms command completion: sudo ln -s /opt/librenms/lnms /usr/bin/lnms sudo cp /opt/librenms/misc/lnms-completion.bash /etc/bash_completion.d/ Step 7: Configure Nginx for LibreNMS Let’s create the VirtualHost definition for Nginx to be used by LibreNMS. Create a new file: sudo vim /etc/nginx/conf.d/librenms.conf Add and modify below data: server listen 80; server_name librenms.example.com; root /opt/librenms/html; index index.php; charset utf-8; gzip on; gzip_types text/css application/javascript text/javascript application/x-javascript image/svg+xml text/plain text/xsd text/xsl text/xml image/x-icon; location / try_files $uri $uri/ /index.php?$query_string; location ~ [^/]\.php(/ Check syntax: $ sudo nginx -t nginx: the configuration file /etc/nginx/nginx.conf syntax is ok nginx: configuration file /etc/nginx/nginx.conf test is successful If all is okay, restart nginx:
sudo rm /etc/nginx/sites-enabled/default sudo systemctl restart nginx sudo systemctl restart php*-fpm.service Step 8: Configure LibreNMS on Web UI Now open your web browser and start the installer: http://librenms.example.com/install.php Confirm that the pre-install checks is successful. Input database connection details. Check provided credentials and build the database. Database credentials check and build processes should both be successful. Create the first LibreNMS admin user. Username should be shown on the screen. Validate your LibreNMS installation on Ubuntu: Login to LibreNMS Admin portal and start configuring your Network Monitoring Further reading: How to Install and Configure Cacti on Ubuntu Install Zabbix Server on Ubuntu
0 notes
Text
godaddy vps vitual private hosting 처음 설정 LAMP
tip)
- linux에서 id {사용자명} 하면 어느 그룹에 속해 있는지 등등 사용자 정보 나온다.
- mysql 기본 문법 https://www.educba.com/mysql-commands/
https://medium.com/@mandeepkaur1/a-list-of-mysql-commands-c4d0d244aa5c
- 에러 Access denied for user 'root'@'localhost' 처리 방법 https://stackoverflow.com/questions/36864206/sqlstatehy000-1698-access-denied-for-user-rootlocalhost
- mysql 사용자 만들기 https://dev.mysql.com/doc/refman/8.0/en/caching-sha2-pluggable-authentication.html
- 모든 권한 가진 사용자 만들기 https://stackoverflow.com/questions/50177216/how-to-grant-all-privileges-to-root-user-in-mysql-8-0
LAMP 설치하기 apache, mysql, php original source: https://www.digitalocean.com/community/tutorials/how-to-install-linux-apache-mysql-php-lamp-stack-on-ubuntu-20-04
Step 1 — Installing Apache and Updating the Firewall
The Apache web server is among the most popular web servers in the world. It’s well documented, has an active community of users, and has been in wide use for much of the history of the web, which makes it a great choice for hosting a website.
Start by updating the package manager cache. If this is the first time you’re using sudo within this session, you’ll be prompted to provide your user’s password to confirm you have the right privileges to manage system packages with apt.
sudo apt update
Copy
Then, install Apache with:
sudo apt install apache2
Copy
You’ll also be prompted to confirm Apache’s installation by pressing Y, then ENTER.
Once the installation is finished, you’ll need to adjust your firewall settings to allow HTTP traffic. UFW has different application profiles that you can leverage for accomplishing that. To list all currently available UFW application profiles, you can run:
sudo ufw app list
Copy
You’ll see output like this:
OutputAvailable applications: Apache Apache Full Apache Secure OpenSSH
Here’s what each of these profiles mean:
Apache: This profile opens only port 80 (normal, unencrypted web traffic).
Apache Full: This profile opens both port 80 (normal, unencrypted web traffic) and port 443 (TLS/SSL encrypted traffic).
Apache Secure: This profile opens only port 443 (TLS/SSL encrypted traffic).
For now, it’s best to allow only connections on port 80, since this is a fresh Apache installation and you still don’t have a TLS/SSL certificate configured to allow for HTTPS traffic on your server.
To only allow traffic on port 80, use the Apache profile:
sudo ufw allow in "Apache"
Copy
You can verify the change with:
sudo ufw status
Copy
OutputStatus: active To Action From -- ------ ---- OpenSSH ALLOW Anywhere Apache ALLOW Anywhere OpenSSH (v6) ALLOW Anywhere (v6) Apache (v6) ALLOW Anywhere (v6)
Traffic on port 80 is now allowed through the firewall.
You can do a spot check right away to verify that everything went as planned by visiting your server’s public IP address in your web browser (see the note under the next heading to find out what your public IP address is if you do not have this information already):
http://your_server_ip
You’ll see the default Ubuntu 20.04 Apache web page, which is there for informational and testing purposes. It should look something like this:
If you see this page, then your web server is now correctly installed and accessible through your firewall.
How To Find your Server’s Public IP Address
If you do not know what your server’s public IP address is, there are a number of ways you can find it. Usually, this is the address you use to connect to your server through SSH.
There are a few different ways to do this from the command line. First, you could use the iproute2 tools to get your IP address by typing this:
ip addr show eth0 | grep inet | awk '{ print $2; }' | sed 's/\/.*$//'
Copy
This will give you two or three lines back. They are all correct addresses, but your computer may only be able to use one of them, so feel free to try each one.
An alternative method is to use the curl utility to contact an outside party to tell you how it sees your server. This is done by asking a specific server what your IP address is:
curl http://icanhazip.com
Copy
Regardless of the method you use to get your IP address, type it into your web browser’s address bar to view the default Apache page.
Step 2 — Installing MySQL
Now that you have a web server up and running, you need to install the database system to be able to store and manage data for your site. MySQL is a popular database management system used within PHP environments.
Again, use apt to acquire and install this software:
sudo apt install mysql-server
Copy
When prompted, confirm installation by typing Y, and then ENTER.
When the installation is finished, it’s recommended that you run a security script that comes pre-installed with MySQL. This script will remove some insecure default settings and lock down access to your database system. Start the interactive script by running:
sudo mysql_secure_installation
Copy
This will ask if you want to configure the VALIDATE PASSWORD PLUGIN.
Note: Enabling this feature is something of a judgment call. If enabled, passwords which don’t match the specified criteria will be rejected by MySQL with an error. It is safe to leave validation disabled, but you should always use strong, unique passwords for database credentials.
Answer Y for yes, or anything else to continue without enabling.
VALIDATE PASSWORD PLUGIN can be used to test passwords and improve security. It checks the strength of password and allows the users to set only those passwords which are secure enough. Would you like to setup VALIDATE PASSWORD plugin? Press y|Y for Yes, any other key for No:
If you answer “yes”, you’ll be asked to select a level of password validation. Keep in mind that if you enter 2 for the strongest level, you will receive errors when attempting to set any password which does not contain numbers, upper and lowercase letters, and special characters, or which is based on common dictionary words.
There are three levels of password validation policy: LOW Length >= 8 MEDIUM Length >= 8, numeric, mixed case, and special characters STRONG Length >= 8, numeric, mixed case, special characters and dictionary file Please enter 0 = LOW, 1 = MEDIUM and 2 = STRONG: 1
Regardless of whether you chose to set up the VALIDATE PASSWORD PLUGIN, your server will next ask you to select and confirm a password for the MySQL root user. This is not to be confused with the system root. The database root user is an administrative user with full privileges over the database system. Even though the default authentication method for the MySQL root user dispenses the use of a password, even when one is set, you should define a strong password here as an additional safety measure. We’ll talk about this in a moment.
If you enabled password validation, you’ll be shown the password strength for the root password you just entered and your server will ask if you want to continue with that password. If you are happy with your current password, enter Y for “yes” at the prompt:
Estimated strength of the password: 100 Do you wish to continue with the password provided?(Press y|Y for Yes, any other key for No) : y
For the rest of the questions, press Y and hit the ENTER key at each prompt. This will remove some anonymous users and the test database, disable remote root logins, and load these new rules so that MySQL immediately respects the changes you have made.
When you’re finished, test if you’re able to log in to the MySQL console by typing:
sudo mysql
Copy
This will connect to the MySQL server as the administrative database user root, which is inferred by the use of sudo when running this command. You should see output like this:
OutputWelcome to the MySQL monitor. Commands end with ; or \g. Your MySQL connection id is 22 Server version: 8.0.19-0ubuntu5 (Ubuntu) Copyright (c) 2000, 2020, Oracle and/or its affiliates. All rights reserved. Oracle is a registered trademark of Oracle Corporation and/or its affiliates. Other names may be trademarks of their respective owners. Type 'help;' or '\h' for help. Type '\c' to clear the current input statement. mysql>
To exit the MySQL console, type:
exit
Copy
Notice that you didn’t need to provide a password to connect as the root user, even though you have defined one when running the mysql_secure_installation script. That is because the default authentication method for the administrative MySQL user is unix_socket instead of password. Even though this might look like a security concern at first, it makes the database server more secure because the only users allowed to log in as the root MySQL user are the system users with sudo privileges connecting from the console or through an application running with the same privileges. In practical terms, that means you won’t be able to use the administrative database root user to connect from your PHP application. Setting a password for the root MySQL account works as a safeguard, in case the default authentication method is changed from unix_socket to password.
For increased security, it’s best to have dedicated user accounts with less expansive privileges set up for every database, especially if you plan on having multiple databases hosted on your server.
Note: At the time of this writing, the native MySQL PHP library mysqlnd doesn’t support caching_sha2_authentication, the default authentication method for MySQL 8. For that reason, when creating database users for PHP applications on MySQL 8, you’ll need to make sure they’re configured to use mysql_native_password instead. We’ll demonstrate how to do that in Step 6.
Your MySQL server is now installed and secured. Next, we’ll install PHP, the final component in the LAMP stack.
Step 3 — Installing PHP
You have Apache installed to serve your content and MySQL installed to store and manage your data. PHP is the component of our setup that will process code to display dynamic content to the final user. In addition to the php package, you’ll need php-mysql, a PHP module that allows PHP to communicate with MySQL-based databases. You’ll also need libapache2-mod-php to enable Apache to handle PHP files. Core PHP packages will automatically be installed as dependencies.
To install these packages, run:
sudo apt install php libapache2-mod-php php-mysql
Copy
Once the installation is finished, you can run the following command to confirm your PHP version:
php -v
Copy
OutputPHP 7.4.3 (cli) (built: Jul 5 2021 15:13:35) ( NTS ) Copyright (c) The PHP Group Zend Engine v3.4.0, Copyright (c) Zend Technologies with Zend OPcache v7.4.3, Copyright (c), by Zend Technologies
At this point, your LAMP stack is fully operational, but before you can test your setup with a PHP script, it’s best to set up a proper Apache Virtual Host to hold your website’s files and folders. We’ll do that in the next step.
Step 4 — Creating a Virtual Host for your Website
When using the Apache web server, you can create virtual hosts (similar to server blocks in Nginx) to encapsulate configuration details and host more than one domain from a single server. In this guide, we’ll set up a domain called your_domain, but you should replace this with your own domain name.
Note: In case you are using DigitalOcean as DNS hosting provider, you can check our product docs for detailed instructions on how to set up a new domain name and point it to your server.
Apache on Ubuntu 20.04 has one server block enabled by default that is configured to serve documents from the /var/www/html directory. While this works well for a single site, it can become unwieldy if you are hosting multiple sites. Instead of modifying /var/www/html, we’ll create a directory structure within /var/www for the your_domain site, leaving /var/www/html in place as the default directory to be served if a client request doesn’t match any other sites.
Create the directory for your_domain as follows:
sudo mkdir /var/www/your_domain
Copy
Next, assign ownership of the directory with the $USER environment variable, which will reference your current system user:
sudo chown -R $USER:$USER /var/www/your_domain
Copy
Then, open a new configuration file in Apache’s sites-available directory using your preferred command-line editor. Here, we’ll use nano:
sudo nano /etc/apache2/sites-available/your_domain.conf
Copy
This will create a new blank file. Paste in the following bare-bones configuration:
/etc/apache2/sites-available/your_domain.conf
<VirtualHost *:80> ServerName your_domain ServerAlias www.your_domain ServerAdmin webmaster@localhost DocumentRoot /var/www/your_domain ErrorLog ${APACHE_LOG_DIR}/error.log CustomLog ${APACHE_LOG_DIR}/access.log combined </VirtualHost>
Copy
Save and close the file when you’re done. If you’re using nano, you can do that by pressing CTRL+X, then Y and ENTER.
With this VirtualHost configuration, we’re telling Apache to serve your_domain using /var/www/your_domain as the web root directory. If you’d like to test Apache without a domain name, you can remove or comment out the options ServerName and ServerAlias by adding a # character in the beginning of each option’s lines.
You can now use a2ensite to enable the new virtual host:
sudo a2ensite your_domain
Copy
You might want to disable the default website that comes installed with Apache. This is required if you’re not using a custom domain name, because in this case Apache’s default configuration would overwrite your virtual host. To disable Apache’s default website, type:
sudo a2dissite 000-default
Copy
To make sure your configuration file doesn’t contain syntax errors, run:
sudo apache2ctl configtest
Copy
Finally, reload Apache so these changes take effect:
sudo systemctl reload apache2
Copy
Your new website is now active, but the web root /var/www/your_domain is still empty. Create an index.html file in that location so that we can test that the virtual host works as expected:
nano /var/www/your_domain/index.html
Copy
Include the following content in this file:
/var/www/your_domain/index.html
<html> <head> <title>your_domain website</title> </head> <body> <h1>Hello World!</h1> <p>This is the landing page of <strong>your_domain</strong>.</p> </body> </html>
Copy
Now go to your browser and access your server’s domain name or IP address once again:
http://server_domain_or_IP
You’ll see a page like this:
If you see this page, it means your Apache virtual host is working as expected.
You can leave this file in place as a temporary landing page for your application until you set up an index.php file to replace it. Once you do that, remember to remove or rename the index.html file from your document root, as it would take precedence over an index.php file by default.
A Note About
DirectoryIndex
on Apache
With the default DirectoryIndex settings on Apache, a file named index.html will always take precedence over an index.php file. This is useful for setting up maintenance pages in PHP applications, by creating a temporary index.html file containing an informative message to visitors. Because this page will take precedence over the index.php page, it will then become the landing page for the application. Once maintenance is over, the index.html is renamed or removed from the document root, bringing back the regular application page.
In case you want to change this behavior, you’ll need to edit the /etc/apache2/mods-enabled/dir.conf file and modify the order in which the index.php file is listed within the DirectoryIndex directive:
sudo nano /etc/apache2/mods-enabled/dir.conf
Copy/etc/apache2/mods-enabled/dir.conf
<IfModule mod_dir.c> DirectoryIndex index.php index.html index.cgi index.pl index.xhtml index.htm </IfModule>
Copy
After saving and closing the file, you’ll need to reload Apache so the changes take effect:
sudo systemctl reload apache2
Copy
In the next step, we’ll create a PHP script to test that PHP is correctly installed and configured on your server.
Step 5 — Testing PHP Processing on your Web Server
Now that you have a custom location to host your website’s files and folders, we’ll create a PHP test script to confirm that Apache is able to handle and process requests for PHP files.
Create a new file named info.php inside your custom web root folder:
nano /var/www/your_domain/info.php
Copy
This will open a blank file. Add the following text, which is valid PHP code, inside the file:
/var/www/your_domain/info.php
<?php phpinfo();
Copy
When you are finished, save and close the file.
To test this script, go to your web browser and access your server’s domain name or IP address, followed by the script name, which in this case is info.php:
http://server_domain_or_IP/info.php
You’ll see a page similar to this:
This page provides information about your server from the perspective of PHP. It is useful for debugging and to ensure that your settings are being applied correctly.
If you can see this page in your browser, then your PHP installation is working as expected.
After checking the relevant information about your PHP server through that page, it’s best to remove the file you created as it contains sensitive information about your PHP environment and your Ubuntu server. You can use rm to do so:
sudo rm /var/www/your_domain/info.php
Copy
You can always recreate this page if you need to access the information again later.
Step 6 — Testing Database Connection from PHP (Optional)
If you want to test whether PHP is able to connect to MySQL and execute database queries, you can create a test table with dummy data and query for its contents from a PHP script. Before we can do that, we need to create a test database and a new MySQL user properly configured to access it.
At the time of this writing, the native MySQL PHP library mysqlnd doesn’t support caching_sha2_authentication, the default authentication method for MySQL 8. We’ll need to create a new user with the mysql_native_password authentication method in order to be able to connect to the MySQL database from PHP.
We’ll create a database named example_database and a user named example_user, but you can replace these names with different values.
First, connect to the MySQL console using the root account:
sudo mysql
Copy
To create a new database, run the following command from your MySQL console:
CREATE DATABASE example_database;
Copy
Now you can create a new user and grant them full privileges on the custom database you’ve just created.
The following command creates a new user named example_user, using mysql_native_password as default authentication method. We’re defining this user’s password as password, but you should replace this value with a secure password of your own choosing.
CREATE USER 'example_user'@'%' IDENTIFIED WITH mysql_native_password BY 'password';
Copy
Now we need to give this user permission over the example_database database:
GRANT ALL ON example_database.* TO 'example_user'@'%';
Copy
This will give the example_user user full privileges over the example_database database, while preventing this user from creating or modifying other databases on your server.
Now exit the MySQL shell with:
exit
Copy
You can test if the new user has the proper permissions by logging in to the MySQL console again, this time using the custom user credentials:
mysql -u example_user -p
Copy
Notice the -p flag in this command, which will prompt you for the password used when creating the example_user user. After logging in to the MySQL console, confirm that you have access to the example_database database:
SHOW DATABASES;
Copy
This will give you the following output:
Output+--------------------+ | Database | +--------------------+ | example_database | | information_schema | +--------------------+ 2 rows in set (0.000 sec)
Next, we’ll create a test table named todo_list. From the MySQL console, run the following statement:
CREATE TABLE example_database.todo_list (
item_id INT AUTO_INCREMENT,
content VARCHAR(255),
PRIMARY KEY(item_id)
);
Copy
Insert a few rows of content in the test table. You might want to repeat the next command a few times, using different values:
INSERT INTO example_database.todo_list (content) VALUES ("My first important item");
Copy
To confirm that the data was successfully saved to your table, run:
SELECT * FROM example_database.todo_list;
Copy
You’ll see the following output:
Output+---------+--------------------------+ | item_id | content | +---------+--------------------------+ | 1 | My first important item | | 2 | My second important item | | 3 | My third important item | | 4 | and this one more thing | +---------+--------------------------+ 4 rows in set (0.000 sec)
After confirming that you have valid data in your test table, you can exit the MySQL console:
exit
Copy
Now you can create the PHP script that will connect to MySQL and query for your content. Create a new PHP file in your custom web root directory using your preferred editor. We’ll use nano for that:
nano /var/www/your_domain/todo_list.php
Copy
The following PHP script connects to the MySQL database and queries for the content of the todo_list table, exhibiting the results in a list. If there’s a problem with the database connection, it will throw an exception. Copy this content into your todo_list.php script:
/var/www/your_domain/todo_list.php
<?php $user = "example_user"; $password = "password"; $database = "example_database"; $table = "todo_list"; try { $db = new PDO("mysql:host=localhost;dbname=$database", $user, $password); echo "<h2>TODO</h2><ol>"; foreach($db->query("SELECT content FROM $table") as $row) { echo "<li>" . $row['content'] . "</li>"; } echo "</ol>"; } catch (PDOException $e) { print "Error!: " . $e->getMessage() . "<br/>"; die(); }
Copy
Save and close the file when you’re done editing.
You can now access this page in your web browser by visiting the domain name or public IP address configured for your website, followed by /todo_list.php:
http://your_domain_or_IP/todo_list.php
You should see a page like this, showing the content you’ve inserted in your test table:
That means your PHP environment is ready to connect and interact with your MySQL server.
.
.
.
======================================================
======================================================
original source : https://www.digitalocean.com/community/tutorials/how-to-install-and-secure-phpmyadmin-on-ubuntu-20-04 How To Install and Secure phpMyAdmin on Ubuntu 20.04
Step 1 — Installing phpMyAdmin
You can use APT to install phpMyAdmin from the default Ubuntu repositories.
As your non-root sudo user, update your server’s package index:
sudo apt update
Copy
Following that you can install the phpmyadmin package. Along with this package, the official documentation also recommends that you install a few PHP extensions onto your server to enable certain functionalities and improve performance.
If you followed the prerequisite LAMP stack tutorial, several of these modules will have been installed along with the php package. However, it’s recommended that you also install these packages:
php-mbstring: A module for managing non-ASCII strings and convert strings to different encodings
php-zip: This extension supports uploading .zip files to phpMyAdmin
php-gd: Enables support for the GD Graphics Library
php-json: Provides PHP with support for JSON serialization
php-curl: Allows PHP to interact with different kinds of servers using different protocols
Run the following command to install these packages onto your system. Please note, though, that the installation process requires you to make some choices to configure phpMyAdmin correctly. We’ll walk through these options shortly:
sudo apt install phpmyadmin php-mbstring php-zip php-gd php-json php-curl
Copy
Here are the options you should choose when prompted in order to configure your installation correctly:
For the server selection, choose apache2Warning: When the prompt appears, “apache2” is highlighted, but not selected. If you do not hit SPACE to select Apache, the installer will not move the necessary files during installation. Hit SPACE, TAB, and then ENTER to select Apache.
Select Yes when asked whether to use dbconfig-common to set up the database
You will then be asked to choose and confirm a MySQL application password for phpMyAdmin
Note: Assuming you installed MySQL by following Step 2 of the prerequisite LAMP stack tutorial, you may have decided to enable the Validate Password plugin. As of this writing, enabling this component will trigger an error when you attempt to set a password for the phpmyadmin user:
To resolve this, select the abort option to stop the installation process. Then, open up your MySQL prompt:
sudo mysql
Copy
Or, if you enabled password authentication for the root MySQL user, run this command and then enter your password when prompted:
mysql -u root -p
Copy
From the prompt, run the following command to disable the Validate Password component. Note that this won’t actually uninstall it, but just stop the component from being loaded on your MySQL server:
UNINSTALL COMPONENT "file://component_validate_password";
Copy
Following that, you can close the MySQL client:
exit
Copy
Then try installing the phpmyadmin package again and it will work as expected:
sudo apt install phpmyadmin
Copy
Once phpMyAdmin is installed, you can open the MySQL prompt once again with sudo mysql or mysql -u root -p and then run the following command to re-enable the Validate Password component:
INSTALL COMPONENT "file://component_validate_password";
Copy
The installation process adds the phpMyAdmin Apache configuration file into the /etc/apache2/conf-enabled/ directory, where it is read automatically. To finish configuring Apache and PHP to work with phpMyAdmin, the only remaining task in this section of the tutorial is to is explicitly enable the mbstring PHP extension, which you can do by typing:
sudo phpenmod mbstring
Copy
Afterwards, restart Apache for your changes to be recognized:
sudo systemctl restart apache2
Copy
phpMyAdmin is now installed and configured to work with Apache. However, before you can log in and begin interacting with your MySQL databases, you will need to ensure that your MySQL users have the privileges required for interacting with the program.
Step 2 — Adjusting User Authentication and Privileges
When you installed phpMyAdmin onto your server, it automatically created a database user called phpmyadmin which performs certain underlying processes for the program. Rather than logging in as this user with the administrative password you set during installation, it’s recommended that you log in as either your root MySQL user or as a user dedicated to managing databases through the phpMyAdmin interface.
Configuring Password Access for the MySQL Root Account
In Ubuntu systems running MySQL 5.7 (and later versions), the root MySQL user is set to authenticate using the auth_socket plugin by default rather than with a password. This allows for some greater security and usability in many cases, but it can also complicate things when you need to allow an external program — like phpMyAdmin — to access the user.
In order to log in to phpMyAdmin as your root MySQL user, you will need to switch its authentication method from auth_socket to one that makes use of a password, if you haven’t already done so. To do this, open up the MySQL prompt from your terminal:
sudo mysql
Copy
Next, check which authentication method each of your MySQL user accounts use with the following command:
SELECT user,authentication_string,plugin,host FROM mysql.user;
Copy
Output+------------------+-------------------------------------------+-----------------------+-----------+ | user | authentication_string | plugin | host | +------------------+-------------------------------------------+-----------------------+-----------+ | root | | auth_socket | localhost | | mysql.session | *THISISNOTAVALIDPASSWORDTHATCANBEUSEDHERE | caching_sha2_password | localhost | | mysql.sys | *THISISNOTAVALIDPASSWORDTHATCANBEUSEDHERE | caching_sha2_password | localhost | | debian-sys-maint | *8486437DE5F65ADC4A4B001CA591363B64746D4C | caching_sha2_password | localhost | | phpmyadmin | *5FD2B7524254B7F81B32873B1EA6D681503A5CA9 | caching_sha2_password | localhost | +------------------+-------------------------------------------+-----------------------+-----------+ 5 rows in set (0.00 sec)
In this example, you can see that the root user does in fact authenticate using the auth_socket plugin. To configure the root account to authenticate with a password, run the following ALTER USER command. Be sure to change password to a strong password of your choosing:
ALTER USER 'root'@'localhost' IDENTIFIED WITH caching_sha2_password BY 'password';
Copy
Note: The previous ALTER USER statement sets the root MySQL user to authenticate with the caching_sha2_password plugin. Per the official MySQL documentation, caching_sha2_password is MySQL’s preferred authentication plugin, as it provides more secure password encryption than the older, but still widely used, mysql_native_password.
However, some versions of PHP don’t work reliably with caching_sha2_password. PHP has reported that this issue was fixed as of PHP 7.4, but if you encounter an error when trying to log in to phpMyAdmin later on, you may want to set root to authenticate with mysql_native_password instead:
ALTER USER 'root'@'localhost' IDENTIFIED WITH mysql_native_password BY 'password';
Copy
Then, check the authentication methods employed by each of your users again to confirm that root no longer authenticates using the auth_socket plugin:
SELECT user,authentication_string,plugin,host FROM mysql.user;
Copy
Output+------------------+-------------------------------------------+-----------------------+-----------+ | user | authentication_string | plugin | host | +------------------+-------------------------------------------+-----------------------+-----------+ | root | *DE06E242B88EFB1FE4B5083587C260BACB2A6158 | caching_sha2_password | localhost | | mysql.session | *THISISNOTAVALIDPASSWORDTHATCANBEUSEDHERE | caching_sha2_password | localhost | | mysql.sys | *THISISNOTAVALIDPASSWORDTHATCANBEUSEDHERE | caching_sha2_password | localhost | | debian-sys-maint | *8486437DE5F65ADC4A4B001CA591363B64746D4C | caching_sha2_password | localhost | | phpmyadmin | *5FD2B7524254B7F81B32873B1EA6D681503A5CA9 | caching_sha2_password | localhost | +------------------+-------------------------------------------+-----------------------+-----------+ 5 rows in set (0.00 sec)
You can see from this output that the root user will authenticate using a password. You can now log in to the phpMyAdmin interface as your root user with the password you’ve set for it here.
Configuring Password Access for a Dedicated MySQL User
Alternatively, some may find that it better suits their workflow to connect to phpMyAdmin with a dedicated user. To do this, open up the MySQL shell once again:
sudo mysql
Copy
If you have password authentication enabled for your root user, as described in the previous section, you will need to run the following command and enter your password when prompted in order to connect:
mysql -u root -p
Copy
From there, create a new user and give it a strong password:
CREATE USER 'sammy'@'localhost' IDENTIFIED WITH caching_sha2_password BY 'password';
Copy
Note: Again, depending on what version of PHP you have installed, you may want to set your new user to authenticate with mysql_native_password instead of caching_sha2_password:
ALTER USER 'sammy'@'localhost' IDENTIFIED WITH mysql_native_password BY 'password';
Copy
Then, grant your new user appropriate privileges. For example, you could grant the user privileges to all tables within the database, as well as the power to add, change, and remove user privileges, with this command:
GRANT ALL PRIVILEGES ON *.* TO 'sammy'@'localhost' WITH GRANT OPTION;
Copy
Following that, exit the MySQL shell:
exit
Copy
You can now access the web interface by visiting your server’s domain name or public IP address followed by /phpmyadmin:
https://your_domain_or_IP/phpmyadmin
Log in to the interface, either as root or with the new username and password you just configured.
When you log in, you’ll see the user interface, which will look something like this:
Now that you’re able to connect and interact with phpMyAdmin, all that’s left to do is harden your system’s security to protect it from attackers.
Step 3 — Securing Your phpMyAdmin Instance
Because of its ubiquity, phpMyAdmin is a popular target for attackers, and you should take extra care to prevent unauthorized access. One way of doing this is to place a gateway in front of the entire application by using Apache’s built-in .htaccess authentication and authorization functionalities.
To do this, you must first enable the use of .htaccess file overrides by editing your phpMyAdmin installation’s Apache configuration file.
Use your preferred text editor to edit the phpmyadmin.conf file that has been placed in your Apache configuration directory. Here, we’ll use nano:
sudo nano /etc/apache2/conf-available/phpmyadmin.conf
Copy
Add an AllowOverride All directive within the <Directory /usr/share/phpmyadmin> section of the configuration file, like this:
/etc/apache2/conf-available/phpmyadmin.conf
<Directory /usr/share/phpmyadmin> Options SymLinksIfOwnerMatch DirectoryIndex index.php AllowOverride All . . .
Copy
When you have added this line, save and close the file. If you used nano to edit the file, do so by pressing CTRL + X, Y, and then ENTER.
To implement the changes you made, restart Apache:
sudo systemctl restart apache2
Copy
Now that you have enabled the use of .htaccess files for your application, you need to create one to actually implement some security.
In order for this to be successful, the file must be created within the application directory. You can create the necessary file and open it in your text editor with root privileges by typing:
sudo nano /usr/share/phpmyadmin/.htaccess
Copy
Within this file, enter the following information:
/usr/share/phpmyadmin/.htaccess
AuthType Basic AuthName "Restricted Files" AuthUserFile /etc/phpmyadmin/.htpasswd Require valid-user
Copy
Here is what each of these lines mean:
AuthType Basic: This line specifies the authentication type that you are implementing. This type will implement password authentication using a password file.
AuthName: This sets the message for the authentication dialog box. You should keep this generic so that unauthorized users won’t gain any information about what is being protected.
AuthUserFile: This sets the location of the password file that will be used for authentication. This should be outside of the directories that are being served. We will create this file shortly.
Require valid-user: This specifies that only authenticated users should be given access to this resource. This is what actually stops unauthorized users from entering.
When you are finished, save and close the file.
The location that you selected for your password file was /etc/phpmyadmin/.htpasswd. You can now create this file and pass it an initial user with the htpasswd utility:
sudo htpasswd -c /etc/phpmyadmin/.htpasswd username
Copy
You will be prompted to select and confirm a password for the user you are creating. Afterwards, the file is created with the hashed password that you entered.
If you want to enter an additional user, you need to do so without the -c flag, like this:
sudo htpasswd /etc/phpmyadmin/.htpasswd additionaluser
Copy
Then restart Apache to put .htaccess authentication into effect:
sudo systemctl restart apache2
Copy
Now, when you access your phpMyAdmin subdirectory, you will be prompted for the additional account name and password that you just configured:
https://domain_name_or_IP/phpmyadmin
After entering the Apache authentication, you’ll be taken to the regular phpMyAdmin authentication page to enter your MySQL credentials. By adding an extra set of non-MySQL credentials, you’re providing your database with an additional layer of security. This is desirable, since phpMyAdmin has been vulnerable to security threats in the past.
.
.
.
.
========================================================
========================================================
original source : https://www.digitalocean.com/community/tutorials/how-to-install-mysql-on-ubuntu-20-04 How To Install MySQL on Ubuntu 20.04
Step 1 — Installing MySQL
On Ubuntu 20.04, you can install MySQL using the APT package repository. At the time of this writing, the version of MySQL available in the default Ubuntu repository is version 8.0.27.
To install it, update the package index on your server if you’ve not done so recently:
sudo apt update
Copy
Then install the mysql-server package:
sudo apt install mysql-server
Copy
This will install MySQL, but will not prompt you to set a password or make any other configuration changes. Because this leaves your installation of MySQL insecure, we will address this next.
Step 2 — Configuring MySQL
For fresh installations of MySQL, you’ll want to run the DBMS’s included security script. This script changes some of the less secure default options for things like remote root logins and sample users.
Run the security script with sudo:
sudo mysql_secure_installation
Copy
This will take you through a series of prompts where you can make some changes to your MySQL installation’s security options. The first prompt will ask whether you’d like to set up the Validate Password Plugin, which can be used to test the password strength of new MySQL users before deeming them valid.
If you elect to set up the Validate Password Plugin, any MySQL user you create that authenticates with a password will be required to have a password that satisfies the policy you select. The strongest policy level — which you can select by entering 2 — will require passwords to be at least eight characters long and include a mix of uppercase, lowercase, numeric, and special characters:
OutputSecuring the MySQL server deployment. Connecting to MySQL using a blank password. VALIDATE PASSWORD COMPONENT can be used to test passwords and improve security. It checks the strength of password and allows the users to set only those passwords which are secure enough. Would you like to setup VALIDATE PASSWORD component? Press y|Y for Yes, any other key for No: Y There are three levels of password validation policy: LOW Length >= 8 MEDIUM Length >= 8, numeric, mixed case, and special characters STRONG Length >= 8, numeric, mixed case, special characters and dictionary file Please enter 0 = LOW, 1 = MEDIUM and 2 = STRONG: 2
Regardless of whether you choose to set up the Validate Password Plugin, the next prompt will be to set a password for the MySQL root user. Enter and then confirm a secure password of your choice:
OutputPlease set the password for root here. New password: Re-enter new password:
Note that even though you’ve set a password for the root MySQL user, this user is not currently configured to authenticate with a password when connecting to the MySQL shell.
If you used the Validate Password Plugin, you’ll receive feedback on the strength of your new password. Then the script will ask if you want to continue with the password you just entered or if you want to enter a new one. Assuming you’re satisfied with the strength of the password you just entered, enter Y to continue the script:
OutputEstimated strength of the password: 100 Do you wish to continue with the password provided?(Press y|Y for Yes, any other key for No) : Y
From there, you can press Y and then ENTER to accept the defaults for all the subsequent questions. This will remove some anonymous users and the test database, disable remote root logins, and load these new rules so that MySQL immediately respects the changes you have made.
Once the script completes, your MySQL installation will be secured. You can now move on to creating a dedicated database user with the MySQL client.
Step 3 — Creating a Dedicated MySQL User and Granting Privileges
Upon installation, MySQL creates a root user account which you can use to manage your database. This user has full privileges over the MySQL server, meaning it has complete control over every database, table, user, and so on. Because of this, it’s best to avoid using this account outside of administrative functions. This step outlines how to use the root MySQL user to create a new user account and grant it privileges.
In Ubuntu systems running MySQL 5.7 (and later versions), the root MySQL user is set to authenticate using the auth_socket plugin by default rather than with a password. This plugin requires that the name of the operating system user that invokes the MySQL client matches the name of the MySQL user specified in the command, so you must invoke mysql with sudo privileges to gain access to the root MySQL user:
sudo mysql
Copy
Note: If you installed MySQL with another tutorial and enabled password authentication for root, you will need to use a different command to access the MySQL shell. The following will run your MySQL client with regular user privileges, and you will only gain administrator privileges within the database by authenticating:
mysql -u root -p
Copy
Once you have access to the MySQL prompt, you can create a new user with a CREATE USER statement. These follow this general syntax:
CREATE USER 'username'@'host' IDENTIFIED WITH authentication_plugin BY 'password';
Copy
After CREATE USER, you specify a username. This is immediately followed by an @ sign and then the hostname from which this user will connect. If you only plan to access this user locally from your Ubuntu server, you can specify localhost. Wrapping both the username and host in single quotes isn’t always necessary, but doing so can help to prevent errors.
You have several options when it comes to choosing your user’s authentication plugin. The auth_socket plugin mentioned previously can be convenient, as it provides strong security without requiring valid users to enter a password to access the database. But it also prevents remote connections, which can complicate things when external programs need to interact with MySQL.
As an alternative, you can leave out the WITH authentication_plugin portion of the syntax entirely to have the user authenticate with MySQL’s default plugin, caching_sha2_password. The MySQL documentation recommends this plugin for users who want to log in with a password due to its strong security features.
Run the following command to create a user that authenticates with caching_sha2_password. Be sure to change sammy to your preferred username and password to a strong password of your choosing:
CREATE USER 'sammy'@'localhost' IDENTIFIED BY 'password';
Copy
Note: There is a known issue with some versions of PHP that causes problems with caching_sha2_password. If you plan to use this database with a PHP application — phpMyAdmin, for example — you may want to create a user that will authenticate with the older, though still secure, mysql_native_password plugin instead:
CREATE USER 'sammy'@'localhost' IDENTIFIED WITH mysql_native_password BY 'password';
Copy
If you aren’t sure, you can always create a user that authenticates with caching_sha2_plugin and then ALTER it later on with this command:
ALTER USER 'sammy'@'localhost' IDENTIFIED WITH mysql_native_password BY 'password';
Copy
After creating your new user, you can grant them the appropriate privileges. The general syntax for granting user privileges is as follows:
GRANT PRIVILEGE ON database.table TO 'username'@'host';
Copy
The PRIVILEGE value in this example syntax defines what actions the user is allowed to perform on the specified database and table. You can grant multiple privileges to the same user in one command by separating each with a comma. You can also grant a user privileges globally by entering asterisks (*) in place of the database and table names. In SQL, asterisks are special characters used to represent “all” databases or tables.
To illustrate, the following command grants a user global privileges to CREATE, ALTER, and DROP databases, tables, and users, as well as the power to INSERT, UPDATE, and DELETE data from any table on the server. It also grants the user the ability to query data with SELECT, create foreign keys with the REFERENCES keyword, and perform FLUSH operations with the RELOAD privilege. However, you should only grant users the permissions they need, so feel free to adjust your own user’s privileges as necessary.
You can find the full list of available privileges in the official MySQL documentation.
Run this GRANT statement, replacing sammy with your own MySQL user’s name, to grant these privileges to your user:
GRANT CREATE, ALTER, DROP, INSERT, UPDATE, DELETE, SELECT, REFERENCES, RELOAD on *.* TO 'sammy'@'localhost' WITH GRANT OPTION;
Copy
Note that this statement also includes WITH GRANT OPTION. This will allow your MySQL user to grant any permissions that it has to other users on the system.
Warning: Some users may want to grant their MySQL user the ALL PRIVILEGES privilege, which will provide them with broad superuser privileges akin to the root user’s privileges, like so:
GRANT ALL PRIVILEGES ON *.* TO 'sammy'@'localhost' WITH GRANT OPTION;
Copy
Such broad privileges should not be granted lightly, as anyone with access to this MySQL user will have complete control over every database on the server.
Following this, it’s good practice to run the FLUSH PRIVILEGES command. This will free up any memory that the server cached as a result of the preceding CREATE USER and GRANT statements:
FLUSH PRIVILEGES;
Copy
Then you can exit the MySQL client:
exit
Copy
In the future, to log in as your new MySQL user, you’d use a command like the following:
mysql -u sammy -p
Copy
The -p flag will cause the MySQL client to prompt you for your MySQL user’s password in order to authenticate.
Finally, let’s test the MySQL installation.
Step 4 — Testing MySQL
Regardless of how you installed it, MySQL should have started running automatically. To test this, check its status.
systemctl status mysql.service
Copy
You’ll see output similar to the following:
Output● mysql.service - MySQL Community Server Loaded: loaded (/lib/systemd/system/mysql.service; enabled; vendor preset: enabled) Active: active (running) since Tue 2020-04-21 12:56:48 UTC; 6min ago Main PID: 10382 (mysqld) Status: "Server is operational" Tasks: 39 (limit: 1137) Memory: 370.0M CGroup: /system.slice/mysql.service └─10382 /usr/sbin/mysqld
If MySQL isn’t running, you can start it with sudo systemctl start mysql.
For an additional check, you can try connecting to the database using the mysqladmin tool, which is a client that lets you run administrative commands. For example, this command says to connect as a MySQL user named sammy (-u sammy), prompt for a password (-p), and return the version. Be sure to change sammy to the name of your dedicated MySQL user, and enter that user’s password when prompted:
sudo mysqladmin -p -u sammy version
Copy
You should see output similar to this:
Outputmysqladmin Ver 8.0.19-0ubuntu5 for Linux on x86_64 ((Ubuntu)) Copyright (c) 2000, 2020, Oracle and/or its affiliates. All rights reserved. Oracle is a registered trademark of Oracle Corporation and/or its affiliates. Other names may be trademarks of their respective owners. Server version 8.0.19-0ubuntu5 Protocol version 10 Connection Localhost via UNIX socket UNIX socket /var/run/mysqld/mysqld.sock Uptime: 10 min 44 sec Threads: 2 Questions: 25 Slow queries: 0 Opens: 149 Flush tables: 3 Open tables: 69 Queries per second avg: 0.038
This means MySQL is up and running.
0 notes
Text
Unzip Zip File Mac Terminal

Unzip Zip File Mac Terminal Tool
Unzip Zip File Mac Command Line

Unzip Zip File Mac Terminal Tool
Zip is a command-line utility tool used for compressing files and folders. Compression of files & folders enables faster and more efficient transfer, storage, and emailing of files and folders. On the other hand, unzip is a utility tool that helps you decompress files and folders.
Benefits of zipping files:
Compressed/zipped files take up less disk space, leaving you with more space to work with.
Zipped files are easy to transfer including uploading, downloading, and attaching them on email.
You can easily decompress zipped files on Linux, Windows, and even mac.
Step 3 – Unzip the ZIP File Using Terminal. The next step is to navigate to the ZIP file and unzip it. To navigate to the correct folder, we can use the cd command, as shown below. We uploaded our backup.zip file to the /private directory, so we’ll use the command below.
Fig.02: How to unzip a zip file from the Terminal using unzip command A note about bash: unzip: command not found If the unzip command NOT installed on your Linux or Unix box, then run any one of the following commands as per your Linux distribution to install the unzip command.
Enter the 'unzip' command. Type in unzip file.zip where file is the folder's name, then press Enter to run it. This extracts the files to the current directory. If the file's name has spaces in it, you'll place quotation marks on either side of 'file.zip' (e.g., unzip 'this is a zipped folder.zip'). On Linux or OSX you can unzip ngrok from a terminal with the following command. On Windows, just double click ngrok.zip.
In this topic, we focus on how you can install the zip and unzip utilities on various Linux distributions.
On this page:

Let’s now see how you can install these useful command-line utilities.
How to Install Zip/Unzip in Debian/Ubuntu/Mint
For Debian-based distributions, install the zip utility by running the command.
After installation, you can confirm the version of zip installed using the command.
For the unzip El capitan os x features. utility, execute a similar command as shown.
Again, just like zip, you can confirm the version of the unzip utility installed by running. Soundflower mac download 2020.
How to Install Zip/Unzip in RedHa/CentOS/Fedora
Just like on Debian distributions, installing zip and unzip utilities on Redhat distros is quite simple.
To install zip, simply execute:
For the unzip utility, install it by running:
How to Install Zip/Unzip in Arch/Manjaro Linux
Unzip Zip File Mac Command Line
For Arch-based distros, run:
For the unzip utility,
How to Install Zip/Unzip in OpenSUSE
On OpenSUSE, run the command below to install zip.
And to install unzip, execute.
For more information, read our article that shows how to create and extract a zip files in Linux.
Conclusion
For newer versions of Linux distros such as Ubuntu 20.04 and CentOS 8, the zip and unzip utilities already come pre-installed and you are good to go.
We covered how to install zip and unzip command-line tools on various Linux distributions and the benefits that come with compressing files.
For information on making use of an macOS Launch Daemon to automatically start and stop MySQL, see Section 2.4.3, “Installing a MySQL Launch Daemon”. For information on the MySQL Preference Pane, see Section 2.4.4, “Installing and Using the MySQL Preference Pane”. Mysql mac start up safe mode. MySQL Community Edition is a freely downloadable version of the world's most popular open source database that is supported by an active community of open source developers and enthusiasts. MySQL Cluster Community Edition is available as a separate download.
0 notes
Text
Compiling Percona XtraBackup for ARM
This blog post will show how to compile the Percona XtraBackup (PXB) tool for ARM. For this, we are going to use an AWS EC2 ARM instance with Ubuntu 20.04(Focal Fossa). The motivation for this was born in my interest in the new generation of ARM processors and if this is a viable option for the future. Ideally, I do not recommend installing all the necessary packages to compile Xtrabackup in a production environment for security reasons. Still, you can have a “compiling” server for this purpose and then move the binaries around. Machine Configuration For this blog post, I picked a c6g.2xlarge instance. The machine has the following hardware configuration: Instance Size vCPU Memory (GiB) Instance Storage (GiB) Network Bandwidth (Gbps) EBS Bandwidth (Mbps) c6g.2xlarge 8 16 EBS-Only Up to 10 Up to 4,750 And the OS specifications:$ cat /etc/*release DISTRIB_ID=Ubuntu DISTRIB_RELEASE=20.04 DISTRIB_CODENAME=focal DISTRIB_DESCRIPTION="Ubuntu 20.04.2 LTS" NAME="Ubuntu" VERSION="20.04.2 LTS (Focal Fossa)" ID=ubuntu ID_LIKE=debian PRETTY_NAME="Ubuntu 20.04.2 LTS" VERSION_ID="20.04" HOME_URL="https://www.ubuntu.com/" SUPPORT_URL="https://help.ubuntu.com/" BUG_REPORT_URL="https://bugs.launchpad.net/ubuntu/" PRIVACY_POLICY_URL="https://www.ubuntu.com/legal/terms-and-policies/privacy-policy" VERSION_CODENAME=focal UBUNTU_CODENAME=focalNote that the hardware capacity does not matter in the final result. But having a higher number of cores allows us to compile PXB faster. With all set, let’s start the compiling process. Installing Dependencies First, we will install and upgrade some packages necessary for this task:# apt-get -y install dirmngr # apt-get update -y # apt-get -y install cmake # apt-get -y install lsb-release wget # apt-get -y install build-essential flex bison automake autoconf libtool cmake libaio-dev mysql-client libncurses-dev zlib1g-dev libev-dev libcurl4-gnutls-dev vim-common # apt-get install git # apt-get -y install devscripts libnuma-dev openssl libssl-dev libgcrypt20-dev Cloning XtraBackup Repository Now, we will get the XtraBackup code in GitHub:# mkdir -p /compile_xtrabackup # cd /compile_xtrabackup/ # git clone https://github.com/percona/percona-xtrabackup.git # cd percona-xtrabackup # git checkout percona-xtrabackup-8.0.23-16Note that I’m picking the percona-xtrabackup-8.0.23-16 version. The reason is that the latest MySQL release is MySQL 8.0.24, and PXB will work only with equal or lower versions than the one we currently selected. In this case, it is MySQL 8.0.23. Compiling Ok, we are ready to begin our first compilation! Let’s fire the necessary commands:cd /compile_xtrabackup/percona-xtrabackup mkdir build && cd build mkdir /boost cmake .. -DWITH_NUMA=1 -DDOWNLOAD_BOOST=1 -DWITH_BOOST=/boost -DWITH_NUMA=1 -DCMAKE_INSTALL_PREFIX=/compile_xtrabackup/percona-xtrabackup/build make -j 8 && make installRemember in the beginning when I mentioned a better machine could compile faster? So, note in the last command above the option j -8. This will tell to make command to compile using all the 8 CPUs that I have available for this instance. You can adjust for any number of threads that you have (ideally should lesser or equal). This process will take a while to finish, so we need to be patient. Testing Once the process is done, we are ready to run the binaries. They will be located in the /compile_xtrabackup/percona-xtrabackup/build/bin directory.# ./bin/xtrabackup -version ./bin/xtrabackup version 8.0.23-16 based on MySQL server 8.0.23 Linux (aarch64) (revision id: 934bc8fb1d1)The backup process is the same for x86 platforms. For example:./bin/xtrabackup --user=root --socket=/tmp/n1.sock --backup --target-dir= --datadir= ./bin/xtrabackup --prepare --target-dir=At this moment, Oracle does not provide ARM packages for Ubuntu 20.04, so I opened this Feature Request for it: Add Packages for Ubuntu to ARM architecture However, if you are enjoying the compiling path and want to give a shot at compiling MySQL for Ubuntu in ARM as well, you can check this blog post: Compiling MySQL (Desmistifying) And if you are wondering about PMM for ARM, my colleague Agustin Galego (GitHub) wrote a blog post about compiling the Percona Monitoring and Management client for ARM: Compiling a Percona Monitoring and Management v2 Client in ARM Architecture Conclusion Compiling MySQL and PXB are not recommended for production systems, but for me, it is an excellent way to learn more about the code and its internal things. If you are interested in ARM, it is a way to start testing in advance to evaluate if it is the right architecture for your needs. Useful Resources Finally, you can reach us through the social networks, our forum, or access our material using the links presented below: Blog Solution Briefs White Papers Ebooks Technical Presentations archive Videos/Recorded Webinars Forum Knowledge Base (Percona Subscriber exclusive content) https://www.percona.com/blog/2021/04/28/compiling-percona-xtrabackup-for-arm/
0 notes
Text
How to Install MySQL 8.0 on Ubuntu 20.04
How to Install MySQL 8.0 on Ubuntu 20.04
MySQL is the popular relational database management system used for storing structured data in table formats. It is open source database server uses SQL (Structured Query Language) statements for to interact with. The MySQL is freely available under the terms of the GNU General Public License. This tutorial will help you to install MySQL 8 on Ubuntu 20.04 LTS Focal Linux…

View On WordPress
0 notes
Text
How to Install MySQL 8 Ubuntu 20.04 Linux.
How to Install MySQL 8 Ubuntu 20.04 Linux.
Hi Techies! Let’s learn about “How to install MySQL 8 in Ubuntu 20.04 Linux”, we will look at the MySQL community edition server, installation step by step in Ubuntu 20.04. MySQL is the Relation Database, which is used to store the data. It Is open-source and widely used in the industries. MySQL written in C and C++. It has also been tested to be a “fast, stable and true multi-user,…

View On WordPress
#how to check mysql version in ubuntu#how to install mysql in ubuntu#how to install mysql on linux#how to install mysql on ubuntu#install mysql 8#install mysql 8 ubuntu#install mysql 8 ubuntu 20.04#install mysql 8.0 ubuntu 20.04#install mysql in ubuntu#install mysql on ubuntu#install mysql on ubuntu 20.04#mysql community download#mysql community edition#mysql community server download
0 notes
Link
0 notes
Text
MariaDB is the most powerful and widely used relational database management system developed by the MariaDB Foundation. We have many articles on the installation of MariaDB on various Linux distributions. This guide will focus on the installation of MariaDB on Ubuntu 22.04|20.04 Linux system. For those new to MariaDB, it is a community-developed fork of MySQL database system. It was primarily designed to be free and open source, without any compromise in speed, stability and scalability. Most Linux distributions will have MariaDB in their upstream repositories available for quick installation with the default OS package manager. #1) Install MariaDB Server on Ubuntu 22.04|20.04 We always start our installations by ensuring the system is updated. This can be achieved by running the commands: sudo apt update sudo apt -y upgrade Once the system is updated, use the following commands to install MariaDB Server on Ubuntu22.04|20.04. sudo apt install software-properties-common mariadb-server mariadb-client Confirm that the service is started. $ systemctl status mariadb ● mariadb.service - MariaDB 10.5.12 database server Loaded: loaded (/lib/systemd/system/mariadb.service; enabled; vendor preset: enabled) Active: active (running) since Mon 2021-11-08 23:50:42 EAT; 2h 46min ago Docs: man:mariadbd(8) https://mariadb.com/kb/en/library/systemd/ Main PID: 56606 (mariadbd) Status: "Taking your SQL requests now..." Tasks: 13 (limit: 9482) Memory: 91.2M CPU: 2.767s CGroup: /system.slice/mariadb.service └─56606 /usr/sbin/mariadbd Nov 08 23:50:42 ubuntu22 mariadbd[56606]: 2021-11-08 23:50:42 0 [Note] Plugin 'FEEDBACK' is disabled. Nov 08 23:50:42 ubuntu22 mariadbd[56606]: 2021-11-08 23:50:42 0 [Note] InnoDB: Loading buffer pool(s) from /var/lib/mysql/ib_buffer_pool Nov 08 23:50:42 ubuntu22 mariadbd[56606]: 2021-11-08 23:50:42 0 [Note] InnoDB: Buffer pool(s) load completed at 211108 23:50:42 Nov 08 23:50:42 ubuntu22 mariadbd[56606]: 2021-11-08 23:50:42 0 [Note] Server socket created on IP: '127.0.0.1'. Nov 08 23:50:42 ubuntu22 mariadbd[56606]: 2021-11-08 23:50:42 0 [Note] Reading of all Master_info entries succeeded Nov 08 23:50:42 ubuntu22 mariadbd[56606]: 2021-11-08 23:50:42 0 [Note] Added new Master_info '' to hash table Nov 08 23:50:42 ubuntu22 mariadbd[56606]: 2021-11-08 23:50:42 0 [Note] /usr/sbin/mariadbd: ready for connections. Nov 08 23:50:42 ubuntu22 mariadbd[56606]: Version: '10.5.12-MariaDB-1build1' socket: '/run/mysqld/mysqld.sock' port: 3306 Ubuntu 21.10 Nov 08 23:50:42 ubuntu22 systemd[1]: Started MariaDB 10.5.12 database server. Nov 08 23:50:43 ubuntu22 /etc/mysql/debian-start[56903]: Triggering myisam-recover for all MyISAM tables and aria-recover for all Aria tables By default, you should be able to access the mysql command line as root user without being prompted to provide a password. Let’s ensure we harden our MariaDB server and set the root password. $ sudo mysql_secure_installation NOTE: RUNNING ALL PARTS OF THIS SCRIPT IS RECOMMENDED FOR ALL MariaDB SERVERS IN PRODUCTION USE! PLEASE READ EACH STEP CAREFULLY! In order to log into MariaDB to secure it, we'll need the current password for the root user. If you've just installed MariaDB, and you haven't set the root password yet, the password will be blank, so you should just press enter here. Enter current password for root (enter for none): OK, successfully used password, moving on... Setting the root password ensures that nobody can log into the MariaDB root user without the proper authorisation. Set root password? [Y/n] y New password: Re-enter new password: Password updated successfully! Reloading privilege tables.. ... Success! By default, a MariaDB installation has an anonymous user, allowing anyone to log into MariaDB without having to have a user account created for them. This is intended only for testing, and to make the installation
go a bit smoother. You should remove them before moving into a production environment. Remove anonymous users? [Y/n] y ... Success! Normally, root should only be allowed to connect from 'localhost'. This ensures that someone cannot guess at the root password from the network. Disallow root login remotely? [Y/n] y ... Success! By default, MariaDB comes with a database named 'test' that anyone can access. This is also intended only for testing, and should be removed before moving into a production environment. Remove test database and access to it? [Y/n] y - Dropping test database... ... Success! - Removing privileges on test database... ... Success! Reloading the privilege tables will ensure that all changes made so far will take effect immediately. Reload privilege tables now? [Y/n] y ... Success! Cleaning up... All done! If you've completed all of the above steps, your MariaDB installation should now be secure. Thanks for using MariaDB! #2) Confirm MariaDB Server Installation on Ubuntu 22.04/20.04 Let’s confirm our installation of MariaDB server on Ubuntu22.04/20.04: $ mysql -V mysql Ver 15.1 Distrib 10.5.12-MariaDB, for debian-linux-gnu (x86_64) using EditLine wrapper Create a test database. $ sudo mysql -u root -p MariaDB [(none)]> CREATE DATABASE testdb; Query OK, 1 row affected (0.000 sec) MariaDB [(none)]> DROP DATABASE testdb; Query OK, 0 rows affected (0.001 sec) MariaDB [(none)]> QUIT Bye Enjoy using MariaDB database server on Ubuntu22.04|20.04 Linux system.
0 notes
Text
Cómo instalar un entorno LEMP en Ubuntu 20.04 Server/Desktop

Este tutorial te mostrará cómo instalar la pila LEMP (Nginx, MariaDB y PHP7.4) en Ubuntu 20.04. Un entorno de software es un conjunto de herramientas de software agrupadas. LEMP significa Linux, Nginx (Engine-X), MariaDB/MySQL y PHP, todos ellos de código abierto y de uso gratuito. Es la pila de software más común que impulsa sitios y aplicaciones web dinámicas. Linux es el sistema operativo; Nginx es el servidor web; MariaDB/MySQL es el servidor de bases de datos y PHP es el lenguaje de scripting del lado del servidor responsable de generar páginas web dinámicas.
Requisitos previos para instalar un entorno LEMP
Para seguir este tutorial, necesitas un sistema operativo Ubuntu 20.04 en tu ordenador local o en un servidor remoto. Si estás buscando un VPS (Servidor Privado Virtual), puedes contratar el tuyo en CONTABO o en OVH. Si necesitas configurar una pila LEMP con un nombre de dominio, recomiendo la compra de nombres de dominio de NameCheap porque el precio es bajo y dan protección de la privacidad whois libre para la vida.
Paso 1: Actualizar los paquetes de software
Antes de instalar la pila LEMP, es una buena práctica actualizar el repositorio y los paquetes de software ejecutando los siguientes comandos en su sistema operativo Ubuntu 20.04. sudo apt update sudo apt upgrade
Paso 2: Instalar el servidor web Nginx
Nginx es un servidor web de alto rendimiento y muy popular en estos días. También se puede utilizar como un proxy inverso y un servidor de caché. Introduzca el siguiente comando para instalar el servidor web Nginx. sudo apt install nginx Una vez instalado, podemos habilitar Nginx para que se inicie automáticamente en el arranque ejecutando el siguiente comando. sudo systemctl enable nginx A continuación, inicia sudo systemctl start nginx Ahora comprueba su estado. sudo systemctl status nginx Respuesta: ● nginx.service - A high performance web server and a reverse proxy server Loaded: loaded (/lib/systemd/system/nginx.service; enabled; vendor preset: enabled) Active: active (running) since Fri 2020-04-10 14:11:43 UTC; 3s ago Docs: man:nginx(8) Process: 8533 ExecStartPre=/usr/sbin/nginx -t -q -g daemon on; master_process on; (code=exited, status=0/SUCCESS) Process: 8545 ExecStart=/usr/sbin/nginx -g daemon on; master_process on; (code=exited, status=0/SUCCESS) Main PID: 8549 (nginx) Tasks: 3 (limit: 9451) Memory: 3.9M CGroup: /system.slice/nginx.service ├─8549 nginx: master process /usr/sbin/nginx -g daemon on; master_process on; ├─8550 nginx: worker process └─8551 nginx: worker process "Enabled" indica que el auto-inicio en el arranque está habilitado y podemos ver que Nginx se está ejecutando. También puedes ver cuánta RAM está usando Nginx en la salida. Si el comando anterior no sale inmediatamente después de la ejecución. Usted necesita presionar "q" para hacer que salga. Compruebe la versión de Nginx. nginx -v Respuesta: nginx version: nginx/1.17.9 (Ubuntu) Ahora escribe la dirección IP pública de tu servidor Ubuntu 20.04 en la barra de direcciones del navegador. Deberías ver la página web "Welcome to Nginx", lo que significa que el servidor web Nginx está funcionando correctamente. Si estás instalando LEMP en tu ordenador Ubuntu 20.04 local, entonces escribe 127.0.0.1 o localhost en la barra de direcciones del navegador.
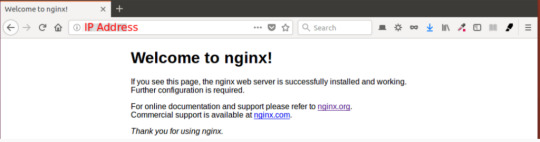
Si la conexión se rechaza o no se completa, es posible que haya un cortafuegos que impida las solicitudes entrantes al puerto TCP 80. Si utiliza el cortafuegos iptables, debe ejecutar el siguiente comando para abrir el puerto TCP 80. sudo iptables -I INPUT -p tcp --dport 80 -j ACCEPT Si utilizas el cortafuegos UFW, ejecuta este comando para abrir el puerto TCP 80. sudo ufw allow http Por último, tenemos que hacer que www-data (usuario Nginx) sea el propietario del directorio web. Por defecto, es propiedad del usuario root. sudo chown www-data:www-data /usr/share/nginx/html -R
Paso 3: Instalar el servidor de bases de datos MariaDB
MariaDB es un sustituto directo de MySQL. Ha sido desarrollado por antiguos miembros del equipo de MySQL a quienes les preocupa que Oracle pueda convertir MySQL en un producto de código cerrado. Introduce el siguiente comando para instalar MariaDB en Ubuntu 20.04. sudo apt install mariadb-server mariadb-client Una vez instalado, el servidor MariaDB debería iniciarse automáticamente. Utiliza systemctl para comprobar su estado. systemctl status mariadb Respuesta: ● mariadb.service - MariaDB 10.3.22 database server Loaded: loaded (/lib/systemd/system/mariadb.service; enabled; vendor preset: enabled) Active: active (running) since Fri 2020-04-10 14:19:16 UTC; 18s ago Docs: man:mysqld(8) https://mariadb.com/kb/en/library/systemd/ Main PID: 9161 (mysqld) Status: "Taking your SQL requests now..." Tasks: 31 (limit: 9451) Memory: 64.7M CGroup: /system.slice/mariadb.service └─9161 /usr/sbin/mysqld Si no se está ejecutando, inícialo con este comando: sudo systemctl start mariadb Para que MariaDB se inicie automáticamente en el arranque, ejecuta sudo systemctl enable mariadb Ahora ejecuta el script de seguridad posterior a la instalación. sudo mysql_secure_installation Cuando te pida que introduzcas la contraseña de root de MariaDB, pulsa la tecla Enter ya que la contraseña de root aún no está establecida. A continuación, introduce una para establecer la contraseña de root para el servidor MariaDB.

A continuación, puedes pulsar Enter para responder a todas las preguntas restantes, lo que eliminará el usuario anónimo, deshabilitará el inicio de sesión de root remoto y eliminará la base de datos de prueba. Este paso es un requisito básico para la seguridad de la base de datos MariaDB. (Observe que Y está en mayúsculas, lo que significa que es la respuesta por defecto).
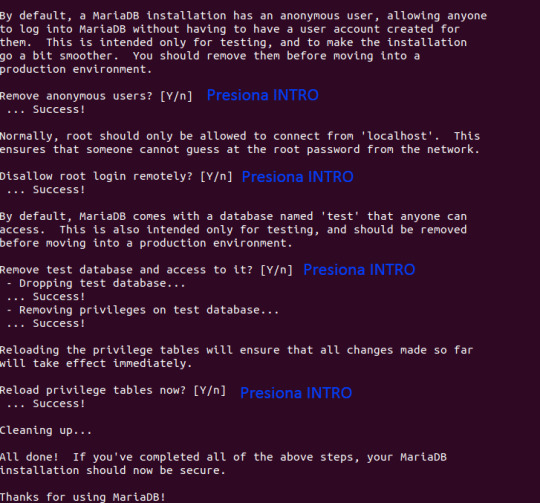
Por defecto, el paquete MaraiDB en Ubuntu utiliza unix_socket para autenticar el inicio de sesión del usuario, lo que básicamente significa que puede utilizar el nombre de usuario y la contraseña del sistema operativo para iniciar sesión en la consola de MariaDB. Así que puede ejecutar el siguiente comando para iniciar sesión sin proporcionar la contraseña de root de MariaDB. sudo mariadb -u root Para salir, ejecuta exit; Compruebe la información de la versión del servidor MariaDB. mariadb --version Como puedes ver, hemos instalado MariaDB 10.3.22. mariadb Ver 15.1 Distrib 10.3.22-MariaDB, for debian-linux-gnu (x86_64) using readline 5.2
Paso 4: Instalar PHP7.4
PHP7.4 está incluido en el repositorio de Ubuntu 20.04 y tiene una pequeña mejora de rendimiento respecto a PHP7.3. Introduzca el siguiente comando para instalar PHP7.4 y algunas extensiones comunes. sudo apt install php7.4 php7.4-fpm php7.4-mysql php-common php7.4-cli php7.4-common php7.4-json php7.4-opcache php7.4-readline php7.4-mbstring php7.4-xml php7.4-gd php7.4-curl Las extensiones de PHP son comúnmente necesarias para los sistemas de gestión de contenidos (CMS) como WordPress. Por ejemplo, si tu instalación carece de php7.4-xml, entonces algunas de las páginas de tu sitio de WordPress pueden estar en blanco y puede encontrar un error en el registro de errores de Nginx como: PHP message: PHP Fatal error: Uncaught Error: Call to undefined function xml_parser_create() La instalación de estas extensiones de PHP asegura que su CMS funcione sin problemas. Ahora inicia sudo systemctl start php7.4-fpm Activar el inicio automático en el arranque. sudo systemctl enable php7.4-fpm Comprueba el estado: systemctl status php7.4-fpm Ejemplo de resultado: ● php7.4-fpm.service - The PHP 7.4 FastCGI Process Manager Loaded: loaded (/lib/systemd/system/php7.4-fpm.service; enabled; vendor pr> Active: active (running) since Fri 2020-04-10 14:40:26 UTC; 12s ago Docs: man:php-fpm7.4(8) Process: 21019 ExecStartPost=/usr/lib/php/php-fpm-socket-helper install /ru> Main PID: 21012 (php-fpm7.4) Status: "Processes active: 0, idle: 2, Requests: 0, slow: 0, Traffic: 0req> Tasks: 3 (limit: 9451) Memory: 9.4M CGroup: /system.slice/php7.4-fpm.service ├─21012 php-fpm: master process (/etc/php/7.4/fpm/php-fpm.conf) ├─21017 php-fpm: pool www └─21018 php-fpm: pool www Si el comando anterior no sale inmediatamente después de ejecutarse. Debe pulsar "q" para que salga.
Paso 5: Crear un bloque de servidor en Nginx
Un bloque de servidor Nginx es como un host virtual en Apache. No usaremos el bloque de servidor por defecto porque es inadecuado para ejecutar código PHP y si lo modificamos, se convierte en un lío. Así que elimina el symlink por defecto en el directorio sites-enabled ejecutando el siguiente comando. (Todavía está disponible como /etc/nginx/sites-available/default). sudo rm /etc/nginx/sites-enabled/default A continuación, utiliza un editor de texto de línea de comandos como Nano para crear un nuevo archivo de bloque del servidor en el directorio /etc/nginx/conf.d/. sudo nano /etc/nginx/conf.d/default.conf Pegue el siguiente texto en el archivo. El siguiente fragmento hará que Nginx escuche en el puerto 80 de IPv4 y en el puerto 80 de IPv6 con un nombre de servidor de captura. server { listen 80; listen :80; server_name _; root /usr/share/nginx/html/; index index.php index.html index.htm index.nginx-debian.html; location / { try_files $uri $uri/ /index.php; } location ~ .php$ { fastcgi_pass unix:/run/php/php7.4-fpm.sock; fastcgi_param SCRIPT_FILENAME $document_root$fastcgi_script_name; include fastcgi_params; include snippets/fastcgi-php.conf; } # A long browser cache lifetime can speed up repeat visits to your page location ~* .(jpg|jpeg|gif|png|webp|svg|woff|woff2|ttf|css|js|ico|xml)$ { access_log off; log_not_found off; expires 360d; } # disable access to hidden files location ~ /.ht { access_log off; log_not_found off; deny all; } } Guarda y cierra el archivo. (Para guardar un archivo en el editor de texto Nano, pulsa Ctrl+O, y luego pulsa Enter para confirmar. Para salir, pulse Ctrl+X). A continuación, prueba las configuraciones de Nginx. sudo nginx -t Si la prueba es exitosa, reinicia Nginx. sudo systemctl reload nginx
Paso 6: Probar PHP
Para probar PHP-FPM con el servidor web Nginx, necesitamos crear un archivo info.php en el directorio webroot. sudo nano /usr/share/nginx/html/info.php Pega el siguiente código PHP en el archivo. Guarde y cierre el archivo. Ahora, en la barra de direcciones del navegador, introduzca server-ip-address/info.php. Sustituye dirección-ip-servidor por tu IP real. Si sigues este tutorial en tu ordenador local, escribe 127.0.0.1/info.php o localhost/info.php. Debería ver la información de PHP de su servidor. Esto significa que los scripts PHP pueden ejecutarse correctamente con el servidor web Nginx.
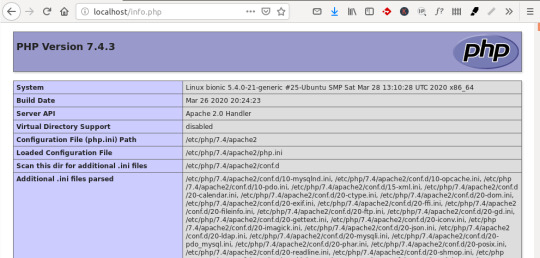
¡Enhorabuena! Has instalado con éxito Nginx, MariaDB y PHP7.4 en Ubuntu 20.04. Para la seguridad de su servidor, debe eliminar el archivo info.php ahora para evitar que los hackers lo vean. sudo rm /usr/share/nginx/html/info.php
Consejo para la resolución de problemas
Si te encuentras con errores, puedes comprobar el registro de errores de Nginx (/var/log/nginx/error.log) para averiguar qué está mal.
Reinicio automático de Nginx
Si por alguna razón tu proceso Nginx es eliminado, necesitas ejecutar el siguiente comando para reiniciarlo. sudo systemctl restart nginx En lugar de escribir manualmente este comando, podemos hacer que Nginx se reinicie automáticamente editando la unidad de servicio nginx.service systemd. Para anular la configuración del servicio systemd por defecto, creamos un directorio separado. sudo mkdir -p /etc/systemd/system/nginx.service.d/ A continuación, crea un archivo en este directorio. sudo nano /etc/systemd/system/nginx.service.d/restart.conf Añade las siguientes líneas en el archivo, que harán que Nginx se reinicie automáticamente 5 segundos después de detectar un fallo. El valor predeterminado de RetartSec es 100ms, que es demasiado pequeño. Nginx puede quejarse de que "la solicitud de inicio se repite demasiado rápido" si RestartSec no es lo suficientemente grande. Restart=always RestartSec=5s Guarda y cierra el archivo. A continuación, vuelve a cargar systemd para que los cambios surtan efecto. sudo systemctl daemon-reload Para comprobar si esto funciona, mata el proceso Nginx con: sudo pkill nginx A continuación, comprueba el estado de Nginx. Encontrará que Nginx se reinicia automáticamente. systemctl status nginx Ya tienes tu entorno LEMP funcionando, ya estas listo para hacer una instalación de Mautic, por ejemplo. Yo prefiero usar un entorno Apache para instalar Wordpress pero podrías hacerlo también con una pila LEMP. Read the full article
0 notes
Text
MySQL + Dynimize: 3.6 Million Queries per Second on a Single VM
In this post I describe the various steps that allowed me to reach 3.6 million queries per second on a single VM instance using MySQL 8.0 with the help of Dynimize. It's not every day that you get to break a record. So when I discovered that you can now rent by the hour massive instances within Google Compute Cloud that support 224 virtual cores based on AMD EPYC 2 Rome processors, I had to jump at the opportunity to see what kind low hanging fruit might be out there. Low and behold I found it! The record for MySQL on a single server stands at 2.1M QPS without using Unix sockets, and 2.25M QPS with Unix sockets. Seeing that was published 3 years ago on Broadwell based CPUs, I suspected this record was ripe for the taking on one of these instances, especially if we put Dynimize to work. The following post describes the journey to 3.6 million queries per second with MySQL 8.0 using one of these servers. The MySQL Server Team has done a fantastic job at getting newer versions of MySQL to scale to more and more cores, and the MySQL 8.0 release was no exception. At 96 physical cores, they've shown world how MySQL 8.0 easily scales to take advantage of the parallelism you can now get a hold of on the most powerful x86-64 based servers. However I've been dying to know what kind of record QPS is possible if we put CPU performance virtualization to use through Dynimize, which can significantly increase the instructions per cycle (IPC) or programs like MySQL. The remainder of this post will walk us through all the steps I took to reach 3.6M queries per second on this single VM instance. Hardware Instance Type Google Compute Platform n2d-highcpu-224 Cores 224 virtual CPU Model AMD EPYC 7B12 / 2.25GHz RAM 224 GB Storage GCP Standard SSD The wonderful thing here is that at a mere $5/hour, one can easily take the scripts used for these runs and repeat these tests at little cost. I think it's always great if you can do your benchmarking on an easily accessible, publicly available server to rent so that others can recreate your experiments. This creates an extra level of validation and transparency, and may also allow others the opportunity to improve upon your results. Software MySQL 8.0.21 Dynimize 1.1.3.16 Distro Ubuntu 20.04 LTS Kernel 5.4.0-1022-gcp x86_64 Workload Sysbench 1.0.20 OLTP Point Select, 8 x 10M rows This is the stock Ubuntu 20 distro that Google Compute Cloud provides, along with the MySQL version available with the default MySQL Server repository that comes with it. I also installed jemalloc and set LD_PRELOAD to use it in both mysqld and sysbench. How it was run The following my.cnf was used: max_connections=2000 default_password_lifetime=0 ssl=0 performance_schema=OFF innodb_open_files=4000 innodb_buffer_pool_size=32000M One noteworthy thing I found with the my.cnf is that once I size the buffer pool accordingly, disable the performance schema and ssl, the default settings provide for excellent performance here without a need to excessively tune other parameters. Disabling the binary log appears to prevent large intermittent dips in throughput here, however I've left it enabled so as to not include any settings that would disqualify this my.cnf for production. To incorporate Dynimize I perform a warmup before beginning measurements (for both with and without Dynimize) to allow mysqld to reach the dynimized state. This warmup is done once using 256 Sysbench client threads, and I then proceed to run and record Sysbench results from 1 to 1024 connections without restarting the mysqld server process so that mysqld remains dynimized. Below is the sysbench command used for these tests. sysbench /usr/share/sysbench/oltp_point_select.lua --db-driver=mysql --table-size=10000000 --tables=8 --threads=$1 --time=300 --rate=0 --report-interval=1 --rand-type=uniform --rand-seed=1 --mysql-user=$user --mysql-password=$pass --mysql-host=$host --mysql-port=$port --events=0 run The actual scripts used can be found in this GitHub repository along with the raw results. So let's see what happened. Baseline Performance ThreadsDefault Sysbench oltp point select without Dynimize The above results without Dynimize shows a peak throughput of 1.6 M QPS at 512 client connections using TCP/IP. That's a very impressive number to start with for a single VM instance although falls short of the 2.1M QPS record we are trying to break. Note that here we are plotting each throughput sample at one second intervals. Enter Dynimize The below graph show the results after Dynimize CPU performance virtualization is applied. From this we can see a 44% increase in performance by simply installing Dynimize and running dyni -start during the warmup period. Here's a quickstart tutorial in case you're curious as to how to do this. 44% is a non-trivial improvement folks. Actually that's quite the understatement. And with a peak throughput of 2.3M QPS using TCP/IP, we've broken the previous 2.1M QPS record that was set using a Broadwell based bare metal server. Threads Single Threaded Improvements There's more to these Dynimize gains. New releases of MySQL have achieved better results on this workload by being able to better scale and take full advantage of the more cores on offer with the latest CPUs. Of course that is a very challenging task and nothing to scoff at. However in real life that means newer versions of MySQL won't necessarily increase performance on many workloads when run on hardware with a more modest number of cores. In fact at times they can even reduce performance. And realistically who's using servers with these many cores today? While some may, the reality is that for most, these scalability improvements on newer versions aren't necessarily helpful without upgrading your current hardware to something with a very high number of CPU cores. However notice something about the Dynimize results… increased performance at every concurrency level. That's because Dynimize achieves the holy grail of performance improvements - improving single threaded CPU performance. That type of improvement simply scales when you add more cores and more threads. That means workloads on smaller servers can also benefit. This single threaded result is somewhat difficult to see with the above graph, so lets zoom in to just the runs with a single connection, as seen below. Single threaded throughput with one connection. Reduced Response Time All this sounds amazing, but what really matters to our end users? A high throughput number feels great, gives me chest thumping bragging rights and adds a boost to help me reach a record QPS number for my blog post's eye-catching benchmarketing title. However for most situations what actually matters is what the end user of our applications experience, which for our purposes all comes down to response time. You'll notice in the below graph that the gains Dynimize achieves are actually a result of reduced response time at every concurrency level. That's a critical improvement that many of us can apply in many real world situations to the benefit of our end users. Average 95th percentile response time for each concurrency level. Above we can see the average 95th percentile response time for each concurrency level, and below we see the individual data points plotted at one second intervals. Threads95th percentile response time for each data point. Let's zoom in on the single threaded response time improvements with Dynimize. Single threaded response time with one connection. As we can see this response time improvement can even be found with the single threaded case. You'll notice the results have a digital look as they are only recorded in increments of 0.01 ms. I would argue that the above response time improvements at all concurrency levels are the most valuable benefit Dynimize will provide to most real-world use cases. Disabling Spectre/Meltdown Mitigations Maybe at this point you're wondering why the baseline performance when using TCP/IP connections without Dynimize is only 1.6M QPS for a relatively newer server with 224 vCores, compared to 2.1M QPS on an older Broadwell based server with 96 physical cores at 196 hardware threads. Is KVM virtualization overhead the only thing holding back these results? Seeing that the old record was set in Oct 2017 just a few months before the Spectre and Meltdown mitigations were introduced into Linux, I felt that these mitigations were an obvious place to look. Let's try disabling the mitigations within Linux by setting the following in /etc/default/grub: GRUB_CMDLINE_LINUX="spectre_v2=off nopti spec_store_bypass_disable=off" Here is a comparison of the performance without Dynimize with and without these mitigations enabled. Threads Our baseline without Dynimize has gone from 1.6M QPS to 2.39M QPS by simply disabling these mitigations. That is a massive boost that is quite shocking to me. My suspicions are that some of the mitigations enabled by default may not be necessary on AMD Rome systems, or potentially some of these mitigations are not well tuned for these processors. Regardless of the cause, the same experiment with mysqld dynimized gives the following: Threads We are now at over 3M QPS on a single virtual machine by dynimizing mysqld. That's pretty amazing! Now what else can we do? TCP/IP vs Unix Sockets Seeing that we're running Sysbench and MySQL on the same server, we can connect to MySQL using a Unix socket file and bypass the TPC/IP stack with its associated overhead. Below are the results. Threads As you can see we get a nice boost here using the Unix socket file, lifting peak throughput to 3.4M QPS with all other enhancements enabled. That compares favourably to the previous Unix socket record of 2.25M QPS that would not have included any Spectre and Meltdown mitigations. Below are graphs of all these performance enhancements combined. Threads Below is a plot of the consolidated QPS for each concurrency level. Threads Dynimizing the Sysbench Process Sysbench is based on the Lua scripting language and has undergone many improvements to reduce the overhead of the sysbench process. It was bundled with LuaJIT for exactly that reason, however like other programs that include JIT compilers, its performance still relies heavily on the machine code of its actual executable (in this case the sysbench executable) along with the shared libraries that all programs rely on. That of course leaves us with an opportunity for Dynimize to dynamically compile and optimize with profie guided optimizations the executable machine code within sysbench that isn't running in the LuaJIT code cache. Dynimize works in this context because it automatically ignores anonymous code regions that can potentially be a JIT code cache, and only targets the executable and shared library code regions. So to target the sysbench process I simply add sysbench under [exeList] in /etc/dyni.conf. The challenge here is that because you need to start a new sysbench process every time you want to increase the number of threads/connections, each new sysbench process must become dynimized again. This results in dynimizing overhead and a delay before sybench reaches the dynimized state, interfering with the results. Since we're trying to set a QPS record, we'd like to see everything fully dynimized before measurements begin. To do this I run Sysbench with Dynimize however only include the data points after the dynimizing warmup period is complete. To simplify the post processing step I only do this for one run at 512 connections. Throughput change after dynimizing the sysbench process. The above graph plots QPS at one second intervals with and without sysbench dynimized after the warmup period. In both runs we have mysqld dynimized, along with the Spectre and Meltdown mitigations disabled using using a Unix socket file for communication. Here you can see that dynimizing the sysbench process provides for an additional boost in QPS, bringing the sustained average throughput to our new 3.6M QPS record. Wrap up Well that was fun! In the end we saw a 44% QPS increase after dynimizing mysqld vs baseline, and over 3.6 million queries per second on this single VM server with MySQL 8.0 after all performance enhancements were combined. Beyond that, we were also able to achieve these improvements with Dynimize all the way down to the single threaded case. More importantly, we measured response time reductions with Dynimize of up to 38% with significant reductions at every concurrency level. This post also shows us how accessible large servers are becoming in the cloud. To be able to push 3.6 million queries per second on a single cloud VM instance using a free opensource RDBMs is testament to what is possible today in the modern cloud. I also found it very interesting that the instances with the most CPU performance available right now on Google Compute Platform are base on AMD EPYC 2 processors. Unfortunately we also saw that the current default Spectre and Meltdown mitigations enabled within Linux on this system incur a massive performance penalty with this workload, and it was necessary to disable them to perform a more apples-to-apples comparison of the previous max MySQL QPS record on a single server. From this we can see that Dynimize is necessary to achieve the very best possible performance for certain MySQL workloads, such as this one involving well indexed point selects hitting the InnoDB buffer pool. It also shows a clear performance upgrade path for those wishing to see CPU-side performance improvements with MySQL without having to 1) migrate to a new server, 2) take the risk of modifying your app or infrastructure, or 3) restart MySQL with the associated downtime. I'd love to hear your thoughts and questions so please comment below. https://dynimize.com/blog/discussions/mysql-dynimize-3-6-million-queries-per-second-on-a-single-vm/
0 notes