#macos tools
Explore tagged Tumblr posts
Visit Tumblr Blog
Explore Tumblr blogs with no restrictions, modern design and the best experience.
Last Seen Tumblr Blogs


Fun Fact
The Tumblr app for Google Glass was released on May 16, 2013.
Text
✨ Mac user? You’ll want to bookmark this.
No ads. No fake buttons. Just working Mac software. From creative tools to pro utilities — everything’s here: 👉 allmacworld.me
💻 You’ll find:
Photo & video editors
Office & productivity suites
Developer tools
Older macOS-compatible versions
Fast, clean downloads
Stop hunting. Start downloading. allmacworld.me – Mac apps, simplified.
#mac software#mac apps#macos tools#apple apps#creative suite#productivity tools#developer software#macbook pro#mac utilities#allmacworld
0 notes
Text

OMG... far too excited seeing this dev'd
"Brainfuck is an esoteric programming language created in 1993 by Swiss student Urban Müller. Designed to be extremely minimalistic, the language consists of only eight simple commands, a data pointer and an instruction pointer."
21 notes
·
View notes
Text
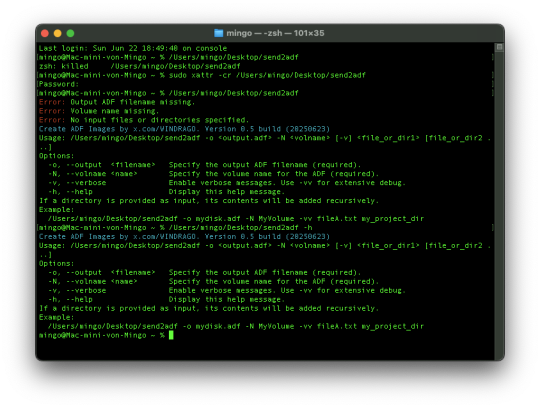
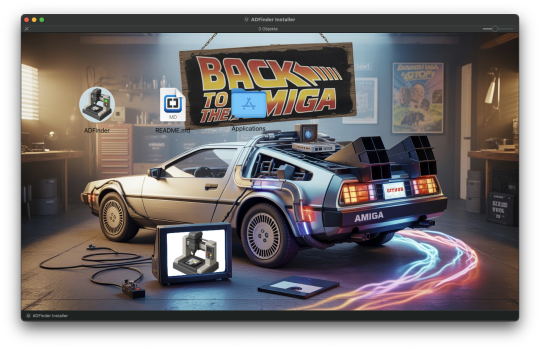

macOS: Amiga tools Send2adf and ADF.inder v1.0.494
4 notes
·
View notes
Text
FFmpeg: The Ultimate Tool for Multimedia Processing
FFmpeg is a powerful open-source tool for handling multimedia files. Whether you’re encoding, decoding, converting, or streaming, FFmpeg is widely used for manipulating video and audio. Getting Started FFmpeg can be installed on various operating systems: Windows: Download from the official site. Here Mac: Use Homebrew: Brew install ffmpeg Linux: Install via package managers like APT or YUM: sudo…
#Audio Editing#Command Line Tools#Encoding & Decoding#FFmpeg#Linux#macOS#Media Conversion#Multimedia Processing#Open Source Software#Streaming#Tech Tools#Video Compression#Video Editing#windows
0 notes
Text
3DMark Benchmarking Tool Now Available on macOS
The popular, previously PC-centric graphics benchmarking suite 3DMark has been launched natively on macOS, offering Mac users a dedicated tool to test their system’s gaming performance. The new macOS version includes four benchmark tests: Wild Life Extreme, Solar Bay, Steel Nomad Light, and the demanding Steel Nomad benchmark previously exclusive to Windows. All tests run natively using Apple’s…
0 notes
Text
Tools - Command Center
I will be curious to see this when it is actually released in February. If it ends up being free or sufficiently cheap I may give it a try. I do have a few bones I would like to pick with the premise of the tool.
Compiled Code as Security Feature
"Second, shell scripts are deployed in uncompiled code to the user's computer, which isn't great from a security perspective, but it also means you're dependent on the version of bash or zsh on that computer, which changes with each OS version."
I really object to the underlying implication here that compilation is a security feature. I am by no means an expert in reverse engineering, but I have done a lot of reverse engineering and binary patching and this is comical. Compile the code for speed, compile the code for power, if you want, but don't call it a security feature.
Jamf Script Handling is Weak
"Third, updating scripts in Jamf Pro is very cumbersome, especially when working with multiple servers. Updating a script is literally copying and pasting code, and if you had hardcoded any changes into that script, those changes are gone as soon as you update it. And since shell scripts don't support libraries, if there's a specific function that needs to be updated for any reason, you have to painstakingly update that across all of your scripts. Because of this, many Jamf admins don't update their scripts unless something breaks."
I agree and disagree with this comment. For example, various people have worked out how to use Github as your source of truth for things like scripts. See the following.
The inability to use libraries in shell scripts is also only half true. While it's not like what you get in Python or other languages you can source another script and call its functions. There are nuances to this, but it is not as cut and dry as the poster would have you believe. If there is one thing I have found–it's that lots of enterprise tools use this trick.
Finally a Lack of Industry Expertise
"Lastly, there is a lack of industry expertise with bash and zsh. Being a Jamf admin requires us to not only have a high level of understanding of the Apple operating system and a variety of IT software, but it also requires us to be good at customer service. But let's face it, most of us are not developers, and many of the difficult challenges we face with shell scripts are easy for a seasoned developer to tackle."
I do agree that there is a lack of expertise in bash and zsh. However, I don't think that this is necessarily a reason to build a tool for common operations. I am not a developer by any means, but I also don't think that encouraging dependence on tools is always the right call.
If you look at the number of third party tools that many Mac administrators rely on such as SwiftDialog, Installomator, etc while all good tools–those who rely on them are at the mercy of an ever increasing number of "vendors" many of whom are not paid for their work.
I would also submit that the less technical we become as administrators the easier it is to replace us with a tool. I would go as far as to suggest that if you solve your problems with other people's tools, then you aren't putting yourself all that far from being replaced by a tool yourself.
0 notes
Text
macOS Sequoia 15.2: Novedades y funciones a probar
Apple lanzó recientemente macOS Sequoia 15.2, una actualización que trae consigo interesantes novedades, especialmente en el ámbito de la inteligencia artificial. Veamos las funciones más destacadas que tienes que probar de macOS Sequoia 15.2. Apple Intelligence: El protagonista de la actualización macOS Sequoia 15.2 es la primera versión del sistema operativo que incorpora Apple Intelligence,…
0 notes
Text
Apple's Pixelmator Move: A Bold Play Against Adobe?
Apple’s recent acquisition of Pixelmator is a striking indication that it could be edging further into Adobe's long-held territory. This feels more deliberate than just expanding the macOS toolkit—it's a challenge. Adobe has reigned over design, photo editing, and creative software for decades, with products like Photoshop and Illustrator practically becoming industry standards. Yet with Pixelmator now in Apple’s camp, Cupertino might be rethinking that status quo, perhaps with more native integration and affordability for creatives.
Pixelmator has been known for its impressive, accessible alternatives to Adobe software. Its user-friendly interface and innovative features, optimised specifically for Apple devices, have long given Adobe a worthy competitor in the consumer photo-editing market. Adobe’s Creative Cloud subscription model has often left users craving a robust, one-time purchase solution, which Pixelmator smartly filled with its buy-to-own model.
Apple’s motives, though, could extend far beyond a simple software acquisition. With Pixelmator, Apple now has control over an image editing powerhouse, and they’re likely to take advantage of that with direct iCloud integration, seamless macOS enhancements, and more of the Apple ecosystem perks Adobe can’t easily replicate. Imagine Pixelmator being optimised for Apple Silicon in ways that even Adobe’s dedicated macOS apps can’t keep up with—software that leverages every bit of M-series power Apple has to offer.
Apple’s refusal to support Flash on iPhones and iPads was, in some ways, a power move by Jobs to drive Adobe to modernise. Instead, it marked the beginning of a gradual end for Flash, which was finally phased out in 2020. The fallout with Adobe was significant for Jobs; he wanted partners that aligned fully with Apple’s vision of the future. For him, Adobe wasn’t it.
On the surface, it’s about making professional-grade tools more accessible, but Apple doesn’t make moves lightly. They have a chance to rethink the design suite for a new generation of creators who are drawn to the simplicity, power, and sleek design Apple products deliver. Adobe may still lead the pro market, but Pixelmator’s acquisition is a game changer that suggests Apple is ready to bring new heat to the creative software arena.
For Adobe, Apple’s announcement has to be a call to step up and reinforce their grip on the market because, with Pixelmator, Apple is just a few innovations away from building an affordable, Apple-native ecosystem that could truly compete. The battle for creatives is heating up, and for those of us who’ve been watching the Apple-Adobe dance, this could be the shake-up we’ve been waiting for.
#Apple#Adobe#SteveJobs#Pixelmator#AppleAcquisition#CreativeSoftware#DesignTools#MacOS#Flash#CreativeIndustry#AdobeVsApple#TechAcquisition#AppleEcosystem#MSeries#CreativeCloud#DigitalArt#ImageEditing#TechHistory#Innovation#SteveJobsLegacy#Creative Software#Photo Editing#Design Tools#Apple Acquisition#macOS#Apple Ecosystem#Adobe vs Apple#Creative Cloud#Apple Silicon#M-Series
0 notes
Text

#Apple's #iPhone16 is all about #artificialintelligence -#AI-driven features like object recognition, custom emojis, and even a smarter #Siri.
Is this the future of smart devices?
#AppleEvent #AI #iPhone16 #technology #tech #news #technews #future
#apple#artificial intelligence#technology#artificial#inteligência artificial#ai technology#tech#technews#openai#ai tools#smartphone#iphone#macos#iphone 16#applefans#gadgets#technology news#future#techinnovation#phones#hardware#huawei
0 notes
Text
0 notes
Text
SanDisk Professional Pro-Blade Transport Review: A Smart Modular Stora - Videoguys
New Post has been published on https://thedigitalinsider.com/sandisk-professional-pro-blade-transport-review-a-smart-modular-stora-videoguys/
SanDisk Professional Pro-Blade Transport Review: A Smart Modular Stora - Videoguys
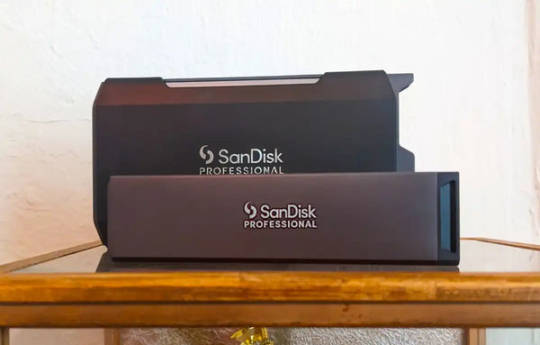
Dive into Jon Jacobi’s detailed review of the SanDisk Professional Pro-Blade Transport, a sleek modular storage system optimized for Mac users. Discover its stylish design, performance capabilities, and compatibility considerations.
Introduction: Explore the SanDisk Professional Pro-Blade Transport with Jon Jacobi’s insightful review, tailored for Mac aficionados seeking efficient storage solutions. Uncover the device’s chic design, practical features, and performance nuances, all expertly analyzed for your convenience.
Content: SanDisk Professional Pro-Blade Transport: A Sleek Modular Storage Solution for Mac Enthusiasts
Jon Jacobi’s review for MacWorld offers an in-depth examination of the SanDisk Professional Pro-Blade Transport, an innovative storage solution designed specifically for Mac users. Discover the device’s compact design, intuitive functionality, and performance characteristics, as Jacobi navigates through its various aspects.
Mac Compatibility and Transfer Speeds: Understanding the Limitations Despite its impressive capabilities, the Pro-Blade Transport encounters a notable constraint on Mac systems: limited transfer speeds capped at 10Gbps. Jacobi delves into the intricacies of this compatibility issue, shedding light on the device’s potential versus its real-world performance on macOS platforms.
Design and Construction: Aesthetics Meets Functionality Jacobi explores the sleek design and sturdy construction of the Pro-Blade Transport, highlighting its compact form factor and stylish appearance. Learn about the device’s modular architecture, featuring NVMe SSD modules known as “Mags,” and their seamless integration with the main dock.
Performance Testing: Real-World Insights Gain valuable insights from Jacobi’s performance testing, which evaluates the Pro-Blade Transport’s speed and efficiency using industry-standard benchmarking tools. Explore the device’s capabilities in handling everyday tasks and data-intensive operations, providing a nuanced perspective on its practical utility.
Speculating on Potential Enhancements Looking ahead, Jacobi speculates on potential enhancements to the Pro-Blade Transport, including the integration of USB4 support to unlock higher transfer speeds on compatible Mac systems. Stay informed about SanDisk’s strategic roadmap and its implications for future iterations of this innovative storage solution.
Making Informed Decisions In conclusion, Jacobi offers valuable insights for prospective buyers, emphasizing the importance of weighing performance considerations against aesthetic appeal and pricing. Navigate the purchasing dilemma with confidence, armed with a comprehensive understanding of the Pro-Blade Transport’s strengths and limitations.
Read the full article by Jon Jacobi for MacWorld HERE
#architecture#Article#comprehensive#construction#content#data#Design#efficiency#factor#Features#form#Full#Future#Industry#insights#integration#Learn#Light#Mac#mac users#MacOS#modular#performance#Pricing#Read#review#speed#Storage#testing#Tools
0 notes
Text
honestly my conclusion from testing so far is that xkit rewritten works fine on safari except that having a massive unbundled top-level-await-filled import waterfall is gonna be unreliable at least some of the time on at least one browser no matter what else you do. don't do it
#safari ios and orion macos seem to work fine loading reliability aside#troubleshooting orion ios without any dev tools might be a pain but I'll get around to it.#it's buggy enough that it's not worth it though#and tbh macos safari performs poorly enough that I would just recommend people switch to ff/chromium#it's just the ios platform where safari might be the best choice for tumblr
0 notes
Text
#pcd pharma franchise#adobe#my pc#pc#pc engine#pc games#pc mods#pc players rush to pick up incredible 89-rated game selling for at a staggering 80% off – save over £40#pcb#pcos#Mac#Computer Software#Desktop Tool#GSM Box With Crack#Repack#Pre-Cracked PC#MacOS#Linux#GSM Box#PreCracked#Patching#Keygen#Portable
0 notes
Text
how to build a digital music collection and stuff
spotify sucks aaaass. so start downloading shit!!
file format glossary
.wav is highest quality and biggest
.mp3 is very small, but uses lossy compression which means it's lower quality
.flac is smaller than .wav, but uses lossless compression so it's high quality
.m4a is an audio file format that apple uses. that's all i really know
downloading the music
doubledouble.top is a life saver. you can download from a variety of services including but not limited to apple music, spotify, soundcloud, tidal, deezer, etc.
i'd recommend ripping your music from tidal or apple music since they're the best quality (i think apple music gives you lossless audio anyway. .m4a can be both lossy and lossless, but from the text on doubledouble i assume they're ripping HQ files off apple music)
i also love love love cobalt.tools for ripping audio/video from youtube (they support a lot of other platforms too!)
of course, many artists have their music on bandcamp — purchase or download directly from them if you can. bandcamp offers a variety of file formats for download
file conversion
if you're downloading from apple music with doubledouble, it spits out an .m4a file.
.m4a is ok for some people but if you prefer .flac, you may wanna convert it. ffmpeg is a CLI (terminal) tool to help with media conversion
if you're on linux or macOS, you can use parameter expansion to batch convert all files in a folder. put the files in one place first, then with your terminal, cd into the directory and run:
for i in *.m4a; do ffmpeg -i "$i" "${i%.*}.flac"; done
this converts from .m4a to .flac — change the file extensions if needed.
soulseek
another way to get music is through soulseek. soulseek is a peer-to-peer file sharing network which is mainly used for music. nicotine+ is a pretty intuitive (and open-source) client if you don't like the official one.
you can probably find a better tutorial on soulseek somewhere else. just wanted to make this option known
it's bad etiquette to download from people without sharing files of your own, so make sure you've got something shared. also try to avoid queuing up more than 1-2 albums from one person in a row
tagging & organizing your music
tagging: adding metadata to a music file (eg. song name, artist name, album) that music players can recognize and display
if you've ripped music from a streaming platform, chances are it's already tagged. i've gotten files with slightly incorrect tags from doubledouble though, so if you care about that then you might wanna look into it
i use musicbrainz picard for my tagging. they've got pretty extensive documentation, which will probably be more useful than me
basically, you can look up album data from an online database into the program, and then match each track with its file. the program will tag each file correctly for you (there's also options for renaming the file according to a certain structure if you're into that!)
there's also beets, which is a CLI tool for... a lot of music collection management stuff. i haven't really used it myself, but if you feel up to it then they've got extensive documentation too. for most people, though, it's not really a necessity
how you wanna organize your music is completely up to you. my preferred filestructure is:
artist > album > track # track

using a music player
the options for this are pretty expansive. commonly used players i see include VLC, foobar2000, clementine (or a fork of it called strawberry), and cmus (for the terminal)
you can also totally use iTunes or something. i don't know what audio players other systems come with
i personally use dopamine. it's a little bit slow, but it's got a nice UI and is themeable plus has last.fm support (!!!)
don't let the github page fool you, you don't have to build from source. you can find the releases here
click the "assets" dropdown on the most recent release, and download whichever one is compatible with your OS
syncing
if you're fine with your files just being on one device (perhaps your computer, but perhaps also an USB drive or an mp3 player), you don't have to do this
you can sync with something like google drive, but i hate google more than i hate spotify
you can get a free nextcloud account from one of their providers with 2GB of free storage. you can use webDAV to access your files from an app on your phone or other device (documents by readdle has webDAV support, which is what i use)
disroot and blahaj.land are a couple providers i know that offer other services as well as nextcloud (so you get more with your account), but accounts are manually approved. do give them a look though!!
if you're tech-savvy and have an unused machine lying around, look into self-hosting your own nextcloud, or better yet, your own media server. i've heard that navidrome is a pretty good audio server. i unfortunately don't have experience with self-hosting at the moment so i have like zero advice to give here. yunohost seems to be a really easy way to manage a server
afterword
i don't know if any of this is helpful, but i just wanted to consolidate my personal advice in one place. fuck big tech. own your media, they could take it away from you at any moment
2K notes
·
View notes
Text
My GIF Making process: Screen capturing using MPV player, Organizing files, 3 Sharpening settings, Basic Coloring PSD + Actions set

This is a very long post so heads up.
I’ll try to be as thorough and true as much as possible to the way I make my gifs (I already use Photoshop Actions which I’ve long since set up but now for this tutorial I’m reviewing them to show you the exact steps I’ve learned to create my gifs 😃) and present them to you in a semi-coherent way. Also, please bear with me since English is my second language.
First things first. Below are the things and tools we need to do this:
Downloaded 4K or 1080p quality videos (let’s all assume we know where to get these—especially for high definition movies and tv series—so this post doesn’t get removed, okay? 😛)
Adobe Photoshop CC or the CS versions can work as well, but full disclosure I haven’t created gifs using the CS versions since 2020. I’m currently using Adobe Photoshop 2024.
mpv player. Use mpv player to get those frames/screenshots or any other video player that has a screen grabber feature. I’ve used adapter for the longest time but I’ve switched to mpv because the press to screenshot feature while the video is playing has been a game changer not to mention ultimate time saver for me. For adapter you need to play it in another video player (like VLC player), to get the start and end timestamps of the scene you want to gif which takes me ages before I can even open Photoshop.
Anyway! Please stop reading this post for a moment and head over to this amazing tutorial by kylos. She perfectly tells you how to install and use mpv player, both for Mac and Windows users.
One thing I have to share though, I had a tough time when I updated my MacOS to Sonoma since MPV is suddenly either duplicating frames or when I delete the duplicates the player seems to be skipping frames :/ I searched and found a solution here, though it didn’t work for me lol. My workaround for this in the meantime is decreasing the speed down to 0.70 then start screenshotting—it’s not the same pre Sonoma update but it works so I’ll have to accept it rather than have jumpy looking gifs.
Now, after this part of kylos’ tutorial:

you can continue reading the following sections of my gif tutorial below.
I want to share this little tip (sorry, this will only cater to Mac users) that I hope will be helpful for organizing the screenshots that MPV saved to the folder you have selected. Because believe me you don’t want to go through 1k+ of screenshots to select just 42-50 frames for your gif.
The Control + Command + N shortcut
This shortcut allows you to create a new folder from files you have pre-selected. As you can see below I have already created a couple of folders, and inside each folder I have selected screenshots that I want to include in one single gif. It's up to you how you want to divide yours, assuming you intend to create and post a Tumblr gifset rather than just one gif.

Another tip is making use of tags. Most of, if not all the time, I make supercorp gifs so I tag blue for Kara and red (or green) for Lena—just being ridiculously on brand and all that.
Before we finally open Photoshop, there's one more thing I want to say—I know, please bear with me for the third? fourth? time 😅
It's helpful to organize everything into their respective folders so you know the total number of items/frames you have. This way, you can add or delete excess or unnecessary shots before uploading them in Photoshop.
For example below there are 80 screenshots of Kara inside this folder and for a 1:1 (540 x 540 px) Tumblr gif, Photoshop can just work around with 42-50 max number of frames with color adjustments applied before it exceeds the 10 MB file size limit of Tumblr.

Sometimes I skip this step because it can be exhausting (haha) and include everything so I can decide visually which frames to keep later on. You'll understand what I mean later on. But it's important to keep the Tumblr 10 MB file size limit in mind. Fewer frames, or just the right amount of frames, is better.
So, with the screenshot organization out of the way, let's finally head over to Photoshop.
Giffing in Photoshop, yay!
Let’s begin by navigating to File > Scripts > Load Files into Stack…

The Load Layers window will appear. Click the Browse button next.
Find your chosen screenshots folder, press Command + A to select all files from that folder then click Open. Then click OK.
After importing and stacking your files, Photoshop should display the following view:

By the way, I'll be providing the clip I've used in this tutorial so if want to use them to follow along be my guest :)
If you haven't already opened your Timeline panel, navigate to Windows > Timeline.
Now, let's focus on the Timeline panel for the next couple of steps.
Click Create Video Timeline, then you’ll have this:

Now click the menu icon on the top right corner then go to Convert Frames > Make Frames from Clips

Still working on the Timeline panel, click the bottom left icon this time—the icon with the three tiny boxes—to Convert to Frame Animation
Select Make Frames From Layers from the top right corner menu button.
So now you have this:

Go and click the top right menu icon again to Select All Frames
Then click the small dropdown icon to set another value for Frame Delay. Select Other…

The best for me and for most is 0.05 but you can always play around and see what you think works for you.
Click the top right menu icon again to Reverse Frames.
I think Photoshop has long since fixed this issue but usually the first animation frame is empty so I just delete it but now going through all these steps there seems to be none of that but anyways, the delete icon is the last one among the line of feature buttons at the bottom part of the Timeline panel.
Yay, now we can have our first proper GIF preview of a thirsty Lena 😜

Press spacebar to watch your gif play for the very first time! After an hour and half of selecting and cutting off screenshots! 😛 Play it some more. No really, I’m serious. I do this so even as early (lol) as this part in the gif making process, I can see which frames I can/should delete to be within the 10 MB file size limit. You can also do it at the end of course 🙂
Now, let’s go to the next important steps of this tutorial post which I’ve numbered below.
Crop and resize to meet Tumblr's required dimensions. The width value should be either 540px, 268px, or 177px.
Convert the gif to a Smart Object for sharpening.
Apply lighting and basic color adjustments before the heavy coloring. I will be sharing the base adjustments layers I use for my gifs 😃.
1. Crop and Resize
Click on the Crop tool (shortcut: the C key)

I like my GIFs big so I always set this to 1:1 ratio if the scene allows it. Press the Enter key after selecting the area of the frame that you want to keep.
Side note: If you find that after cropping, you want to adjust the image to the left or another direction, simply unselect the Delete Cropped Pixels option. This way, you will still have the whole frame area available to crop again as needed and as you prefer.
Now we need to resize our gif and the shortcut for that is Command + Opt + I. Type in 540 as the width measurement, then the height will automatically change to follow the ratio you’ve set while cropping.
540 x 540 px for 1:1
540 x 405 px for 4:3
540 x 304 px for 16:9
For the Resample value I prefer Bilinear—but you can always select the other options to see what you like best.
Click OK. Then Command + 0 and Command + - to properly view the those 540 pixels.

Now we get to the exciting part :) the sharpen settings!
2. Sharpen
First we need to have all these layers “compressed” intro a single smart object from which we can apply filters to.
Select this little button on the the bottom left corner of the Timeline panel.


Select > All Layers
Then go to Filter > Convert for Smart Filters
Just click OK when a pop-up shows up.
Now you should have this view on the Layers panel:

Now I have 3 sharpen settings to share but I’ll have download links to the Action packs at the end of this long ass tutorial so if you want to skip ahead, feel free to do so.
Sharpen v1
Go to Filter > Sharpen > Smart Sharpen…
Below are my settings. I don’t adjust anything under Shadows/Highlights.
Amount: 500
Radius: 0.4
Click OK then do another Smart Sharpen but this time with the below adjustments.
Amount: 12
Radius: 10.0

As you can see Lena’s beautiful eyes are “popping out” now with these filters applied. Click OK.
Now we need to Convert to Frame Animation. Follow the steps below.
Click on the menu icon at the top right corner of the Timeline panel, then click Convert Frames > Flatten Frames into Clips
Then Convert Frames > Convert to Frame Animation
One more click to Make Frames From Layers
Delete the first frame then Select All then Set Frame Delay to 0.05

and there you have it! Play your GIF and make sure it’s just around 42-50 frames. This is the time to select and delete.
To preview and save your GIF go to File > Export > Save for Web (Legacy)…
Below are my Export settings. Make sure to have the file size around 9.2 MB to 9.4 MB max and not exactly 10 MB.

This time I got away with 55 frames but this is because I haven’t applied lighting and color adjustments yet and not to mention the smart sharpen settings aren't to heavy so let’s take that into consideration.
Sharpen v1 preview:

Sharpen v2
Go back to this part of the tutorial and apply the v2 settings.
Smart Sharpen 1:
Amount: 500
Radius: 0.3
Smart Sharpen 2:
Amount: 20
Radius: 0.5
We’re adding a new type of Filter which is Reduce Noise (Filter > Noise > Reduce Noise...) with the below settings.

Then one last Smart Sharpen:
Amount: 500
Radius: 0.3
Your Layers panel should look like this:

Then do the Convert to Frames Animation section again and see below preview.
Sharpen v2 preview:

Sharpen v3:
Smart Sharpen 1:
Amount: 500
Radius: 0.4
Smart Sharpen 2:
Amount: 12
Radius: 10.0
Reduce Noise:
Strength: 5
Preserve Details: 50%
Reduce Color Noise: 0%
Sharpen Details: 50%
Sharpen v3 preview:

And here they are next to each other with coloring applied:
v1

v2

v3

Congratulations, you've made it to the end of the post 😂
As promised, here is the download link to all the files I used in this tutorial which include:
supercorp 2.05 Crossfire clip
3 PSD files with sharpen settings and basic coloring PSD
Actions set
As always, if you're feeling generous here's my Ko-fi link :) Thank you guys and I hope this tutorial will help you and make you love gif making.
P.S. In the next post I'll be sharing more references I found helpful especially with coloring. I just have to search and gather them all.
-Jill
#tutorial#gif tutorial#photoshop tutorial#gif making#sharpening#sharpening tutorial#photoshop#photoshop resources#psd#psd coloring#gif coloring#supercorp#supercorpedit#lena luthor#supergirl#my tutorial#this has been a long time coming#guys. i'm BEGGING you. use the actions set - it was a pain doing all this manually again ngl LMAO#i've been so used to just playing the actions#so this has been a wild refresher course for me too 😆
811 notes
·
View notes
Note
Thoughts on Linux (the OS)
Misconception!
I don't want to be obnoxiously pedantic, but Linux is not an OS. It is a kernel, which is just part of an OS. (Like how Windows contains a lot more than just KERNEL32.DLL). A very, very important piece, which directly shapes the ways that all the other programs will talk to each other. Think of it like a LEGO baseplate.

Everything else is built on top of the kernel. But, a baseplate does not a city make. We need buildings! A full operating system is a combination of a kernel and kernel-level (get to talk to hardware directly) utilities for talking to hardware (drivers), and userspace (get to talk to hardware ONLY through the kernel) utilities ranging in abstraction level from stuff like window management and sound servers and system bootstrapping to app launchers and file explorers and office suites. Every "Linux OS" is a combination of that LEGO baseplate with some permutation of low and high-level userspace utilities.
Now, a lot of Linux-based OSes do end up feeling (and being) very similar to each other. Sometimes because they're directly copying each other's homework (AKA forking, it's okay in the open source world as long as you follow the terms of the licenses!) but more generally it's because there just aren't very many options for a lot of those utilities.
Want your OS to be more than just a text prompt? Your pick is between X.org (old and busted but...well, not reliable, but a very well-known devil) and Wayland (new hotness, trying its damn hardest to subsume X and not completely succeeding). Want a graphics toolkit? GTK or Qt. Want to be able to start the OS? systemd or runit. (Or maybe SysVinit if you're a real caveman true believer.) Want sound? ALSA is a given, but on top of that your options are PulseAudio, PipeWire, and JACK. Want an office suite? Libreoffice is really the only name in the game at present. Want terminal utilities? Well, they're all gonna have to conform to the POSIX spec in some capacity. GNU coreutils, busybox, toybox, all more or less the same programs from a user perspective.
Only a few ever get away from the homogeneity, like Android. But I know that you're not asking about Android. When people say "Linux OS" they're talking about the homogeneity. The OSes that use terminals. The ones that range in looks from MacOS knockoff to Windows knockoff to 'impractical spaceship console'. What do I think about them?
I like them! I have my strongly-felt political and personal opinions about which building blocks are better than others (generally I fall into the 'functionality over ideology' camp; Nvidia proprietary over Nouveau, X11 over Wayland, Systemd over runit, etc.) but I like the experience most Linux OSes will give me.
I like my system to be a little bit of a hobby, so when I finally ditched Windows for the last time I picked Arch Linux. Wouldn't recommend it to anyone who doesn't want to treat their OS as a hobby, though. There are better and easier options for 'normal users'.
I like the terminal very much. I understand it's intimidating for new users, but it really is an incredible tool for doing stuff once you're in the mindset. GUIs are great when you're inexperienced, but sometimes you just wanna tell the computer what you want with your words, right? So many Linux programs will let you talk to them in the terminal, or are terminal-only. It's very flexible.
I also really, really love the near-universal concept of a 'package manager' -- a program which automatically installs other programs for you. Coming from Windows it can feel kinda restrictive that you have to go through this singular port of entry to install anything, instead of just looking up the program and running an .msi file, but I promise that if you get used to it it's very hard to go back. Want to install discord? yay -S discord. Want to install firefox? yay -S firefox. Minecraft? yay -S minecraft-launcher. etc. etc. No more fucking around in the Add/Remove Programs menu, it's all in one place! Only very rarely will you want to install something that isn't in the package manager's repositories, and when you do you're probably already doing something that requires technical know-how.
Not a big fan of the filesystem structure. It's got a lot of history. 1970s mainframe computer operation procedure history. Not relevant to desktop users, or even modern mainframe users. The folks over at freedesktop.org have tried their best to get at least the user's home directory cleaned up but...well, there's a lot of historical inertia at play. It's not a popular movement right now but I've been very interested in watching some people try to crack that nut.
Aaaaaand I think those are all the opinions I can share without losing everyone in the weeds. Hope it was worth reading!
225 notes
·
View notes