#mysql community server 8 installation
Explore tagged Tumblr posts
Visit Tumblr Blog
Explore Tumblr blogs with no restrictions, modern design and the best experience.
Last Seen Tumblr Blogs


Fun Fact
Tumblr’s website traffic is steadily declining.
Text
You can learn NodeJS easily, Here's all you need:
1.Introduction to Node.js
• JavaScript Runtime for Server-Side Development
• Non-Blocking I/0
2.Setting Up Node.js
• Installing Node.js and NPM
• Package.json Configuration
• Node Version Manager (NVM)
3.Node.js Modules
• CommonJS Modules (require, module.exports)
• ES6 Modules (import, export)
• Built-in Modules (e.g., fs, http, events)
4.Core Concepts
• Event Loop
• Callbacks and Asynchronous Programming
• Streams and Buffers
5.Core Modules
• fs (File Svstem)
• http and https (HTTP Modules)
• events (Event Emitter)
• util (Utilities)
• os (Operating System)
• path (Path Module)
6.NPM (Node Package Manager)
• Installing Packages
• Creating and Managing package.json
• Semantic Versioning
• NPM Scripts
7.Asynchronous Programming in Node.js
• Callbacks
• Promises
• Async/Await
• Error-First Callbacks
8.Express.js Framework
• Routing
• Middleware
• Templating Engines (Pug, EJS)
• RESTful APIs
• Error Handling Middleware
9.Working with Databases
• Connecting to Databases (MongoDB, MySQL)
• Mongoose (for MongoDB)
• Sequelize (for MySQL)
• Database Migrations and Seeders
10.Authentication and Authorization
• JSON Web Tokens (JWT)
• Passport.js Middleware
• OAuth and OAuth2
11.Security
• Helmet.js (Security Middleware)
• Input Validation and Sanitization
• Secure Headers
• Cross-Origin Resource Sharing (CORS)
12.Testing and Debugging
• Unit Testing (Mocha, Chai)
• Debugging Tools (Node Inspector)
• Load Testing (Artillery, Apache Bench)
13.API Documentation
• Swagger
• API Blueprint
• Postman Documentation
14.Real-Time Applications
• WebSockets (Socket.io)
• Server-Sent Events (SSE)
• WebRTC for Video Calls
15.Performance Optimization
• Caching Strategies (in-memory, Redis)
• Load Balancing (Nginx, HAProxy)
• Profiling and Optimization Tools (Node Clinic, New Relic)
16.Deployment and Hosting
• Deploying Node.js Apps (PM2, Forever)
• Hosting Platforms (AWS, Heroku, DigitalOcean)
• Continuous Integration and Deployment-(Jenkins, Travis CI)
17.RESTful API Design
• Best Practices
• API Versioning
• HATEOAS (Hypermedia as the Engine-of Application State)
18.Middleware and Custom Modules
• Creating Custom Middleware
• Organizing Code into Modules
• Publish and Use Private NPM Packages
19.Logging
• Winston Logger
• Morgan Middleware
• Log Rotation Strategies
20.Streaming and Buffers
• Readable and Writable Streams
• Buffers
• Transform Streams
21.Error Handling and Monitoring
• Sentry and Error Tracking
• Health Checks and Monitoring Endpoints
22.Microservices Architecture
• Principles of Microservices
• Communication Patterns (REST, gRPC)
• Service Discovery and Load Balancing in Microservices
1 note
·
View note
Text
Sponzy Nulled Script 5.8

Download Sponzy Nulled Script – Monetize Your Content Creatively If you're looking for a powerful yet cost-effective solution to launch a creator-support platform, Sponzy Nulled Script is the perfect tool for you. Whether you're building a Patreon-style website or looking to monetize content through subscriptions and donations, this script is a game-changer. Enjoy full access to premium features without any licensing restrictions. Get the latest version for free right here and empower your online journey today! What Is Sponzy Nulled Script? Sponzy Nulled Script is a premium PHP-based platform that enables creators to receive financial support from fans and subscribers. With seamless payment integrations, customizable layouts, and multi-language support, Sponzy allows you to create a community-focused platform that rivals the best in the business. The nulled version gives you complete access to its premium functionalities for free—no subscriptions, no hidden charges. Technical Specifications Script Type: PHP Laravel Framework Responsive Design: Fully Mobile-Optimized Database Support: MySQL 5.7+ Latest Version Compatibility: PHP 8+ Security: Integrated reCAPTCHA, CSRF Protection Powerful Features & Unique Benefits The Sponzy Nulled Script comes loaded with high-end features that give you a competitive edge: 1. Multi-Currency & Payment Gateway Support Integrate with PayPal, Stripe, and even cryptocurrency gateways to offer a seamless payment experience worldwide. 2. Membership Tiers Create different support plans with varying benefits to attract a wider range of supporters—from casual fans to superfans. 3. Real-Time Notifications Keep users engaged with real-time alerts for messages, tips, and subscription renewals. 4. GDPR-Ready and SEO-Friendly Built to meet modern data privacy regulations while optimizing your platform for search engines right out of the box. 5. Monetization Tools Enable tipping, subscriptions, and pay-per-view content—all built into the system with intuitive admin control. Why Choose Sponzy Nulled Script? Unlike many open-source alternatives, Sponzy Nulled Script is professionally designed and continuously updated. The nulled version saves you hundreds of dollars while providing the exact same user experience. It’s ideal for entrepreneurs, influencers, bloggers, and creative professionals who want to launch a content support platform without financial risk. How to Install Sponzy Nulled Script Download the script from our website. Upload it to your server using FTP or cPanel. Create a new MySQL database and import the included SQL file. Open the installation URL and follow the on-screen setup process. Log in to your admin panel and start customizing your platform! Use Cases of Sponzy Nulled Script Content Creators: Monetize exclusive videos, blogs, or artwork. Influencers: Offer membership perks to loyal followers. Nonprofits: Receive recurring donations without complex setups. Writers & Journalists: Launch subscription-based content easily. FAQs About Sponzy Nulled Script Q: Is it safe to use the nulled version? A: Yes, we ensure all scripts are scanned for malware and viruses before making them available. However, always use a secure hosting environment. Q: Can I update the script? A: Updates are manual, and you may need to download the latest version from our website when available. Q: Does it support RTL languages? A: Absolutely. Sponzy Nulled Script supports both LTR and RTL, making it perfect for global use. Q: Can I integrate custom themes? A: Yes, the script supports theme customization and development for a personalized user experience. Final Thoughts The Sponzy is more than just a content monetization tool—it’s your gateway to building a thriving digital community. Whether you're just starting out or scaling an established brand, Sponzy delivers professional-grade features without the professional-grade price tag. Don’t miss this opportunity to download it for free and unlock unlimited potential!
Looking for more premium resources? Check out our collection like avada nulled for even more web design flexibility. For a powerful eCommerce theme, try woodmart nulled—a must-have for modern online stores.
0 notes
Text
Why Choose WordPress Development: A Comprehensive Guide
Building a strong online presence is essential for both individuals and organizations in the current digital era. Among the myriad of content management systems (CMS) available, WordPress stands out as a leading choice for website development. This article delves into why you can choose WordPress development, highlighting its benefits, flexibility, and integration with top technologies like HTML5, CSS3, JavaScript, PHP, MySQL, React, Angular, Node.js, Python, and Java.

Why WordPress is a Preferred Choice for Website Development
1. User-Friendly Interface
WordPress is renowned for its ease of use, making it accessible even to those without extensive technical expertise. The intuitive dashboard allows users to manage content, customize themes, and install plugins effortlessly. This user-friendly interface ensures that anyone can create and maintain a professional-looking website without needing to delve deep into coding languages like HTML5 or CSS3.
2. Extensive Customization Options
One of the primary reasons to choose WordPress development is the vast array of customization options it offers. With thousands of themes and plugins available, users can tailor their websites to meet specific needs. Whether you want to integrate advanced functionalities using JavaScript or enhance your site's aesthetics with CSS3, WordPress provides the tools necessary to achieve your goals.
3. SEO Optimization Capabilities
Search Engine Optimization (SEO) is vital for improving your website's visibility on search engines. WordPress is inherently SEO-friendly, offering numerous plugins like Yoast SEO that help optimize your site. By leveraging these tools, you can ensure your website ranks higher in search results, driving more organic traffic. Additionally, integrating technologies such as PHP and MySQL ensures your site remains fast and efficient, further boosting SEO performance.
4. Responsive Design Support
A flexible website is crucial given the rise in the use of mobile devices. Because WordPress themes are mobile-friendly, your website will look fantastic on all screens. Utilizing modern web technologies like HTML5 and CSS3, WordPress developers can create responsive designs that adapt seamlessly to different screen sizes, enhancing user experience.
5. Robust Community and Support
WordPress boasts a large and active community of developers and users who contribute to its continuous improvement. This vibrant ecosystem means you’ll find ample resources, tutorials, and forums to help troubleshoot issues or learn new skills. Moreover, the availability of expert developers proficient in technologies like React, Angular, and Node.js ensures you can always find support for complex projects.
Integrating Top Technologies with WordPress Development

6. HTML5 and CSS3 for Enhanced Web Design
HTML5 and CSS3 are foundational technologies for modern web design. When developing a WordPress site, these languages play a critical role in structuring content and styling elements. By utilizing HTML5, developers can incorporate multimedia features and semantic elements, while CSS3 allows for sophisticated styling and animations, resulting in visually appealing websites.
7. JavaScript for Interactive Features
JavaScript is indispensable for adding interactivity to your WordPress site. From dynamic forms to interactive maps, JavaScript enables developers to create engaging user experiences. Frameworks like React and Angular, built on JavaScript, offer additional capabilities for building complex applications within WordPress, enhancing functionality and user engagement.
8. PHP and MySQL for Backend Efficiency
At its core, WordPress relies on PHP and MySQL to handle server-side operations and database management. PHP scripts process data and generate dynamic content, while MySQL stores and retrieves information efficiently. These technologies ensure your WordPress site operates smoothly, handling high traffic volumes and complex queries with ease.
9. Node.js for Real-Time Applications
For websites requiring real-time updates, such as live blogs or chat applications, Node.js is an excellent addition to WordPress development. Its event-driven architecture allows for non-blocking I/O operations, making it ideal for handling concurrent requests. By integrating Node.js, developers can build scalable and responsive applications that enhance user interaction.
10. Python and Java for Advanced Functionalities
While not traditionally associated with WordPress, Python and Java can be integrated to extend your site's capabilities. Python's simplicity and versatility make it suitable for data analysis and machine learning applications, which can be embedded into WordPress sites. Similarly, Java's robustness and cross-platform compatibility allow for the development of enterprise-level solutions, providing advanced functionalities when needed.
Advantages of Choosing WordPress Development Cost-Effectiveness
Since WordPress is an open-source platform, anyone can use and alter it for free. This cost-effectiveness makes it an attractive option for startups and small businesses looking to establish an online presence without significant financial investment. Furthermore, the abundance of free themes and plugins reduces the need for custom development, saving both time and money.
Scalability and Flexibility
Whether you're launching a simple blog or a comprehensive e-commerce platform, WordPress scales effortlessly to accommodate your needs. Its modular nature allows you to start small and expand as your business grows. With the ability to integrate various technologies like PHP, MySQL, and Node.js, WordPress can handle increased traffic and complexity without compromising performance.
Security Features
For any website owner, security is paramount. WordPress offers numerous security plugins and best practices to protect your site from threats. Regular updates and patches ensure vulnerabilities are addressed promptly, safeguarding your data and maintaining trust with your audience. Additionally, employing secure coding practices with languages like Python and Java further fortifies your site against potential breaches.
E-Commerce Capabilities
For businesses venturing into online sales, WordPress provides powerful e-commerce solutions through plugins like Woo Commerce. These tools enable you to set up an online store quickly and efficiently, complete with product catalogs, payment gateways, and inventory management. Leveraging technologies like JavaScript and React enhances the shopping experience, making it seamless and enjoyable for customers.
Multilingual Support
Expanding your reach globally requires multilingual support, and WordPress excels in this area. Plugins like WPML and the Polyang allow you to translate your content into multiple languages, catering to diverse audiences. This feature, combined with responsive design powered by HTML5 and CSS3, ensures your message resonates across cultural and linguistic boundaries.

Conclusion
Choosing WordPress development offers numerous advantages, from its user-friendly interface and extensive customization options to its robust community support and integration with cutting-edge technologies. By harnessing the power of HTML5, CSS3, JavaScript, PHP, MySQL, React, Angular, Node.js, Python, and Java, you can create a versatile, scalable, and secure website tailored to your unique requirements.
Whether you’re a novice blogger or a seasoned entrepreneur, WordPress provides the tools and flexibility needed to succeed in today’s competitive digital landscape. Embrace the possibilities of WordPress development and unlock the full potential of your online presence.
#web development#seo services#web designing#social media marketing#graphic design#digital marketing#digitalmarketing#marketing#digitalindia#seo
0 notes
Text
How to Write the Perfect PHP Script for Your Web Development Class
PHP (Hypertext Preprocessor) is a widely-used server-side scripting language that powers millions of websites and applications.
Its versatility, ease of use, and integration capabilities with databases make it a popular choice for web developers.
If you’re enrolled in a web development class, mastering PHP is essential for creating dynamic and interactive web pages.
In the initial stages of learning PHP, many students encounter challenges that can hinder their progress.
This is where AssignmentDude comes in. Offering expert assistance in PHP homework, AssignmentDude provides personalized support tailored to your learning needs with PHP assignment help.
Whether you’re struggling with basic syntax or complex database interactions, our team of experienced tutors is here to help you navigate through your assignments and enhance your understanding of PHP programming.
At AssignmentDude, we understand that mastering PHP requires practice and guidance.
Our services are designed to empower you with the skills needed to tackle real-world projects confidently.
From understanding fundamental concepts to implementing advanced features, our dedicated tutors are committed to helping you succeed in your web development journey.
As you embark on this learning path, remember that seeking help is not a sign of weakness but rather a proactive step toward mastering the art of programming.
With AssignmentDude’s support, you can overcome obstacles and develop a strong foundation in PHP that will serve you well throughout your career.
Understanding the Basics of PHP
Before diving into writing scripts, it’s crucial to understand the fundamentals of PHP. This section will cover the essential concepts that every beginner should know.
What is PHP?
PHP is a server-side scripting language designed primarily for web development but also used as a general-purpose programming language.
It allows developers to create dynamic content that interacts with databases and can handle user input effectively.
Why Use PHP?
Cross-Platform Compatibility: PHP runs on various platforms (Windows, Linux, macOS), making it versatile for different server environments.
Database Integration: PHP seamlessly integrates with databases like MySQL, PostgreSQL, and SQLite, allowing for efficient data management.
Open Source: Being open-source means that PHP is free to use and has a large community contributing to its continuous improvement and support.
Ease of Learning: The syntax of PHP is similar to C and Java, making it relatively easy for beginners to pick up.
Setting Up Your Development Environment
To start writing PHP scripts, you’ll need a suitable development environment. Here’s how to set it up:
Install XAMPP/WAMP/MAMP: These are popular packages that include Apache server, MySQL database, and PHP interpreter.
XAMPP: Cross-platform solution available for Windows, Linux, and macOS.
WAMP: Windows-specific solution.
MAMP: Mac-specific solution.
Create Your Project Directory:
Navigate to the htdocs folder within your XAMPP installation directory (usually found at C:\xampp\htdocs on Windows).
Create a new folder for your project (e.g., my_first_php_project).
Choose an IDE or Text Editor:
Popular choices include Visual Studio Code, Sublime Text, or PhpStorm. These editors provide syntax highlighting and debugging tools that enhance your coding experience.
Writing Your First PHP Script
Now that your environment is set up, let’s write your first simple PHP script.
Step 1: Create a New File
Open your text editor or IDE.
Create a new file named index.php in your project directory.
Step 2: Write Basic PHP Code
Add the following code to index.php:
php
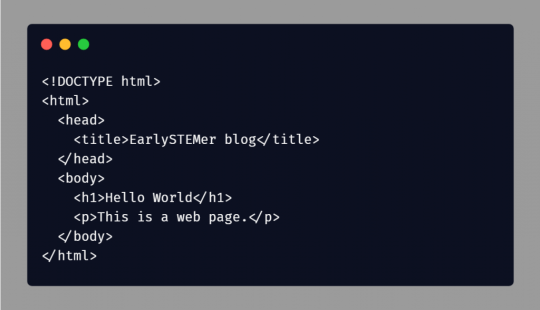
<!DOCTYPE html>
<html lang=”en”>
<head>
<meta charset=”UTF-8">
<meta name=”viewport” content=”width=device-width, initial-scale=1.0">
<title>My First PHP Page</title>
</head>
<body>
<h1>Welcome to My First PHP Page!</h1>
<?php
echo “Hello, World! This is my first PHP script.”;
?>
</body>
</html>
Step 3: Run Your Script
Start the Apache server using XAMPP Control Panel.
Open your web browser and navigate to http://localhost/my_first_php_project/index.php.
You should see “Welcome to My First PHP Page!” followed by “Hello, World! This is my first PHP script.” displayed on the page.
Understanding Basic Syntax
PHP scripts can be embedded within HTML code. The opening tag <?php indicates the start of a PHP block, while ?> marks its end. Here are some key points about PHP syntax:
Variables: Variables in PHP start with a dollar sign ($). For example:
php
$name = “John Doe”;
echo $name; // Outputs: John Doe
Data Types: Common data types include strings, integers, floats, booleans, arrays, and objects.
Comments: Use comments to document your code:
php
// This is a single-line comment
/* This is a
multi-line comment */
Control Structures
Control structures allow you to control the flow of execution in your scripts.
Conditional Statements
Conditional statements execute different blocks of code based on certain conditions:
php
$age = 18;
if ($age >= 18) {
echo “You are an adult.”;
} else {
echo “You are not an adult.”;
}
Looping Statements
Loops enable repetitive execution of code blocks:
For Loop:
php
for ($i = 0; $i < 5; $i++) {
echo “Number: $i<br>”;
}
While Loop:
php
$count = 0;
while ($count < 5) {
echo “Count: $count<br>”;
$count++;
}
Working with Functions
Functions are reusable blocks of code that perform specific tasks.
Defining Functions
You can define functions using the function keyword:
php
function greet($name) {
return “Hello, $name!”;
}
echo greet(“Alice”); // Outputs: Hello, Alice!
Built-in Functions
PHP comes with numerous built-in functions for various purposes:
String manipulation functions like strlen(), str_replace(), etc.
Array functions like array_push(), array_merge(), etc.
Handling Forms and User Input
One of the key aspects of web development is handling user input through forms.
Creating HTML Forms
You can create forms using standard HTML elements:
xml
<form action=”process.php” method=”post”>
Name: <input type=”text” name=”name”><br>
Age: <input type=”number” name=”age”><br>
<input type=”submit” value=”Submit”>
</form>
Processing Form Data in PHP
To process submitted form data:
php
// process.php
if ($_SERVER[“REQUEST_METHOD”] == “POST”) {
$name = $_POST[‘name’];
$age = $_POST[‘age’];
echo “Name: $name<br>”;
echo “Age: $age<br>”;
}
Form Validation and Security
Always validate user input before processing it:
php
if (!empty($name) && filter_var($age, FILTER_VALIDATE_INT)) {
// Process valid input
} else {
echo “Invalid input.”;
}
Working with Databases (MySQL)
Integrating databases into your applications allows for dynamic data management.
Connecting to MySQL Database
To connect to a MySQL database using PDO (PHP Data Objects):
php
try {
$pdo = new PDO(‘mysql:host=localhost;dbname=my_database’, ‘username’, ‘password’);
} catch (PDOException $e) {
echo “Connection failed: “ . $e->getMessage();
}
Performing CRUD Operations
CRUD stands for Create, Read, Update, Delete operations on database records.
Create Operation
php
$sql = “INSERT INTO users (name, age) VALUES (:name, :age)”;
$stmt = $pdo->prepare($sql);
$stmt->execute([‘name’ => ‘John’, ‘age’ => 30]);
Read Operation
php
$sql = “SELECT * FROM users”;
$stmt = $pdo->query($sql);
while ($row = $stmt->fetch()) {
echo $row[‘name’] . “<br>”;
}
Update Operation
php
$sql = “UPDATE users SET age = :age WHERE name = :name”;
$stmt = $pdo->prepare($sql);
$stmt->execute([‘age’ => 31, ‘name’ => ‘John’]);
Delete Operation
php
$sql = “DELETE FROM users WHERE name = :name”;
$stmt = $pdo->prepare($sql);
$stmt->execute([‘name’ => ‘John’]);
Object-Oriented Programming (OOP) in PHP
OOP allows for more organized code through encapsulation and inheritance.
Defining Classes and Objects
You can define classes using the class keyword:
php
class User {
public $name;
public function __construct($name) {
$this->name = $name;
}
public function greet() {
return “Hello, {$this->name}!”;
}
}
$user = new User(“Alice”);
echo $user->greet(); // Outputs: Hello, Alice!
Inheritance in OOP
Inheritance allows one class to inherit properties and methods from another class:
php
class Admin extends User {
public function greet() {
return “Welcome back, Admin {$this->name}!”;
}
}
$admin = new Admin(“Bob”);
echo $admin->greet(); // Outputs: Welcome back, Admin Bob!
Error Handling in PHP
Handling errors gracefully is crucial for maintaining application stability.
Using Try-Catch Blocks
You can catch exceptions using try-catch blocks:
php
try {
// Code that may throw an exception
} catch (Exception $e) {
echo ‘Caught exception: ‘, $e->getMessage(), “\n”;
}
Best Practices for Writing Clean Code
Writing clean code improves maintainability and readability:
Use Meaningful Variable Names: Choose descriptive names for variables and functions.
Keep Functions Short: Each function should perform one task only.
Comment Your Code: Use comments judiciously to explain complex logic but avoid over-commenting obvious code.
Follow Coding Standards: Adhere to consistent coding standards such as PSR (PHP Standards Recommendations).
Advanced Topics in PHP
As you become more comfortable with basic concepts in PHP scripting, it’s time to explore some advanced topics that will enhance your skills further.
Working with Sessions
Sessions allow you to store user information across multiple pages during their visit to your website.
Starting a Session
To use sessions in PHP:
php
session_start(); // Must be called before any output is sent
$_SESSION[‘username’] = ‘JohnDoe’;
Accessing Session Variables
To access session variables on another page:
php
session_start();
echo $_SESSION[‘username’]; // Outputs: JohnDoe
Destroying Sessions
To end a session when it’s no longer needed:
php
session_start();
session_destroy(); // Destroys all data registered to a session
File Handling
PHP provides functions for reading from and writing to files on the server.
Writing Data to Files
You can write data to files using fopen() and fwrite() functions:
php
$file = fopen(“example.txt”, “w”);
fwrite($file, “Hello World!”);
fclose($file);
Reading Data from Files
To read data from files:
php
$file = fopen(“example.txt”, “r”);
$content = fread($file, filesize(“example.txt”));
fclose($file);
echo $content; // Outputs: Hello World!
Using Composer
Composer is a dependency manager for PHP that simplifies package management.
Installing Composer
To install Composer globally on your system:
Download Composer installer from getcomposer.org.
Follow installation instructions based on your operating system.
Using Composer
To create a new project with Composer:
Navigate to your project directory in the terminal.
Run:
bash
composer init
Follow prompts to set up your project configuration.
You can then require packages by running:
bash
composer require vendor/package-name
Security Best Practices
Security should always be a priority when developing web applications with PHP. Here are some key practices:
Input Validation
Always validate user inputs before processing them:
php
$name = filter_input(INPUT_POST, ‘name’, FILTER_SANITIZE_STRING);
$age = filter_input(INPUT_POST,’age’, FILTER_VALIDATE_INT);
if (!$age) {
die(“Invalid age provided.”);
}
Prepared Statements
Use prepared statements when interacting with databases to prevent SQL injection attacks:
php
$stmt = $pdo->prepare(“SELECT * FROM users WHERE email=:email”);
$stmt->execute([‘email’ => $_POST[‘email’]]);
$user = $stmt->fetch();
Password Hashing
Never store passwords as plain text; always hash them before saving them in the database:
php
$passwordHash = password_hash($passwordInput , PASSWORD_DEFAULT);
// Store `$passwordHash` in the database instead of plain password.
To verify passwords during login:
php
if (password_verify($passwordInput ,$passwordHash)) {
echo ‘Password is valid!’;
} else {
echo ‘Invalid password.’;
}
Debugging Techniques
Debugging is an essential skill for developers when things don’t work as expected.
Enabling Error Reporting
During development phases enable error reporting by adding this line at the top of your script:
php
error_reporting(E_ALL);
ini_set(‘display_errors’, 1);
This will display all errors directly on the page during development which helps identify issues quickly but should be disabled on production sites.
Using Debugging Tools
Tools such as Xdebug provide advanced debugging capabilities including stack traces which help trace issues back through function calls leading up until an error occurs.
Real-World Applications of PHP
Understanding how PHP fits into real-world applications will solidify your knowledge further.
Content Management Systems (CMS)
Many popular CMS platforms such as WordPress are built using PHP. Learning how these systems work can provide insights into best practices for building scalable applications.
WordPress Development: You might want to explore creating themes or plugins which involves understanding hooks and filters within WordPress’s architecture.
E-commerce Platforms
Building e-commerce websites often involves complex functionalities like user authentication systems along with payment gateway integrations which rely heavily on secure coding practices learned through mastering core concepts in PHP development.
Example Project Idea: Create an online store where users can register accounts; add products into their cart; checkout securely using payment gateways like PayPal or Stripe integrated via API calls handled through backend scripts written in php!
RESTful APIs
PHP can also be used to build RESTful APIs which allow different applications or services communicate over HTTP protocols seamlessly exchanging data formats like JSON or XML making it easier integrate third-party services into existing applications without much hassle!
Here’s an example snippet demonstrating how you might set up routes within an API built using php:
php
header(‘Content-Type: application/json’);
$requestMethod=$_SERVER[“REQUEST_METHOD”];
switch ($requestMethod) {
case ‘GET’:
// Handle GET request
break;
case ‘POST’:
// Handle POST request
break;
case ‘PUT’:
// Handle PUT request
break;
case ‘DELETE’:
// Handle DELETE request
break;
default:
http_response_code(405); // Method Not Allowed
break;
}
Common Pitfalls When Learning PHP
As you learn more about writing scripts in php here are some common pitfalls students often face along their journey!
Not Understanding Scope: Variables defined inside functions have local scope meaning they cannot be accessed outside those functions unless explicitly returned or declared global which leads many beginners confused when trying access them elsewhere leading errors being thrown unexpectedly!
Overusing Global Variables: While globals may seem convenient they make tracking down bugs much harder since any part could change its value at any time leading unpredictable behavior instead try pass values around via function parameters whenever possible!
Ignoring Security Measures: Failing implement proper security measures opens doors malicious attacks such as SQL injections so always sanitize inputs validate data before processing anything coming from users!
Neglecting Documentation & Comments: As projects grow larger keeping track becomes increasingly difficult without proper documentation so take time write clear comments explaining logic behind decisions made throughout codebase helps others understand intentions behind design choices later down line!
Not Testing Thoroughly Enough Before Deployment: Always test thoroughly before deploying anything live since bugs missed during development phases could cause significant issues once exposed real-world scenarios especially if sensitive information involved!
Conclusion
Writing perfect PHP scripts requires understanding fundamental concepts as well as best practices in coding standards while avoiding common pitfalls along way!
By mastering these skills through practice seeking help when needed — like utilizing resources from AssignmentDude — you can excel not only within classroom settings but also beyond them into real-world projects! Submit Your Assignment Now!
Remember that learning programming is an ongoing journey filled with challenges opportunities growth embrace each challenge as chance improve skills further!
If you ever find yourself stuck overwhelmed by assignments related specifically C++ don’t hesitate reach out AssignmentDude expert assistance tailored specifically students just like YOU! Together we’ll ensure success throughout entire learning process!
#do my programming homework#programming assignment help#urgent assignment help#assignment help service#final year project help#php assignment help#python programming
0 notes
Text
VoIP Engineer || Vice Process Company || Technical Support VoIP Engineer || Technical Support || NOC Engineer || Kolkata || West Bengal
About Company: Recruitment Company is a rapidly growing Business Process Outsourcing Company, headquartered in London, United Kingdom, and an outsourcing branch in Pune, India. They cover the fields of Business Solutions, Recruitment Solutions, and Designing Solutions as their Core Business. They are specialized and deal in inbound and out bound calls, consultancy, Design and marketing solutions.
Mission of the Company: To be a reliable partner for their clients and they intend to offer new solutions and technology to drive B2B and B2C services with great ease.
Hi we are from Ideal Career Zone: Where Your Skills Meet Your Passions. The ideal career zone is the sweet spot where your skills and passions intersect. It's the place where you can use your talents to make a difference in the world, while also feeling fulfilled and satisfied. Finding your ideal career zone can be a challenge, but it's worth it. When you're in the right zone, you'll be more productive, more motivated, and more likely to succeed.
Now the company need some staffs for the post of VOIP engineer.
Job Description
Profile: Technical Support VoIP Engineer / NOC Engineer
Location: Kolkata, West Bengal
Experience: 3+ Years
Profile: VoIP Support Engineer.
Salary Budget: 5 LPA to 11 LPA
Brief description:
Should have Good exposure to GSM, VOIP, SIP, MSRC, RTP, MSRP, RCS.
Should be adept in VOIP Trunk SIP Configuration, PRI Card Installation, Asterisk/ Dahdi/ FreePBX Installation / IP PBX /IP Telephony / IP phone configuration / EPBX /VOIP Gateway /Asterisk server management.
Troubleshooting of SIP and VOIP Based Call-center telephony Issues.
Experience in Installing, configuring and deployments of Asterisk, Asterisk-based applications like Vicidial, IVR and FreePBX.
Experience in Installing, configuring and deployment of Asterisk, GoAutoDial, Vicidial, IVR and FreePBX.
Sound knowledge of Asterisk Installation, Configuration, Dialplan, AGI, AMI, Call troubleshooting (SIP, ISDN, PSTN)
Configuration, Maintenance and troubleshooting of Asterisk Based Servers, VICIDIAL, FreePBX, Freeswitch.
Good verbal and written communication.
Excellent team player, ability to work in a global team and follow through on deadlines.
Strong technical and analytical skills.
Resolve Client issues through Skype and Remote Screen sharing.
Minimum 2+yearsexperience in Troubleshooting VoIP Required.
Proficiency in the following programming languages: MySQL, PHP, Perl. Preferred skills
Industry Type: Telcom, ISP, BPO.
Key Skills: Asterisk, Vici Dail, Free PBX IVR, VOIP, Wire Shark
Employment Type: Full Time
Note:- Many more Jobs available just search in Google “Ideal Career Zone” Kolkata.
You can find many more job details in various posts in various companies.
You may call us between 9 am to 8 pm
8 7 7 7 2 1 1 zero 1 6
9 3 3 1 2 zero 5 1 3 3
Or you can visit our office.
Ideal Career Zone
128/12A, Bidhan Srani Shyam Bazaar metro Gate No.1 Gandhi Market Behind Sajjaa Dhaam Bed Sheet Bed cover Show room Kolkata 7 lakh 4
Thank you for watching our channel Please subscribed and like our videos for more jobs opening. Thank You again.
VoIPEngineer, #ViceProcessCompany, #TechnicalSupportVoIPEngineer, #TechnicalSupport, #NOCEngineer, #Kolkata, #WestBengal, #FemalesJob, #BadaBazaar, #Howrah, #idealcareerzone, #kolkatajobs, #WestBengal, #Silliguri, #Asaam, #mizuram, #Tripura, #India, #Bihar, #Jharkhand, #PanIndia, #jobIndia, #kolkatajobcenter, #latestjobsinkolkata, Newjobsinkolkata,
0 notes
Text
Building a Portfolio Website with HTML and CSS: Showcase Your Work
1. Introduction
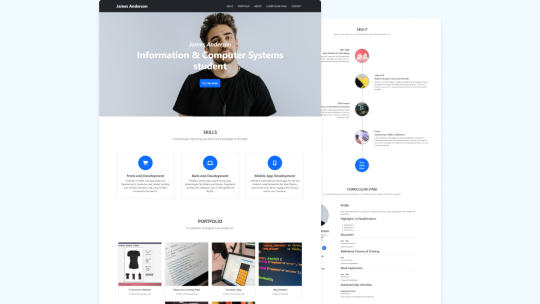
Welcome to the exciting journey of building a stunning portfolio website using HTML and CSS. In today's digital age, having a well-crafted portfolio is crucial for showcasing your work, skills, and creativity as a web developer or designer. Whether you're a seasoned professional looking to display your extensive body of work or a beginner eager to make a mark in the industry, this guide will help you create a standout portfolio that sets you apart.
2. Setting Up Your Development Environment
Before we dive into building your portfolio website, it's essential to set up the right development environment. This will ensure that you have the necessary tools and software to create and test your web projects seamlessly. Let's walk through the key components of your development environment: Code Editor Your code editor is your digital workspace, where you'll write, edit, and manage your HTML and CSS files. There are several popular code editors to choose from, including: - Visual Studio Code (VS Code): A free, open-source code editor with a rich ecosystem of extensions and excellent support for web development. - Sublime Text: Known for its speed and simplicity, Sublime Text is a favorite among many developers. - Atom: Another open-source editor that's highly customizable and comes with various packages for web development. Web Browser A web browser is your window to the internet, and it's crucial for testing and debugging your website. While you can use multiple browsers, Google Chrome, Mozilla Firefox, and Microsoft Edge are popular choices for web development. Make sure to install and keep these browsers up to date for thorough testing. Version Control System Using a version control system like Git is a smart move. It allows you to track changes in your code, collaborate with others, and easily revert to previous versions if something goes wrong. Platforms like GitHub and GitLab are excellent choices for hosting your web projects and collaborating with a global community of developers. Local Development Server To preview your website locally and test server-side functionalities, you'll need a local development server. Some common options include: - XAMPP: A package that includes Apache, MySQL, PHP, and Perl for local web development. - MAMP: Similar to XAMPP but designed for macOS users. - Node.js: If you prefer JavaScript-based development, Node.js can serve as your local server for testing. Project Folder Structure Organize your project files effectively. A well-structured folder system makes it easier to manage and find your files. Here's a simple example of a folder structure: FolderPurposecss/Store your CSS files.images/Keep your project images here.index.htmlYour main HTML file.scripts/For JavaScript files (if needed). By ensuring you have the right tools and a well-organized development environment, you'll be well-prepared to embark on the journey of creating your impressive portfolio website.
3. HTML Structure for Your Portfolio
Now that you have your development environment ready, it's time to start building the HTML structure of your portfolio website. A well-organized HTML structure serves as the foundation for your website, making it easier to style and manage your content. Let's break down the essential components of the HTML structure:
Basic HTML Template Begin with a basic HTML template that includes the following elements: - : Declares the document type and version. - : The root element of your web page. - : Contains metadata and links to external resources like CSS and JavaScript files. - Sets the title of your web page, which appears in the browser tab. - : Specifies the character encoding for your page (UTF-8 is recommended). - :The main content area of your webpage. Header Section Your portfolio's header section should include elements like: - :The container for your site's header content. - :The main title or your name/logo. - :Navigation links to various sections of your portfolio. About Me Section Introduce yourself to your visitors in the "About Me" section. Include: - :A container for the entire "About Me" content. - :A subheading for this section. - :A paragraph describing your background, skills, and interests. Portfolio Projects Display your work with a dedicated "Portfolio Projects" section. Utilize: - :A container for your project items. - :Subheadings for each project title. - :Each project description and details. Contact Information Make it easy for visitors to reach out to you by including a "Contact Information" section. Include: - :A container for your contact details. - :A subheading for the contact section. - :An unordered list with contact options like email and social media links. Footer Finish your HTML structure with a footer section, which typically includes: - :A container for your site's footer content. - :Copyright information or a short message. By structuring your portfolio website's HTML in this way, you create a clear and organized foundation for your content. This approach will not only make it easier to style your website with CSS but also enhance accessibility and SEO optimization.
Styling Your Portfolio with CSS
Now that you've structured your portfolio with HTML, it's time to give it a visual identity that reflects your unique style and creativity. Cascading Style Sheets (CSS) will be your artistic toolkit in this phase. Let's delve into how you can style your portfolio effectively:

External CSS File Start by creating an external CSS file. This separate file will keep your styling code organized and easily maintainable. In your HTML document, link to this CSS file in the section using the tag. This way, all your styling instructions will be applied to your HTML structure. Selectors and Rules CSS works by applying styles to specific HTML elements through selectors. You can use various types of selectors, such as: - Element Selector: Styles all instances of a particular HTML element (e.g., or
). - Class Selector: Styles elements with a specific class attribute (e.g., ). - ID Selector: Styles a single element with a specific ID attribute (e.g., ). Combine selectors with CSS rules to define the properties you want to modify, like color, font-size, or margin. Box Model The CSS box model governs how elements are structured and spaced. It comprises four components: ComponentDescriptionContentThe inner content of the element.PaddingSpace between the content and the border.BorderThe element's border, if defined.MarginSpace between the border and neighboring elements. Understanding the box model is crucial for controlling element dimensions and spacing within your portfolio. Responsive Design In the modern web, responsive design is a must. CSS allows you to adapt your portfolio to different screen sizes and devices. Use media queries to apply different styles based on factors like screen width, ensuring your website looks great on everything from desktop monitors to mobile phones. Typography and Fonts Your choice of fonts and typography plays a significant role in the overall aesthetics of your portfolio. Utilize CSS properties like font-family and line-height to define a readable and visually pleasing text style. Colors and Images Enhance your portfolio's visual appeal by selecting an attractive color palette and incorporating images. CSS provides properties like color and background-image to control these aspects. Pay attention to contrast and image optimization for a professional look. By mastering CSS for your portfolio, you have the creative freedom to design a visually stunning and responsive website that effectively showcases your work and style. Experiment, refine, and make your portfolio uniquely yours!
Adding Your Projects
Your portfolio's primary purpose is to showcase your projects and demonstrate your skills and abilities. In this section, we'll explore how to add and present your projects effectively on your website: Project Descriptions For each project you want to feature, create a dedicated section that includes: - A container for the entire project description. - A subheading for the project title. A concise but informative project summary. Highlight the objectives, technologies used, and your role in the project. Images and Media Visual elements are crucial in presenting your work. Use: Ensure they are high-quality and relevant to the project's context. If your project includes videos or animations, embed them using this HTML tag. Project Links and Details Include links to the live project and any relevant GitHub repositories. Use tags with the href attribute to create clickable links. Additionally, consider adding details such as project duration, team collaboration, or challenges you overcame. Call-to-Action (CTA) Encourage visitors to engage with your projects. Include a CTA button or link that leads to the live project or a case study page with more in-depth information. Use a contrasting color or styling to make the CTA stand out. Categories and Filtering If you have a diverse set of projects, categorize them. Create a list of categories such as "Web Development," "Design," or "Mobile Apps." Allow visitors to filter projects by category for a user-friendly experience. Use HTML lists to create the categories, and apply CSS for interactive filtering. Testimonials and Feedback If you've received positive feedback or testimonials on your projects, consider showcasing them. Use for the testimonials, and add the source's name and role for credibility. This provides social proof and builds trust with your audience. By implementing these strategies, you can effectively present your projects on your portfolio website. Make sure your projects are visually appealing, informative, and demonstrate your skills and expertise. Your portfolio is a reflection of your work, so put your best foot forward!
6. Responsive Design
Responsive design is a critical aspect of building a successful portfolio website. It ensures that your site adapts and looks great on various devices and screen sizes, providing an optimal user experience. Here's how to achieve responsive design for your portfolio: Media Queries Media queries are CSS rules that allow you to apply different styles based on the user's device characteristics, such as screen width. They are the foundation of responsive design. Use media queries in your CSS to define breakpoints where your layout or styling should change. Common breakpoints include those for smartphones, tablets, and desktops. Flexible Layouts To create a flexible and responsive layout, use relative units like percentages for widths and heights. Avoid fixed pixel values, which can cause issues on smaller screens. Utilize CSS properties such as flexbox or grid for fluid and adaptable designs that automatically adjust to different screen sizes. Mobile-First Approach Embrace the mobile-first design philosophy. Start with the mobile version of your site and progressively enhance it for larger screens. This ensures a better experience for mobile users and simplifies the process of scaling up for desktops and tablets. Images and Media Queries Optimize images for different screen sizes and resolutions. Use the srcset attribute to provide multiple image versions, and let the browser choose the appropriate one. Additionally, set max-width: 100% on images to prevent them from overflowing their containers on smaller screens. Touch-Friendly Design Consider touch gestures and interactions for mobile users. Ensure that buttons and interactive elements are large enough to tap comfortably with a finger. Provide ample spacing between clickable elements to prevent accidental taps. Navigation Menus For navigation menus, use techniques like hamburger menus or off-canvas menus for mobile devices. These approaches save screen real estate and make navigation more accessible on small screens. When scaling up for larger screens, you can use traditional menus or navigation bars. Testing and Debugging Regularly test your website on a variety of devices and browsers. Online tools and browser developer tools can help you simulate different screen sizes and identify responsive design issues. Fix any layout problems or styling inconsistencies to ensure a smooth experience for all users. Responsive design is not just a trend; it's a necessity. In a world where users access websites on a wide range of devices, having a responsive portfolio is crucial for attracting and retaining visitors. By following these practices, you can create a portfolio that looks and performs beautifully across the digital landscape.
7. Personalization and Branding
Your portfolio website is a representation of you and your work. Personalization and branding are essential to make your site unique and leave a lasting impression on visitors. Here's how to infuse your personality into your portfolio: Define Your Brand Start by defining your personal or professional brand. Consider what sets you apart from others in your field. Think about your values, style, and the message you want to convey. Your brand should reflect who you are and what you want to achieve in your career. Logo and Visual Identity Create a distinctive logo and visual identity that aligns with your brand. Your logo should be memorable and easy to recognize. Use consistent colors, fonts, and design elements throughout your site to establish a cohesive visual identity. About Page Your "About Me" page is an excellent place to share your story and background. Use this space to connect with your audience on a personal level. Include a professional photo of yourself to put a face to your name. Share your journey, experiences, and your passion for web development or design. Portfolio Style Your portfolio's design and style should reflect your brand. Consider the use of colors, typography, and layout to create a visually appealing and coherent look. Make sure your design choices align with the message you want to convey to your visitors. Brand Message Craft a compelling brand message or tagline that succinctly describes who you are and what you do. This message should be prominently displayed on your homepage or in your header to immediately communicate your brand's essence to visitors. Testimonials and Case Studies Showcase client testimonials and in-depth case studies that highlight your work's impact. These provide social proof and reinforce your brand's credibility and expertise. Including success stories can make your brand more trustworthy and relatable. Blog or News Section Consider adding a blog or news section to your portfolio. This allows you to share your thoughts, industry insights, and updates related to your work. Regularly updating this section demonstrates your commitment to your field and adds a dynamic element to your brand. Contact Information Make it easy for visitors to get in touch with you. Provide multiple contact options, including an email address, social media links, and a contact form. Use personalized, professional email addresses that align with your domain (e.g., ). Personalization and branding are powerful tools for creating a portfolio that stands out in a crowded digital landscape. Your unique brand identity and personal touches can leave a memorable impression on visitors and potential clients. By combining professionalism with personalization, you can build a portfolio that not only showcases your work but also tells your story.
8. SEO Optimization
Search Engine Optimization (SEO) is a fundamental aspect of ensuring your portfolio website gets the visibility it deserves. By optimizing your site for search engines, you increase the chances of your work being discovered by potential clients and employers. Here's how to effectively optimize your portfolio for SEO: Keyword Research Start by conducting keyword research related to your field and the type of work you do. Identify relevant keywords and phrases that potential visitors might use to find services or skills like yours. Use tools like Google's Keyword Planner to discover high-impact keywords. On-Page SEO Implement on-page SEO techniques to make your individual web pages search engine-friendly: - Page Titles: Create unique and descriptive titles for each page. Include relevant keywords to improve search engine visibility. - Meta Descriptions: Write concise, informative meta descriptions that entice users to click. Use relevant keywords naturally. - Heading Tags: Use
for your main page title and
, , and for subheadings. Incorporate keywords where appropriate. - Image Alt Text: Add descriptive alt text to your images. This not only improves accessibility but also helps search engines understand the content of your images. Content Quality Create high-quality, original content that adds value to your visitors. Your project descriptions, blog posts, and any text content should be well-written and engaging. Google rewards sites that provide informative and relevant content. Mobile Friendliness Ensure that your portfolio is mobile-friendly.
Read the full article
0 notes
Text
How to Install MySQL 8 on Amazon Linux 2 EC2.
How to Install MySQL 8 on Amazon Linux 2 EC2.
We will learn about “How to Install MySQL 8 on Amazon Linux 2 EC2”, we will look at the installation for MySQL 8 step by step in Amazon Linux 2 EC2 . MySQL is the Relation Database, which is used to store the data. It Is open-source and widely used in the industries. MySQL written in C and C++. It has also been tested to be a “fast, stable and true multi-user, multi-threaded SQL database…

View On WordPress
#install mysql 8#install mysql 8 in linux#install mysql 8 on amazon linux#install mysql 8 on amazon linux 2#install mysql 8 on aws ec2#install mysql in ubuntu#install mysql on amazon linux 2#mysql community download#mysql community edition#mysql community server download
0 notes
Text
dizzy Nulled Script 5.0

Download dizzy Nulled Script – The Ultimate Content Monetization Platform Are you looking for a powerful, versatile, and free way to build a revenue-generating platform for content creators? The dizzy Nulled Script is your gateway to launching a full-featured digital marketplace without spending a fortune. With this free script, you can empower creators, sell exclusive content, and generate income—all from a beautifully designed and professionally coded system. What is dizzy Nulled Script? The dizzy is a premium PHP-based solution developed to help users create a content-sharing and monetization platform similar to OnlyFans, Patreon, or Buy Me a Coffee. It allows creators to upload images, videos, stories, and other digital content, offer subscriptions, and interact with their followers through a feature-rich dashboard. Best of all, you can now access the dizzy for free and take full advantage of its powerful tools—without paying for a license. Technical Specifications of dizzy Nulled Script Framework: Laravel 8+ Database: MySQL Frontend: Bootstrap 5, jQuery File Uploads: Amazon S3 and local storage support Payment Gateways: PayPal, Stripe, Bank Transfer, and more Languages: Multi-language support Device Compatibility: Fully responsive on all devices Top Features and Benefits By choosing the dizzy Nulled Script, you’ll gain access to an incredible suite of features that will take your content-sharing platform to the next level: Subscription System: Creators can set monthly fees and offer exclusive content to paying subscribers. Live Notifications: Users receive real-time alerts for messages, follows, and interactions. Private Messaging: Secure one-on-one communication between users and creators. Multi-Currency Support: Sell content globally without limitations. Content Scheduling: Creators can schedule posts for maximum engagement. Monetization Tools: Tips, pay-per-view content, and donation buttons. Who Can Benefit from dizzy Nulled Script? The dizzy Nulled Script is ideal for developers, entrepreneurs, and digital marketers who want to create a personalized space for creators. Whether you’re launching a new niche platform or offering creators a new way to earn, this script offers flexibility, performance, and control. It’s also perfect for influencers, educators, coaches, and artists who want to share exclusive content with a loyal community—and get paid for their creativity. How to Install and Use dizzy Nulled Script Getting started with the dizzy is straightforward, even for beginners. Simply download the package, upload it to your server, and follow the built-in installation wizard. Here's a quick overview: Unzip the downloaded package to your web server directory. Set up a MySQL database and configure your .env file with the appropriate credentials. Run the installation script by visiting your domain. Follow the on-screen instructions to complete setup. Log in to your admin dashboard and start customizing your platform! No advanced coding skills? No problem. The script is well-documented and user-friendly, making it easy to configure even for non-developers. FAQs About dizzy Nulled Script Is dizzy Nulled Script safe to use? Yes, when downloaded from a trusted source, the dizzy Nulled Script is thoroughly tested and secure. Always ensure you're using the latest version for optimal performance and safety. Can I customize the dizzy Script? Absolutely. The script is fully open-source and built on Laravel, giving you full control over its appearance, features, and integrations. Is it legal to use the nulled version? While using a nulled script may violate licensing agreements with the original developer, many users choose to explore nulled options to evaluate the platform before purchasing. We encourage you to support developers if the tool adds value to your business. Conclusion If you’re serious about launching a content monetization platform without the hefty price tag, the dizzy is your ideal solution.
Rich in features, easy to use, and completely free when downloaded from our trusted source, this script will help you build a thriving community of creators and subscribers in no time. Ready to expand your digital toolkit? Explore more nulled plugins to power up your web projects with ease. For an advanced WordPress page builder, check out the elementor nulled pro version—also available for free!
0 notes
Text
Mac Os Torrent Downloader

Mac Os Torrent Downloader
Mac Os For Pc Torrent
Mac Os Torrent Downloader Download
There are two different types of OS one is Mac OS X Lion 10.7 ISO, DMG and the other one is OS X mountain lion. So please don’t get confused in both OS.
Mac OS X Lion 10.7 is the eighth major release of Mac OS X is a completely different version from the for windows because it is a version that is totally based on the productivity suite for mac os x. This for mac is one of the best and successors of 2011 and it is followed by the for mac of 2007.
Download Transmission The current release version is. Mac OS X Nightly builds Previous Releases. Source Code Nightly tarballs Previous tarballs How to build. Windows (early preview) Nightly builds. SHA256 Hashes Code Signing Policy Windows MSI packages: free code signing provided by SignPath.io, certificate by SignPath Foundation. Mar 19, 2020.
Magnet 2.4.6 Crack for Mac OS Torrent Free Download from link given below: Download Now. Magnet 2.4.6 Crack for Mac OS Torrent Free Download. Window Magnet 2.4.6 Crack for Mac will change the way you work with Mac! Easily combine windows in different sizes and positions by simply dragging them to the edges and corners of the screen. Remember, when you download a torrent for Mac computers using Vuze, it not only plays on a MacBook or iMac, it runs on portable devices. Those of you who utilize Apple TV will also be able to share files and playback downloads with Vuze. Vuze is a great way to download torrents on a Mac, share files with friends or the bittorrent community,. Download Torrent File. Mac OS X Mountain Lion 10.8 is the ninth major release of the OS family. The goal behind the operating system was to create an OS with better management and synchronizing between different Apple products. The old Mac OS X is now called macOS. As, Apple has released the operating system with the only available only on the.
Mac os x lion was released in the month of June on the date of 22nd and in the year of 2011 in the Apple worldwide developers conference. It was announced to release officially in the month of July but due to there technicals problems and due to there technical errors they have to release it earlier.
Download: Mac OS X Mountain Lion 10.8 DMG & ISO Image
License Official Installer
File Size 4.4GB / 3.5GB
Language English
Developer Apple Inc.
Tutorials: How to Clean Install Mac OS using a USB drive on Mac
On June 6, 2011, at the Apple Worldwide Developers Conference, it was reported that the official discharge for Lion would be in July 2011. The particular discharge date of July 20 was not affirmed until the day preceding, July 19, by Apple CFO, Peter Oppenheimer, as a major aspect of Apple’s 2011 second from last quarter income announcement.
Apple did not at first report any physical media circulation for Lion, for example, a lot of CD-ROMs or a DVD-ROM as utilized for past discharges. Rather, the working framework was said to be accessible only as a download from the Mac App Store for US$29.99. The main earlier form of OS X that underpins the Mac App Store in Snow Leopard, which suggested that any machines that help Lion at present running Tiger or Leopard would initially be moved up to Snow Leopard, instead of enabling an immediate move up to Lion.
System requirements
x86-64 CPU (64 bit Macs, with an intel core 2 duo, Intel core i5, intel core i7, or processor.)
At least 2 GB of memory.
Mac OS X 10.6.6 or later (Mac OS X 10.6.8 is recommended) .
7 GB of available space.
Airdrop is supported on the following Mac models:MacBook Pro (late 2008 or newer), MacBook Air (late 2010 or newer), MacBook (late 2008 or newer), iMac (early 2009 or newer), Mac Mini (mid-2010 or newer), Mac Pro (early 2009 with AirPort Extreme card and mid-2010 or newer).
Features
Server features
Mac os x lion
Wiki Server 3 – Making it easier to collaborate, share, and exchange information. Users can quickly switch between a server’s home page, My Page, Updates, Wikis, People, and Podcasts. File sharing is simpler, and a new Page Editor is added for easy customization.
Web DAV File Sharing – Lion Server delivers wireless file sharing for clients that support WebDAV. Enabling WebDAV in Lion Server gives iOS users the ability to access, copy, and share documents on the server from applications such as Keynote, Numbers, and Pages.
Profile Manager – Profile Manager delivers simple, profile-based setup and management for Mac OS X Lion, iPhone, iPad, and iPod touch devices. It also integrates with existing directory services and delivers automatic over-the-air profile updates using the Apple Push Notification service.
Mac Os Torrent Downloader
Features of Macintosh OS X Lion
The principal variant of Mac OS X was Mac OS X Lion. Macintosh OS X lion – 1.2v3 depended on Rhapsody, a half and half of OPENSTEP from NeXT Computer and Mac OS 8.5.1. The GUI resembled a blend of Mac OS 8’s Platinum appearance with OPENSTEP’s NeXT-based interface. It incorporated a runtime layer called Blue Box for running inheritance Mac OS-based applications inside a different window. There was the talk of executing a ‘straightforward blue box’ which would intermix Mac OS applications with those composed for Rhapsody’s Yellow Box condition, yet this would not occur until Mac OS X’s Classic condition. Apple File Services, Macintosh Manager, QuickTime Streaming Server, WebObjects, and NetBoot were incorporated with Mac OS X lion 1.0 – 1.2v3. We couldn’t utilize FireWire gadgets in Macintosh OS X lion 10.7 iso/dmg.
Macintosh OS X lion 10.7 incorporated the new Aqua UI, Apache, PHP, MySQL, Tomcat, WebDAV bolster Macintosh Manager and NetBoot.
macOS x lion 10.7 is the most recent rendition of Mac with new highlights. Nonetheless, this refresh will keep running on Mac 2012 or later forms. On the off chance that you are running macOS X lion 10.7 or prior, you ought to probably move up to the most recent rendition of mac os x lion 10.7 from the App Store.
Downloading Mac OSX Lion 10.7 ISO/DMG
The main reason for which people preferred downloading apps from the App Store is that it would just download the stub installer (web installer) which is little in size. The real Operating System will begin introducing after running the stub installer.
In this article, you will most likely download MacOS X Lion 10.7 full installer. You can make a bootable USB from the given record and complete a new introduce just as update the present establishment of your Mac OS.
About Apple Security Updates
For their clients’ insurance, Apple doesn’t uncover, examine, or affirm security issues until an examination has happened and fixes or discharges are accessible. Ongoing discharges are recorded on the Apple security refreshes page. For more data about security, see the Apple Product Security page. You can encode interchanges with Apple utilizing the Apple Product Security PGP Key.
If the download fails
If so, the only thing you ought to do is to pause and retry later. Or on the other hand, change from a remote to a satellite web association. If it is the case that this doesn’t help, go to App Store > View My Account and restart the download from the Unfinished Downloads segment.
Mac Os For Pc Torrent
Alternatively, you can also download Mac OS X Lion 10.7 ISO/DMG from our website for free. The installation process will be similar to the installation process of the images downloaded from the app store.
Mac Os Torrent Downloader Download
Mac OS X Lion 10.7 ISO / DMG file Direct Download - ISORIVER
There are two different types of OS one is Mac OS X Lion 10.7 ISO, DMG and the other one is OS X mountain lion. So please don't get confused in both OS.
Price Currency: USD
Operating System: Mac OS X Lion 10.7
Application Category: OS
1 note
·
View note
Text
Self Managed VPS Hosting
Self Managed VPS Hosting Effortlessly get the power and flexibility you need. Total control with full root access and optional control panels. Backups with uptime and performance monitoring. Unlimited traffic – 99.9% guaranteed uptime. Virtual server Self Managed Virtual Private Server (VPS) Hosting plans and prices: 1 vCPU As low as $4.99 /mo On sale - Save 37% Continued discount applies at renewal. Details 2 vCPU As low as $19.99 /mo On sale - Save 33% Continued discount applies at renewal. Details 4 vCPU As low as $39.99 /mo On sale - Save 33% Continued discount applies at renewal. Details 8 vCPU As low as $69.99 /mo On sale - Save 33% Continued discount applies at renewal. Details For expert help setting up and maintaining your server, see Fully Managed VPS Hosting. Plans & Pricing Included More... Self Managed VPS Hosting – perfect for system administrators and developers. That’s right, if you’re a developer, designer or system administrator with experience managing a server – seeking full control over your hosting environment – our Self Managed VPS Hosting is a solid fit. You get full root access with SSH keys for total control as well as command line for flexibility and power. Plus, we offer a wide range of scalable performance options with flexible server configurations. All Self Managed VPS Hosting plans include: Performance Experience high-performance SSDs on OpenStack for 3X the speed plus unlimited traffic. You also get KVM virtualization for full control of your hardware resources. Websites and apps that process credit cards are expected to be . Compare GoDaddy VPS Hosting plans and support services: Self Managed As low as $4.99/mo Fully Managed As low as $99.99/mo For experienced users that want full control over their server. For those that don’t have the time or advanced server skills. Performance / RAM 1 – 32 GB RAM 2 – 32 GB RAM Operating Systems CentOS, Ubuntu or Windows Server CentOS or Windows Server Control Panel cPanel/WHM, Plesk Obsidian Web Host Edition cPanel/WHM or Plesk Obsidian Web Host Edition Monitoring and alerts 5-minute intervals 1-minute interval CPU, RAM, disk & uptime Services monitoring Proactive remediation Support Standard Hosting phone support Comprehensive help/how-to video library and technical blogs Community peer-to-peer advice Dedicated services team - (control panel recommended) Paid option Unlimited service requests. Content migration Paid option 5 free site migrations, 70% discount off service fee for additional site migrations. Server setup Paid option DNS setup and configuration Paid option SSL installation Paid option HTTP/2 server configuration Paid option SQL Server Express install Paid option Package management Paid option Email client setup Paid option PHP module install/upgrade Paid option MySQL optimization Paid option WordPress setup Paid option Disk space audit Paid option Firewall rules configuration Paid option Call for custom service request Paid option Top 5 (make that 6) popular uses for Self Managed VPS Hosting: eCommerce Launch your traffic-ready eCommerce site by installing Magento, OpenCart and PrestaShop — with a single click. Yep, we got ‘em… more GoDaddy hosting solutions. In addition to Self Managed VPS Hosting, we offer a full range of hosting solutions, like Dedicated Hosting, Business Hosting and if a WordPress site’s your thing, no worries. We’ve got ya’ covered with Managed WordPress Hosting. And rest assured, if you need hosting to take your business to new heights, we’ve got you covered. Frequently asked questions (FAQ) about VPS Hosting. What is the difference between managed vs. unmanaged (Self Managed) VPS? And how do I determine which is best for me? Unmanaged VPS (also known as “Self-Managed VPS”) tends to
1 note
·
View note
Text
How to Install MySQL 8 on CentOS 7 Linux
How to Install MySQL 8 on CentOS 7 Linux
Hi Friends! We will learn about “How to install MySQL 8 on CentOS 7 Linux”, we will look at the installation for MySQL 8 step by step in CentOS 7 . MySQL is the Relation Database, which is used to store the data. It Is open-source and widely used in the industries. MySQL written in C and C++. It has also been tested to be a “fast, stable and true multi-user, multi-threaded SQL database…

View On WordPress
#install mysql 8#install mysql 8 centos 7#install mysql 8 centos 7 digitalocean#install mysql 8 in centos 7#Install MySQL 8 in Rocky Linux#install mysql 8 on amazon linux#install mysql 8 on rhel 7#Install MySQL 8 on Ubuntu 20.04#Install mySQL in linux#install mysql on ubuntu 18.04#mysql community download#mysql community edition#mysql community server download
0 notes
Link
For any website to be able to reveal itself and give it a proper space in SERP requires a good hosting server and there are several platforms providing it. But not all provide high-quality service at reasonable prices.
Dreamhost is one of those platforms which provides you with both the best hosting server within a reasonable amount with several add-ons to support your site more productively. Here you will explore the services, products, and features of the Dreamhost in depth.
About Dreamhost
Table of Contents [hide]
1 About Dreamhost
2 What are the features of Dreamhost?
3 Dreamhost Hosting Plans
4 Dreamhost Domains
5 Dreamhost Custom Web Design Services
6 Starter
7 Pro
8 Bottom line for the Dreamhost
3.1 Shared Hosting:
3.2 WordPress Hosting (DreamPress):
3.3 VPS
3.4 Dedicated
3.5 Cloud Hosting
3.6 Object Storage
3.7 Cloud Computing
3.2.1 WordPress Starter
3.2.2 WordPress Unlimited
3.7.1 Features of hosting plans
6.0.1 Plus
Dreamhost is one of the top priority web hosting platforms which make sure that your website is fast, secure, and always up so your visitors and search engines trust you. It helps you grow faster.
The custom control panel is simple to use and removes the headaches of managing your web hosting. It is a fully-featured platform with all the necessary features pre-installed over here. It somewhat does more than what is meant by web hosting.
It majorly makes your website fast and reliable to gain customers, conversions, and search engine rankings. The major hosting platforms which are available over here are WordPress hosting, website hosting, VPS hosting, WP website builder, dedicated hosting, and cloud hosting.
What are the features of Dreamhost?
Dreamhost has around 20 years of hosting experience, it majorly focuses on successful sites for web designers, developers, bloggers, and online businesses. The whole community collaborates to create a website for you faster and easier. The major features of Dreamhost are:
Since it is employee-owned that keeps it focused on the unique needs of the users. It is totally committed to helping find success online for everyone.
Another major feature of Dreamhost is the passion for privacy. It does consider everyone’s right to privacy and it backs that with a strong anti-spam policy and free WHOIS privacy.
Dreamhost also promises a commitment to security. Its security features mainly include Multi-Factor Authentication, auto-enabled sFTP, and free secure hosting with Let’s Encrypt.
The Dreamhost platform provides open source solutions to our customers whenever possible.
The in-house team members of the Dreamhost do their best to provide one-touch resolution, and the support is 24/7available.
The Dreamhost guarantees you 100% uptime so you don’t have to worry about it.
Dreamhost Hosting Plans
DreamHost offers several different types of hosting plans that work for all website hosting needs. Its major plans are discussed over here:
Shared Hosting:
If you are looking for the most affordable hosting option then the shared hosting is just for you. It is the most affordable option with some limitations. The customers of shared hosting share the servers with the other customers affiliated with the same.
The limitations here are that if the other customer or the site on the same server is receiving large amounts of traffic, or using more amounts of traffic than it is possible that your site may run slower.
But still, the Dreamhost works and does its best to make sure sites in a shared server never disrupt each other. This will be a good choice if your main aim is the budget but if you want to experience high traffic levels on your site then you must look for other powerful options.
Still, a shared hosting is perfect for blogs, portfolios, personal/business sites, and database-driven sites.
WordPress Hosting (DreamPress):
Another most popular hosting plan available in the Dreamhost is the WordPress hosting also known as DreamPress. DreamPress is DreamHost’s managed WordPress hosting. It’s a scalable service that allows users to manage their WordPress sites worry-free via automatic updates, caching, daily backups, and a content delivery network (CDN).
WordPress Starter
Among the major services, first come the starter plan which is great for smaller or newer websites.
1 Website
Free Domain included
Unlimited Traffic
WordPress Pre-Installed
NEW Free Automated WordPress Migrations
NEW WP Website Builder
Fast SSD Storage
Free SSL Certificate
Add Email as low as $1.67/mo
3 Year, 1 Year & Monthly Plans
And you get all this at just $2.59/mo.
WordPress Unlimited
Next comes the WordPress unlimited which is perfect for those who require more websites. You can purchase this service plan at $4.95/mo. It offers you the following features:
Unlimited Websites
Free Domain included
Unlimited Traffic
WordPress Pre-Installed
NEW Free Automated WordPress Migrations
NEW WP Website Builder
Fast SSD Storage
Free SSL Certificate
Unlimited Email @ your domain
3 Year, 1 Year & Monthly Plans
VPS
DreamHost’s Virtual Private Server (VPS) hosting is a premium solution that runs faster than the shared hosting. It’s available as an add-on to an existing DreamHost plan, but also as a standalone service.
DreamHost’s VPSs use Linux-VServer to create a “virtual machine” that protects a user’s resources from others on the same physical machine. This allows for a more powerful solution.
If you compare a shared hosting with the VPS one, simply the VPS is the best one because, on a shared server, resources are shared by other users.
On a VPS, these resources are more isolated which improves performance and helps to maintain stability. You also have the ability to control how much RAM your server uses.
A virtual private server is a perfect platform for websites that require more resources than a shared server can provide, but may not need the full power of a dedicated server. VPS is ideal for businesses, eCommerce websites, designers, and developers that need unhindered performance.
Dedicated
The dedicated server is the most ideal kind of hosting plan available in the Dreamhost where it contains only your files on it. You will get full root access which will be beneficial if you are looking to customize your server to fit your specific needs.
A dedicated server will be more beneficial since your MySQL server is on the same server which allows faster access. With other hosting plans, the MySQL database is on a separate database server.
Dedicated servers are fully-managed, business class servers. It is perfect for resource-heavy apps and giant websites.
Cloud Hosting
DreamHost offers two different cloud hosting products.
Object Storage
This is the cost-effective cloud storage service, which is beneficial to host static data for your websites, store backups, or develop the next big thing. You can also access DreamObjects in your panel using the built-in interface, programmatically via standard APIs, or with a growing library of applications. DreamObjects is compatible with the Amazon S3 API.
Cloud Computing
DreamComputing is a highly scalable cloud computing service built to power up the web and mobile applications. It powers up the digital media and e-commerce websites, big data, testing, and development environments.
All instances can be managed through the DreamCompute’s dashboard built off of OpenStack’s Horizon.
Features of hosting plans
Dreamhost comes with the most amazing hosting features which are all included in its all hosting plans. These features are discussed below:
Custom Control Panel: The intuitive control panel present over here gives you admin access to all your Dreamhost products. This will help you to easily update domain information, add users, adjust email settings, gain access to promotions, and many more.
1-Click Installer: They have the simplest installation of web apps like WordPress.
100% Uptime Guarantee: The Dreamhost has multiple datacenter locations, redundant cooling, emergency generators, and constant monitoring, which is able to offer our 100% Uptime Guarantee.
Solid State Drives (SSDs): This helps your website, caching, and database queries faster.
Award-Winning Support: The in house support team and service team are always there to help you 24/7/365.
Dreamhost Domains
Dreamhost is a really unique platform that has got all the features that others don’t. This is why it offers the domain name feature.
Dreamhost offers you the free private registration. It helps you to control how much your personal information is shared online. This is why the WHOIS Domain Privacy is included without any cost and will renew automatically.
Dreamhost also offers you free subdomains. If you have owned the shared, VPS, and dedicated hosting then you can enjoy unlimited subdomains.
Simple Domain Management
A single page in our panel makes it possible to manage domains, edit DNS records, set up domain forwarding, and more. If you get stuck, our support is here 24/7 for you.
Dreamhost Custom Web Design Services
The Dreamhost services are beautiful, 100% original designs, and it moves beyond a stock template and provides a one of a kind, mobile-friendly website that makes your brand truly shine.
The pro designers of Dreamhost create a custom prototype of your new website for you to easily offer feedback. Once approved, they code it into a high-performance WordPress site.
Hereby you get instant access to a team of visual designers and web developers with the skills to create anything your website needs.
Starter
Among the major services, first come the starter plan which is great for smaller or newer websites. It has 100% custom homepages, 5 subpages, WordPress implementation, web style guide, SEO friendly blog, free domain and email address, analytics setup with free 3 months of dreams are, 12 months DreamPress hosting. And you get all this at just $1,499.
Plus
Next comes the plus services which are perfect for the bigger websites requiring more subpages and content customization. You can purchase this service plan at $2,499. It offers you the following features:
-100% Custom Homepage
-10 Subpages
-WordPress Implementation
-Web Style Guide
-SEO-Friendly Blog
-FREE Domain & Email Address
-Analytics Setup
-6 Months of DreamCare
-12 Months of DreamPress Hosting
Pro
Pro services, this is an ideal one for content-heavy websites with lots of subpages, products, and more complex requirements. You can purchase it at $3,499. The following features will be unlocked with this plan:
-100% Custom Homepage
-15 Subpages
-WordPress Implementation
-Web Style Guide
-SEO-Friendly Blog
-FREE Domain & Email Address
-Analytics Setup
-6 Months of DreamCare
-12 Months of DreamPress Hosting
Bottom line for the Dreamhost
Thus, Dreamhost is just an ultimate platform providing you the best hosting server adaptable for all kinds of users. It provides several kinds of offers and services at a very affordable rate. Here you can start web hosting at just $2.59 per month.
The Dreamhost gives you an accurate platform not only to showcase your website but also to provide it with the domain name and proper server. This is why it will be just a perfect place to grow your business.
1 note
·
View note
Text
How to Create a Drupal Website? | Hostperl
Drupal has been extraordinary compared to other content management system framework stages on the web, alongside Joomla and WordPress. With Drupal, you can easily and rapidly get a site ready for action without figuring out how to code or buying an outsider support of help you with that. Whether you’re looking to create a simple personal blog or a professional online presence for business, it can all be done with this free, open source CMS solution.
Advantages of Building a Website with Drupal
Drupal has many featuring highlights that make it stand apart from competition.
.Free
You can download and install Drupal on your hosting server for nothing, paying little heed profoundly programming, contributed modules or a library of layouts. This can fundamentally help you with decreasing web development cost.
.Exceptionally Customizable
Drupal makes it simple to customize attributes from highlights to design and activity. Especially for designers and developers, they can approach various decisions to meet their very good quality needs.
.High Performance
Drupal ordinarily delivers quicker page loads and response times than other web designers, on account of the less resource-intensive core that requires more affordable server or hosting arrangement.
.Broad API Support
Facebook, Twitter and numerous other significant social networking platforms offer a broad API support for Drupal, on which developers can construct custom modules.
Also, Drupal is SEO friendly since it offers you an adaptable method to show content that is liked via search engines. And furthermore, your Drupal site is responsive to both desktop and mobile phone screens, which gives you greater probability to create leads.
Build a Website on Drupal Step by Step
Presently, I will walk you through the basics of making a Drupal site. Before the end, you will have a comprehension of Drupal's basic structure blocks.
Step 1. Register a Domain Name
Your domain name is your unique identity, which decides the initial introduction of your site on users, defines your company image, and furthermore, influences your SEO. If you are not kidding about your online presence, an domain name is a beneficial investment.
Here are a few hints to help you with getting a good domain name:
1.Buy a domain name that is anything but difficult to type and remember;
2.Avoid slang terms, hyphens, and numbers;
3.Keep a domain name shorter;
4.Stick with .com, .net, .data, .organization expansions;
5.Don't utilize trademark domains;
The good news is, HOSTPERL is a one-stop search for web hosting, which implies that you can buy a Drupal hosting service and register a domain name simultaneously.
Step 2. Find a Web Hosting Plan
There are such a significant number of web hosting suppliers available and you may get confused and disappointed when facing such a significant number of choices. Luckily, there are a few criteria to control your choice. Similarly as we've referenced detailedly in the article—How to Choose a Reliable Drupal Hosting Service—you have to consider in any event four components: similarity and installation, execution, technical support, cost.
In case you're going to construct a little to medium-sized Drupal site, consider going with HOSTPERL. We're offering four web hosting plans that completely support the most recent versions of Apache, PHP, and MySQL database. Importantly, we utilize leading edge advances, for example, SSD and Intel Xeon processor, to upgrade server execution.
Step 3. Download & Install Drupal
Downloading and installing Drupal is a genuinely direct procedure, especially when your facilitating supplier offers you the 1-click establishment usefulness.
Take HOSTPERL for instance, you can easily and rapidly have the Drupal application installed. Simply sign into your account, and go to Applications > Featured Applications, discover the Drupal symbol and click on Install, at that point the most recent version of Drupal will be introduced. In the event that you have other wanted Drupal form or need to change default installation settings, you can pick Install (Custom) alternative.
Step 4. Create Users
If you simply need a basic Drupal site and you're the one in particular who will creator, alter, and deal with the content, you can keep the default establishment settings. Something else, If you should share content creation just as the management activities with others, you have to make represents those clients.
In the Manage authoritative menu, explore to People at that point click Add client and fill in the structure fields as required.
Step 5. Choose a Layout & Theme
The presence of your site assumes a significant job in how visitors respond. At the point when it is sufficiently enough, it might likewise help improve business relations and users will remain longer to read your substance. Along these lines, you need give more consideration to the decision of the format and topic for your Drupal site.
Explore to the Appearance menu, and click Install New Theme. You will see an enormous number of enabled themes, which will be somewhat overpowering, in any case. To find a most reasonable one to your site, you should take several factors into consideration: simple of customization, responsive, straightforwardness, and your design vision.
After you select a theme to be your default, you can visit your Drupal site and see the new format based on the topic you've chosen.
Step 6. Develop the Homepage
The homepage is one of the most valuable and mainstream pages on your Drupal site. At the point when users land on your site, the homepage is the main thing they will see. To set up a static page to act as the forefront, you ought to explore to Content > Add Content > Basic Page, at that point add a title to the article and fill the body with the content you wish to show on the first page.
From that point onward, click the Promotion Options right to expand its window and afterward select the checkbox by Promoted to first page. If you might want to add more fields to your homepage, go to Structure > Content types > Basic page > Manage fields > Add field and include any field with a label.
Step 7. Add Contributed Modules
Drupal takes pride in a loyal, supportive community, where developers contribute thousands of excellent modules to the platform. The modules are helpful for expanding upon the functionality of Drupal core.
Just visit https://www.drupal.org/project/project_module, and then search for the module you want to add. There are two options of downloads you can choose: tar.gz and zip. After download it to your hard drive, you can upload it to the sites/all/modules of the Drupal installation, using FTP client. Then unzip the files and enable the module on the Admin > Modules page.
Step 8. Utilize Blocks
Blocks have been a highlighted feature of Drupal. They provide a means to create widgets to display User Login, Who’s Online and other content in the header, siderbar, footer and other regions on your page. You can create a block by enabling core or contributed modules. Once a block is created, you customize its appearance, size, shape, and position; as well, you can decide which web page you want it to appear on.
Wrapping Up
This tutorial just went over the main steps of how to create a website on Drupal while introduces different functions of Drupal that you may need. Nevertheless, there’s still many information you need to explore by yourself, in terms of developing compelling content and driving traffic to your Drupal website.
1 note
·
View note
Text
E-Business - the biggest opportunity for 2020

What is an E-Business? The term E-business has evolved from the simple abbreviation of “electronic business.” It is a top level term referring to methods of utilising digital information and communication technologies to support or streamline business processes. Our roots in E-Business Our primary E-Business inspiration came at the beginning of our Internet journey at the Live - 95 event in London. Having sat through a number demo’s and speeches from various providers, we realised that the simple concepts of electronic communication and data transfer offered fantastic life efficiency opportunities - not just business. We were already looking at application of collaborative tools such as communication and document management systems - in the form of Internet connected bulletin boards. In 1998 I actually graduated from Anglia University having designed and created a similar system for my dissertation/project entitled - Worldwide Communications. Having dialled in and had a play - the lecturer did not appear to see the relevance to the Automotive Engineering Degree - he said he doubted the collaborative approach to information sharing would be likely to catch-on and he did not perceive any significant benefit. I didn’t argue - but I did forward the 8 page document published in the Wall Street Journal on 7th October 1997, by IBM - they used E-Business as the term to describe how they believed corporate systems would fundamentally change in the digital era. Suffice to say it caught on. As we begin to embrace todays opportunities - the initial strategic thinking back in the 90s is fundamental, as it reminds us of the potential scope of E-Business. They said - E-Business is 'redesigning strategic business processes and meeting the challenges of a new market increasingly characterised by globalisation, and based on new knowledge.’ Luckily they decided against patenting the term in the hope that other companies such as ours would engage with the concept and help to form a new industry.Capitalising on E-Business Solutions Fast forward to 2020 - E-Commerce is a widely used term, however - aligned to our strategic thinking from back in the 90s - whilst it does describe the commercial transactions in buying and selling it is still just one possible E-Business Component. In 2002 we built our first web based application server, designed to provide E-Business services, capitalising on web based solutions - to replace previous paper based equivalents, in an infinitely more efficient way. E-Business Hosting - was born in 2002 with a core service offering, designed to provide advanced, Linux based web hosting services with a focus on the extended functionality provided by server side technologies such as Coldfusion and PHP. The 2002 strategy was designed to enable integration of E-Business solutions into company intranets and public websites which we built for customers. The 2020 strategy enables automated setup of an E-Business service websites, utilising cloud server technology to deploy the latest LAMP (Linux, Apache, MySQL, PHP) Optimised web based server systems. Why - E-Business Hosting? Built on these solid technological foundations, E-Business Hosting not only provides a highly functional web hosting platform at an extremely competitive price. Additionally, every customer is provided with a selection of hundreds of ready made E-Business applications which can be automatically be installed on a website in minutes. For example - a new novice customer can have a Wordpress blog or a Prestashop E-Commerce app running within seconds of signing up. Package Prices start small for small and increase only as customers grow needing more resources.Considering all of the global challenges of 2020 - it is an ideal time to make the move into E-Business.The COVID-19 influence By definition - E-Business solutions are naturally web based or online and hence satisfy all lock-down requirements. So wether you are looking to setup a Blog to engage creatively with the world to pass the time, or would like to enhance office based process to suit a home based work force, or if you simply want to setup a web shop or affiliate marketing site, we not only have a product which will fit your needs, we have the experience to help you select it and set it up. Even if you are not sure what you want to do - but have drive, enthusiasm an a small amount of creativity - we can help point you in the right direction. SIGNUP NOW Read the full article
1 note
·
View note
Text
InfixEdu School Nulled Script 8.2.2
Unlock Academic Excellence with InfixEdu School Nulled Script Managing educational institutions has never been more streamlined and efficient. InfixEdu School Nulled Script offers a comprehensive, user-friendly platform tailored for schools, colleges, and universities aiming to digitize their academic and administrative operations. Whether you’re handling class schedules, exams, student records, or online communication, this powerful script delivers all the tools you need—without the hefty price tag. What is InfixEdu School Nulled Script? InfixEdu School is a fully-featured academic management system that empowers schools to operate in a digitally enhanced ecosystem. Designed for administrators, teachers, students, and parents, this script offers seamless coordination between different roles while reducing manual workload. With this nulled version, you can download, install, and experience all the premium features—absolutely free. Technical Specifications Framework: Laravel 8+ Database: MySQL 5.6+ Server Requirements: PHP 7.3+, Apache/Nginx Responsive Design: Fully mobile-optimized UI Languages Supported: Multilingual support including RTL languages Top Features and Benefits Student Information System (SIS): Easily manage student records, attendance, grades, and ID generation. Timetable & Exam Management: Automate scheduling for classes, exams, and events with intuitive calendar integration. Online Fee Collection: Integrated payment gateways for effortless fee tracking and management. Homework & Communication Tools: Teachers can assign homework and communicate directly with students and parents. Library & Inventory Management: Keep track of educational resources and supplies with real-time updates. Integrated HR & Payroll: Manage staff payroll, attendance, and leave requests all in one place. Why Choose InfixEdu School Nulled Script? Unlike costly academic systems, InfixEdu School offers premium-level features without financial commitment. It’s ideal for schools that want to go digital but need to keep costs minimal. Its elegant design, fast performance, and flexibility make it a standout option for institutions of any size. Use Cases Private Schools: Simplify day-to-day operations from enrollment to exams. Public Institutions: Manage large student databases and improve parent-teacher engagement. Tutorial Centers: Use it for class scheduling, result publishing, and student tracking. Online Learning Platforms: Enhance your digital course delivery with structured academic tools. How to Install InfixEdu School Nulled Script Download the InfixEdu School Nulled Script ZIP package from our website. Upload the files to your server using FTP or cPanel. Configure the .env file with your database credentials. Run the installation wizard and follow the on-screen steps. Login to the admin dashboard and begin customizing your settings. Our platform also offers other top-notch nulled plugins that can enhance your WordPress ecosystem. Frequently Asked Questions (FAQs) Is it legal to use InfixEdu School Nulled Script? While nulled scripts should be used responsibly, our version is intended for educational and testing purposes. We encourage you to evaluate the script thoroughly before considering a licensed copy. Does the script include all premium features? Yes, you get full access to every module and premium functionality present in the official version—without paying a dime. Can I integrate other plugins with this script? Absolutely. In fact, we recommend using popular tools like Slider Revolution NULLED to boost your site’s visual appeal and performance. Is support available for the nulled version? Official support may not be available, but our community and tutorials can help you resolve common issues. Conclusion InfixEdu School Nulled Script is your gateway to building a smarter, more efficient academic environment. With its robust suite of tools and zero-cost access, there’s no better time to digitize your educational institution.
Download it now and experience the future of school management—today.
0 notes
Text
Installing Nginx, MySQL, PHP (LEMP) Stack on Ubuntu 18.04
Ubuntu Server 18.04 LTS (TunzaDev) is finally here and is being rolled out across VPS hosts such as DigitalOcean and AWS. In this guide, we will install a LEMP Stack (Nginx, MySQL, PHP) and configure a web server.
Prerequisites
You should use a non-root user account with sudo privileges. Please see the Initial server setup for Ubuntu 18.04 guide for more details.
1. Install Nginx
Let’s begin by updating the package lists and installing Nginx on Ubuntu 18.04. Below we have two commands separated by &&. The first command will update the package lists to ensure you get the latest version and dependencies for Nginx. The second command will then download and install Nginx.
sudo apt update && sudo apt install nginx
Once installed, check to see if the Nginx service is running.
sudo service nginx status
If Nginx is running correctly, you should see a green Active state below.
● nginx.service - A high performance web server and a reverse proxy server Loaded: loaded (/lib/systemd/system/nginx.service; enabled; vendor preset: enabled) Active: active (running) since Wed 2018-05-09 20:42:29 UTC; 2min 39s ago Docs: man:nginx(8) Process: 27688 ExecStart=/usr/sbin/nginx -g daemon on; master_process on; (code=exited, status=0/SUCCESS) Process: 27681 ExecStartPre=/usr/sbin/nginx -t -q -g daemon on; master_process on; (code=exited, status=0/SUCCESS) Main PID: 27693 (nginx) Tasks: 2 (limit: 1153) CGroup: /system.slice/nginx.service ├─27693 nginx: master process /usr/sbin/nginx -g daemon on; master_process on; └─27695 nginx: worker process
You may need to press q to exit the service status.
2. Configure Firewall
If you haven’t already done so, it is recommended that you enable the ufw firewall and add a rule for Nginx. Before enabling ufw firewall, make sure you add a rule for SSH, otherwise you may get locked out of your server if you’re connected remotely.
sudo ufw allow OpenSSH
If you get an error “ERROR: could find a profile matching openSSH”, this probably means you are not configuring the server remotely and can ignore it.
Now add a rule for Nginx.
sudo ufw allow 'Nginx HTTP'
Rule added Rule added (v6)
Enable ufw firewall.
sudo ufw enable
Press y when asked to proceed.
Now check the firewall status.
sudo ufw status
Status: active To Action From -- ------ ---- OpenSSH ALLOW Anywhere Nginx HTTP ALLOW Anywhere OpenSSH (v6) ALLOW Anywhere (v6) Nginx HTTP (v6) ALLOW Anywhere (v6)
That’s it! Your Nginx web server on Ubuntu 18.04 should now be ready.
3. Test Nginx
Go to your web browser and visit your domain or IP. If you don’t have a domain name yet and don’t know your IP, you can find out with:
sudo ifconfig | grep -Eo 'inet (addr:)?([0-9]*\.){3}[0-9]*' | grep -Eo '([0-9]*\.){3}[0-9]*' | grep -v '127.0.0.1'
You can find this Nginx default welcome page in the document root directory /var/www/html. To edit this file in nano text editor:
sudo nano /var/www/html/index.nginx-debian.html
To save and close nano, press CTRL + X and then press y and ENTER to save changes.
Your Nginx web server is ready to go! You can now add your own html files and images the the /var/www/html directory as you please.
However, you should acquaint yourself with and set up at least one Server Block for Nginx as most of our Ubuntu 18.04 guides are written with Server Blocks in mind. Please see article Installing Nginx on Ubuntu 18.04 with Multiple Domains. Server Blocks allow you to host multiple web sites/domains on one server. Even if you only ever intend on hosting one website or one domain, it’s still a good idea to configure at least one Server Block.
If you don’t want to set up Server Blocks, continue to the next step to set up MySQL.
4. Install MySQL
Let’s begin by updating the package lists and installing MySQL on Ubuntu 18.04. Below we have two commands separated by &&. The first command will update the package lists to ensure you get the latest version and dependencies for MySQL. The second command will then download and install MySQL.
sudo apt update && sudo apt install mysql-server
Press y and ENTER when prompted to install the MySQL package.
Once the package installer has finished, we can check to see if the MySQL service is running.
sudo service mysql status
If running, you will see a green Active status like below.
● mysql.service - MySQL Community Server Loaded: loaded (/lib/systemd/system/mysql.service; enabled; vendor preset: enabled) Active: active (running) since since Wed 2018-05-09 21:10:24 UTC; 16s ago Main PID: 30545 (mysqld) Tasks: 27 (limit: 1153) CGroup: /system.slice/mysql.service └─30545 /usr/sbin/mysqld --daemonize --pid-file=/run/mysqld/mysqld.pid
You may need to press q to exit the service status.
5. Configure MySQL Security
You should now run mysql_secure_installation to configure security for your MySQL server.
sudo mysql_secure_installation
If you created a root password in Step 1, you may be prompted to enter it here. Otherwise you will be asked to create one. (Generate a password here)
You will be asked if you want to set up the Validate Password Plugin. It’s not really necessary unless you want to enforce strict password policies for some reason.
Securing the MySQL server deployment. Connecting to MySQL using a blank password. VALIDATE PASSWORD PLUGIN can be used to test passwords and improve security. It checks the strength of password and allows the users to set only those passwords which are secure enough. Would you like to setup VALIDATE PASSWORD plugin? Press y|Y for Yes, any other key for No:
Press n and ENTER here if you don’t want to set up the validate password plugin.
Please set the password for root here. New password: Re-enter new password:
If you didn’t create a root password in Step 1, you must now create one here.
Generate a strong password and enter it. Note that when you enter passwords in Linux, nothing will show as you are typing (no stars or dots).
By default, a MySQL installation has an anonymous user, allowing anyone to log into MySQL without having to have a user account created for them. This is intended only for testing, and to make the installation go a bit smoother. You should remove them before moving into a production environment. Remove anonymous users? (Press y|Y for Yes, any other key for No) :
Press y and ENTER to remove anonymous users.
Normally, root should only be allowed to connect from 'localhost'. This ensures that someone cannot guess at the root password from the network. Disallow root login remotely? (Press y|Y for Yes, any other key for No) :
Press y and ENTER to disallow root login remotely. This will prevent bots and hackers from trying to guess the root password.
By default, MySQL comes with a database named 'test' that anyone can access. This is also intended only for testing, and should be removed before moving into a production environment. Remove test database and access to it? (Press y|Y for Yes, any other key for No) :
Press y and ENTER to remove the test database.
Reloading the privilege tables will ensure that all changes made so far will take effect immediately. Reload privilege tables now? (Press y|Y for Yes, any other key for No) :
Press y and ENTER to reload the privilege tables.
All done!
As a test, you can log into the MySQL server and run the version command.
sudo mysqladmin -p -u root version
Enter the MySQL root password you created earlier and you should see the following:
mysqladmin Ver 8.42 Distrib 5.7.22, for Linux on x86_64 Copyright (c) 2000, 2018, Oracle and/or its affiliates. All rights reserved. Oracle is a registered trademark of Oracle Corporation and/or its affiliates. Other names may be trademarks of their respective owners. Server version 5.7.22-0ubuntu18.04.1 Protocol version 10 Connection Localhost via UNIX socket UNIX socket /var/run/mysqld/mysqld.sock Uptime: 4 min 28 sec Threads: 1 Questions: 15 Slow queries: 0 Opens: 113 Flush tables: 1 Open tables: 106 Queries per second avg: 0.055
You have now successfully installed and configured MySQL for Ubuntu 18.04! Continue to the next step to install PHP.
6. Install PHP
Unlike Apache, Nginx does not contain native PHP processing. For that we have to install PHP-FPM (FastCGI Process Manager). FPM is an alternative PHP FastCGI implementation with some additional features useful for heavy-loaded sites.
Let’s begin by updating the package lists and installing PHP-FPM on Ubuntu 18.04. We will also install php-mysql to allow PHP to communicate with the MySQL database. Below we have two commands separated by &&. The first command will update the package lists to ensure you get the latest version and dependencies for PHP-FPM and php-mysql. The second command will then download and install PHP-FPM and php-mysql. Press y and ENTER when asked to continue.
sudo apt update && sudo apt install php-fpm php-mysql
Once installed, check the PHP version.
php --version
If PHP was installed correctly, you should see something similar to below.
PHP 7.2.3-1ubuntu1 (cli) (built: Mar 14 2018 22:03:58) ( NTS ) Copyright (c) 1997-2018 The PHP Group Zend Engine v3.2.0, Copyright (c) 1998-2018 Zend Technologies with Zend OPcache v7.2.3-1ubuntu1, Copyright (c) 1999-2018, by Zend Technologies
Above we are using PHP version 7.2, though this may be a later version for you.
Depending on what version of Nginx and PHP you install, you may need to manually configure the location of the PHP socket that Nginx will connect to.
List the contents for the directory /var/run/php/
ls /var/run/php/
You should see a few entries here.
php7.2-fpm.pid php7.2-fpm.sock
Above we can see the socket is called php7.2-fpm.sock. Remember this as you may need it for the next step.
7. Configure Nginx for PHP
We now need to make some changes to our Nginx server block.
The location of the server block may vary depending on your setup. By default, it is located in /etc/nginx/sites-available/default.
However, if you have previously set up custom server blocks for multiple domains in one of our previous guides, you will need to add the PHP directives to each server block separately. A typical custom server block file location would be /etc/nginx/sites-available/mytest1.com.
For the moment, we will assume you are using the default. Edit the file in nano.
sudo nano /etc/nginx/sites-available/default
Press CTRL + W and search for index.html.
Now add index.php before index.html
/etc/nginx/sites-available/default
index index.php index.html index.htm index.nginx-debian.html;
Press CTRL + W and search for the line server_name.
Enter your server’s IP here or domain name if you have one.
/etc/nginx/sites-available/default
server_name YOUR_DOMAIN_OR_IP_HERE;
Press CTRL + W and search for the line location ~ \.php.
You will need to uncomment some lines here by removing the # signs before the lines marked in red below.
Also ensure value for fastcgi_pass socket path is correct. For example, if you installed PHP version 7.2, the socket should be: /var/run/php/php7.2-fpm.sock
If you are unsure which socket to use here, exit out of nano and run ls /var/run/php/
/etc/nginx/sites-available/default
... location ~ \.php$ { include snippets/fastcgi-php.conf; # # # With php-fpm (or other unix sockets): fastcgi_pass unix:/var/run/php/php7.2-fpm.sock; # # With php-cgi (or other tcp sockets): # fastcgi_pass 127.0.0.1:9000; } ...
Once you’ve made the necessary changes, save and close (Press CTRL + X, then press y and ENTER to confirm save)
Now check the config file to make sure there are no syntax errors. Any errors could crash the web server on restart.
sudo nginx -t
nginx: the configuration file /etc/nginx/nginx.conf syntax is ok nginx: configuration file /etc/nginx/nginx.conf test is successful
If no errors, you can reload the Nginx config.
sudo service nginx reload
8. Test PHP
To see if PHP is working correctly on Ubuntu 18.04, let’s a create a new PHP file called info.php in the document root directory. By default, this is located in /var/www/html/, or if you set up multiple domains in a previous guide, it may be located in somewhere like /var/www/mytest1.com/public_html
Once you have the correct document root directory, use the nano text editor to create a new file info.php
sudo nano /var/www/html/info.php
Type or paste the following code into the new file. (if you’re using PuTTY for Windows, right-click to paste)
/var/www/html/info.php
Save and close (Press CTRL + X, then press y and ENTER to confirm save)
You can now view this page in your web browser by visiting your server’s domain name or public IP address followed by /info.php: http://your_domain_or_IP/info.php
phpinfo() outputs a large amount of information about the current state of PHP. This includes information about PHP compilation options and extensions, the PHP version and server information.
You have now successfully installed PHP-FPM for Nginx on Ubuntu 18.04 LTS (Bionic Beaver).
Make sure to delete info.php as it contains information about the web server that could be useful to attackers.
sudo rm /var/www/html/info.php
What Next?
Now that your Ubuntu 18.04 LEMP web server is up and running, you may want to install phpMyAdmin so you can manage your MySQL server.
Installing phpMyAdmin for Nginx on Ubuntu 18.04
To set up a free SSL cert for your domain:
Configuring Let’s Encrypt SSL Cert for Nginx on Ubuntu 18.04
You may want to install and configure an FTP server
Installing an FTP server with vsftpd (Ubuntu 18.04)
We also have several other articles relating to the day-to-day management of your Ubuntu 18.04 LEMP server
Hey champ! - You’re all done!
Feel free to ask me any questions in the comments below.
Let me know in the comments if this helped. Follow Us on - Twitter - Facebook - YouTube.
1 note
·
View note