#php nested conditions
Explore tagged Tumblr posts
Visit Tumblr Blog
Explore Tumblr blogs with no restrictions, modern design and the best experience.
Last Seen Tumblr Blogs


Fun Fact
Tumblr was the first site to host the blog for President Barack Obama in 2011.
Text
PHP Nested if Statement
Learn everything about PHP nested if statements with easy examples, syntax, best practices, and real-world use cases. Perfect for beginners and intermediate learners. Mastering PHP Nested if Statements: A Complete Guide Conditional statements are the backbone of decision-making in programming. In PHP, the if statement allows us to execute code based on whether a condition is true. But what if…
#php conditional statements#php decision making#php if inside if#php multiple conditions#php nested conditions#php nested if statement
0 notes
Text
Complete PHP Tutorial: Learn PHP from Scratch in 7 Days
Are you looking to learn backend web development and build dynamic websites with real functionality? You’re in the right place. Welcome to the Complete PHP Tutorial: Learn PHP from Scratch in 7 Days — a practical, beginner-friendly guide designed to help you master the fundamentals of PHP in just one week.
PHP, or Hypertext Preprocessor, is one of the most widely used server-side scripting languages on the web. It powers everything from small blogs to large-scale websites like Facebook and WordPress. Learning PHP opens up the door to back-end development, content management systems, and full-stack programming. Whether you're a complete beginner or have some experience with HTML/CSS, this tutorial is structured to help you learn PHP step by step with real-world examples.
Why Learn PHP?
Before diving into the tutorial, let’s understand why PHP is still relevant and worth learning in 2025:
Beginner-friendly: Easy syntax and wide support.
Open-source: Free to use with strong community support.
Cross-platform: Runs on Windows, macOS, Linux, and integrates with most servers.
Database integration: Works seamlessly with MySQL and other databases.
In-demand: Still heavily used in CMS platforms like WordPress, Joomla, and Drupal.
If you want to build contact forms, login systems, e-commerce platforms, or data-driven applications, PHP is a great place to start.
Day-by-Day Breakdown: Learn PHP from Scratch in 7 Days
Day 1: Introduction to PHP & Setup
Start by setting up your environment:
Install XAMPP or MAMP to create a local server.
Create your first .php file.
Learn how to embed PHP inside HTML.
Example:
<?php echo "Hello, PHP!"; ?>
What you’ll learn:
How PHP works on the server
Running PHP in your browser
Basic syntax and echo statement
Day 2: Variables, Data Types & Constants
Dive into PHP variables and data types:
$name = "John"; $age = 25; $is_student = true;
Key concepts:
Variable declaration and naming
Data types: String, Integer, Float, Boolean, Array
Constants and predefined variables ($_SERVER, $_GET, $_POST)
Day 3: Operators, Conditions & Control Flow
Learn how to make decisions in PHP:
if ($age > 18) { echo "You are an adult."; } else { echo "You are underage."; }
Topics covered:
Arithmetic, comparison, and logical operators
If-else, switch-case
Nesting conditions and best practices
Day 4: Loops and Arrays
Understand loops to perform repetitive tasks:
$fruits = ["Apple", "Banana", "Cherry"]; foreach ($fruits as $fruit) { echo $fruit. "<br>"; }
Learn about:
for, while, do...while, and foreach loops
Arrays: indexed, associative, and multidimensional
Array functions (count(), array_push(), etc.)
Day 5: Functions & Form Handling
Start writing reusable code and learn how to process user input from forms:
function greet($name) { return "Hello, $name!"; }
Skills you gain:
Defining and calling functions
Passing parameters and returning values
Handling HTML form data with $_POST and $_GET
Form validation and basic security tips
Day 6: Working with Files & Sessions
Build applications that remember users and work with files:
session_start(); $_SESSION["username"] = "admin";
Topics included:
File handling (fopen, fwrite, fread, etc.)
Reading and writing text files
Sessions and cookies
Login system basics using session variables
Day 7: PHP & MySQL – Database Connectivity
On the final day, you’ll connect PHP to a database and build a mini CRUD app:
$conn = new mysqli("localhost", "root", "", "mydatabase");
Learn how to:
Connect PHP to a MySQL database
Create and execute SQL queries
Insert, read, update, and delete (CRUD operations)
Display database data in HTML tables
Bonus Tips for Mastering PHP
Practice by building mini-projects (login form, guest book, blog)
Read official documentation at php.net
Use tools like phpMyAdmin to manage databases visually
Try MVC frameworks like Laravel or CodeIgniter once you're confident with core PHP
What You’ll Be Able to Build After This PHP Tutorial
After following this 7-day PHP tutorial, you’ll be able to:
Create dynamic web pages
Handle form submissions
Work with databases
Manage sessions and users
Understand the logic behind content management systems (CMS)
This gives you the foundation to become a full-stack developer, or even specialize in backend development using PHP and MySQL.
Final Thoughts
Learning PHP doesn’t have to be difficult or time-consuming. With the Complete PHP Tutorial: Learn PHP from Scratch in 7 Days, you’re taking a focused, structured path toward web development success. You’ll learn all the core concepts through clear explanations and hands-on examples that prepare you for real-world projects.
Whether you’re a student, freelancer, or aspiring developer, PHP remains a powerful and valuable skill to add to your web development toolkit.
So open up your code editor, start typing your first <?php ... ?> block, and begin your journey to building dynamic, powerful web applications — one day at a time.

0 notes
Text
Optimizing PHP Code for High-Traffic Web Portals
In the world of digital business, performance is everything—especially when your web application handles thousands (or even millions) of users daily. High-traffic web portals must be optimized for both speed and scalability, and in PHP-based platforms, that starts with writing efficient, maintainable code.
Over the years, we've worked with various enterprises to tune their PHP applications for performance, and in this article, we’re sharing proven optimization techniques that PHP developers—and especially teams at leading PHP development companies—use to ensure smooth operations even under peak loads.
Understanding the Performance Bottlenecks
When a PHP application starts to lag under pressure, the root cause can usually be traced to a few common culprits:
Inefficient database queries
Uncached content
Memory bloat or unnecessary object creation
Unoptimized loops or nested logic
Lack of asynchronous handling
While any of these issues can slow down your site, it's the combination of them that really hurts performance on high-traffic platforms. That’s why experienced PHP development companies often begin optimization by profiling the entire application to pinpoint exactly where resources are being misused.
Code-Level Improvements That Make a Big Impact
We recently worked with a client in the media industry whose content platform was experiencing slow page loads during traffic spikes. After thorough analysis, our PHP team implemented a series of improvements:
1. Refactored Loops and Conditionals
Heavy iterations and deeply nested if-else statements were consuming more memory than necessary. We restructured the code with early returns and more efficient loop logic to reduce processing time significantly.
2. Implemented Caching with Redis
Instead of querying the database for every page view, we introduced Redis to cache data such as category lists, trending articles, and user session data. This minimized repeated database calls and reduced server load.
3. Database Query Optimization
Some queries were fetching unnecessary columns and not using indexes properly. By rewriting these queries and adding the right indexing strategies, we cut down response times on key pages.
4. Adopted Lazy Loading and Autoloading
To reduce the memory footprint, we introduced autoloading classes and used lazy loading for resources that weren’t needed immediately. This reduced page generation time and helped scale better under load.
These strategies are standard practice among top PHP development agencies that handle performance-critical applications for global audiences.
Server-Side Tweaks for Better Throughput
Optimizing PHP code is only half the equation. Equally important are server configurations. We worked closely with the DevOps team to:
Enable PHP opcode caching (OPcache)
Increase worker threads and set up process management
Introduce HTTP/2 for faster content delivery
Configure load balancing for redundancy and distribution
By combining PHP code optimization with server-level tuning, the platform was able to handle 3x more concurrent users without slowing down.
Monitoring and Maintenance
After deployment, we didn't just walk away. A continuous monitoring strategy was implemented to watch memory usage, execution time, and database performance. Tools like New Relic and Blackfire helped us identify new optimization opportunities as traffic grew.
Ongoing performance management is a key differentiator for successful PHP development companies. It’s not just about fixing what’s broken—it’s about anticipating future growth and preparing the codebase for it.
Final Thoughts
For high-traffic web portals, optimizing PHP code isn’t optional—it’s essential. Clean, efficient, and scalable code can mean the difference between delighting users and driving them away due to slow load times.
Businesses looking to scale their PHP applications can benefit greatly by partnering with top PHP development agencies that bring both experience and technical depth. With the right team and strategies in place, performance bottlenecks become solvable challenges, and growth becomes sustainable.
0 notes
Photo

hydralisk98′s web projects tracker:
Core principles=
Fail faster
‘Learn, Tweak, Make’ loop
This is meant to be a quick reference for tracking progress made over my various projects, organized by their “ultimate target” goal:
(START)
(Website)=
Install Firefox
Install Chrome
Install Microsoft newest browser
Install Lynx
Learn about contemporary web browsers
Install a very basic text editor
Install Notepad++
Install Nano
Install Powershell
Install Bash
Install Git
Learn HTML
Elements and attributes
Commenting (single line comment, multi-line comment)
Head (title, meta, charset, language, link, style, description, keywords, author, viewport, script, base, url-encode, )
Hyperlinks (local, external, link titles, relative filepaths, absolute filepaths)
Headings (h1-h6, horizontal rules)
Paragraphs (pre, line breaks)
Text formatting (bold, italic, deleted, inserted, subscript, superscript, marked)
Quotations (quote, blockquote, abbreviations, address, cite, bidirectional override)
Entities & symbols (&entity_name, &entity_number,  , useful HTML character entities, diacritical marks, mathematical symbols, greek letters, currency symbols, )
Id (bookmarks)
Classes (select elements, multiple classes, different tags can share same class, )
Blocks & Inlines (div, span)
Computercode (kbd, samp, code, var)
Lists (ordered, unordered, description lists, control list counting, nesting)
Tables (colspan, rowspan, caption, colgroup, thead, tbody, tfoot, th)
Images (src, alt, width, height, animated, link, map, area, usenmap, , picture, picture for format support)
old fashioned audio
old fashioned video
Iframes (URL src, name, target)
Forms (input types, action, method, GET, POST, name, fieldset, accept-charset, autocomplete, enctype, novalidate, target, form elements, input attributes)
URL encode (scheme, prefix, domain, port, path, filename, ascii-encodings)
Learn about oldest web browsers onwards
Learn early HTML versions (doctypes & permitted elements for each version)
Make a 90s-like web page compatible with as much early web formats as possible, earliest web browsers’ compatibility is best here
Learn how to teach HTML5 features to most if not all older browsers
Install Adobe XD
Register a account at Figma
Learn Adobe XD basics
Learn Figma basics
Install Microsoft’s VS Code
Install my Microsoft’s VS Code favorite extensions
Learn HTML5
Semantic elements
Layouts
Graphics (SVG, canvas)
Track
Audio
Video
Embed
APIs (geolocation, drag and drop, local storage, application cache, web workers, server-sent events, )
HTMLShiv for teaching older browsers HTML5
HTML5 style guide and coding conventions (doctype, clean tidy well-formed code, lower case element names, close all html elements, close empty html elements, quote attribute values, image attributes, space and equal signs, avoid long code lines, blank lines, indentation, keep html, keep head, keep body, meta data, viewport, comments, stylesheets, loading JS into html, accessing HTML elements with JS, use lowercase file names, file extensions, index/default)
Learn CSS
Selections
Colors
Fonts
Positioning
Box model
Grid
Flexbox
Custom properties
Transitions
Animate
Make a simple modern static site
Learn responsive design
Viewport
Media queries
Fluid widths
rem units over px
Mobile first
Learn SASS
Variables
Nesting
Conditionals
Functions
Learn about CSS frameworks
Learn Bootstrap
Learn Tailwind CSS
Learn JS
Fundamentals
Document Object Model / DOM
JavaScript Object Notation / JSON
Fetch API
Modern JS (ES6+)
Learn Git
Learn Browser Dev Tools
Learn your VS Code extensions
Learn Emmet
Learn NPM
Learn Yarn
Learn Axios
Learn Webpack
Learn Parcel
Learn basic deployment
Domain registration (Namecheap)
Managed hosting (InMotion, Hostgator, Bluehost)
Static hosting (Nertlify, Github Pages)
SSL certificate
FTP
SFTP
SSH
CLI
Make a fancy front end website about
Make a few Tumblr themes
===You are now a basic front end developer!
Learn about XML dialects
Learn XML
Learn about JS frameworks
Learn jQuery
Learn React
Contex API with Hooks
NEXT
Learn Vue.js
Vuex
NUXT
Learn Svelte
NUXT (Vue)
Learn Gatsby
Learn Gridsome
Learn Typescript
Make a epic front end website about
===You are now a front-end wizard!
Learn Node.js
Express
Nest.js
Koa
Learn Python
Django
Flask
Learn GoLang
Revel
Learn PHP
Laravel
Slim
Symfony
Learn Ruby
Ruby on Rails
Sinatra
Learn SQL
PostgreSQL
MySQL
Learn ORM
Learn ODM
Learn NoSQL
MongoDB
RethinkDB
CouchDB
Learn a cloud database
Firebase, Azure Cloud DB, AWS
Learn a lightweight & cache variant
Redis
SQLlite
NeDB
Learn GraphQL
Learn about CMSes
Learn Wordpress
Learn Drupal
Learn Keystone
Learn Enduro
Learn Contentful
Learn Sanity
Learn Jekyll
Learn about DevOps
Learn NGINX
Learn Apache
Learn Linode
Learn Heroku
Learn Azure
Learn Docker
Learn testing
Learn load balancing
===You are now a good full stack developer
Learn about mobile development
Learn Dart
Learn Flutter
Learn React Native
Learn Nativescript
Learn Ionic
Learn progressive web apps
Learn Electron
Learn JAMstack
Learn serverless architecture
Learn API-first design
Learn data science
Learn machine learning
Learn deep learning
Learn speech recognition
Learn web assembly
===You are now a epic full stack developer
Make a web browser
Make a web server
===You are now a legendary full stack developer
[...]
(Computer system)=
Learn to execute and test your code in a command line interface
Learn to use breakpoints and debuggers
Learn Bash
Learn fish
Learn Zsh
Learn Vim
Learn nano
Learn Notepad++
Learn VS Code
Learn Brackets
Learn Atom
Learn Geany
Learn Neovim
Learn Python
Learn Java?
Learn R
Learn Swift?
Learn Go-lang?
Learn Common Lisp
Learn Clojure (& ClojureScript)
Learn Scheme
Learn C++
Learn C
Learn B
Learn Mesa
Learn Brainfuck
Learn Assembly
Learn Machine Code
Learn how to manage I/O
Make a keypad
Make a keyboard
Make a mouse
Make a light pen
Make a small LCD display
Make a small LED display
Make a teleprinter terminal
Make a medium raster CRT display
Make a small vector CRT display
Make larger LED displays
Make a few CRT displays
Learn how to manage computer memory
Make datasettes
Make a datasette deck
Make floppy disks
Make a floppy drive
Learn how to control data
Learn binary base
Learn hexadecimal base
Learn octal base
Learn registers
Learn timing information
Learn assembly common mnemonics
Learn arithmetic operations
Learn logic operations (AND, OR, XOR, NOT, NAND, NOR, NXOR, IMPLY)
Learn masking
Learn assembly language basics
Learn stack construct’s operations
Learn calling conventions
Learn to use Application Binary Interface or ABI
Learn to make your own ABIs
Learn to use memory maps
Learn to make memory maps
Make a clock
Make a front panel
Make a calculator
Learn about existing instruction sets (Intel, ARM, RISC-V, PIC, AVR, SPARC, MIPS, Intersil 6120, Z80...)
Design a instruction set
Compose a assembler
Compose a disassembler
Compose a emulator
Write a B-derivative programming language (somewhat similar to C)
Write a IPL-derivative programming language (somewhat similar to Lisp and Scheme)
Write a general markup language (like GML, SGML, HTML, XML...)
Write a Turing tarpit (like Brainfuck)
Write a scripting language (like Bash)
Write a database system (like VisiCalc or SQL)
Write a CLI shell (basic operating system like Unix or CP/M)
Write a single-user GUI operating system (like Xerox Star’s Pilot)
Write a multi-user GUI operating system (like Linux)
Write various software utilities for my various OSes
Write various games for my various OSes
Write various niche applications for my various OSes
Implement a awesome model in very large scale integration, like the Commodore CBM-II
Implement a epic model in integrated circuits, like the DEC PDP-15
Implement a modest model in transistor-transistor logic, similar to the DEC PDP-12
Implement a simple model in diode-transistor logic, like the original DEC PDP-8
Implement a simpler model in later vacuum tubes, like the IBM 700 series
Implement simplest model in early vacuum tubes, like the EDSAC
[...]
(Conlang)=
Choose sounds
Choose phonotactics
[...]
(Animation ‘movie’)=
[...]
(Exploration top-down ’racing game’)=
[...]
(Video dictionary)=
[...]
(Grand strategy game)=
[...]
(Telex system)=
[...]
(Pen&paper tabletop game)=
[...]
(Search engine)=
[...]
(Microlearning system)=
[...]
(Alternate planet)=
[...]
(END)
4 notes
·
View notes
Link

Excerpt from this story from the San Antonio Express-News:
The golden-cheeked warbler, a songbird that has lost much of its nesting area to suburban sprawl near San Antonio, Austin and across Central Texas, will remain protected under the federal Endangered Species Act, a judge in Austin has ruled.
The decision came in a lawsuit filed 18 months ago by the conservative Texas Public Policy Foundation on behalf of the Texas General Land Office.
It argued that a 2015 Texas A&M University study had shown the warbler no longer needed the federal protection, which has required a development permit process that undermined property rights.
The endangered status of the bird has been a significant shaper of suburban growth in the Texas Hill Country, with the setting aside of land to preserve its habitat often required as a condition for construction on other tracts.
Environmental groups that included the Audubon Society and Center for Biological Diversity hailed Wednesday’s decision by Senior U.S. District Judge Sam Sparks to keep protections for the bird in place. He had previously dismissed two other parts of the lawsuit.
7 notes
·
View notes
Text
Birds in the Ecosystem of the Forest Tundra of Western Siberia
Abstract
The species composition and ecology of birds in the forest-tundra natural zone are analyzed. There is no own avifauna of the forest-tundra, with the existence of fauna of taiga and tundra natural zones. At present, it is being formed, the species diversity of nesting birds is increasing, species have appeared, whose density maxima are located in the forest tundra. But there is practically no effect of “overlaying faunas” both on the whole space of Western Siberia and on the local territory of woodlands. Ecological adaptations of birds to the conditions of life in the forest-tundra have not been identified with such adaptations to the taiga and tundra.
Read more about this article: https://lupinepublishers.com/environmental-soil-science-journal/fulltext/birds-in-the-ecosystem-of-the-forest-tundra-of-western-siberia.ID.000162.php
Read more Lupine Publishers Google Scholar articles: https://scholar.google.com/citations?view_op=view_citation&hl=en&user=f6syqaoAAAAJ&cstart=20&pagesize=80&citation_for_view=f6syqaoAAAAJ:u9iWguZQMMsC
0 notes
Text
Spatial Modelling of Some Conditional Autoregressive Priors in A Disease Mapping Model: the Bayesian Approach - BJSTR Journal

Spatial Modelling of Some Conditional Autoregressive Priors in A Disease Mapping Model: the Bayesian Approach by Davies Obaromi* in Biomedical Journal of Scientific & Technical Research https://biomedres.us/fulltexts/BJSTR.MS.ID.002555.php The basic model usually used in disease mapping is the Besag, York and Mollie (BYM) model, which combines two random effects, a spatially structured and a spatially unstructured random effect. Bayesian Conditional Autoregressive (CAR) model is a disease mapping method that is commonly used for smoothening the relative risk of any disease as used in the Besag, York and Mollie (BYM) model. This model (CAR), which is also usually assigned as a prior to one of the spatial random effects in the BYM model, successfully uses information from adjacent sites to improve estimates for individual sites. However, it has been pointed out that there exist some unrealistic or counterintuitive consequences on the posterior covariance matrix of the CAR prior for the spatial random effects. In the conventional BYM (Besag, York and Mollie) model, the spatially structured and the unstructured random components cannot be seen independently, and which challenges the prior definitions for the hyperparameters of the two random effects. Therefore, the main objective of this study is to utilize some spatial CAR models for flexibility as applied to tuberculosis (TB) disease mapping. The extended Bayesian spatial CAR model is proved to be a useful and a little robust tool for disease modeling and as a prior for the structured spatial random effects because of the inclusion of an extra hyperparameter. A Bayesian modeling approach by the Integrated Nested Laplace Approximation method (INLA) is used to estimate model parameters and comparison was made by the deviance information criterion (DIC). For more articles on Medical and Medicinal Journal please click here bjstr Follow on Twitter : https://twitter.com/Biomedres01 Follow on Blogger : https://biomedres01.blogspot.com/ Like Our Pins On : https://www.pinterest.com/biomedres/
#Open Access Clinical and Medical Journal#Journals on Biomedical Engineering#Journals on Biomedical Science#Journal on Medical Genetics#Journals on Cancer Medicine
0 notes
Text
PHP if...else Statements
Master PHP if, else, and elseif statements with simple examples and best practices. Learn how to use conditions in PHP to control program flow. ✅ PHP if...else Statements – Complete Beginner’s Guide Conditional statements in PHP allow you to make decisions based on conditions. The most basic and commonly used conditional structure is the if...else statement. This tutorial will walk you through…
#learn php conditions#php conditional statements#php control flow#php decision making#php elseif#php if else#php if else syntax#php if examples#php if nested#php if statement#php if tutorial#php logic#ternary operator in php
0 notes
Text
300+ TOP PostgreSQL Interview Questions and Answers
PostgreSQL Interview Questions for freshers experienced :-
1.What is postgresql? PostgreSQL is a most advance open source database system. PostgreSQL is an object Oriented Relational Database Management System (ORDBMS). PostgreSQL source code is available free of charge and it is not controlled by any corporation. 2.What are different advantages of Postgresql? Following are the advantages of postgresql : Reliable Stable Open source Extensible Easy to learn Cross Platform Designed for High Volume Environments Flexible Better Support 3.What are different features of Postgresql? Following are some features of Postgresql : Object relational database Extensibility and support for SQL Database validation and flexible API Procedural languages and MVCC Client server and WAL. 4.What is maximum size of table in postgresql? The postgresql has maximum size of table is 32TB. 5.What is the option that can be used in PostgreSQL to make transactions see rows affected in previous parts of the transaction? The SQL standard defines four levels of transaction isolation in terms of three phenomena that must be prevented between concurrent transactions. These undesirable phenomena are: Dirty read : A transaction reads data written by a concurrent uncommitted transaction. Nonrepeatable read : A transaction re-reads data it has previously read and finds that data has been modified by another transaction (that committed since the initial read). Phantom read : A transaction re-executes a query returning a set of rows that satisfy a search condition and finds that the set of rows satisfying the condition has changed due to another recently-committed transaction. 6.Explain Multi Version concurrency control. Multi version concurrency control or MVCC is used to avoid unnecessary locking of the database. This removes the time lag for the user to log into his database. This feature or time lag occurs when some one else is on the content. All the transactions are kept as a record. 7.How the stats updated in Postgresql? To update statistics in PostgreSQL explicit ‘vacuum’ call is made. Hope you know the method of doing this. If not let us know and we would help you.Vacuum with the option Analyze is used to update statistics in Postgresql VACUUM ANALYZE ; is the syntax. 8.What is write ahead logging in Postgresql? This feature increases the reliability of the database by logging changes before any changes or updations to the data base. This provides log of database incase of a database crash. This helps to start the work from the point it was discontinued. 9.How to start database server in postgresql? /usr/local/etc/rc.d/010.pgsql.sh start /usr/local/etc/rc.d/postgresql start 10.How to stop database server in postgresql? /usr/local/etc/rc.d/010.pgsql.sh stop /usr/local/etc/rc.d/postgresql stop

PostgreSQL Interview Questions 11.Which different languages are supported by postgresql? Some of the languages which PostgreSQL supports are as follows: It supports a language of its own known as PL/pgSQL and it supports internal procedural languages. Pl/pgSQL can be compared to oracle, PL/SQL, etc. Languages such as Perl, Python, TCL can be used as embedded languages. 12.What is purpose of overlay function in Postgresql? Overlay functions purpose is to replace substring from a specified position to a specified position. Example: Select Overlay(‘www.complexpql.com’ Placing ‘sql’ From 12 For 3) “Overlay Example” /* Result */ Overlay Example ————— www.complexsql.com 12.What is String_to_array function in postgresql? This function used to convert the specified string in to array.This functions splits a string to an array provided the delimeter is supplied. It returns an array. Syntax: String_To_Array(String,delimeter) e.g. Select String_To_Array(‘Postgresql is cool language’,’ ‘) /* Result */ string_to_array —————- {Postgresql,is,cool,language} 13.Explain about command Enable debug. This command is used for enabling compilation of all libraries and applications. This process generally slows down the system and it also increases the binary file size. Debugging symbols are present which can assist developers in noticing bugs and problems associated with their script. 14.Explain about functions in Postgresql. Functions are important because they help the code to be executed on the server. Some of the languages which can program functions for efficient use are PL/pgSQL which is the native language of PostgreSQL. Scripting languages are supported by many languages such as PHP, Perl, Python, etc. PL/R a statistical language can also be used. 15.How to find version of postgresql? To find out the version in postgresql use following command : select version(); 16.Which are different type of indexes in postgresql? There are built in functions such as B-tree, hash table, and GIST indices can be used or users can define their own indices. PostgreSQL can scan the index backwards. Expression index could be created with the result of an expression. Partial index created with addition of WHERE clause. 17.How to select first 10 records in postgresql? User needs to use the limit clause to select first n records in postgresql. Select * from tablename limit 10; 18.How to calculate cube root in postgresql? To calculate the Cuberoot use ||/ operator. Example: e.g. Select ||/ 16 “CubeRoot of 16” Result: CubeRoot of 16 —————- 2.5 19.What are Triggers in postgresql? By SQL query you can trigger an event. Triggers can be activated with the help of INSERT and UPDATE queries. These can be attached to tables. Triggers more than one can be triggered alphabetically. These triggers have the capability to invoke functions from other languages. 20.Which are different datatypes of Postgresql? There are different new datatypes supported by postgresql.Following are those datatypes : Arbitrary precision numeric’s Geometric primitives Arrays XML etc Users can create their own indexes and make them indexed. 21.Which are different database administration tools used in Postgresql? There are various data administration tools they are Psql Pgadmin Phppgadmin Most of these tools are front end administration tools and web based interfaces. Out of these phppgadmin is the most popular one. 22.What is pgadmin?Explain.(100% asked Postgresql Interview Questions ) Pgadmin forms a graphical front end administration tool. This feature is available under free software released under Artistic License. Pgadmin iii is the new database administration tool released under artistic license. 23.How to create database in postgresql? Creating a database is the primary step in creating a database. A command $createdb newdatabasedb. CREATE DATABASE This creates a new database and a message displays CREATE DATABASE which indicates that the creation of the database was successful. 24.What is Write ahead log in postgresql? write-ahead log (WAL), means it always writes the transactions to the log following with writing the modified pages to the disk to maintain the transaction ACID properties. 25.Explain about tokens in postgresql? Tokens are also known to contain several special character symbols. It can be considered as keyword, constant, identifier and quoted identifier. Keywords include pre defined SQL meanings and SQL commands. Variable names such as tables, columns, etc are represented by identifiers. These are some bery important postgresql interview questions.Hope you like this article of Postgresql Interview Questions and dont forget to comment in comment section.These postgresql interview questions are really helpful to users. 26. Explain history of postgresql. Here In this article we will discuss History Of Postgresql in detail.In MAC OS Postgresql is default database.Michel Stonebraker is Father of Postgresql who has started Post Ingres project for supporting Contemporary Database systems.PostgreSQL’s developers pronounce PostgreSQL as It is abbreviated as Postgres because of ubiquitous support for the SQL Standard among most relational databases.PostgreSQL, originally called Postgres, was created at UCB by a computer science professor named Michael Stonebraker, who went on to become the CTO of Informix Corporation. Stonebraker started Postgres in 1986 as a followup project to its predecessor, Ingres, now owned by Computer Associates. The name Postgres thus plays off of its predecessor (as in “after Ingres”). Ingres, developed from 1977 to 1985, had been an exercise in creating a database system according to classic RDBMS theory. Postgres, developed between 1986-1994, was a project meant to break new ground in database concepts such as exploration of “object relational” technologies.An enterprise class database, PostgreSQL boasts sophisticated features such as Multi-Version Concurrency Control (MVCC), point in time recovery, tablespaces, asynchronous replication, nested transactions (savepoints), online/hot backups, a sophisticated query planner/optimizer, and write ahead logging for fault tolerance. PostgreSQL Questions and Answers Pdf Download Read the full article
0 notes
Photo

BEIJING with GREAT WALL and PANDA ZOO RATE: PHP 21,888 PER PERSON TRAVEL DATES: AUTUMN:OCT 17-21, NOV 7-11 // WINTER: DEC 14 – 18 TRAVEL DETAILS: 5J 672 MNL PEK 07:15PM - 12:15AM // 5J 673 PEK MNL 01:20AM - 05:45AM INCLUSIONS • Roundtrip airfare via Cebu Pacific • 7kg hand carry baggage • 4 days 3 nights hotel accommodation at Days Hotel Beijing Guomen/Jinshi Building Hotel or similar 4* • Meals as per itinerary • Entrance tickets as per itinerary • English speaking guide EXCLUSIONS • Philippine travel tax • China visa • Tips for tour guide and driver - USD 3/ pax/ day • Tips for porter TRAVEL ITINERARY: DAY 01 Manila (No meal) • Departure in Manila - 07:15PM. DAY 02 Beijing (Breakfast/Lunch/Dinner) • Arrival at Beijing airport - 12:15AM. Meet and transfer to hotel for check in. • Breakfast. Pickup and proceed with tour, visit: Tian an men Square, The Forbidden City, Temple of Heaven and Wangfujing street. Overnight at hotel. Day 03 Beijing (Breakfast/Lunch/Dinner) • Breakfast. Pickup and proceed with tour, visit: Great Wall (Juyongguan), Jade shop, Herbal Medicine shop, Olympic Green Common Domain, Bird Nest (outside), Water Cube (outside) and Wangfujing shopping street. Overnight at hotel. DAY 04 Beijing (Breakfast/Lunch/Dinner) • Breakfast. Pickup and proceed with tour, visit: Tea shop, Summer Palace, Pearl Shop and Panda Zoo. After Dinner, transfer to Airport for departure to Manila. DAY 05 Beijing (No meal) • Departure Beijing airport - 01:20AM, arrival -05:45AM BOOKING CONDITIONS: • Non refundable downpayment of PHP 5,500 to reserve slot • Full payment must be made 1 month before the departure • Surcharge apply to foreign passport --- #wca hanguk travelandTours #HalikaNaTravelTayo #TravelandTours #Travel #barkadagoals #BEIJING #CHINA #THEGREATWALL #PANDAZOO https://www.instagram.com/p/B120LfsBkJ7/?igshid=ocx7645fixil
0 notes
Text
I Ching for the Day
55 Feng / Abundance (Fullness) Changing to 62 Hsiao Kuo / The Preponderance of the Small #HealEarth June 5, 2019 Sunrise Waxing Moon Question: What does Earth need most to be healed at this time? 55 Feng / Abundance (Fullness) Changing to 62 Hsiao Kuo / The Preponderance of the Small Cast Hexagram

55 Feng / Abundance (Fullness) https://ichingfortune.com/hexagrams/55.php Above Chen the Arousing, Thunder Below Li the Clinging, Fire Introduction Chen is movement; Li is flame, whose attribute is clarity. Clarity within, movement without-this produces greatness and abundance. The hexagram pictures a period of advanced civilization. However, the fact that development has reached a peak suggests that this extraordinary condition of abundance cannot be maintained permanently. Judgement Abundance has success. The king attains abundance. Be not sad. Be like the sun at midday. Judgement Commentary It is not given to every mortal to bring about a time of outstanding greatness and abundance. Only a born ruler of men is able to do it, because his will is directed to what is great. Such a time of abundance is usually brief. Therefore a sage might well feel sad in view of the decline that must follow. But such sadness foes not befit him. Only a man who is inwardly free of sorrow and care can lead in a time of abundance. He must be like the sun at midday, illuminating and gladdening everything under heaven. The Image Both thunder and lightning come: The image of Abundance. Thus the superior man decides lawsuits and carries out punishments. Image Commentary This hexagram has a certain connection with Shih Ho, Biting Through(21), in which thunder and lightning similarly appear together, but in the reverse order. In Biting Through, laws are laid down; here they are applied and enforced. Clarity [Li] within makes it possible to investigate the facts exactly, and shock [Chen] without ensures a strict and precise carrying out of punishments. Changing Line (1) Nine at the beginning means: When a man meets his destined ruler they can be together ten days and it is not a mistake. Going meets with recognition. To bring about a time of abundance, a union of clarity with energetic movement is needed. Two individuals possessed of these two attributes are suited to each other, and even if they spend an entire cycle of time together during the period of abundance, it will not be too long, nor is it a mistake. Therefore one may go forth, in order to make one's influence felt, it will meet with recognition. Changing only this line creates Hexagram 62 - Hsiao Kuo / Preponderance of the Small. When the junior or less experienced joins with the senior, more experienced they can jointly bring about good things. This line being junior, is encouraged to seek out and ally itself with experienced, higher ranked, help. Legge says "...mutual helpfulness is the great instrument for the maintenance of prosperity." The resultant hexagram 62, Preponderance of the Small, suggests that the partnership will prosper as long as it sticks to achieving small things, "Small things may be done; great things should not be done." Transformed Hexagram 62 Hsiao Kuo / The Preponderance of the Small https://ichingfortune.com/hexagrams/62.php Above Chen the Arousing, Thunder Below Ken Keeping Still, Mountain Introduction While in the hexagram Ta Kuo, Preponderance of the Great (28), the strong lines preponderate and are within, enclosed between weak lines at the top and bottom, the present hexagram has weak lines preponderating, though here again they are on the outside, the strong lines being within. This indeed is the basis of the exceptional situation indicated by the hexagram. When strong lines are outside, we have the hexagram I, Providing Nourishment (27), or Chung Fu, Inner Truth, (61); neither represents and exceptional state. When strong elements within preponderate, they necessarily enforce their will. This creates struggle and exceptional conditions in general. But in the present hexagram it is the weak element that perforce must mediate with the outside world. If a man occupies a position of authority for which he is by nature really inadequate, extraordinary prudence is necessary. Judgement Preponderance of the Small. Success. Perseverance furthers. Small things may be done; great things should not be done. The flying bird brings the message: It is not well to strive upward, It is well to remain below. Great good fortune. Judgement Commentary Exceptional modesty and conscientiousness are sure to be rewarded with success; however, if a man is not to throw himself away, it is important that they should not become empty form and subservience but be combined always with a correct dignity in personal behavior. We must understand the demands of the time in order to find the necessary offset for its deficiencies and damages. In any event we must not count on great success, since the requisite strength is lacking. In this lies the importance of the message that one should not strive after lofty things but hold to lowly things. The structure of the hexagram gives rise to the idea that this message is brought by a bird. In Ta Kuo, Preponderance of the Great (28), the four strong, heavy lines within, supported only by two weak lines without, give the image of a sagging ridgepole. Here the supporting weak lines are both outside and preponderant; this gives the image of a soaring bird. But a bird should not try to surpass itself and fly into the sun; it should descend to the earth, where its nest is. In this way it gives the message conveyed by the hexagram. The Image Thunder on the mountain: The image of Preponderance of the Small. Thus in his conduct the superior man gives preponderance to reverence. In bereavement he gives preponderance to grief. In his expenditures he gives preponderance to thrift. Image Commentary Thunder on the mountain is different from thunder on the plain. In the mountains, thunder seems much nearer; outside the mountains, it is less audible than the thunder of an ordinary storm. Thus the superior man derives an imperative from this image: he must always fix his eyes more closely and more directly on duty than does the ordinary man, even though this might make his behavior seem petty to the outside world. He is exceptionally conscientious in his actions. In bereavement emotion means more to him than ceremoniousness. In all his personal expenditures he is extremely simple and unpretentious. In comparison with the man of the masses, all this makes him stand out as exceptional. But the essential significance of his attitude lies in the fact that in external matters he is on the side of the lowly.

#HealEarth https://thehealearthproject.blogspot.com/2018/12/welcome-about-healearth-project.html If you would like to participate in The #HealEarth Project, please send an email to: [email protected]
0 notes
Text
How I Built a GPS-Powered Weather Clock With My Old iPhone 4
My first smartphone was an iPhone 4s. I remember the excitement of exploring its capabilities at a time when it was the coolest thing around. Eventually, of course, I replaced it with a newer model and the old iPhone, still in mint condition, gathered dust for two years. What a waste!
But was it? It occurred to me that I could repurpose the old iPhone to create a useful weather clock for our hallway.
Who needs Nest anyway?
In the process, I discovered that reusing an old device is not only fun and economical, it can also deepen your understanding of web standards. In this tutorial, I will show how I created a small web page to display the date, time, and current weather conditions based on the current GPS location. Together, we’ll retrieve weather data from a public API and hide an API key in a PHP file for security. Finally, we’ll look at adding a manifest file and meta tags so that users can save the page to a device’s home screen and then launch it as a standalone app, including a custom icon for it.
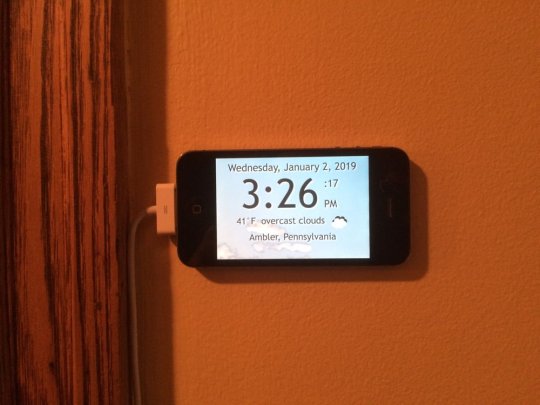
Here is a screen shot of what we’re aiming for:

Step 1: What time is it?
See the Pen Wall Clock by Steven Estrella (@sgestrella) on CodePen.
The HTML for the clock has some placeholder text that we will eventually replace. All we really need at this moment is a centered <main> container element and a couple of semantic <time> elements for the date and time. The <span> tag within the second <time> element will be styled specially to display the running seconds and the meridian. The datetime attribute within the <time> elements will be updated dynamically with JavaScript.
<main id="container" class="daymode"> <time id="date" datetime="" class="clocktext">Someday, Anymonth 15, 20XX</time> <time id="time" datetime="" class="clocktext">12:00<span>:00 PM</span></time> </main>
A little responsive design is key here. We want this to fit nicely on an iPhone 4s screen or any other small-ish smartphone in both portrait and landscape modes. We also want it to work well on a desktop web browser, of course. We can’t use any bleeding-edge CSS or JavaScript, however, because older devices like my iPhone 4s won’t understand it.
I wound up taking things up a notch by creating styles specific for the time of day and we’ll definitely get to that as well. We could even leverage a media query to darken the daytime style for Mac users who have dark mode turned on in the latest MacOS.
The <span> tag with the running seconds and meridian will wrap nicely based on a width of 2em which is just large enough to accommodate two capital letters (i.e. AM and PM). The final CSS that’s needed is a media query to bump up font sizes when the clock is in landscape mode, or really any device with a viewport wider than 480px.
Here are the base styles we’re looking at, with the more decorative styles in the final app removed for brevity:
/* Base nighttime styles */ .nightmode { background-color: #121212; color: #fff; } /* Base daytime styles */ .daymode { background-color: #87ceeb; color: #333; } /* Target MacOS users who have Dark Mode enabled */ @media (prefers-color-scheme: dark) { .daymode { background-color: #003; color: #ffc; } } /* Used to wrap any lines of text */ .clocktext { display: block; margin: 0; padding: 1px 0 0 0; text-align: center; white-space: nowrap; width: 100%; } #date { font-size: 1.3rem; padding-top: 15px; } #time { font-size: 5rem; margin: 1px 0 0 0; } #time span { display: inline-block; font-size: 1.5rem; line-height: 1.5; margin: 0 0 0 0.5em; padding: 0; text-align: left; vertical-align: baseline; white-space: normal; width: 2em; } @media (min-width: 480px){ #date {font-size: 2rem;} #time {font-size: 8rem;} #time span { font-size: 2rem; line-height: 2; } }
For the JavaScript, I chose ES5 because many features of ES6 don’t work on the mobile Safari browser in iOS 9.35, which is the final iOS that runs on the iPhone 4s. Fortunately, ES5 is more than up to the task and the app runs properly on newer devices as well.
We need variables for the current date and time (now), the element that will display the date (dd), the element that will display the time (td) and the names of the months and days. Once the page is loaded, an init function is called to update the time every second (1000 milliseconds). The getClockStrings() function updates the value in the now Date object and returns an object containing HTML strings for the date and time. Then the updateTime() function updates the HTML to show the time. One lesser-used feature here is the inclusion of the toISOString() method of the Date object which adds a machine-readable date string to the datetime attribute of the two <time> elements.
Here’s what that boils dow to, using the JavaScript from the demo:
// NOTE: ES5 chosen instead of ES6 for compatibility with older mobile devices var now, dd, td; var months = ["January","February","March","April","May","June","July","August","September","October","November","December"]; var days = ["Sunday","Monday","Tuesday","Wednesday","Thursday","Friday","Saturday"]; document.addEventListener("DOMContentLoaded", init, false); function init() { dd = document.getElementById("date"); td = document.getElementById("time"); updateTime(); setInterval(updateTime,1000); } function updateTime() { var clockdata = getClockStrings(); dd.innerHTML = clockdata.datehtml; td.innerHTML = clockdata.timehtml; dd.dateTime = now.toISOString(); td.dateTime = now.toISOString(); } function getClockStrings() { now = new Date(); var year = now.getFullYear(); var month = months[now.getMonth()]; var date = now.getDate(); var day = days[now.getDay()]; var hour = now.getHours(); var minutes = now.getMinutes(); var seconds = now.getSeconds(); var meridian = hour < 12 ? "AM" : "PM"; var clockhour = hour > 12 ? hour - 12 : hour; if (hour === 0) {clockhour = 12;} var clockminutes = minutes < 10 ? "0" + minutes : minutes; var clockseconds = seconds < 10 ? "0" + seconds : seconds; var datehtml = day + ", " + month + " " + date + ", " + year; var timehtml = clockhour + ":" + clockminutes + "<span>:" + clockseconds + " " + meridian + "</span>"; return {"datehtml":datehtml,"timehtml":timehtml}; }
Step 2: Where are you?
See the Pen Clock with GPS by Steven Estrella (@sgestrella) on CodePen.
The Geolocation API is an easy way to get the user’s accurate location. We can do that when the page loads, but good manners and Chrome’s best practices audit dictate that we ask the user to initiate the location feature. So, we must add a button and a <div> to the HTML to display the GPS information we receive.
<button id="gpsbutton">Get GPS Location</button> <div id="gps" class="clocktext infotext"></div>
These new items require their own styles — mine can be seen in the embedded Pen above. The important thing is to add the class selector rule for the infotext class as well as the two ID selector rules for the gpsbutton.
Finally, we’ll need to add the modified infotext class selector rule within the media query.
Again, the basic styles minus decorative styling for brevity:
/* The geolocation coordinates upon clicking GPS button */ .infotext { font-size: 1.3rem; line-height: 1.4; padding: 0 5px 0 5px; width: auto; } /* The button itself */ #gpsbutton { -webkit-appearance: none; -moz-appearance: none; display: block; margin: 0 auto; width: auto; cursor: pointer; } #gpsbutton:hover { /* Styles for the hover state */ } @media (min-width: 480px){ /* Add the rule below to the end of the media query */ .infotext {font-size: 1.8rem;} }
The JavaScript requires a few new variables for the latitude, longitude, GPS <div>, and GPS <button>. When clicked, the GPS button calls the getLocation() function which tests for the availability of geolocation support in the browser. If it finds such support, it calls the getCurrentPosition method of the navigator.geolocation object and passes a reference to a success callback function named showPosition and an error callback function named geoError.
At this point, the browser will ask the user for permission to obtain their GPS location. If the visitor refuses, an appropriate message is displayed. If the user approves, the showPosition() function then displays the latitude and longitude and hides the GPS button.

Here’s the Javascript we get based on what we’ve covered in this section:
// ... var lat, lon, gd, gpsbutton; // ... function init(){ // ... gd = document.getElementById("gps"); gpsbutton = document.getElementById("gpsbutton"); gpsbutton.addEventListener("click",getLocation,false); // ... } function updateTime(){ // ... var sec = now.getSeconds(); var minutes = now.getMinutes(); if (sec === 0){ if (minutes % 5 === 0){ getLocation(); // Get location every 5 minutes while the app is running } } } function getClockStrings(){ // ... } function getLocation() { if (navigator.geolocation) { navigator.geolocation.getCurrentPosition(showPosition,geoError); }else{ gd.innerHTML = "location unknown"; } } function geoError(){ gd.innerHTML = "location detection disabled"; } function showPosition(position) { gpsbutton.style.display = "none"; lat = position.coords.latitude; lon = position.coords.longitude; gd.innerHTML = "GPS: " + lat.toFixed(2) + " | " + lon.toFixed(2); }
Step 3: How’s the weather?
Adding current weather conditions to this clock is a useful feature. Fortunately, the good folks at OpenWeatherMap.org allow access to basic weather information for free. Sign up for a free account there and you will be given an API key you can use in your web development. The free account provides current conditions and 5-day forecasts for any valid GPS location you throw at it. Just be sure to call the API no more than 60 times per minute or you will be prodded to upgrade to a paid account. Once you have an API key, substitute it for the words YOUR_API_KEY_HERE in this code sample and then paste the code into the browser’s location bar. You will receive a JSON object containing the weather for my location here in Pennsylvania. Experiment with different latitudes and longitudes. You can find coordinates for any major city at LatLong.net where the coordinates are given in the decimal format you need.
http://api.openweathermap.org/data/2.5/weather?lat=40.15&lon=-75.21&APPID=YOUR_API_KEY_HERE
See the Pen Clock and Weather by Steven Estrella (@sgestrella) on CodePen.
Add the HTML
Just below the GPS <button>, add the following to the HTML:
<div id="weather" class="clocktext infotext"></div> <img id="icon" src="https://openweathermap.org/img/w/01n.png" alt="weather icon" />
Add the CSS
The CSS needs styles for the new weather <div> and the icon image. Note that the icon is set to 0 opacity initially. That will be changed in the JavaScript code once valid weather information is retrieved.
#weather { display: block; width: auto; } #icon { display: inline-block; opacity: 0; vertical-align: top; width: 50px; height: 50px; } @media (min-width: 480px){ /* Add the rule below to the end of the media query */ #weather {display: inline-block;} }
Add the JavaScript
We need to add variables to reference the weather URL, the weather <div> (wd), and the weather icon. We also need to decide on Fahrenheit or Celsius. The Boolean value for usephp should be set to false for now. We will discuss hiding your API key in a PHP document a little later. The locationRequested Boolean value will help us avoid calling the weather and geolocation APIs before the user has requested them. The sunset and sunrise time variables will allow us to change the appearance of the clock based on the time of day. The iconurl value provides the stem of the URL we need to retrieve weather icons. We also need a random number between 0 and 14 to use in our updateTime function so that all our users don’t request weather at the same minute each quarter hour. If you have your own set of icons, you can change the URL value for iconurl . The file names for the PNG icons are available at OpenWeatherMap.org.
// ... var weatherurl, wd, icon, weatherminute; var temperaturescale = "F"; // Set to F or C (fahrenheit or celsius) var usephp = false; // Set to true to use a PHP document to hide your api key var locationRequested = false; var sunsettime = 0; var sunrisetime = 0; var iconurl = "https://openweathermap.org/img/w/"; // ... function init(){ //... Add these lines before the updateTime call at the end of the function wd = document.getElementById("weather"); icon = document.getElementById("icon"); weatherminute = randRange(0,14); // ... } // Random number utility function function randRange(min, max) { return Math.floor(Math.random()*(max-min+1))+min; }
Next we will modify the final if block of the updateTime() function. We wish to avoid unnecessary calls to the weather and geolocation APIs so it is important to test for sec === 0 to be sure we don't call either API 60 times in a given minute. We also wish to call the APIs only if the user has approved the browser’s geolocation request.
function updateTime(){ //... if (locationRequested && sec === 0){ checkForSunset(); // Checks for sunset once each minute if (minutes % 15 === weatherminute){ getWeather(); // Get weather every 15 minutes while the app is running // weatherminute is a random number between 0 and 14 to ensure // that users don't all hit the API at the same minute } if (minutes % 5 === 0){ getLocation(); // Get location every 5 minutes while the app is running } } }
In the showPosition() function, the URL to request the weather data will be either a relative path to the PHP file or a full HTTPS URL pointing to the OpenWeatherMap.org service. In both cases, we will be passing the latitude and longitude in the query string of the URL. For the APPID, please substitute your own API Key for the words YOUR_API_KEY_HERE unless you are using the PHP solution discussed in Step 4 below.
function showPosition(position) { //... if (usephp){ weatherurl = "clock.php?lat=" + lat + "&lon=" + lon; }else{ weatherurl = "https://api.openweathermap.org/data/2.5/weather?"; weatherurl += "lat=" + lat + "&lon=" + lon + "&APPID="; weatherurl += "YOUR_API_KEY_HERE"; } if (!locationRequested){ getWeather(); locationRequested = true; } }
The showPosition() function then calls getWeather() which updates the weather <div> to let the user know something is happening while the weather data is being retrieved. I opted to use the older XMLHttpRequest standard because fetch is not supported on old devices like the iPhone 4s. If the weather data request is being channeled through a PHP document, the response type will be "document" rather than plain text so we have to test for that. If that is the case, the JSON object we need will be in the textContent property of the body of the response. Otherwise, we only need the plain text found in the responseText property. The data is then parsed as a JSON object and sent to the processWeather() function.
function getWeather() { wd.innerHTML = "getting weather"; var xhttp = new XMLHttpRequest(); xhttp.responseType = usephp ? "document" : "text"; // The PHP file returns a document rather than plain text xhttp.onreadystatechange = function() { if (this.readyState === 4 && this.status === 200) { // When using PHP as a data source we need the `textContent` // of the body of the returned document var data = usephp ? xhttp.response.body.textContent : xhttp.responseText; processWeather(JSON.parse(data)); } }; xhttp.open("GET", weatherurl, true); xhttp.send(); }
The JSON object sent to processWeather() will look something like this:
{"coord":{"lon":-75.21,"lat":40.15}, "weather":[{"id":701,"main":"Mist","description":"mist","icon":"50n"}], "base":"stations", "main":{"temp":276.42,"pressure":1011,"humidity":100,"temp_min":275.15,"temp_max":277.15},"visibility":16093,"wind":{"speed":2.1,"deg":310},"clouds":{"all":90},"dt":1545021480, "sys":{"type":1,"id":4743,"message":0.1513,"country":"US","sunrise":1545049047,"sunset":1545082605},"id":5190089,"name":"Fort Washington","cod":200}
From this JSON data, we need to grab the weather property that contains the description of the current conditions and the filename for the weather icon. The <img> tag in the html that has the ID of "icon" is then updated with a new src property value to load the icon image. The temperature is part of the main property but it has to be converted to Fahrenheit or Celsius (most humans don’t think in Kelvin). When that is done, the current conditions can be assigned to the innerHTML property of the weather <div>. The times for sunrise and sunset are found in the sys property of the data. Once we have those, we can call the checkForSunset() function and modify the style to match the time of day.
function processWeather(data){ var weather = data["weather"][0]; icon.src = iconurl + weather.icon + ".png"; icon.style.opacity = 1; var localtemperature = convertTemperature(data["main"].temp).toFixed(0); var weatherstring = localtemperature + "°" + temperaturescale + " " + weather.description; wd.innerHTML = weatherstring; sunsettime = Number(data["sys"].sunset); sunrisetime = Number(data["sys"].sunrise); checkForSunset(); } function checkForSunset(){ var nowtime = now.getTime()/1000; // Changes the presentation style if the time of day is after sunset // or before the next day's sunrise var isDark = nowtime > sunsettime || nowtime < sunrisetime; document.getElementById("container").className = isDark ? "nightmode":"daymode"; } function convertTemperature(kelvin){ // Converts temps in kelvin to celsius or fahrenheit var celsius = (kelvin - 273.15); return temperaturescale === "F" ? celsius * 1.8 + 32 : celsius; }
Step 4: Do I really have to show you my API key?
I used a disposable API key to create a working demo. Generally, however, putting an API key in plain text within the code of a front-end web application seems like a bad idea. Others might copy it and use up your API access quota. If you have access to a typical web server (CodePen doesn’t do PHP), you can hide the API key in a PHP file. Here is some sample code. Substitute the API key and upload the file as clock.php into the same directory as the main HTML file. The PHP file serves as a sort of proxy to the OpenWeatherMap API that we’re using to fetch data in the demo. If it has any problem retrieving weather data, it simply returns an appropriately structured object with "Weather Unavailable" as a description and a temperature that converts to 0° Fahrenheit. The API key is never transferred from the server to the browser so there is nothing for prying eyes to see.
I would be interested to hear from readers if you know of a secure, serverless solution to hiding an API key (Netlify or Docker perhaps?) because it’d be nice not to have to spin up our own server to store and hit the data. Chime in if you have some thoughts.
<!DOCTYPE html> <html lang="en"> <head><meta charset="UTF-8"><title>Clock Data</title></head> <body> <?php error_reporting(0); $latitude = "80"; $longitude = "-85"; if (isset($_GET["lat"]) && isset($_GET["lon"])) { $latitude = $_GET["lat"]; $longitude = $_GET["lon"]; } $endpoint = "http://api.openweathermap.org/data/2.5/weather?"; $apikey = "YOUR_API_KEY_HERE"; $weatherurl = $endpoint . "lat=" . $latitude . "&lon=" . $longitude . "&appid=" . $apikey; $jsonfile = file_get_contents($weatherurl); if ($jsonfile !== false){ echo "$jsonfile"; } else { echo '{"weather":[{"description":"Weather Unavailable","icon":"01n"}],"main":{"temp":255.372278}}'; } ?> </body> </html>
If anyone else tries to use this PHP file from another domain, the browser should throw an error like the one in the following example. I loaded a copy of the weather clock on my makepages.com domain and tried to access the PHP file on my shearspiremedia.com domain. These days, the same-origin policy is in place by default on typical commercial web server installations. You might need to confirm that is the case on the server you are using.
[Error] Origin https://makepages.com is not allowed by Access-Control-Allow-Origin. [Error] XMLHttpRequest cannot load https://shearspiremedia.com/demos/clock/clock.php?lat=40.14616446413611&lon=-75.20946717104738 due to access control checks.
Next, update the usephp variable in the JavaScript file and test:
var usephp = true; // Set to true to use a PHP document to hide your api key
Step 5: Can I please go full screen?
Once the app is up and working, it can load on any smartphone browser. The iPhone, however, is forced to endure the presence of the location bar and footer. Yuck!

It would be lovely to be able to view it full screen instead. To do that, we need a manifest file to tell the device that we wish to view the clock as a standalone app and to tell Android devices where the app icons are located. Here is my manifest file which I saved as manifest.json in the same directory as the HTML file. You can create your own manifest file using the Web App Manifest Generator. Be sure to adjust the icon file names in your own manifest file and in the link tags in the HTML as we see here:
{ "short_name": "Weather Clock", "name": "Weather Clock by Shearspire Media", "icons": { "src": "icons/launcher-icon-1x.png", "type": "image/png", "sizes": "48x48" }, { "src": "icons/launcher-icon-2x.png", "type": "image/png", "sizes": "96x96" }, { "src": "icons/launcher-icon-128.png", "type": "image/png", "sizes": "128x128" }, { "src": "icons/launcher-icon-152.png", "type": "image/png", "sizes": "152x152" }, { "src": "icons/launcher-icon-4x.png", "type": "image/png", "sizes": "192x192" } ], "orientation": "landscape", "display": "standalone", "start_url": "index.html" }
We also need a set of square PNG images at 192px, 152px, 128px, 96px, and 48px for the home screen icon. Save these into an icons folder within the same folder as your HTML file. Use the file names found in the manifest. The Web App Manifest Generator will create icons in all the required sizes other than 48px by uploading a single 512 x 512 pixel image. Here is the simple icon I made:

Home screen icon for my Weather Clock.
Finally, we need to add a bunch of meta and link tags in the head of the HTML file to make this all work. Here is the completed index.html file code including all the head tags you can’t see on CodePen.
<!DOCTYPE html> <html lang="en"> <head> <meta charset="utf-8" /> <meta name="viewport" content="width=device-width, initial-scale=1"> <meta name="mobile-web-app-capable" content="yes"> <meta name="apple-mobile-web-app-capable" content="yes"> <link rel="manifest" href="manifest.json"> <link rel="apple-touch-icon" sizes="48x48" href="icons/launcher-icon-1x.png"> <link rel="apple-touch-icon" sizes="96x96" href="icons/launcher-icon-2x.png"> <link rel="apple-touch-icon" sizes="128x128" href="icons/launcher-icon-128.png"> <link rel="apple-touch-icon" sizes="152x152" href="icons/launcher-icon-152.png"> <link rel="apple-touch-icon" sizes="192x192" href="icons/launcher-icon-4x.png"> <title>Weather Clock by ShearSpire Media</title> <script src="clock.js"></script> <link rel="stylesheet" type="text/css" href="clock.css"> </head> <body> /* Clock markup */ </body> </html>
The visitor can now tap the share button on the iPhone and choose “Add to Home Screen.” An icon will appear that will launch the clock as a full-screen standalone app. Enjoy!

Another Option: IP Address Location
See the Pen Clock and Weather IP by Steven Estrella (@sgestrella) on CodePen.
If the user’s exact location isn’t a requirement, we could avoid the Geolocation API entirely and get the approximate location using any of several IP address services. In the demo above, a JSON object is received from extreme-ip-lookup.com to get the approximate GPS location of the user. That displays the city and region values found in the JSON instead of the GPS coordinates. It should be clear to the user in this case that the weather location is a neighboring town.

Since IP information is part of the normal request for a web page, an argument could be made that there is no ethical problem with displaying IP location information without user permission. That eliminates the need for the GPS button altogether. I actually switched the final app to use the IP address location feature with geolocation only as a fallback in the event the IP location service is down. I also added more weather information, custom background images, and custom weather icons to correspond to current weather conditions. The custom icons are available at this Pen. The final app is available here on my ShearSpireMedia.com site. I also created a Pen that generates a starry sky for night mode that can be used to make a night background.
That’s a wrap!
We covered a lot of ground in this article, but hopefully it gives you an idea that:
We can teach an old device new tricks.
The Geolocation API isn’t all that scary.
Fetching and using data from an external API is useful.
Using a small PHP file is one easy way to hide your API key from prying eyes.
Working with user permissions is a good (and often required) practice.
Like I mentioned earlier, a serverless solution for storing data would be ideal here, so if you have any thoughts on that — or really any ideas or questions at all — please let me know in the comments!
The post How I Built a GPS-Powered Weather Clock With My Old iPhone 4 appeared first on CSS-Tricks.
😉SiliconWebX | 🌐CSS-Tricks
0 notes
Text
An overview of some Paradigms
In this article, we are going to have an overview of some programming paradigms to get a little more familiar with them.
Introduction
Here we are not going to look at each programming paradigm that exists, because it would be too complex. We are going to have an overview of some popular and common paradigms. Our aim is to define them with simple terms and try to understand them better.
What is a paradigm?
A paradigm is like a set of concepts or thought patterns that includes theories, research methods or postulates. It is a system of assumptions that serves as a model. It is a way to see the reality.
What is the relationship with programming?
In programming, paradigms are a way to classify programming languages based on their features. Each programming language follows one or more paradigms. Most of the major language paradigms were invented between the late 1960s and the late 1970s.
Some paradigms are concerned with implications for the execution model of the language, which specifies "how work takes place". So, they are concerned with such things as allowing side effects, in other words, when a function modifies the state of something else outside its own scope, or whether the sequence of operations is defined by the execution model. Other paradigms are concerned with the way that code is organized or with the style of syntax and grammar.
Imperative
Also known as Procedural Programming, Imperative Programming uses statements that change the state of a program. In a way, it is like following a recipe. The Imperative Programming is concerned with defining a linear procedure or sequence of programming statements. It consists of commands for the computer to perform. It could be summarized with the sentence "first do this, next do that".
The Imperative Programming approach is to treat any solution like a series of steps to be performed. So, it uses procedures, functions, subroutines or methods to split the program in small tasks and that makes possible to reuse the code as many times as we want in the program.
The first Imperative Languages were the machine languages and the hardware implementation of nearly all computers is Imperative because it is designed to execute machine code.
Representative programming languages that use this paradigm would be FORTRAN, COBOL or BASIC.
Declarative
In a few words, Declarative Programming describes what it does, but not how it does it. So, we program by specifying the result we want, but not how to get it. It means that the control flow is implicit. It means no loops and no assignments.
Representative languages would be HTML, CSS or SQL.
Structured
The Structured Programming paradigm removes global variables, GOTO and introduces local variables. It means that we create blocks that contain instructions that don't depend on any other. Here, the control flow is defined by nested loops, conditionals and subroutines. It also has in main traits things like structograms and indentation.
Representative programming languages that use this paradigm would be C or Pascal.
Functional
Functional Programming treats computations as the evaluation of mathematical functions and avoids changing-state and mutable data. So, it sees all subprograms as functions that have arguments and return a single solution based on the input. It means that every time a function is called with the argument x it will produce the same result f(x).
This paradigm allows to pass functions to functions and to return functions from functions. Here, the control flow is expressed by combining function calls, rather than by assigning values to variables.
Representative programming languages would be Haskell, Erlang, Scala, Scheme or Lisp.
Logic
The Logic Programming paradigm expresses a set of sentences in a logical form. It means that logical assertions about a specific situation are made, then it is checked if it still true or not. It can be viewed as controlled deduction. We focus on facts stored in memory, called the knowledge base.
It is a form a Declarative Programming and the process flow is reversed because it asserts result first.
One representative language would be Prolog.
Object-Oriented
In Object-Oriented Programming, or OOP, data is represented as objects. These objects are instances of classes that have attributes, representing data fields, and functions called methods. Objects are separate entities and have their own state which is modified built in methods. In Object-Oriented Programming, programs are based on the sending of messages to objects, that respond by performing operations. This concept also provides data encapsulation and information hiding to protect internal properties of an object.
One representative language would be Smalltalk. However, many programming languages are multi-paradigm and support some elements of OOP and combine them with an Imperative style, like Java, C++, PHP or Python.
Event-Driven
Here the control flow is determined by events, such as user actions. It means there are event emitters and listeners. It is dominant in graphical user interfaces. Nevertheless, a lot of software relies on user events for functionality, so we could argue that Event-Driven Programming is present for nearly all kinds of projects.
Representative languages would be JavaScript, ActionScript or Visual Basic.
Parallel Programming
When we talk about Parallel Programming, we mean that we use parallel hardware to execute computation more quickly. It is mainly concerned with speeding-up computation time. So, multiple actions are executed at the same time.
Parallel Programming could be achieved with C++ and OpenMP, for example.
Concurrent Programming
In Concurrent Programming several computations are executed concurrently. So, it means that only one statement is executed at any point in time, but we have no guarantee which task will be executed in the next step. One task doesn't have to wait that another one ends before starting.
Concurrent Programming could be achieved with Scala, Go, or Elixir.
Multi paradigms
Many programming languages combine multiple paradigms to get the advantages of each. This gives us more freedom and flexibility, but it could also increase the complexity of the programs themselves.
C++ and Java fit into that category.
Conclusion
Through this article, we saw what a paradigm is and how it is related to programming. We also had a brief overview of some major programming paradigms by looking at their main concept and how they apply it. We also saw that some programming languages are multi paradigms to give more freedom and to write programs that suit the nature of a specific problem. Many more paradigms exist and some depend on some major paradigms we saw.
One last word
If you like this article, you can consider supporting and helping me on Patreon! It would be awesome! Otherwise, you can find my other posts on Medium and Tumblr. You will also know more about myself on my personal website. Until next time, happy headache!
0 notes
Video
youtube
python while loop with multiple conditions and exercise in Hindi | Onlin...
#heyKyaKaru #learnOnlinePython on #youtubeVideoClasses aur #getCodeOnGithub
#Python #me #while #loop ka #use #case kya hai? Kaise #while #loop me #multiple #conditions ka use kiya jata hai? Kya #while #loop and #for #loop same hai? #While #loop and #For #loop ka #syntax kaisa hai? #PHP ya #other #language se #python #While #loop me kya #difference hai? #Nested while loop kaise use karte hai?
0 notes
Text
Green Forms - Standalone Form Builder
New Post has been published on https://intramate.com/php-scripts/green-forms-standalone-form-builder/
Green Forms - Standalone Form Builder
LIVE PREVIEWGet it now for only $19
This is a standalone form builder script. If you need form builder for WordPress, please find it here: Green Forms – Form Builder for WordPress.
The most powerful and fastest form builder on the Market!
Introducing the most powerful and fastest form builder on the market. With Green Forms you can create multi-purpose nice looking forms which perfectly match design of your website. You can adjust almost everything: from fonts, colors, shadows, etc. to conditional behavior, math expressions and integrations with marketing, newsletter and CRM systems. Each form can be easily embedded into any 3rd party webpage as a regular form or as a popup – all you need is just copy-paste couple JS/HTML-snippets.
We also paid special attention to performance optimization. You can disable the assets that are not required for the current project, so the plugin doesn’t load unnecessary JS and CSS files (like others do). Moreover, it has native caching system to reduce server loads (server doesn’t need build the form each time it’s displayed). As a result, the plugin almost doesn’t affect on Google PageSpeed Insights score.
Demo
Try the power of Green Forms by yourself. Admin panel: https://greenforms.pro/standalone-demo/ Login: demo Password: demo
Features
Drag-n-drop form builder. Create forms with easy-to-use drag and drop Form Builder. No coding knowledge is needed.
Over 20 form elements. Form builder has everything that is needed to create special forms. No limits for your imagination.
Full grid system. Create complex layouts with a one of a kind drag and drop grid system. Includes unlimited column nesting.
Built-in anti-spam. No need for captcha or reCaptcha with new technology anti-spam built into Green Forms.
Form styling. Easily style any element of your form with overall styling settings. Tons of options for any needs.
Native themes. Form builder goes with pre-defined netive themes for any needs.
Built-in Theme Manager. Create and manage custom form themes.
Multi-step forms. Break your complex form into several steps for better user experience. It’s easy.
Conditional logic. Perform actions on form fields, confirmations, notifications, etc. based on user input and selection.
Math expressions. Perform powerful real-time Math expressions based on user input and selection.
Payment forms. Request users to pay money and perform action after successful payment. Green Forms has integration with PayPal.
Interactive forms. Forms can interact with users by displaying the users input in real-time.
Email notifications. Send custom email notifications and user confirmation emails. Use conditional logic, if needed.
3rd party integrations. Automatically submit user input and selection to popular CRM, marketing and newsletter services.
HTML form integration. Automatically submit user input and selection to 3rd party HTML-forms given by your service provider.
3rd party MySQL database. Automatically INSERT user input and selection into 3rd party MySQL database/table.
Custom GET/POST-requests. Automatically send user input and selection to 3rd party URL using GET/POST-requests.
Popup mode. Raise a form as a popup by clicking any element: button, link, menu item, etc.
Remote use. Easily embed any form into 3rd party sites (just copy-paste couple JS/HTML-snippets).
Form stats. Stats of form views, submissions, confirmations and payments for any form for any period.
Field analytics. A set of submitted data can be represented in a convenient way, such as bar charts.
Pre-populate fields. Do it with dynamic data from URL or by setting static default values.
Confirmation system logic. Show confirmations based on user input and selection.
User input filtering. Use optional filters to strip unwanted submitted data.
Performance optimized. Form builder is well optimized for better performance.
Google Analytics event tracker. Track form submission events.
Zero Programming. No coding knowledge is needed to use Green Forms.
Fully responsive. Forms look nice on any devices.
Unlimited notifications. Unlimited emails can be sent from a single submission.
Conditional logic on notifications. Send emails based on user input and selection.
Field validation. Validate user input using 14 built-in validators.
Advanced email validation. check MX-record for domain or use 3rd party services such as: Clearout, Kickbox, TheChecker.
Custom error messages. Show custom error bubble based on validation result.
Google Fonts. Use hundreds fonts to customize form elements.
1500 icons. Green Forms works with latest Font Awesome pack.
RTL support. Green Forms works with RTL sites.
Support. We are ready to help you as fast as possible.
Documentation. Green Forms is well documented.
Ajax-powered. Forms are submitted without any page refreshing.
Integration with CRM/marketing tools. Green Forms works with 35 providers: Acelle Mail, ActiveCampaign, ActiveTrail, AgileCRM, AvangEmail, AWeber, BirdSend, Bitrix24, Campaign Monitor, CleverReach, Conversio, Drip, FreshMail, GetResponse, HubSpot, Jetpack Subscriptions, Klaviyo, Mad Mimi, Mailautic, MailChimp, MailerLite, MailFit, Mailgun, Mailjet, MailPoet, Mailster, MailWizz, Mautic, Moosend, Mumara, Omnisend, Ontraport, Rapidmail, SalesAutoPilot, SendFox, SendGrid, SendinBlue, Sendy, Zapier, Zoho CRM.
Conditional logic on integrations. Perform integrations based on user input and selection.
Integration with payment providers. Green Forms works PayPal, Stripe, Skrill, Authorize.Net, Blockchain, Instamojo, Mollie, PayUmoney, Razorpay, Perfect Money, Yandex.Money, Paystack, WePay, PayFast and InterKassa.
Integration with SMS gateways. Green Forms works BulkSend, FatewayAPI, Nexmo, Twilio.
Double opt-in. Request users to confirm email addresses.
Sensitive data saving. Decide which user data must be saved in database.
Export/import forms. Easily move forms between different installations.
Export form records. Save all form records into CSV-file.
Duplicate forms. Easily create a copy of exiting form.
Custom CSS and classes. Add them to any form elements.
Custom JS handlers. Execute custom JavaScript code when form initialized or successfully submitted.
Installation
We created Wizard which helps to install script properly.
Unpack downloaded archive and upload files to your server.
Open it in your browser – Wizard will be launched automatically. If you have SSL installed, open it through https://
Wizard ask for couple questions. Nothing special – MySQL parameters and admin credentials to access Admin Panel.
Once finished, go to Dashboard and click “Green Forms” box under “Installed Plugins” section. It activates the plugin.
Once activated, plugin adds relevant item to Left Side Menu.
Find “How To Use” submenu item. It explains how to embed plugin into your wesbite – nothing difficult, just paste couple JS/HTML-snippets.
Updates
Updating the script is a manual procedure. It’s pretty simple. Don’t worry.
Download latest version of the script from CodeCanyon.
Overwrite existing files on your server, except file /inc/config.php and folder /content/data/.
You won’t lose forms and settings. They are stored in MySQL database.
Server requirements
Your server must match the following requirements. All modern servers already do it.
PHP version 5.5 or higher.
MySQL version 5.0 or higher.
Support
If you have problems regarding using the script, please contact us and we’ll help you ASAP.
Changelog
Please visit Changelog and check out what we added/fixed in latest version of Green Forms.
Green Forms – The most advanced and fastest form builder on the Market!
LIVE PREVIEWGet it now for only $19
0 notes
Text
Como Funciona o Epocler para Ressaca?
Veja a seguir como funciona o efeito do medicamento Epocler para ressaca, como tomar, seus possíveis efeitos colaterais e contraindicações.
Por mais que muita gente goste de sair com os amigos para se divertir e beber, ninguém gosta de enfrentar a incômoda ressaca no dia seguinte, não é mesmo? É por isso que existem medicamentos como Epocler para ressaca, mas como será que ele funciona?
Será que a utilização do medicamento faz parte da lista de estratégias de como curar uma ressaca segundo a ciência? Ou será que o Epocler faz mal de alguma forma? Vamos descobrir isso tudo agora!
Sobre a ressaca
Como você já deve saber, a ressaca é um quadro que pode ser desenvolvido depois que uma pessoa consome uma quantidade muito elevada de álcool.
Ela pode envolver sintomas como fadiga, fraqueza, sede excessiva, boca seca, dor de cabeça, dores musculares, náusea, vômito, dor de estômago, sono ruim, tontura, sensação de que o cômodo está girando, aumento de sensibilidade à luz e ao som, tremedeira, redução na habilidade para se concentrar, batimento cardíaco rápido e distúrbios de humor como depressão, ansiedade e irritabilidade.
Os sintomas da ressaca costumam encontrar-se em pleno vigor na manhã seguinte a uma noite de muita bebedeira e podem variar de acordo com a quantidade de álcool que foi ingerida.
Como se eles já não fossem ruins o suficiente, ter ressacas com frequência pode resultar problemas no desempenho profissional e conflitos no ambiente de trabalho.
O uso do Epocler para ressaca
Originalmente, Epocler é um remédio destinado ao tratamento de distúrbios metabólicos hepáticos. O medicamento atua principalmente sobre o órgão de modo a evitar o acúmulo de gorduras no fígado e auxilia na remoção de restos metabólicos e de outras toxinas. As informações são da bula de Epocler, disponibilizada pela Agência Nacional de Vigilância Sanitária (Anvisa).
O primeiro ponto que merece destaque ao abordamos o uso de Epocler para ressaca é que o remédio não deve ser tomado junto do consumo de bebidas alcoólicas. O segundo é que não existem comprovações de que o medicamento realmente pode ser eficiente neste sentido – e isso, segundo a própria fabricante do produto.
Isso porque a assessoria de Epocler afirma que o produto não é destinado para o tratamento da ressaca – não é à toa que essa indicação não aparece na bula do remédio.
Teoricamente, o uso dos hepatoprotetores como Epocler por parte de quem bebe muito faz sentido porque não é novidade para ninguém que abusar do consumo de álcool não é nada bom para a saúde do fígado.
O álcool é metabolizado principalmente pelo fígado no organismo na forma de acetaldeído, um composto que é tóxico e cancerígeno.
Entretanto, embora o fígado leve a culpa pelos sintomas da ressaca, na realidade, quem é o mais afetado pelo álcool é o estômago, uma vez que o álcool configura um potencial irritante da parede do órgão, podendo causar dor e náuseas depois de ser ingerido em excesso.
Ainda que os chamados hepatoprotetores possam até promover uma diminuição dos sintomas de uma ressaca, em muitos casos eles podem agravar a irritação do estômago que pode ser provocada pela ingestão de bebidas alcoólicas.
Isso sem contar que, conforme esclareceu a Mayo Clinic, o tempo é a única cura certa para a ressaca, ainda que estratégias como consumir água e sucos de fruta, fazer um lanchinho com alimentos suaves como torradas, bolachinhas de sal ou caldos, tomar um analgésico e dormir possam auxiliar a se sentir melhor durante a ressaca.
Por mais inofensivo que um medicamento pareça ser, antes de utilizar qualquer tipo de remédio antes, durante ou depois da bebedeira para tentar combater a ressaca, consulte o médico para garantir que a substância em questão realmente pode ajudar e, principalmente, não pode trazer algum tipo de prejuízo para a sua saúde, especialmente no modo em que você planeja usar.
Além disso, antes de usar Epocler ou qualquer medicamento para combater a ressaca, leia atentamente a bula do remédio.
Os efeitos colaterais de Epocler
Antes de usar Epocler para ressaca é importante saber que, embora sejam raros, o medicamento pode provocar efeitos colaterais como coceira, dor de cabeça e distúrbios gástricos como náuseas e pirose (azia), conforme informa a sua bula.
Para quem já enfrenta um quadro com os sintomas da ressaca, efeitos colaterais como este não vão ser nada agradáveis, não é mesmo?
As contraindicações e outros cuidados necessários com Epocler
Quando falamos a respeito do uso de Epocler para ressaca, também vale a pena saber que ele é contraindicado para pessoas com hipersensibilidade a qualquer um dos componentes da sua fórmula e para quem sofre com doenças graves do fígado, como a cirrose hepática decorrente do consumo de álcool.
Nos quadros de doenças graves do fígado, um dos componentes do remédio – a metionina – pode resultar na encefalopatia hepática (doença cerebral que surge em consequência das doenças graves no fígado).
Para quem tem dificuldades de comer quando está de ressaca, fica o alerta: Epocler não deve ser ingerido em jejum porque em alguns casos isso pode resultar em problemas gástricos. As informações são da bula de Epocler.
Atenção: a ressaca pode se tornar uma emergência médica
Quando analisamos como funciona o uso de Epocler para ressaca, não podemos deixar de destacar que existem casos em que a condição se enquadra na categoria de uma emergência médica.
Existem sintomas mais severos que podem acompanhar uma ressaca e são indícios de uma intoxicação ou overdose alcoólica, condição considerada potencialmente fatal.
Por isso, é necessário ligar para o serviço local de emergência quando uma pessoa que consumiu bebidas alcoólicas apresentar sinais como:
Confusão;
Vômito;
Convulsões;
Respiração lenta – menos de oito respirações por minuto;
Respiração irregular – uma lacuna de mais de 10 segundos entre as respirações;
Pele azulada ou pálida;
Baixa temperatura corporal – hipotermia;
Dificuldade para permanecer consciente;
Desmaio (inconsciência) sem poder ser acordado – uma pessoa inconsciente que não pode ser despertada corre o risco de falecer.
Caso você desconfie que alguém tem intoxicação ou overdose alcoólica, mesmo que a pessoa não apresente os sintomas clássicos, é necessário procurar o cuidado médico imediatamente, avisa a organização.
Referências Adicionais:
https://www.mayoclinic.org/diseases-conditions/hangovers/symptoms-causes/syc-20373012
https://www.medicalnewstoday.com/articles/297734.php#liver-disease
Você já sabia como funciona o medicamento Epocler para ressaca? Qual remédio você costuma tomar nessas situações? Comente abaixo!
Note: There is a rating embedded within this post, please visit this post to rate it. Como Funciona o Epocler para Ressaca? Publicado primeiro em https://www.mundoboaforma.com.br
0 notes